Announcement

Collapse
No announcement yet.

1991 Mini - Project Trig

Collapse
X
 
  • Filter
  • Time
  • Show
Clear All
new posts

  • Thanks man! So have I! :

    Another day another big bit of progress. Amazing what some fine weather can let you do!

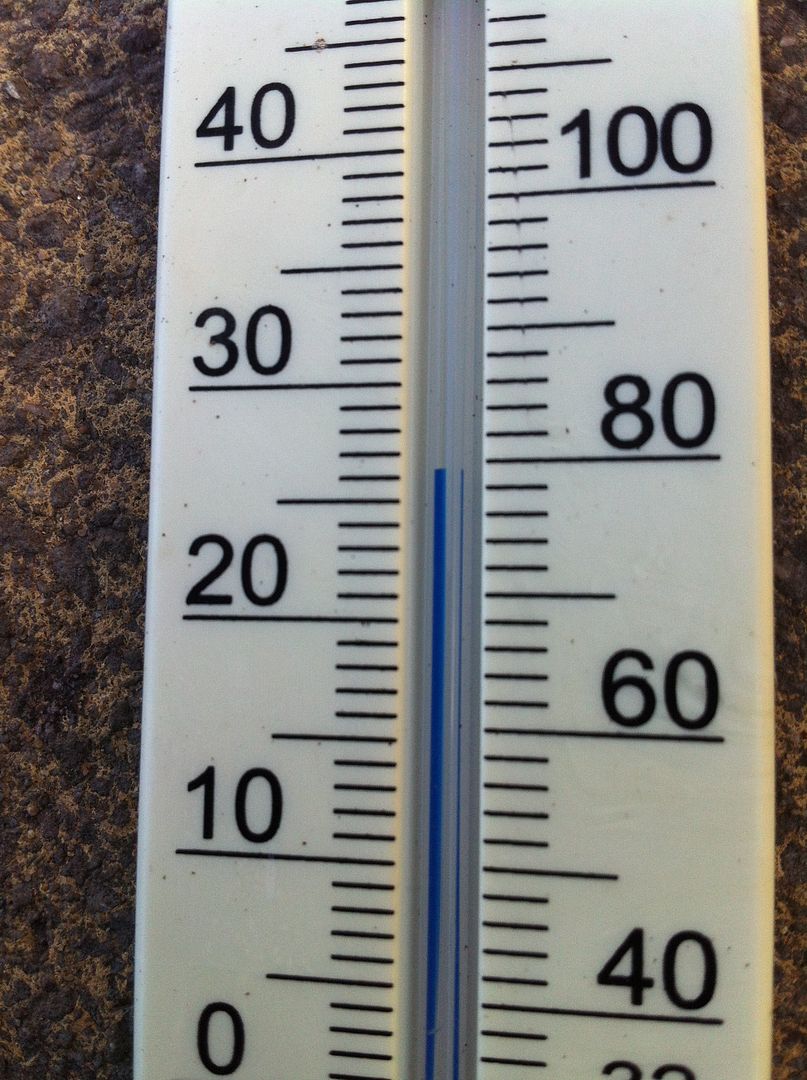
    It actually hit mad levels today!


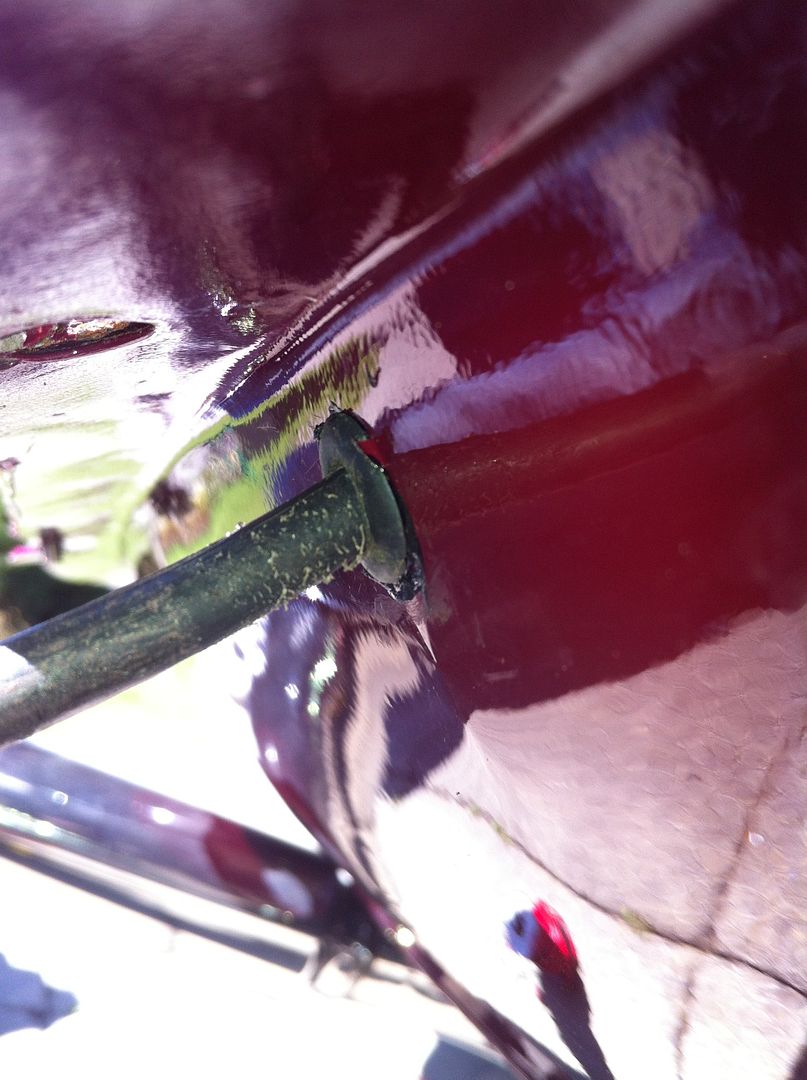
    Went back to the rear number plate light wiring. Had to drill a hole in the boot floor and then another in the rear valence to achieve it which was a sore one considering its perfect paint! But with holes drilled and fresh edges dressed and hammerite'd to prevent rust they were through. Tested and they work. Done! (dont worry I cleaned up the wire)


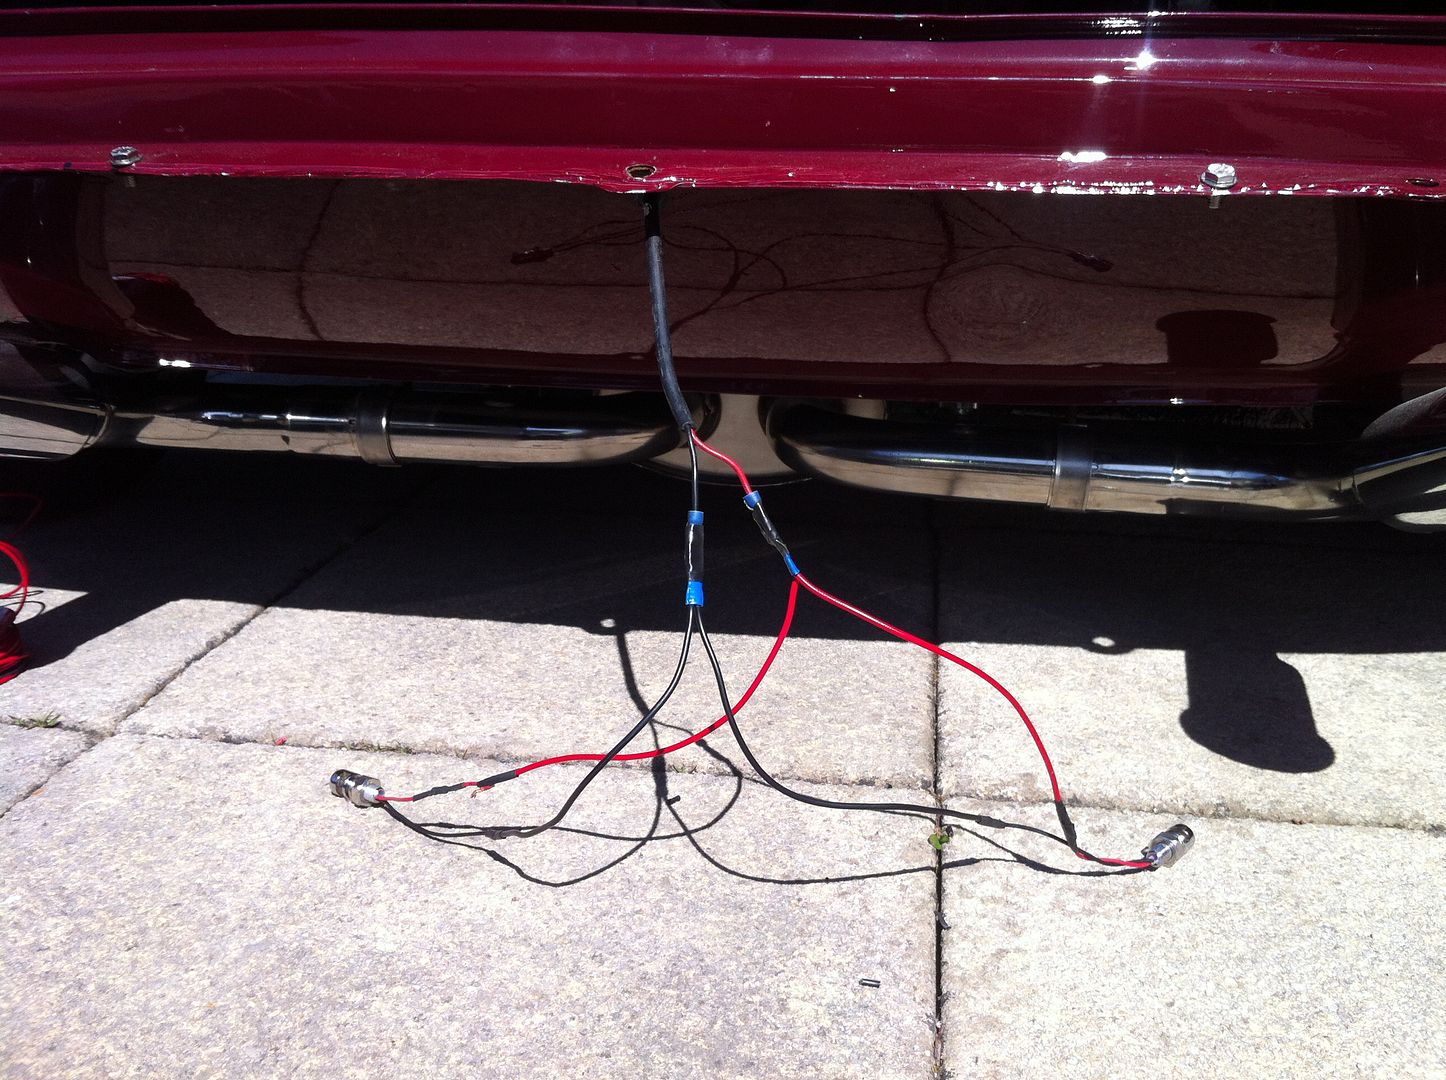
    Made the connections to the lights simple spades so if the plate needs to come off at any time its a quick job.


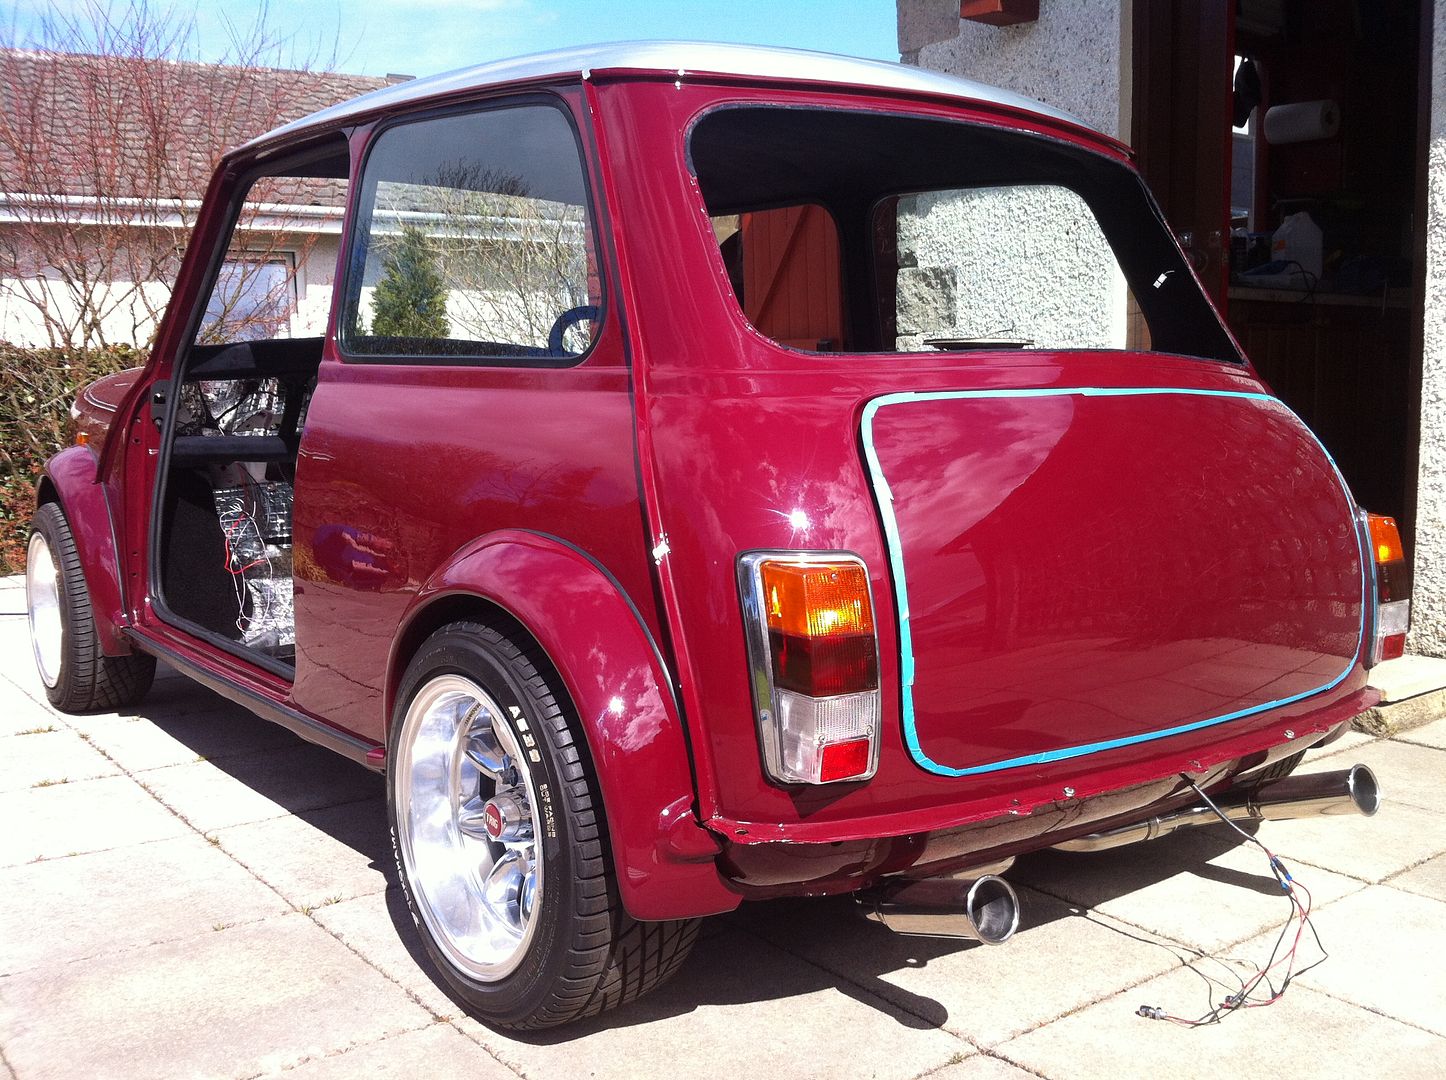
    Put the bootlid on to check fitment. Not the best and I know its going to be a big job so left it for another day as I wanted to get lots done out of the way today instead. It does still look very good but excuse the blue tape. Didnt want to risk damaging the edges.


    Got my bonnet trim put on after glueing the plastic paint protector on the leading edge. Same went onto the grille end moustaches too. Still amazed at the finish on the paint (you're still not getting to see whats underneath )


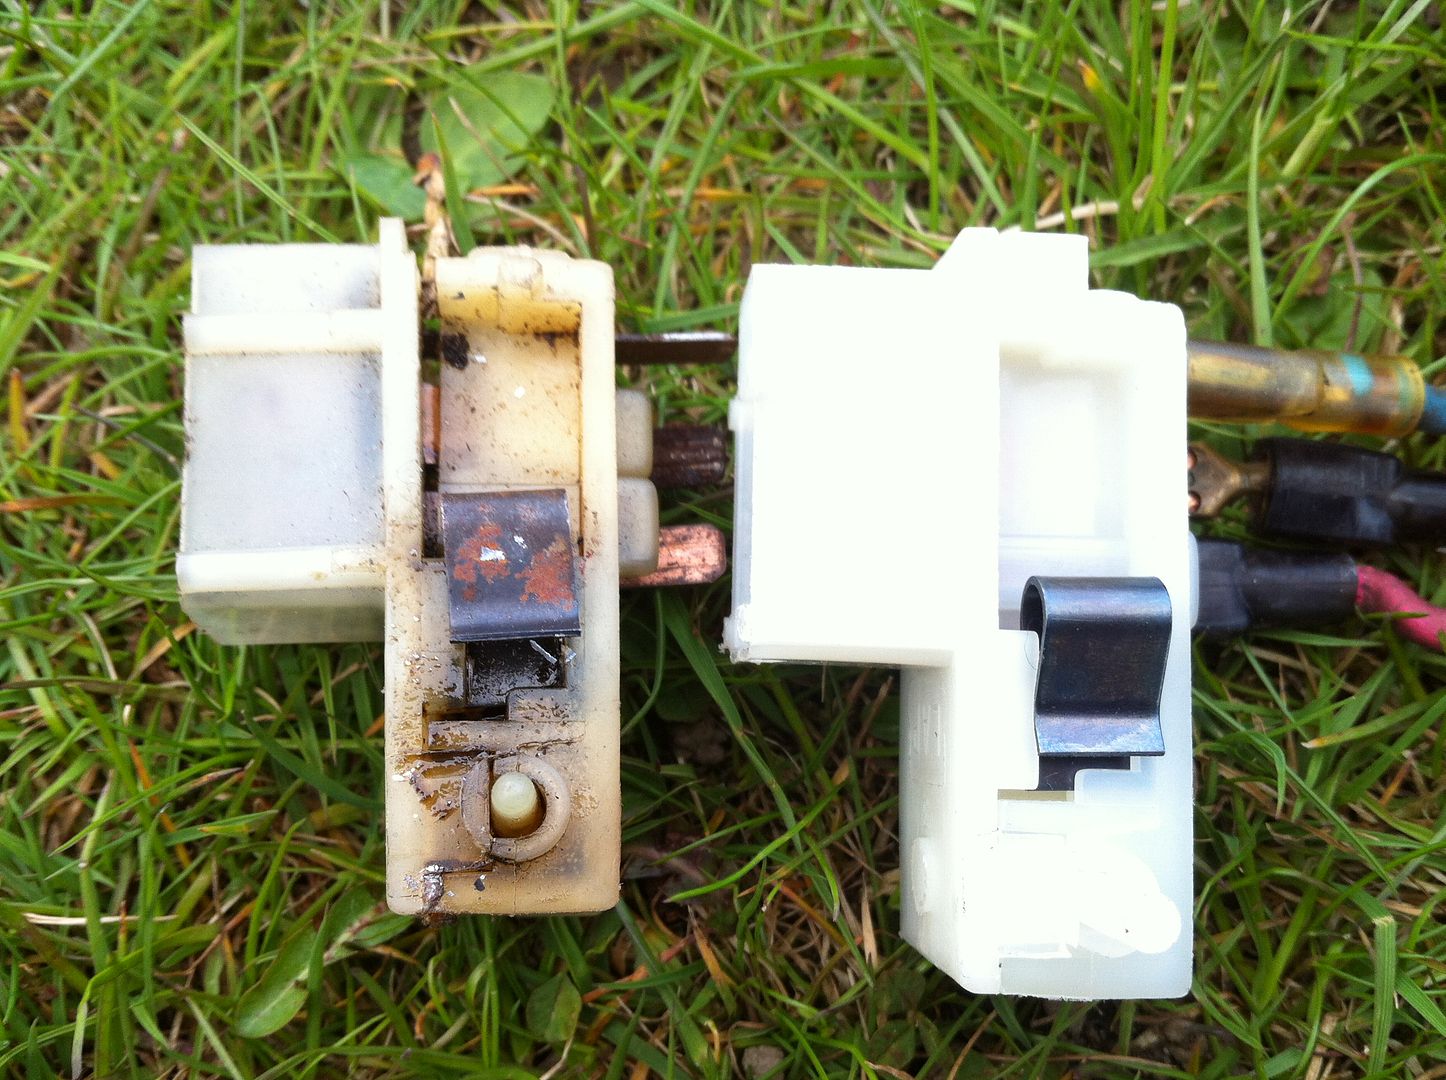
    Fixed the wipers with a new switch. Old vs new shot is of course required here....


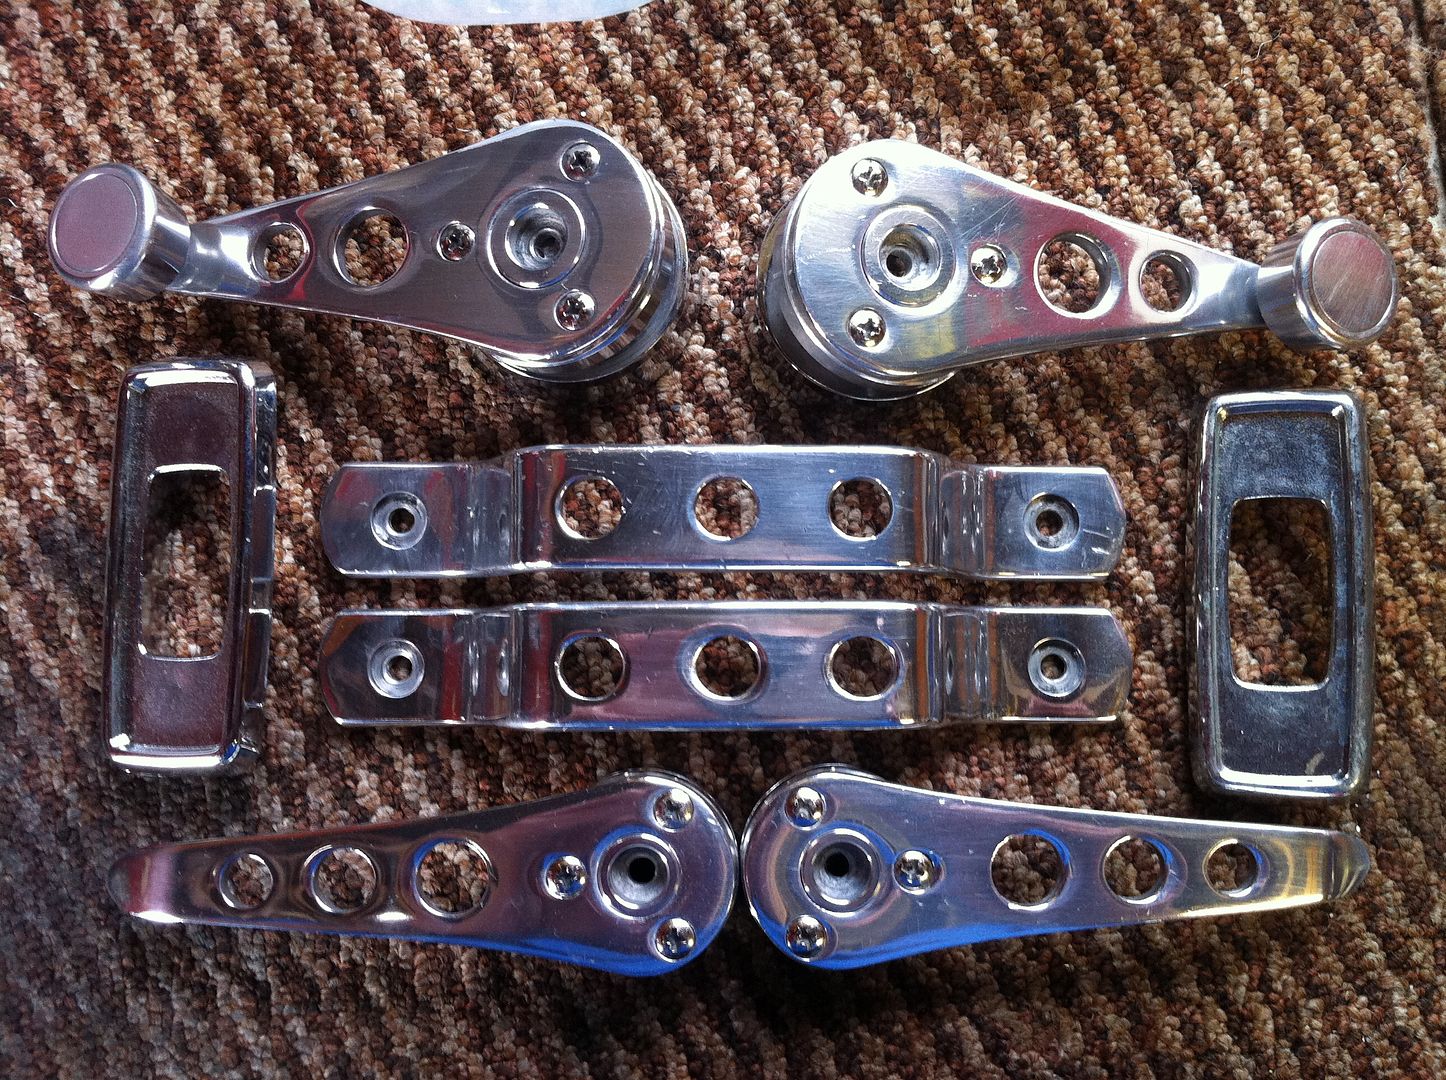
    Whilst I was working away on these things my dad was polishing up the bare alloy door furniture. Like chrome now!


    Also popped the grille back on for now. You can see Ive got the washer bottle in place now along with the internal release bonnet catch with a stainless steel slam plate.


    I dont have pics of it but the lower dash rail is now in and switches are all in place. I relocated the foglight switch into here to save having another plinth on the right hand side of the column. I dont need the brake test switch as its pointless (tells you if your brakes have failed but is common to fail itself.....)


    Got a couple of videos to come of the car moving about under its own steam. Needs fettled with but its sounded much better than yesterday even with a little tweak of the fuel/air mix screw. Copious amounts of exhaust noise was created in the process of this testing. Which was nice.....

    Comment


    • Hey man followed your thread over a few forums over the years used to chat to you over on Scottish minis!! keep up the good work man plus love the steering wheel !!
      I take picture too, sometimes.

      Mini content inside.

      Instagram.

      Tumblr.

      Comment


      • Thanks dude! What was your username?


        As promised....

        [ame="http://www.youtube.com/watch?v=TeVXjE_KrO8"]First drive - YouTube[/ame]

        Comment


        • Originally posted by Mini 360 View Post
          Thanks dude! What was your username?


          As promised....

          First drive - YouTube
          Well as it was back around 2010 with my first one you'd know me by "scotty_1987"
          Loving the car man maybe if i'm back home i'll see it just maybe
          I take picture too, sometimes.

          Mini content inside.

          Instagram.

          Tumblr.

          Comment


          • I mind you! Cool car! I will be over to Ireland in August with it

            Comment


            • Originally posted by Mini 360 View Post
              I mind you! Cool car! I will be over to Ireland in August with it
              haha small world man i'm on TMF too but it's gone shite!! also i could be still in Ireland but i might be going back home for an apprenticeship man :/ either way we shall have to meet up haha if your up for it
              I take picture too, sometimes.

              Mini content inside.

              Instagram.

              Tumblr.

              Comment


              • Some more progress tonight again.

                Got the engine running much smoother. Need to seal up a few gaps in the exhaust as its making it sound a lot worse than it actually is. Still running a tad rich but going to get the MOT station to perfect it after the MOT is done.

                Got my wiper motor and linkage fitted. Works perfectly with the new switch! Spot my helper......:lol:


                Also got my air intake for the heater in but no photos of that. Unsure how it attaches to the inner wing though as its pretty loose. Something for another evening when theres still light.

                Replaced my washer pipes. Old vs new......


                Going to have to play around with the gear selector as its not selecting 1st or 2nd. Only 3rd and reverse have been used, not sure how 4th is.

                No other photos as mainly we were just doing small things but will get more tomorrow!

                Cheers to Greig for the help!

                Comment


                • Before I go out to do more work I had to share this. New arrival today and it is quite possibly my favourite bought part of the whole car. Full real carbon fibre dashboard in original dashboard style. Stunning!

                  Light is weird in this pic so it looks fake....


                  but it isnt


                  Comes with fitting brackets on the back and chrome rings on the tripple clocks. The other three come with their own bezels on anyway. Going to look stunning against the alcantara dash rails top and bottom.


                  Its got a good 1mm of lacquer so plenty there if ever it needs a polish. Main binnacle is removable which will help too. Going to change the glovebox knob for a chrome one to balance it out against the surrounds.


                  And I also have a spare bit (the radio blank) for another little side project Im working on


                  Chuffed!

                  Comment


                  • Friday night my mate Greig and I tried to fix the linkage to no avail. Even swapped over the entire linkage (I had a spare, as you do.....) but still no first or second. Open heart surgery time!

                    Fail!


                    So as I had a 998 sitting from the car originally, we set about plucking the box from the block. So my dad and i set about it! People say that the flywheel is a nightmare to remove......it came off with two turns with the puller tool. Ace!


                    Worked fine before rebuild so will still be fine now. Got all the gaskets etc in stock as I bought a whole engine kit a while back and didnt use it all. Handy!


                    Standard inner box shot.


                    Engine in, running fine, just no gears. Shame as it was SO close!!!


                    Stripped the ancillaries minus the clutch and brakes systems as I didn't want to rebuild them too. Unbolted the brake servo and managed to get the engine out around it. One less job to do!


                    And with everything disconnected the engine was pulled out gradually so as not to damage anything and to ensure we werent dragging anything with it that we had forgotten about. We did it without a scratch on either engine or body. Very happy with that!


                    Empty bay, hopefully filled again soon....


                    So we tried to take the flywheel off the 1275 but wasn't budging so leaving it overnight under pressure (dum dum dum dum dee dum dum :lol and sometimes the pop off by morning.

                    Looks a bit of a mess but its sort of organised :lol: Was out this evening so didn't get anything else done but pretty sure the above is an acceptable amount of work....


                    Next up, gearbox swap over and refitting! Busy weekend!

                    Comment


                    • Speechless. Loving every update man. Good work
                      When in doubt, cut it out...
                      http://www.stanceworks.com/forums/sh...ad.php?t=39445 <<<<<<< Check out my BUILD!!!!

                      Comment


                      • Originally posted by TheCrabMaster View Post
                        Speechless. Loving every update man. Good work
                        Thanks man! Heres another one for you......


                        Good and bad. Managed to separate the flywheel etc from the 1275 and got the box off. Shame I didn't have all the required gaskets and seals to reassemble it with the 998 box though! Bits ordered and should be here by Tuesday. Leaving some parts in paint stripper overnight for reprinting as the paint had reacted and bubbled/blistered. Presentations everything! Not ideal but don't want a leaky engine!

                        No pics of what we did as we were trying to get as much done as possible. That didnt stop us listening into the grand prix on my iPad though!


                        Tonight however I got my other door rebuilt to hopefully hang this coming weekend. Turns out I was having difficulties fitting the glass before as there was the remains of the original window channel seal, about 5" long still stuck in the door which was jamming up the glass! With this found and removed, it went a lot more smoothly!

                        Again, protected everything with blue tape. Its cheap but does the job of stopping scratches well!


                        On factory doors this channel is filled with a grey putty. Obviously this was removed before painting but it does act as a good seal. Instead of this I decided to use clear silicon which wont dry out so easily as the putty did (it was rock hard upon removal)


                        Little bit messy but dries clear and will be covered by the door cards anyway!


                        Then went all Karate Kid on the doors. Wax on....


                        Wax off!


                        Still amazed at the finish on them!

                        Mirror mirror on the door.......


                        So without the parts I need for the engine, and the engine parts taking up all the floor space in the garage Im stuck for work tonight but Greigs coming by to help again tomorrow and with the new seals etc, should get the engine reassembled again and maybe even reinstalled! Although tis seemingly more and more unlikely I will make the Thistle Run, Im not going to give up. Its not over till the MOT man says no! :lol:

                        Comment


                        • Thats some shit luck on the gearbox mate. Hope you sort it in time for the run.

                          Dash is looking sweet!

                          Comment


                          • Very small bit of progress tonight. Garage is filled with engines and gearboxs everywhere so no room to work! Would have got on with the rebuild but not all of the parts arrived......

                            Did however get an indicator screwed in and a doorcard on. :lol: Hopefully get the parts tomorrow and get cracking with the engine again!

                            beyond happy with how the door looks. Perfect inside and outside. Will mount the mirrors once its in place.


                            So come on postie....where are you!?

                            Comment


                            • Cracking work man!
                              sigpic

                              Comment


                              • Evening done! Mainly spent it prepping the flywheel housing and wok for paint. Not 100% perfect but I needed to get it done tonight, so if my half moon seal arrives tomorrow, its ready for fitting. (Kinda...)

                                Seeing as the car is in the garage unable to move I used the apple trees for hanging the bits. Handy! Masked off the internal piece before doing so though!


                                As you can see, not perfect but a hell of a lot better than before. Ultimately these will get powdercoated but will leave that for a winter some year.


                                With those painted and drying on the floor in the garage I got my front indicators screwed in. Ordered clips for them and they werent a good fit at all even though they were sold as genuine from a Mini supplier......but with some modification they were in!


                                Bought new driveshaft dust seals seeing as I had the diff covers off anyway! Fitted with appropriate socket and hammer


                                and in


                                Then decided to shim up my diff! Measured 12thou between plate and bearing so add 4thou to that and you get 16thou overall. Got a 10thou shim, got a 6thou ordered from MiniSport which should be here friday or saturday hopefully! I DID have shims from the 998 box but god knows where they have disappeared to which is a shame as its adding a couple days to getting it all back together!


                                and then back to minisport for more bits and pieces.....couple diff shims so they are brand new throughout and door shims, just incase the fitment isnt perfect as is just now. Tomorrow should see the flywheel housing back on along with flywheel assembly and wok and then get the gearbox on soon after.

                                Times run out. It wont make the Thistle.

                                Comment

                                Working...
                                X