 Tweet
Tweet
coming along nicely. Love the dual exhaust.
-
-
The attention to detail on this build is awesome. Headliner looks great so far!
Comment
-
Just wait until the back box is hidden by the plateOriginally posted by Nuts View Post
Thanks man! No stone left unturned and all that.....Originally posted by martinm13 View Post
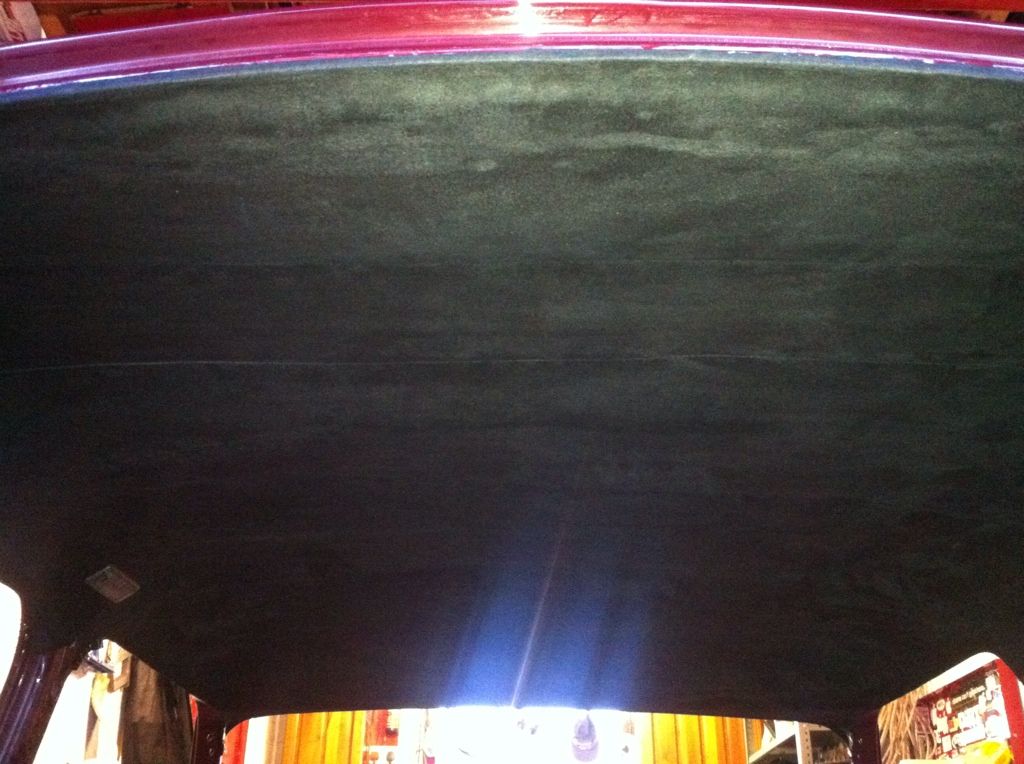
Headlining = done! What a long day thats been! Almost 10hrs but we got there. Looks ace though!
Not the best photo....but its dark so will have to do!
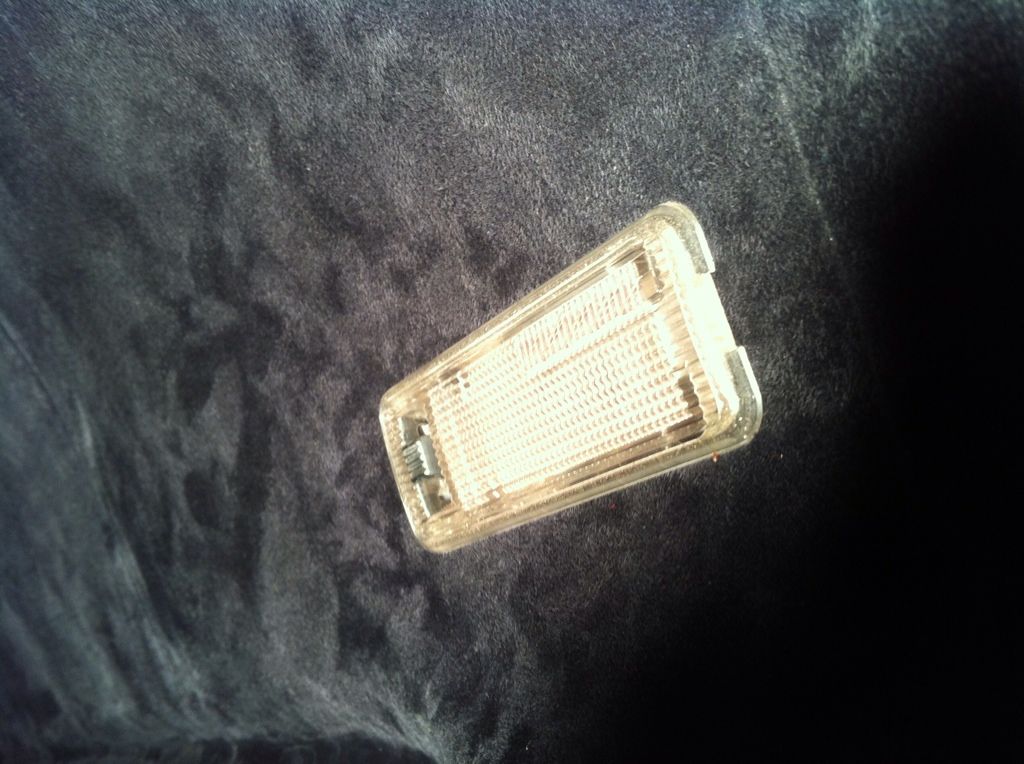
and we are very happy with the fitment of the interior light. Not easy to get right but it is!
And I finished off the day by fitting the brakes (bleed nipples to the top this time.....!) They are such a vast improvement over standard. Look amazing behind the wheels too! Brake lines should be here mid week so i can get going with them too. Another productive weekend! Hope the fuel pump arrives soon too so I can start it for the first time in 3 years

Comment
-
So clean!NathanHeeney.comComment
-
Thanks man! The brakes/under arch look SHOCKING in the above photo but the flash on my phone ruined it (iPhone camera fail!) It really is spotless under there really!Originally posted by NathanHeeney View PostComment
-
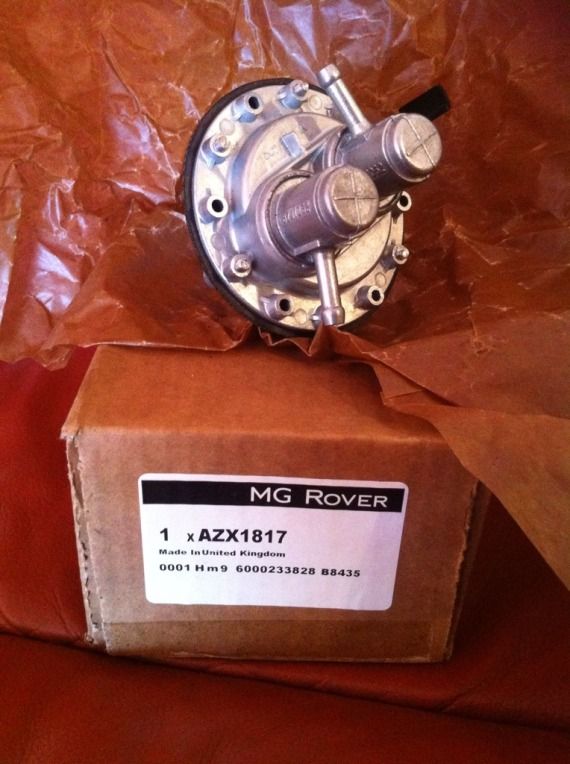
Update again! Postie had been. He's desperate to see this car on the road :lol: New old stock fuel pump still in original box and grease paper. Ace!
And all because this happened to the old (brand new...) one.
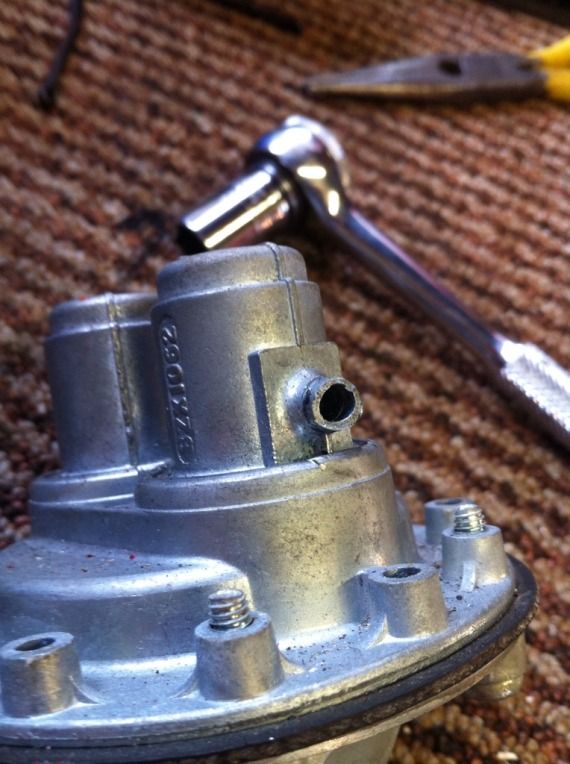
Easy to get out but after an hour and a half I gave up, Greig arrived and got it in in 10 minutes. My hands are too big for working in the enginebay it seems...
Found some old parts from the 80's. They said twat. Hilarity ensued.

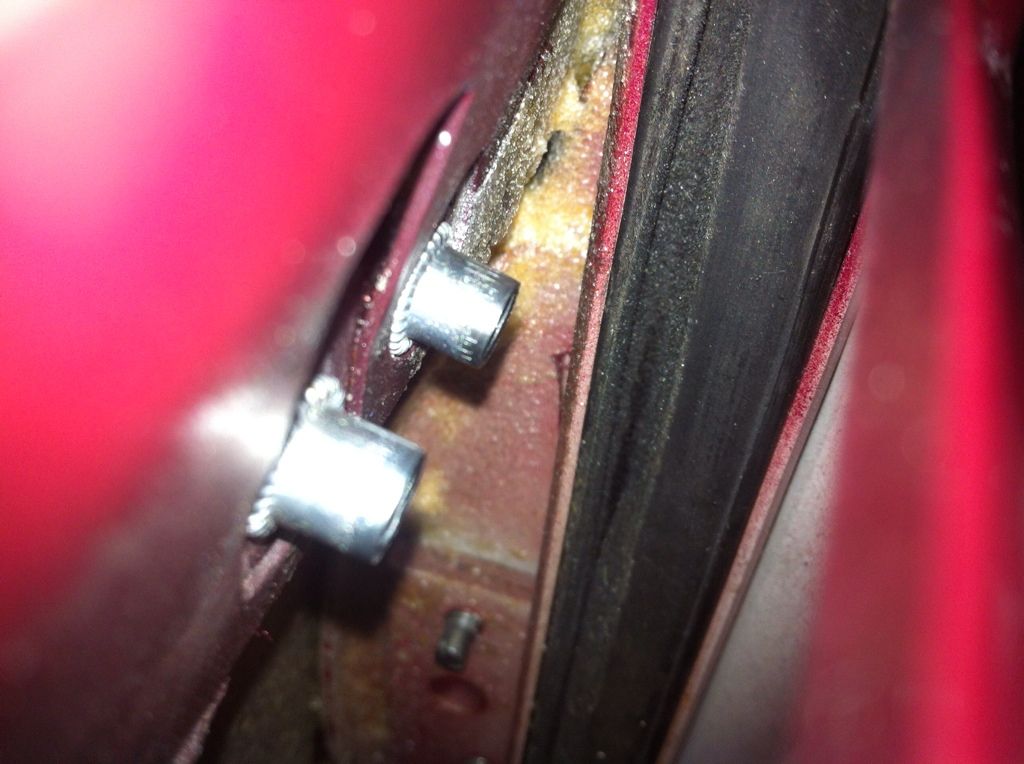
Decided to get the rivnuts for the mirrors in. Greig knew what he was doing so left him to it...he's a happy chap usually but it doesn't show :lol:
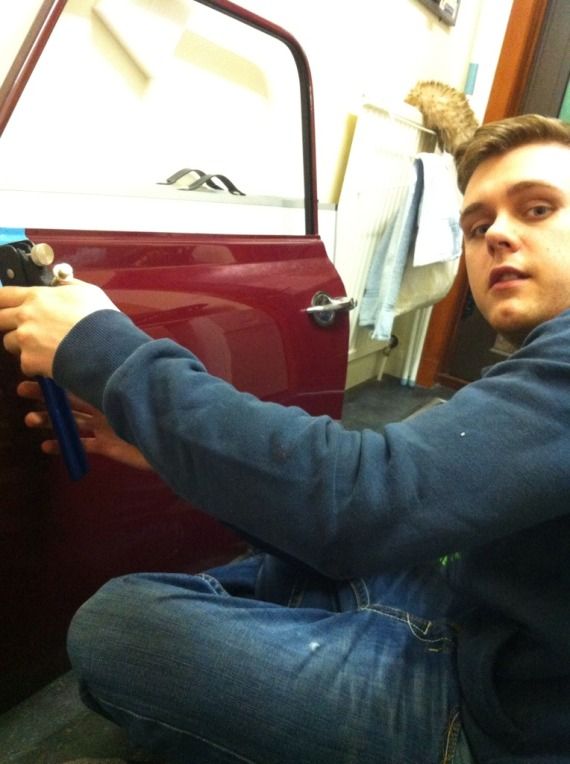
Clever gadgets, very simple and effective. Will nip to Grampian Fasteners on my lunch some day to get the bolts to go in. Made sure I protected the paint as Im paranoid I scratch it!
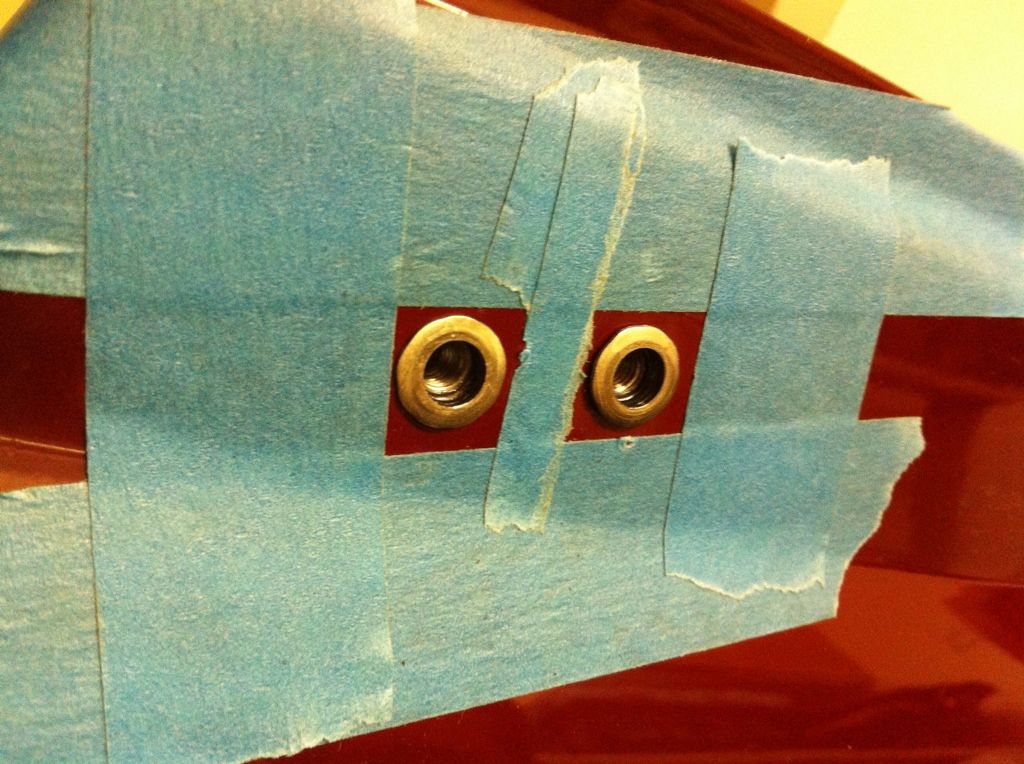
They just crumple onto the opposing face to lock in place. Love it!
Also got the other front brake assembly on. If you want a pic, flip the other one over and you will get the idea :lol: Just need to get the brakes lines all done (once parts arrive tomorrow hopefully) and then I can do up the hub nut. So cheers to Greig for the help and hopefully get more done tomorrow night! Getting there!
So, tomorrow its brakes, hub nuts, A,B,C pillar alcantara trim , radiator back in and filled then see what I can do after (maybe windows?)Comment
-
Uuuuuuuupdate!
Arrived home and MiniSpares had pulled a blinder and got my parts to me in just over 24hrs order to door. Ace and very unusual for them!
Braided front lines, clutch clevis pin and split pin, chrome body/grille filler trim and bonnet seal. Small order but Ive pretty much got everything else! :lol:

So got the lines on, reflared the passenger side subframe brake pipe as it needed cut off the original braided lines. Easy enough. Then bled the system using the Eezibleed and I now have a rock hard brake pedal! Very happy as theres not a single leak. Torqued up the hub nuts, split pins in and wheels back on. Done!

Then i remembered I needed to change the rear shoes about. They aren't symmetrical as I had them, so flipped one round and will leave adjusting them for another evening.

Also remembered I had a set of genuine Minifins kicking about (as you do...) so looked them out and will get them off to the powdercoater (PPS in Inverurie) after payday. Just straight gloss black, nothing fancy.

Also realised that with the 1000W worklight and shiny wheels and paint, you get cool pictures.

It was getting dark and wind was picking up so decided to call it a night.

Put on the bonnet seal as I was tidying up though and used up the slight excess on the channels running towards the front panel.

Another big milestone down and next up, engine starting
Comment
-
What I DID get done tonight though was temporarily plumb in my oil pressure gauge for when the engine is started (at the weekend first thing saturday morning). Used the T piece on the front of the block instead of the sump plug alternative.
Gauge looks like this, to go along with the clock and voltemeter on the dash. Genuine Smiths with magnolia face. Classy!

T piece was looking tatty so cleaned it up on the bench wire attachment.

Replaces the wee red thing on the left which is just a sender. The cappilary for the gauge screws into the hole on the side. Simple!

Was going to fit choke and heater cables but found that the plinth was looking crap too.

So took it apart, repainted cranberry red to tie things together nicely. Eventually this will be carbon skinned but will do for now.

Working our way round the car gradually with the pillar trim. Think we need more clips.....

Should get the front and rears done tomorrow or over the weekend hopefully then windows once they are dry and starting. Need to set the tappets first though.Comment
-
Also, heres my motivation for getting it done asap. Thistle Run on the 26th of May.......a month away :lol:

Comment
-
Update time........
Few wee odds and sods completed. Sprayed my harness bar black, in prep for wrapping in alcantara to blend in with the seats.

finished off the headlining pillars and other trim. Looks amazing!


and got my passenger window mounted on the mechanism runners. They were VERY rusty but nothing a good scrub with a wire brush and a coating of Deox Gel couldnt sort.

Few other bits and pieces done but will leave that for tomorrows update
Comment
-
Fantastic work, Andrew. Don't suppose you have a spare seat for the Thistle run do you?
Comment
-
Nope! Well, I may but wont know nearer the time. If so, its yours!Originally posted by Minuki View Post
Well today has been probably one of the least productive ever. Went to start engine (it turns over well after charging the battery overnight) but no, it just kept on turning over, not even the hint of catching and firing into life. Balls! Turns out its a rather complicated fix that I need knowledge and multimeter skills for. Neither of which I have so im stuck for now on that front.
In better news the engine does have consistent compression readings across all 4 cylinders. 1-4, 130, 125, 130, 130. Happy with that considering I bought it fo �130 untested!
Went to fit the side windows. Didnt go well. The seal was too long, so i cut it at the bonded bit and rebonded to get the right fitment (very tight to allow for slight contraction over time) however upon trying to fit it, the seal got damaged, so need a new one. Balls!
As you can see, far too big....

So we thought, ho hum, get the windscreen in. Was sunny when we started, but the clouds soon took over and cold wind picked up making the seal solid. Balls!
So its currently sitting with the seal on awaiting a warmer evening or weekend.......

Got the plinth fitted into its chrome trim. Thankfully, it was a job that couldn't go wrong......

and i got one of the mirror plinths on too. Other one is missing the metal plate that sits below this, so will add it to the window seal order.......

So yeh, 7hrs to fit a window seal but no window and a mirror plinth. Given up now as i know I will damage stuff if I continue to work on it. Making a list of small things that need done so i can tick them off as I go so I feel like Im making some form of progress.
So to summarise.....BALLS!!!!!Comment
-
Why not just grab a hair dryer and warm the rubber up a bit?Comment
-
Aaaaand heres that small update!
Got a lots done today thankfully!
Fine day, new seals, so got on with fitting the side windows. Not the easiest but once we got the technique (thick nylon cord in the channel being pulled inside) they were in. Genuine seals so perfect fit all round. Lovely! Almost looks like a complete Mini here! (If only.......)


Wheels look amazing in the sun

Also got mirror plinths delivered. Made up a couple of seals from thin foam to prevent water getting into the doors through the rivnuts. They are a good seal anyway but better safe than sorry!

And that was today! Good progress and more tomorrow
Oh......forgot about this bit.......after wiring changes last night went to fure up the car. It runs. Almost 3 years to the day since it fired its last breath. Beyond happy. Its running rough but a bit of tuning and it will be sewing machine smooth. Sounds ACE! Its a full stainless engine to exit system. Specialist components LCB, centre link pipe and PlayMini Supersport back box. Its totally inneficient for power but dont care, it looks ace and sounds even better
And heres the obligatory 'vid or it didnt happen' video :lol:
[ame="http://www.youtube.com/watch?v=Slmm5rWujPc"]Project Trig - Engine start after 3 years - YouTube[/ame]
A HUGE thanks to Dan from The Mini Forum for guiding me through, step by step, all the coil/distributer wiring. It was a MASSIVE help and has helped the car progress massively!Comment
-
That exhaust sounds great! Can't wait to see this one done, been looking forward to this for a whileComment


Comment