 Tweet
Tweet
God damn that thing is beautiful!
-
We lookin' for the girls with the big booty stance.
-
Little bit more done today.
With some modifying and fabrication, got the number plate mounted. Drilling the new plate was not something I was looking forward to doing but thankfully it went well. The bumper would have gone on but one of the brackets had rusted through so its now in the bin and I need two new bumpers!

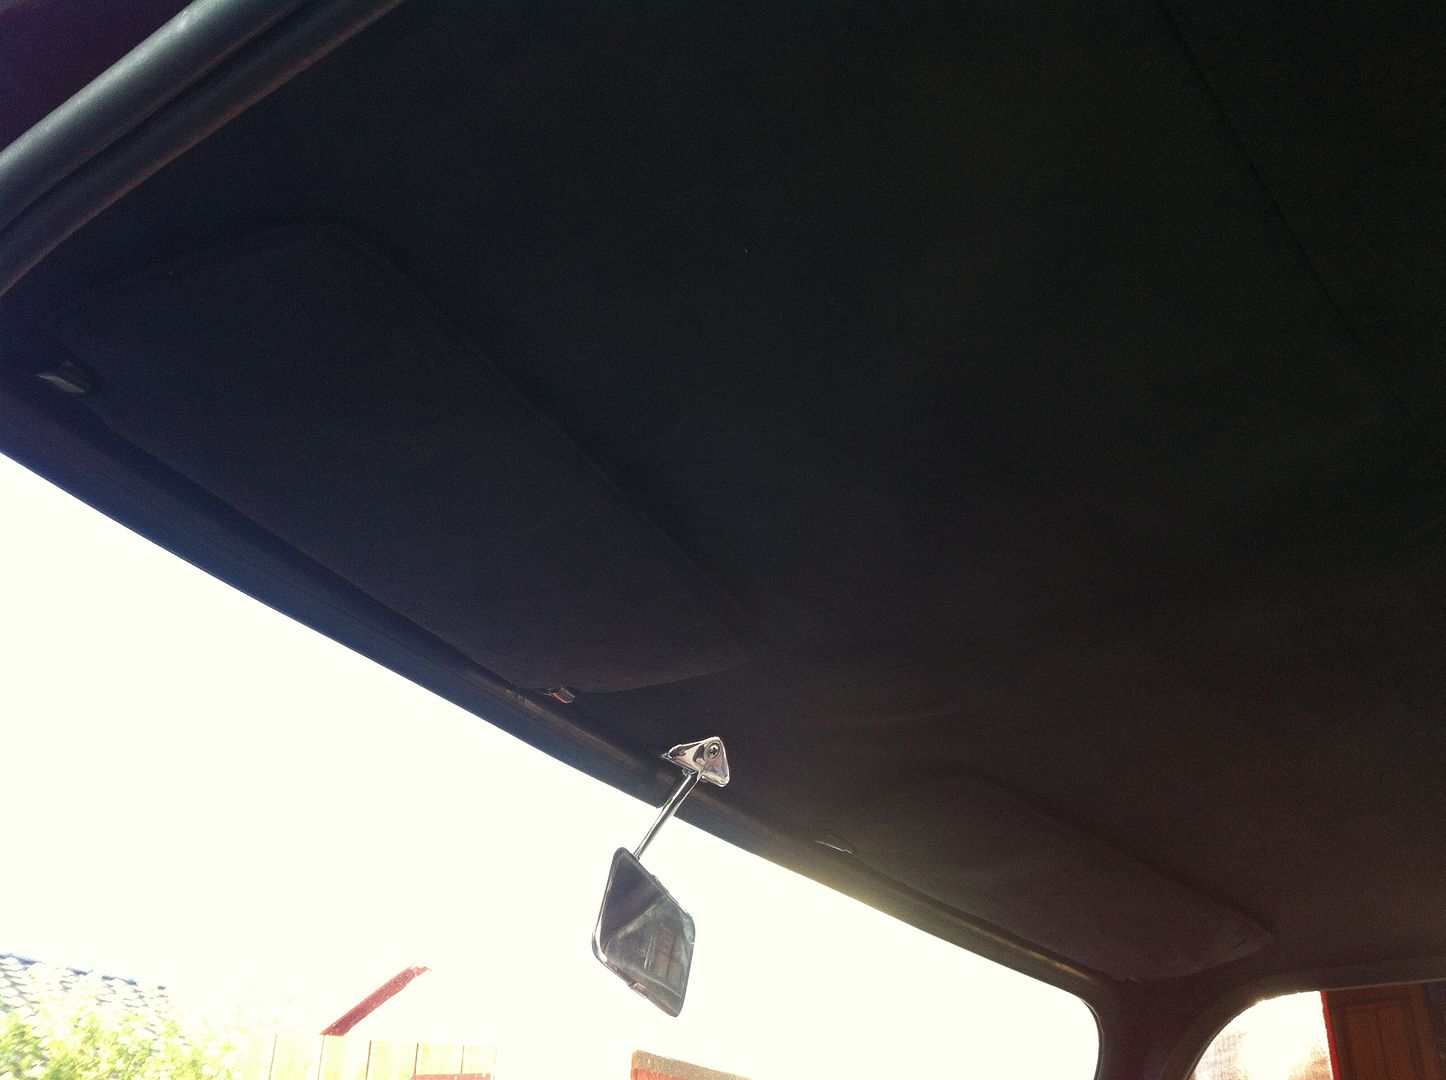
Got the sun visors on after poking around with a pin looking for the screw holes.
and thats about it! I got some radio loom wiring done but spent the afternoon watching the looooong Monaco GP this afternoon! Off tomorrow so will get more done then hopefully. Got a pretty big shopping list again so time to bash the credit card again.Comment
-
Did more work on this yesterday. Got the speakers all wired up and wires hidden beneath the carpets and a rogue trapped wire leading through the roof channel removed.
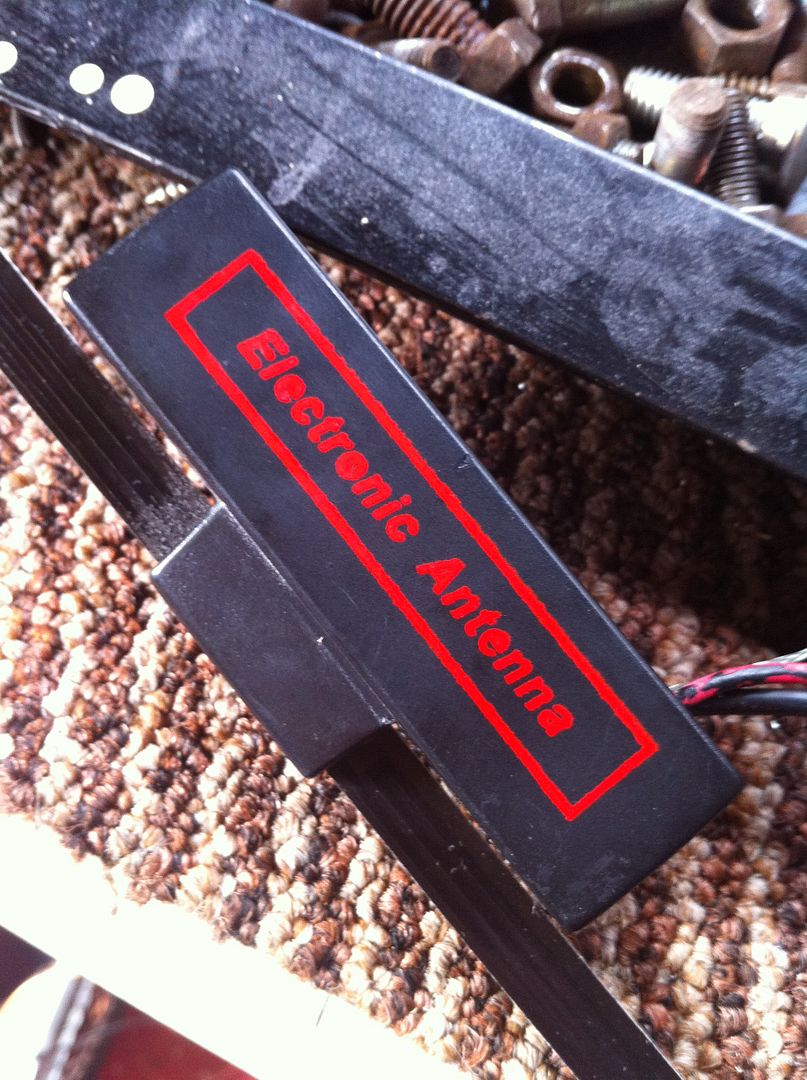
No pics of the wiring as well...its hidden but did make a start on my radio antenna. Originally the car had a front passenger wing mounted monstrosity that was a huge rust trap. I got the hole smoothed off before paint and I had this window stick on one from when it was last on the road. It works great. Stick it to the front screen and then lead the aerial/live wires around the window seal. I will paint over the red writing before it goes in though.....
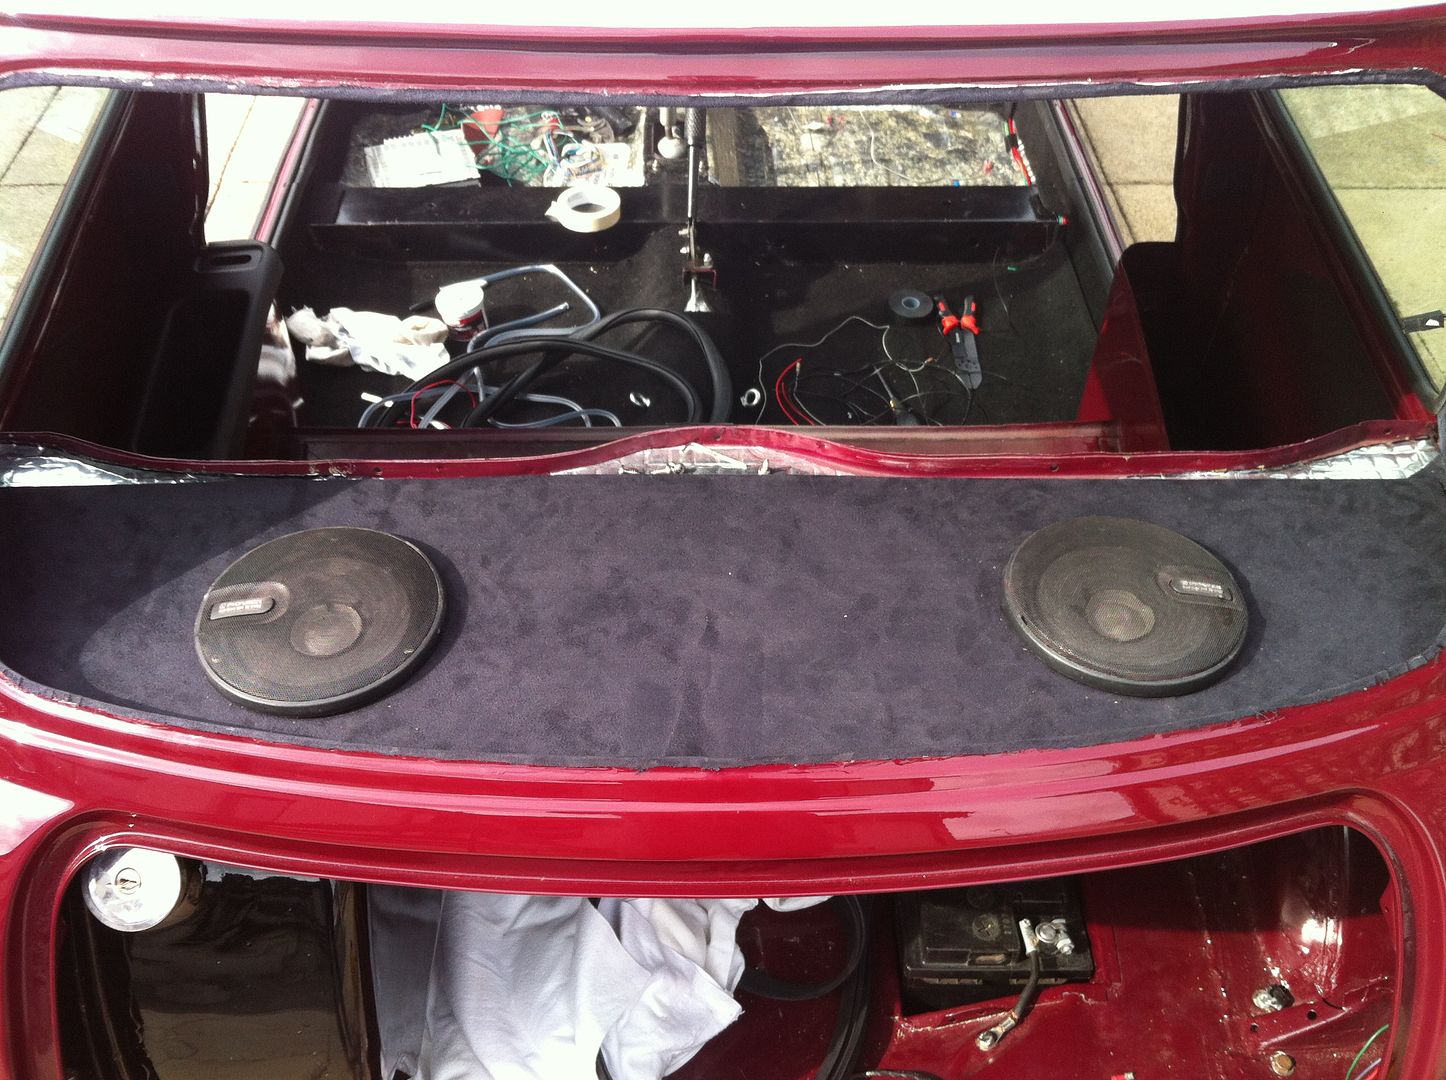
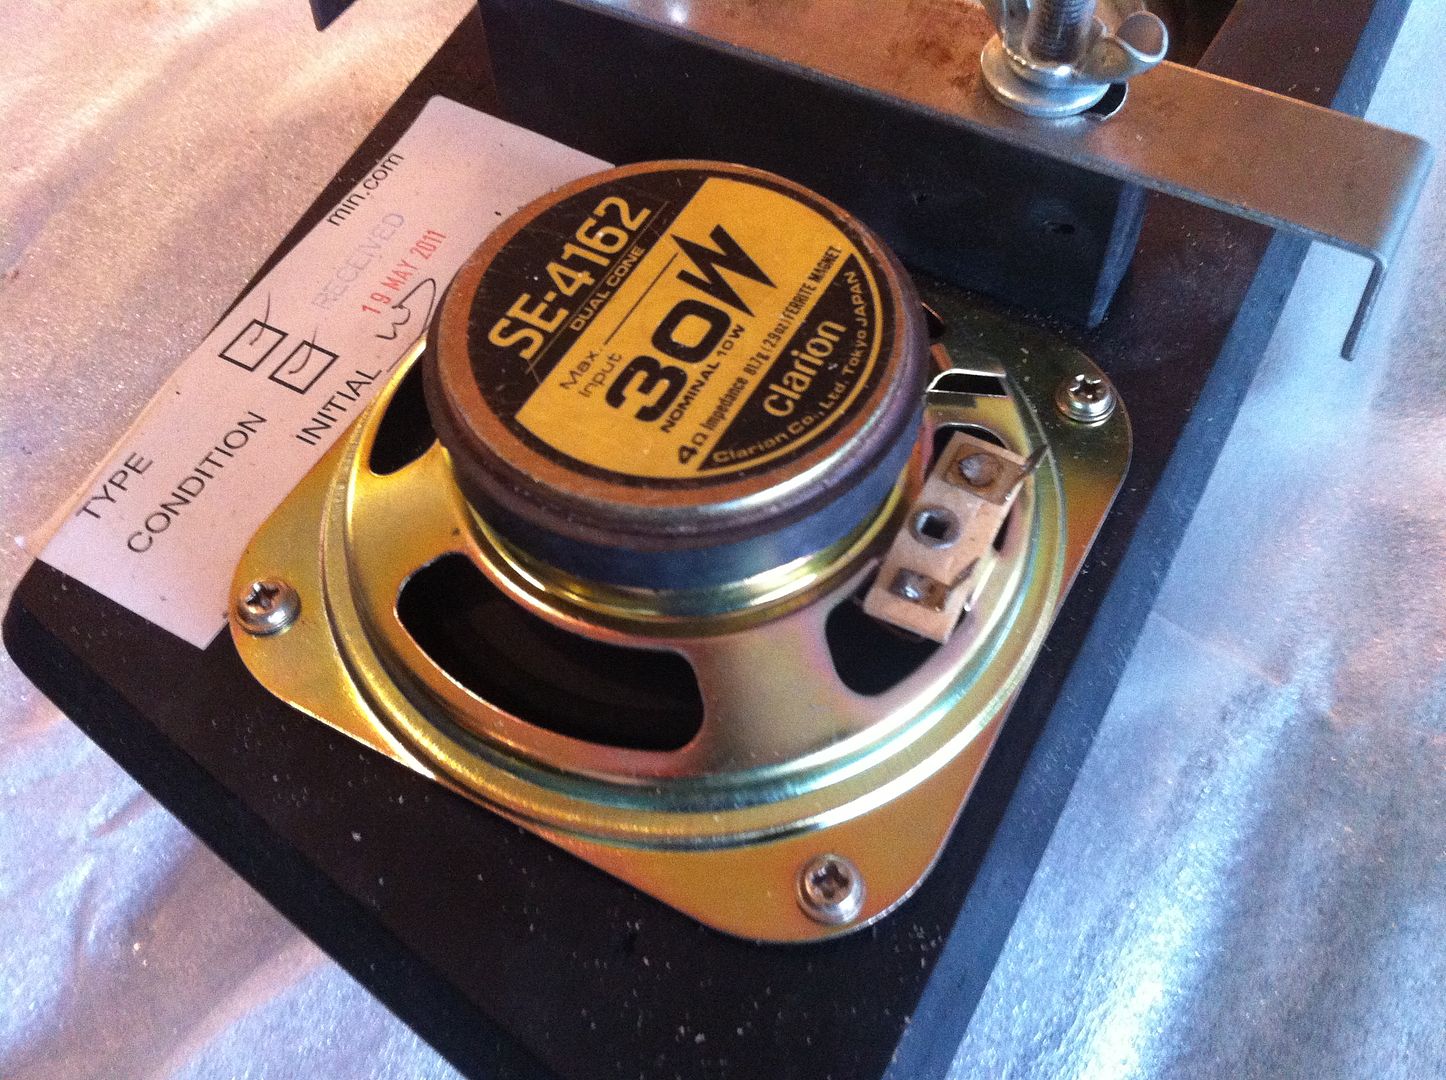
With the speaker wiring done we got the parcel shelf in and speakers mounted. Not doing a fancy install as there wont be much point with the noise the car creates. Standard speakers will do the job fine.
Also rewired my courtesy light wiring after i discovered this lovely bit of work....
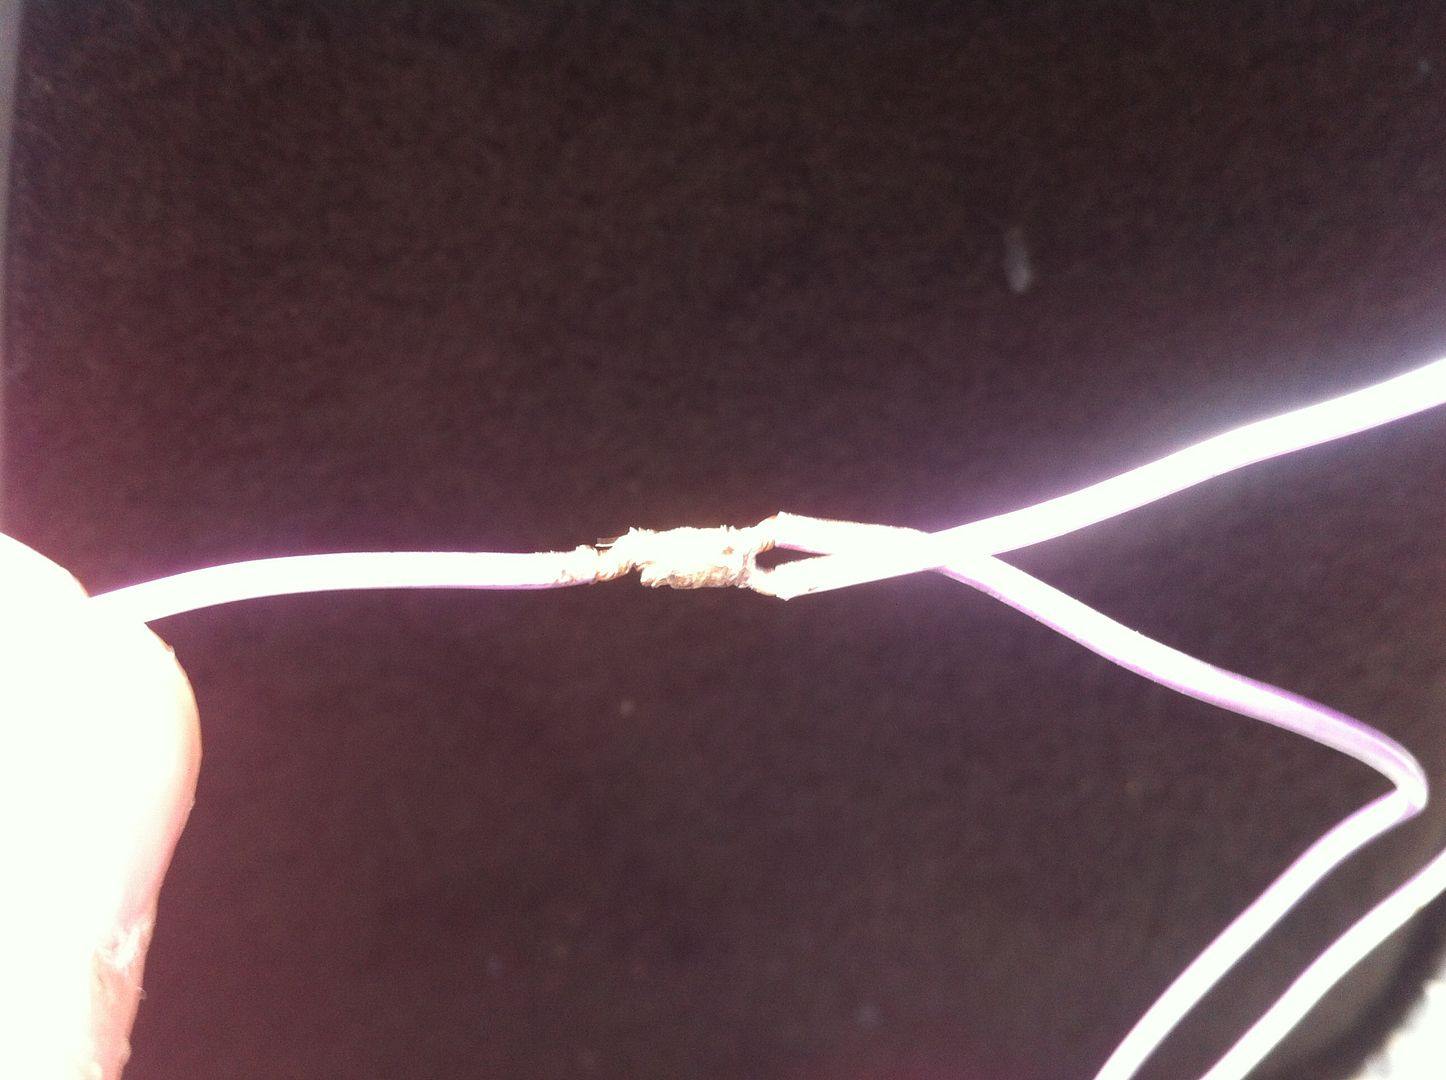
Unshielded wires with some sort of metal clip used for a join. So safe! Properly done now and insulated.
Got the rear window seal into place. Left it to form to the apperture overnight and will get the window in tonight hopefully. Back to work now so its evening and weekend garage time once again!Comment
-
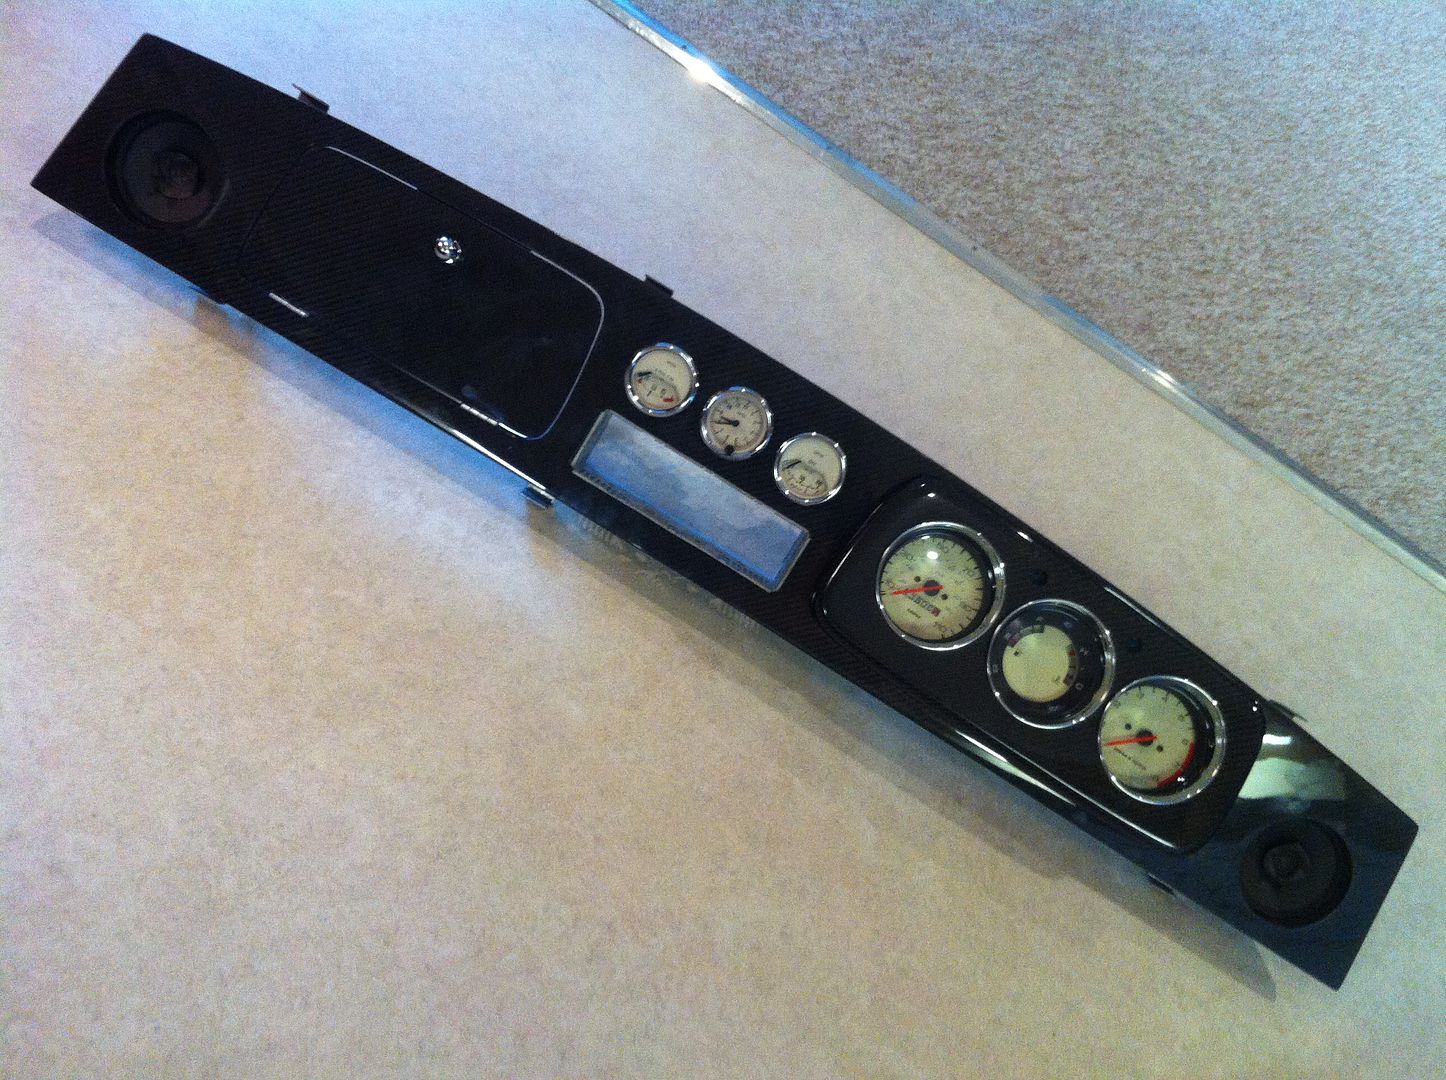
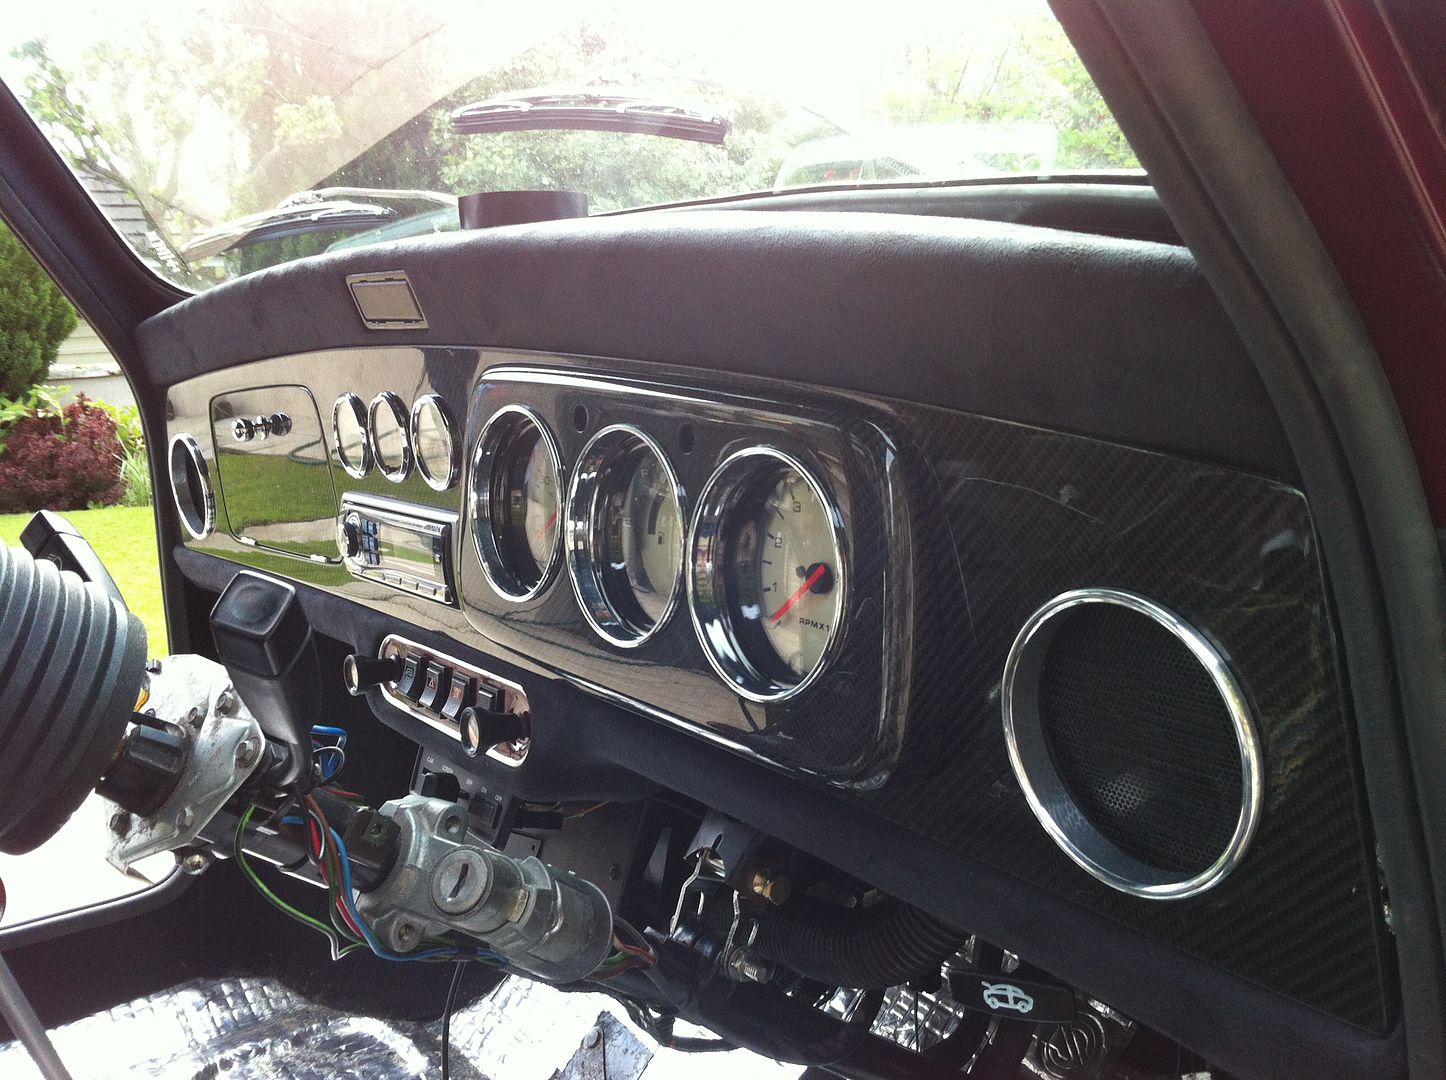
Anyway seeing as I had time to build the car tonight, I got on with the wiring and dashboard.
Beautiful, still evening, radio on, no distractions. Great!
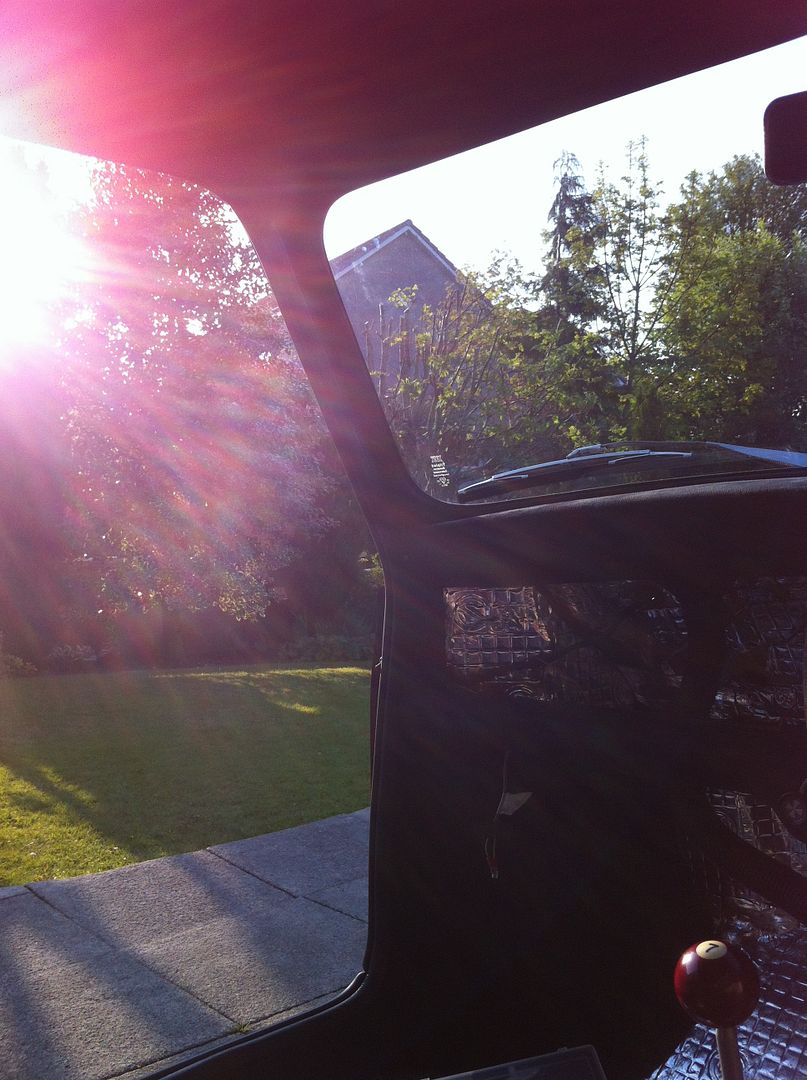
Got the majority of the wires tucked and secured behind the lower dash rail. Only wires remaining are for the aux gauges, head unit and main gauges.
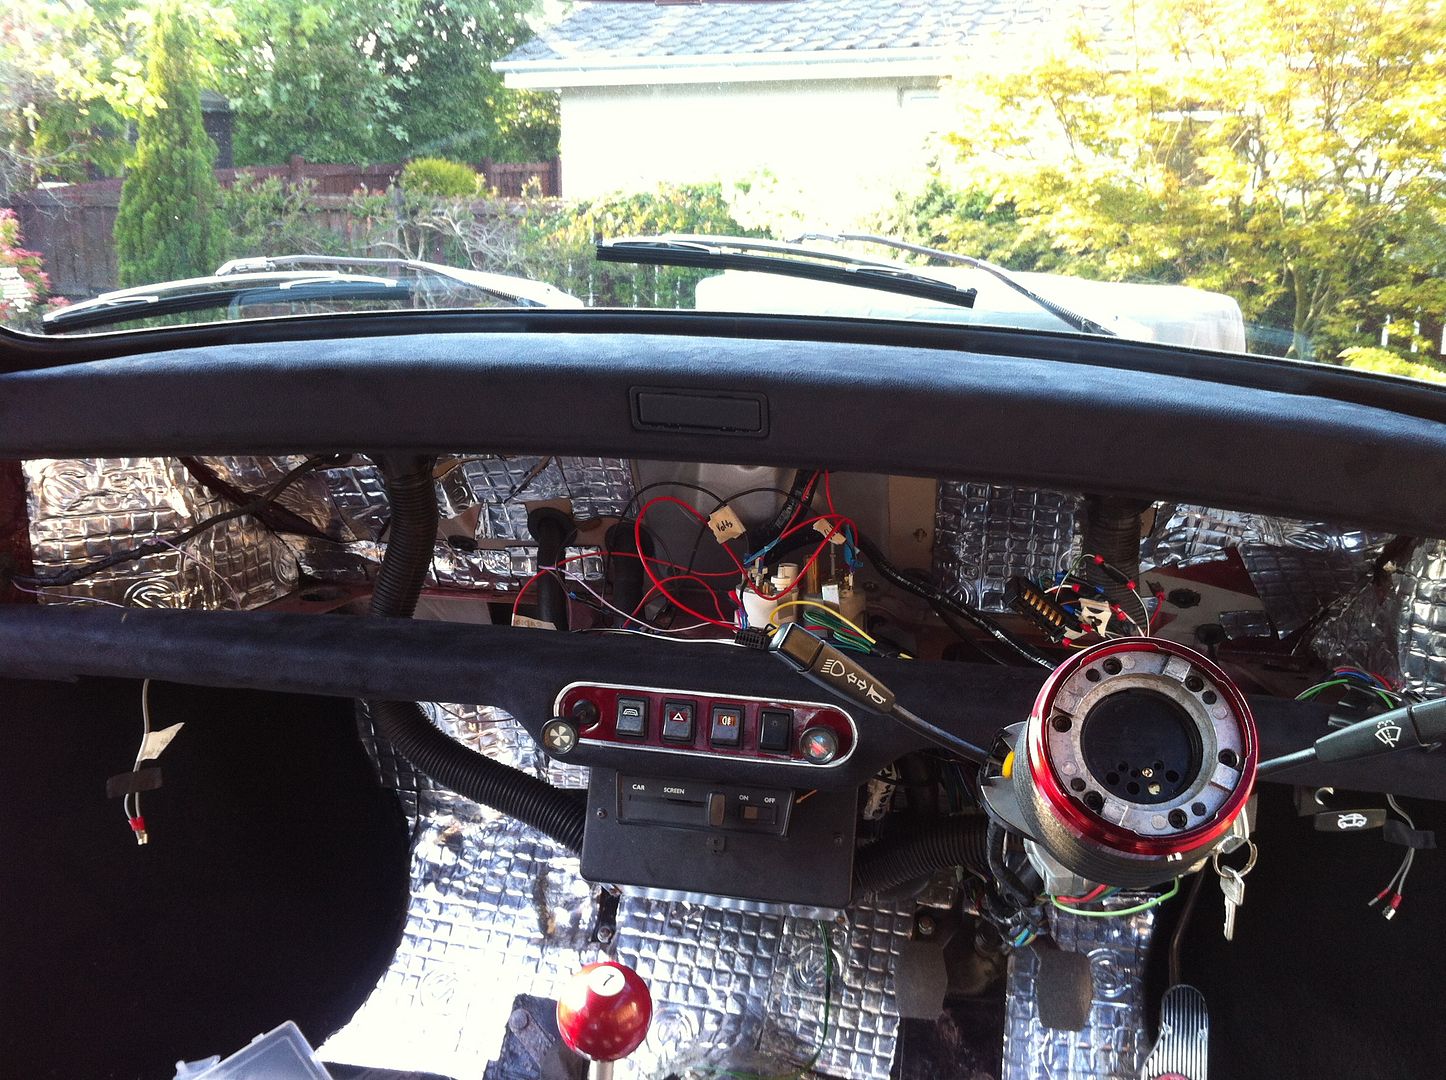
Got my dash built up, complete with speakers in the eyeball vent holes seeing as they no longer have a place on the car!
Having to drill holes in a mad expensive dash was not a pleasant experience but needed to be done! Found some short screws in an assorted box we have collected over the years. Handy to have!
Then, rather annoyingly, the dash needed a few spacers glued onto it to fit the gauges, which are supposed to fit into the shaped dash perfectly.......but thankfully it wasn't a big issue.

Fairly worked though!

So dash built up, just need to buy speaker grilles and a new radio!
Oh and mums been busy again!
Should get the dash fitted up tomorrow if its another nice evening!Last edited by Mini 360; 05-28-2013, 04:20 PM.Comment
-
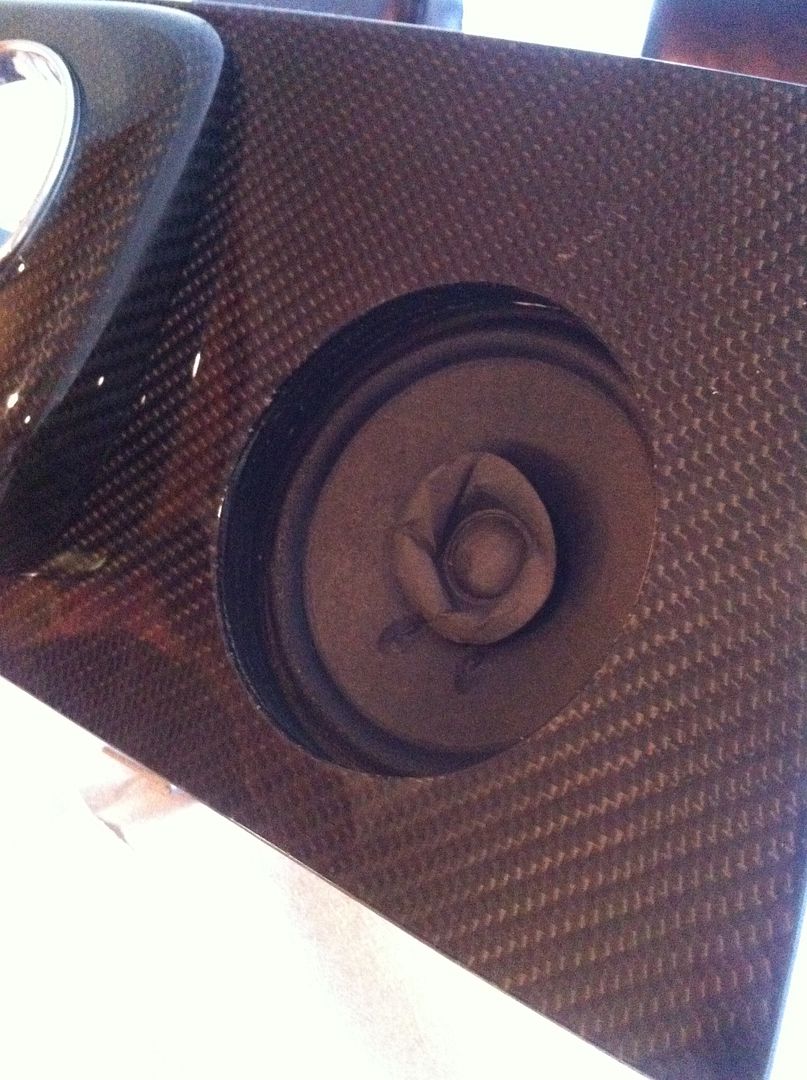
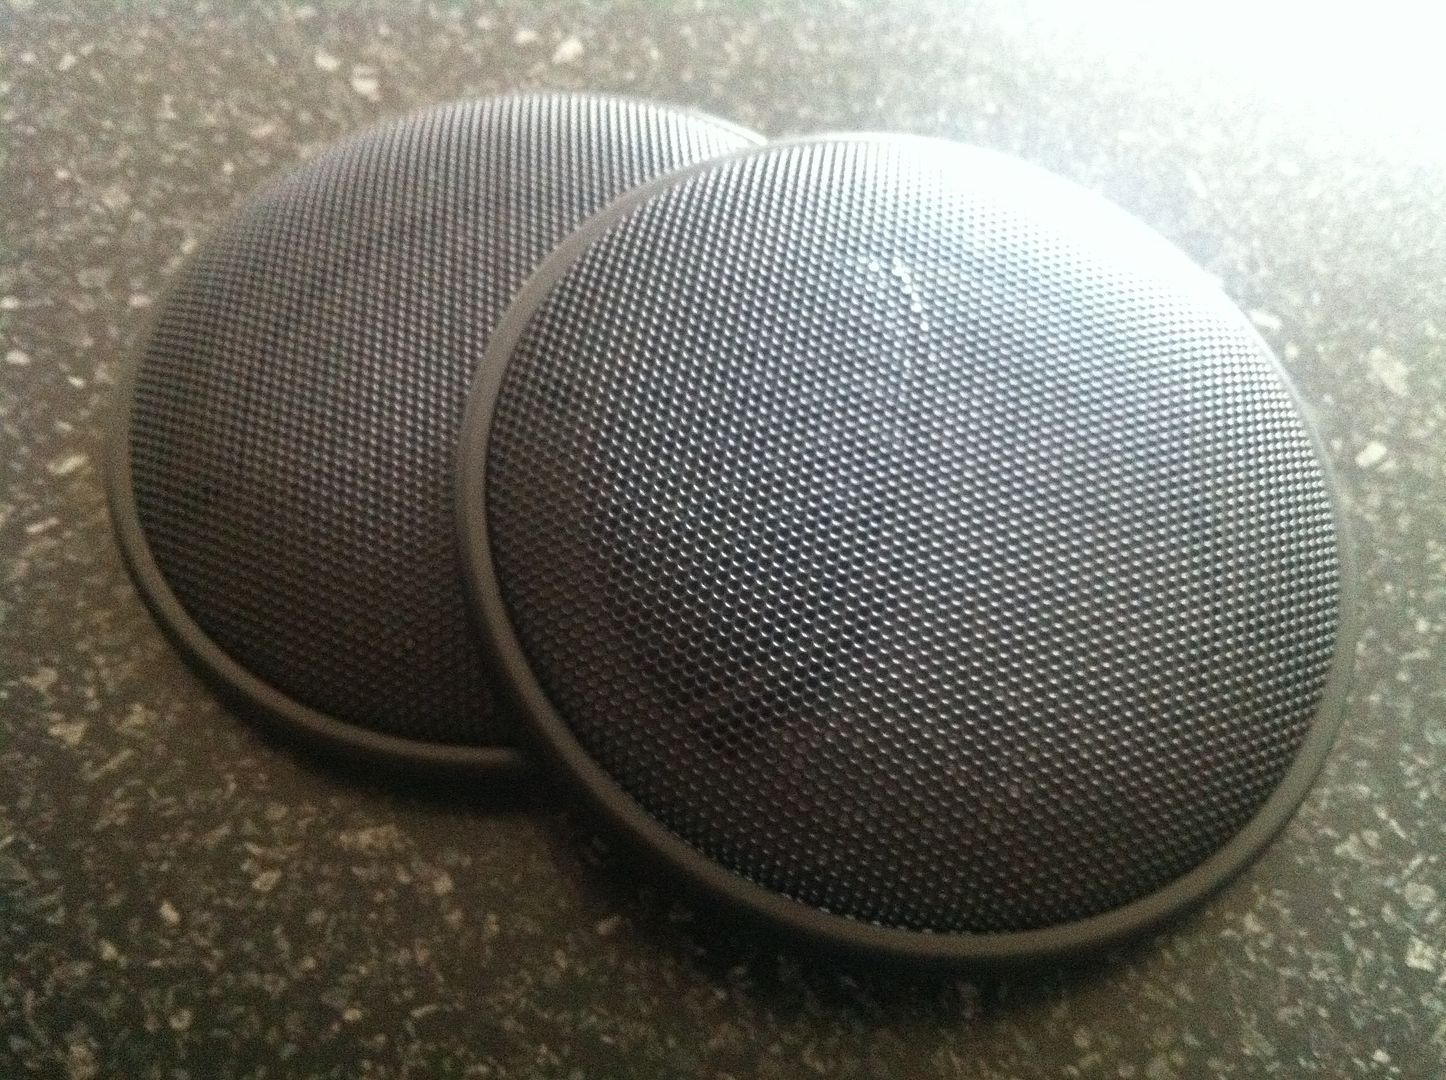
So I ordered a LOAD of bits during the week and the only bits that arrived were the speaker grilles and hinges! They turned out to be too big to stick on the front of the dash but thankfully my dad had an idea.....
I took the grille...
I cut the centre out of it.....
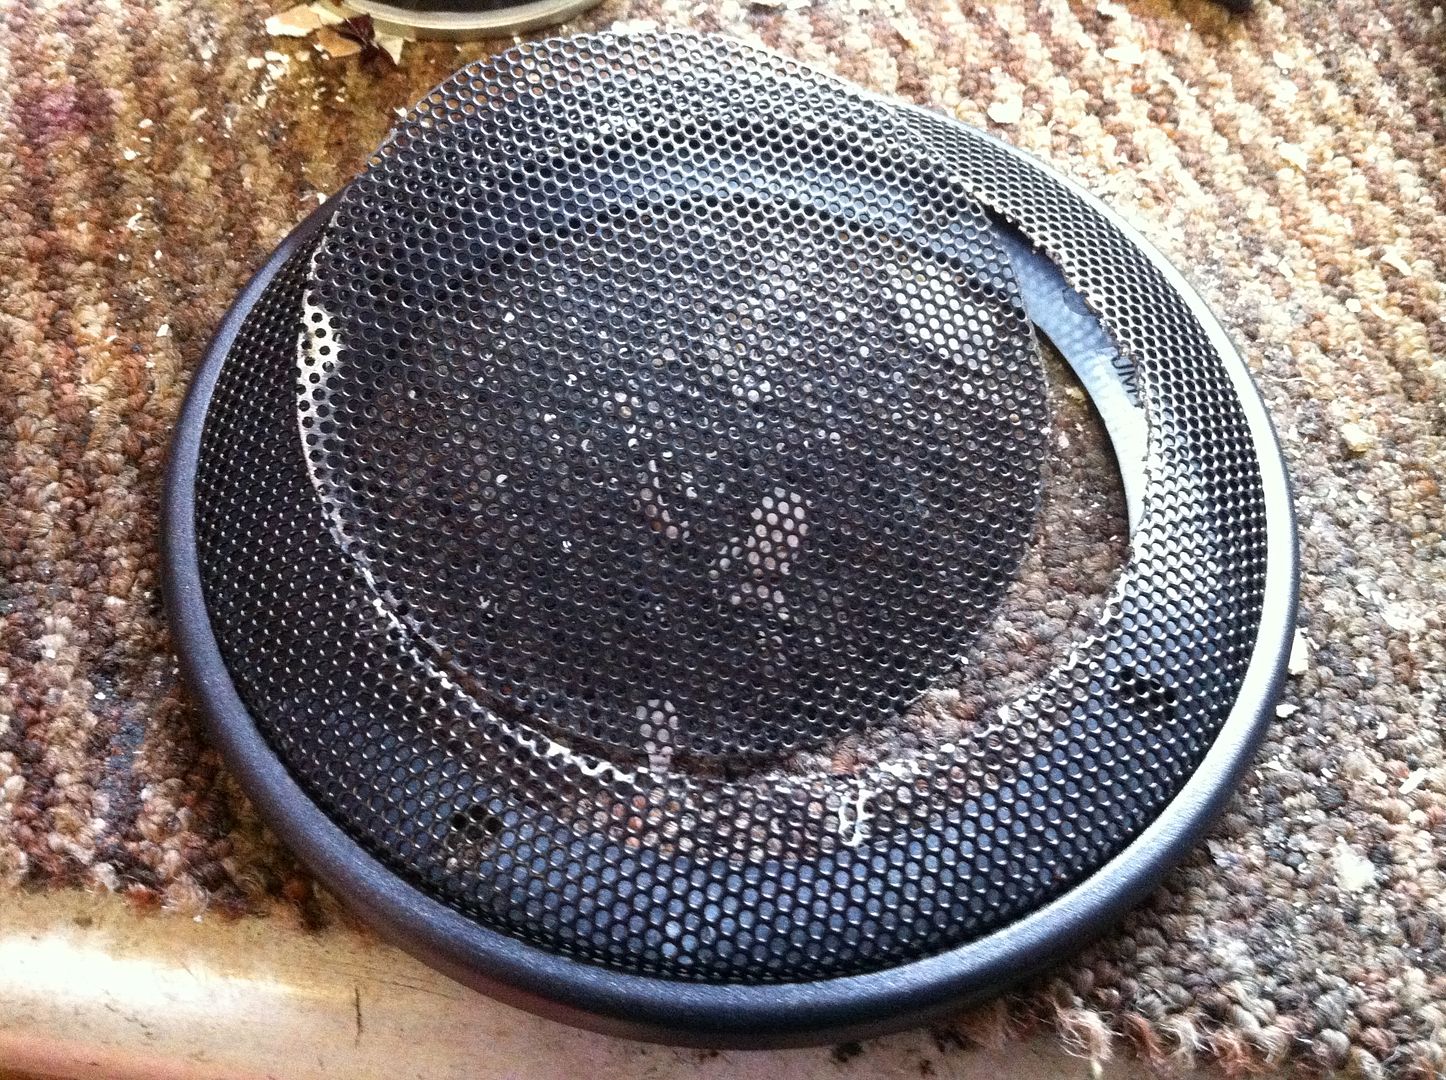
I took a spare chrome ring for the gauges that I had and checked for fitment....which was perfect for the diameter of the hole!
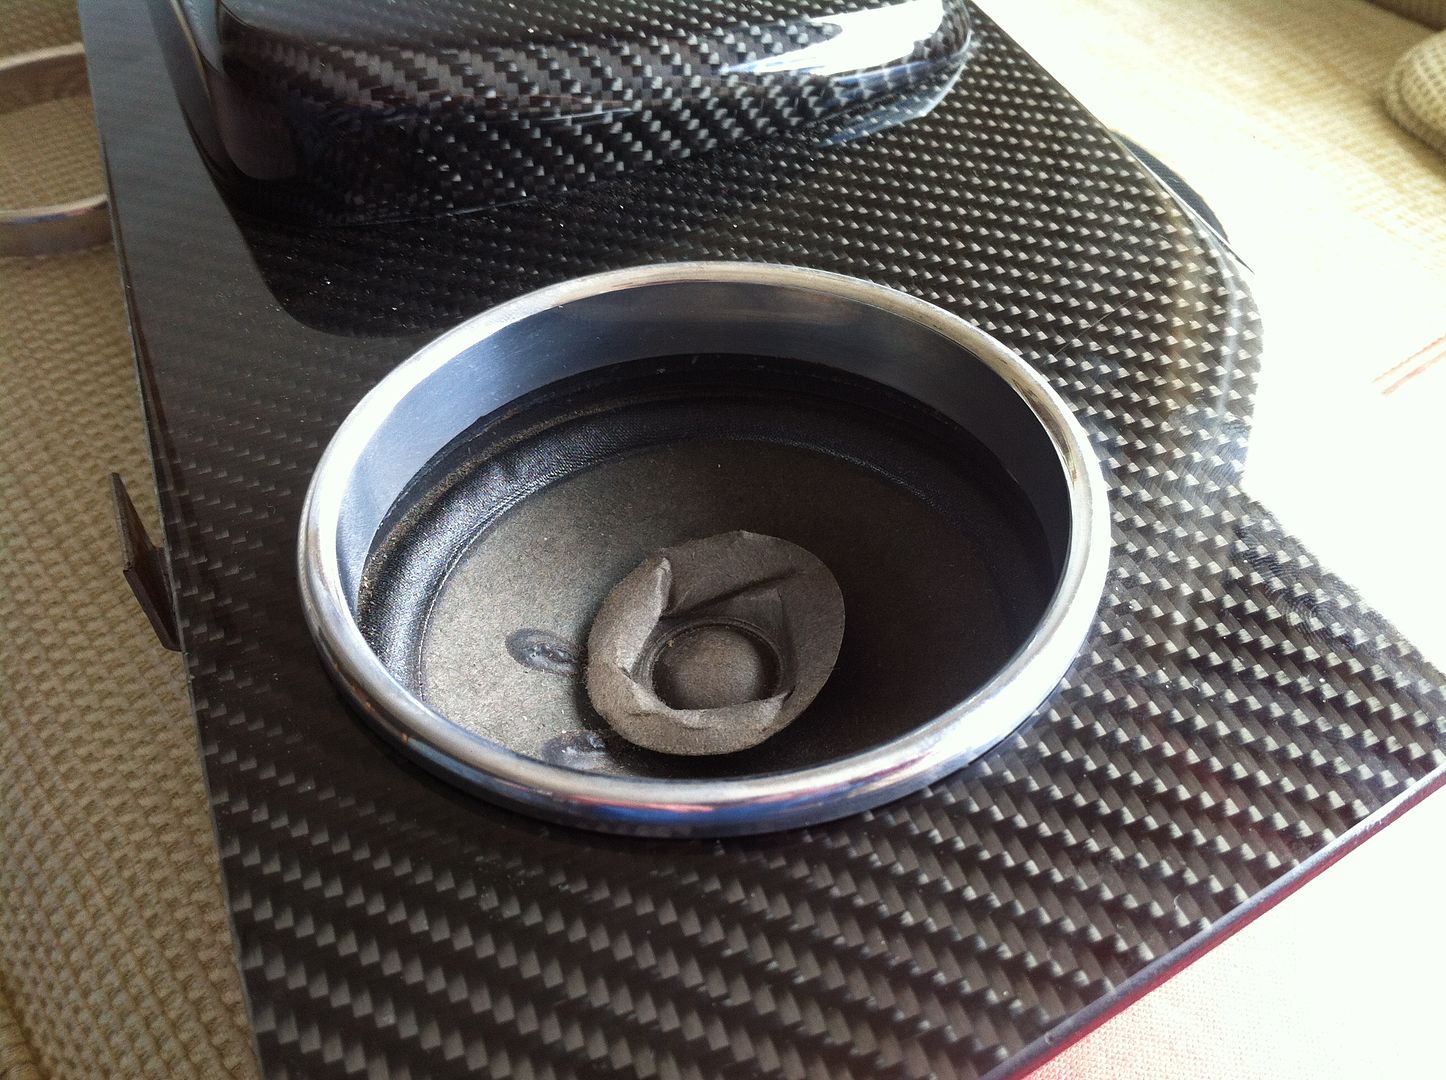
and then after a tidy up of the grille, sandwiched it between the back of the dash and the speaker!

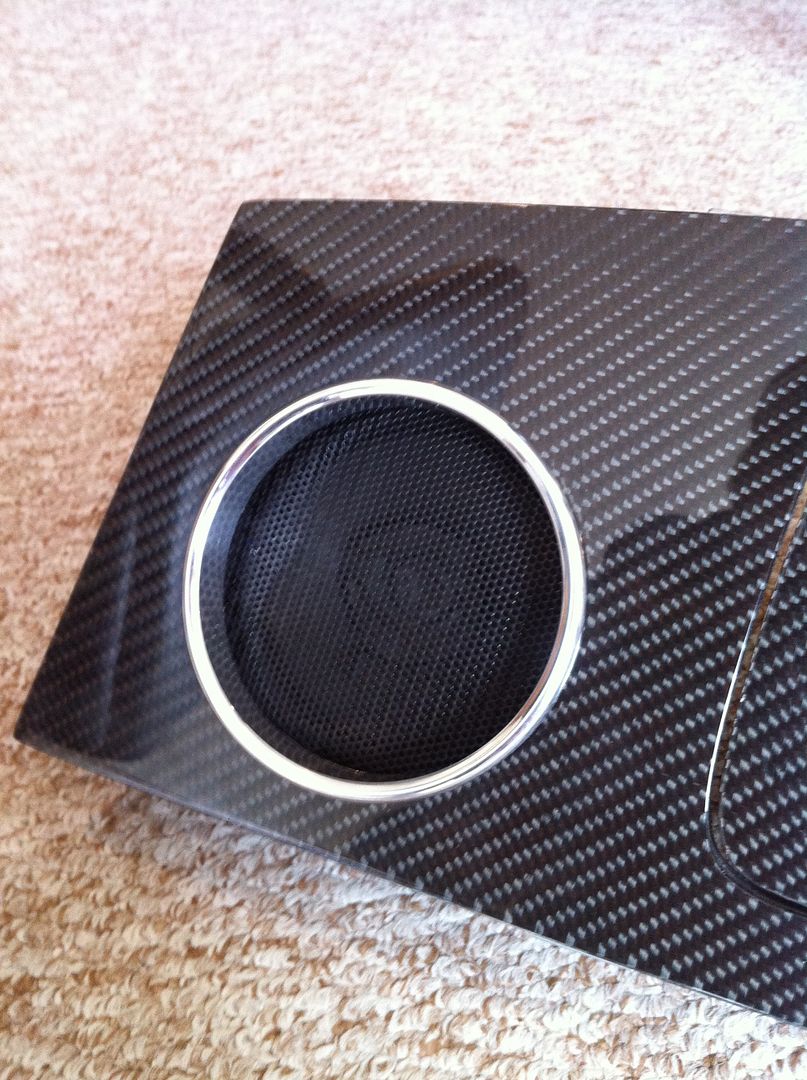
So it looks in keeping with the rest of the dash and functions! Glad I didnt fit the dash before thinking of this now!

Also got the aerial fitted onto the screen and wires tucked etc.
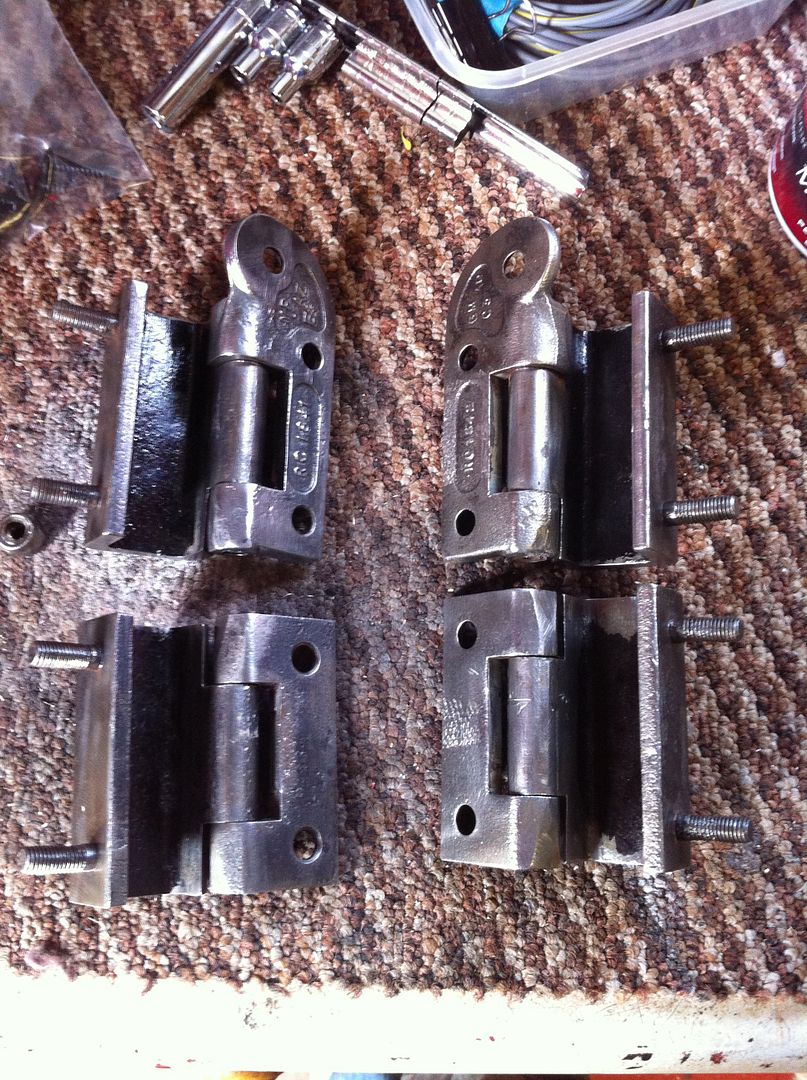
Got the hinges, two were seized so had to split them and free them up/unclog the paint they had been heavily coated in
painted up on the washing line!
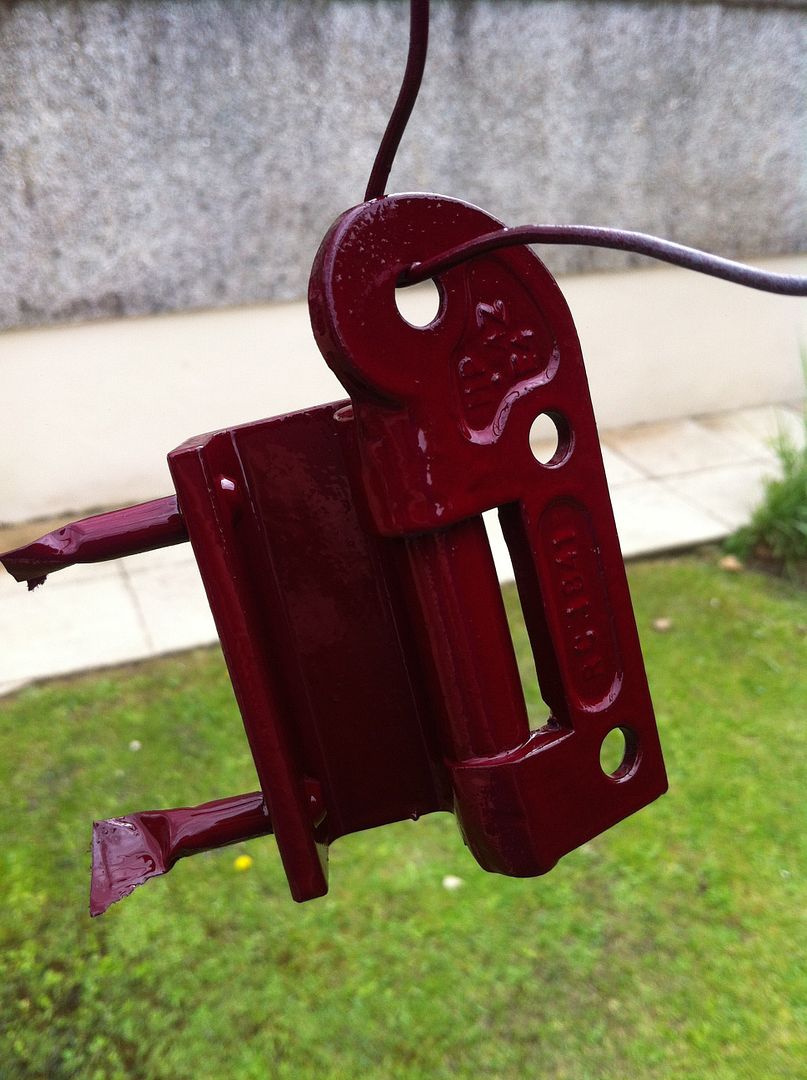
and done ready to go!
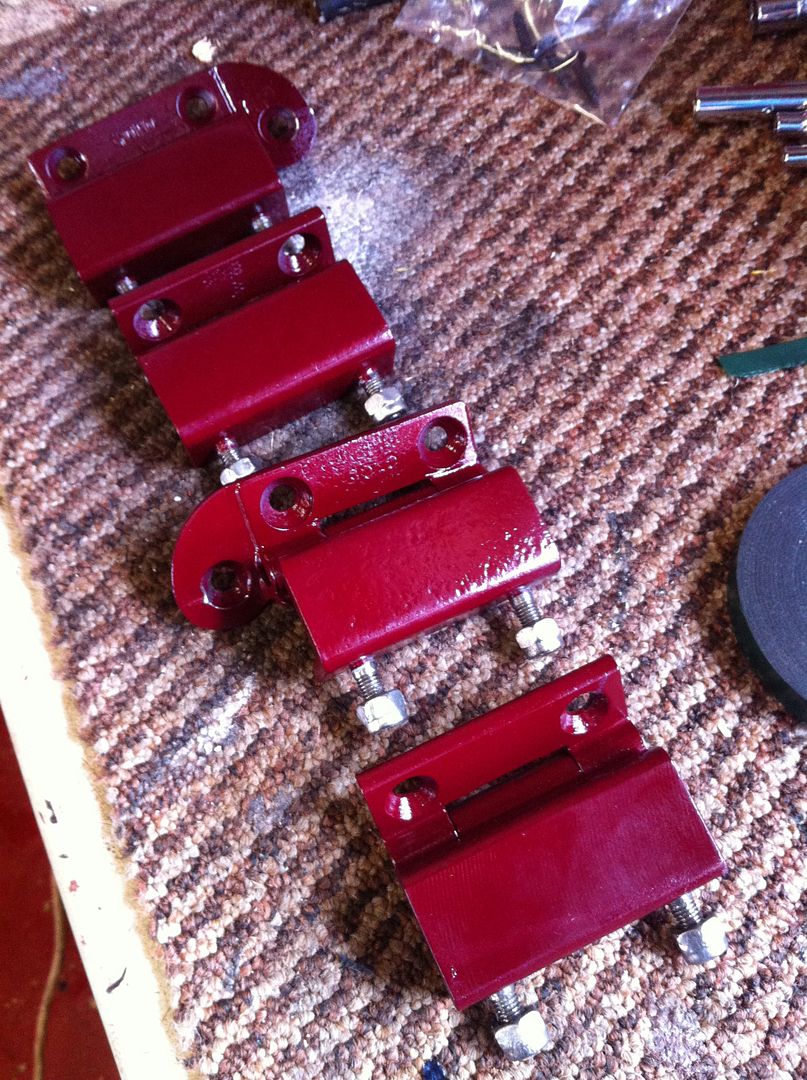
Should get them fitted to the doors tomorrow and then if my folks are about, get the dash and doors in!Comment
-
Update time! Radio arrived in the post, nothing else did due to local holiday. Superb! But seeing as it was already wired into the car ready to go, I plugged it in and tada! Working headunit!

With that tested and the speakers all working I fitted the dash together with everything in its final place. Blue taped up to prevent possible chipping on installation!

Not a bad radio for �50 on eBay! Was circa �200-250 when i worked at Halfords 3 years ago.
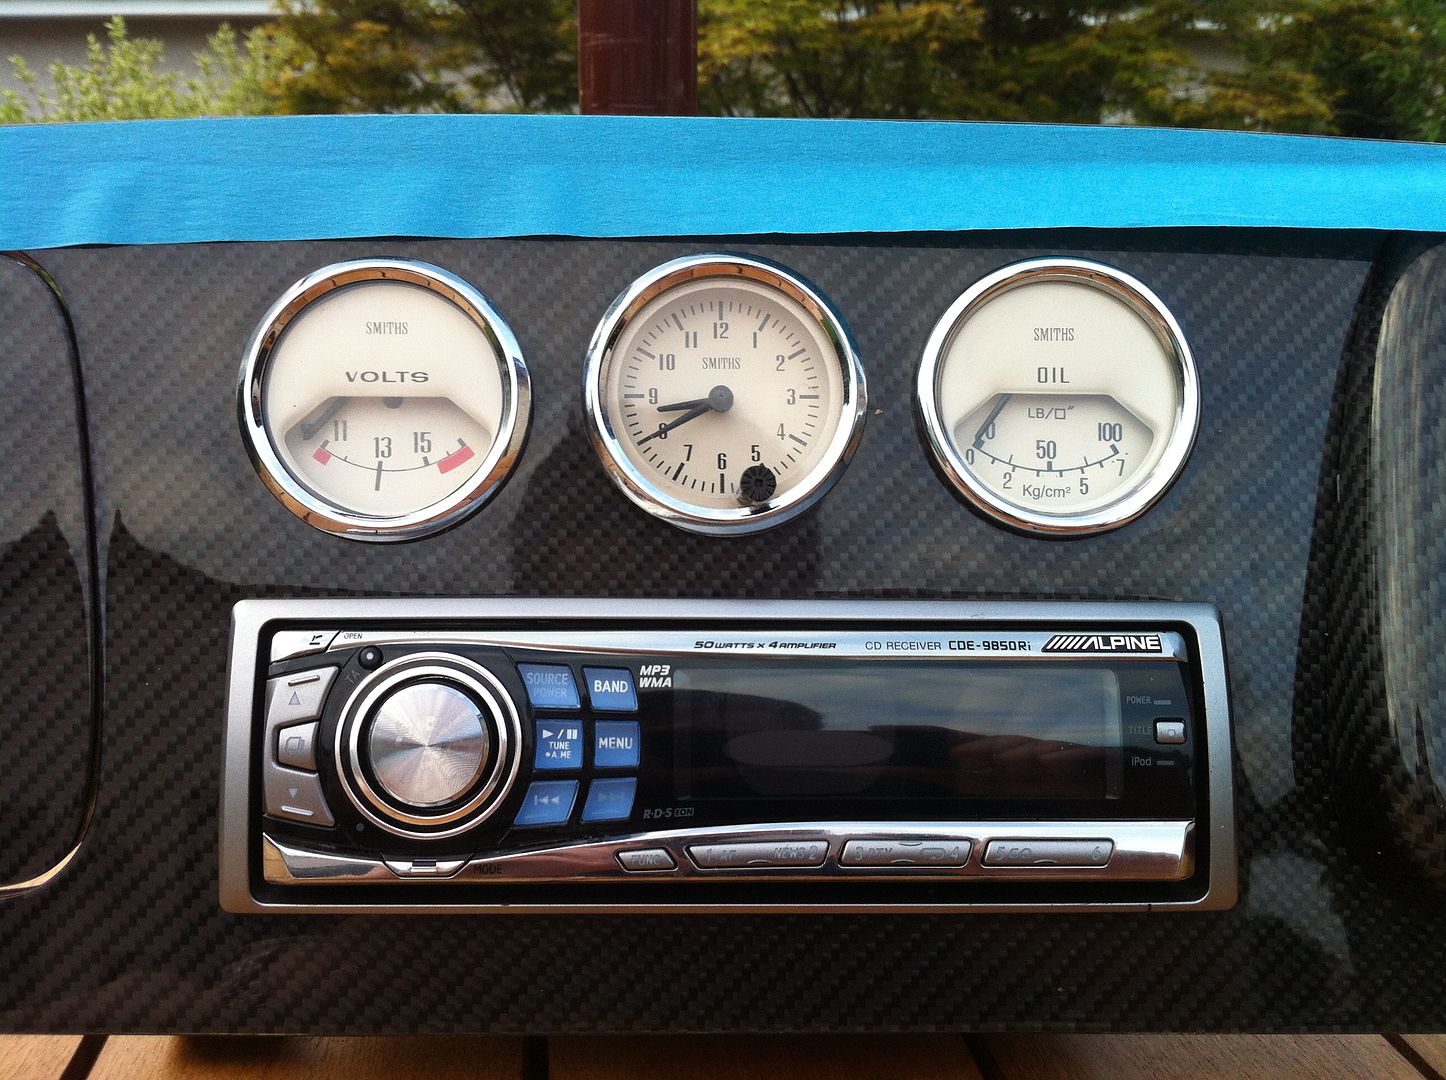
with a bit of fettling and adjusting it went in easily! Everything hooked up and working well. Ace! Looks so much tidier now!
Perfect view of the gauges too which is nice :lol:

Also painted up my rear speakers to make them look fresh. Much better!

Tada!

NExt up carpets, doors and bonnet and boot!
Comment
-
Wow bud great progress.Comment
-
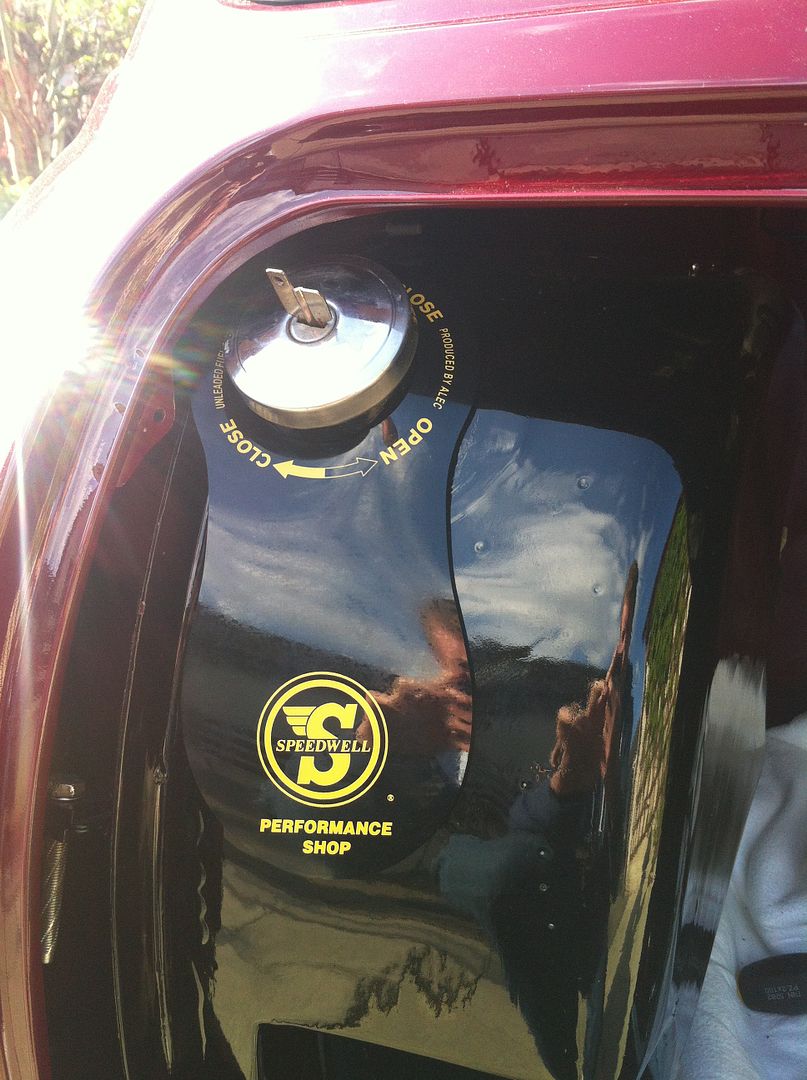
I did get a couple of deliveries yesterday. Unfortunately not MOT dependant ones.....oil pressure capillary fibre washers and a Speedwell (old 60s Mini tuning company) fuel bib to protect the paint on the tank from potential splashes! Looks better in the flesh now Ive put it on properly....(not pictured)

However I also got my fresh air ducting fitted up after it arrived the other day.

and got my rear window in! Need to fit the metal strip at the top but temperatures dropped and the seals hardened up. Leave it for sunnier times.

Tomorrow my mums going to fit the carpets again and then we can get the doors on etc after. So close.....!
Oh and my Tain entry arrived. Its only 10 days away......

Comment
-
Update again!
While I was at work mum carpeted the crossmember and then once I was home managed to get the carpet in after I had checked the reverse light worked and no extra wiring was required.
So a photo of that....

Had these kick plates fitted before. Still not decided if they will stay but they are on for now.


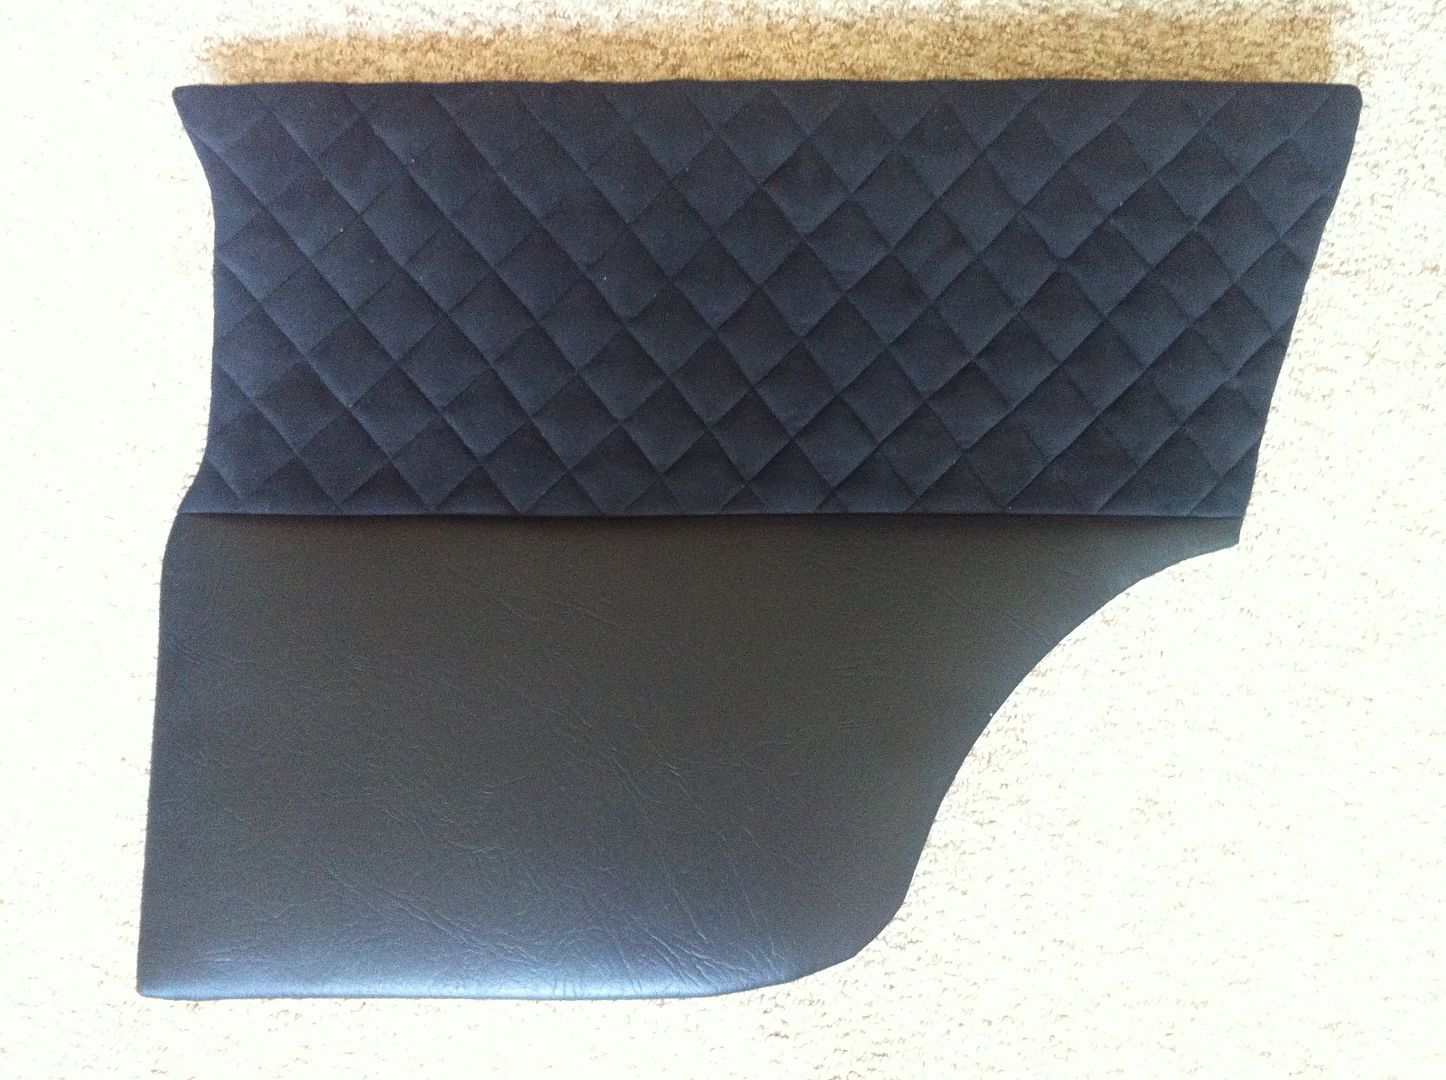
Also after trimming the doorcard to clear the rear arch (tubbed arches mean non standard shape which we forgot about before the card was made....) we got it fitted! VERY happy with it! Fits perfectly and with the doorbin its finished off nicely. The other card is awaiting fabric to arrive and then the backrest of the rear seat needs made up. So close and its looking amazing! Just need to paint the screw heads to let them blend in a bit better than they do here...

and with the carpet in we got the gearstick gaitor in! Getting the weather gaitor underneath the carpet and getting that aligned with the carpet, gaitor and gaitor plate took a while but we got there! Just need to aint the heads of the screws.

And seeing as I dont have standard belts and therefore dont need the holes in the doorbins, mum made up a couple of blanking plates. In suede of course.

and I think the DVLA know its almost ready too. My Tax/Sorn reminder came in today. Will make it easier to tax next week

Dad got a couple of bits of interior trim painted up (steering cowl, rear bench lip trim etc) so they are being left to fully dry overnight. Next up now that the interiors pretty much done is doors, bonnet and the dreaded bootlid! Need to play about with the carb too as the cars not idling. Idle screw issue I think!Comment
-
So after a 9day 48hr delivery from Wood & Picket.....my bumpers finally arrived today.

No sooner said than fitted! Ace!


Also got my harness bar installed. No rear seat going in for MOT as there arent any mounting points for the belts anymore. Will go in again after MOT but wont be useable because of the bar and harnesses for the front seats.
This will be getting covered in the end but not point doing that now when it needs to come out again to fit the seat underneath!

Tried running the car again. It fires and runs for about 3 seconds and cuts out. Need to investigate this over the weekend as it was running totally fine before......!
Mums been busy quilting yet more suede to get the rear seat and final doorcard done and dads been touching up bits of paint in the engine bay and prepping the MOT special steel wheels
Comment
-
Today then! Got the seats in! Changed the brackets since this photo so they are more upright. Much better.

Got the drivers door on. Couple shims on the lower hinge. Perfect alignment and slams 'like a golf' :lol:

Uniform Mini panel gap. Kinda big but no Minis perfect.

Passenger door on. Still needed adjusting of the slam panel bracket here hence slightly dodgy gap at the rear. Sorted now.

Bonnet placed on. Hinges arent acting as they should.....no idea whats going on but temps dropped as did the light so ended for the day. Got a lot more done than pcis suggest (checking over torques on bolts etc) but all needs done for MOT time!

(again door got adjusted after this...)

LOADS to do tomorrow but good weather forecast so fingers crossed we get through all the little niggly jobs!

Also cars STILL not running right. Fires for about 3 seconds then dies no matter what throttle or choke you put on it. No idea whats happening so any ideas??? Getting worried by it!Comment
-
Update time! LOADS done today! (not all mentioned though) It looks like a car again!
First up we tried to fit the bonnet. And came across our first issue! The bonnet pin was from the old bonnet and before the paint went on, it was tried out for bonnet fitment after welding. Problem being it was still slightly rusty and then it got painted over.....and as a result it was jammed SOLID into the captive nut welded onto the bonnet. Not a great issue until you realise the bracket its located into is paper thin and spot welded to the bonnet face. Slightest torque on it and instant bonnet damage. So we sourced one from a mate and cut the cold one off, drilled out the stud and fitted the new one. Nightmare and nerve wracking with paint so close but we did it!
This is the old one....unable to be adjusted.

Then we went to fit the dreaded bootlid. Warmed up the seal for a while to ease application

Cleaned up the boot a bit and saw this angle so had to shoot it

and fitted it. Win! ITs fitted without the seal as its pushing the lid out far too far but it closes firmly. Will try the seal another day but didnt have time to waste on it today.


Shiny? You bet

The lid does open but not far. If it opened any more than this, it would hit the bumpers top edge. Typical me being awkward and wanting the smooth internal hinges. Been a huge pain in the build! Enough to fit a crate of beer in though which is all thats needed

We had loads of boot stays kicking about but all were obviously too long. Adapted one and made up this one. Works a treat!

Front wheels still need cleaned and polished. Rears are done though.

More tomorrow as I've got the day off work.
Comment
-
So today was the day. MOT time. Got the car running again last night. Stupidly I had blocked off a pipe on the carb that shouldnt and tada it ran fine again. Timing/carb way off but ti ran well enough to take it to Jim King about 3 miles away.
So here it is ready to go. Fine day for a wee trip to the station.

Arrived very early but got the company of this guy. Ace garage dog!

You will notice the steel wheels. The 13s arent finished yet so threw these on to get it through the test. Looks horrible but will do the job!

Commence test

Test complete and here the view of the cars they deal with while I awaited the full results. MK1 Escort RS2000, Pontiac Trans am Firebird (yes the smokey and the bandit one), a Lotus Eclat (I believe) and of course Trig

As I expected, it failed. Emissions were through the roof and blocked the machine. Should be 3.5% CO2 for this age of car but Trig was reading just shy of 7%. Good lad! :lol: Also failed on non funtioning horn and headlights out of alignment. That was it! Very happy with that considering its been nut and bolt rebuilt by myself with help from friends and family.
Going to order upo a new stalk for the horn/flasher side as neither of these work and the wiring all seems fine, as do earths etc. If that doesnt fix it, god knows whats wrong with it! Hopefully if that arrives later this week it will have its MOT ready to go to Tain.
The suspension is solid and I mean SOLID! The car was bouncing all over the shop so I think I need to tweak that a fair bit as there is next to no travel in the shocks at all. Other than the above, its great and Jim was very impressed given my previous experience (none...). Even went as far to say he's seen cars built by garages done to a far far lower standard than mine. Happy with that! Felt good to just drive a Mini again too!
Comment
-
Not a better idea to let the suspension settle a little bit before adjusting?
Looking great Andy. I can't wait to shoot it.Comment


Comment