-
hey thanks a lot guys. I have been elbow deep in a full rear end overhaul for the last 6 weeks and will have info on that next up.Leave a comment:
-
Fucking hell!!! the attention to the veil side and the tommy is perfect !!!! loving this brother !!! keen to see this driving around soon manLeave a comment:
-
Okay. Progress time! And I mean real spanner throwing action!
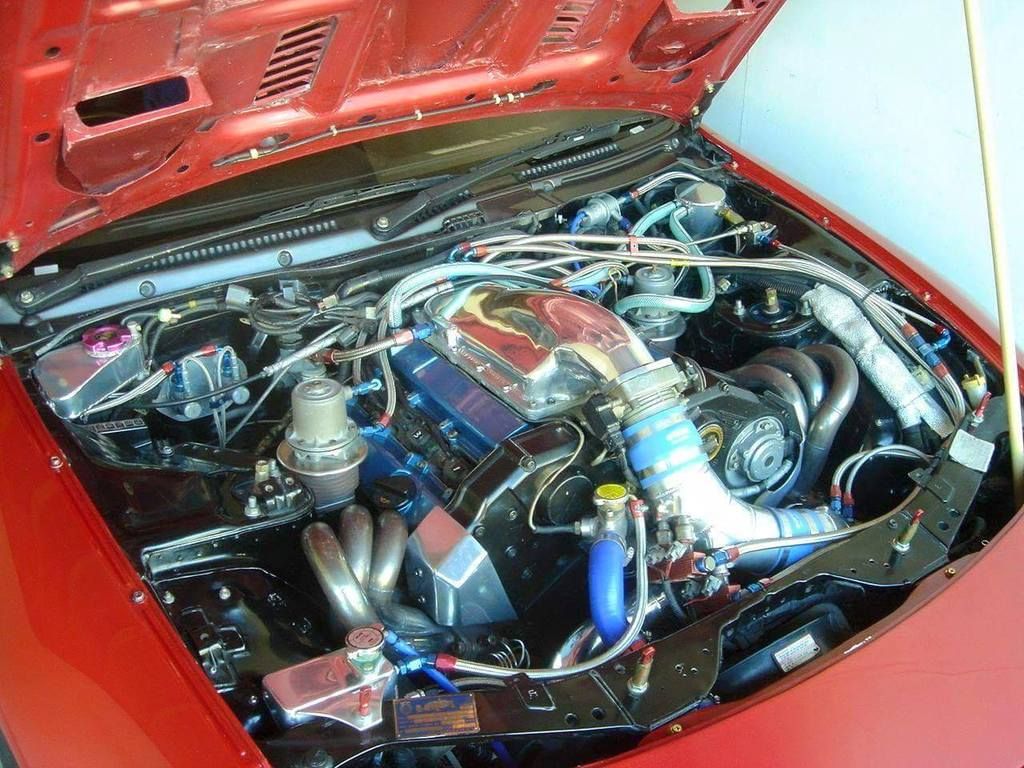
With semester over and time on my hands the first job I started back on in the garage was one I was really looking forward to - a good motivator. Fitting my new TRust heat exchangers. The first step of course was paint stripping the fuck out of them to remove the "wanker blue" finish.
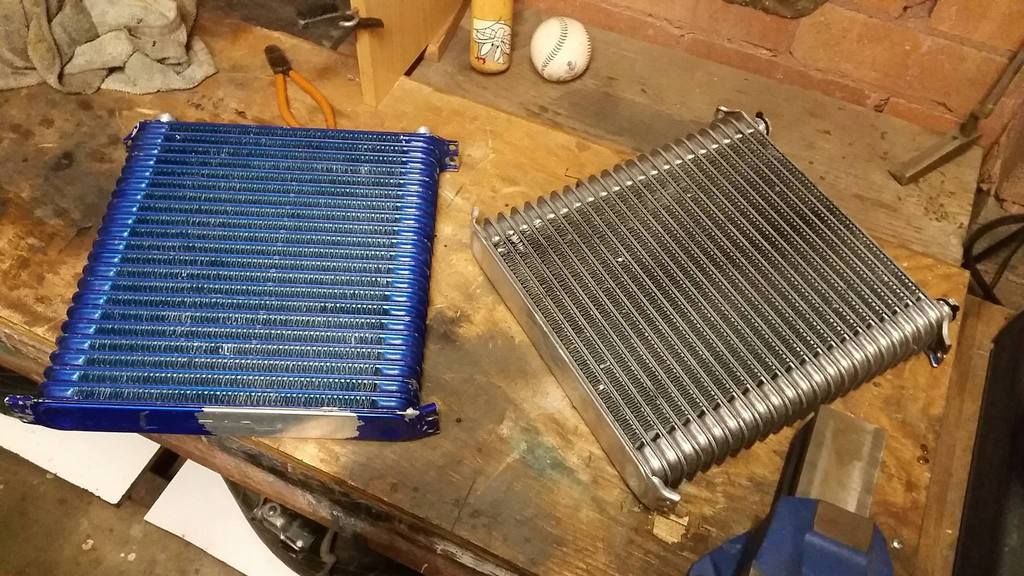
Oh yes. I totally bought another one.
Fitting these up properly took quite a bit of effort but the end result is great. A few brackets on the chassis had to be cut off but nothing too bad. I'm already moving the radiator overflow bottle but a new washer bottle will have to go in too (no big, actually looking forward to it, trust do an after market one which is kind of fitting seeing as why I need one lol).
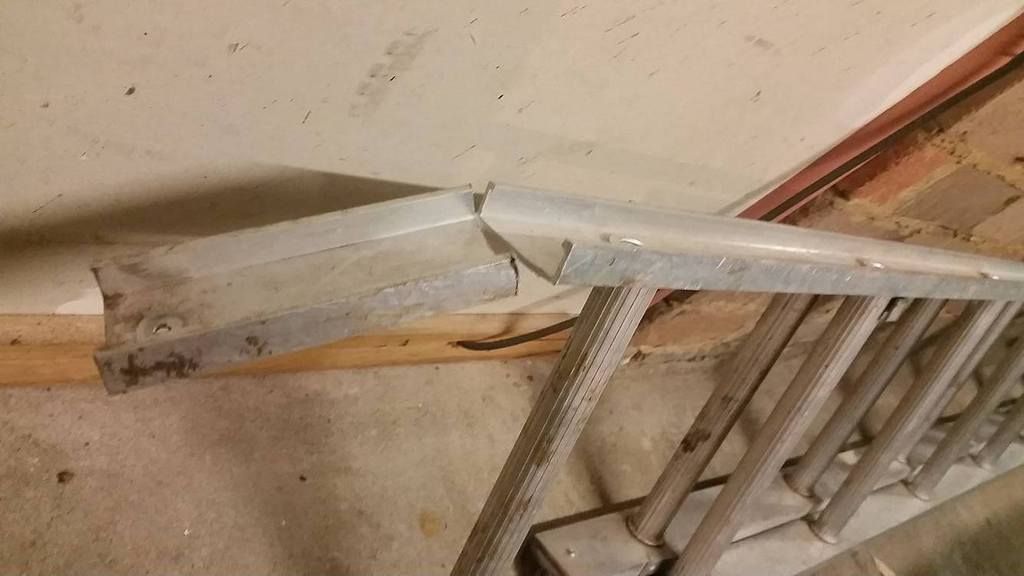
I ended up putting wayyyy too much work into designing these brackets (get too into these things) and ran myself clean out of material. At the time I was still go go go, so dad's ladder became a sacrificial lamb:
The upper brackets rivet to the chassis for simplicity and reduced weight while Nissan OEM rubber vibration isolators mount the cooler.
Folding the bracket over to an L shape with an overlap to be fastened for extra strength;
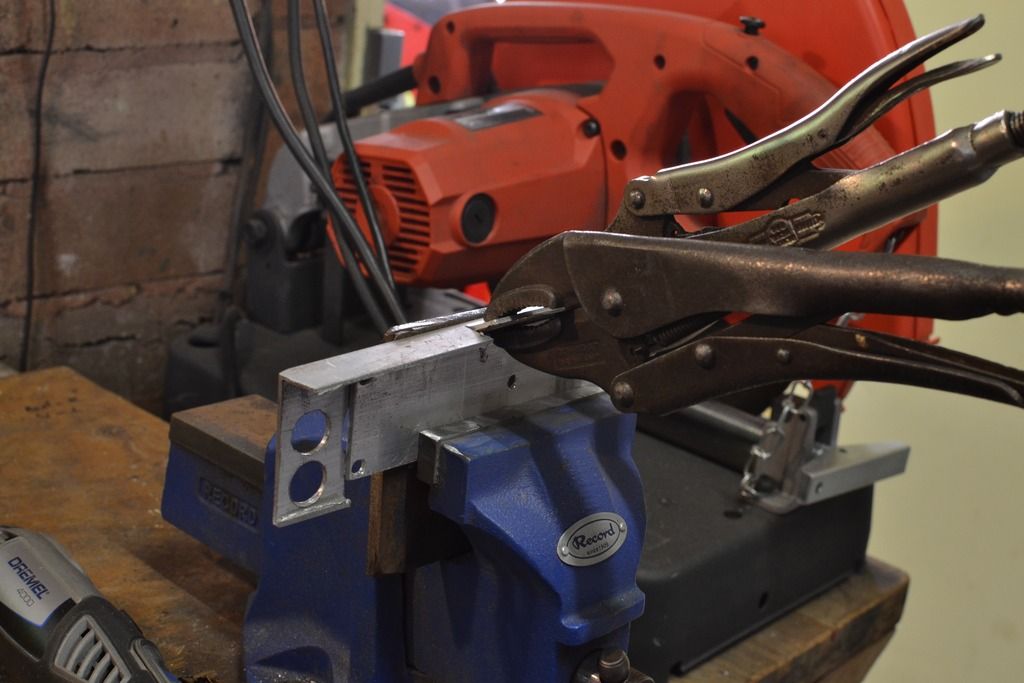
Coming together - nutserts installed into the oil cooler, a pop rivet was put through the fold overlap later on;
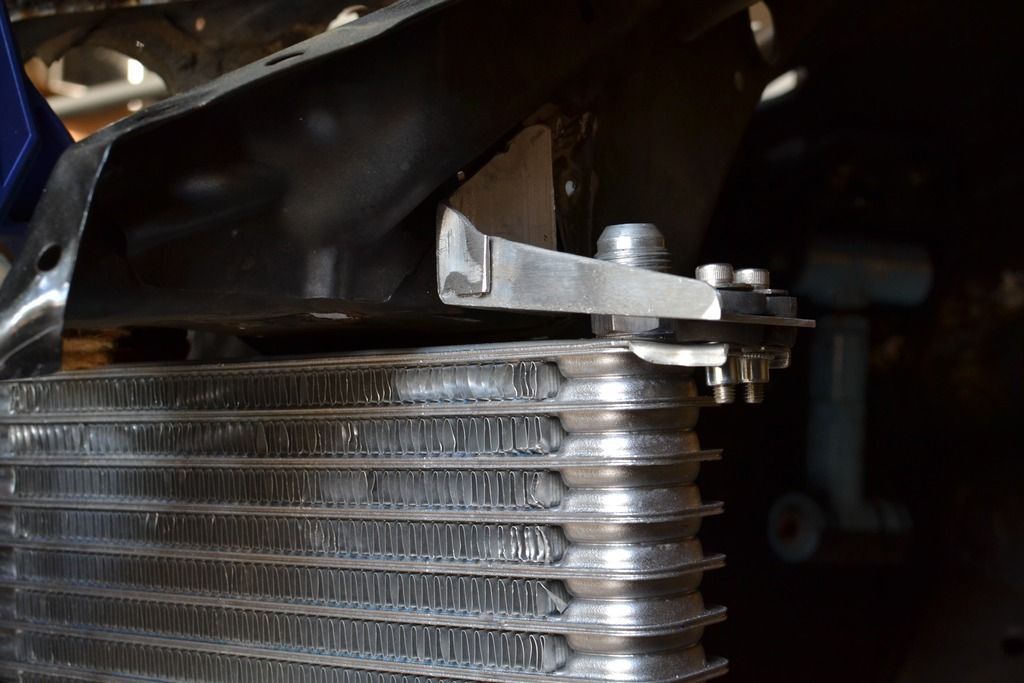
The lower brackets are folded 1" flat bar riveted to the coolers and attaching to the chassis via more vibration isolators.
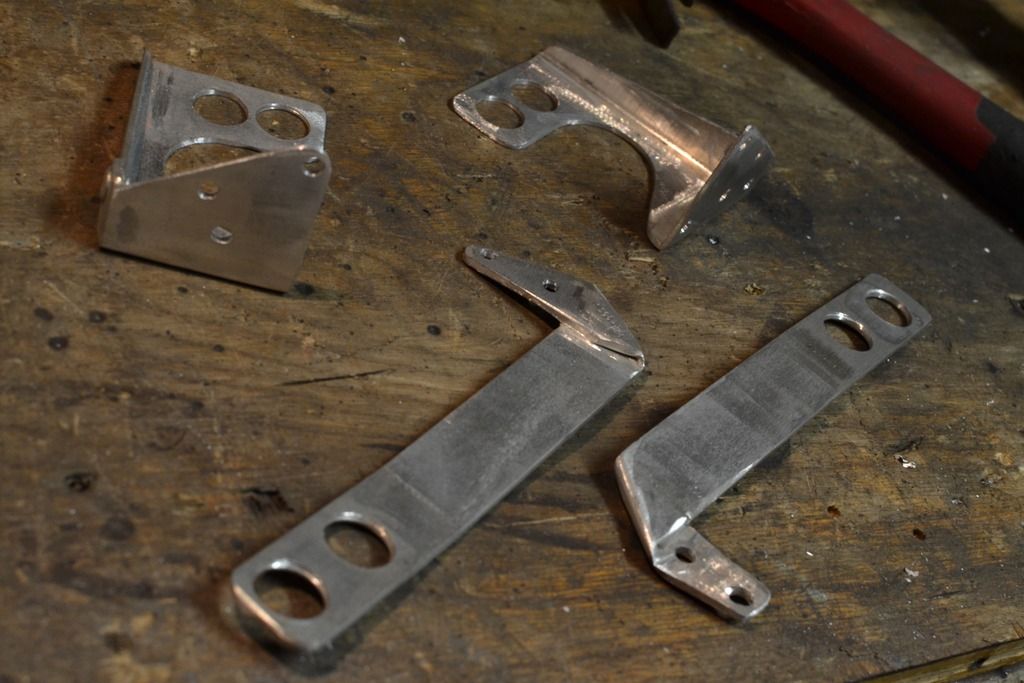
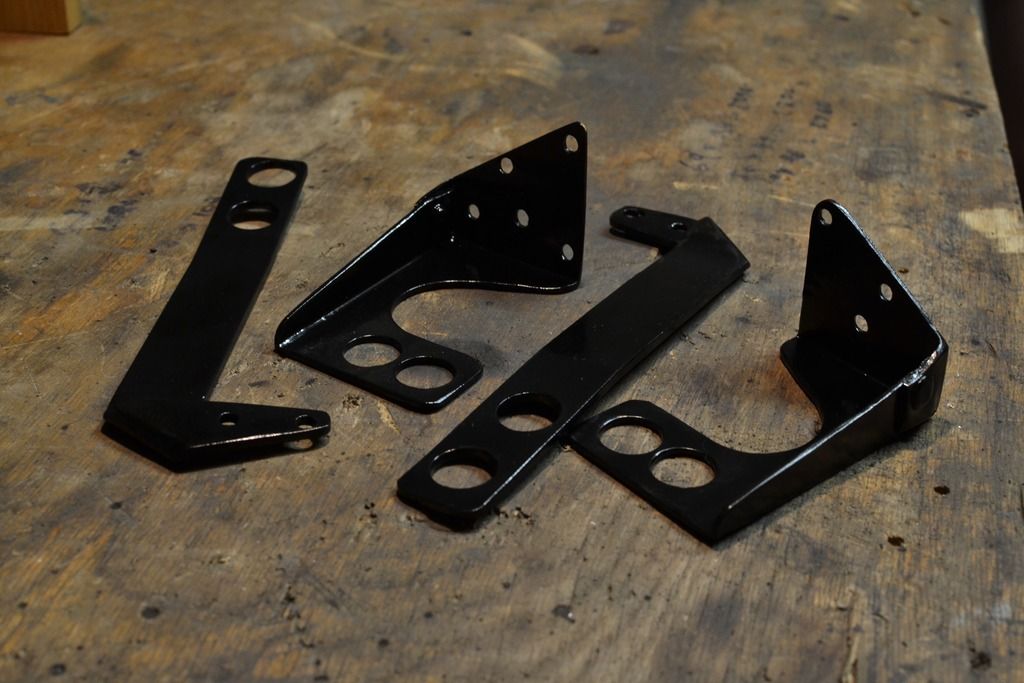
I went with the brackets set up this way and made them (remember what I said about overthinking) they're light as all hell, reliable with the rubber eating up bumps rather than the coolers, none of the hosing or bracketry will block air flow to the cores and lastly they're serviceable; the coolers can be removed via the wheel wells without having to take off any bodywork.
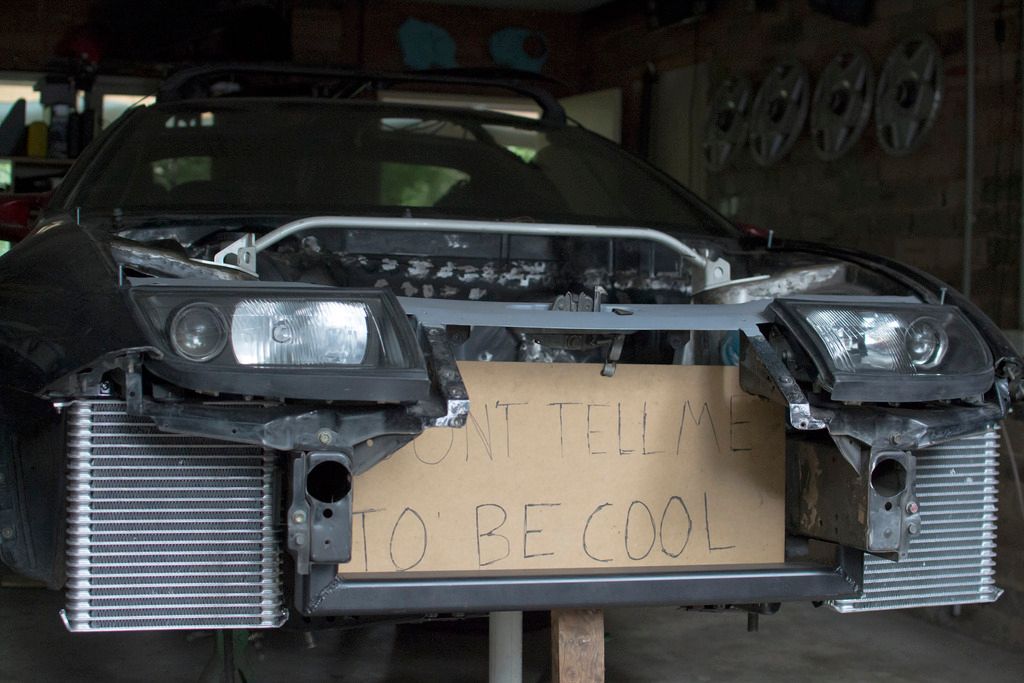
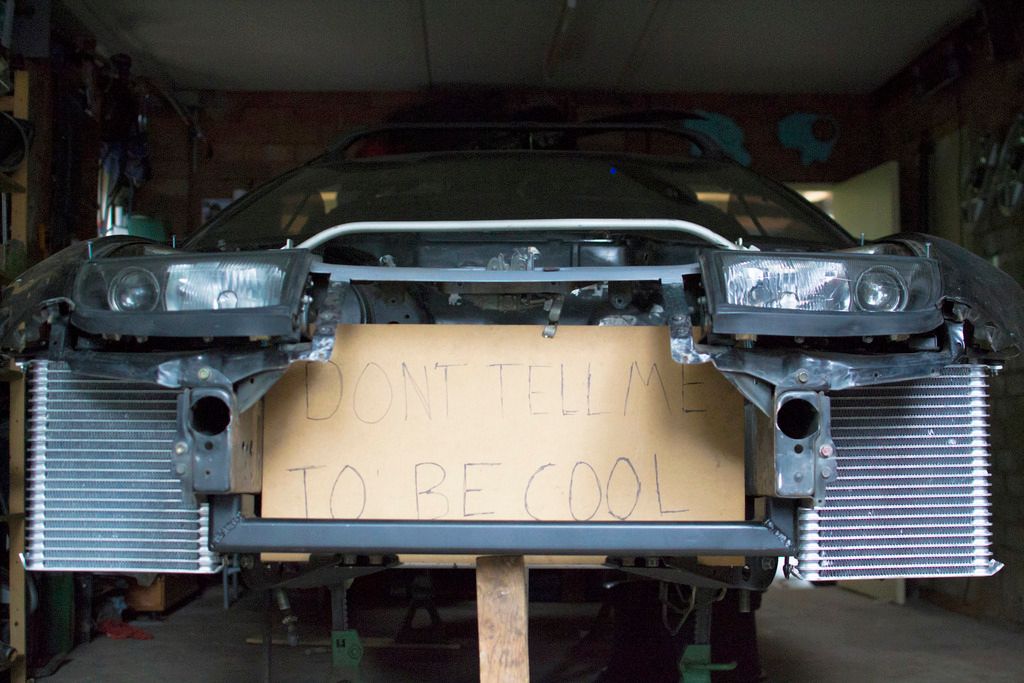
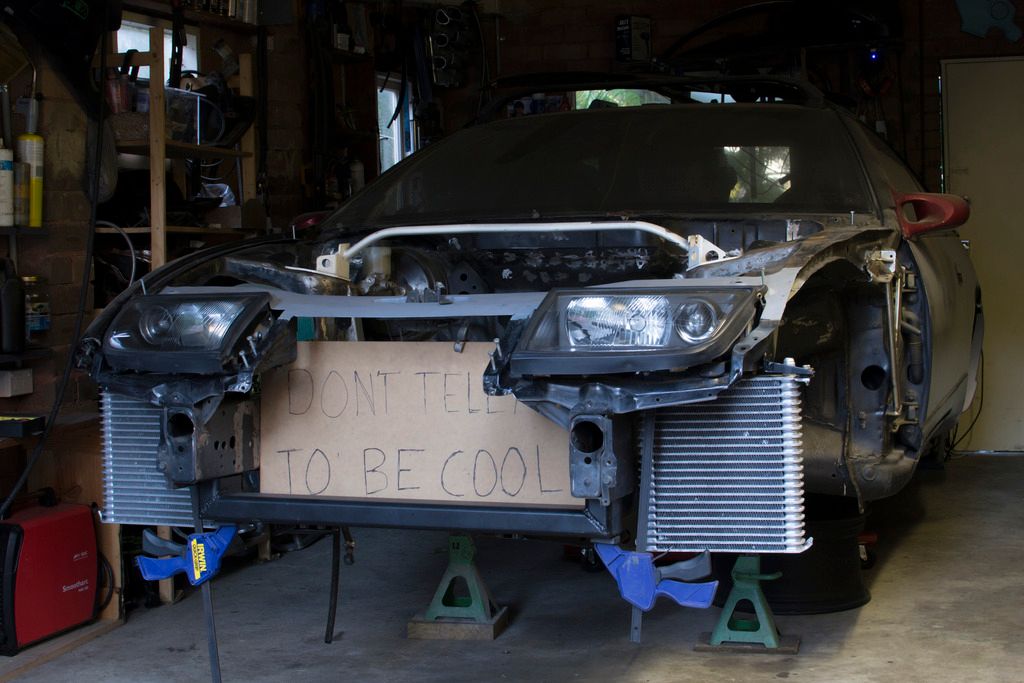
If you're wondering if they clear the bodywork... the answer is no, absolutely not. but with some bumper bracket trimming they should have just a hair of clearance. most importantly though is that they do have a decent amount of road clearance; they're still about an inch from the underside of the bumper. achieving this took a considerable amount of work... bye bye headlight buckets
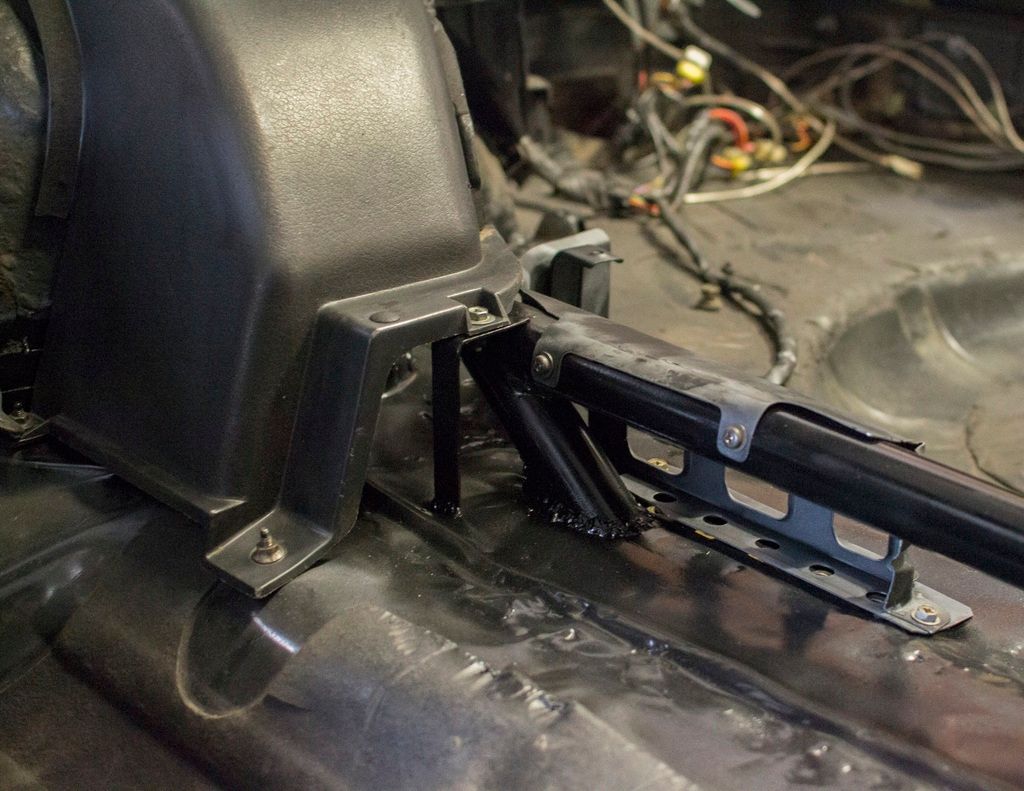
Next up was a job I started ages ago; a custom rear strut brace. I wanted to strengthen the rear towers without having a bar through my interior.
With a bit of planning the OEM metalwork came out;
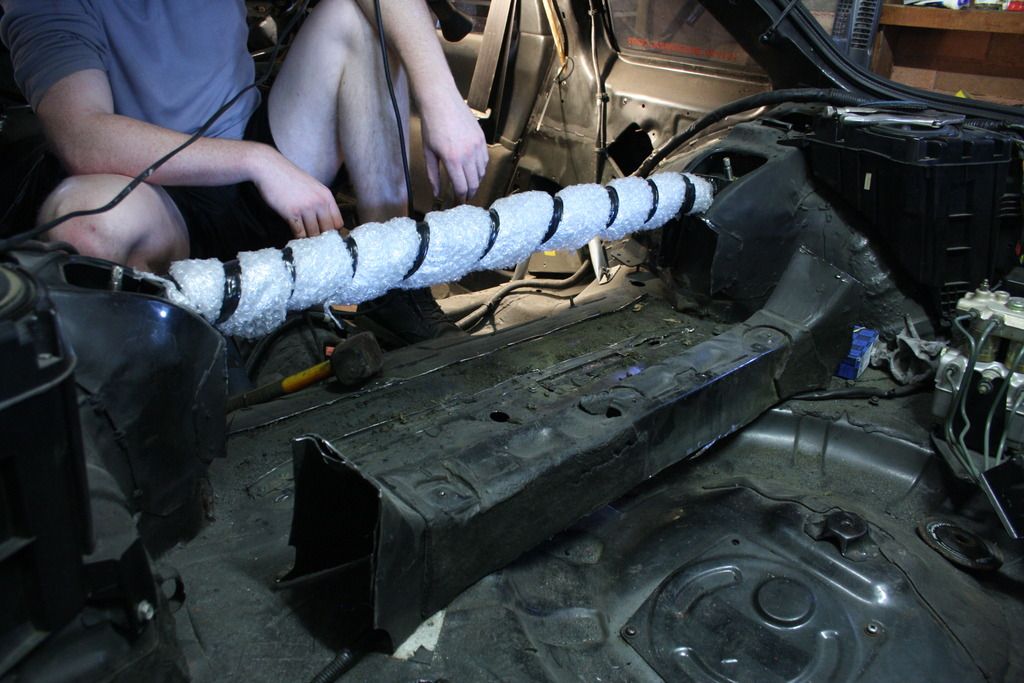
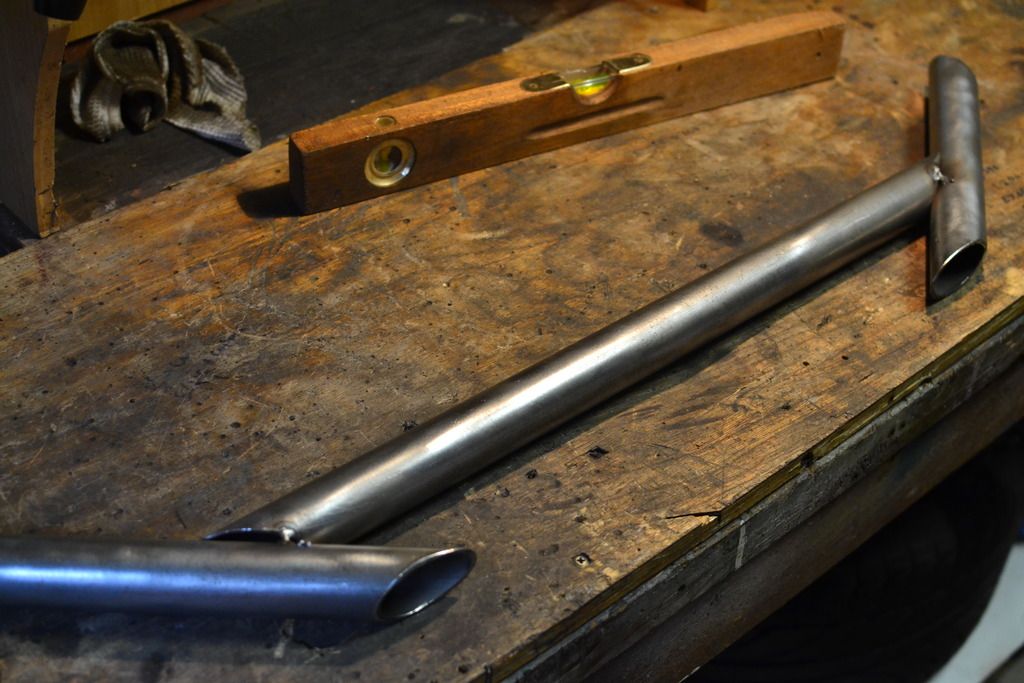
My old strut brace (still nicely trimmed) stayed on throughout the process to stop the towers shifting. I grabbed some DOM tubing from a local roll cage material supplier and set about fish mouthing;

The outer pieces were angled as steeply as possible before they would foul on the boot trim.
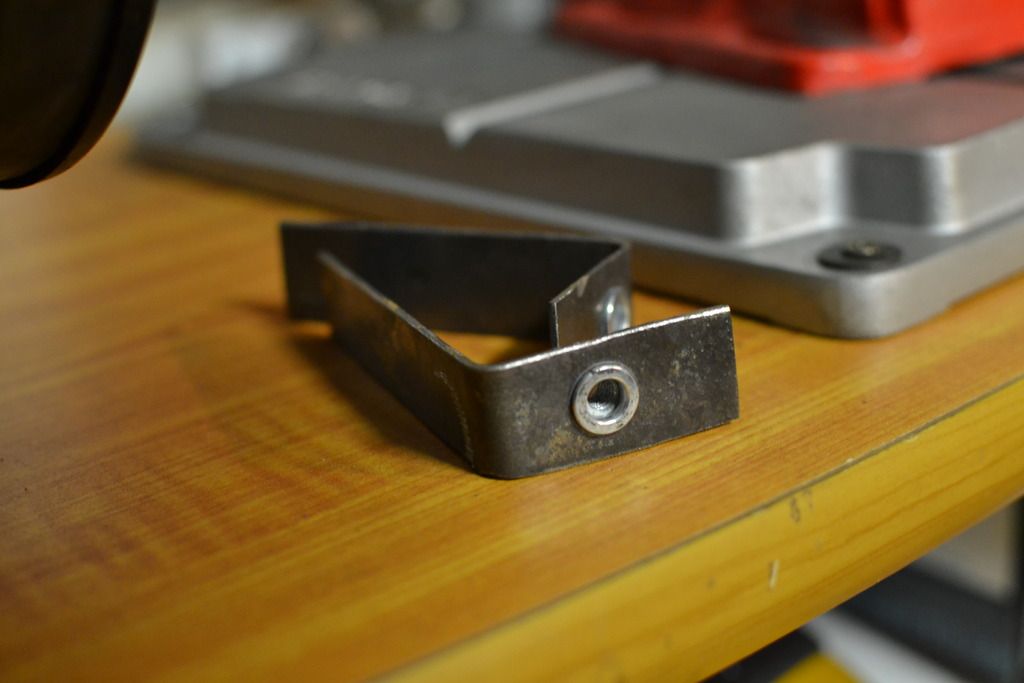
Some new brackets were made up to replace boot trim retaining flanges on the OEM brace. No quality concerns with rattles and flimsy trim.
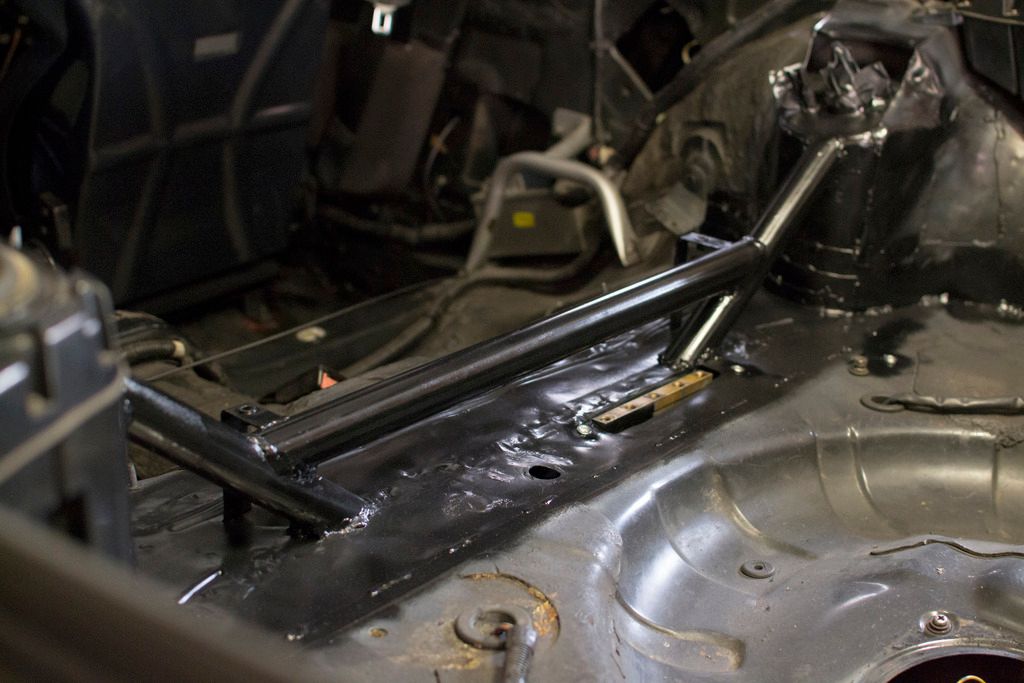
Welding welding welding. That's some stripped sound deadening hanging off the bar. I haven't picked up a mig since before semester started and to be honest I kind of dicked it here. They're over done and ugly but at least they're strong. The good news is that I figured out what the issue was and I'll be pulling off way better work in future.

The OEM brake line shielding brackets were kept and with light work wrapped nicely around the bar, which was drilled and tapped to suit.

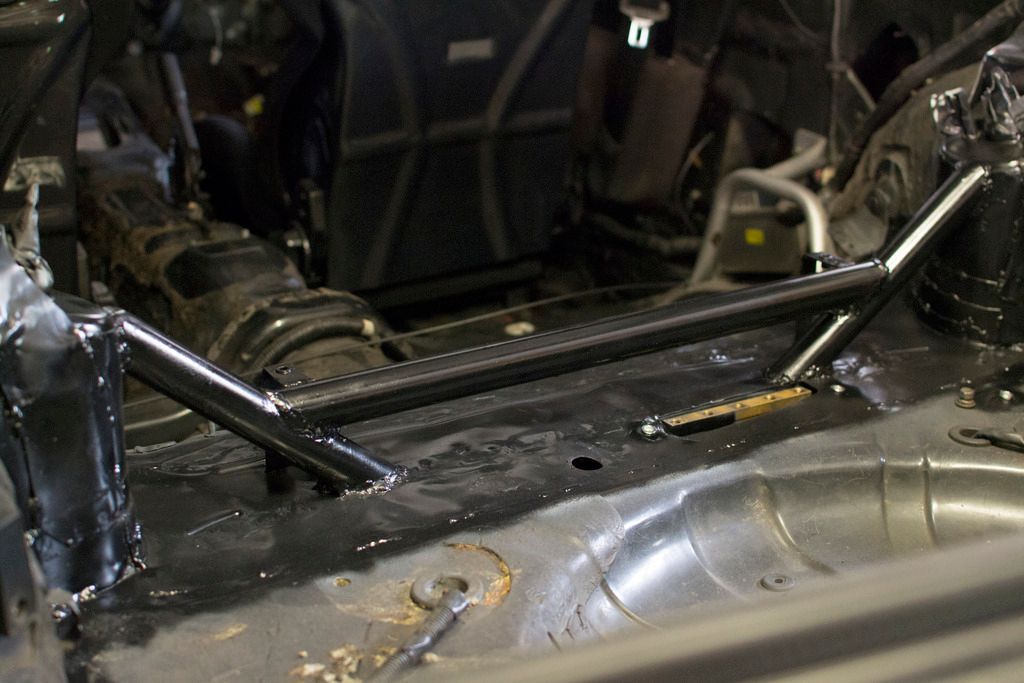
Done and dusted, this is how the trim fits up:
While I'm not overly enthused with the welds the end result I am happy with. The two points fused to the boot floor are actually running across body seams, tying the structure together. The remaining sheet metal that previously connected to the OEM brace was trimmed, folded down and welded to the tower.
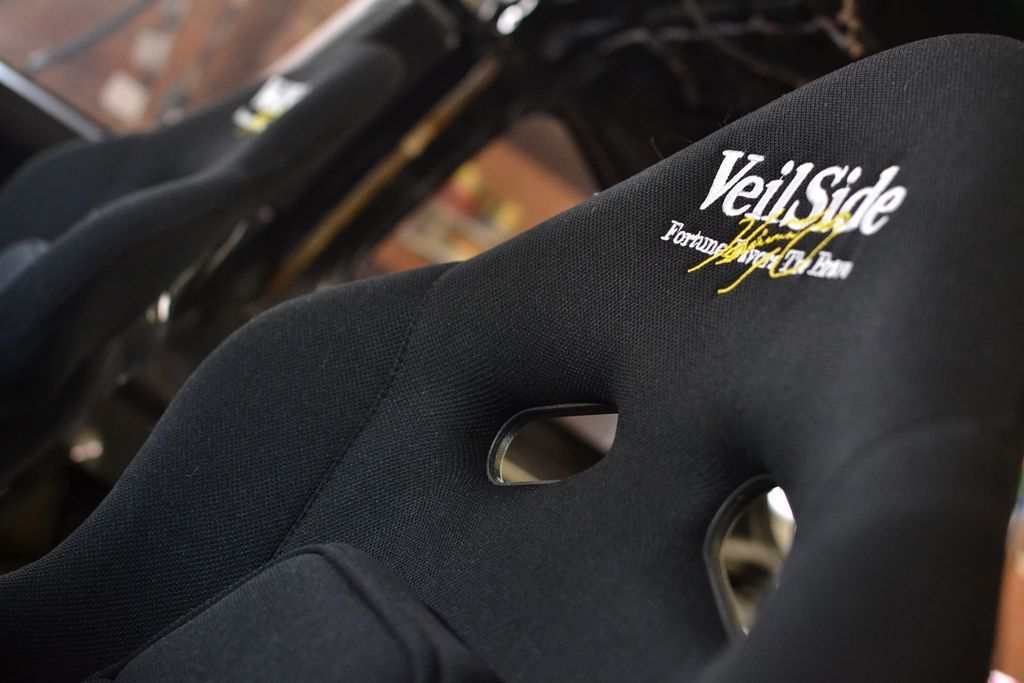
I also fitted up my seats! With an ungodly immense amount of relief that my cut 'n' shut driver's rail from a few posts back worked. They fit the chassis well which was sweet confirmation seeing as I don't know of these ever going into a Z32 before.
This takes us up to about two weeks ago maybe, and since then I've been up to my ass in more car work so much more to come.
-ALast edited by anti.engineered; 01-02-2016, 05:51 PM.Leave a comment:
-
thanks MMM, i'm really glad the ethic of the build is coming though. people get it!
rice, i've been looking into intake plenums quite extensively lately, most particularly thinking of knocking up a lehmann triple plenum setup but i'm really not quite sure yet. i'd love to use the new tb but there are big issues trying to run a single inlet under the hood while maintaining runner length and harsh turns getting into the lower plenum ports... might still end up with a twin plenum that wraps around the top of the motor then merges into one in the front of the bay where the water to air intercooler will be. i need to get me into some cfd. if you have detailed info on either of the jun plenums i'm absolutely all ears!Leave a comment:
-
OP, this build is incredible.
Awesome attention to detail, great mix of parts, and OE-like finishing details make this whole thread a pleasure to read.
Also, your parts collection makes me bite my lower lip.
Keep it up!Leave a comment:
-
Back then the best parts were one off's, so making your own parts is still just as cool as buying old school mad tyte jdm parts.
I can make you a diagram of the intake mani if you want it. The main differences between the 1st and 2nd revision ones were(besides the size) were the 1st one had shorter runners for more top end power, but with a turbocharger, the runner length for the most part stops mattering when boost kicks in. The 2nd revision had longer runners for more low end torque off boost. It shouldn't be too hard for you to fab one up if you have a welder, time, and material. For a single maf, you may be able to run it off the stock ECU. I figure that the J30 can run dual MAF's with a bit of tweaking and it comes with a single, so why can't the DETT run off on one large one instead of two?
Here's some inspiration.
edit: the need for low end torque and longer runners was why they moved to the 2nd intake manifold type. The larger size was due to the long ass runners.Leave a comment:
-
Damn Rice, you really know your iconic imports. I wish I was able to get my hands on some of those old school parts they made like the single intake - but it doesn't look like they ever made more than one or two. I got the picture off of the big Z32 Facebook fan page. The admin who posted it just came across it at random with no additional info.
You're right about the cars here Andy. There's no way I can't come off as full of myself here, but there aren't many guys out there at all doing builds of this calibre. There are some that are great absolutely, but they're seriously seriously rare. Dipshits in thrashed out poser mobiles covers most of the rest.Leave a comment:
-
car looks great man, you've got some great design ethics for that thing. I have to say that when I lived over in AUS, I was not impressed with the quality of car culture as far as "real" builds go. All I saw was nothing but s15's, evo 3's, gtr's, supra's all ruined with knock off 20" chrome wheels and VL turbo's on steelies doing skids. So its nice to see something more in depth coming from an aussie. What part of Sydney are ya in? my nan and pop live in Blacktown. I lived in Wagga Wagga for 4 years before moving back to the states. One day I'll go back for a visit and hopefully bring back an SS ute or an old Monaro GTS.Leave a comment:
-
That's the 2nd revision intake manifold, the first one was flat and could fit under an unmodded hood. In some pictures of it, after it came back to japan and was retrofitted it has the 1st version of the intake manifold and a non bulging vented hood. That car underwent some major changes between 90-91, the video I posted was the first run it made at bonneville, in 91 it had the 2nd revision intake manifold and a bunch of other mods, including that Blitz-Jun livery.
These cars were tuned on old school bosch dynos with an EGT gauge, MBC, and almost no fail safes. Their noses and the EGT were best indicators as to how rich or lean it's running. Not saying it's a bad way to tune a car, but I bet you a lot of engines were lost that way in trial and error.
Where did you find that picture, haven't seen that one before.Leave a comment:
-
I have seen that pic, and a few others of it driving around on the street (in a Bonneville record holder!) It took forever to find a good photo of its bay, I had to search for ages. Weighing up doing a similar manifold.
Leave a comment:
-
The JUN z32 was shipped back to Japan and reconditioned for street use(stripped the stickers off and repainted red). It showed up a few years back and was in driving condition last I heard of it. After it was reconditioned it was allowed to become a full fledged member of the club in under a year, which was almost unheard of. Check out some Yatabe circuit videos, some midnight club cars show up from time to time in those old videos.
Check this video out.
You can see it being tested at Yatabe, which was a popular proving ground for the Midnight Club guys.Leave a comment:
-
schooled! I like it. Thanks for the information. I've seen a bunch of the old option videos and followed a few of the cars too. The Jun Z32 is something I'd be really keen for more info on if you have it. The yellow Pentroof Z32 now resides here in Brisbane, though I haven't heard anything about it in a few years. Not sure where I got that they're a part of Ab-Flug, my mistake. ^^ seems that their stuff is still being appreciated though! thanks loekaaz, just wait 'til I hack the diffuser up...
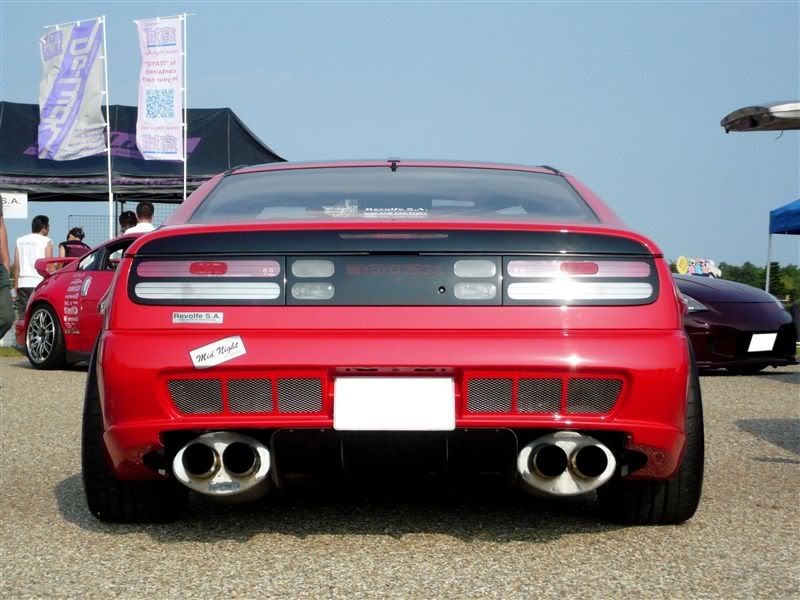
here's a shot of a car with a variant of my rear bar and a midnight decal
Leave a comment:

Leave a comment: