 Tweet
Tweet
Originally posted by Edgar.
View Post
-
The mirrors are at home now, because all the drilling has been done to the body work, but I think you will change your mind once the car is outside in the real world.. LOL Tight spaces and focused attention pictures really change the perspective a bit, so we will see if your view changes, as well as a few others. I just couldnt put the typical non functional crappy chrome mirrors back on this car.. -
I really appreciate it.. I have a few P1800 Builds coming up, and there will be much less clutter in those build thread, because this car was used for product and build process development, so the others will really be just build process and sorting out the styling and options.Originally posted by andybob View PostComment
-
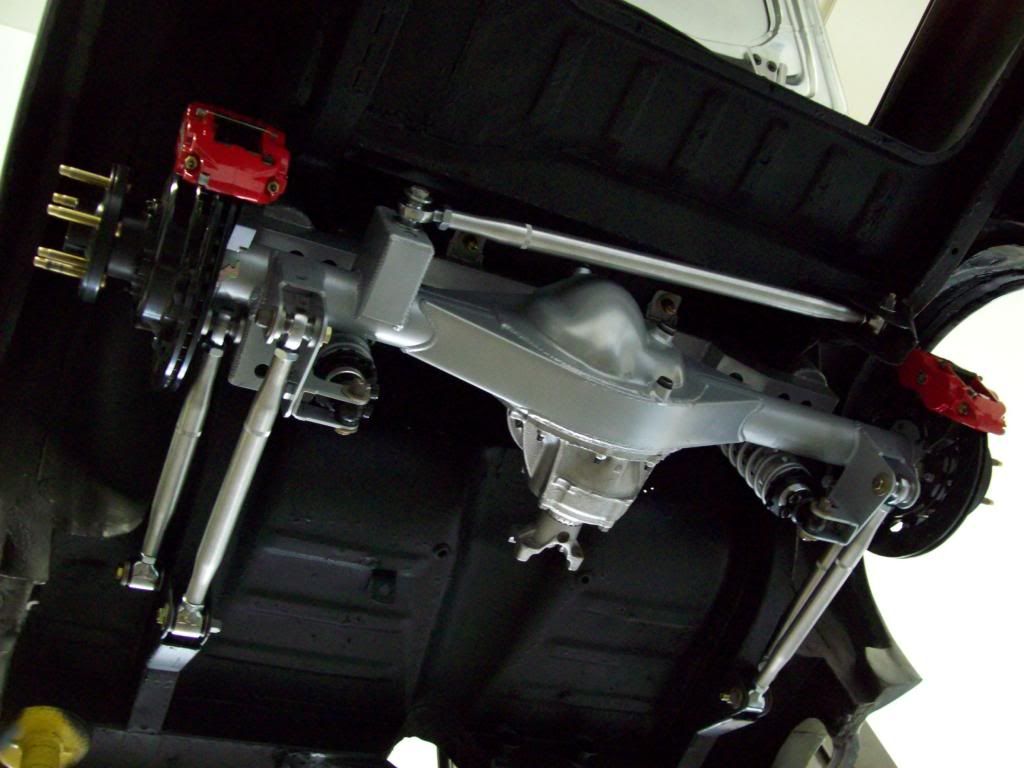
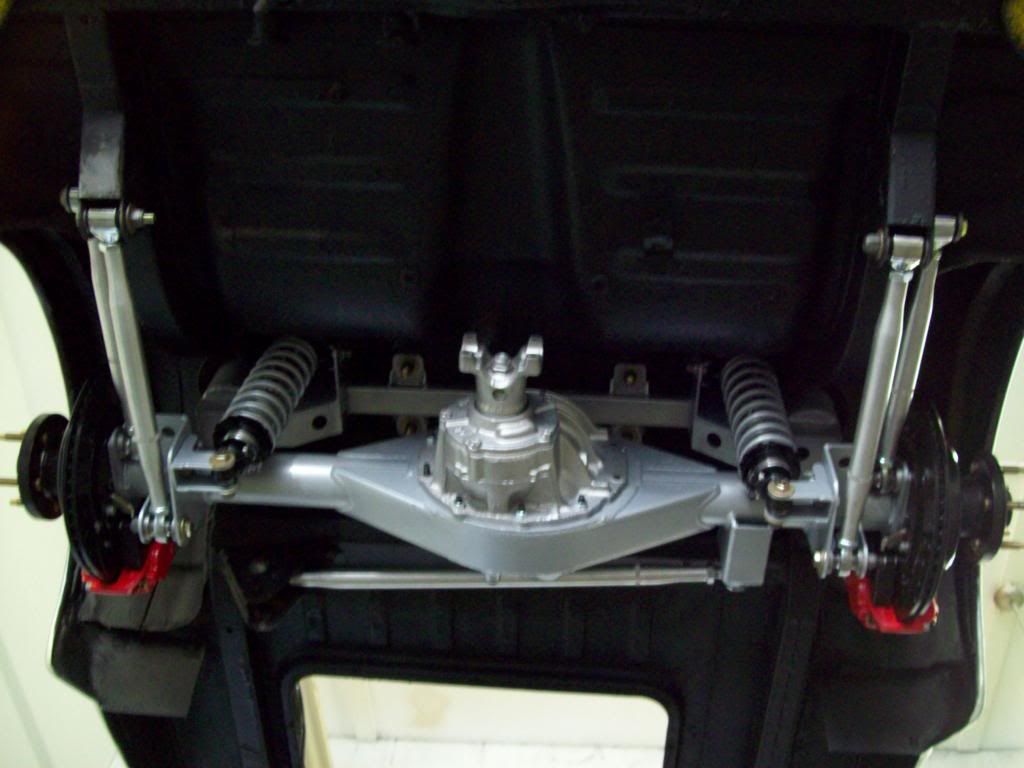
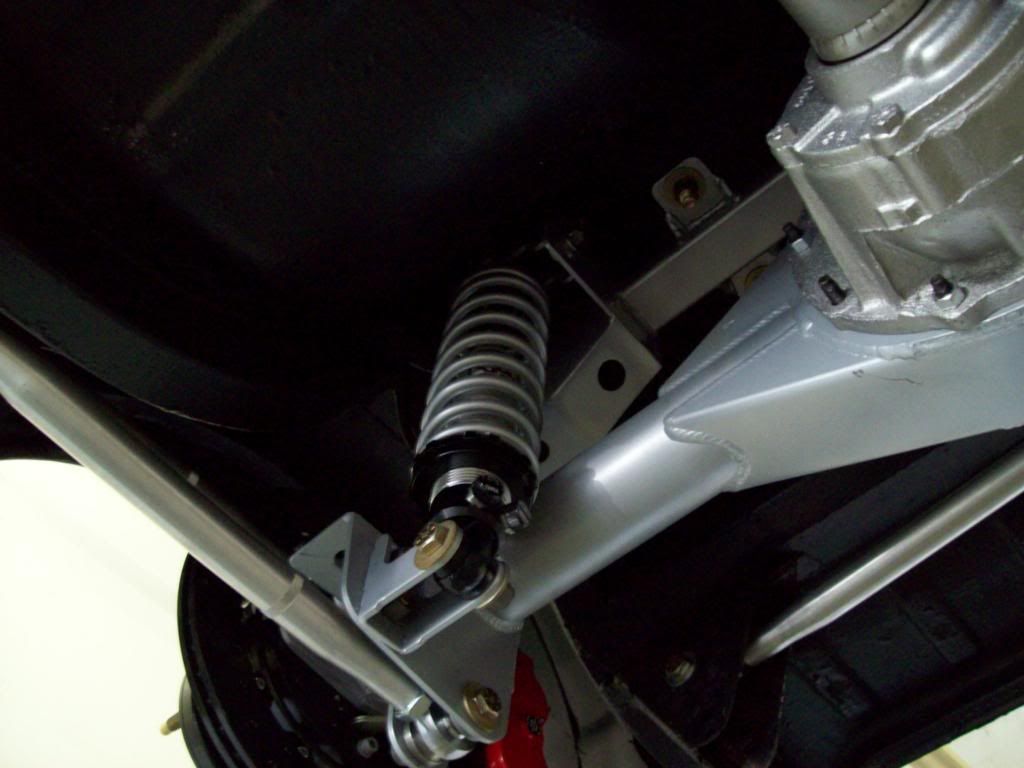
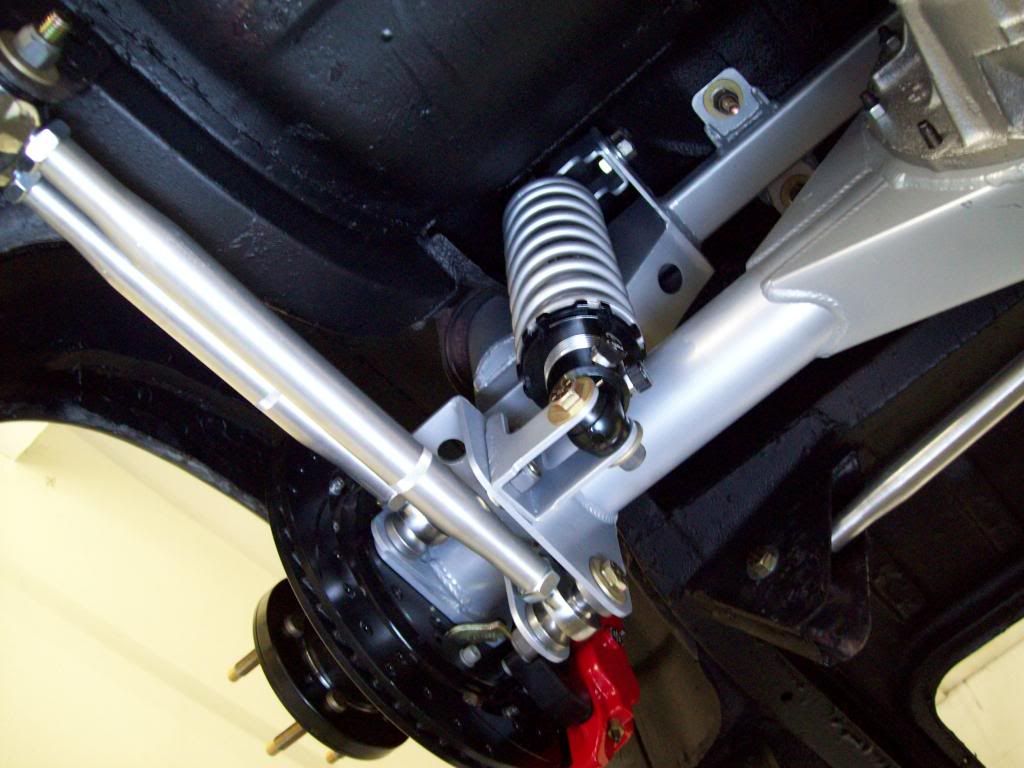
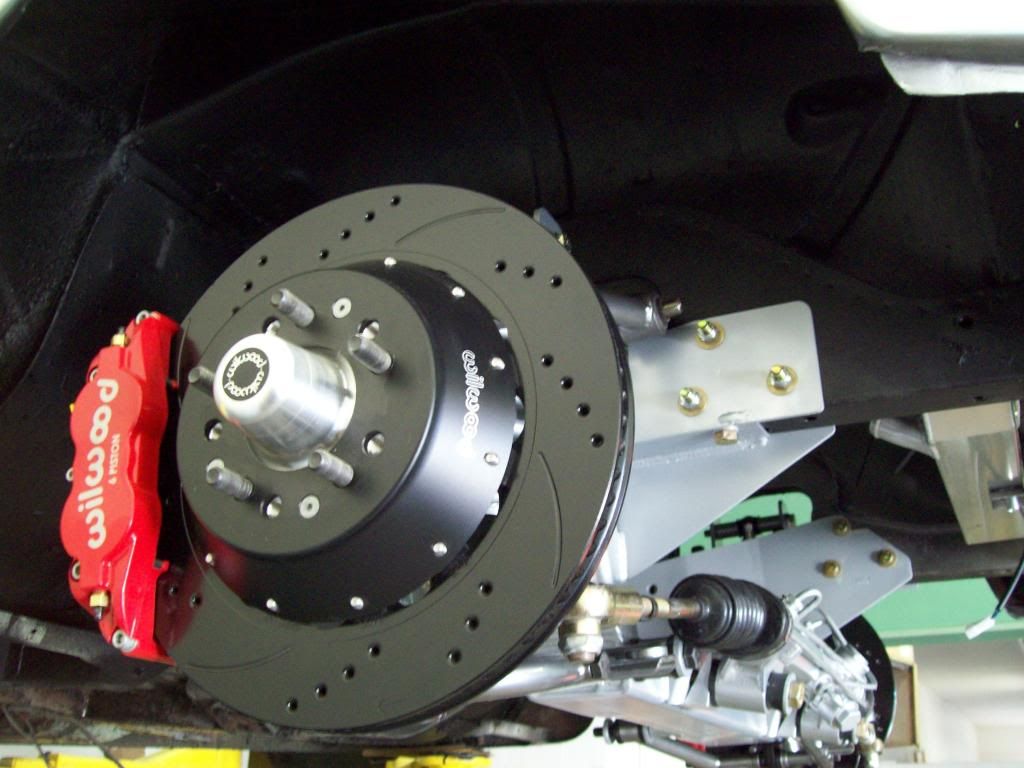
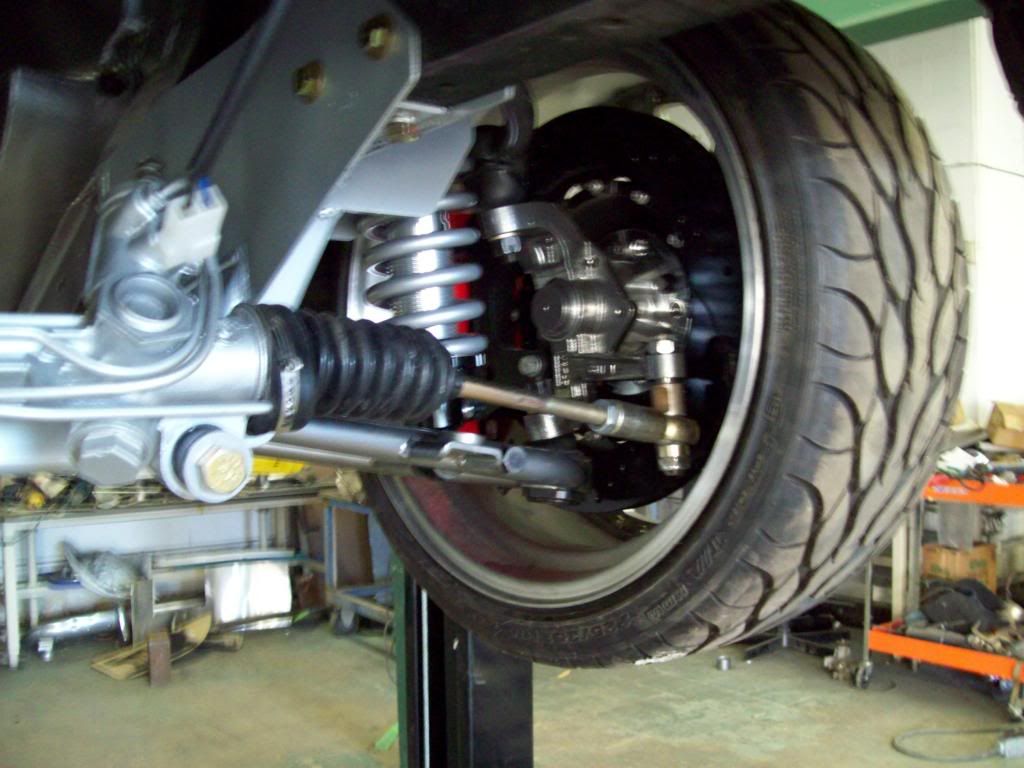
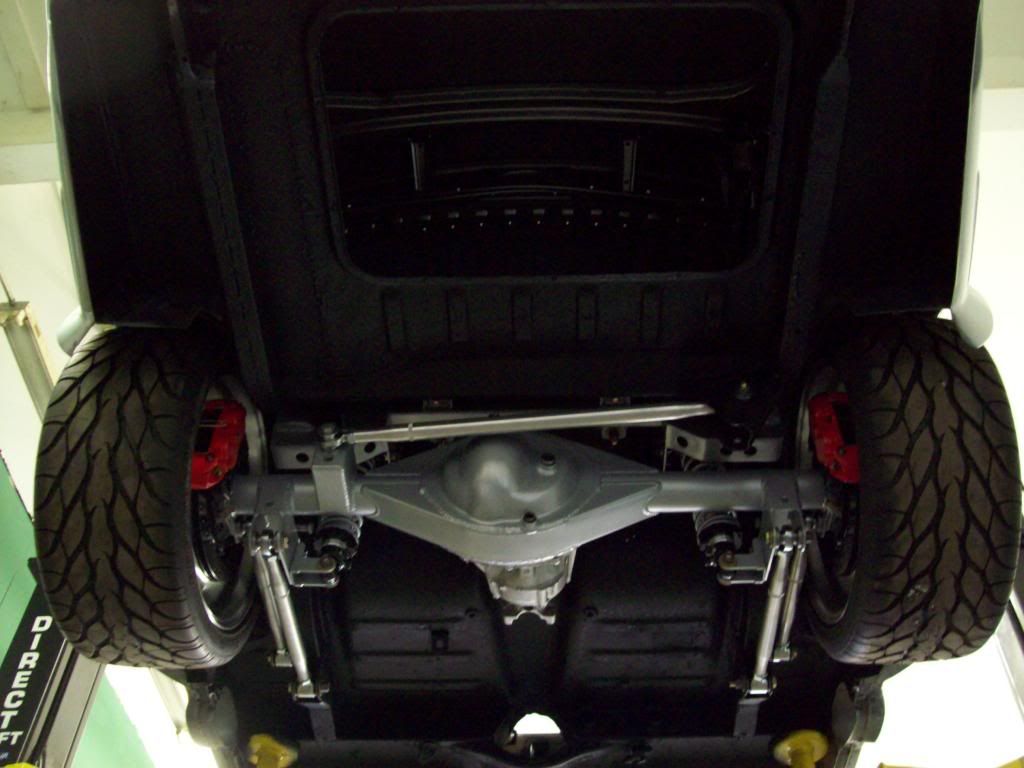
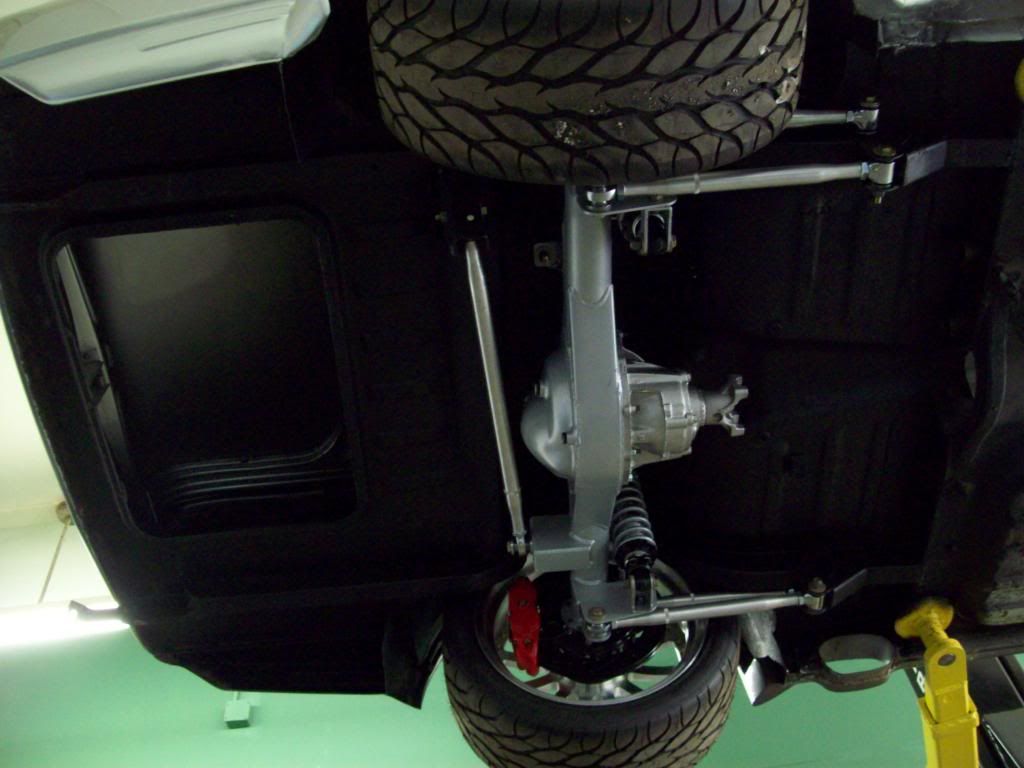
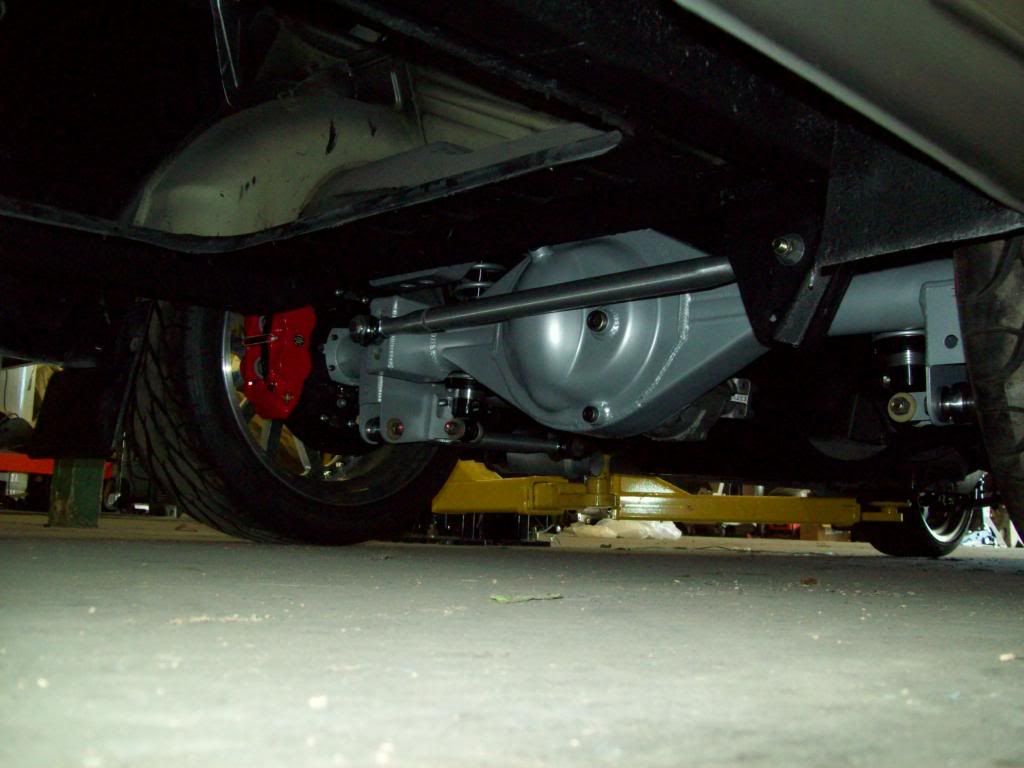
Eventhough I still need to undercoat the center of the car, I went ahead and coated the rear of the car, so I can get the Rear End Assembly installed. I still have to work out some changes I am making to my driveshaft options, so I am not sure how much tunnel mod is necessary, until I get the production motor stands and transmission crossmember in the car..
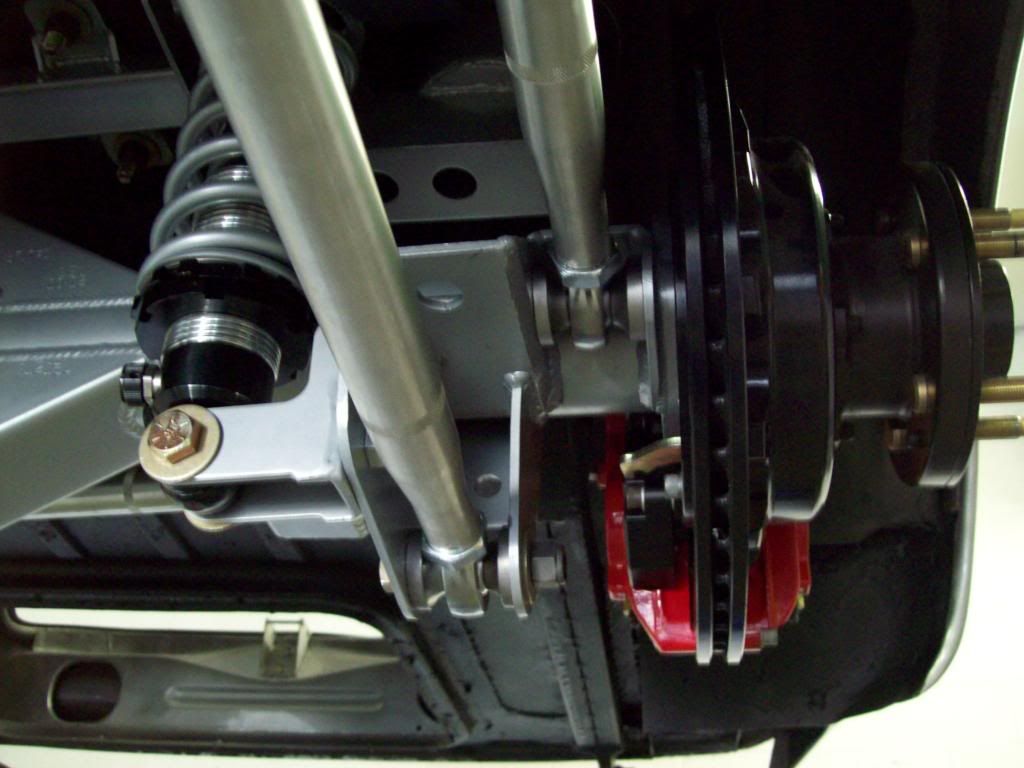
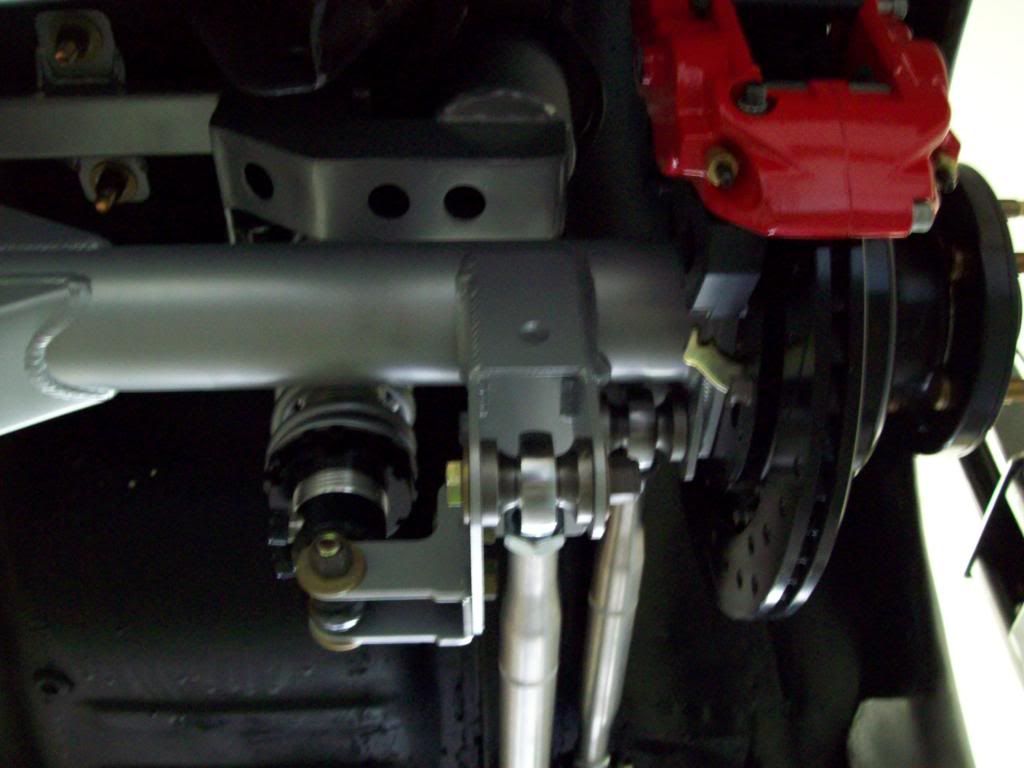
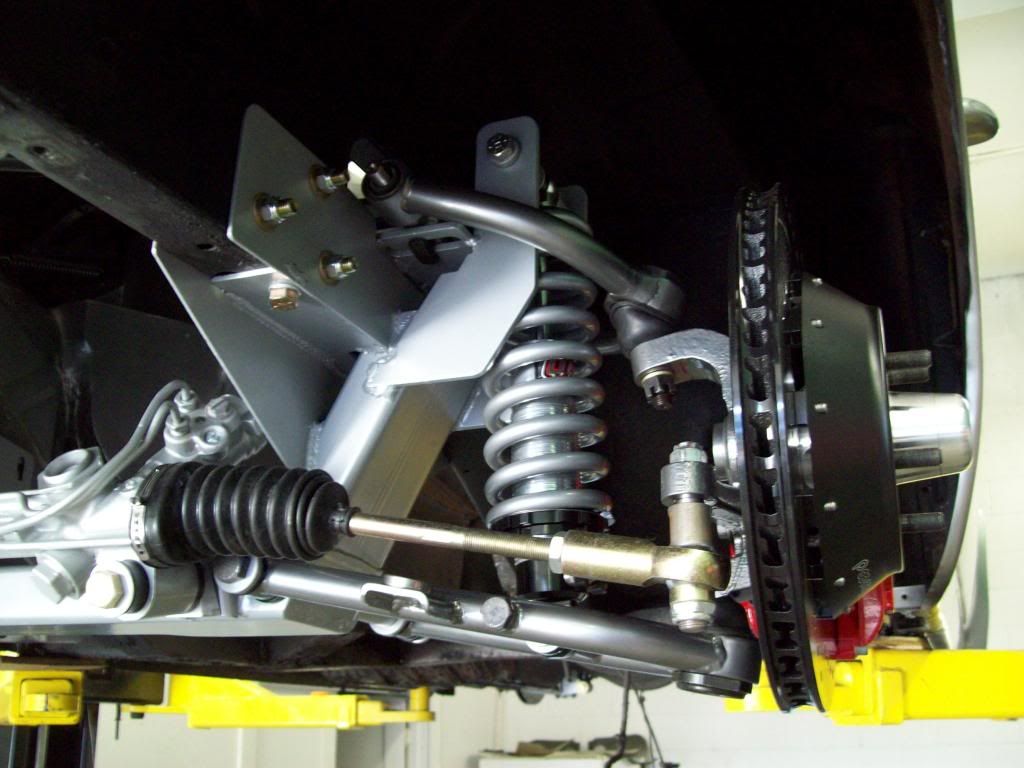
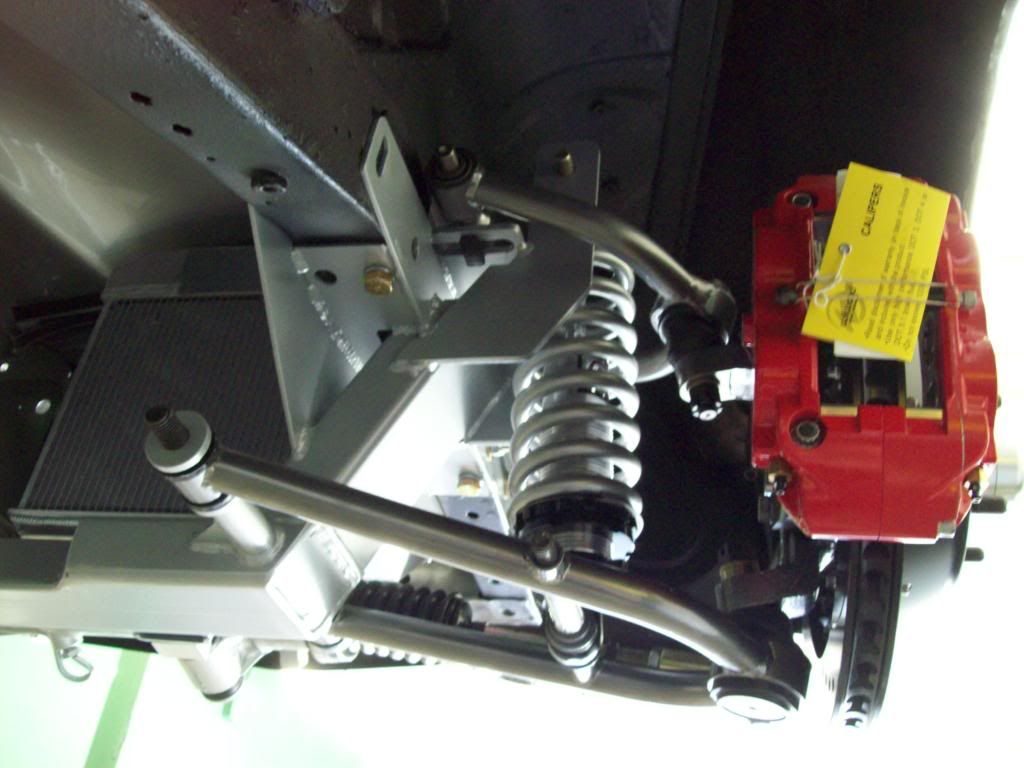
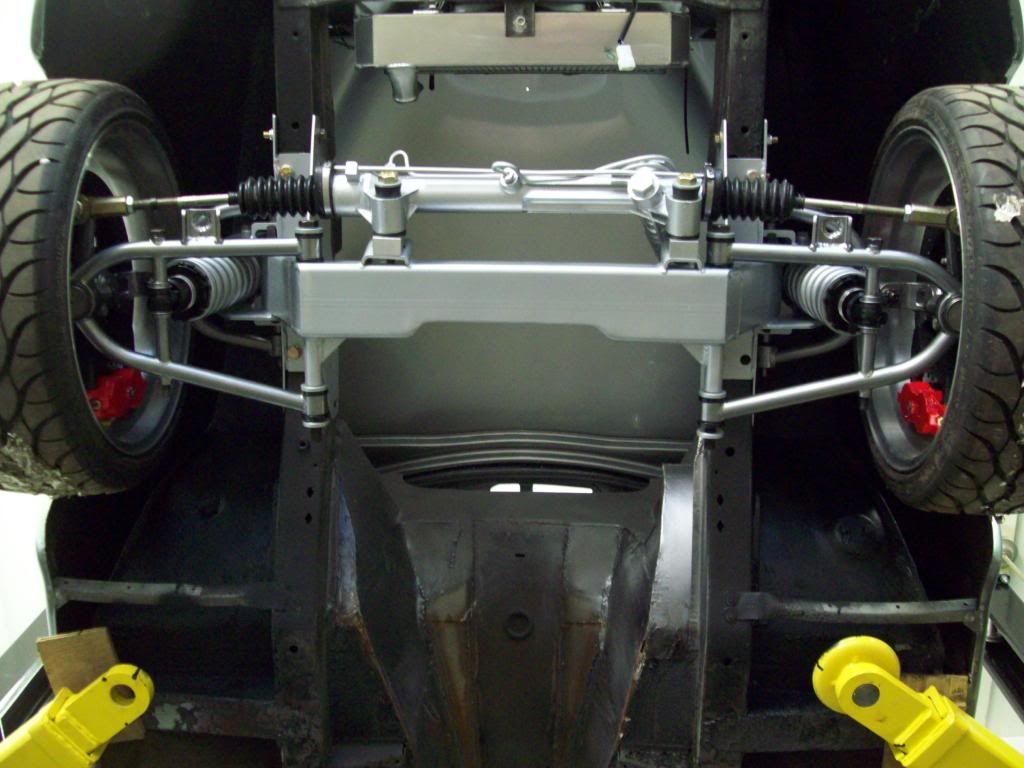
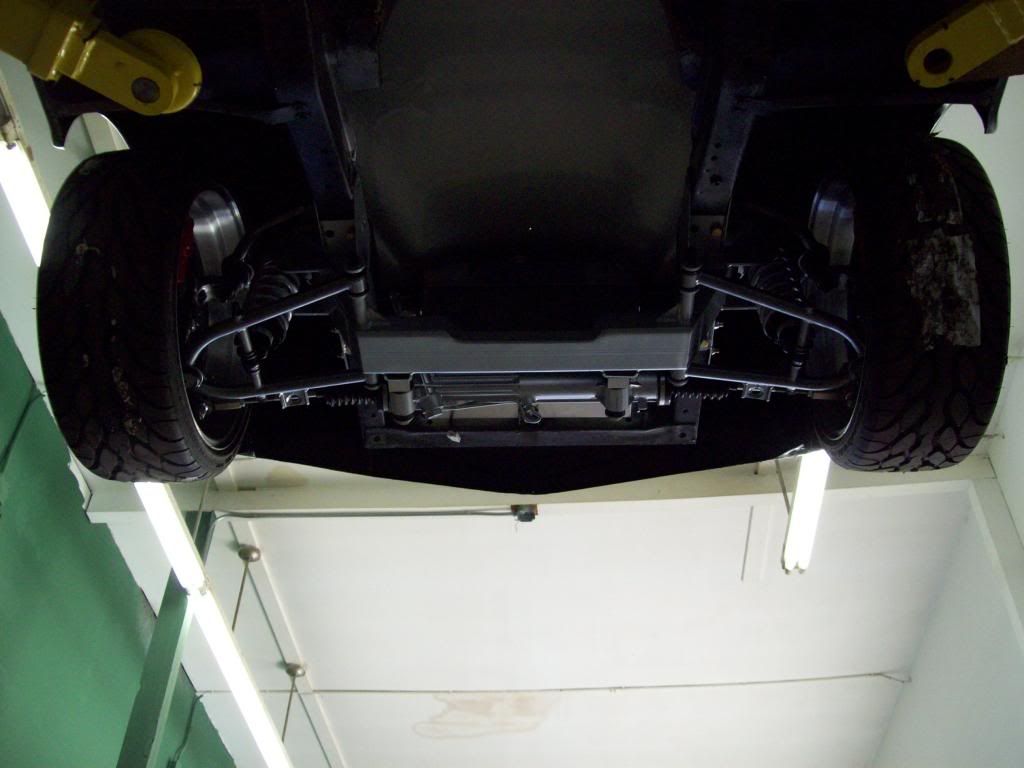
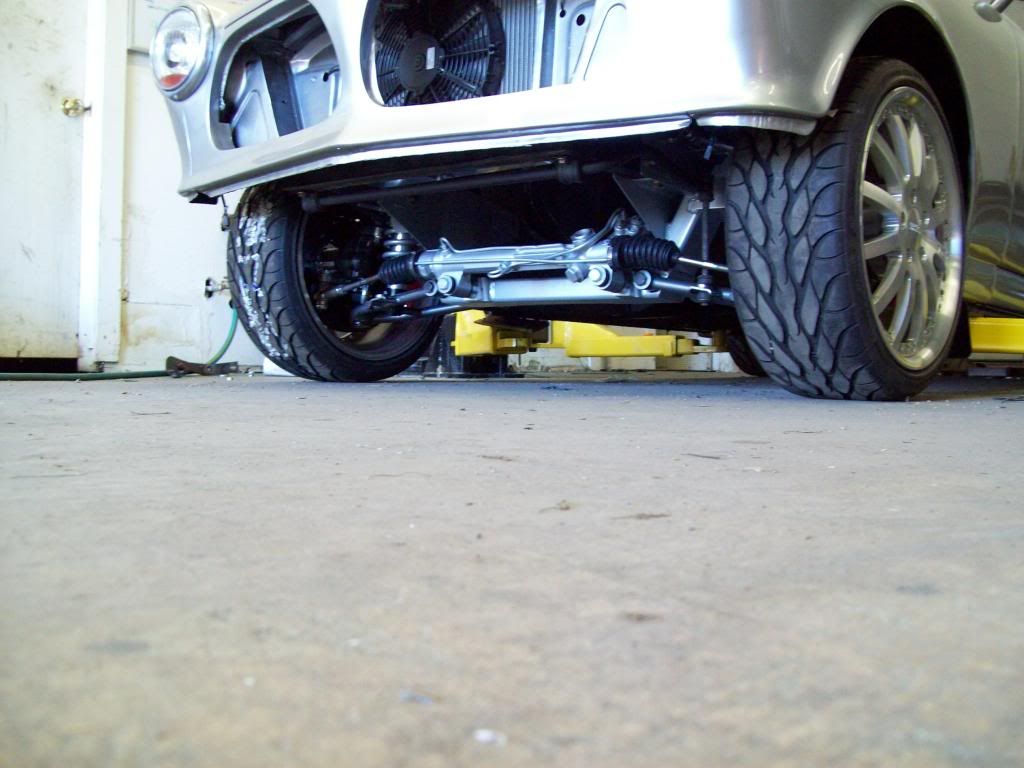
The rear end kit is a direct bolt in, and I have made all the hardware/bushings to make it an easy install, so I can take the guessing out of future builds. This rear end assemble is using a combintation of Heim Joint and Rubber Rod Ends, because I was actually wanting to split the suspension load/give difference between a totally Heim and total Rubber Rod End, so hopefully it is more of a multi-purpose setup. I have also temporarily installed the front end kit, because I forgot I had to drill out the hole for the steering shaft support, and it will be easier to do that without the motor installed.


Comment
-
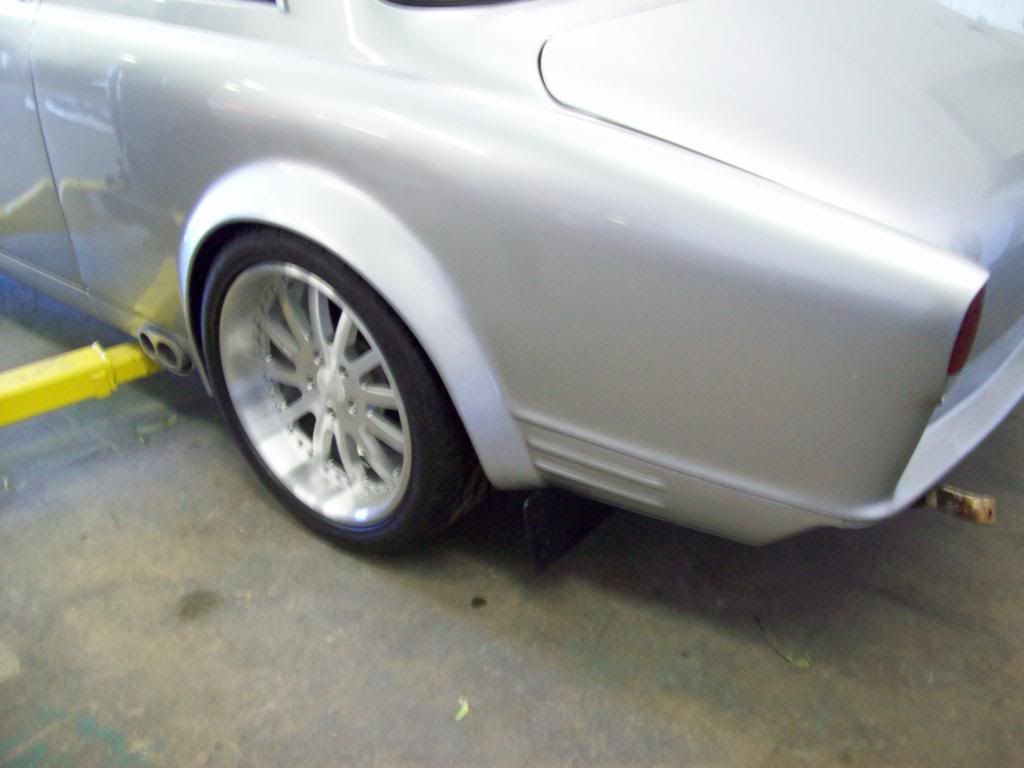
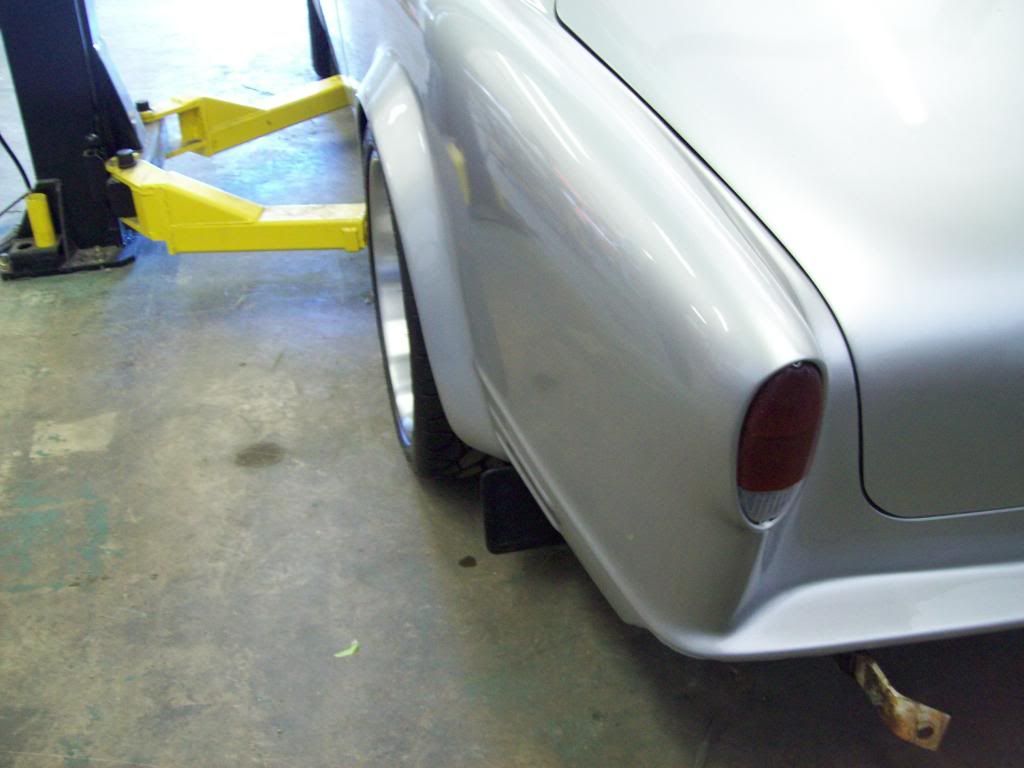
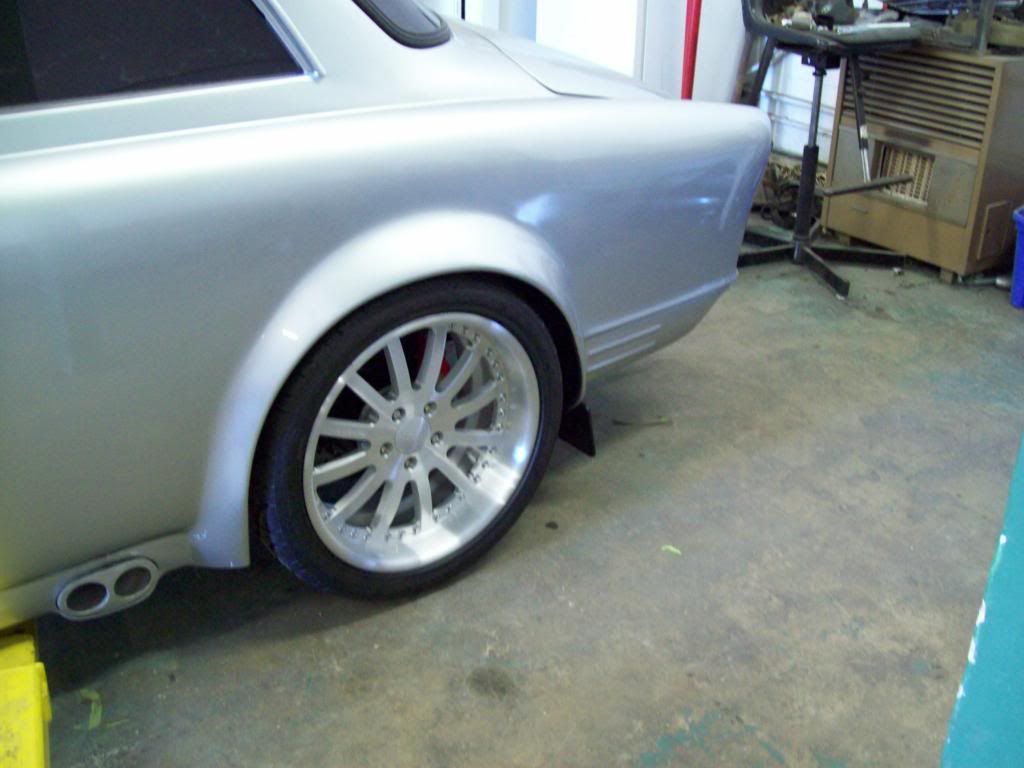
I am still debating on using the original style Volvo Mud Flaps on this car, and that is partly because it is basically a Volvo standard on these older model cars, so it would be a unique feature for this type of build.. Beauty of it is, I can remove them at any time, with no adverse affects, and think that the OEM front style works best for both the front and rear of the car...
 Last edited by Iamtheonlyreal1; 06-02-2013, 07:16 PM.
Comment
-
Thanks man..... It will start coming together real quickly, along some much more epic updates.. LOLOriginally posted by andybob View PostComment
-
Un-fucking-believable the level of detail in this. Can't wait for the rest of the updates.Sup. Call me Z.
My Accord "build".Comment
-
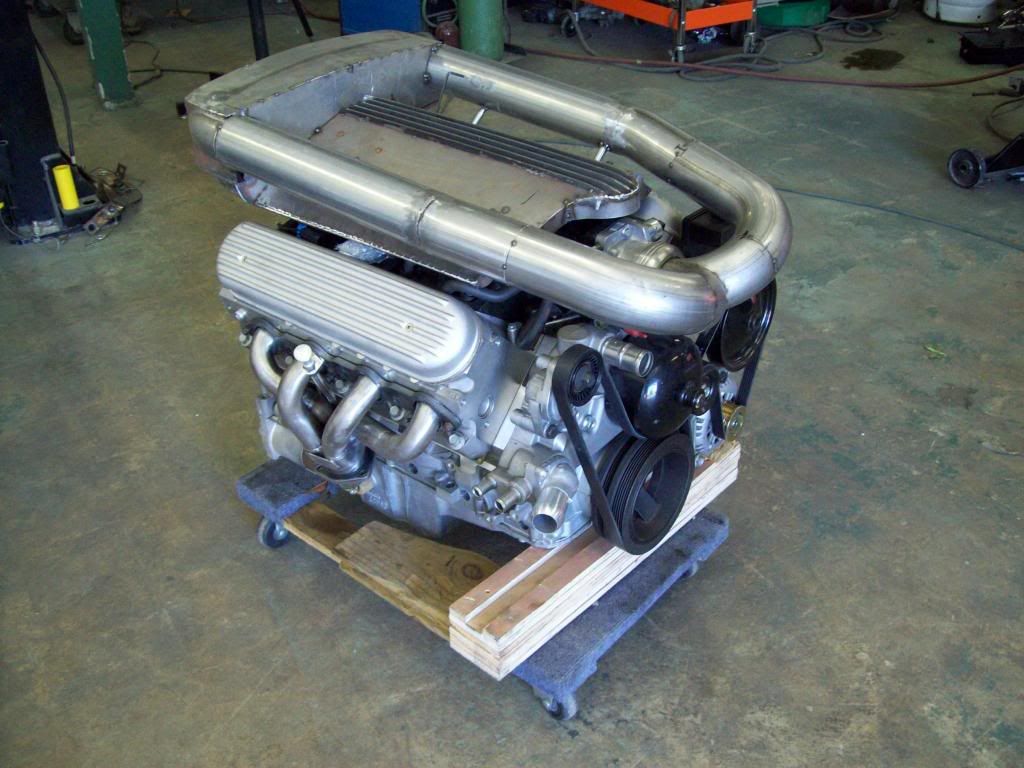
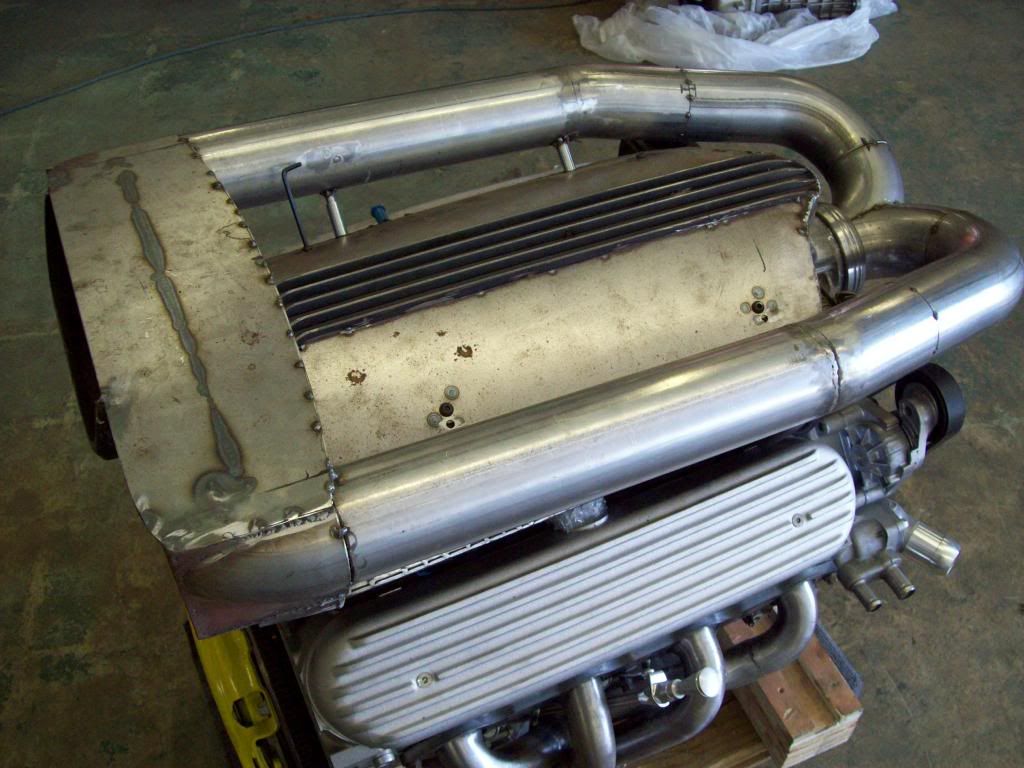
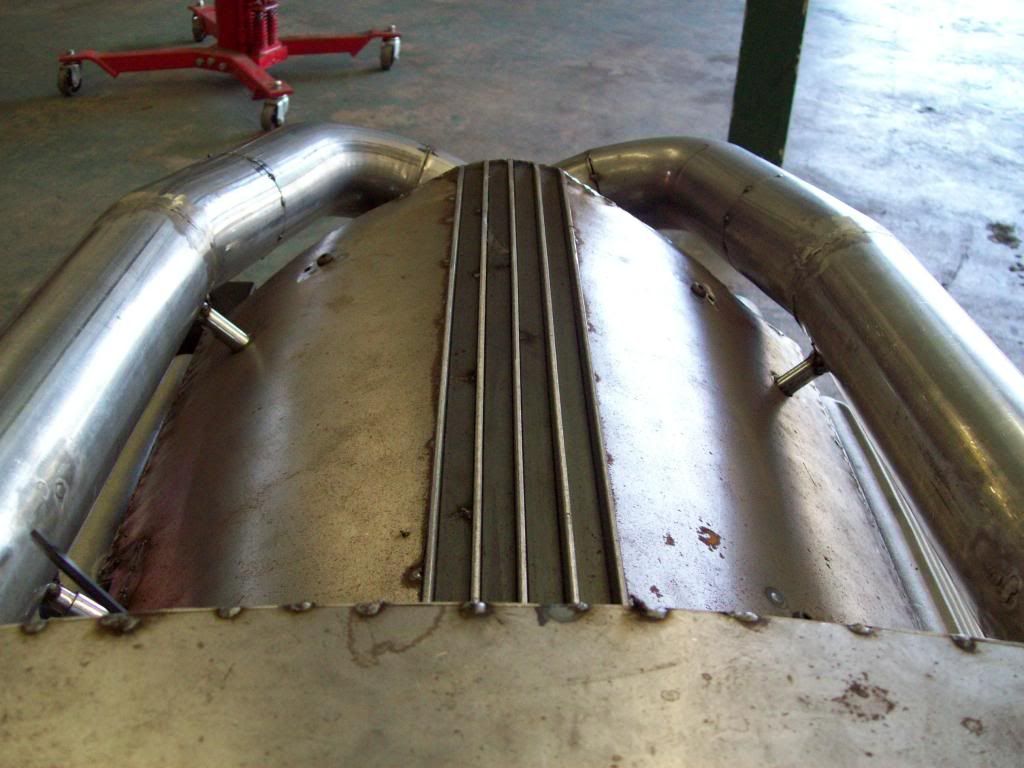
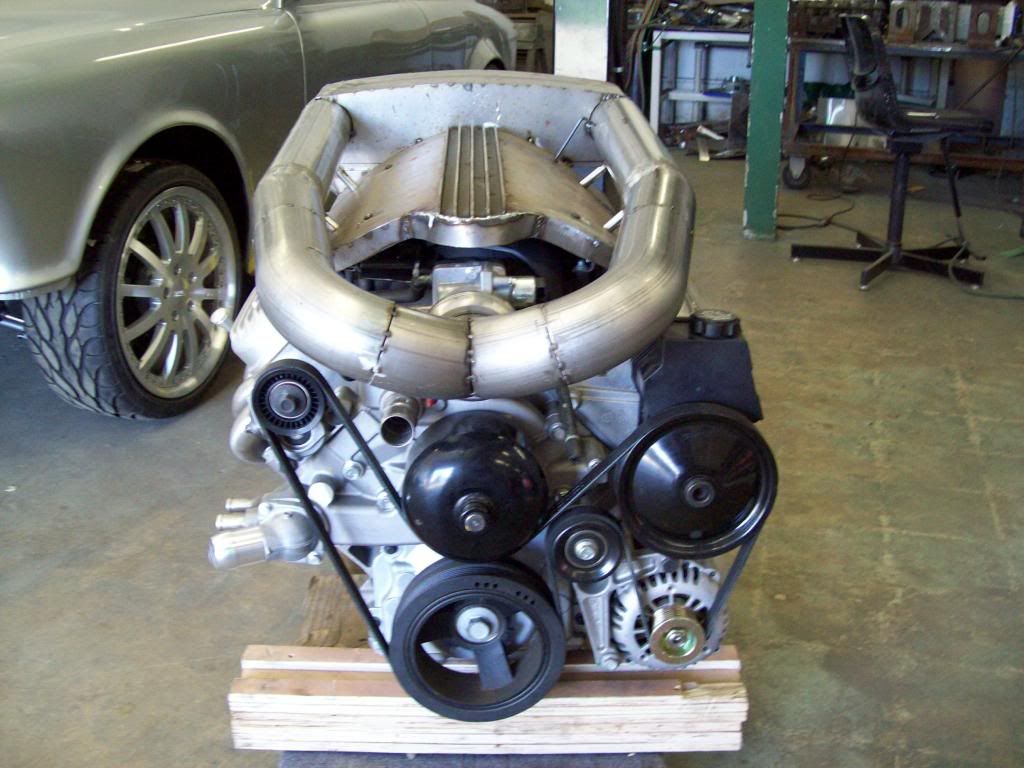
Well, it looks like the intake system I made is about ready to go to the body shop for finish welding and paint, just as soon as I test fit it for the buffer gasket that allows it to draw the air from the Cowl Vent by the windshield.. I have a filter insert that goes in at the bottom of the rear box, and I have fabbed the brackets to solid mount it to the motor. The center and the filter box will be body color, and the Intake Runners will be done to mimic a brused aluminum, unless I change that at the last minute.
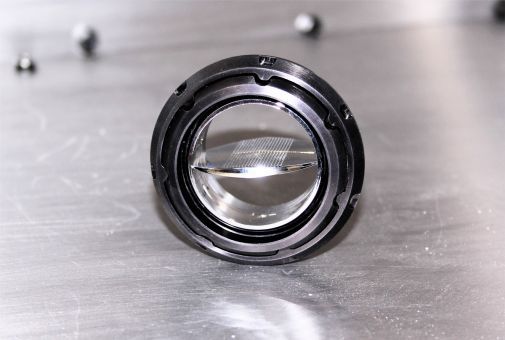
I had my machine shop make the slide on throttle body collar, because I didnt want to be stuck the the common rubber boot and clamp connection that is common to the LS Engine, and I think it looks so much cleaner that way. I also have a sump and drain system made, so water doesnt get into the intake or wet the filter during rain or car washes, and it will move a pretty good volumn of water, so I think I will be just fine there. I was also able to get away from the bulky Mass Air Flow System, and run an insert style Mass Air Flow at the bottom of the intake tube, so that will also remove some clutter and wiring.
Keep in mind here, that Fully Accessorized LS Motor, with all of our upgraded front end, brakes, radiator, air conditioning, power steering, ect, is over 30 pounds lighter in the front end than the stock 4 cyl, and I dont think that you can get a whole lot better than that.. LOL
Comment
-
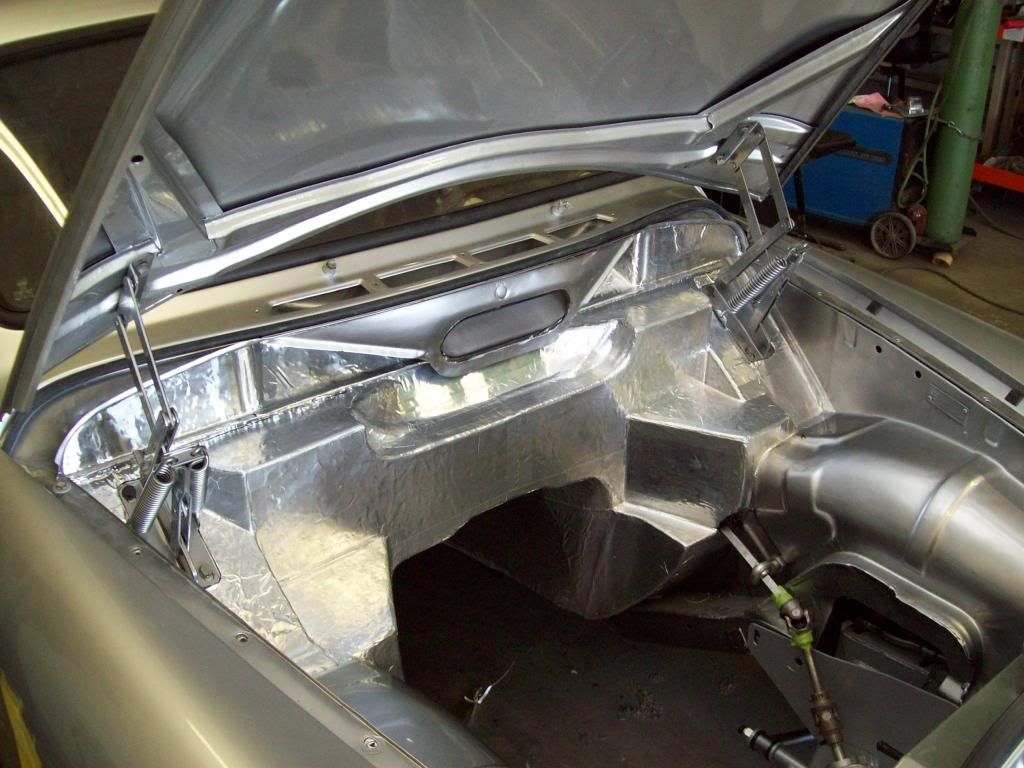
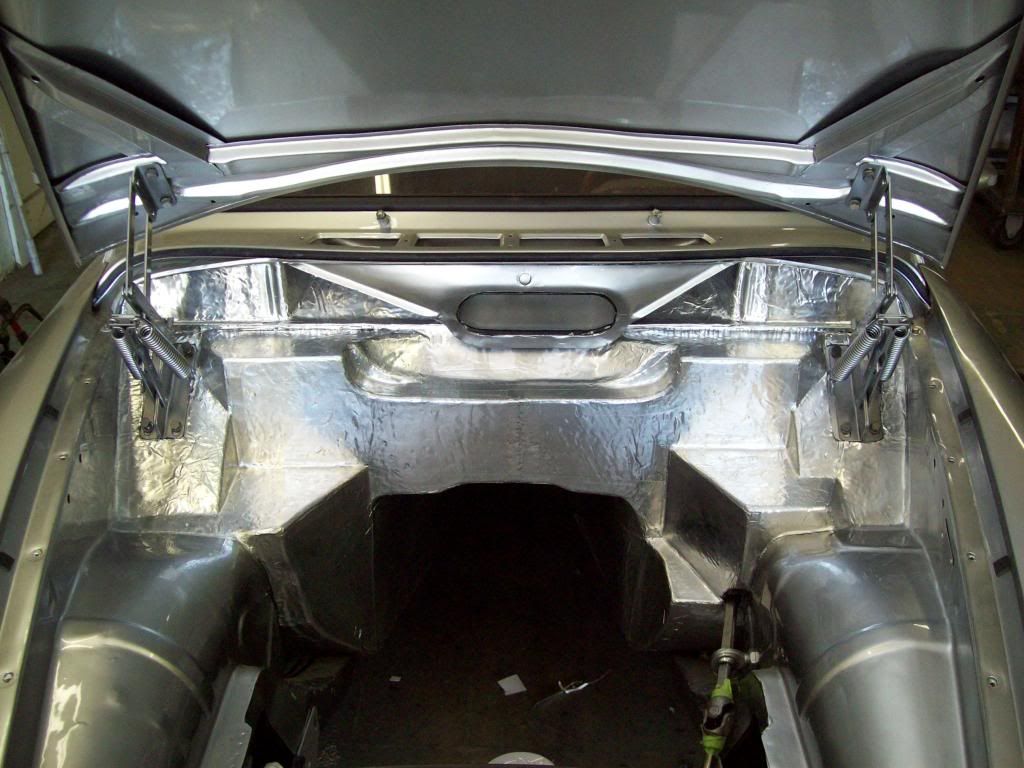
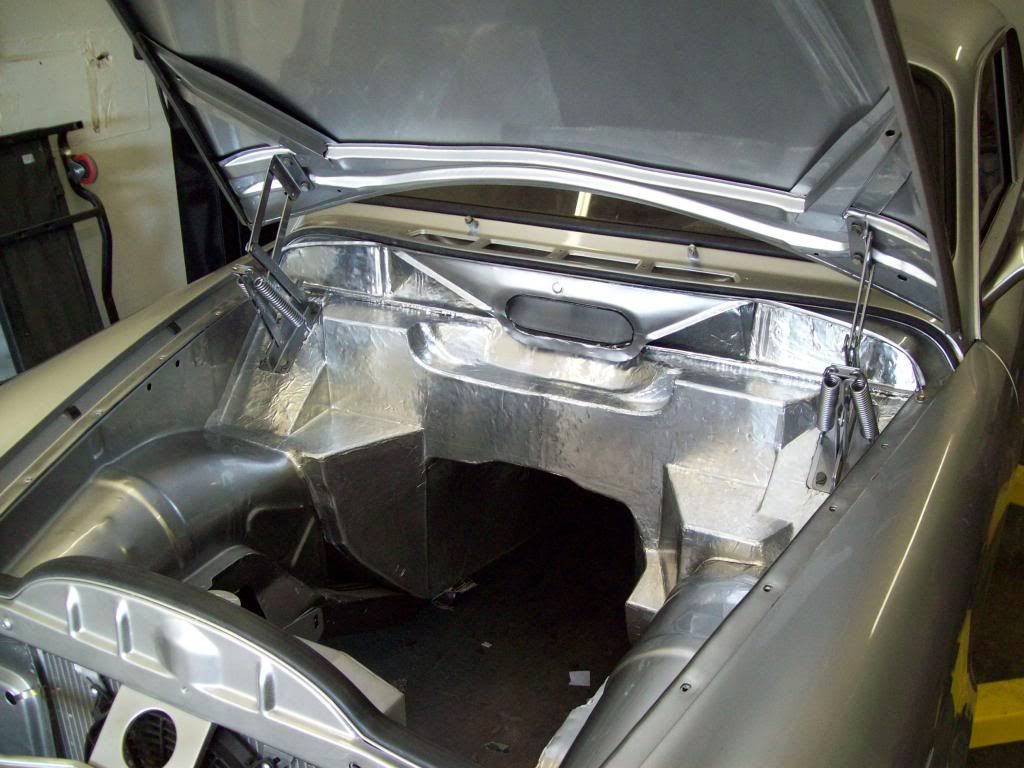
Here are some pics of the outer firewall insulation, and I will also be running inner firewall insulation for extra heat and sound protection.. This kit is a very easy kit I got from Hush Mat, and it is really just a matter of cutting it with scissors, and then peel and stick.. I am working with Hush Mat to put together a full insulation kit for the Amazon's and P1800's, that way we can take some of the guess work on how much to order.. It will not be pre-cut pieces, but it will the correct amount to cover every inner panel, floor, firewall, trunk area, back seat and package tray area, roof, doors, kick panels, trans tunnel, ect, ect..
Comment
-
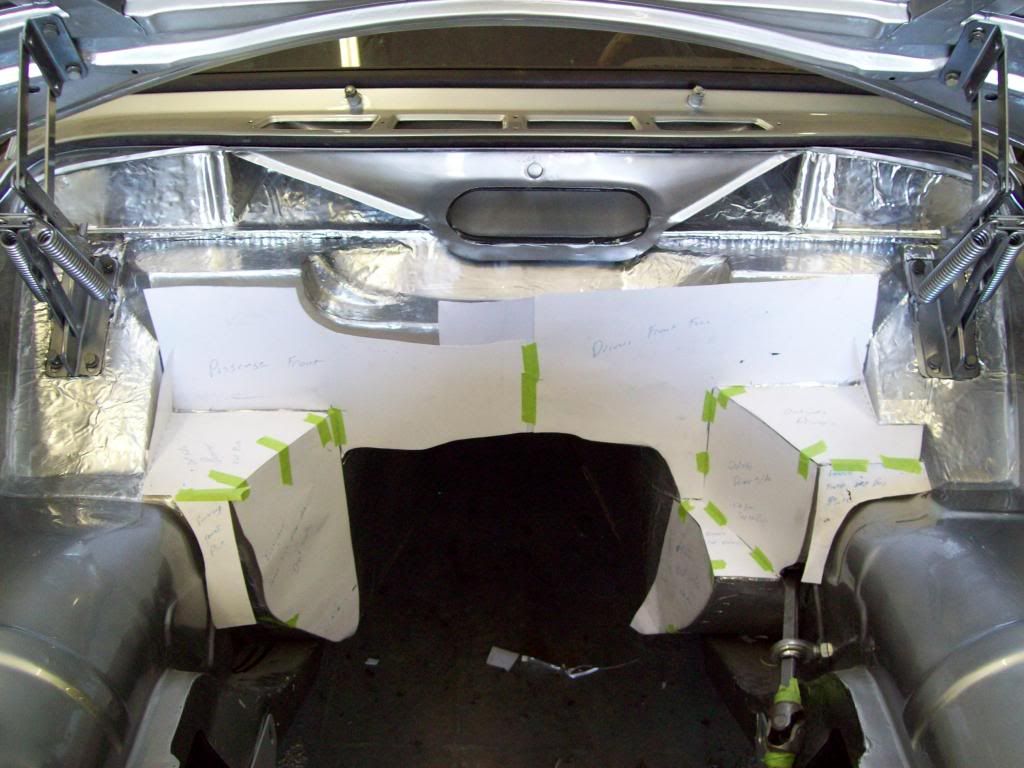
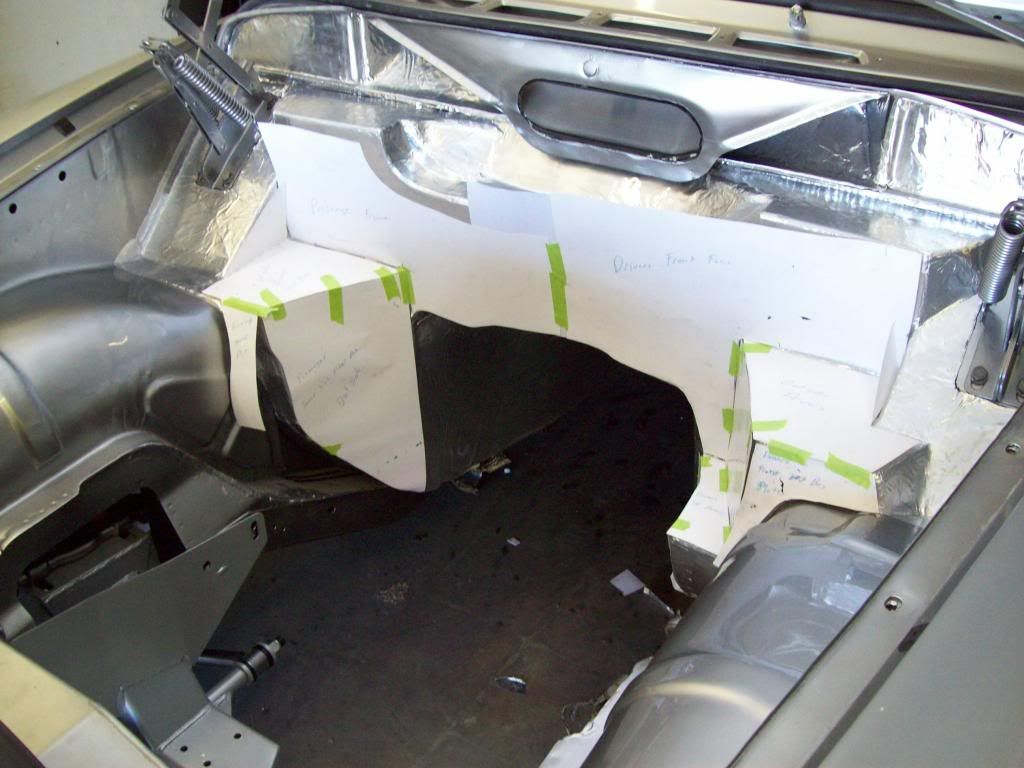
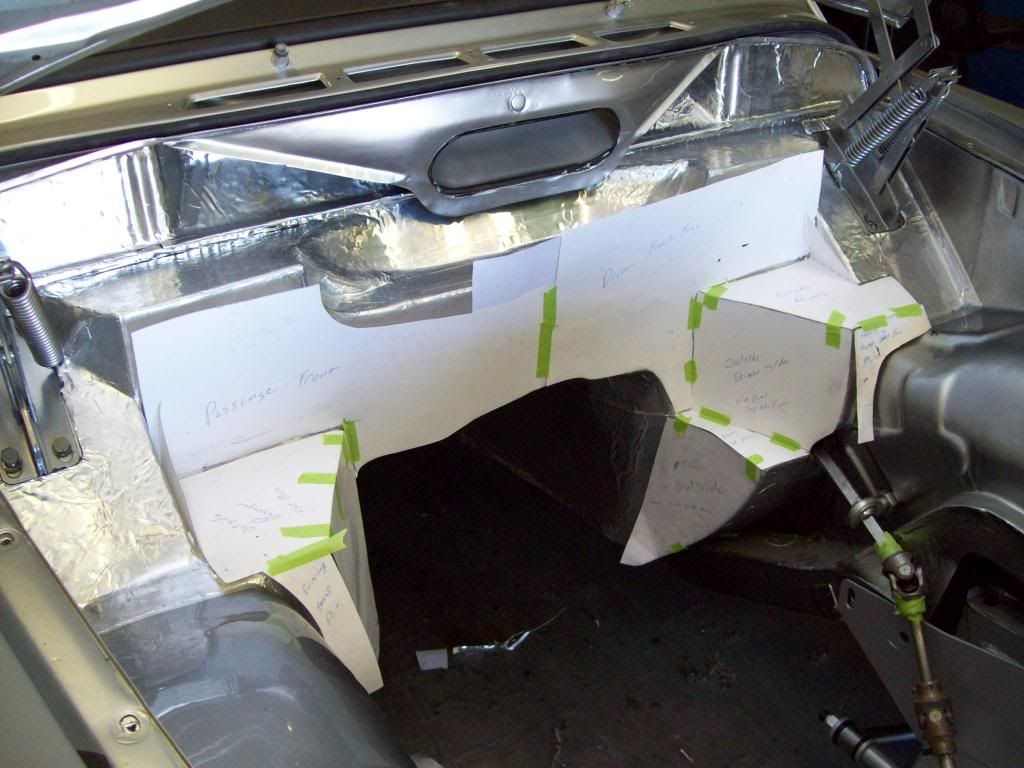
I guess because the firewall looks a bit more finished out since the insulation install, I have gotten several emails about how the firewall conversion works, so here is a bit.. I put the intial poster board templates on over the current firewall, and as you can see there is really a minimal change around the heater box area, and it doest really affect the factory foot well.. The kit is only the paper pieces you see, and they are a combination of notched easy bend seams and guide locking tabs.. By doing it this way, you will have an initial cut template for the OEM Firewall, and then you will also have the capability of constructing a 3 dimenisional firewall that can be easily put together on the bench, and then dropped in place as a complete firewall unit for welding..
The Oem fender wells are not affected, along with a couple of other key body structure points, and those features are actually used as placement and attachment guides.. By doing this, it will literally allow you to drop a tacked together 3 dimensional firewall into place, so you can do all your final trimming/grinding, and then just weld it into place.
Comment
-
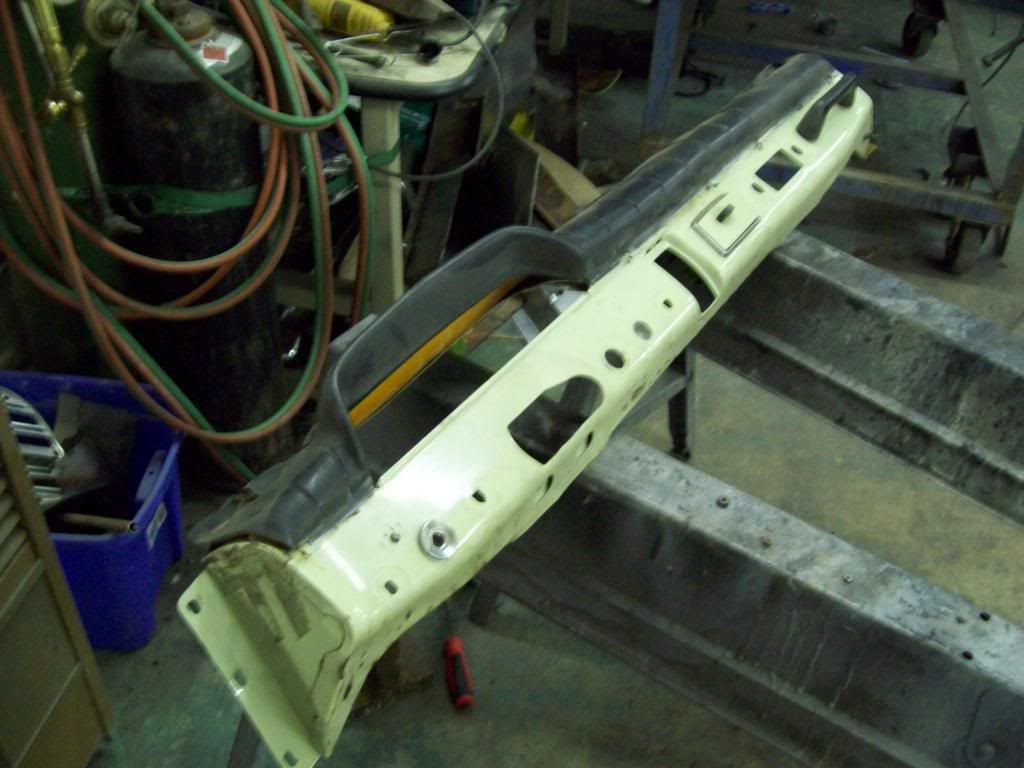
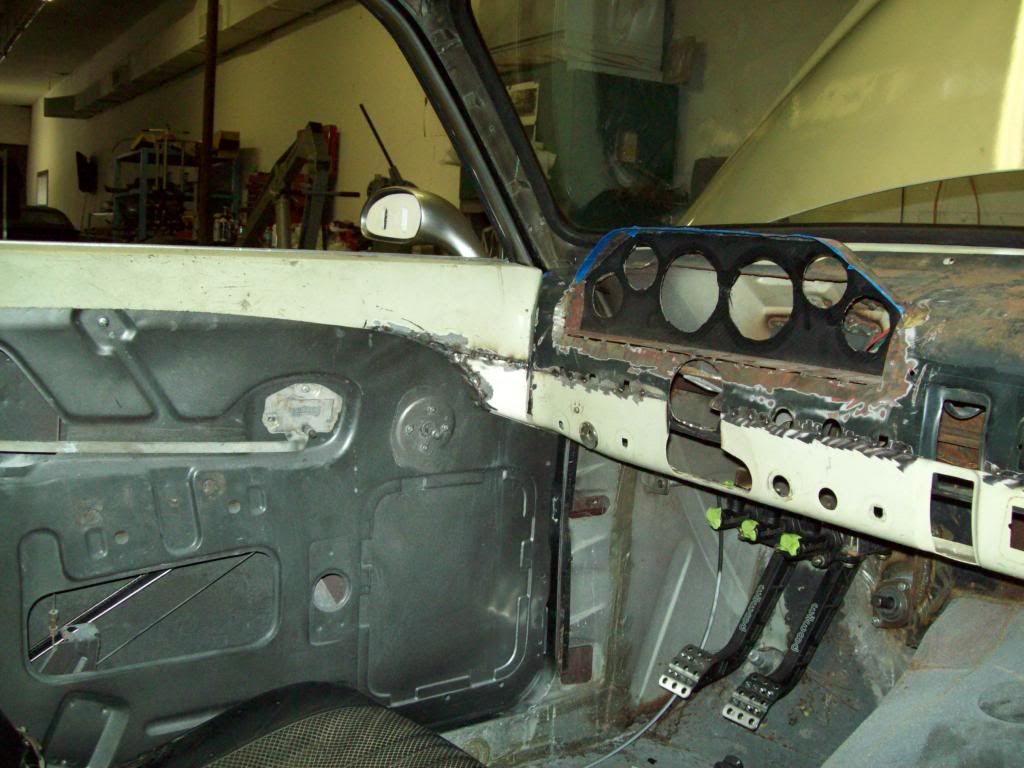
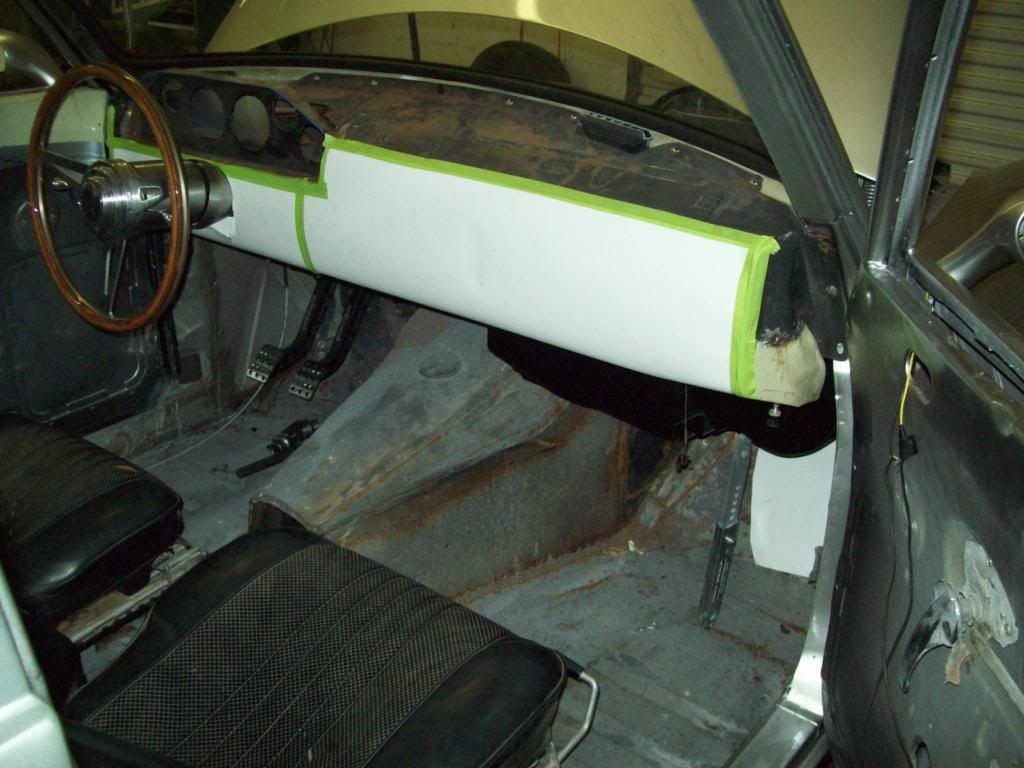
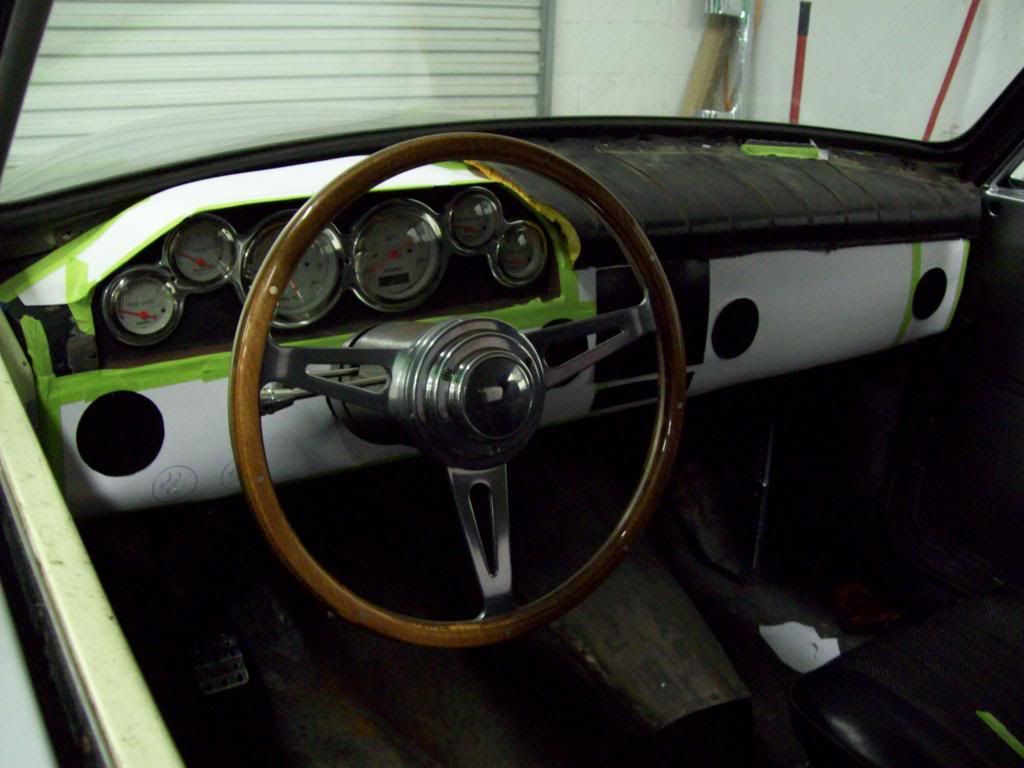
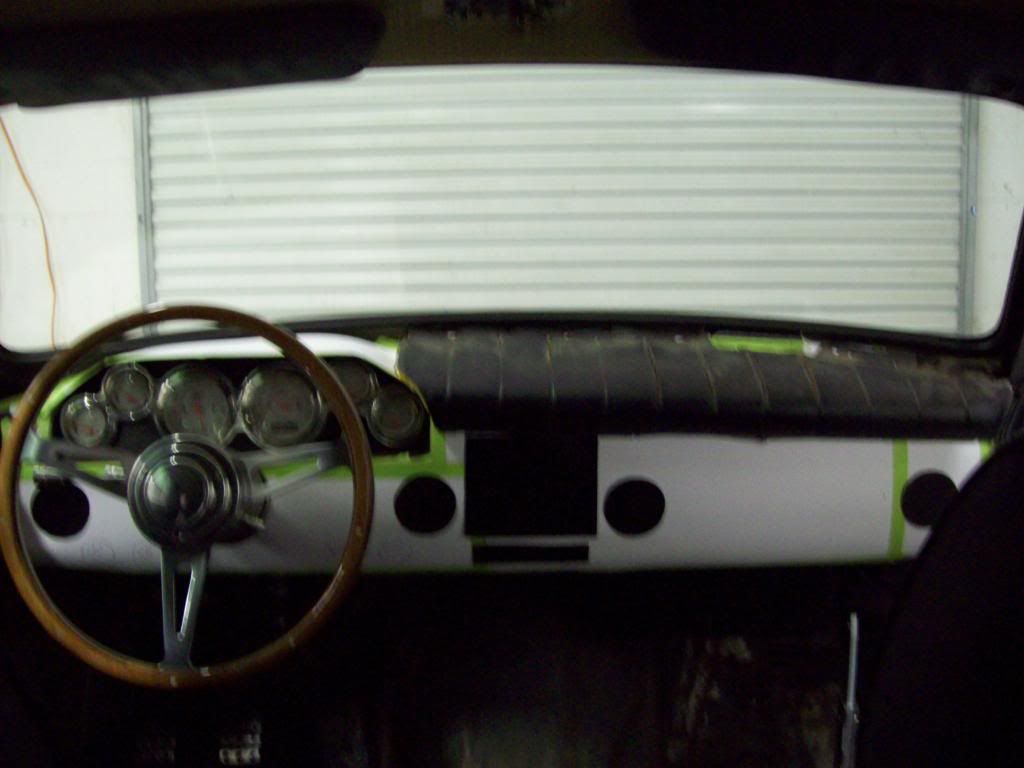
I am trying to sort out the final dash configuration for the car, and I wanted to keep it somewhat original looking, so this is what I have come up with.. I was running into issues with the size of the original dash board, because it didnt allow the use of modern AC and Vents, and wouldnt come close to respectably hiding an aftermarket ac/heat unit, so I had to make it larger.
I thought the easiest way to do this, along with keeping it original looking, would be to use two Amazon Dash Boards to make one larger one. That way I can keep the same basic shape of the dash, along with keep the nice upper door to dash transition, because I really always thought that was a nice feature of these interiors. I had to modify a upper door trim to compensate for the now taller dash, but it wasnt really that difficult to do..
All I really have to do now is map out the accessories, switches, ac vents, and built in navigation, so that is why I now have the dash now covered in poster board.. I can get all the dimensions of everything that I want to run, and the map it out on the paper for appearance and placement, and that way I can get the perfect overall layout.
Comment
-
I really struggle with alot of the details, and like the dash for instance, I really want it to still look at place as if it could have come in the car from the factory. I am debating on a console of some type, but I am kind of steering away from that, because it is really too overdone in alot of cases, and I am not sure that it will fit with the overall styling.. Dont get me wrong, I am going to play with a few potential console styles, but I wont run one if I cant find something that really doesnt fit into the package.Originally posted by CrackerTeg View Post
I went with some early period 60's-70's Datsun Roadster seats, because they fit the car, and you can also tell there are a period sports car seat. Most of the aftermarket or late model seats I see in these cars dont look right because they are to wild or modern, or are way to big for the car, and that can really throw everything off interior wise.. I am actually looking for another set of the Datsun seats, because I am thinking I can make them in to moulded rear bucket seats with head rests, and I am thinking that would look pretty cool.Last edited by Iamtheonlyreal1; 06-12-2013, 10:55 AM.Comment
-
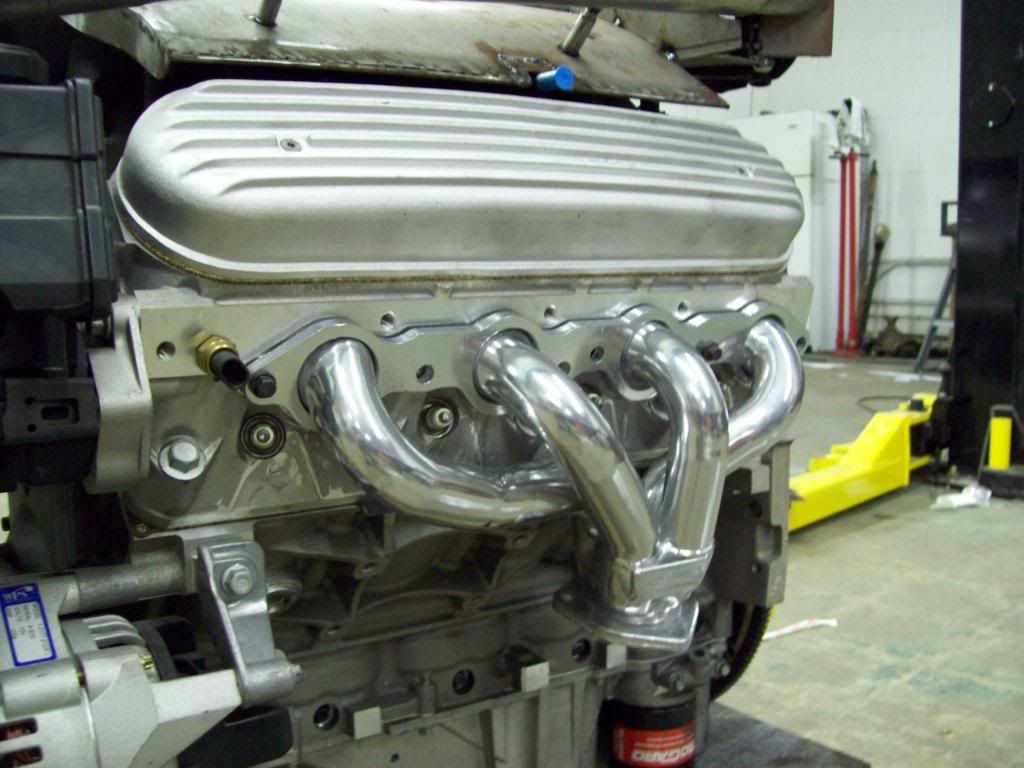
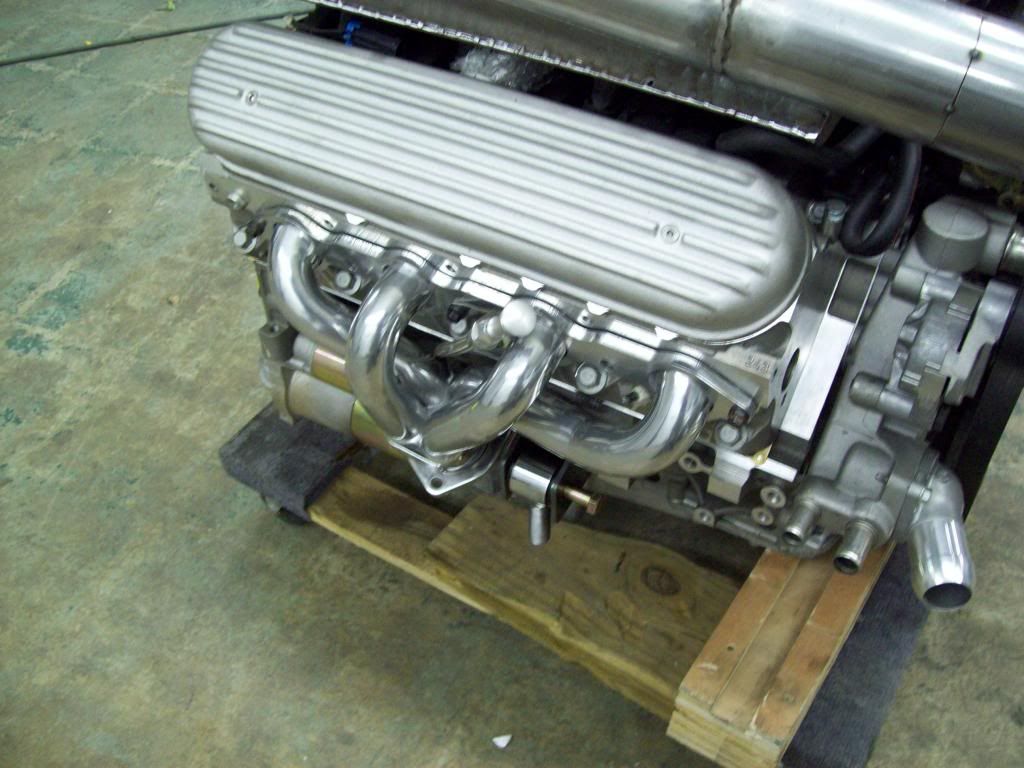
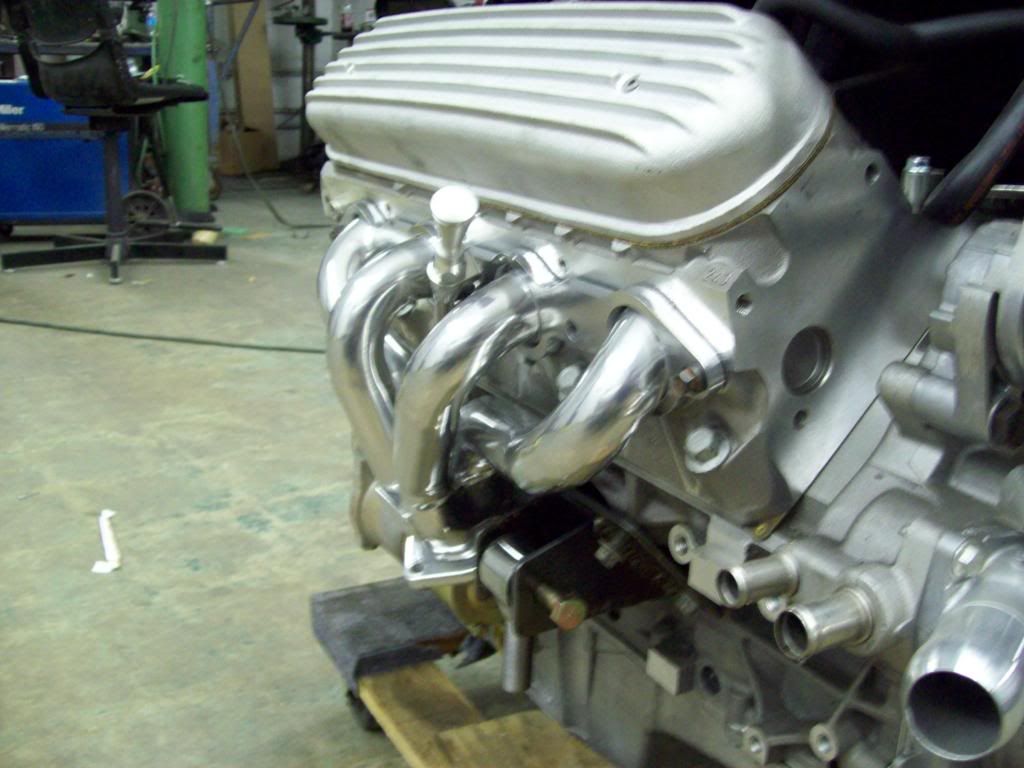
I recieved the final production Swedish Ops/Sanderson's headers today, and what is pictured here, is the coated option.. I had to have my own production headers for these cars, because I didnt want to have to do any cutting the the fender wells of the car, and I couldnt find an available block hugger header system that would work. This design header literally drops right in from the top, after the motor is installed, and doesnt have any of the typical bolt or spark plug clearance issues that you run into with alot of others.
These are more than likely the tightest block hugging headers on the market at this time, atleast from what I have found out there, and I looked pretty hard. I am sure they would work out for other tight space build applications, because the LS motor mount and starter configurations would be the same on most applications, and this configuraion is uniform to the LS block and accessory configuration.. These are being produced exclusively for Swedish Ops by Sanderson Headers, so the quality and warranty is great, and that can only add to the quality of the builds.


Comment
-
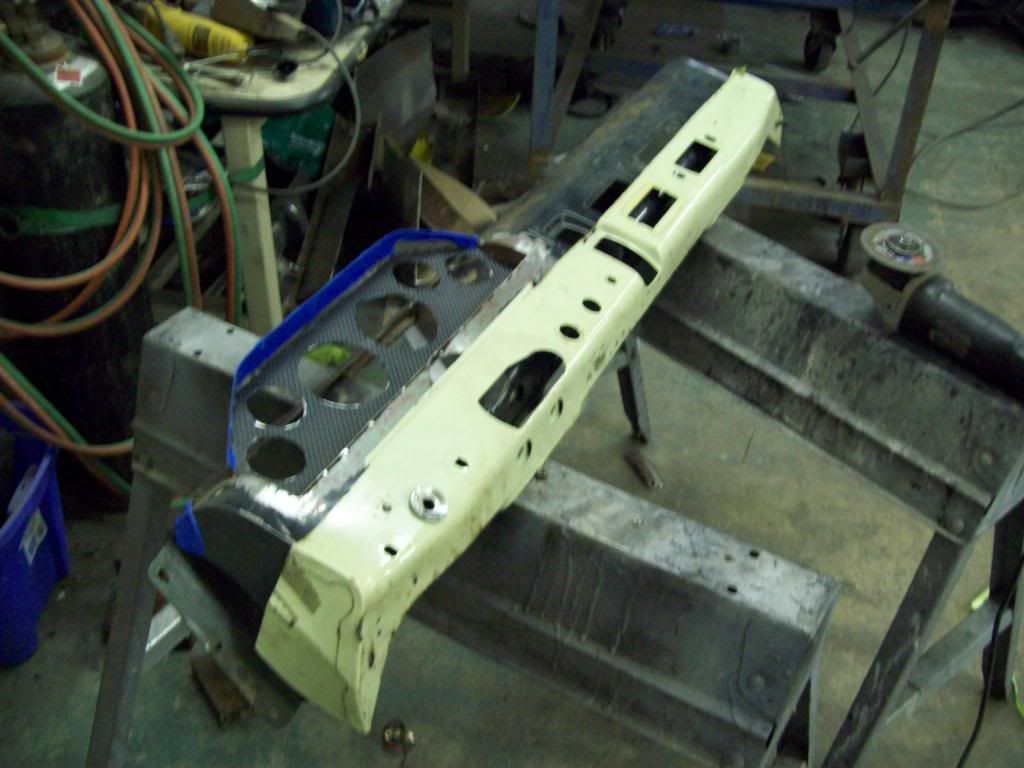
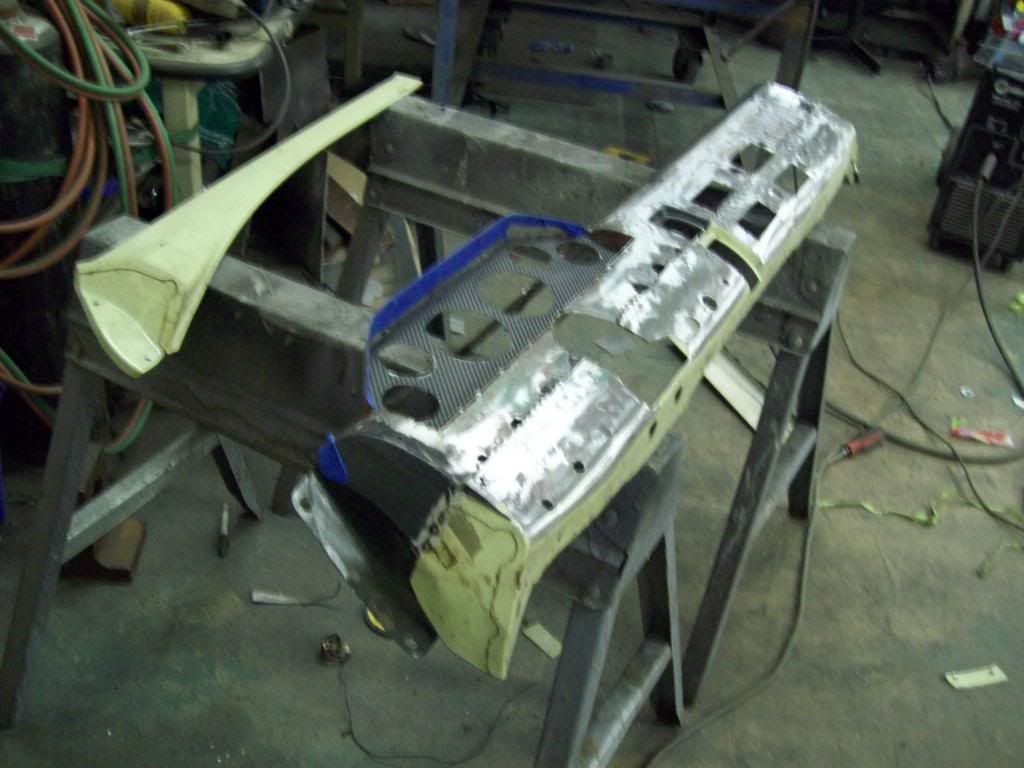
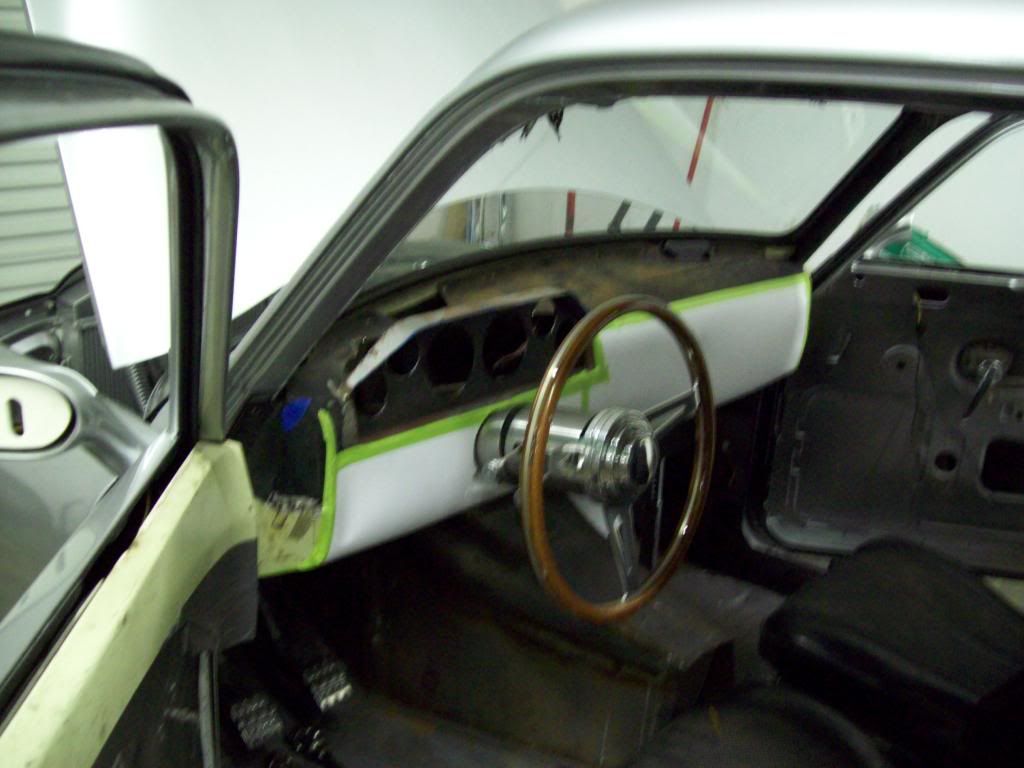
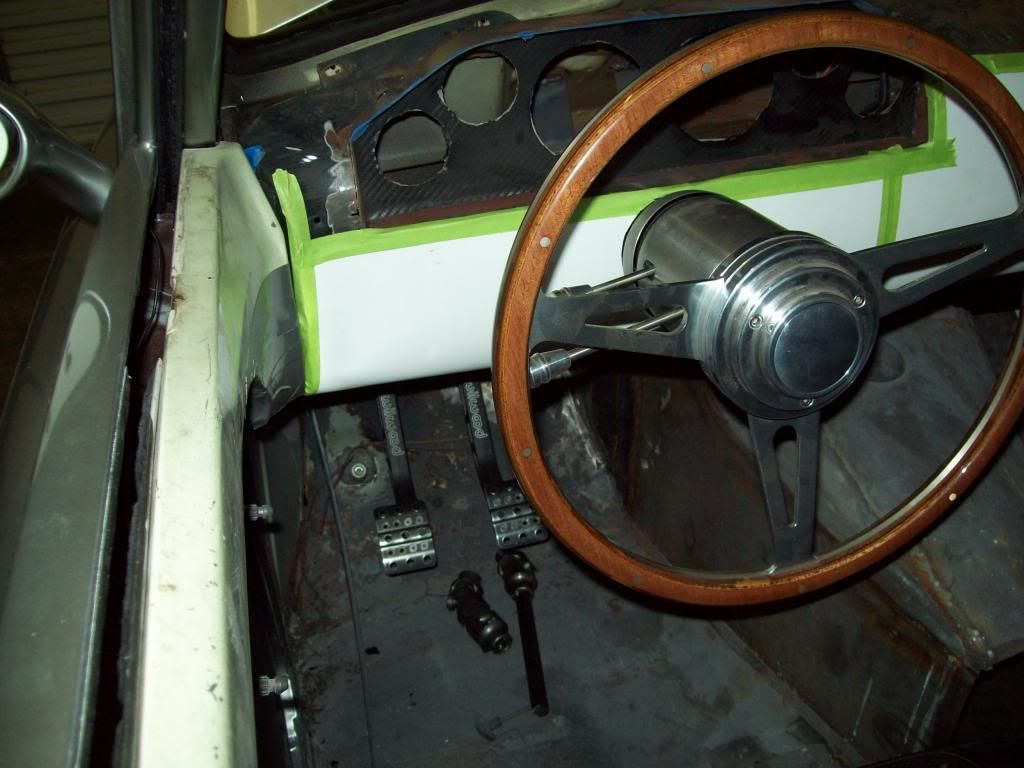
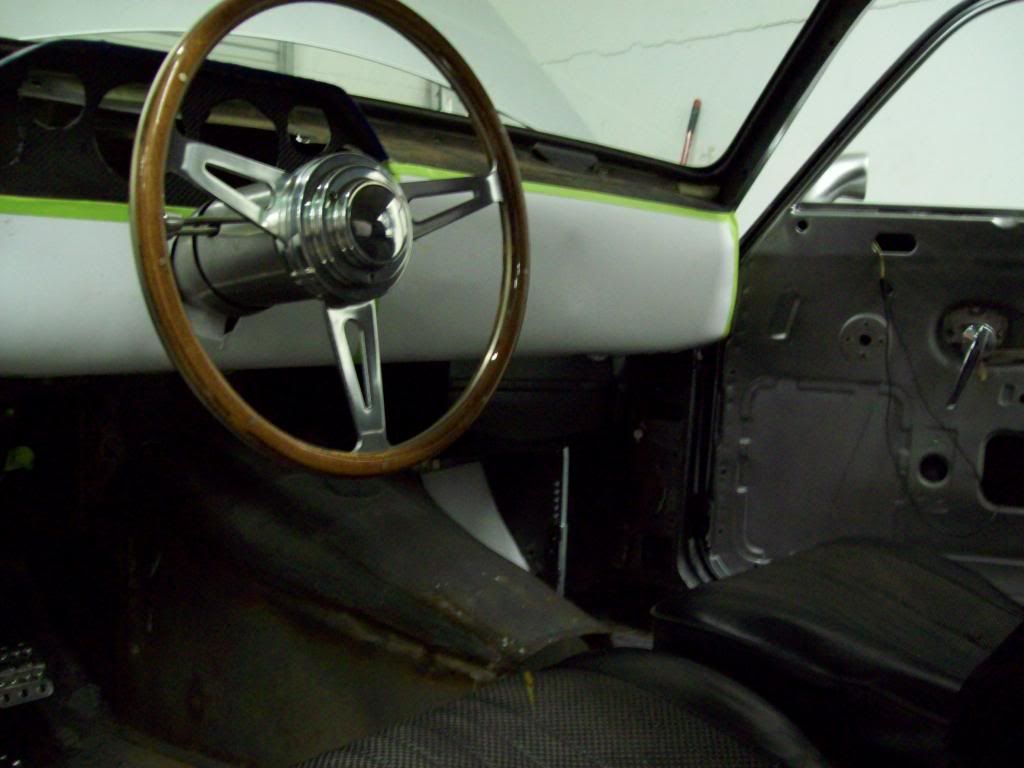
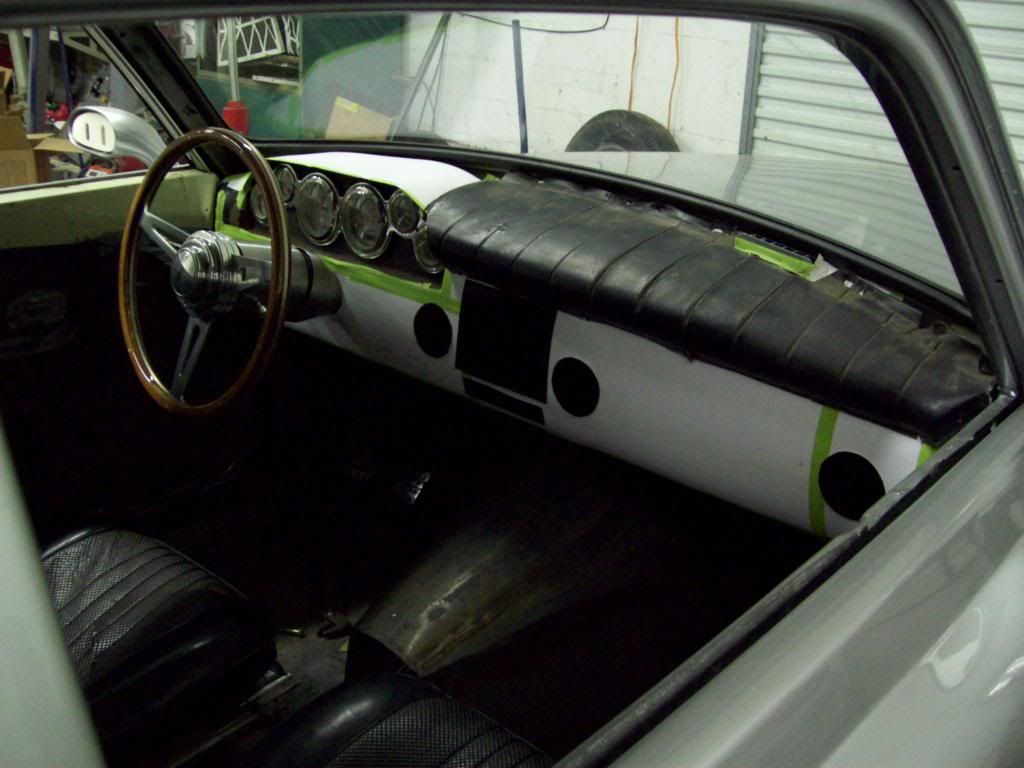
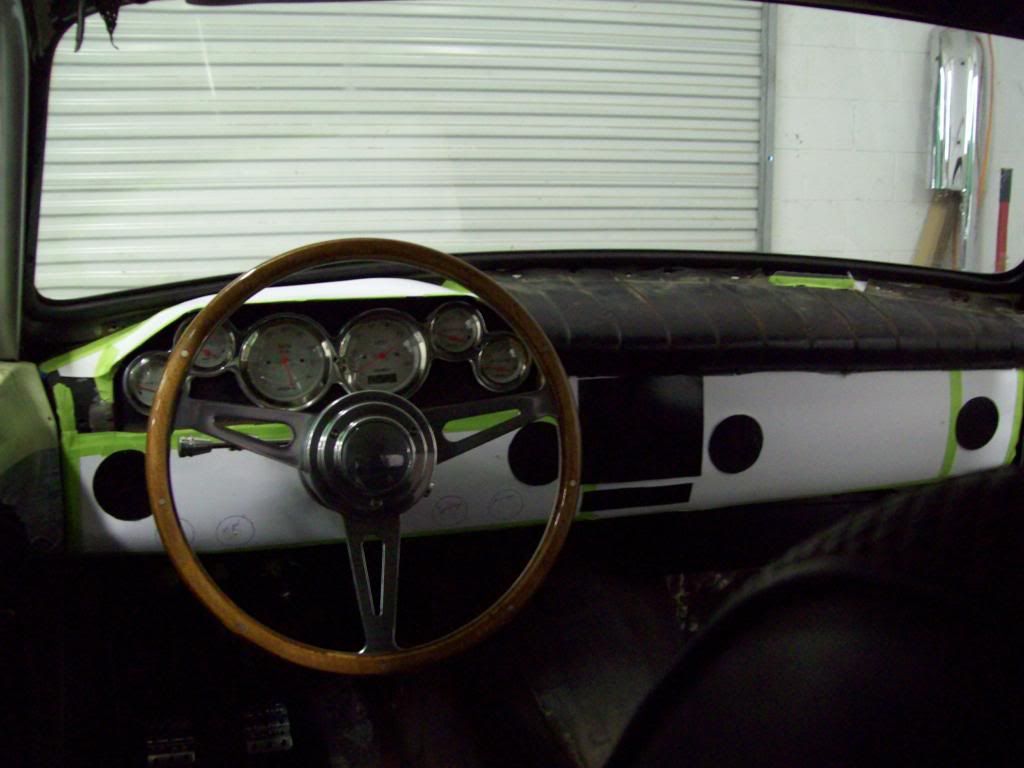
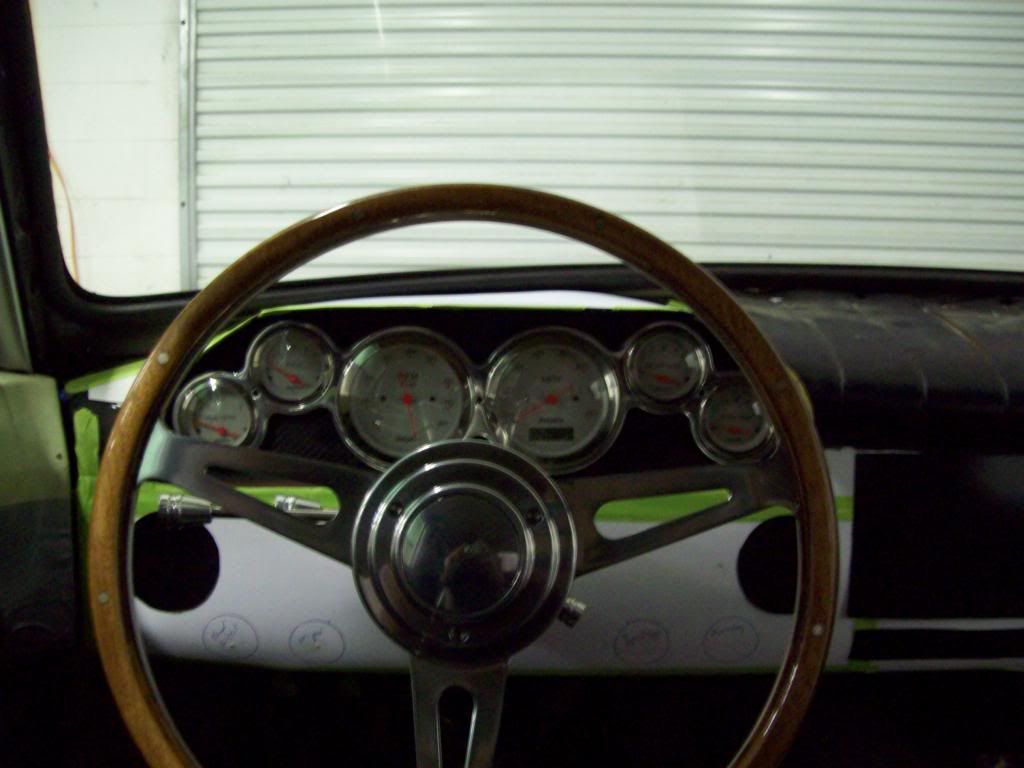
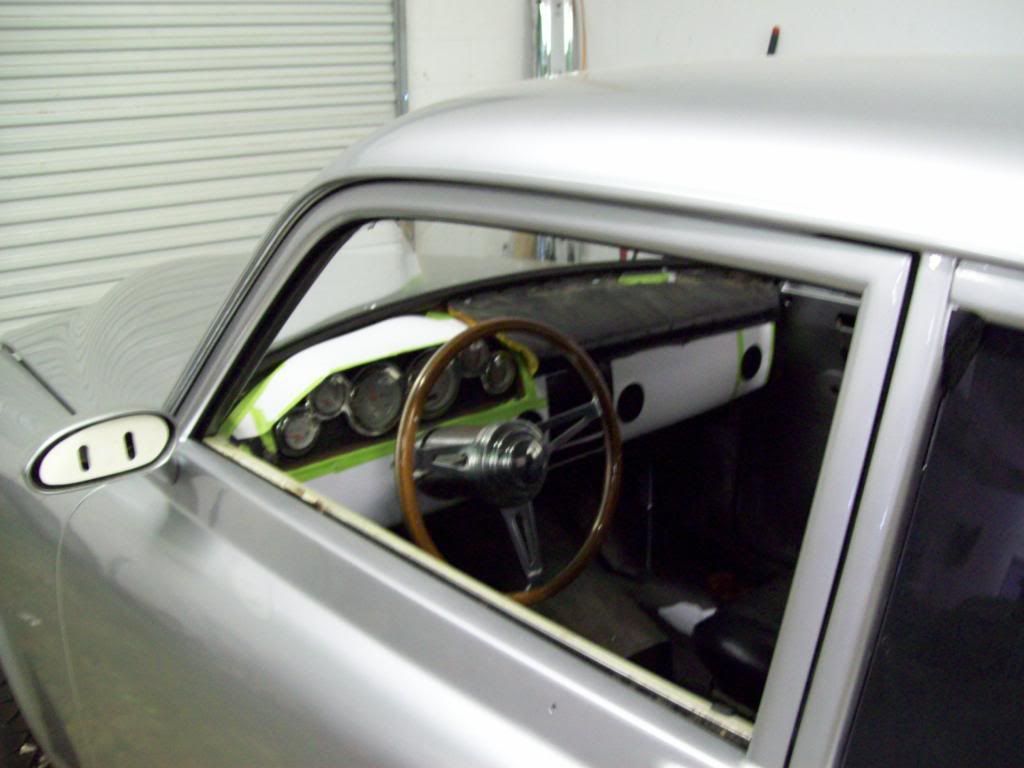
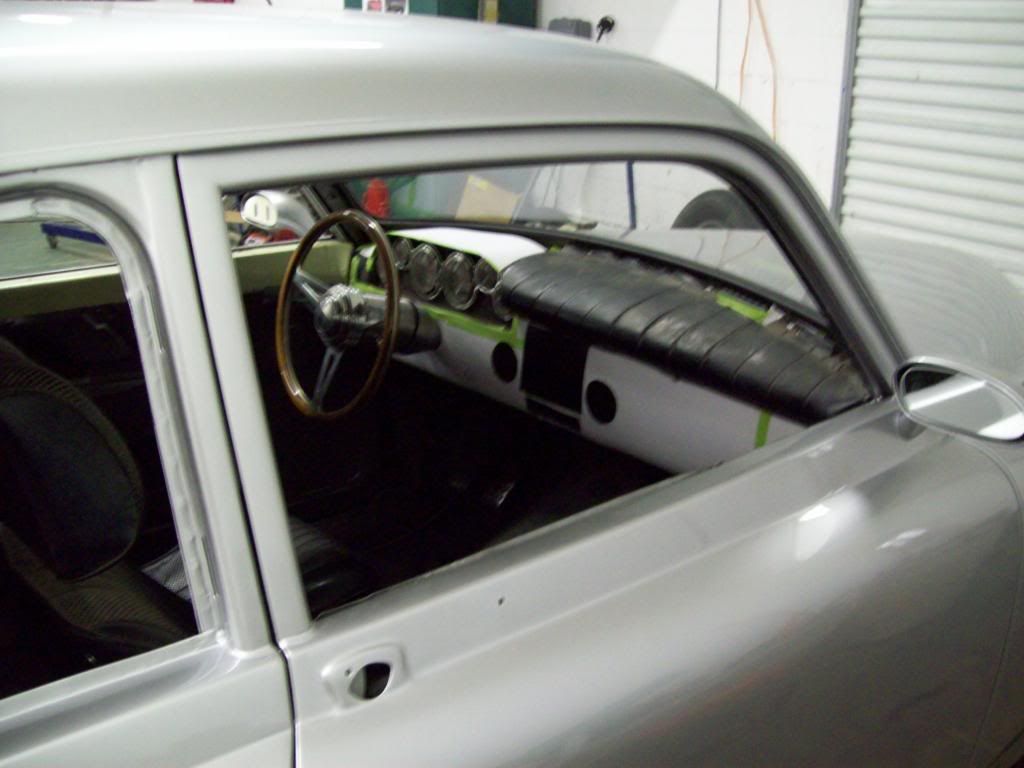
Here is the basic dash layout I am looking at, and I find much easier to make decisions on stuff like this, if I make a template with dimensionally correct accessory that I can look at and move around. The big black square is the Touch Screen Navigation/Stereo, and the black rectangle below it, is the Billet Aluminum AC/Heat Controls. The black rounds are obviously the Ac/Heat vents, and you can also see that I have the Ignition Switch, Headlight Switch, Wiper Switch, Accessory Port all layed out also, and they will be an original Pull Knob Style. After I determine that I like the layout, I will then make a better template that has everything centered out with the correct hole sizes, so I can make my final dash front to attach.
I layed a piece of the original dash pad on the top, because I will be following that basic theme and style, but it will be thinned down just a bit. I will more than likely stitch some of the oem lines in the leather work, that way is is an upgraded version of the original, and will hopefully still be recognizable as an Amazon dash assembly.
Comment
-
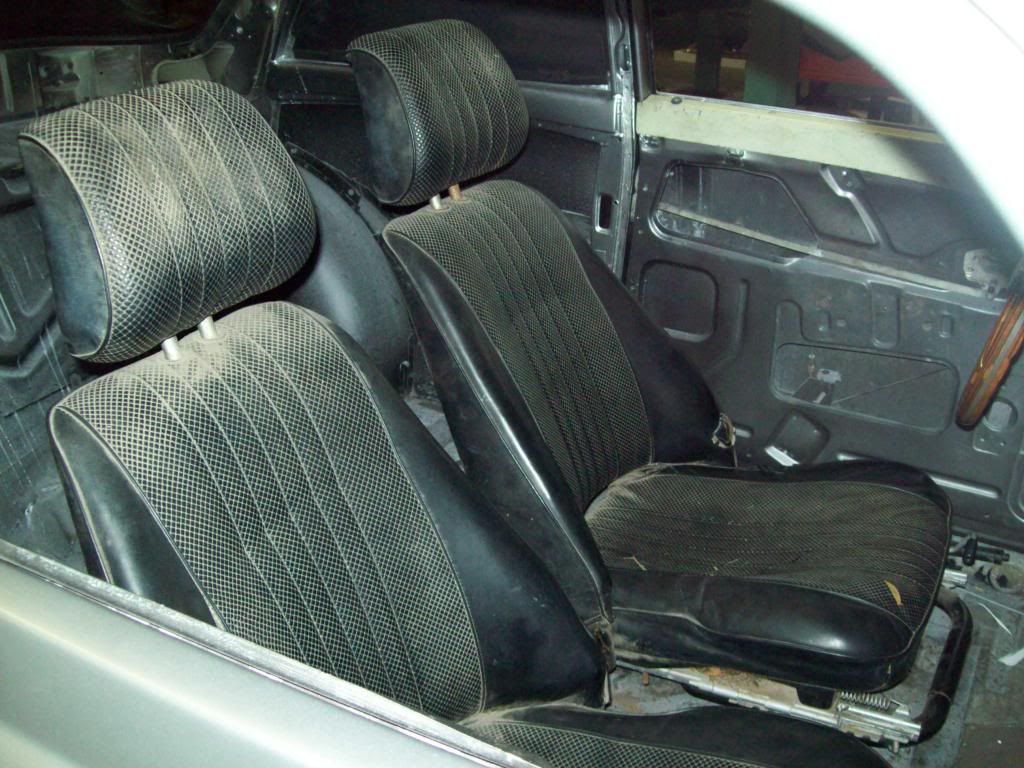
I really like these bucket seats, and I have saved them for years, because I knew I would find a build to use them in.. They are Late 60's Datsun Roadster seats, so they are not way to big like some of the modern adapted seats are, and they are period correct in styling.
I am thinking that I am going to try to source another pair of these seats, and then make a bucket style back seat, so the front will match the rear. I am thinking that I can take these seats off of their tracks, and then actually bolt them down to the back seat floor, because they fit right in the moulded floor pockets. I can then fab a center piece between them, and have that piece follow the contours of the buckets tightly, and then have it upholstered like the seats themselves.. This should make the back seat area look uniform and a complete unit, rather than two bucket seats with a console between them.. I really like the idea of having a matching bolstered and headrest optioned back seat, and with this seat option, it should give it modern/retro look?
Comment
-
Ok, now if you'll make that dash look old-school and not "becauseracekar", then it just might compensate for your mirrors.
Comment


Comment