Announcement

Collapse
No announcement yet.

1967 Pro-Touring 122 Amazon (Project Volvo X)540 Horsepower LS6/Tremec TKO600 5-Speed

Collapse
X
 
  • Filter
  • Time
  • Show
Clear All
new posts

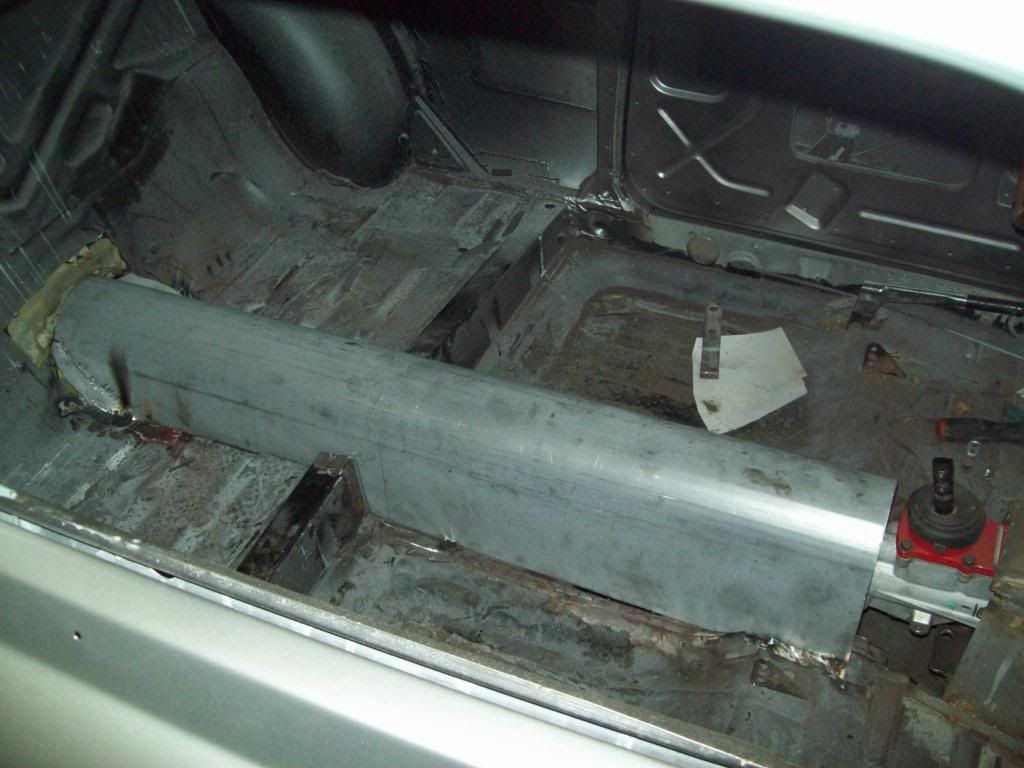
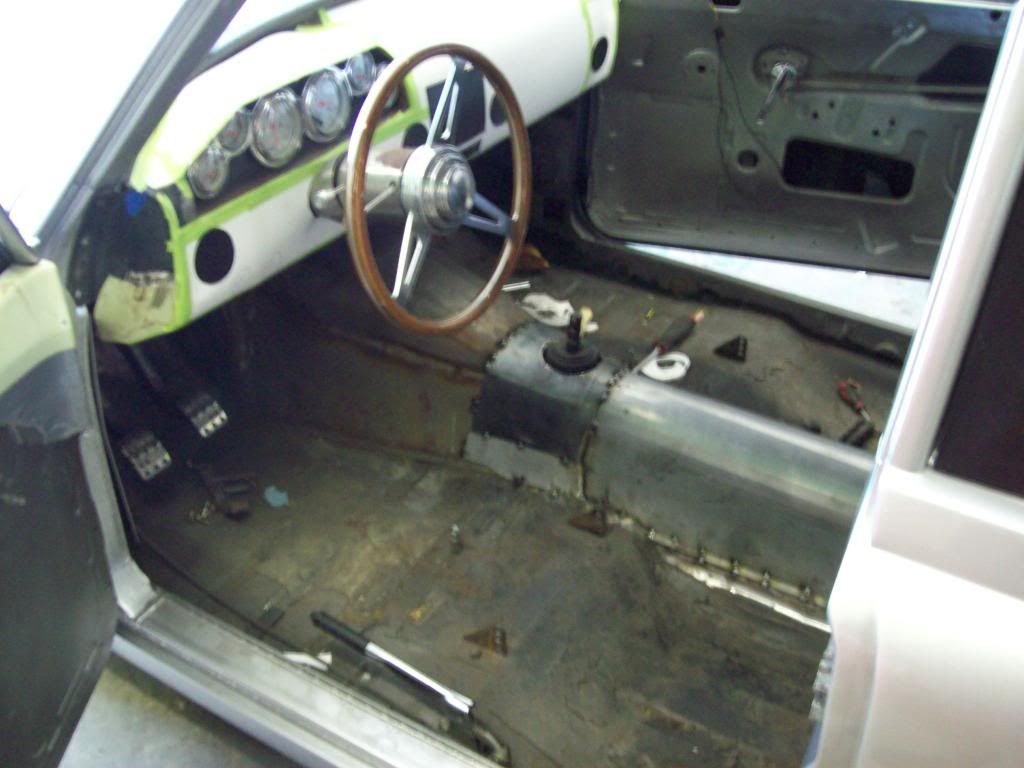
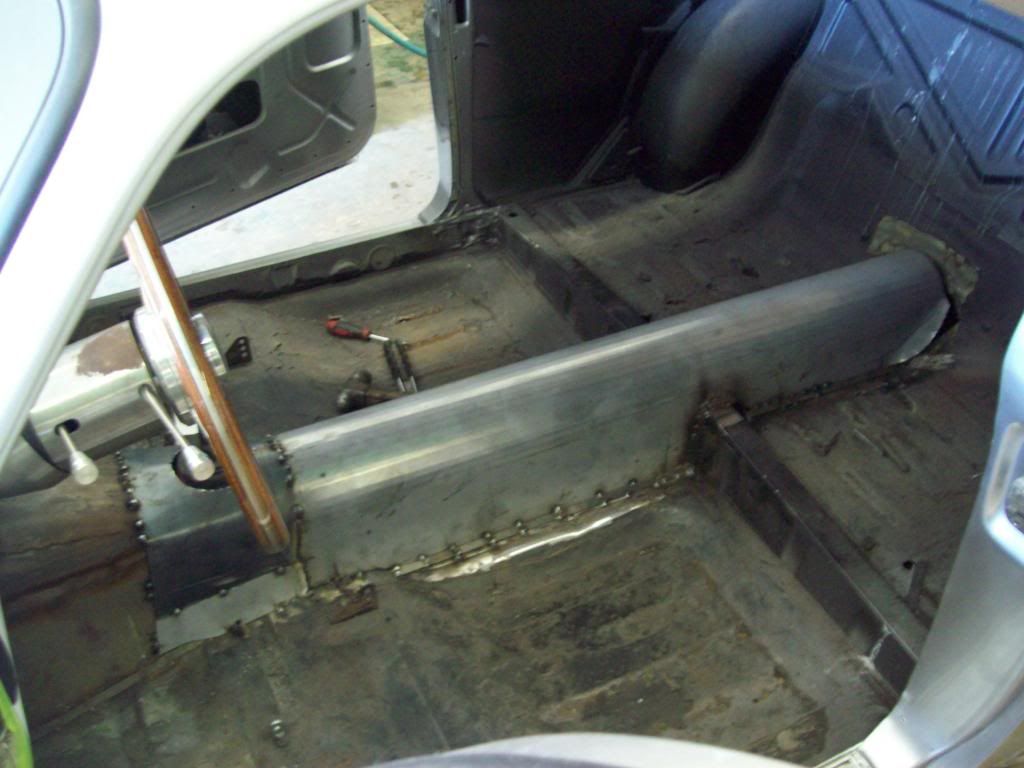
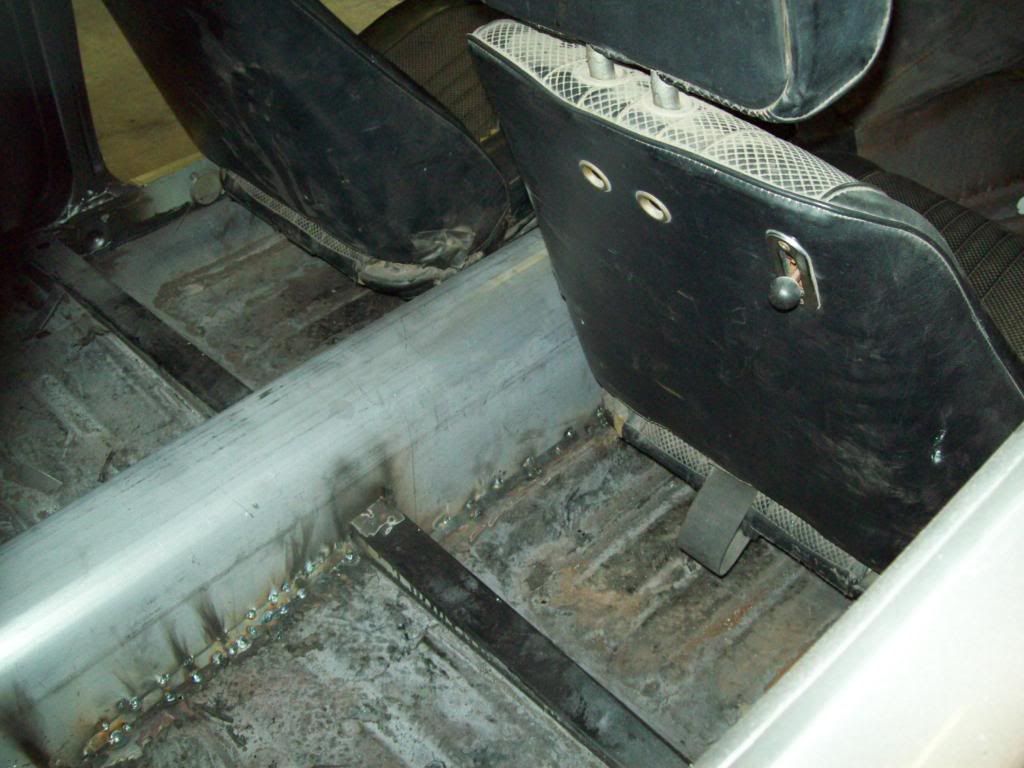
  • Now that I got all the drivetrain locked with the production mounts, I was able to install the driveshaft tunnel, and it wasnt hard at all.. I left all the bottom support of the closed driveshaft tunnel, so I only actually had to go up a bit, and the body integrity didnt change due to removal of factory braces.. You can see how it all lays out here, but I still have some finish welding to do, and as you can see I like to add some bar/strap to the weld points for some extra bracing.. It is a pretty simple addition, and I think it just gives me a bit more piece of mind, and I think it also looks better when it is all finished up.


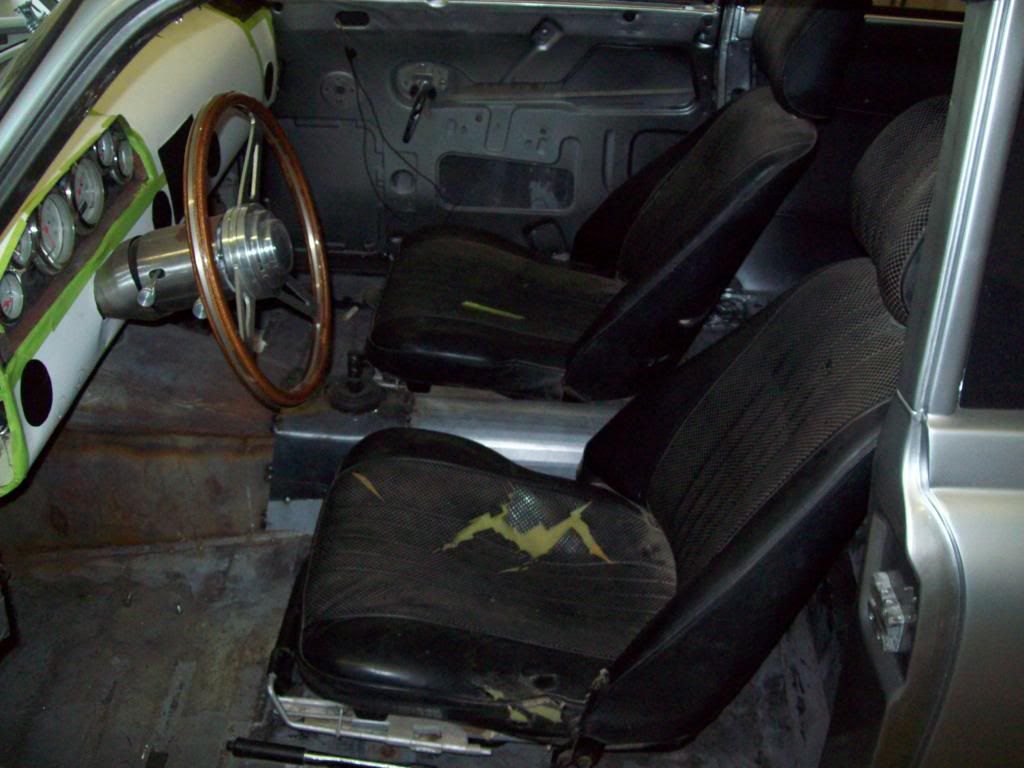
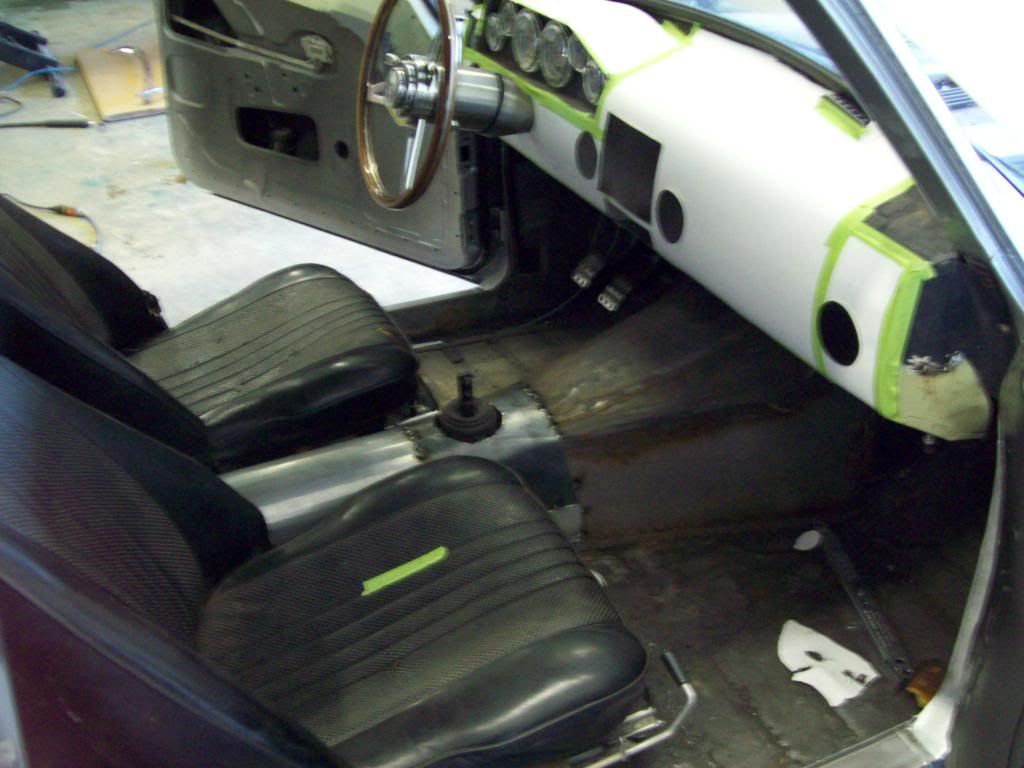
    The Datsun seats that I am using are narrower than the oem Amazon seats, so I actually needed to move them 2in away from the center, and that centers everything to the column and guages perfectly. I really like the fit of these seats, because they dont look like they are stuffed in there, and have nice trans tunnel and door gapping, for a factory look.


    Comment


    • Some of the order of this build is a bit off, because this all would have normally been done before paint work was started, but all the timing couldnt help but be thrown off with this build. Customer builds will be done in the proper job order sequence, which will actually make the overall quality much better, but the development of the build process and products left me at the mercy of scheduling necessary for each task. If I havent done things in this order, this car would be much further behind, along with sorting out the necessary items for future builds.

      Here is an update of the Trans Tunnel completion, just short of the final under coating that I am applying for the final coats.. I had welded everything up, and I am a firm believer in seam sealer, eventhough I can never really get it to lay correctly.. LOL I would rather ensure that I am sealed, so I tend to go a bit in the excess, because it is all hidden and smoothed out after the finish body insulation and undercoating is applied.

      The black paint is a high quality Chassis Paint, and it was applied before the caulking, so I was able to make sure that it penetrated everywhere it could before the seam sealer closed everything up. The interior has a full Insulation Mat that is going over the floors and every panel, so I dont really have any need for another type of paint, because it will just be hidden. As far as the underside, it wil get a final coat of a Truck Bed Liner spray, and that will allow everything to blend smoothly, due to the properties and thickness of the bed coat, so I should have a pretty uniform underside also.

      You should also be able to see that all the Original Body Braces in the trans tunnel area are intact, because it wasnt necessary to remove them at all, and I like the close driveshaft tunnel design.


      Comment


      • amazing build!

        Comment


        • Simply stunning

          Comment


          • trips me out how the exterior is so finished but the interior still needs so much work.


            For Sale - e24 Build thread

            Add me on Facebook
            Instagram @Dared_Turtle

            Comment


            • Originally posted by evilstar View Post
              trips me out how the exterior is so finished but the interior still needs so much work.
              Oh.. I know.. LOL As I said in one of my last post, there were procedures that needed be done out of order, due to the scheduling necessity of body/paint work and the rest of the components.. Now it is really a matter of completing items like the trans tunnel, without damaging the previously done paint work, and luckily I havent scratched the car yet.. LOL Good news is, I am really about done with all of that at this point, so now it is the typical plumbing and wiring task coming up..
              Last edited by Iamtheonlyreal1; 06-23-2013, 01:27 PM.

              Comment


              • This is how I envision your interior in my dreams.

                Comment


                • Here are some pics of the bottom side of the car, after I laid down the Bed Liner Coat for extra protection, and it is much easier to keep clean. It looks a bit rougher textured in the pics due to the flash, but it is a very hard and smooth, so dust will not really stick to it at all.. The new driveshaft tunnel works out great, and there is plenty of room to remove it with no effort, along with service the 5-speed transmission.

                  I still have to put a bit more coating on the area's that the lift blocked access to, and once that is done, it should look pretty uniform.. There will be a bit of extra care taken with this process to the Customer Build Cars, because they will be done in the correct task order, which would have had all of this done prior to assembly. Some of this build process is completely out of order, and does complicate a few things, but it was the only way to work the logistics of everything that is going on with outside sources and services.


                  Comment


                  • Originally posted by Miroteknik View Post
                    This is how I envision your interior in my dreams.

                    Wow... That is beautiful for sure, but I would never consider doing that for a daily driver car that the family rides in.. LOL

                    Comment


                    • Here are some pics of the exhaust system layout, but I will have to remove it for all the finish welding and protective coating, and also add some sectional flange/gaskets so I can take it apart in sections if ever necessary. I really wanted to run the electric exhaust dumps, but I didnt want to run them if I couldnt have the open exhaust run out the same side tips, rather than dump on the ground. There really isnt a good way to do it, and that is due to space, and the fact I am trying to keep all the exhaust as tight to the body as possible.

                      I was able to fab the exhaust out of a 2.5in exhaust tubing and mandrel bent ends at the shop, so now I dont have to worry about sending it out somewhere else to get done, because it is rare that the shops around here make any of the bend even. I also tried to take some pictures that would show how it all fits in the recesses of the body, and I would almost bet that it isnt as low as some of the 4cylinder exhaust versions out there.


                      Comment


                      • Now we are getting to some really productive updates, and that is because, it will be time to fire this car up very soon.. LOL I dont know why some people are afraid of the wiring and engine management of the LS Upgrades, and you should be able to see by the simple harnes below, that there isnt really anything to them. Once you have your basic Ignition Hot, Ignition Signal, and Ground, you are basically done, and dont have to worry about Timing, Tuning, or any other typical Carburation/Distributor issues. So here are some of the engine wiring and Brake and Clutch master cylinder resevoir mounting, and I think it all came out pretty clean, because it looks pretty minimal.. As far as the LS Engine wiring goes, it is actually very easy and clean, especially if your have your engine management harness pop through the firewall directly behind the motor.. With the way these LS motors wire up, it is very easy to tuck and hide the wiring, so it isnt very noticable at all.


                        Here is the motor fully wired with the Intake back on it, and as you can see, the wiring is basically hidden. You can do this same thing with the original LS plastic engine covers, or any other basic aftermarket intake cover, and this is one of the reasons I really like these motors


                        Here are the pics of the final Brake/Clutch Resevoir mounting and plumbing, and it came out pretty simple looking, so it wont be so bad.. I could have mounted these resevoirs directly on the Wilwood Pedal Assembly/Master Cylinders under the dash, and it would have made the underhood look much cleaner, but I dont like the idea of checking and filling brake fluid from under the dash


                        Comment


                        • It seems these cars body were made to accept bigger and more powerful items, because the larger dual exhaust fits under the car nicely, due to being able to tuck into the contours of the floor pan and body structure.. Here are some pictures of the car outside, and the pictures were taken low and flat, so you can see the amount of exhaust clearance.. I debated on running a 3in exhaust at one time, and it appears it might have worked out just fine. The wiring you can see hanging down, is the transmission speed sensor wiring, because I didnt have the car on the lift to hook it up during the wiring harness install.


                          Comment


                          • I was able to make the original Emergency Brake setup work with the Wilwood cable setup and the exhaust setup, so I dont have to worry about relocating the oem emergency brake lever. I actually like the original location of the brake lever, so I wanted to do what I could do to keep it there, and not have to go through the extra work of modifying something else to replace it.


                            Comment


                            • Here are some pictures of the computer mounted under the dash, along with the engine management fuse block, and hopefully some of the guys who are unfamilar with the LS transplants can actually see how simple it is. The loop of wires you see still hanging, are my guage signal and warning light wiring, and it blends very nicely into upgraded electronic guages. You can also see the Data Link Connector (DLC) hanging down, and there is enough length to pretty well mount that anywhere I would like to hide it, but I am still deciding where I would like to put it.

                              The next stages are to coat the inner firewall with the same chassis paint as I have done the rest of the intererior , and then complete the final insulating of the firewall the rest of the interior. The Body Wiring Harness is really just as simple, and will be added once the painting and insulation is completed. I have ordered the AC/Heat Assembly, and will have it ready to mount after the rest is done, but you can see that it is actually a pretty decent fit now. For modern air conditioning, the dash really needed to be made to hang down further, and now I am happy with the outcome there, because its exposure below the dash is pretty well standard to most conventional cars today.

                              Hopefully the last pictures show the perspective of normal standing with the door open, and the fact that you cannot see the Computer Mounting or wiring, because all the other pics were taken while sitting on shop floor to get an under dash angle for viewing.


                              Comment


                              • It appears we now have the first sign of Life.. LOL Working out the wiring, and I figured I would start with the Custom Headlights right now, because I am waiting on a few items to fire the motor up. I tried to capture alot of what is going on with the headlights, but there is a glare that I cant get rid of in most of the pics, but there is alot more definition of the LED Halo Components and Projector Eyeball in person.

                                Here are just the Daytime Halo's operating, along with the Right Turn Signal.


                                Here are the Low Beam lights on, because if I kick the brights on, there is way too much glare.. These lights are Crystal Clear in person, and I dont know how to describe other than, the light is very Crisp and Clear. The last three pictures are a better representative of how the lights appear in person with out the glare from the pics being taken head on, and that is how they look if you are standing directly in front of the car in person.


                                Comment

                                Working...
                                X