Announcement

Collapse
No announcement yet.

1967 Pro-Touring 122 Amazon (Project Volvo X)540 Horsepower LS6/Tremec TKO600 5-Speed

Collapse
X
 
  • Filter
  • Time
  • Show
Clear All
new posts

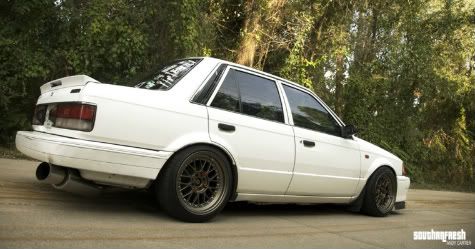
  • Excellent work, that modification has really balanced things out. It does the side view of the car a lot of good.

    Originally posted by Iamtheonlyreal1 View Post
    The heat shield or rock guard is a great idea, and I think you should consider it. Since you are going for a raw metal look on the car, maybe a brushed aluminum or stainless steel? I would shy away from rivets only because they give the rough industrial look. Your build is sleek and refined, so I would opt for some small bolts with a polished round cap for a head. That way you could have the rivet look, without it looking like a WWII fighter plane.

    Comment


    • What about stainless, chrome or brushed nickel for the stone gaurd? I think that would match your wheels and trim work better than black. I agree with the clear being problematic since I own a Porsche 951 and have the same issue but black just seems wrong for some reason. It doesn't match all the other work you've done and stands out as an afterthought in my opinion.

      Comment


      • Well I think I have the solution to the gravel guard, and with just a of final sanding and refining of the edges to fit the body lines better, I think it will work out just fine.. I made it out of aluminum, so it will have the same basic look as the wheels, so that should tie everything in.. I will also be able to double side tape it or use a bonding agent to attach it to the body, so it will sit completely flush to the body, along with take the need out of screws or rivets.

        It is kind of hard to tell in the pics, but in person, it sort of reminds me of an aircraft style shrouding or cover. I made this thing by hand with a 4in agle grinder, some files, and bench vice, so I still have to refine the edges in these pics. It is only held on with a couple of small piece of double sided tape, so it will fit tightly and follow all the body lines perfectly when done, but I wanted to stare at it for a couple of days before I even thought about making the other side. The quater glass frame pieces at the body shop getting prepped for paint, so the ugly oversized quarter glass is back.. LOL

        I will also be removing the rear jack bracket because it got in the way of the exhaust port, and there isnt any need for it now, because I have a very strong jacking point due to the quarter flare and exhaust mods, so only a rubber pad is needed.


        Last edited by Iamtheonlyreal1; 05-09-2013, 09:20 PM.

        Comment


        • I had to remake the exhaust tip shield, because I wasnt happy that it didnt close in the bottom of the tip, so it was really just the top and the sides. I still have to do just a bit of finish sanding to round out the exhuast tip hole, along with finish up the seams to where the sheild meets the body, along with round out the bottom arches. I need to take out the straight line appearance as it come from the bottom center of the tip back to the rocker panel, which should give the shield a more subtle appearance on the bottom, and allow everything to tie in correctly. This was made with 4in angle grinder, hammers, and a vice, so there is some finish work and fine tuning that needs to be done.


          Comment


          • Well I recieved my quarter glass frames back from the body shop today, along with the tops of the inner doors, so I am just waiting on the actual side glasses to make it in, so I can get the glass installed..

            I know we are probably getting tired of the exhaust/flare shield updates, but I have been steadily tweeking them as I wait for the final details ready for all the big updates everyone is waiting to see.. I am waiting for some finish up on the suspension powdercoating, along with the final motor stands and headers to make it in, and then we will have some of the more exciting updates.. LOL

            I think I have finally gotten the shield design the way I want it, so now it is just a matter of making the other side, and getting them out for plating. These things are Way More of a pain in the ass to make than I thought they would be, partly because they are not just flat plates laying on the body, and they are basically box/covers that had to be hammered out of sheet of aluminum without any real sheetmetal equipment. That being said, the black vinyl sticker that I was considering is looking much better now, considering I will still have to make the other side, along with make it match.. LOL I fumbled through the best I could, and I think that once they are back from the platers, they will look Way better..

            In these pics, the shield is just barely two-way taped on, so it isnt perfectly seamless to the body at this time. If I press them on, they lay completely flat to the body, and has no air gaps between the body and the shield, so they will look much better.. I have put some pics of a Shield on the drivers side, and No Shield on the passenger side, so what do you think? Shield or No Shield?


            Passenger Side with No Shield


            Drivers Side with Shield


            Here are the finished out rear quarter glass frames that were made from the rear doors from a 4 door car.


            Comment


            • What a transformation! Awesome work!
              '88 323 - K-swapped
              '03.5 Mazdaspeed Protege

              Comment


              • Well here is a crappy update, becaue it is a very messy job., but has to be done before the final installation of all the powder coated chassis. Normally this procedure, along with the spare tire sump removal would have been done before paint work, but my painters scheduling made it necessary to get it to him before I could get this done. Being painted also makes these jobs even more of a pain in the ass, because I cannot scratch or damage the paint, which I have been extremely lucky so far.. LOL

                I removed the bulk of the original undercoating, and found that a Air Hammer/Chisel makes a quicker and easier process out of it, because it falls off in big chunks.. I suppose it may be due to the fact this car is pretty solid, but the factory undercoat is actually has a very hard make up, so the vibrations from the air hammer releases it with easy.. I have had to use other methods to remove undercoat in the past, and none of it is good, but I was able to get about 90 percent of all the undercoating off in about 2 hours or less..

                I have also removed the Spare Tire Sump at this time, because I didnt like the appearance of it in the cars side and rear profiles.. Some may not see reason for this modification, but I will not have a need for a spare, partly because none of the wheels and tires I am running will fit in the sump... Here is some of the process below, and you can also see the undercoating removal results using the air hammer...


                After the removal of the sump, it was only a matter of cutting some tubing to duplicate the passenger side rear frame rail. I found that if I welded to pieces of tubing I had together, it was basically the same dimensions as the factory frame rail, so that kept me from having to source more material.


                I was also able to cut a section of the frame tubing off of the spare tire sump, and that allowed me to make the curved transition angle at the back of the wheel well, which made it much easier than fabbing something else.


                The re-bracing of the bumper bracket mount wasnt difficult at all, and was only a matter of trimming and folding the bracked, so it can be welded to the new frame rail. From here, it was just a matter of cutting a new piece of sheet metal to weld to fill in the sump hole, and then seal and clean everything up.


                Here is the pile of undercoating that was removed in the short couple of hours or less, and I can only imagine how long it would have taken to remove with other procedures.. You can see the big chunks that fell off, along with the smooth attachement surface for the paint, and that allowed it to just pop off with really no more effort than just holding the air hammer, and the trick is to use a Dull or Rounded chisel bit, because you dont want to dig into the metal.. Just a slight downward and forward pressure will cause enough vibration to break it off in chunks.


                Comment


                • It is almost like the LS motor was made for these cars, because it appears they are just going to slide right in, and these are the factory wheel wells. I am working out a system to where I can install the Complete Suspension Kit, Accessorized Engine, Transmission, Transmission Crossmember all in one assembly from the bottom. I am working on a table style fixture that will hold the complete assembled suspension and drivetrain, so I can roll it under the car on the lift, and then set the body down on it for attachment.. This will make installation jobs much easier for our customer build cars, and will take out all potential damages from going in from the top, because you dont have to worry about angling the engine/trans to fit in the bay and transmission tunnel, while worry about the assembly dangling over the new paint work..

                  Below is the test lowering of the body over the motor, and there is a bit more room than it appears in the pics.. I did have to remove the headers I designed, but they literally install in a matter of a few minutes after the motor is in position, so it is probably easier to not worry about this procedure with them installed. I will also remove the radiator during the final install, but as you can see I dont really even have to do that..

                  To break up some of the constant under hood color a bit, I am going to install an outer engine bay insulation on the firewall, and it will be a silver/metal color, and I think it will give it a bit more of a performance/race appearance.. It should help out with some styling, along with some functionality, and hopefully make everything look right at home.. The flat area's of the firewall around the motor will be done, along with a full exterior of the trans tunnel, so it should all tie in nicely and look pretty clean.. I am not sure if I am going to do the bottom side of the hood yet, and I know it would be beneficial to the paintwork, but that might be too much. I am running all of my motor wiring behind the motor and under the cover, so that is about all you will see there, and I am running all my body wiring and AC/Heat hose on the outside of the engine bay and under the fenders, so all of that clutter will basically be gone also..

                  I also have to make a trip to the bolt store, so I can find all the nice mouting hardware I need for the hinges, fenders, ect, and I am thinking I will find some sort of stainless steel rounded allen head bolts for all of that, and that should really finish everything out nicely also.. I cannot finish out the intake I am working, until I get all the complete suspension and drivetrain permanently mounted in position, because I need to make the flanges for the buffer boot necessary to allow for engine torque and seal the filter box to the air intake snout. I also still need to finish out the front of the intake cover, and I am not sure how I want to do that yet, but I need to get it done for paintwork fairly soon.


                  Last edited by Iamtheonlyreal1; 05-27-2013, 10:02 PM.

                  Comment


                  • Well I have the final fitment of the mirrors done, so now they need to go to the body shop for paint work, which will be body color.. I know this mirror option was a matter of debate in the past, but I dont want to install the typical non functional chrome mirrors that are generally on these cars, and I think they will blend into the body nicely after they are body color.. Like anything else, if you focus the pictures and attention on a particular item, it can make you blind to the overall appearnce in the complete package, so lets be open minded until they are painted. Besides it is too late now, there are mounting holes drilled into the paint work now. LOL

                    These are a really neat mirror kit, because you actually cut and sand the base to fit your car.. You can actually draw them in tighter if you want, and I actual moved them inboard quite a bit, because they had a few more inches of base stock on them. After you cut and sand them to your desired position and angle, you drill a couple of 3/8" holes in them, and then install the proviced threaded inserts for the mounting.. I actually purchase the VF-4LED option, because I wanted the integrated turn signals on them, which I thought was a nice touch of hidden modern.

                    These came from Vision Hot Rod Concepts www.visionhotrod.com and they were very reasonably priced...


                    Comment


                    • very nice car but those mirrors look way to new

                      Comment


                      • Well here is an update that looks like progress... I am just waiting on my production LS Engine Stands to make it in, and then I can install the motor/trans to the crossmember, and then install the whole unit in the car at once.. I went with a lighter aluminum crossmember and rear end assembly, and smoked chrome control arms and spindles, because I needed something to photograph well with the black bottom body coating. I think it also matches the overall theme of the car, and it should look pretty clean once it is all installed..


                        Last edited by Iamtheonlyreal1; 05-30-2013, 11:46 PM.

                        Comment


                        • Here are some updated pictures of the mirrors after they were painted, and I think they look like they are right at home now, and they look much better in person versus the pics.. I went ahead and lit up the LED's, because I wanted to see the whole package, so here it is... Once the car is outside in an open space, the mirrors will only get better looking, because you can get the correct perspectives..


                          Comment


                          • So gangsta! I really like the fact that you're documenting just about every step of the process.
                            Feels like it's close to being done!


                            "Never argue with an idiot; they'll drag you down to their level and beat you with experience"

                            Comment


                            • Axles... My god they look great...
                              Not liking the side mirrors.
                              The Moskvich. (Video)

                              Comment


                              • Just read the hole thing. Absolutely gorgeous man. Well done.


                                The Kia has been parted.

                                Comment

                                Working...
                                X