 Tweet
Tweet
Originally posted by Edgar.
View Post
-
Ha Ha... The dash will not be race themed, and I am going for something of a modern version of the old, and hope it appears it could have came in a higher end version of the Amazon if they ever made one.. I appreciate the compensation offer for the mirrors, but I dont think I will need that, once you see the whole package completed.. LOL -
I am really wanting to hide the coil packs on my build, and thought about relocating them to the inner firewall, but I would like to find a closer place to do it.. I have this little pocket in my crossmember kit, along with a unibody frame rail relief for the oem upper a-frame, so it makes a nice little pocket.. I understand that there would be potential water during rains and ect, but these coils are pretty well water proof from what I understand, with the exception of the actual power/signal plug and plug wire, which I am sure can be dealt with.. There should be enough fresh air, along with actual header air gap clearance to run fairly cool, so I am not sure if that would be a major factor at all. I am thinking they would actually run cooler than being trapped in the engine bay air space, while mounted to the valve covers..
I thinking I can fab some sort of close out plate, and actually mount the coils on the wheel well side of it, and then have holes for the individual plug wires to run through. This could also finish out the original a-frame opening, and do some additional finish look appearance, but I need to make sure that I will not have any potential issues running the coils this way.
Comment
-
wow so awesome im in for moreComment
-
+1...makes me want one. such a cool volvo in so many ways.Comment
-
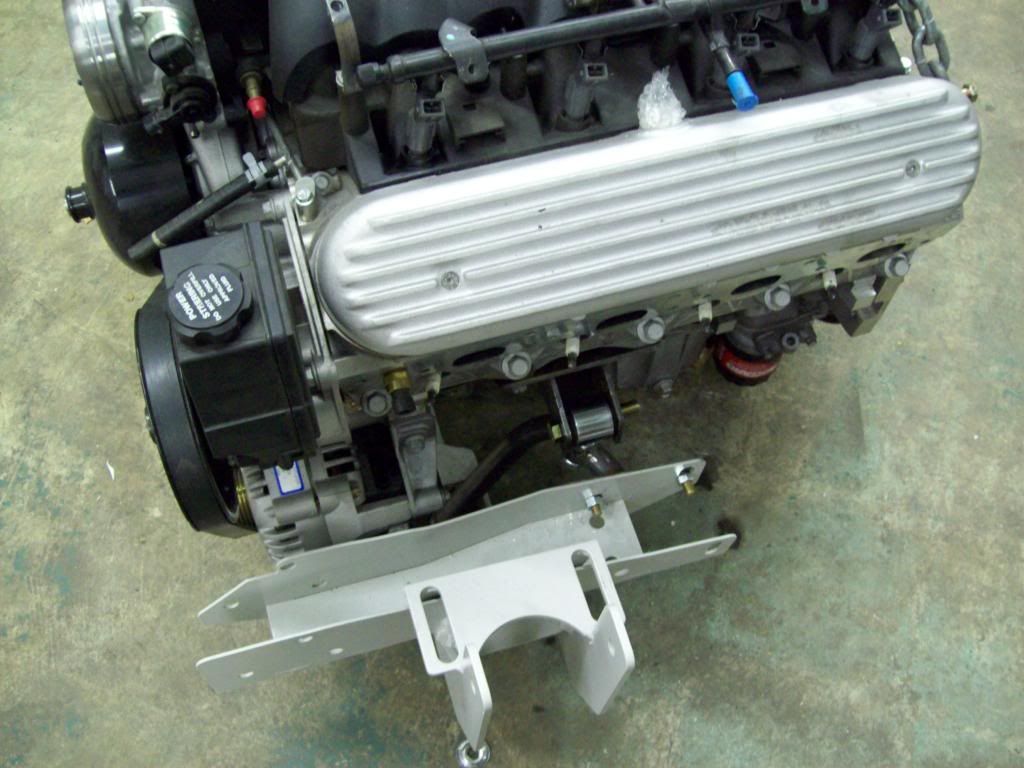
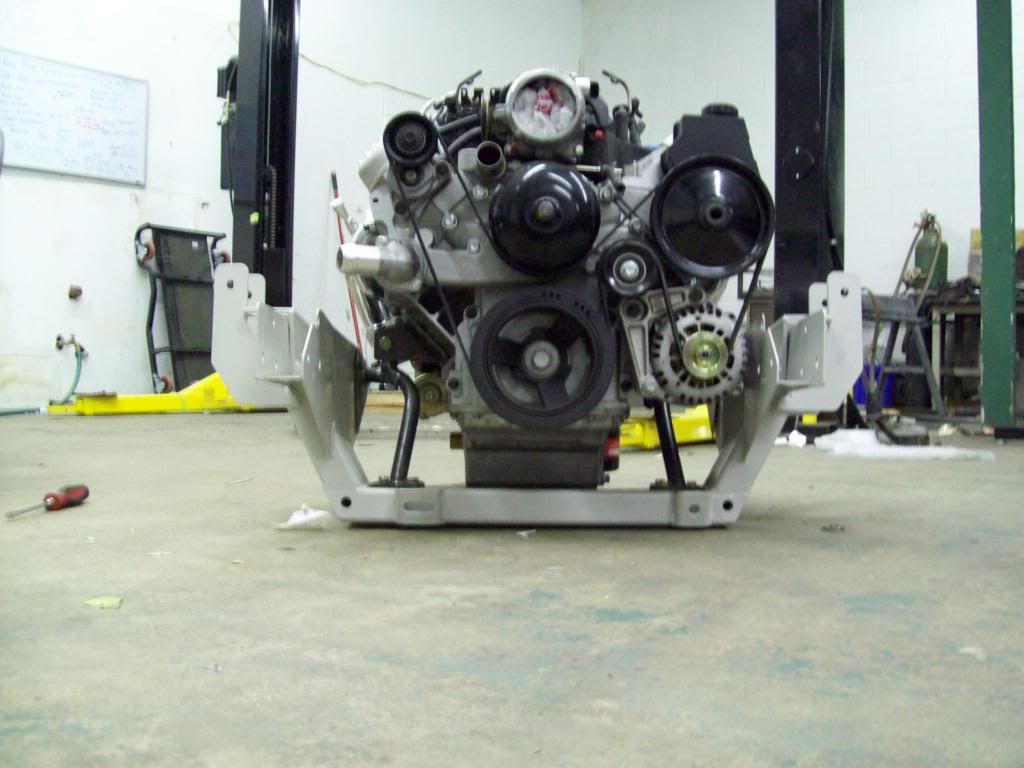
Here are some of the first test fit of the Adjustable Motor Stands that I am working with, because I want to have a little freedom to make adjustments on the fly.. You can raise the motor a couple of degrees for fine tuning the drivetrain angles, or you can pitch it up or down on the right or left side.. I am sure this is a bit of overkill, but I have been in situations where this has been handy in the past, and the adjustment is really just a matter of twisting a wrench when everything is installed.

Comment
-
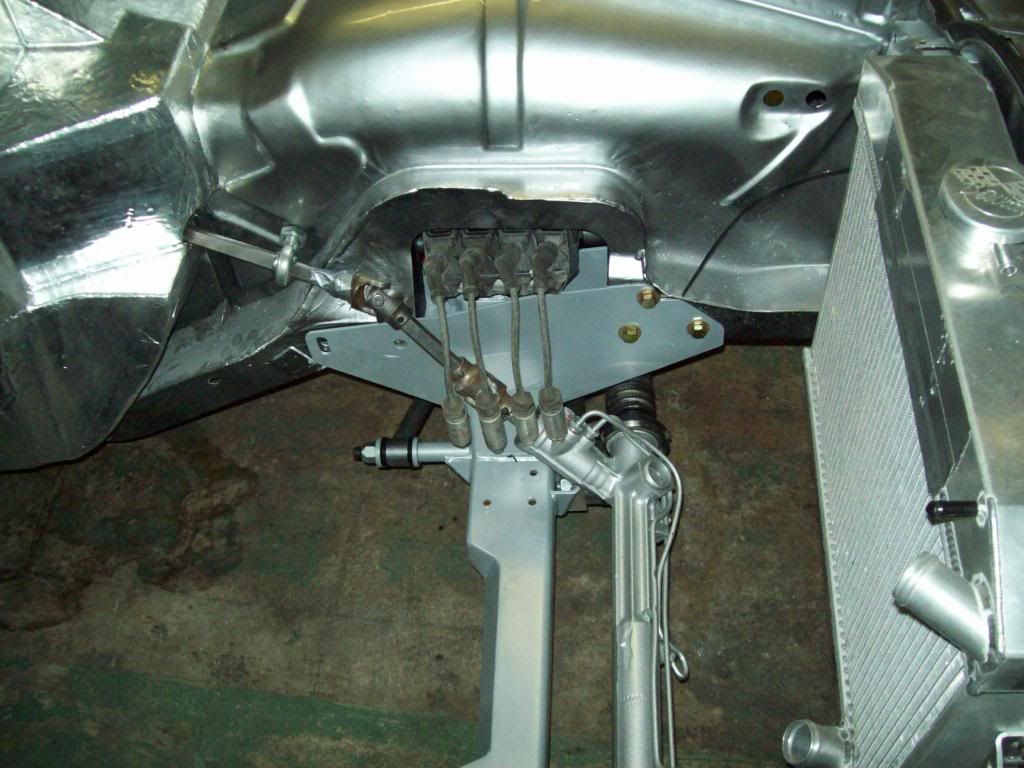
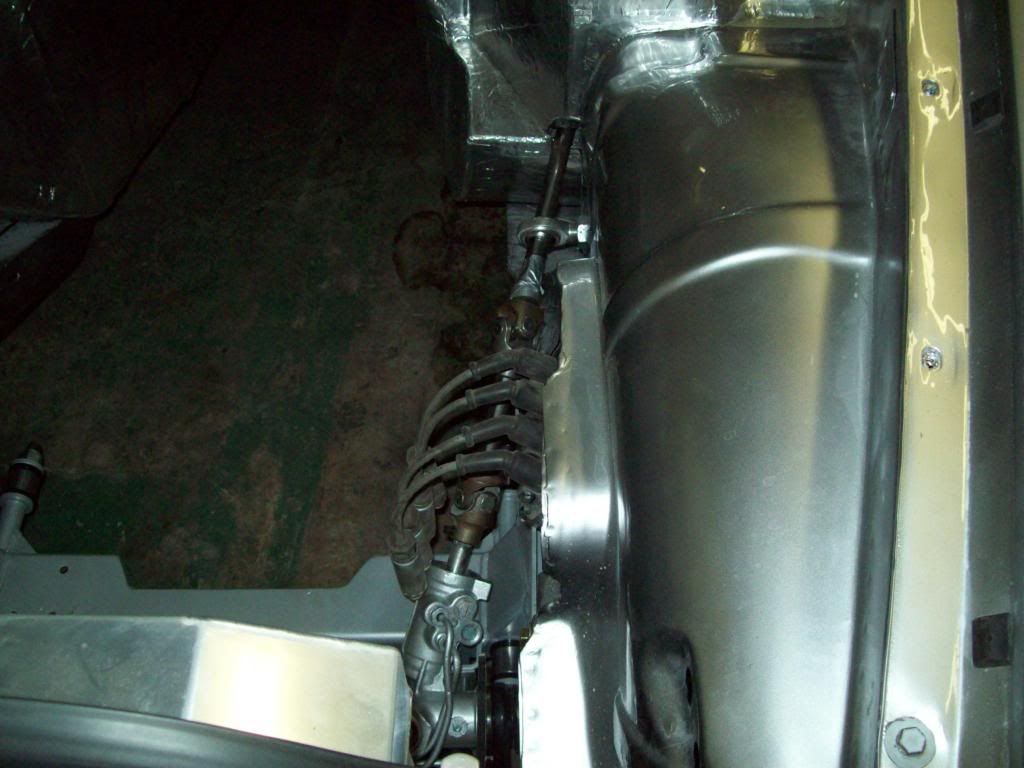
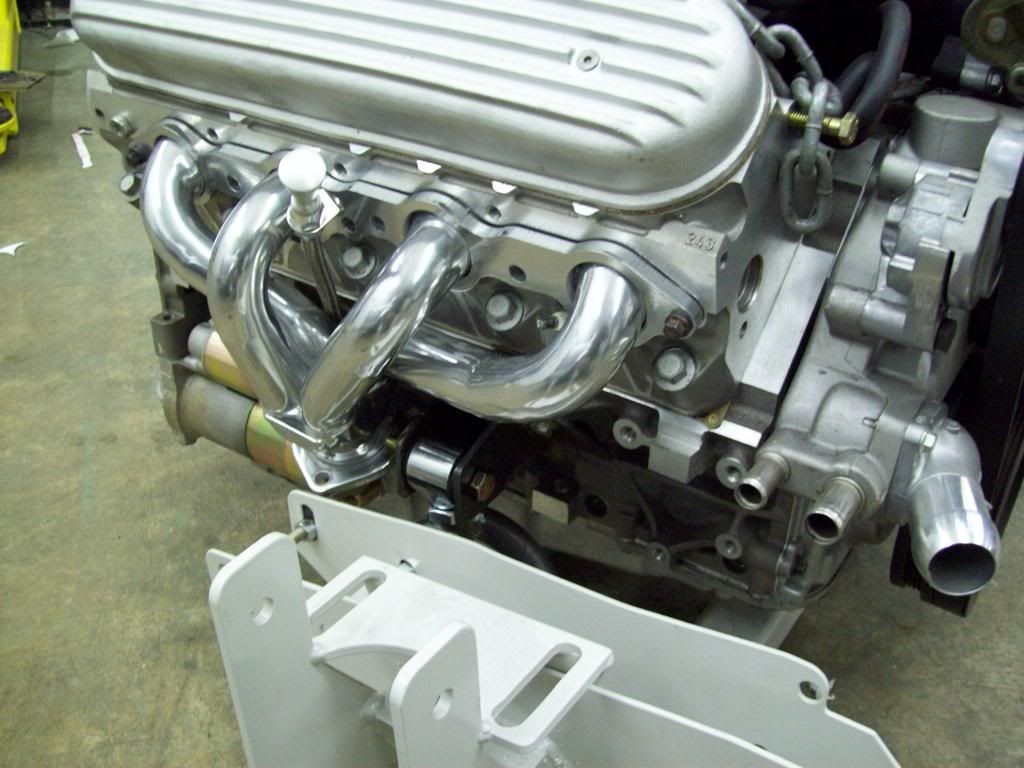
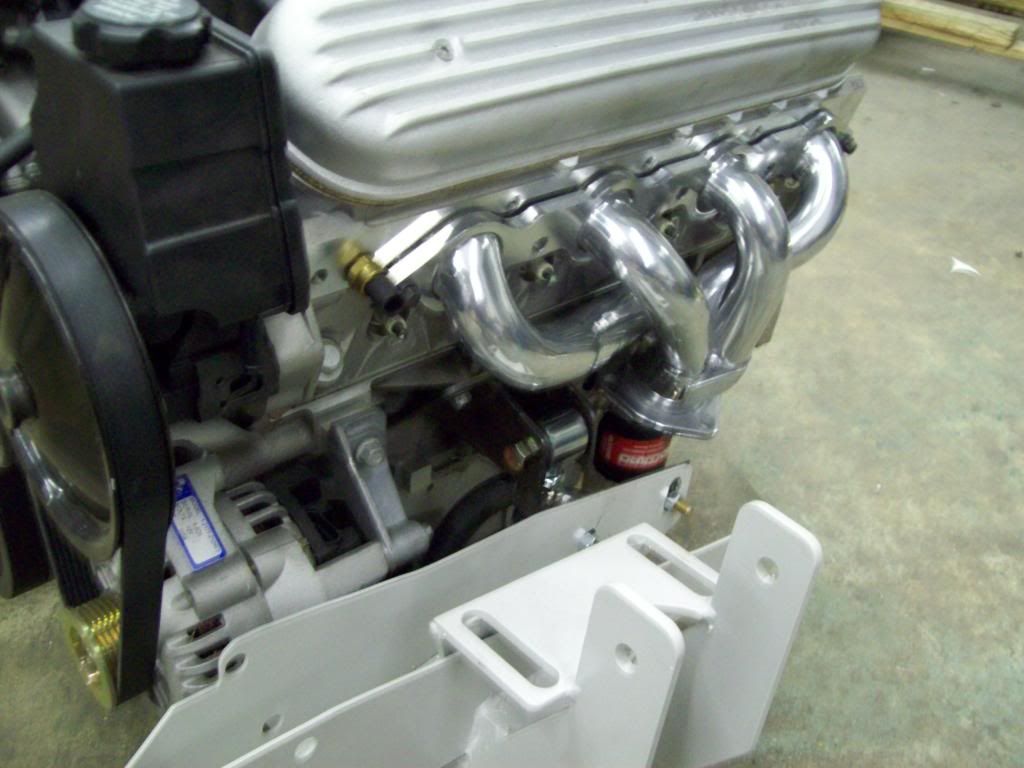
Here are some clearance pics of the motor/trans in the car,. The headers drop right in, but with the way that I wanted my steering shaft routed, it did make it where I had to jack the drivers side just a hair for it to drop in.. I guess I cant win them all.. LOL In the pictures, you can see all the accessores are tightly packed in, but you can remove each item with no issue, and probably much easier than the Corvette/Camaro the motor originally came out of..


Comment
-
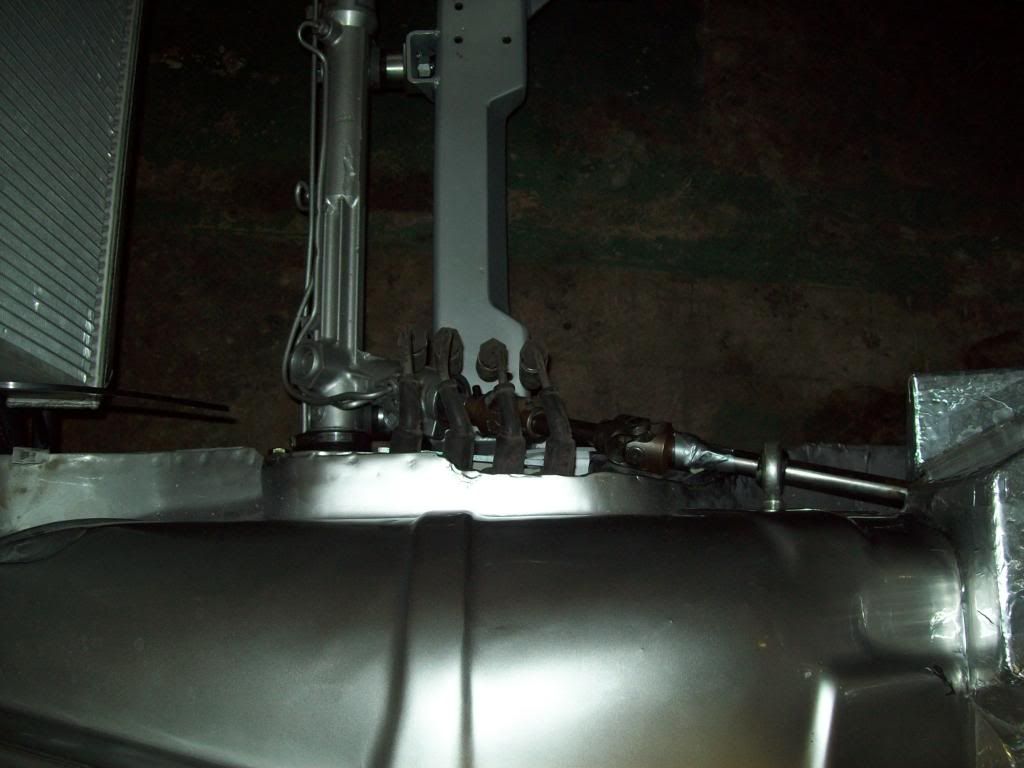
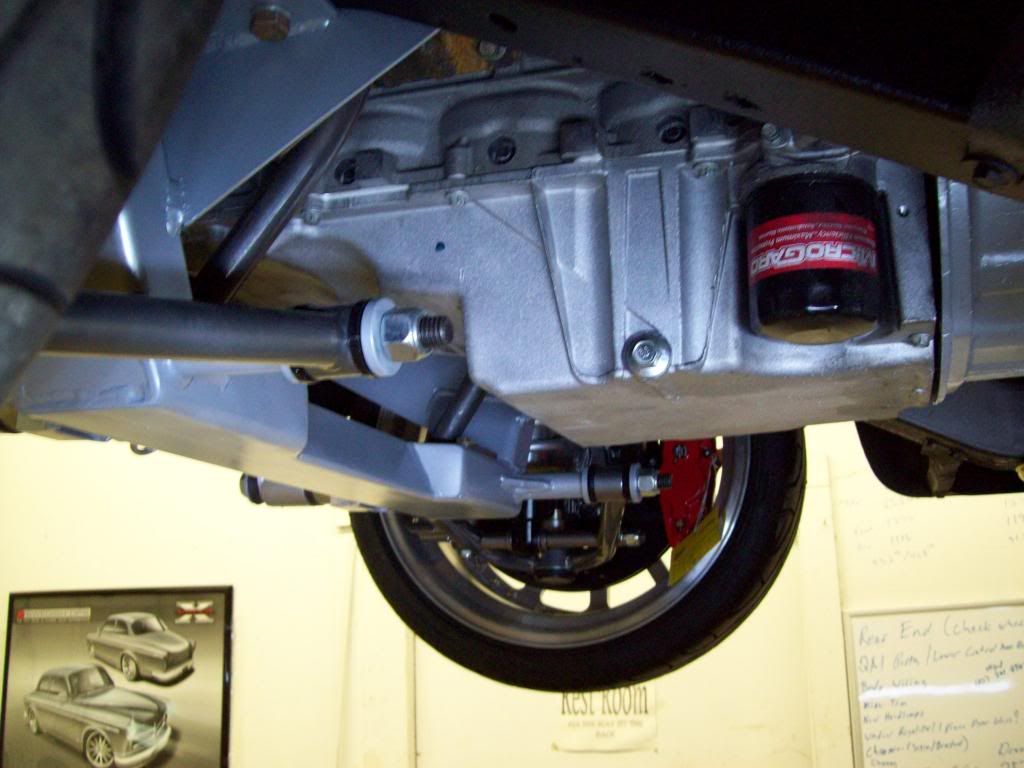
Here are some better pictures from the bottom side, and as you can see, there is really plenty of clearances.. You can remove all the accessories and service the car with no issue, and if you needed for some reason, you can drop the oil pan down without having to remove anything or jack up the motor. Please ignore the unfinished motor mount stand and brackets, these were the first rough pieces that I was testing off of the production jig, and the finished/powder coated pieces will be of much better quality.


Comment
-
-
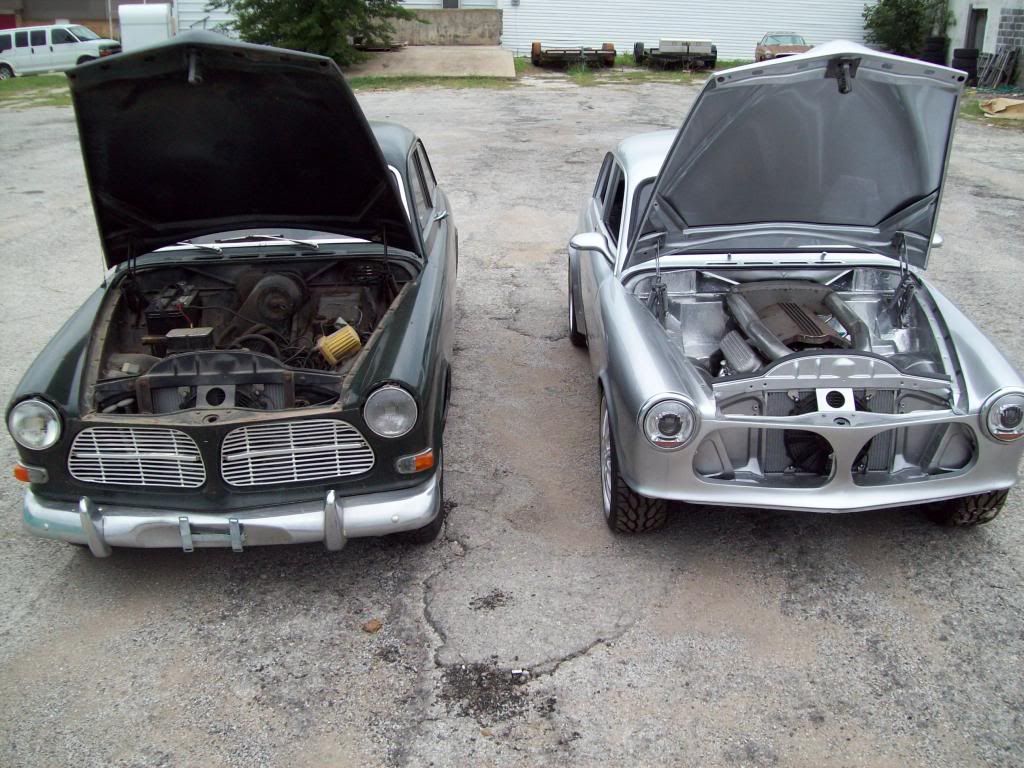
I had to roll the car outside for just a bit, so I can do a bit of cleaning, so I figured I would post some pics now that the mirrors and mud flaps are installed. In the real world, they look much more at home than focused pictures in a tight spaces, so hopefully a few doubters can retract their concerns.. LOL
The front end of the car still needs to be lowered about another 1/2in, and that should be about the right overall stance I am looking for, and the bumpers being reinstalled should make the car look a bit lower overall.. Man, I want wait for the trim to get back, because that is really going to make all the difference in the world.
After being in the shop for so long, I keep forgetting how small the car is, because it seems alot larger in the shop.


Comment
-
Yep, no doubt in my mind, you sir are a wizard.
Fantastic fab skills.Comment
-
Damn, I wish I was a Wizard, this thing would have been done already.. LOL ThanksOriginally posted by andybob View PostComment
-
Well... I am at a struggle here, because I was thinking I had a nice solution for my battery position, but I keep forgetting how small these cars are.. It is really the best position for the battery, but I dont want this thing looking like a track car, if I can help it.. I have a larger 1k cranking amp battery here, and it is about the shortest battery I am aware of, but it still hangs down just a bit too far for my taste.. Once the rear bumper is mounted again, it will take alot of the bulk away, but I was actually hoping there would be just a bit more tuck.. I may have to split the difference between the trunk intrusion and hang down, that way I can get a bit of each benefit?
This is why I love Duct Tape, poster board, and card board.. LOL It makes things quicker to visualize, without going through all the hard work, and then finding yourself comprimising on using something that you really dont like, just because you dont want to start all over.. I have scrapped so many versions of things, because it sure sounds good, but the real world application doesnt look right.. I dont mind sharing what I think are bad ideas that I have worked through, because it might actually save someone else the waste of time and effort, and atleast something came out of the failed process..


Comment
-
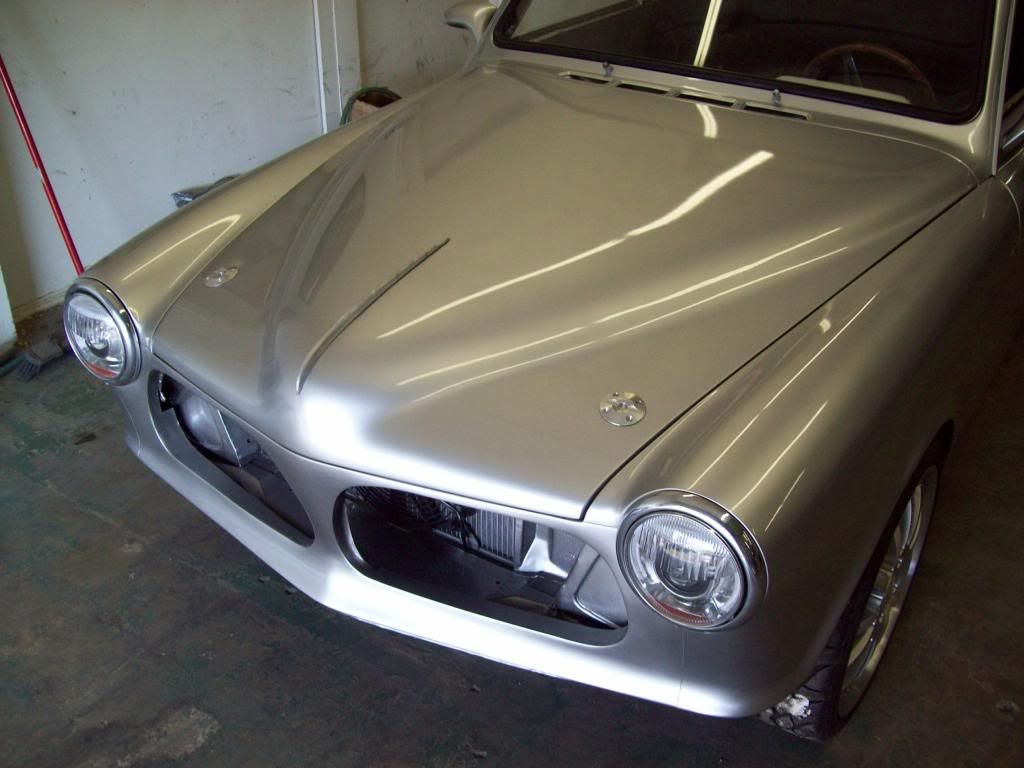
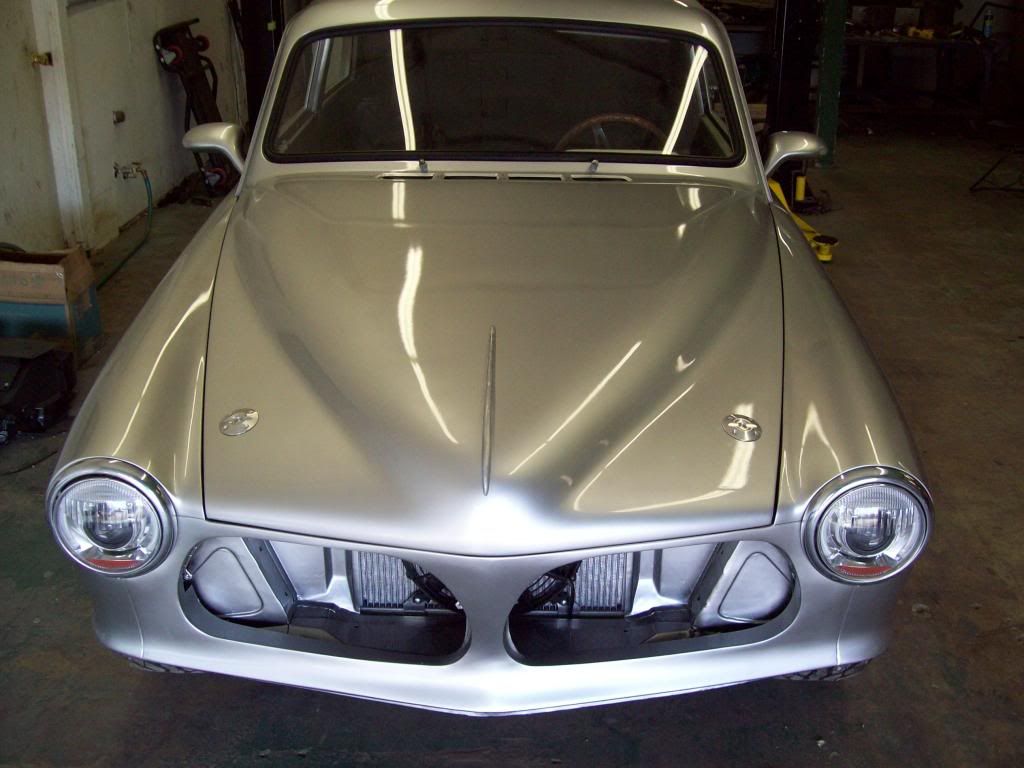
I had a friend come by the shop the other day, and he put a realistic concern in my head, and I am now wondering how to ease my mind a bit.. Man I can really curse him right now.. LOL The car is going to be quicker and have a higher overall top speed than the original car, and grille openings are fairly large with a large under hood surface area, so how secure will the oem hood latch be? There wouldnt be a whole lot worse situation for damage, than the hood flying up at high speeds, so that has me thinking a bit.
I had this nice aluminum hood pin kit that I was considering using on another build, but I dont really want to drill into the hood at this point, but that would be less than the potential damage of the hood latch letting go. There are serveral styles of hood pin kits out there, and they even have some flush mount button style, but this is more typical of the European sports cars, so I really think this is the direction I need to go if I should decide to run some. The problem is the mounting position isnt really conventional, and that is due to the curvature of the hood and core support postion, so I am pretty limited here..
I wonder if anyone has pictures of Amazon's with hood pins installed, so I can see how others have done it, along with the overall astheticis of them?
Natural Sun Light in this first pic, and the 2nd pic is Artificial Lighting, so I just thought I would show some contrast.. LOL


Comment
-
What about a hook and lanyard mounted somewhere under the hood? It would be something you'd have to unhook each time to open the hood but it would be a hell of a lot cleaner than any ugly pins. Out of sight solution and it would keep the hood from fully opening IF the latch were to fail.
If you've got a spare latch why not rig up a come-along and some scales and failure/load test the thing?
please don't drill that hood or do pins, in my personal opinon that's a step in the wrong directions on what has been an exceptionally clean buildComment
-
Not a huge fan of that style hood pin. The flush mount ones are a different story though....Comment


Comment