If this is your first visit, be sure to
check out the FAQ by clicking the
link above. You may have to register
before you can post: click the register link above to proceed. To start viewing messages,
select the forum that you want to visit from the selection below.
this just keeps getting better and better! Please tell me you will be posting a build thread for that as well. I have loved p1800s since I first saw them. My uncle has a wagon that I have been begging him to let me buy since I can remember lol. He has 2 more now. lol
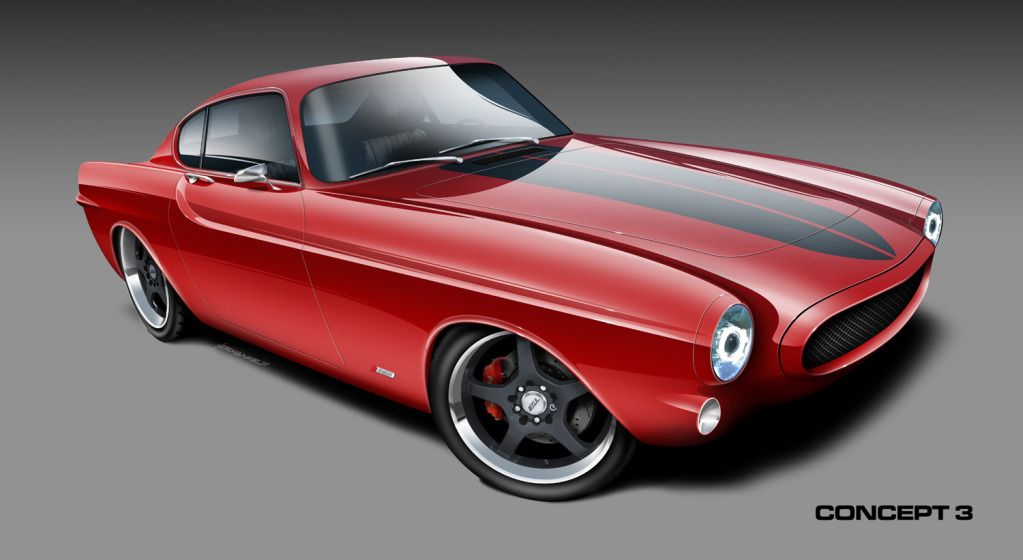
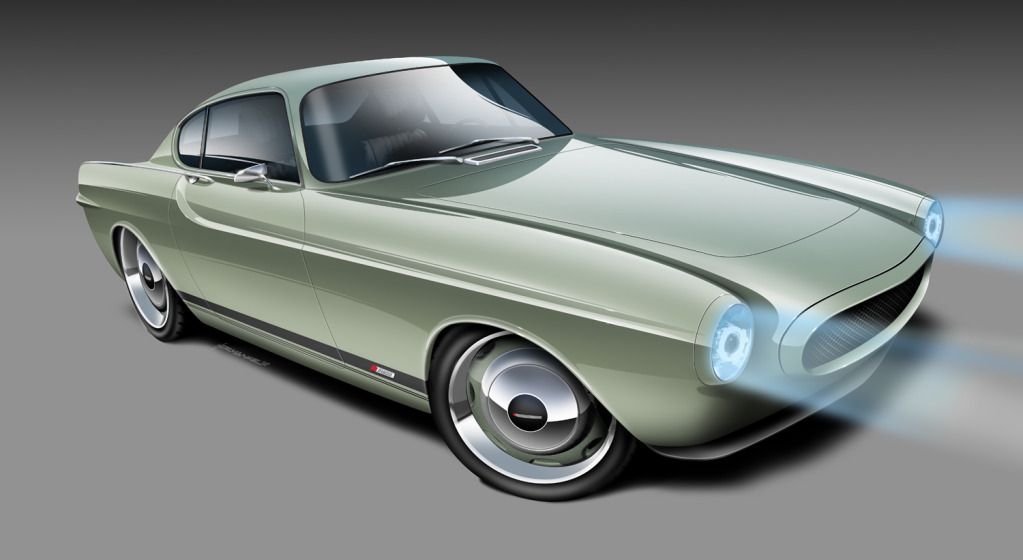
Here are a couple of renditions of the Swedish Ops (Special Builds Division) P1800's, and you can see some subtle mods in them. I will be posting the other upcoming build cars, because these type build threads will act as my customers build updates, so they can see everything that is going on with their car, along with offer some technical information to the public.. I have 3 inhouse customer builds, along with 4 more on the waiting list, and that doesnt include the Swedish Ops shop promotional builds.
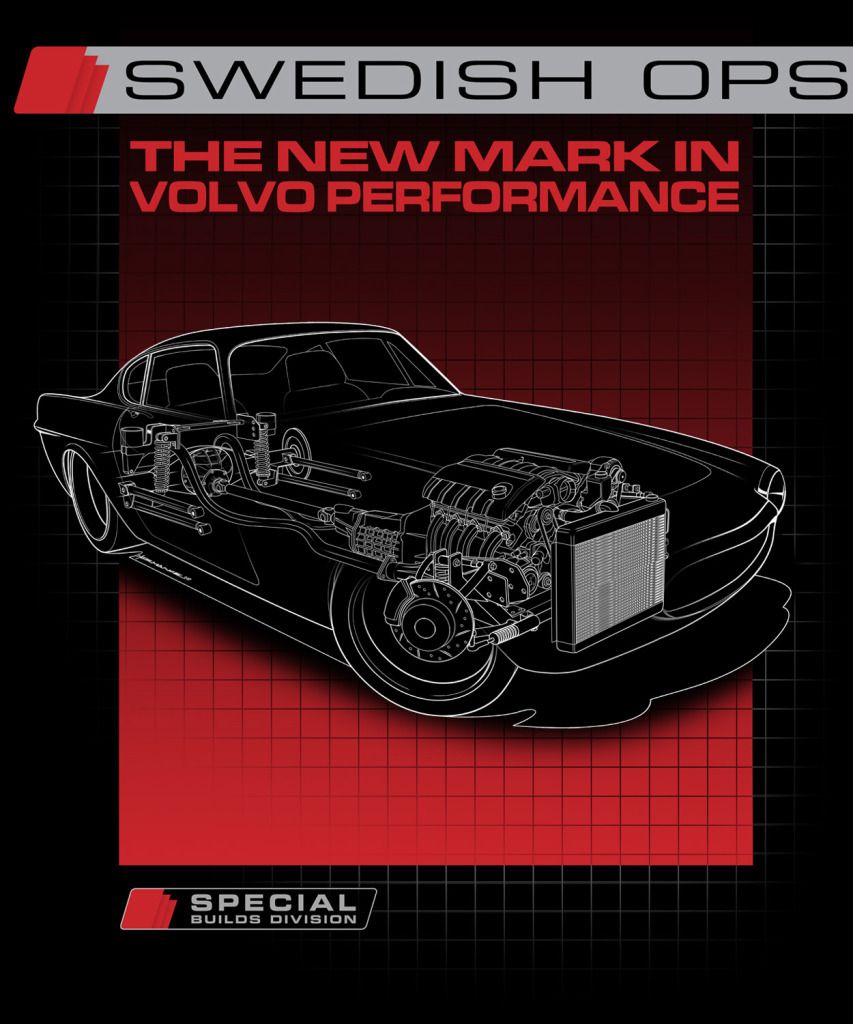
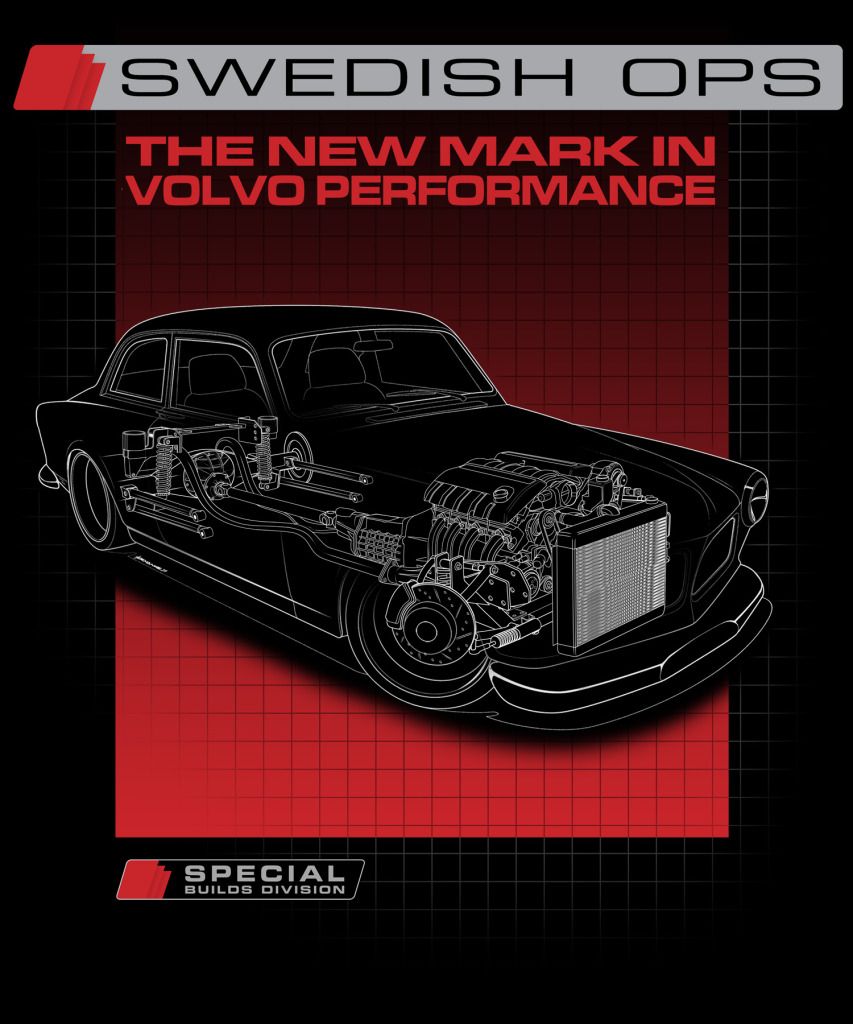
Here are the some of the upcoming Swedish Ops P1800/Amazon T-shirts, they will be coming in the normal T-shirt, along with the old Dickie Style button up automotive shop shirt. I had them done in this line drawing fashion, because it showcases the products that are in these cars, and I like the technical look.. I have never been a big fan of specific build car/motorcycle shirts, like OCC/PJD and other car/motorcycle builders/ because they seem a bit hokey and gimicky.
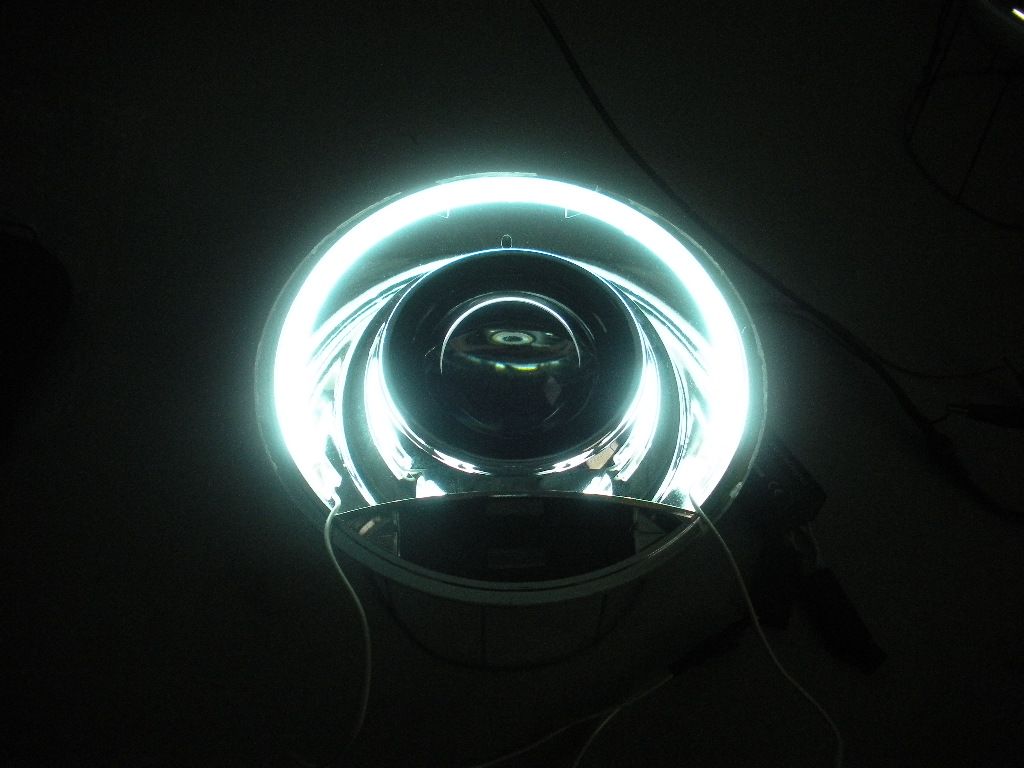
Here is a little bit more of the headlight building process, and you can see where the turn/park lamp will be placed, along with the new Halo placement..
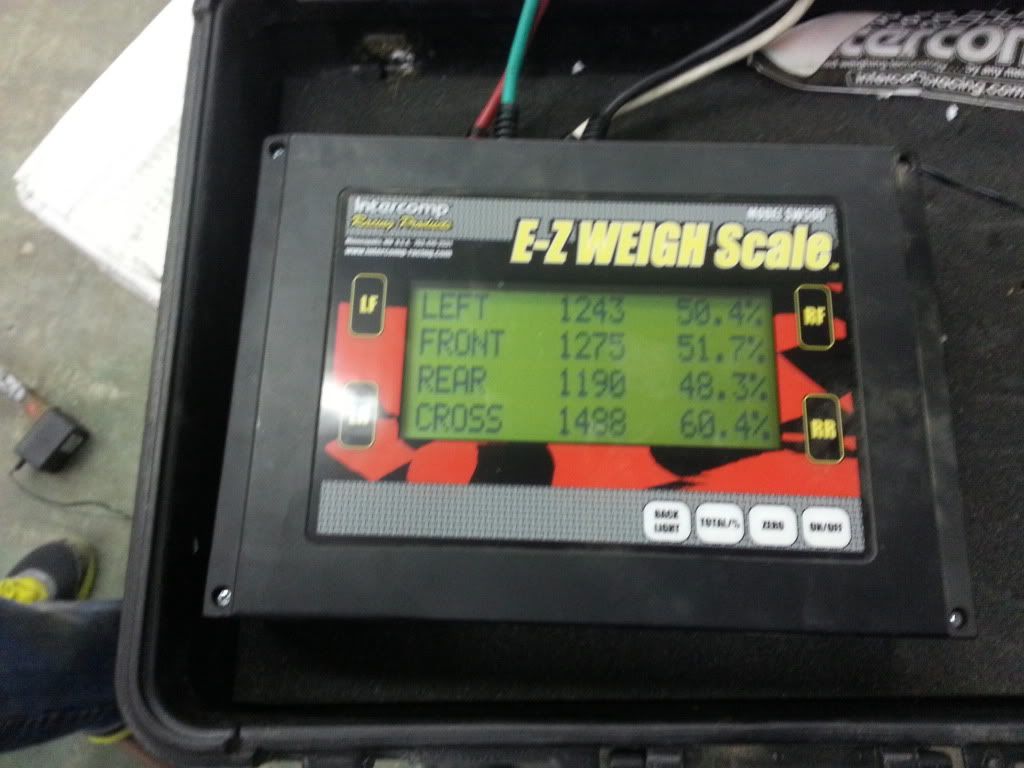
Well I have some preliminary weight figures for Volvo X, and hopefully that answers some of the questions some have had about the weight affect of the V8 and extra performance components. As a comparison to stock, I also have some figures from a 39,000 mile original car, so we should get a great preliminary indication here.. I must say that I am very pleased with the outcome so far, I think this car is going to hit the mark I was shooting for..
With these weight figures, I have an all original car first, and it is as stock as you can get, so this is a great comparison car.. Volvo X has all its running gear in the car, simulated Fuel weight, seats, complete suspension, Steering Column, Guages, bumpers, ect.. It is really only missing the basic wiring, windshield/back glass, insulation and carpet, so we should be in 200-300 pound difference margin for the added accessories. We are figuring that, by the time we add the missing weight of the missing interior/insulation components, Windshield/Back Glass, HVAC to the central part of the car, that will actually get the Distribution ratio even closer to 50/50
Original Car ________________________________Volvo X
Total Weight 2386lb_____________________________Total Weight 2465lb
Front Weight 1270lb________________________Front Weight 1275lb
Rear Weight 1116lb________________________Rear Weight 1190lb
Weight Distribution___________________________Weight Distribution
Front 53.2% Rear 46.8%_________________________Front 51.7% Rear 48.3%
I had a problem getting Volvo X totally level, and that is why you will see the variation in the cross weight, and that is cause by the floor affecting the contact points on the scales.. It was way to cold to switch the cars around, but I will definitely do that on the final weigh in..
Something to consider in all of these figures, is that I have added additional weight in areas like the wheels and tires, along with some heavy duty parts like the rear end assembly and other items, so I think a major achievement was made here.. Keep in mind we are at 540 horsepower, with a V8 and heavy duty trans/Rear end assembly.. Also I am running 14in Front and 13in Rear Brake assemblies, ect, so we are gaining alot, with minimal over all weight difference. On the next weigh in, I will probalby put some original style wheels on the car, along with a few other less bulky things, and I think we will find that there really isnt any notable overall gain in suspension and drivetrain.
You should add the power to weight ratio for the original and project x. To bad you cant quantify the other added features/benifits to show that comparison. Its amazing the amount of improvements for the little weight you are gaining.
You should add the power to weight ratio for the original and project x. To bad you cant quantify the other added features/benifits to show that comparison. Its amazing the amount of improvements for the little weight you are gaining.
♥ Raf
I think the comparison Video's will quantify those benefits just fine.. LOL
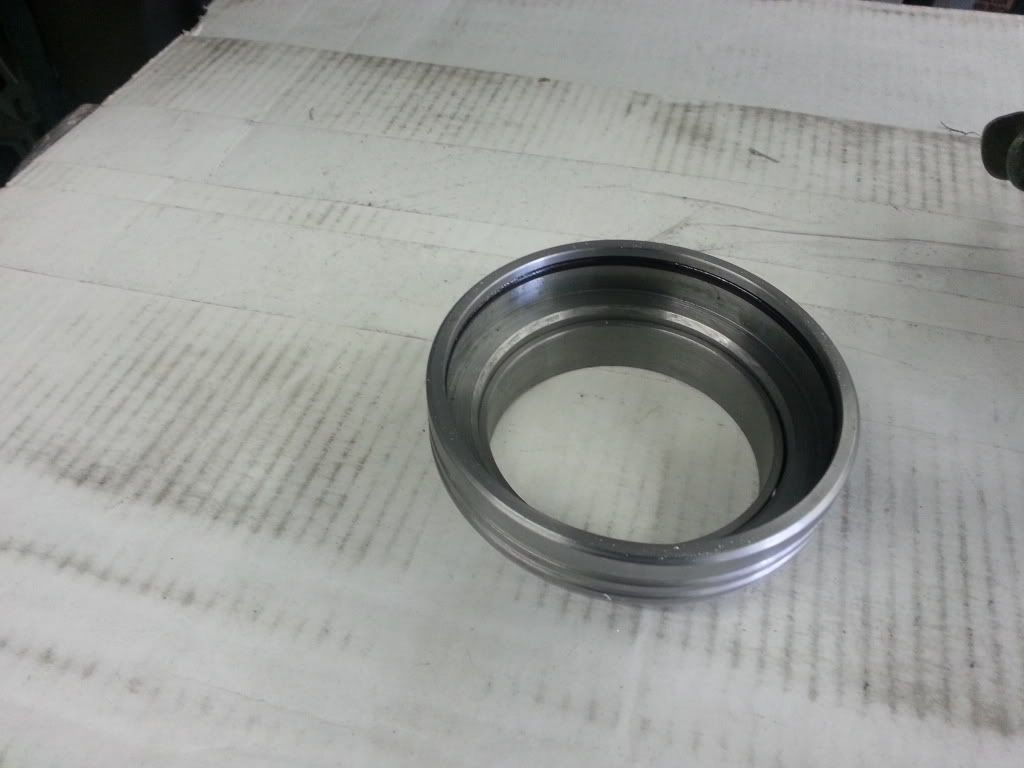
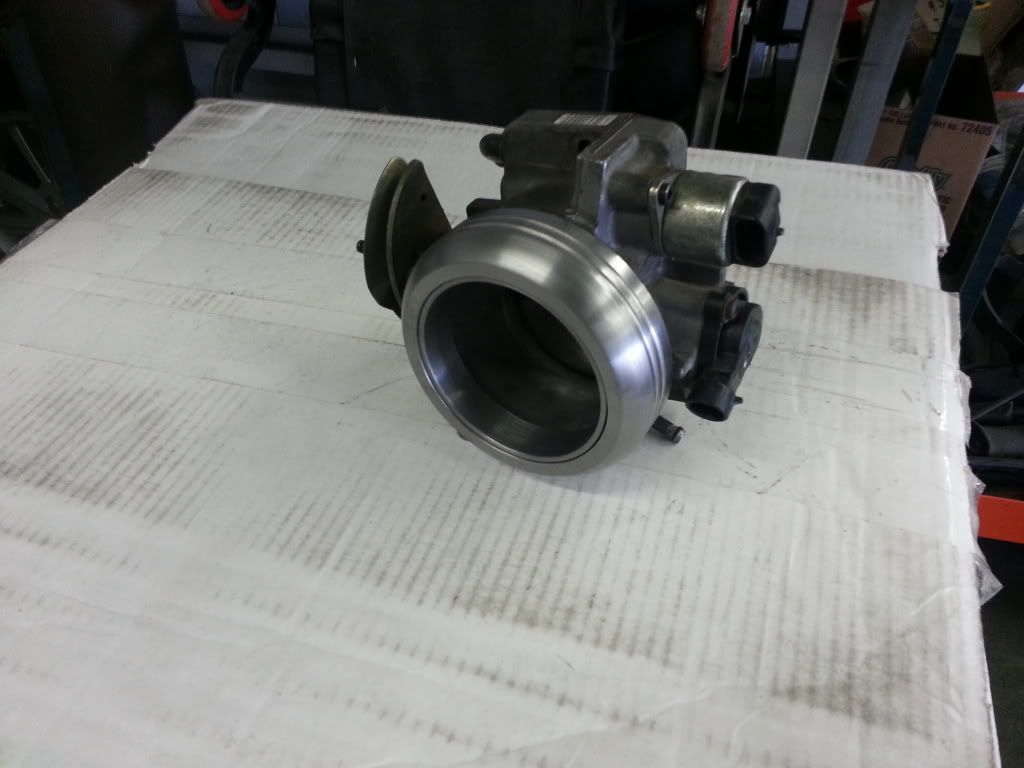
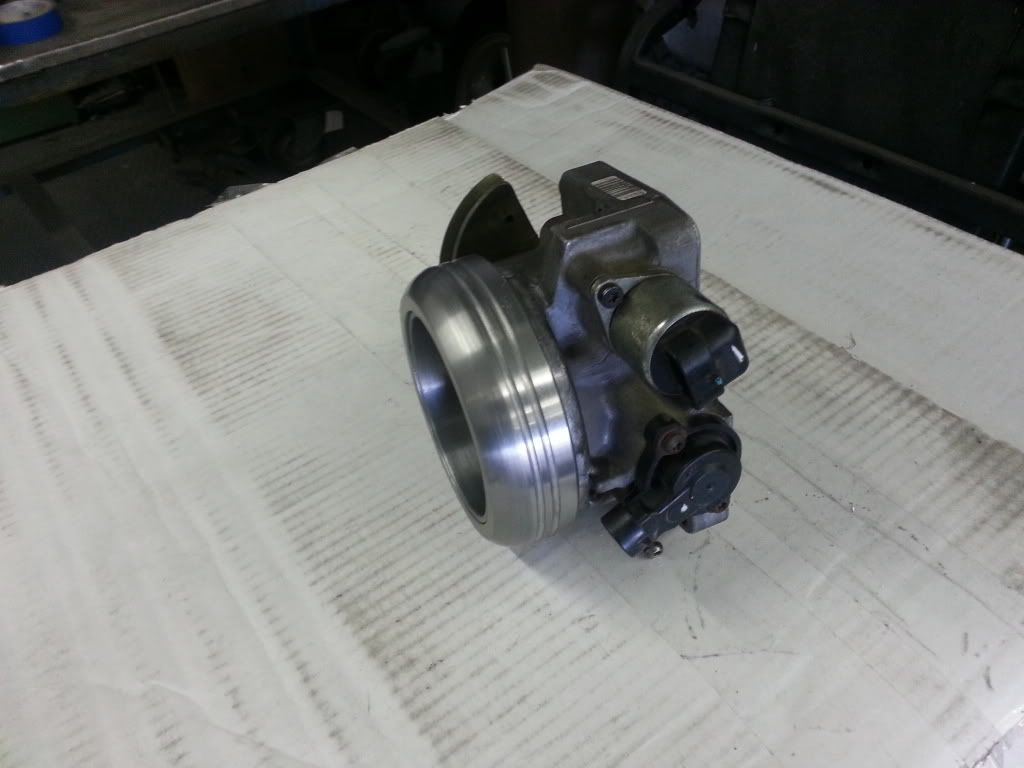
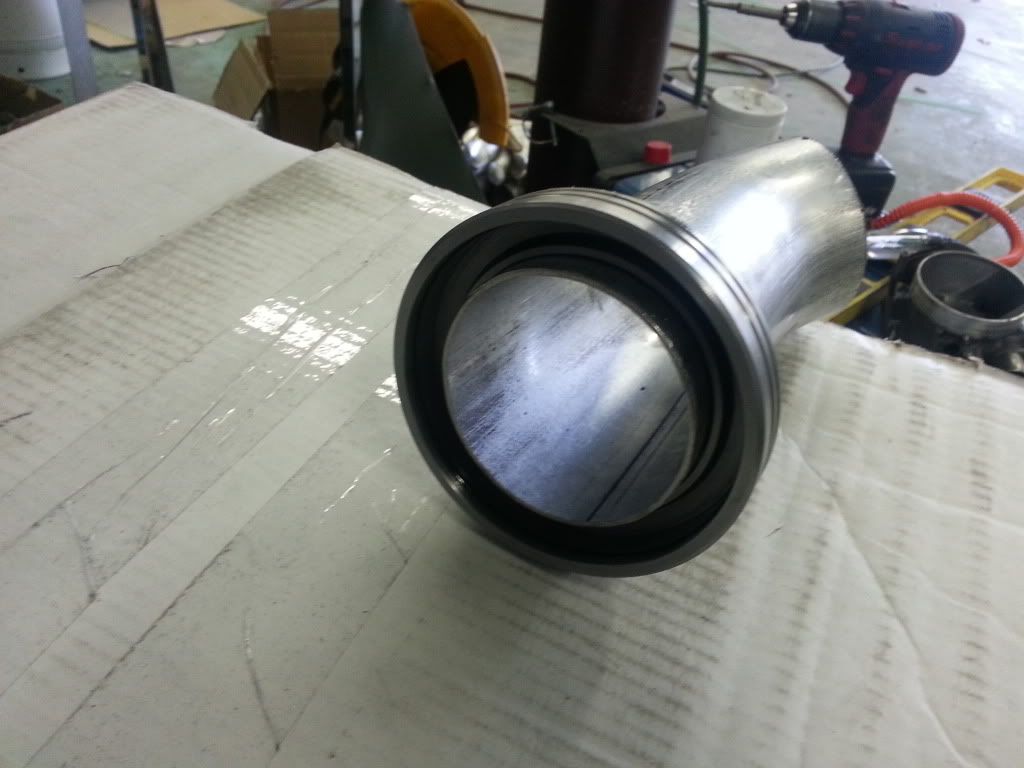
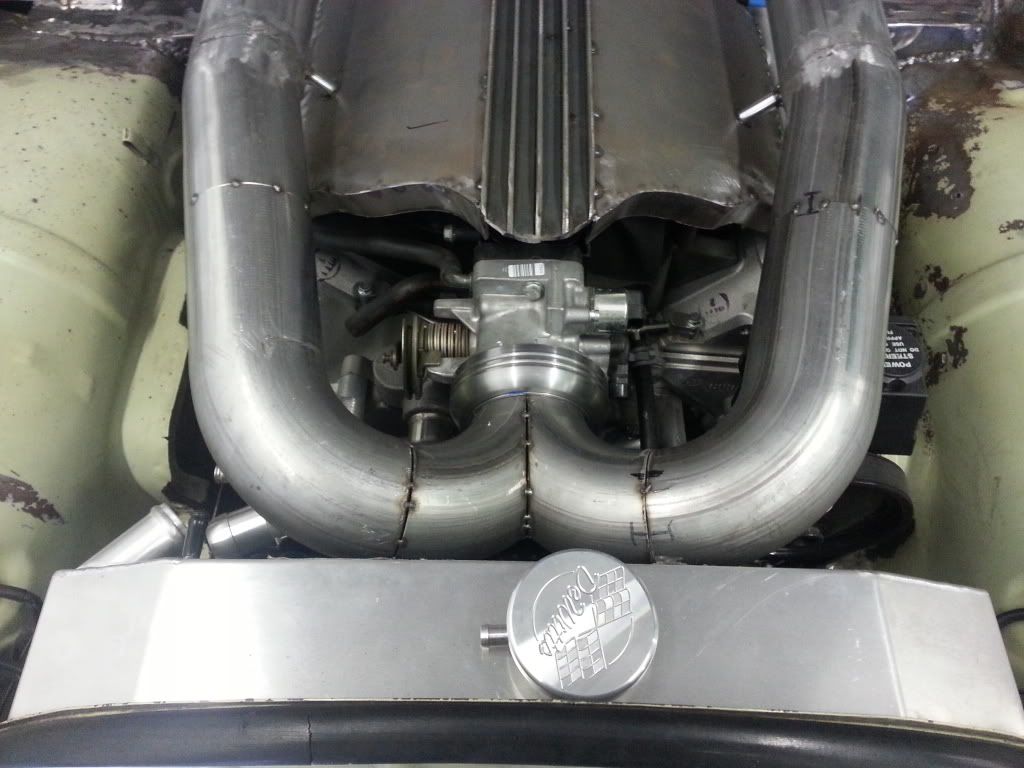
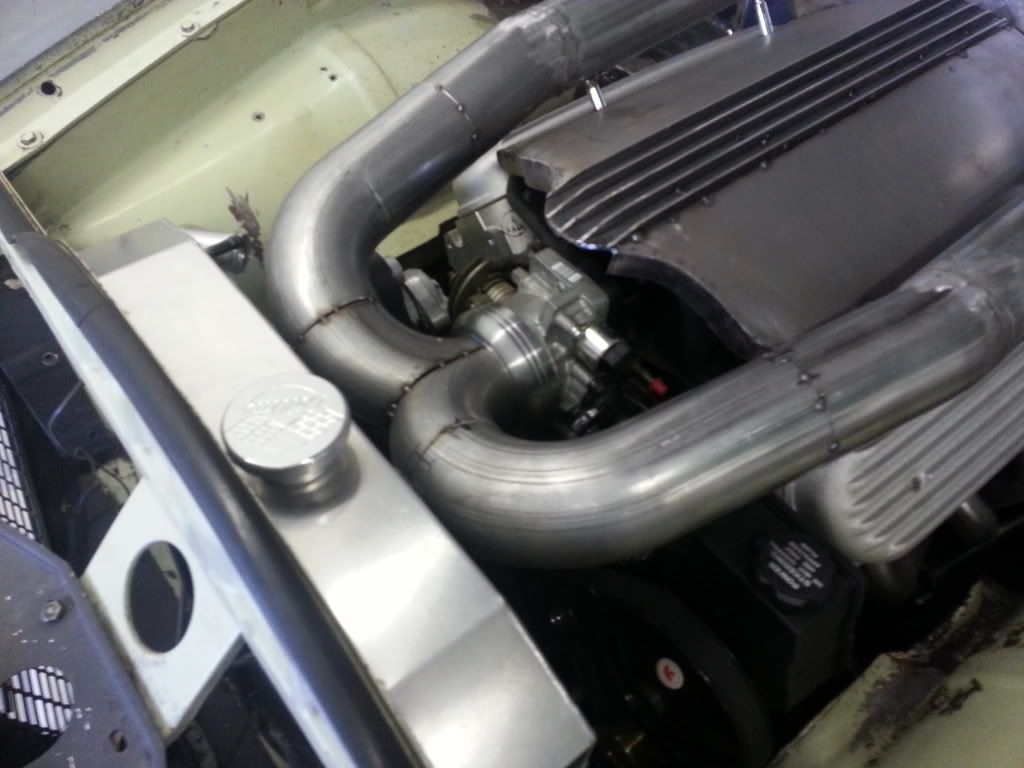
Here are some pics of what I have come up with for the intake/throttle body attachement, because I dont want the typical rubber boot and clamps you see. This collar welds onto the intake tube, and has a machine fit for tight tolerance, along with an O-Ring gasket setup. All the welding will be done from the inside, because I didnt want to have to worry about finish grinding on the curves, so finish product will look just as clean as it appears in these pics. This particular intake will be solidly mounted to the motor, so the O-ring should work out great, and I am sure this style collar could be used on other intake runner setups.. Hopefully it will be little items like this, that really make the build of this car planned out, rather than off the Ebay page or off the shelf.
For the other version of fabbed tube intakes, this collar could still be used for a free standing style system that doesnt have attachment points on the body of the car, because the tubes would be supported with hidden brackets to the motor.. I just really wanted a clean look, and couldnt find anything else out there for a factory style throttle body, so I had to make something for atleast my car.. These can be made in Steel, Stainless, Aluminum, Plastic, ect, ect, so I suppose they could be made to work with what ever material tubes you wanted to run.. I didnt make these to sell, but if anyone would like some, I can ask my machine guy to pop some out, that way he get a bit more out of his cnc programming.. LOL
Well Volvo X is leaving for body work on Monday, which will be about 3 weeks of dedicated body shop time, and I will have updates of the process.. This car is not be done as a routisserie build, because it is going to be used and abused, but it will still be a very nice quality.. We are taking the extra time to weld up all the edges and gaps, so this car will be straight and precise looking..
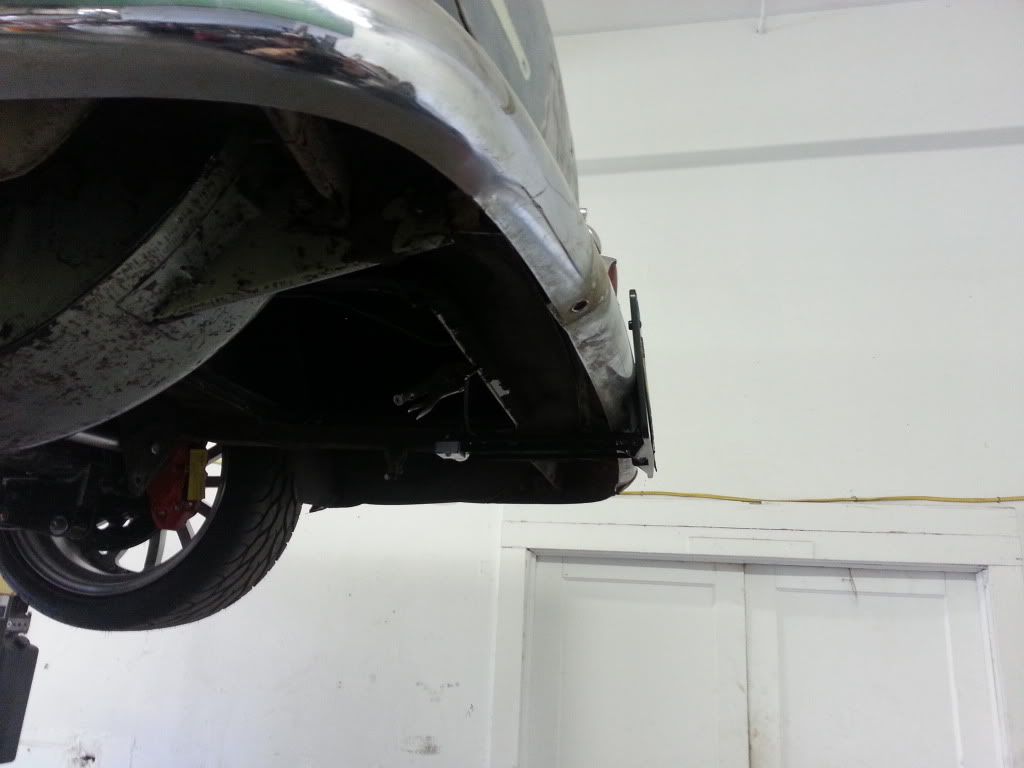
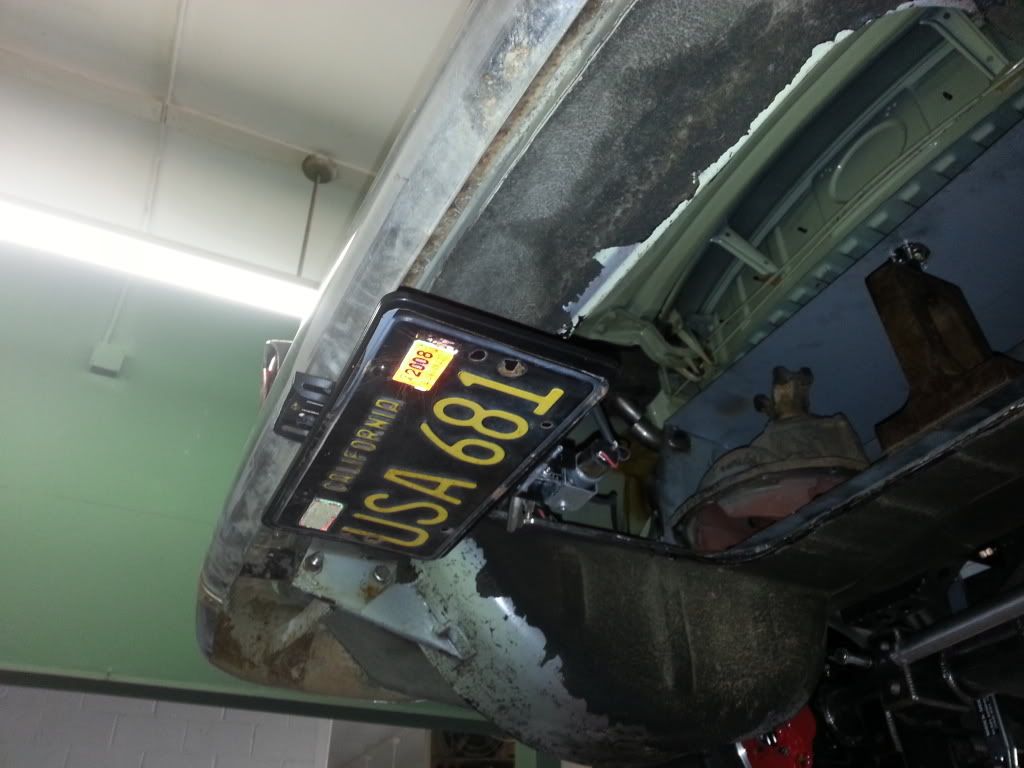
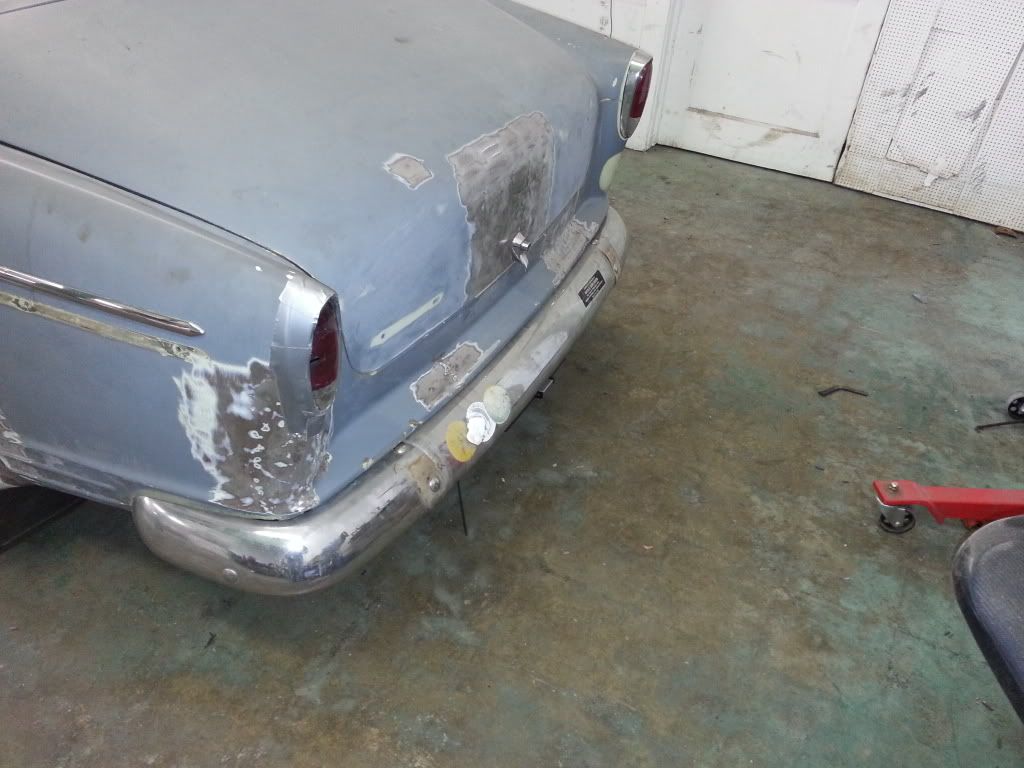
I have locked on a solution to my rear license plate bulk issue, and I think this is going to work out just fine, along with look very minimal and clean. This set up is normally used for a front plate application, and it is on a Key Fob remote operation set up, but I am wiring it up to a timer relay for ignition Off/On operation. By doing that, I take the Key Fob operation out of the equation, along with the chance of forgetting to put it up or down. Here is the basic set up, and it is actually a very easy system.. I wanted to have it drop straight down, and be hidden in the body work, but there really wasnt any good way to do it with the body space I had available..
In order to get rid of the small reciever hitch look of the bracket below the bumper, I am thinking that all I will have to do is paint it a fairly close grey color that will match the new finished brushed/satin bumper.. Worst case scenario would be to have the metal track also put through the plating process, and that should help hide the overall appearance.
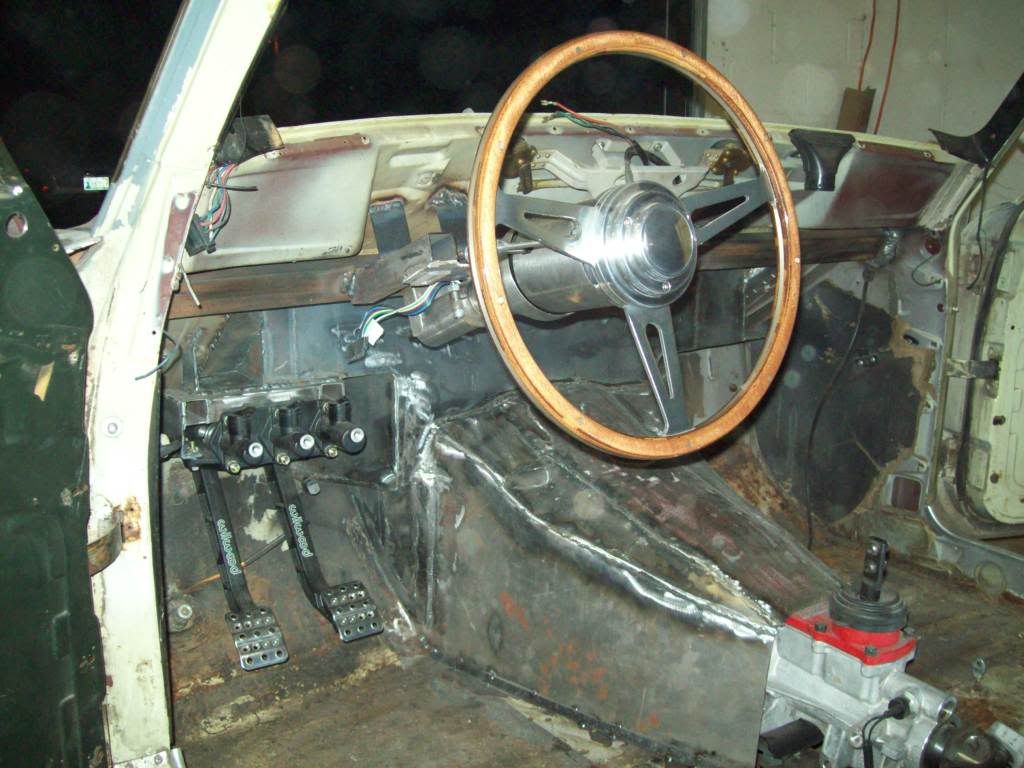
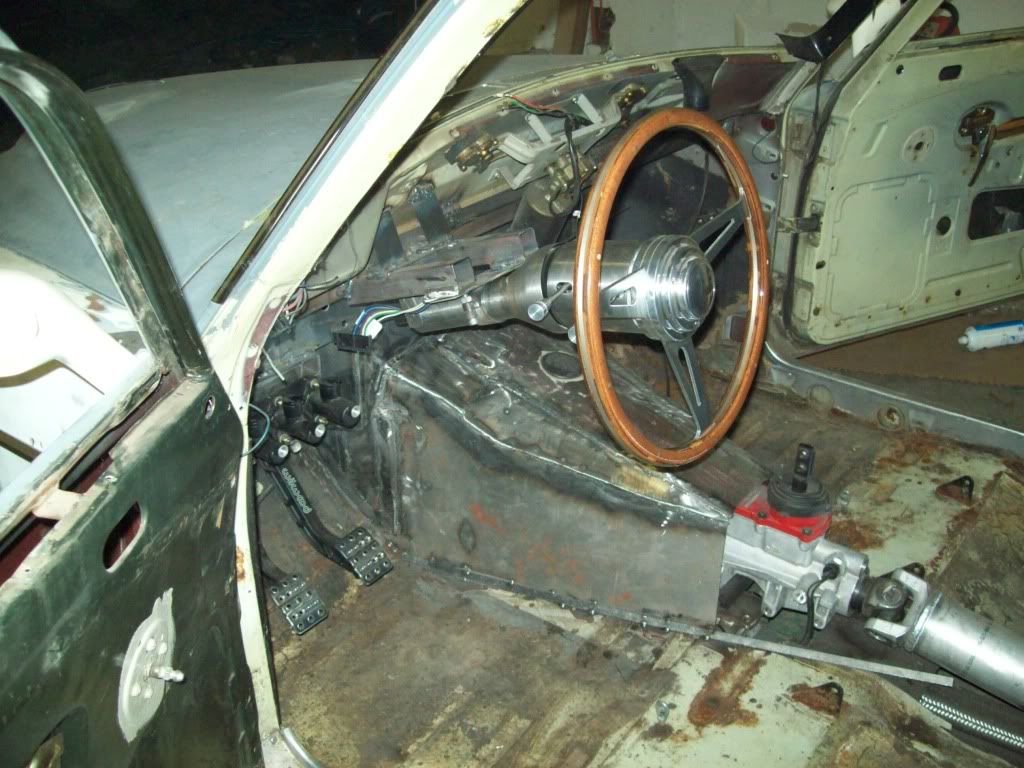
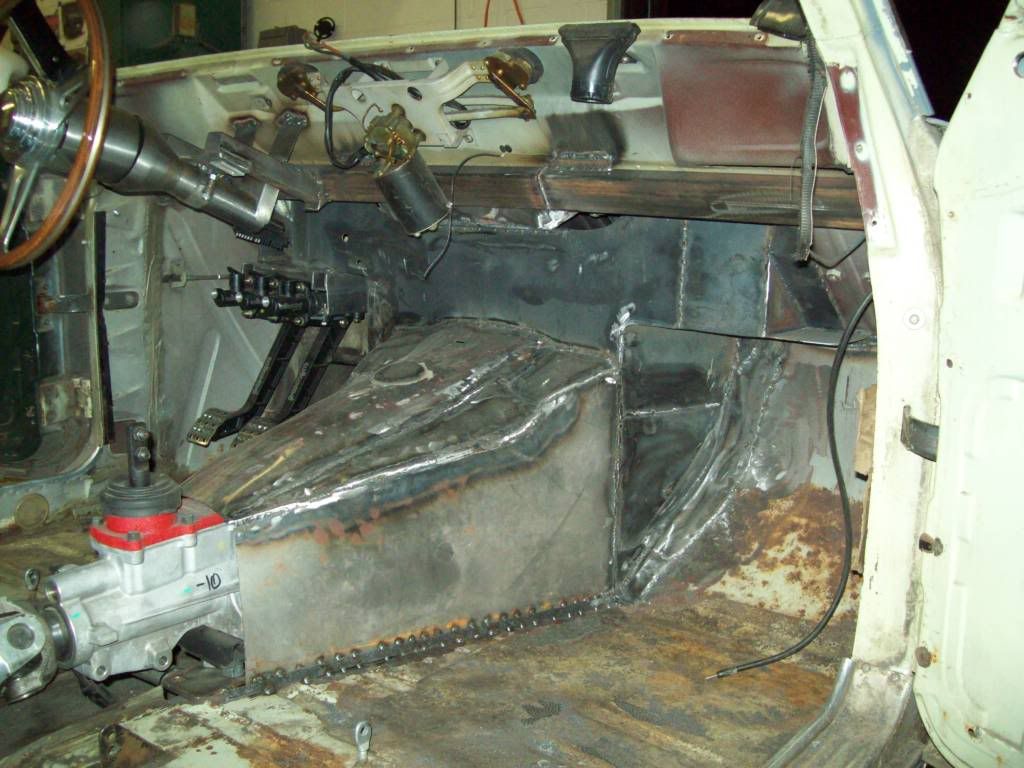
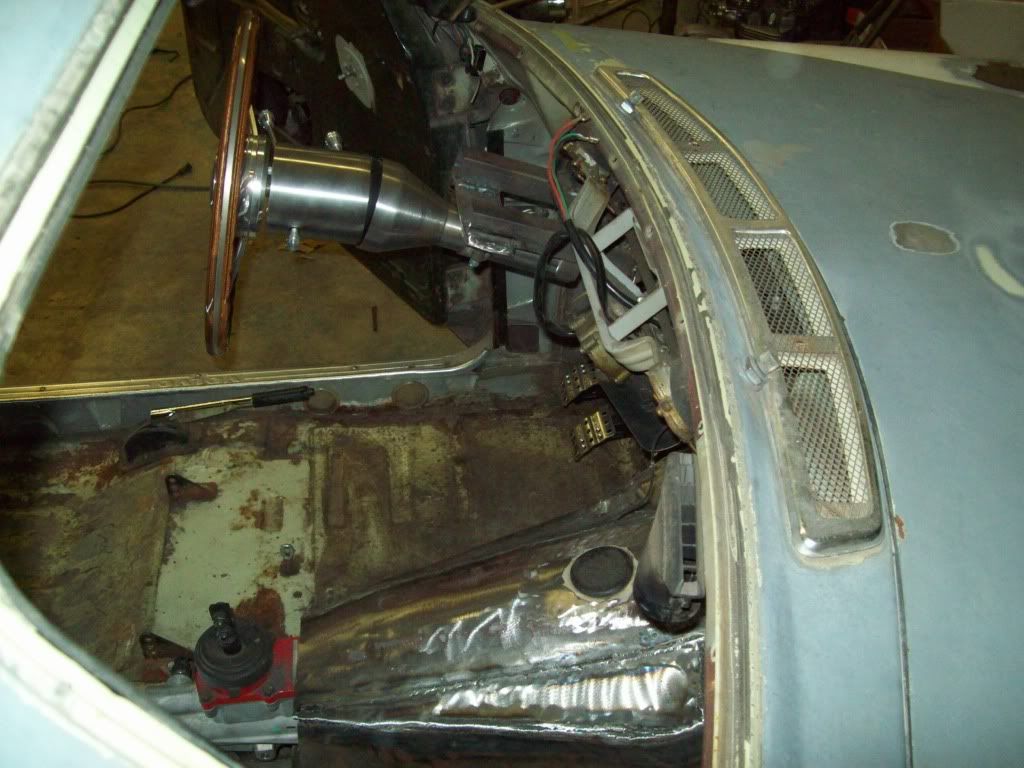
Here are some pictures of the firewall set up from the inside.. It really could use just a bit more grinding, but there really isnt a point to do more, because it will have seam sealer and dynamat covering it all.. I used a heavier guage steel plate for the firewall metal, and with all the compound angles, it shouldnt have really needed the crossbar I added across the top of the firewall. That bar will add support, but is really there just to support the new steering column.. The Wilwood pedal assembly works out great, and the whole unit just drops out with four bolts.
I probably made things just a bit more complicated by not just rolling a piece of steel to make the trans tunnel, but I didnt want that typical street rod trans tunnel.. I actually used some of the original Amazon trans tunnel, and piece things together for a but more contour. The trans tunnel is really just a bit taller, and not too much wider at all, so it has a nice pedal position, that has plenty of room for work boots to make the pedal function.
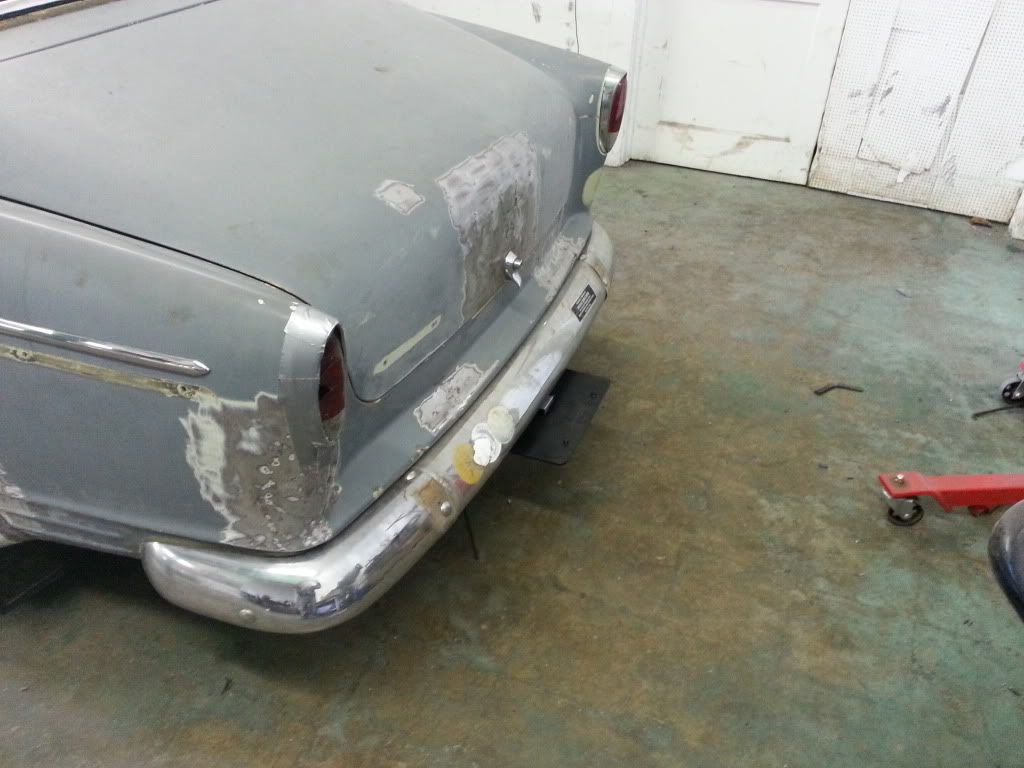
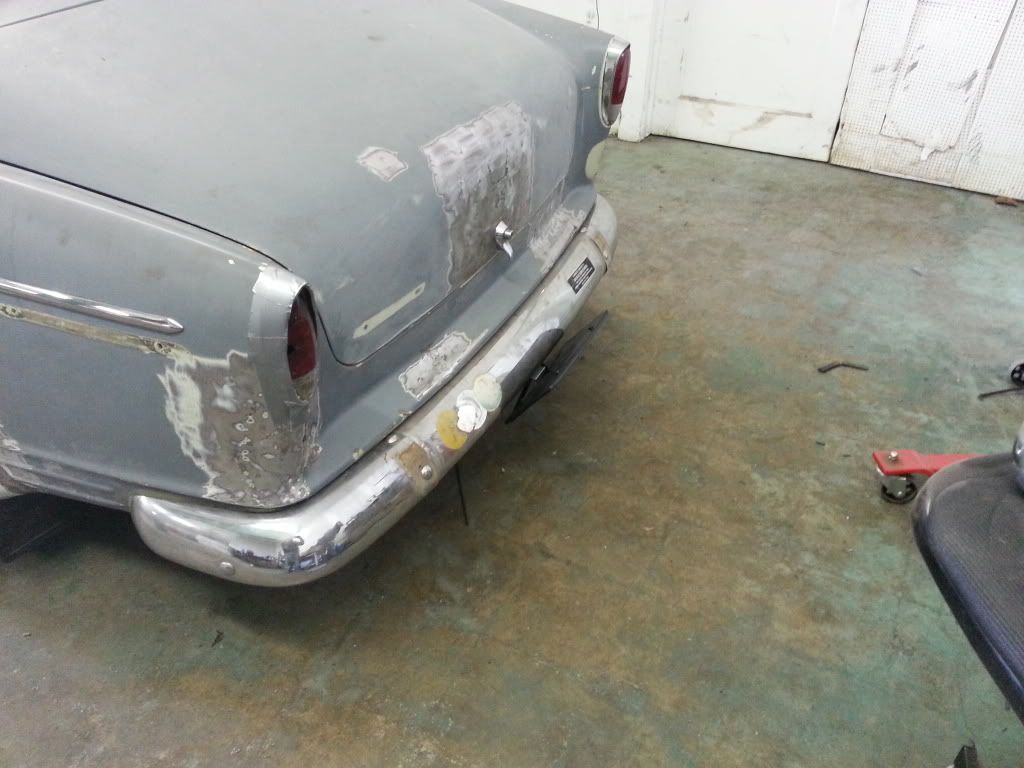
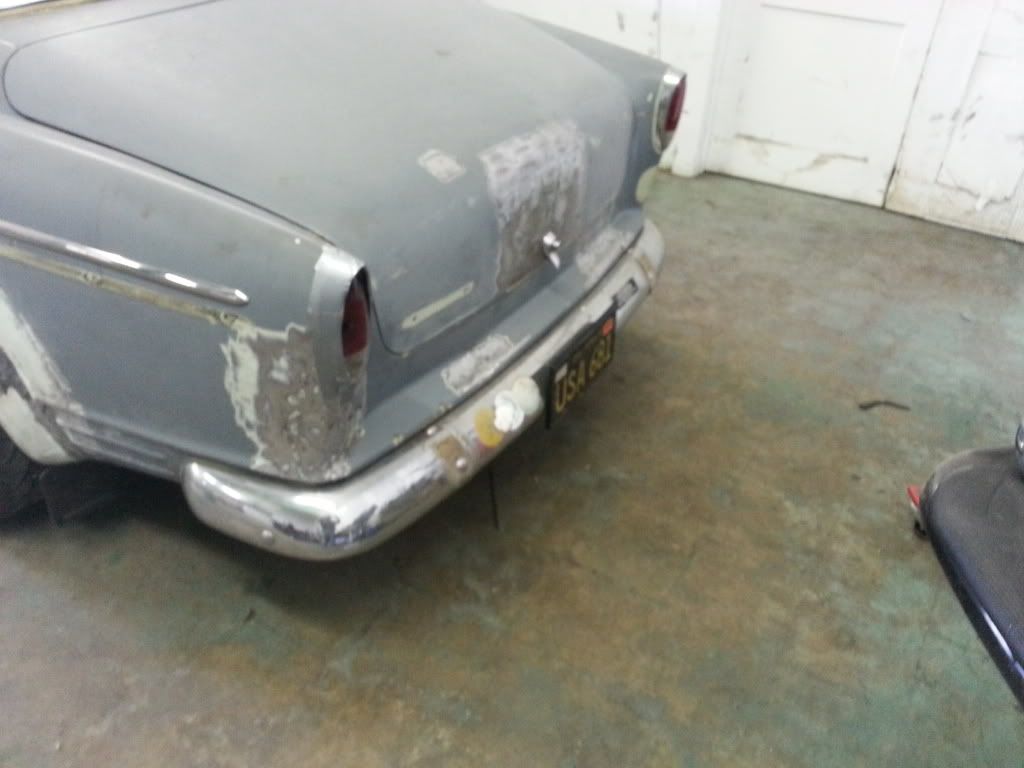
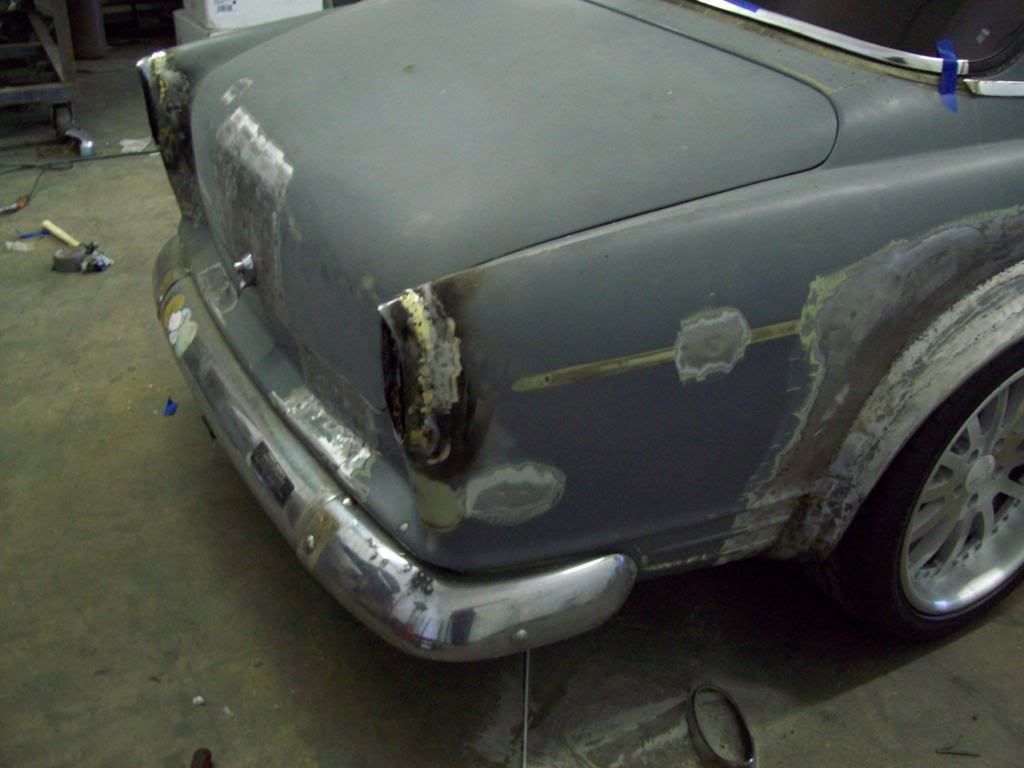
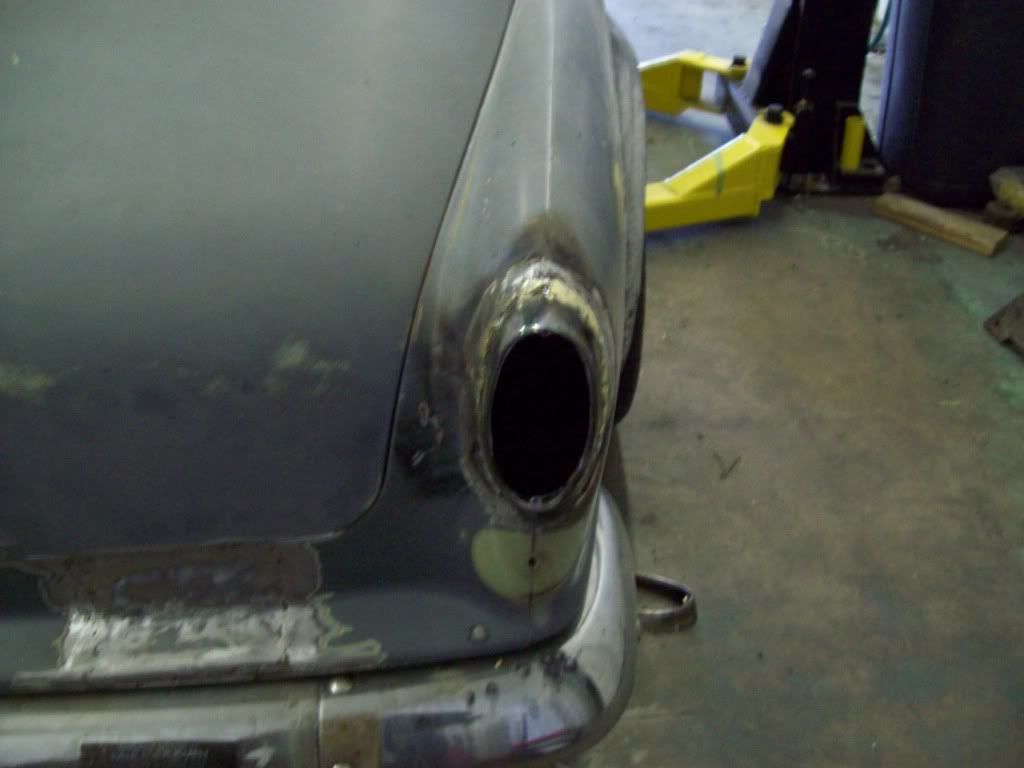
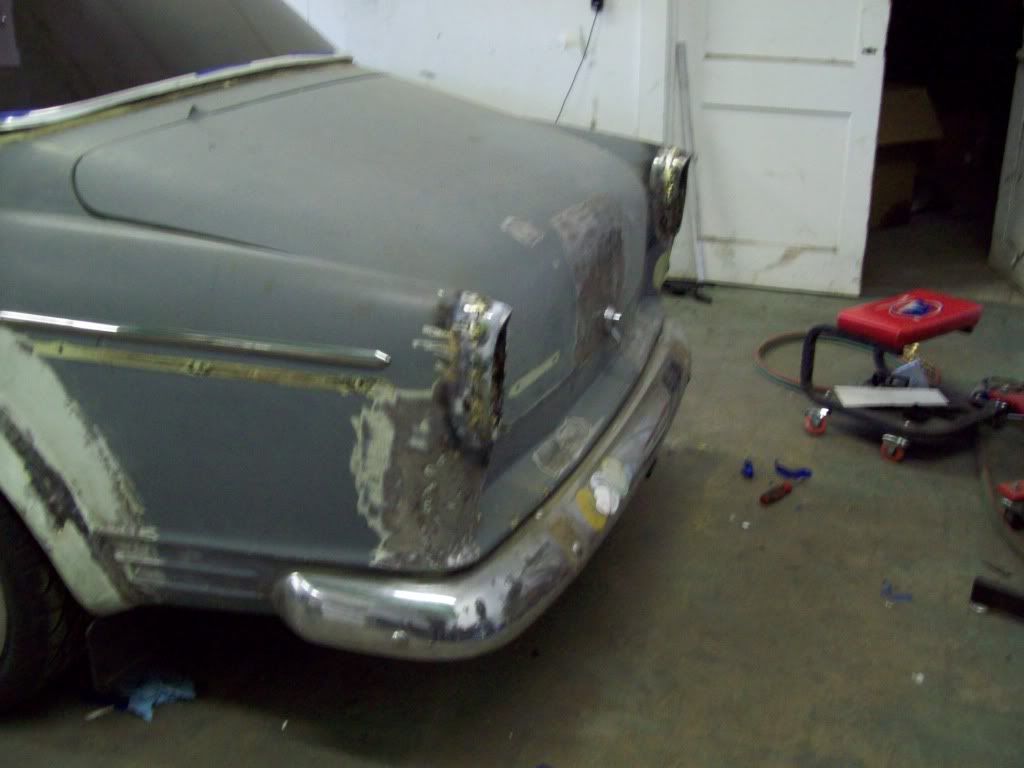
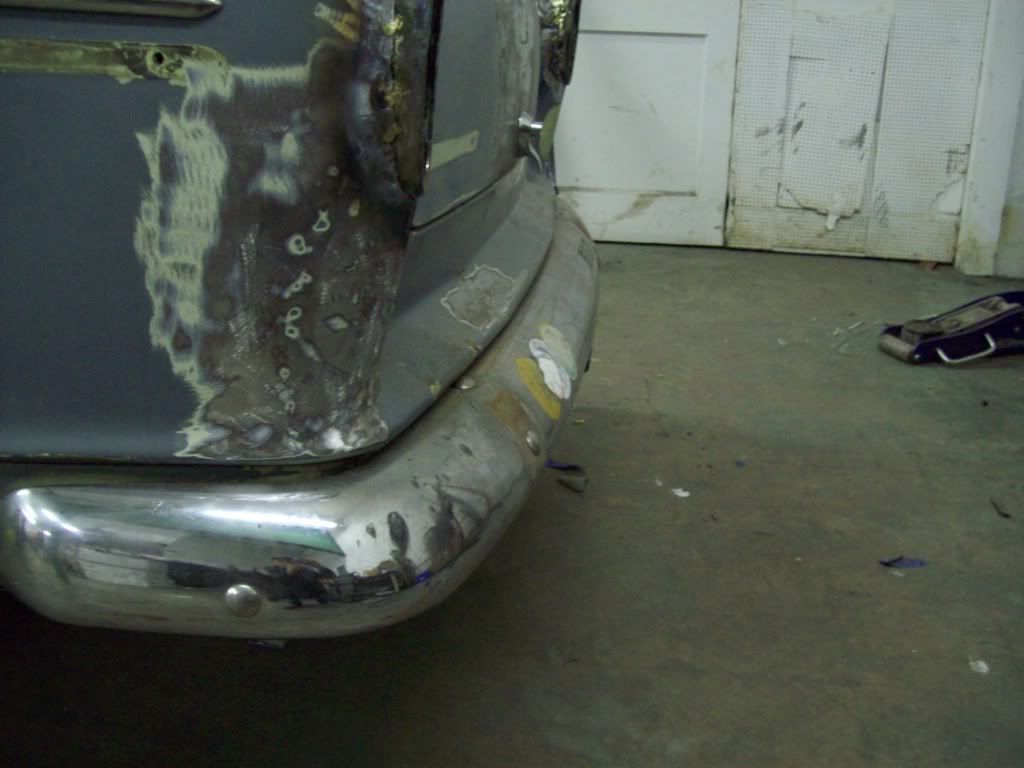
I had worked on blending the tail light bezels into the body, because I really dont like the bulky gasket seamed look, and think it will really make a clean looking quarter panel. I have figured out how to trim the tail light lenses so I can mount them from the inside, along with how to mount the light panel, so there really wasnt any reason not to do it.
I will say that it was a bit more difficult than I had thought, because the original bezels are thin brass, so brazing was just a bit tricky.. I messed up two bezels, before I figured out the best way to do it.. You can braze Brass to Steel with a Brass/Bronze rod and plenty of brazing flux, but with the bezels being so thin, you really need a thinner brazing rod than I had on hand, so heat was my enemy here. After the thin bezels were brazed to the quarters, they really got very sturdy/rigid, and after I apply a panel bond epoxy to the inside of them, I really dont see any issue of them being weak at all.
After the bezels were tacked in a few spots on the outside, I found it was better to braze by reaching inside the bezel, and sweating the brass/bronze into the seam from the inside out. Here are some pictures, when brazing with the brass/bronze and flux things dont look too clean, until the final grinding is done..
 Tweet
Tweet


 IMG_20140729_210811 by MGRAND3, on Flickr
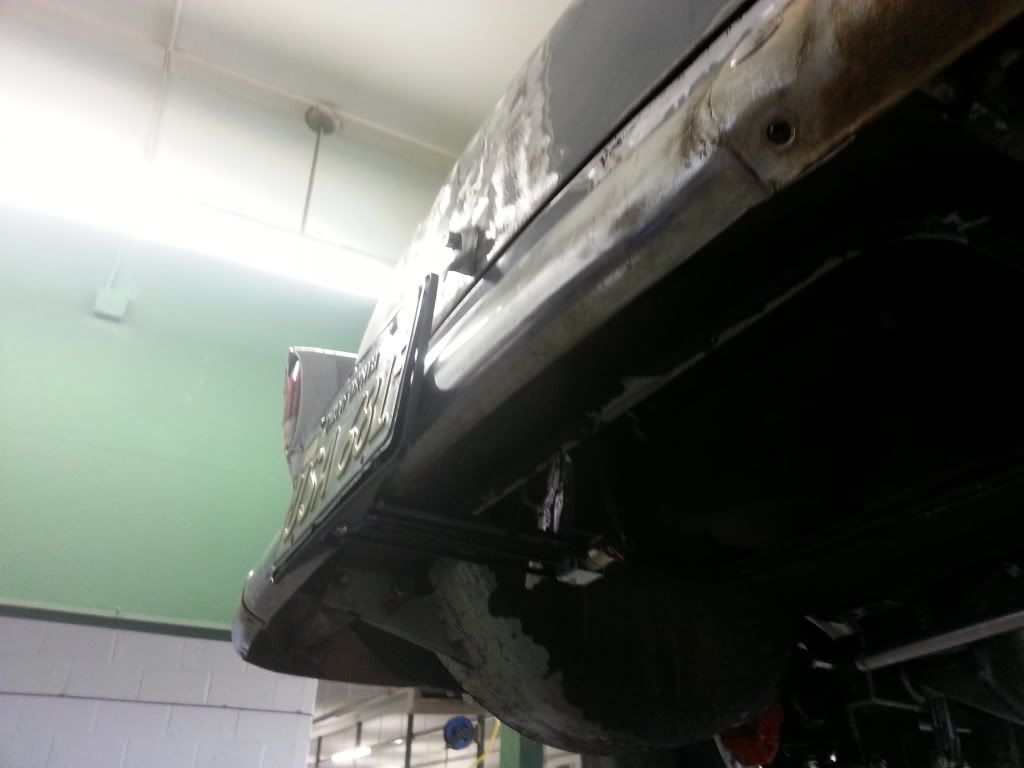


Comment