Announcement

Collapse
No announcement yet.

1991 Mini - Project Trig

Collapse
X
 
  • Filter
  • Time
  • Show
Clear All
new posts

  • An update!? Surely not! :lol:

    Getting used to having evenings free so thought I might as well use them to my advantage!

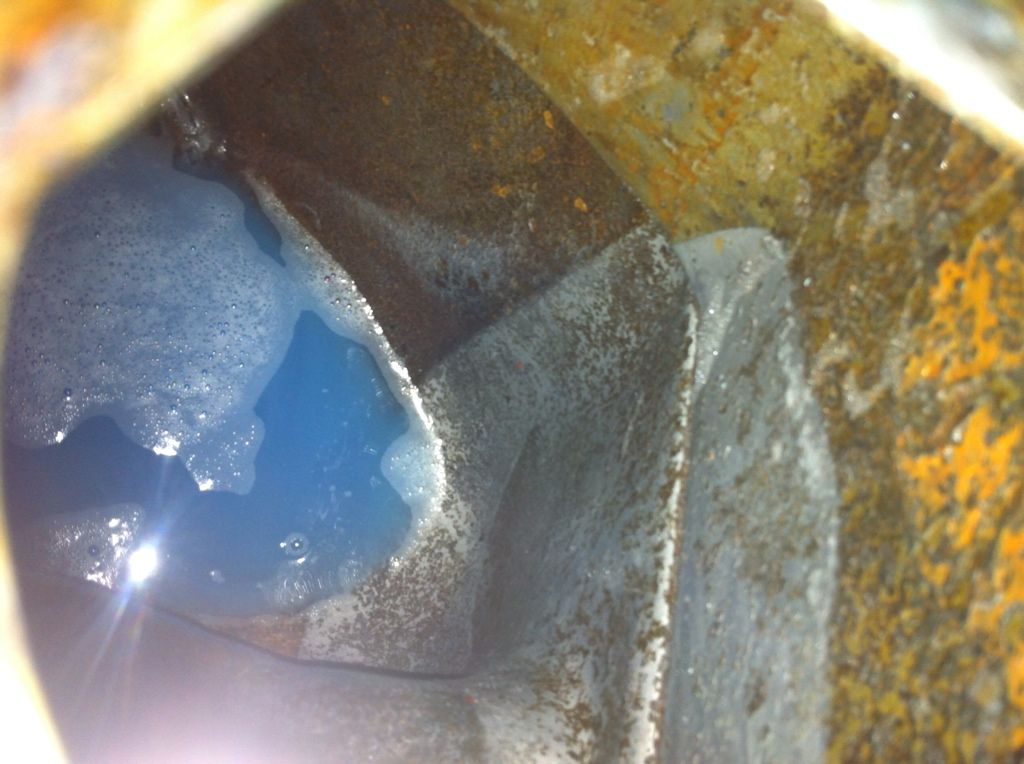
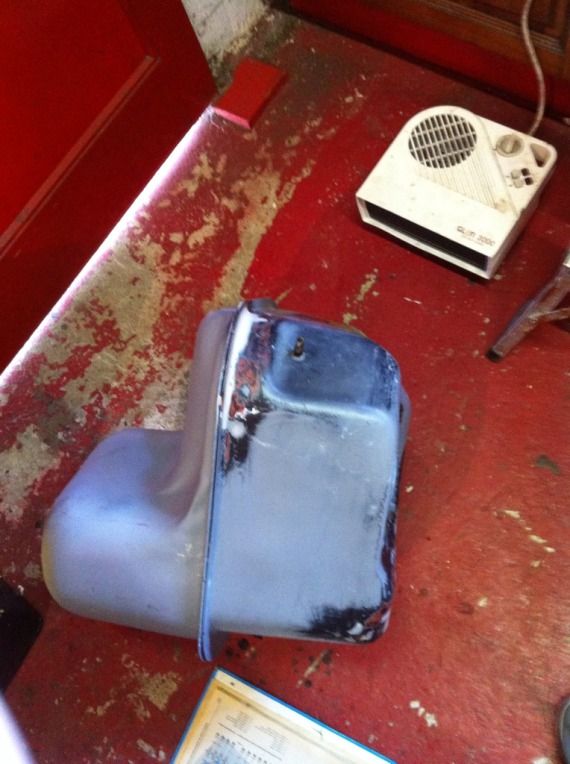
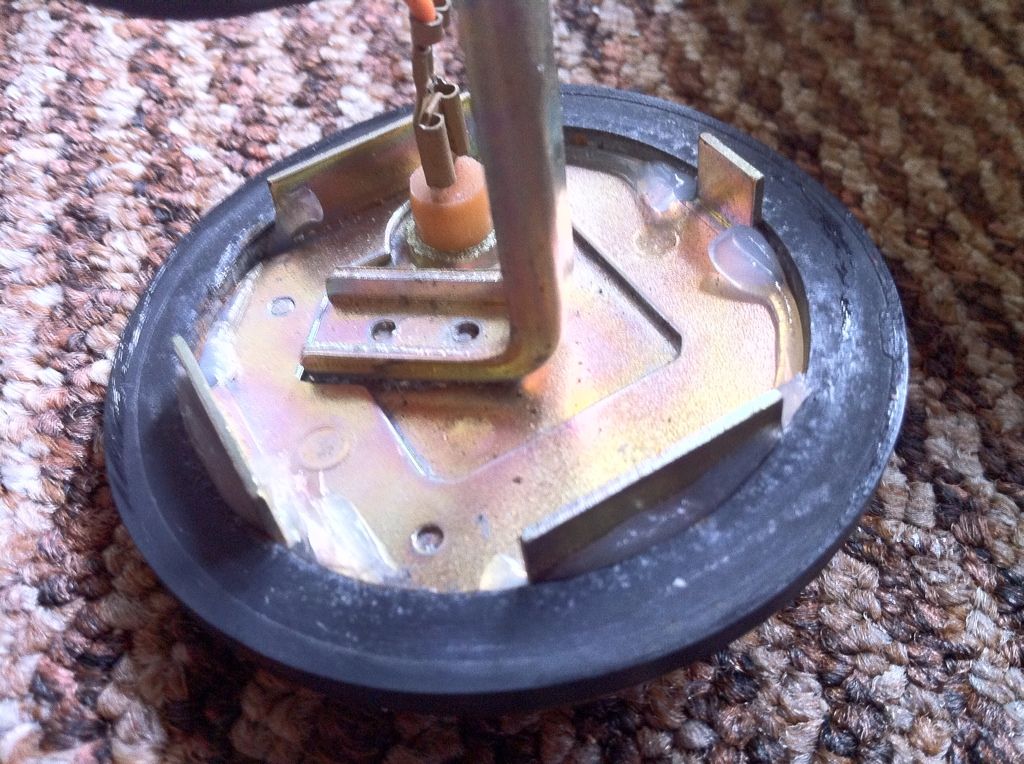
    Fuel tank is now cleaned and prepped for the sealer to go in over the next couple of days. Just need to let it dry out for a while until its bone dry for the sealer to work correctly.

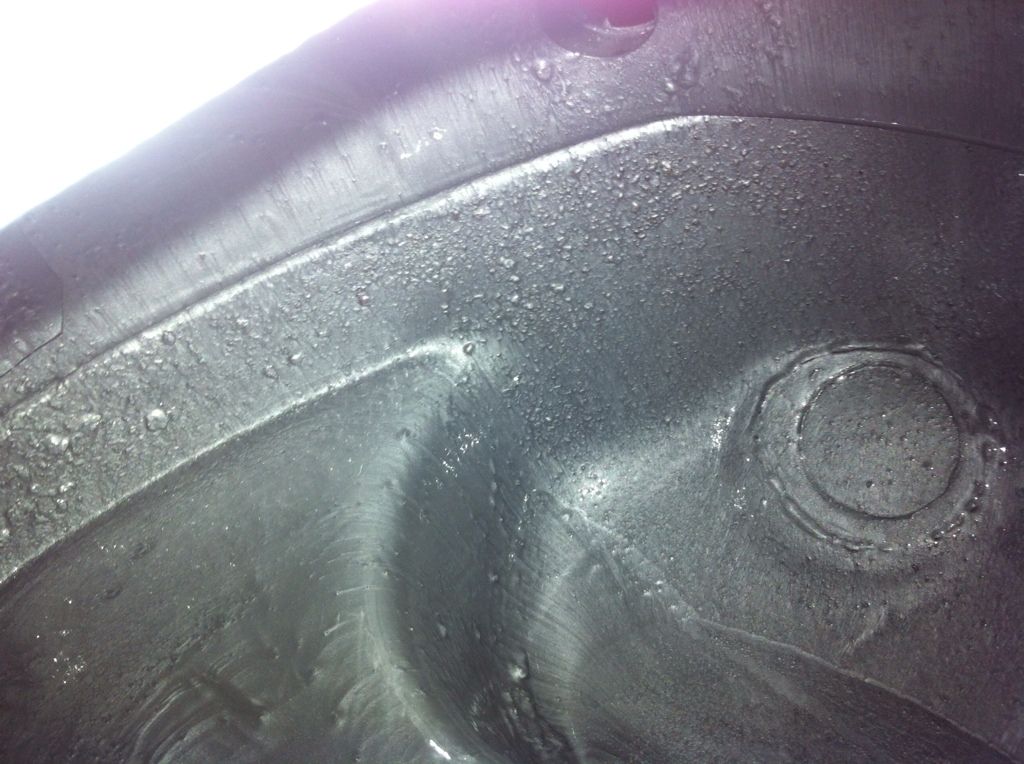
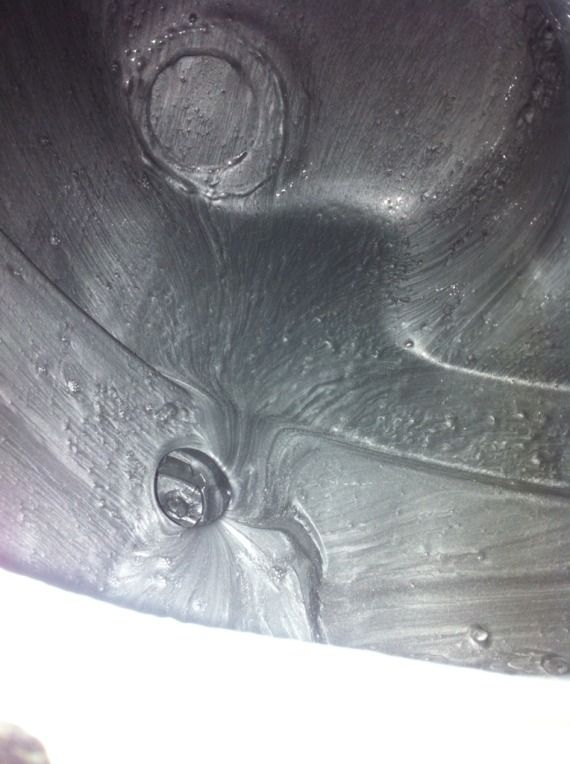
    Here's how effective it is......a clear tide mark where it sat and the whole tank now looks like this. Brilliant product and reusable too!


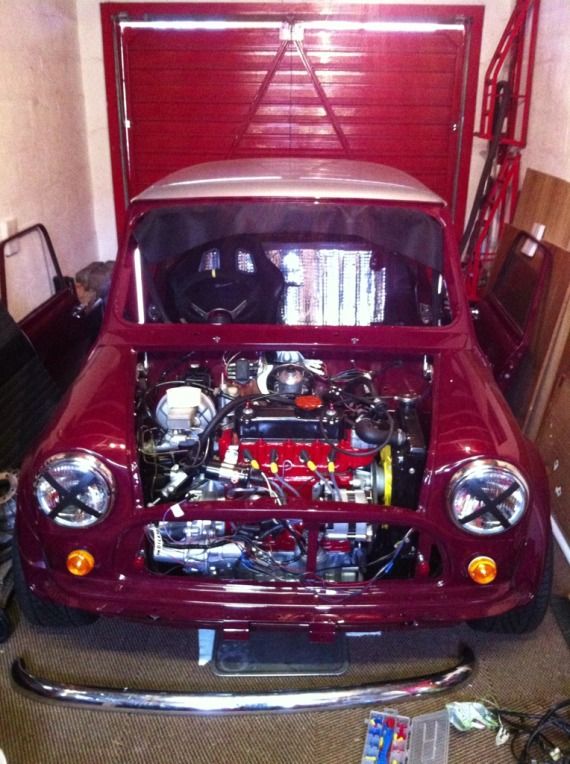
    Then as I'm nearing the first start up in 3yrs I thought it would be best to get some oil in it. Halfords 20w50 designed for the Mini.


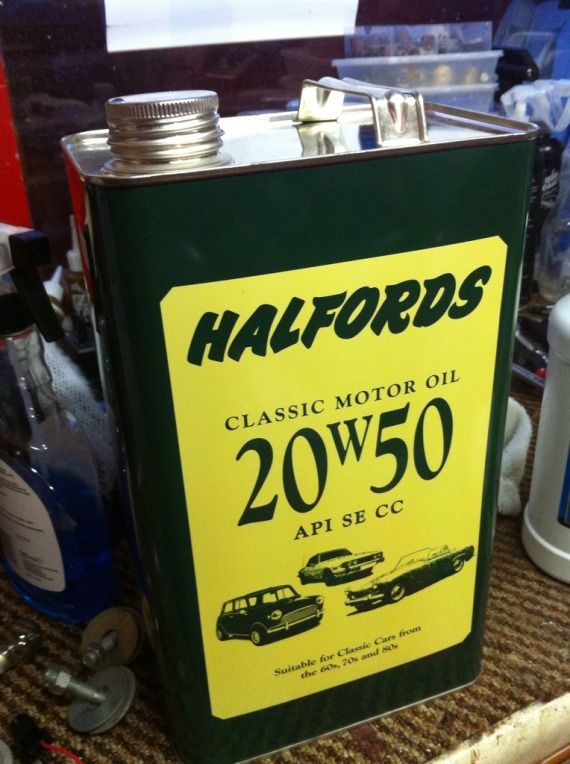
    old school (its green!!!) and given its grade, very thick. It's got to lubricate the engine and box as they aren't separate units on A series engines.


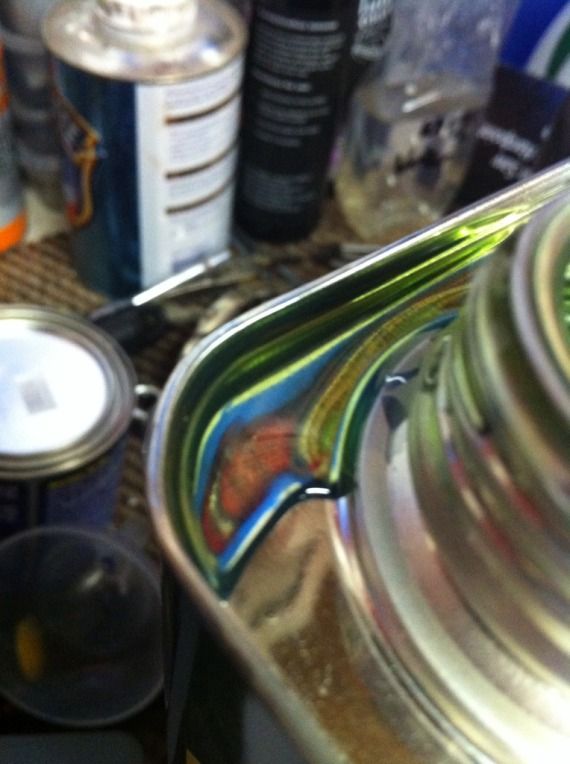
    So gradually started filling it up, leaving to settle and checking for leaks throughout given the fact that its an untested engine and I've not replaced any of the seals. (May do a full strip down and rebuild on this engine over another winter to refresh it and maybe add a mod or two)

    Then set about doing a bit of wiring. Got the coil hooked up to the starter motor/solenoid. Only issue now is this......


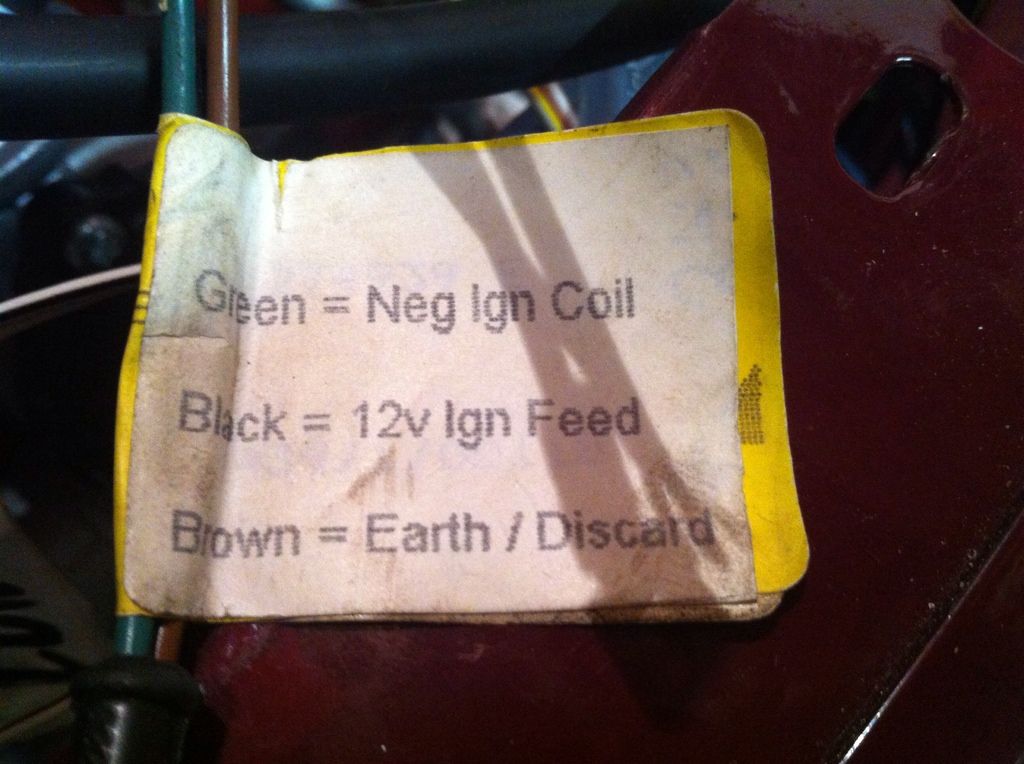
    Not us what colour wires these connect too at the front of the bay! Any ideas Mini peeps?


    So that's the update on the car, now for something completely different! I recently left my job working for Apple Retail in Union Square and received this as a leaving gift from my department colleagues. It's ace! Signed by everyone and custom plates and Apple logo on the bonnet. Takes pride of place on my desk.


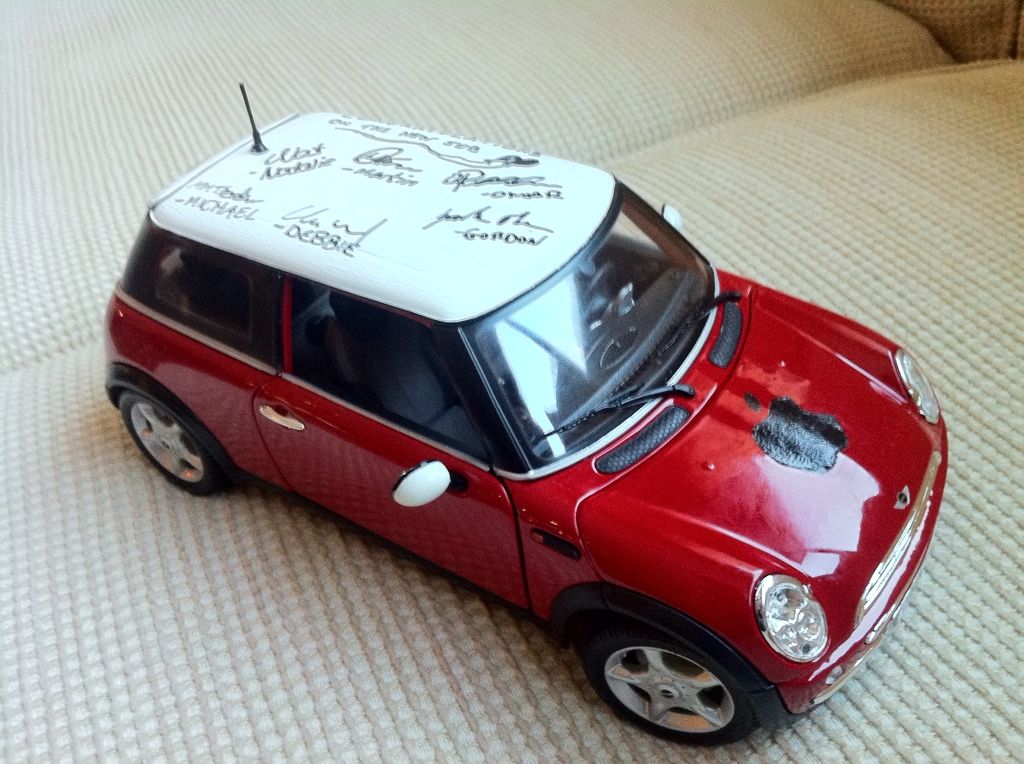
    (And they knew it wasn't an old mini but they couldn't find an old one!)

    Comment


    • SOOOOO nice.... super nice build!

      Im going to be a budget banger with my 1977 special... summerproject..

      Keep this thread in my favorites!!


      Currenty owned cars:
      VW passat 3b 1997 daily on 19 inches
      BMW E30 M3 S50B30 waiting for summer 2011

      Comment


      • Update again. Wiring is all hooked up to what I believe to be correct! Going to try and get it checked over before turning the key though, just incase I've made a fire, not a Mini :lol:


        So moved onto the tank again. Still drying out but getting there with the help of a fan heater. Should be good to go after tea and will get the sealer in afterwards. Takes 72hrs to fully cure, but may throw the heater on again to speed things up.


        Took a look at the float/sender unit. Scrap! Thankfully had a new one in stock anyway.


        Only to find that the new one had a cracked seal


        the old one was still fresh though so swapped them over and fitted with some silicon sealer to guarantee a decent seal.


        filled the radiator too. Getting close now.....

        Comment


        • Having realised my stupidity, I removed all the silicon from the tank bit as the petrol will eat the silicon. Thankfully wasn't dried! Seal cleaned and put back in.

          So the tank dried out so set about sealing it up. Very simple!

          Pour the whole can in, sloosh about so all faces are coated (cover ALL holes with decent tape first!) and then pour out again. Ive still got 3/4 of a can left now which will be handy in the future no doubt on future toys

          Doesnt look too bonny but it seals rock solid and doesnt let any crap that may have still remained from below, resurface.


          Took forever to pour out the excess due to all the contours but got the majority out again. Now to wait 3 days for it all to cure properly. Then its external paint time


          Progress indeed! Worthwhile weekend! Oh and I went for a drive yesterday in my daily DC2. some pics from that to keep you amused.....Scotland = Win!


          Aberdeen > Ballater > Grantown on Spey by Andrew Forbes Photography, on Flickr


          Aberdeen > Ballater > Grantown on Spey by Andrew Forbes Photography, on Flickr


          Aberdeen > Ballater > Grantown on Spey by Andrew Forbes Photography, on Flickr

          Cooked brakes. Was a good run


          Aberdeen > Ballater > Grantown on Spey by Andrew Forbes Photography, on Flickr

          Comment


          • Wee update. Fitted the tank and got some help/advice from Chris with some wiring. turns out everythings was pretty much ok, just a wee bit of adjusting here and there. Fuel tank got painted straight gloss black. Not an amazing finish but didnt ask for perfection as the boot barely opens as it is so nobodys going to be looking inside anyway. Hooked up, just need to put fuel in and then fire it up! Should get that done tomorrow after checking over the coil connections as it looks like a ballasted setup but not sure whats coming out of all the wires. We shall see, but exciting times none the less!

            Rolled it outside for some space. Fine morning helped!


            Refitted the float/sender unit. Think its catching on the inside so will take it out, bend the stalk outwards a bit and refit before filling it up.


            And firmly in place, ready to go!


            Comment


            • So much love for this Mini! The attention to detail is superb!

              Flickr Photostream | My Build Thread | Stalk me on Instagram, yo!

              Comment


              • More progress. Or maybe more accurately one step forwards, two steps back.....

                Wanted to get the car started this weekend. Everything was going well. Tank in, electrics sussed (12v coming from coil = non ballasted. Win! Meant I could get going with the firing. Until I tried to check the fuel lines were all ok. Overtightened one of the rubber pipes going to the pump aaaaand snapped the inlet pipe on the pump. Cast metal pipes = fail! No fuel in it so all is not lost but still means forking out £40 to replace a brand new unused pump. Never noticed you got 998cc pumps and 1275cc pumpsand mine appears to be for a 998cc so wouldn't feed enough fuel through anyway. Blessing in disguise maybe......

                However the timing was set (dizzy was 180deg out....) and everything else is ready to go. Wee bit of electrics here and there still to sort though.

                Hacked off with it for today, so its back in the garage and I'll maybe try and do some other stuff on it this week before trying again once the new pumps here. Bloody Minis!!!

                Comment


                • Originally posted by Mini 360 View Post
                  However the timing was set (dizzy was 180deg out....) and everything else is ready to go. Wee bit of electrics here and there still to sort though.
                  Ha, had that problem rebuilding a '69 MGB with my dad. After installing electronic ignition in place of the points inside the stock distributor, managed to put it in backwards. Surprisingly the engine still ran, although very roughly!

                  Glad you figured out you had the wrong fuel pump now, rather than later though.
                  Steve - now in San Diego!

                  Shoot My Car - Automotive Photography in SoCal

                  Comment


                  • Looking good. Not sure if youve picked it up but in the picture with your back drums, it looks like you've got one shoe on backwards. They shouldn't be symmetrical

                    Comment


                    • I am speechless. Some things I would do differently but everyone has their own taste. I have a buddy in Scotland I wonder if he knows you. lol

                      Comment


                      • So beautiful, and such an immense amount of work. I'll have to stop by next time I'm over there visiting family! Hahahah.

                        E30 V8 Build thread

                        Go here be happy!

                        Instagram: stuartrussell

                        Store: alwaysindividual.bigcartel.com

                        Comment


                        • Originally posted by timmy201 View Post
                          Looking good. Not sure if youve picked it up but in the picture with your back drums, it looks like you've got one shoe on backwards. They shouldn't be symmetrical
                          Its on the 'snag list' of things to do when i run out of other jobs

                          Originally posted by Aitch View Post
                          Ha, had that problem rebuilding a '69 MGB with my dad. After installing electronic ignition in place of the points inside the stock distributor, managed to put it in backwards. Surprisingly the engine still ran, although very roughly!

                          Glad you figured out you had the wrong fuel pump now, rather than later though.
                          Yeh its pretty agricultural really so thankfully an easy fix!


                          Originally posted by GOK4RT View Post
                          I am speechless. Some things I would do differently but everyone has their own taste. I have a buddy in Scotland I wonder if he knows you. lol
                          Possibly but considering theres 5.5million people in Scotland, I doubt it

                          Originally posted by FunfGang View Post
                          So beautiful, and such an immense amount of work. I'll have to stop by next time I'm over there visiting family! Hahahah.
                          Haha just say the word........

                          Comment


                          • So having realised that my brake callipers were on upside down (mega fail!) I set about taking them off and swapping them over. Simple! Or so i thought......

                            The nice, new, shiny, expensive brake lines were tightened and tightened hard! As a result their soft faces got quickly rounded off and not even the much favoured mole grips would touch them. So tonight I too off the callipers and brake lines together, took the pads out and binned them. Destroyed.......


                            Bit extreme you may think but not when I found these 4 miles away.......time for an upgrade! MiniSport fully CNC'd alloy 4 pots! Special limited edition '50s' to commemorate the 50th Anniversary of the Mini too, so rather rare and only have 200miles max on them! Will help sharpen up the brake feel no end, plus look much better.


                            Shame to have to bin working brakes but they arent worth anything anyway. The new ones most definitely are though. Pocket will be hurting until payday but they are coming with the grooved and vented discs so did a deal.

                            So Im looking at it as a blessing in disguise. Just need to order up new lines and then get them fitted up again soon.

                            Getting the brake lines out when the engine is in proved to be a nightmare too, but nothing a 3' long extension combo couldn't handle :lol:


                            Took off the discs (which are now for sale as they are brand new if anyone wants) and took a pic of the assembly. Performance throughout


                            Also needed a red bulb for my rear cluster fog light mod. Shame none of the local shops sell the bulb in red, so out with the clear red paint.


                            Hoping to collect the brakes either tomorrow night or saturday and get them cleaned and fitted.

                            Comment


                            • So new parts are here. BRAKES!!! Birdog (Nikki) got the brakes disassembled for me so picked them up tonight. In desperate need of a clean so decided to split them and get rid of any brake fluid/dirt with some brake cleaner.


                              Easy enough, just 4 Allen head bolts per calliper. Stainless, of course.

                              So no ingrained dirt, just machined and anodised finish! Love it!


                              Came with vented and grooved discs. Yes they wear down pads quicker. Don't care. They look amazing.


                              And with them clean I set about degreasing, and then sealing with GTechniq C5 Wheel armour to fend off the dirt they will collect. Hopefully will mean it only needs shampoo to clean!


                              So a wee standard vs upgrade photo. Vast improvement and less than half the weight!


                              Ready to go once I go back and get the bolts for the drive flanges as they are different on vented discs compared to standard. Wo knew!?


                              Another weekend means more work on the car! With the new brakes cleaned, I went to put them onto the flanges. Got the bolts from Nikki so set about it. Only to find vented discs need difference flanges. The bolts I had didn't fit through the standard flange. So thankfully Nikki had a set and nipped over to buy them too. So Ive now got full new brake assemblies. Needed a wee clean but nothing brake cleaner couldn't sort!


                              Wee before and after


                              Ready to go!


                              But the main goal for this weekend has been headlining. Attempted it a couple of times already but the fabric (alcantara) was just too stretchy and never sat right. So my mum suggested we added stiffening material to the back to prevent this from happening. With this ironed on we tried again. MUCH better as it made it the same sort of rigidity as vinyl, which is what it was originally.

                              So its in, we're just leaving it overnight to settle into place with all the bulldog clips before applying the glue and cutting/trimming off the excess. Then its windows in and more interior.


                              Not perfect (yet) but a very good starting point.


                              Tomorrow should be finalising this and then getting the brakes installed (would do it tonight but dont want to risk knocking the headlining out of place)
                              Last edited by Mini 360; 04-20-2013, 01:45 PM.

                              Comment


                              • Progress at last! Headlinings in, just two little bits drying out at the moment so will get them done after some food! What a pain of a job!

                                With the inside glued, we set about gluing the outer edge on. This is a small bit to ensure the fabric comes over the lip and is held securely by the door/window seal. We bought some cheap bulldog clips in Home Bargains and used all 10 packs :lol:


                                Just leaving the two bits here to dry, then final trim and leave to set fully.


                                Again, dont want to risk moving the fabric so we decided not to put in the glass. Sure it would be ok but not worth risking a days work for! Get it done tomorrow night. Going to crack on with getting the passenger door built up and the brakes installed ready for the braided lines to arrive though. More pics soon.....

                                Comment

                                Working...
                                X