-
Alright, picking up where we left off somewhat.
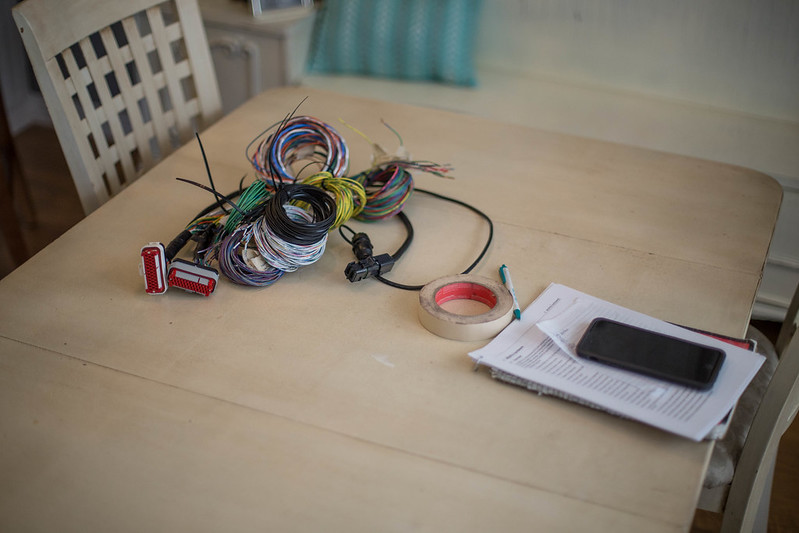
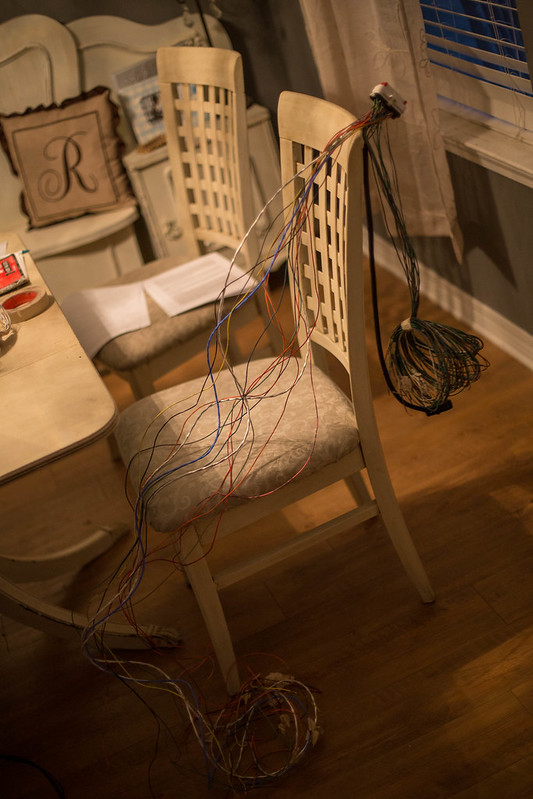
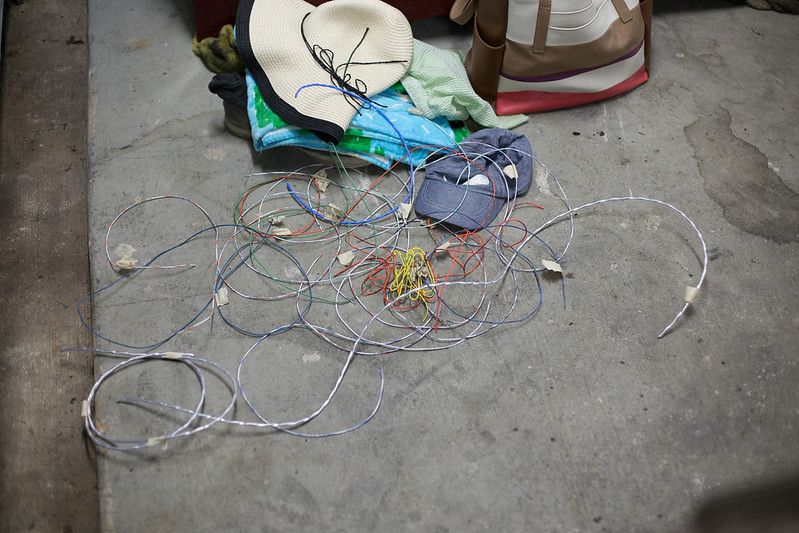
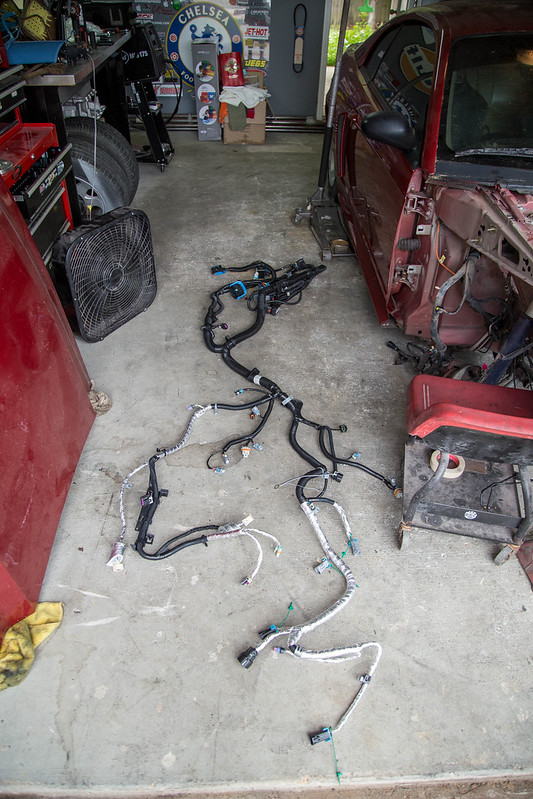
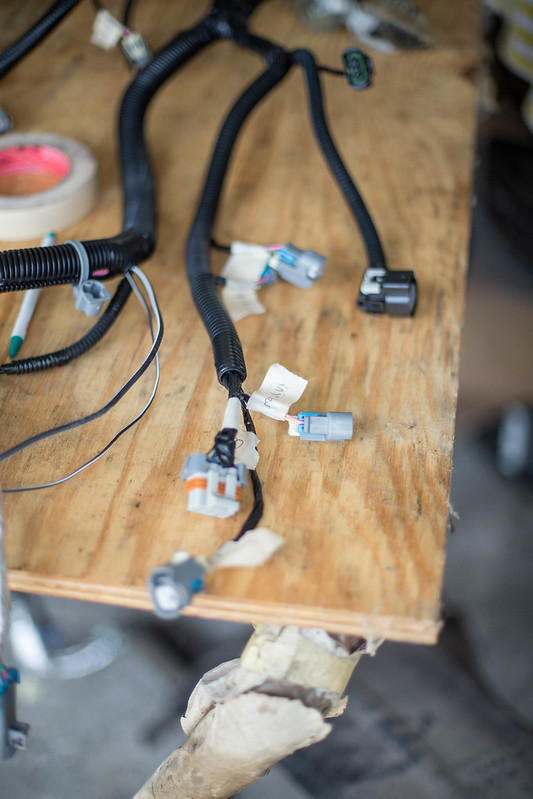
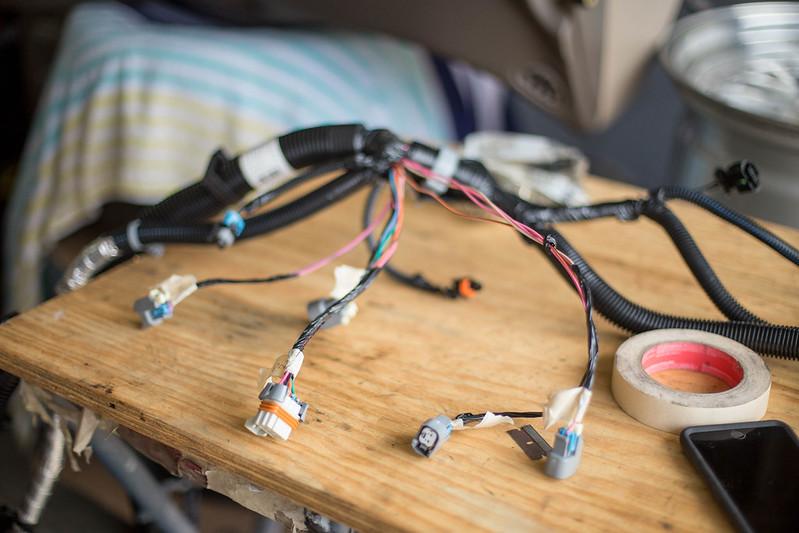
Started working on the ms3pro harness. Pulled it inside, pages out of the manual in hand and started sorting through the wires. I had previously grouped all the specific type of wires together, analog inputs together, injectors, ignition, etc etc to make it a bit easier when I got this point.
Keep in mind. This is my first time ever building an engine harness. Ive done a few smal harness stuff here and there for headlights etc, but nothing like this. Still trying to figure out whats the best process and way to do this. Im still missing a few key components that help figure out exact wire length needed and whatnot, but those will come in time. I promise even tho all these pictures look the same progress is being made.... I hope.
 new computer (1 of 18)-2 by lawrx, on Flickr
 new computer (2 of 18)-2 by lawrx, on Flickr
 new computer (3 of 18)-2 by lawrx, on Flickr
 new computer (4 of 18)-2 by lawrx, on Flickr
 new computer (5 of 18)-2 by lawrx, on Flickr
 new computer (6 of 18)-2 by lawrx, on Flickr
 new computer (7 of 18)-2 by lawrx, on Flickr
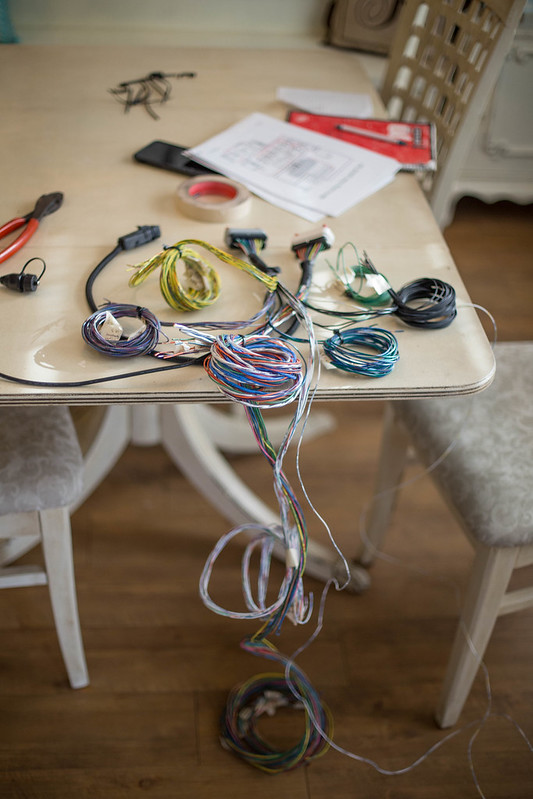
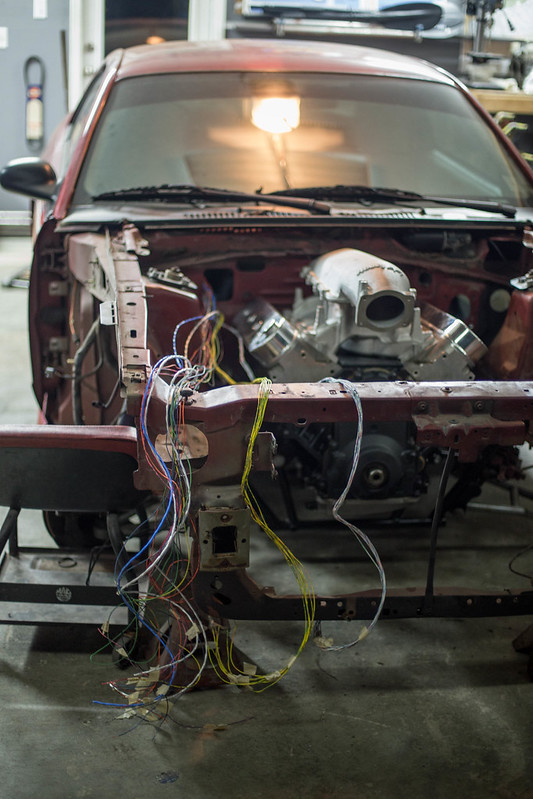
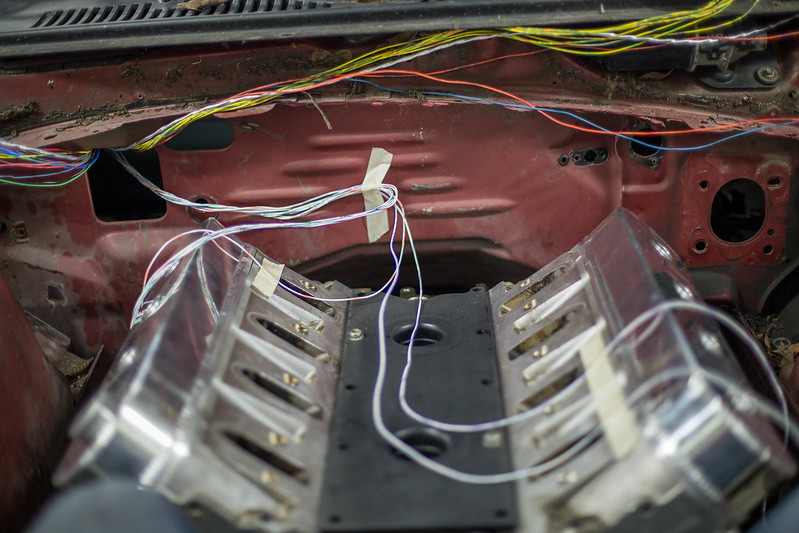
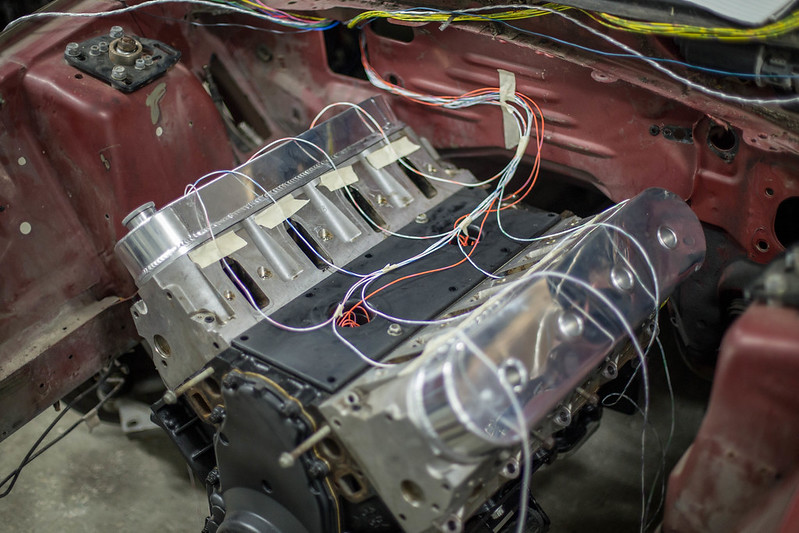
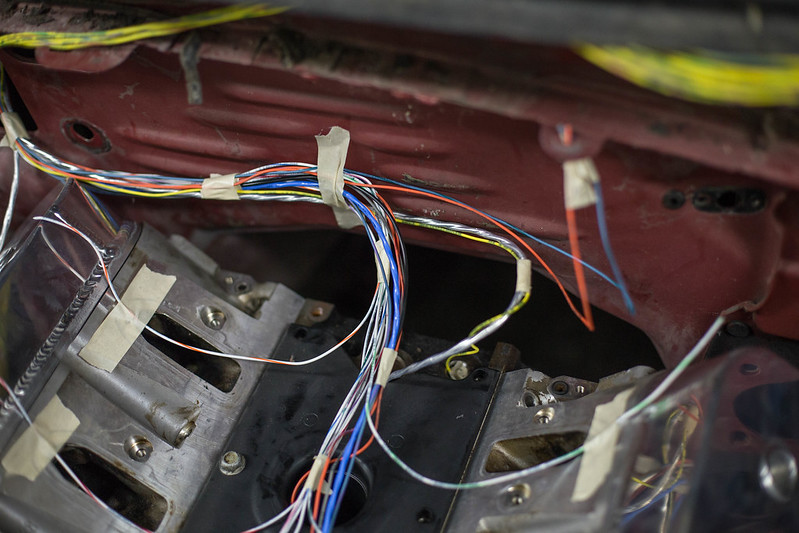
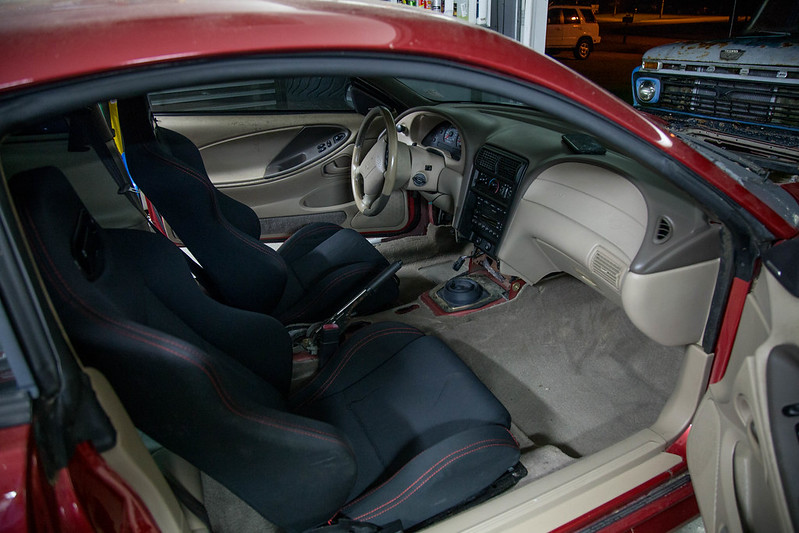
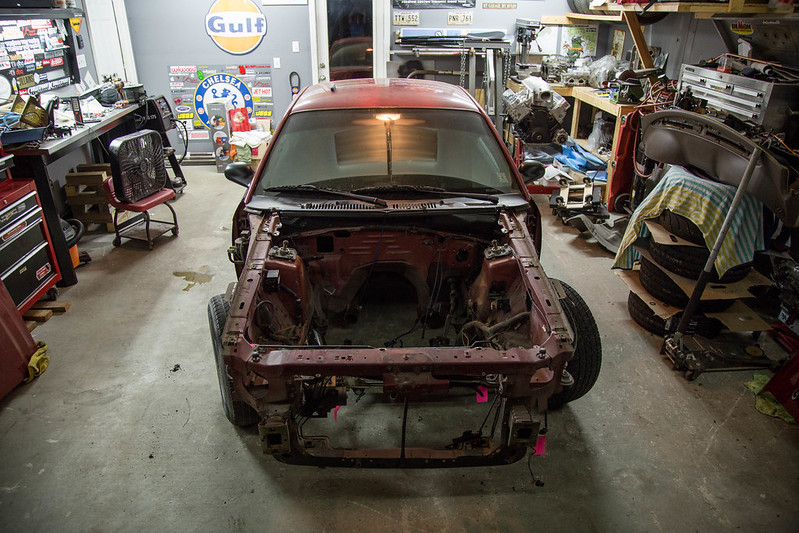
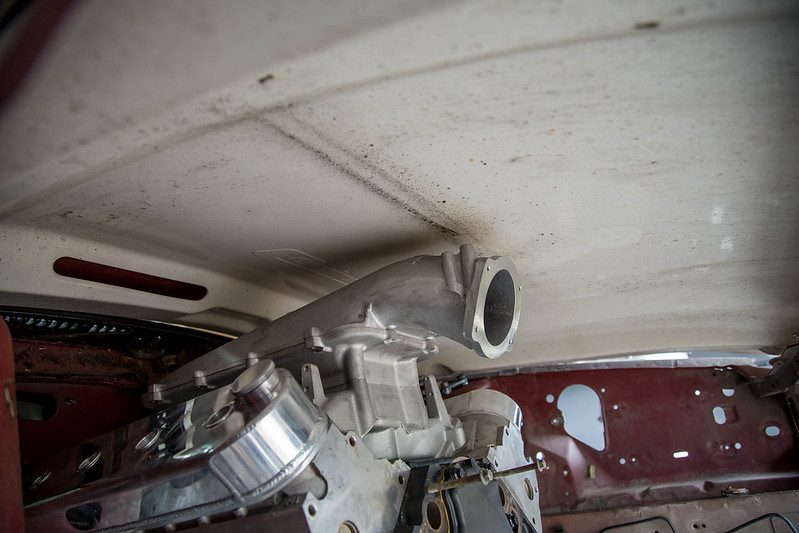
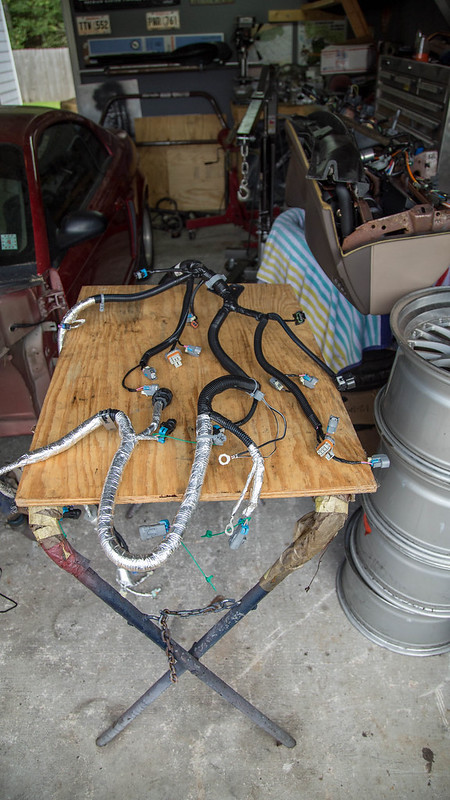
With wires sorted, labels, grouped together etc it was time to bring it to the car and start laying it out. The ecu itself will be mounted just behind the glovebox for easy access incase it needs accessing. I tie strapped the plug there and started fishing the wires through. Initially I was going to run the harness through the firewall directly behind the intake manifold. But upon mocking it up, the harness will be too big and bulky and simply be too crammed in that tight space. So I will be using the large open area from the ac setup. Once its welded up ill be putting my plug there. It will be somewhat hidden as my catch can setup will be mounted in that little corner area between the firewall and the strut tower.
 new computer (8 of 18)-2 by lawrx, on Flickr
 new computer (9 of 18)-2 by lawrx, on Flickr
 new computer (10 of 18)-2 by lawrx, on Flickr
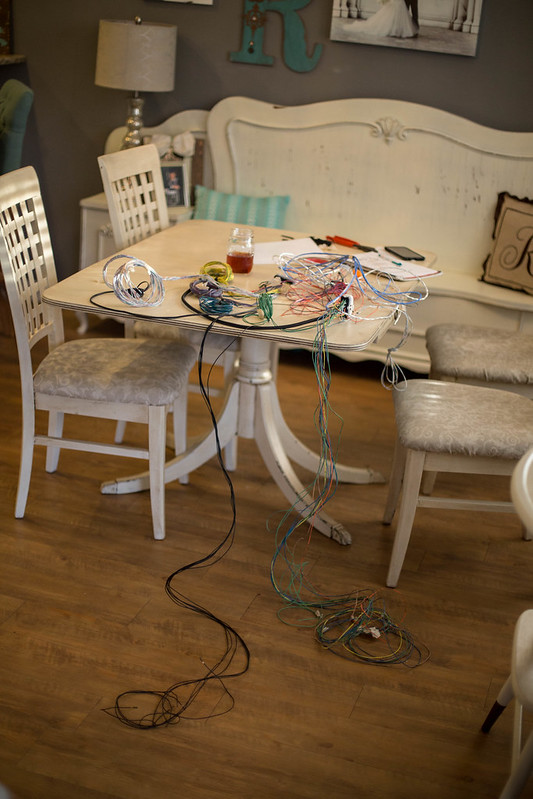
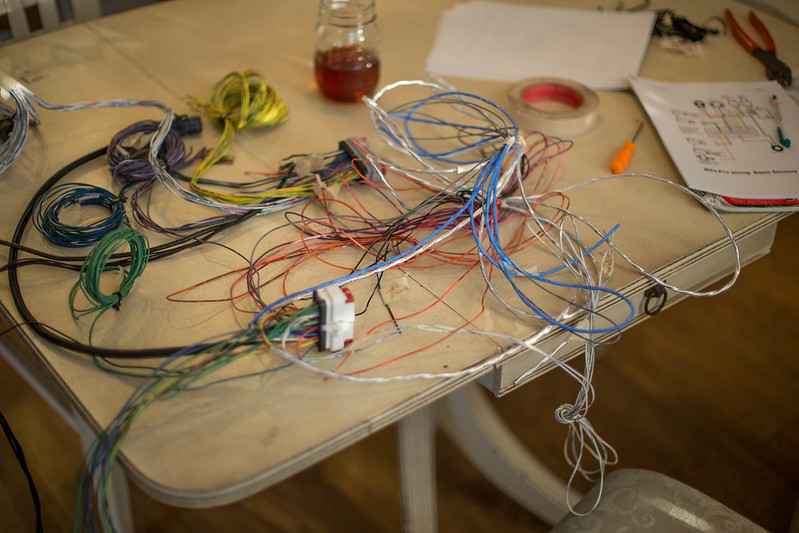
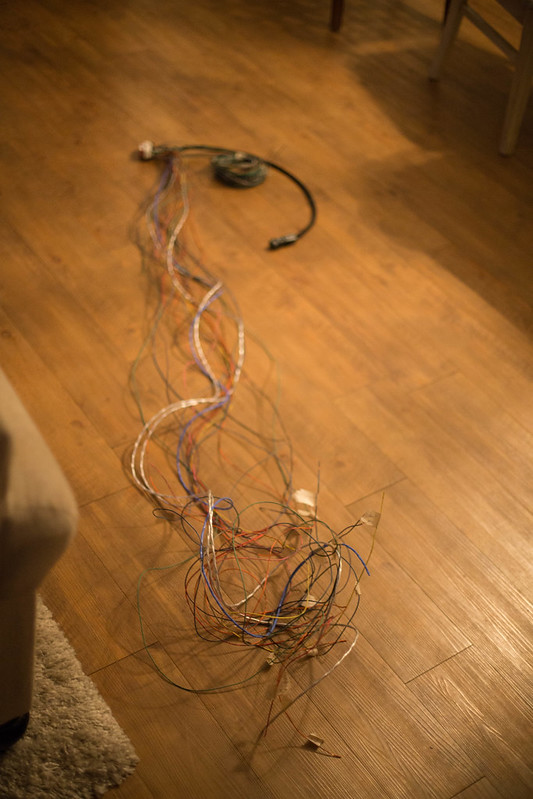
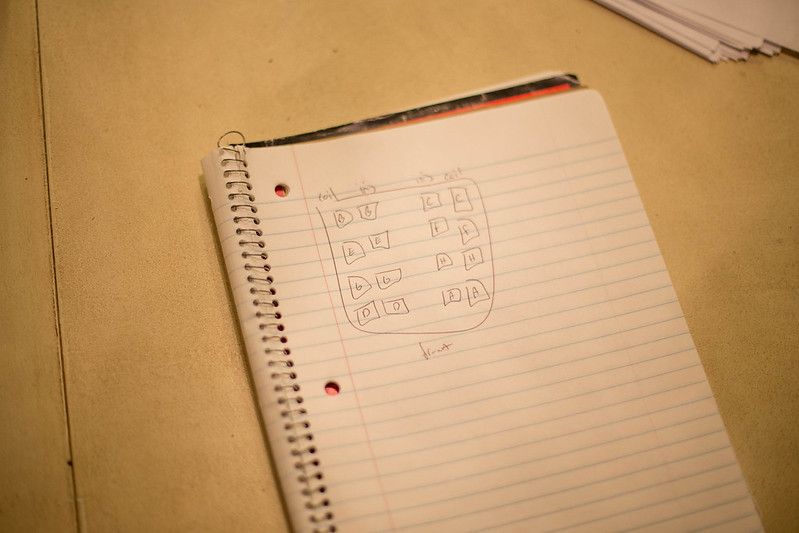
Once the ECU, firewall thru placement finalized and the harness ready to be strung out everywhere, I sat down and went through the manual to start drawing the few diagrams I would need to reference during the wiring process. this would make it easier as they would all be own one place in my notebook vs spread out over the manual on multiple pages. After that it was time to start stringing out the harness for lengths and routing. currently im running the signal wires that all go to the ecu. Once all routing and locations are finalized ill add in the 12v and sensor ground wires that all tie in to each other.
 new computer (11 of 18)-2 by lawrx, on Flickr
 new computer (12 of 18)-2 by lawrx, on Flickr
 new computer (15 of 18)-2 by lawrx, on Flickr
 new computer (13 of 18)-2 by lawrx, on Flickr
 new computer (14 of 18)-2 by lawrx, on Flickr
 new computer (16 of 18)-2 by lawrx, on Flickr
 new computer (17 of 18)-2 by lawrx, on Flickr
 new computer (18 of 18)-2 by lawrx, on Flickr
Leave a comment:
-
Had a fairly productive weekend.
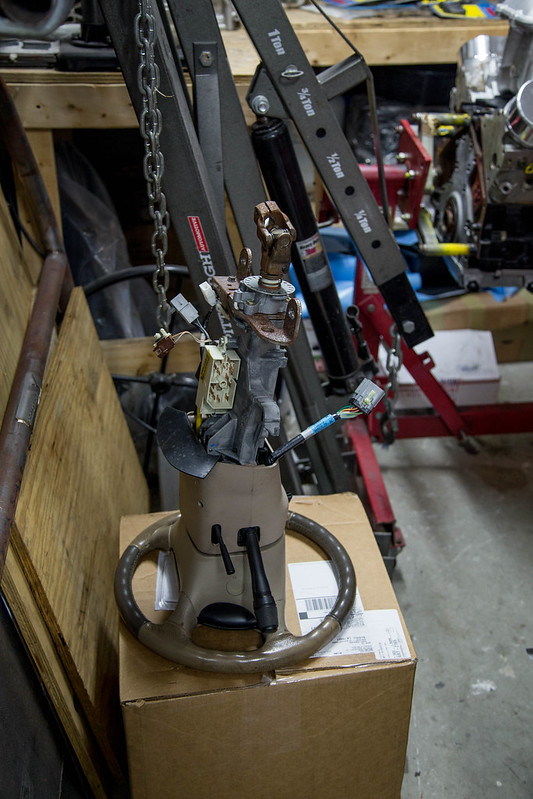
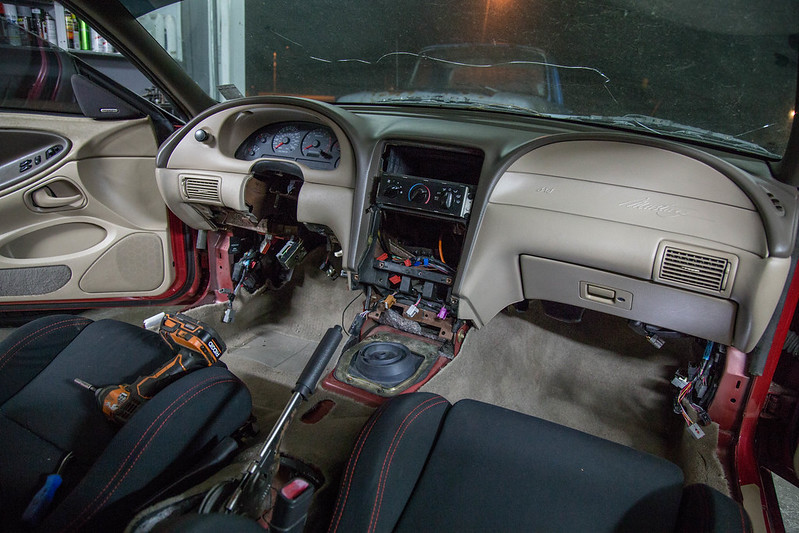
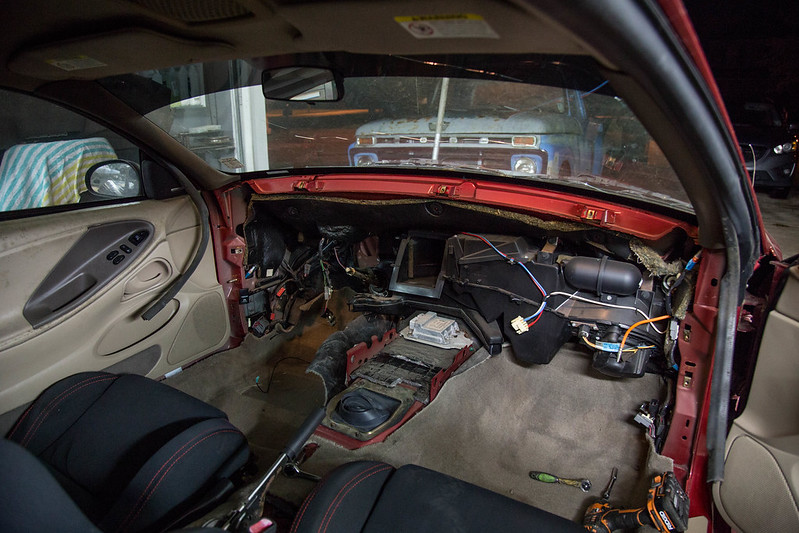
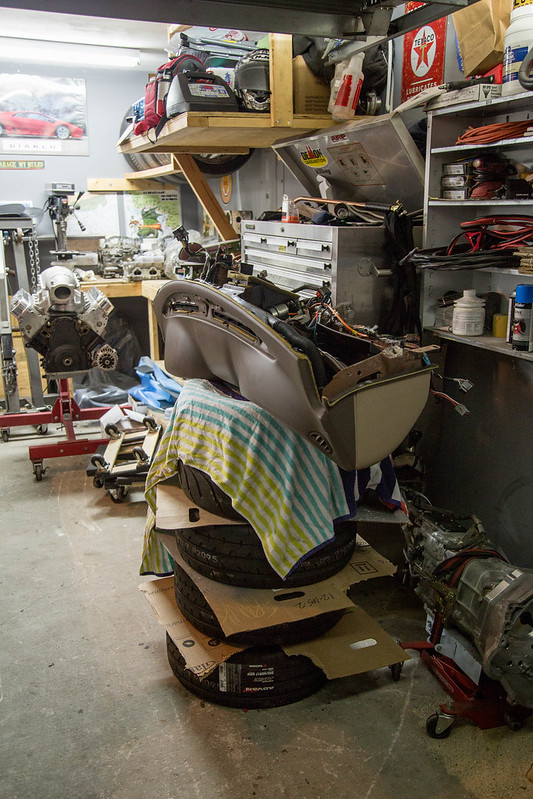
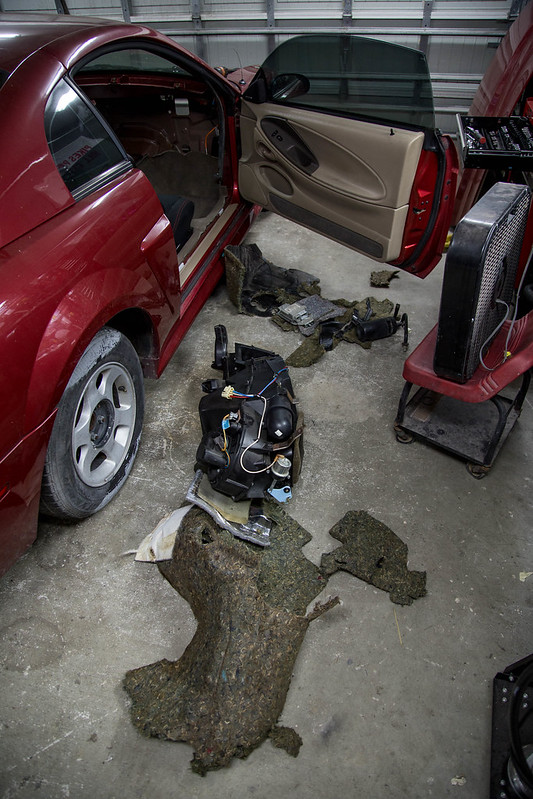
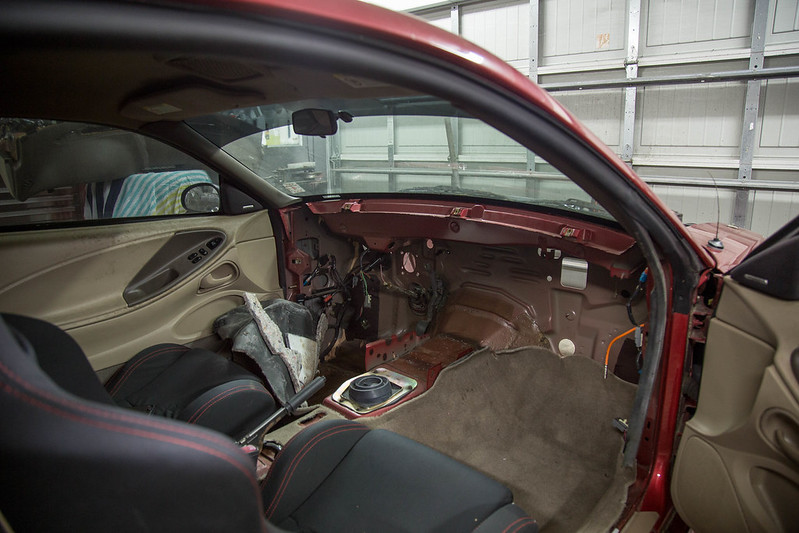
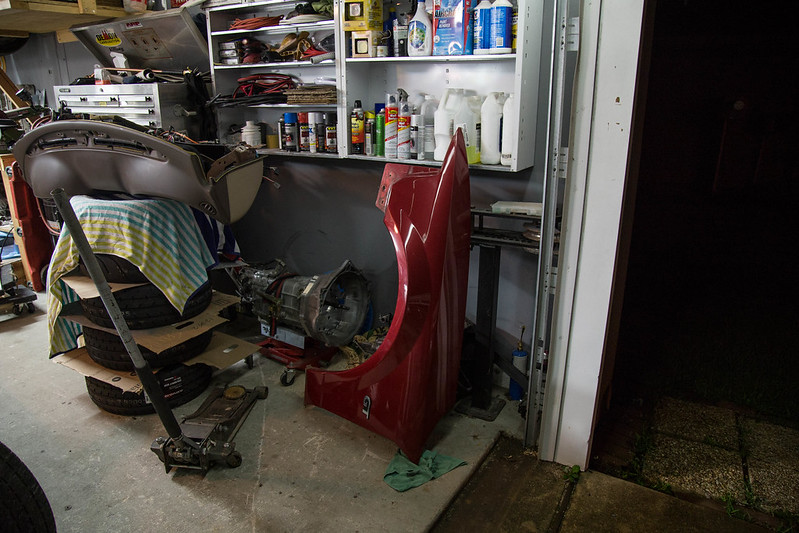
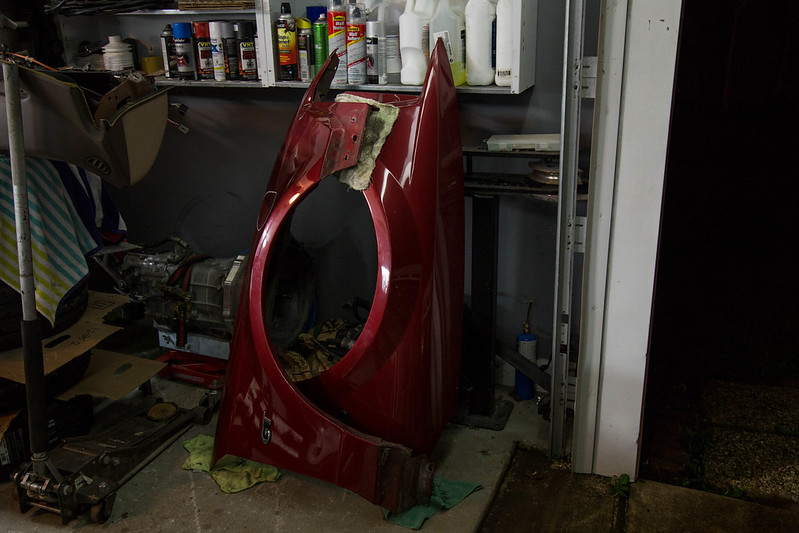
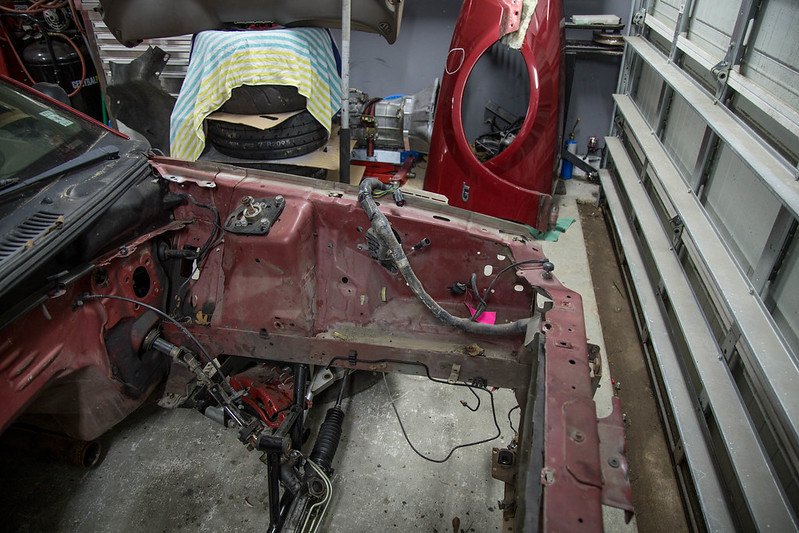
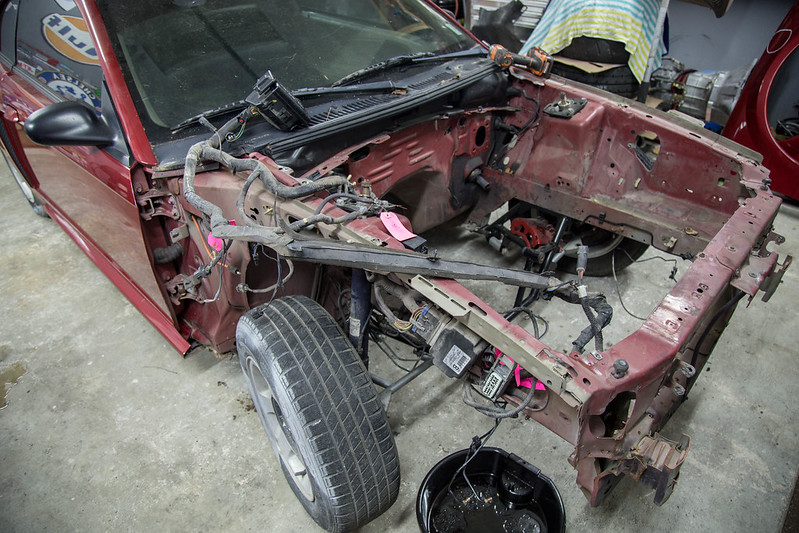
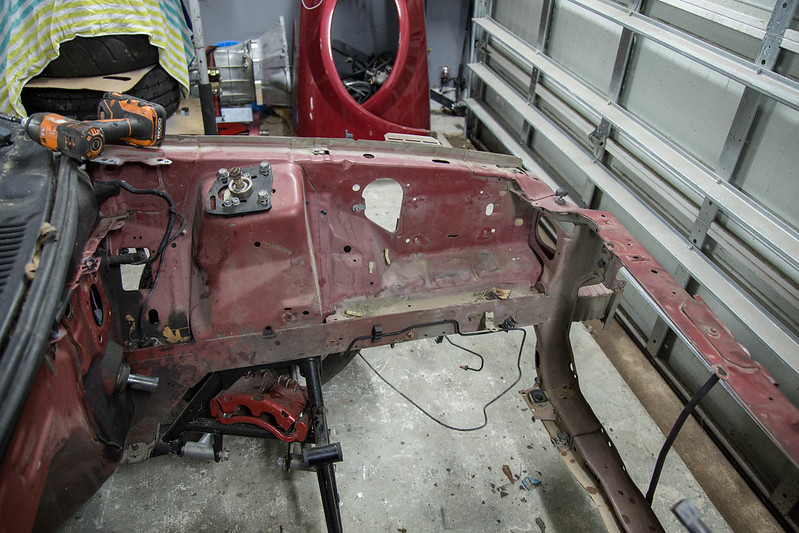
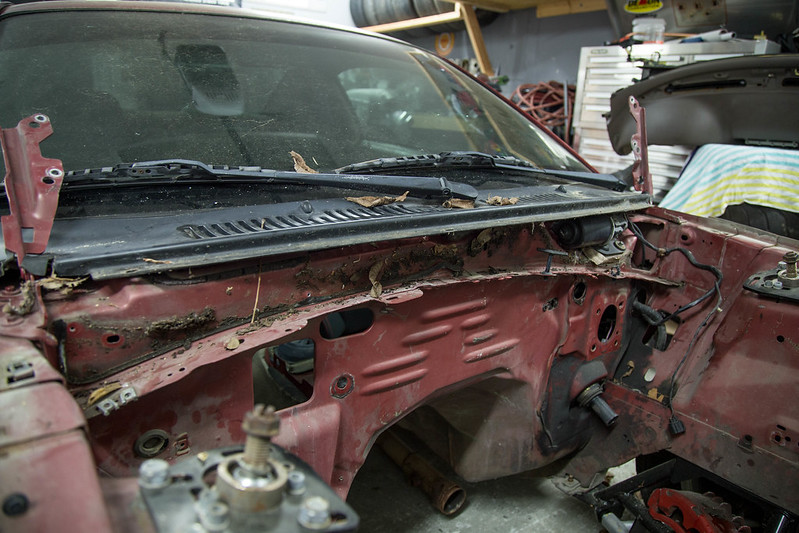
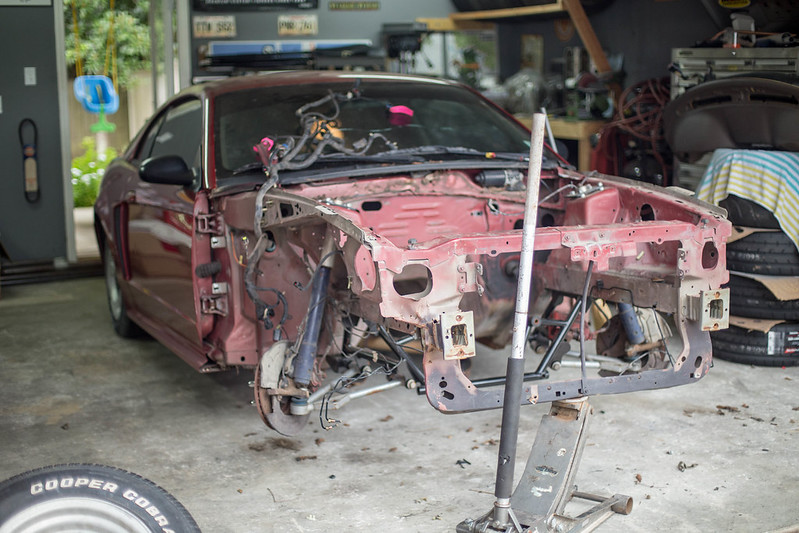
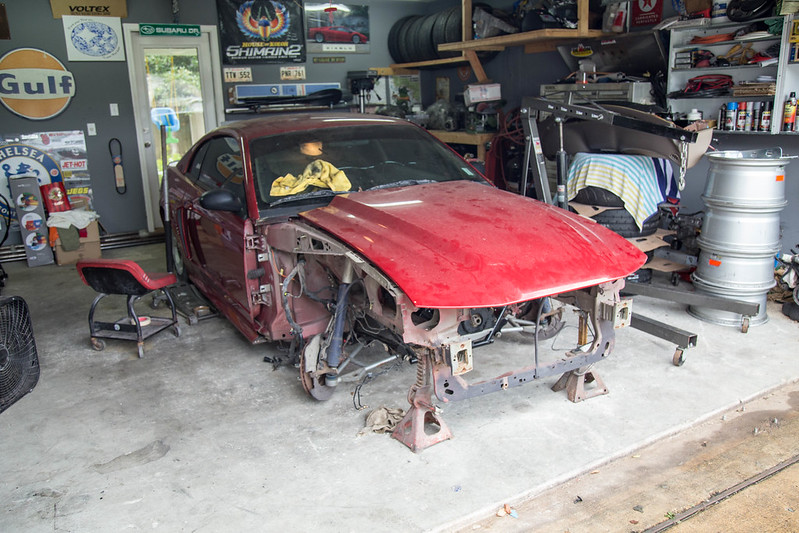
To start Friday night I was able to pull the dash and fenders. Reason being was 1 to pull rest of ac system out, and number two for access to the back of future welds. Ill be shaving and plugging holes in the dash and I wanted access for proper corrosion protection back there.
 new computer (2 of 24) by lawrx, on Flickr
 new computer (3 of 24) by lawrx, on Flickr
 new computer (4 of 24) by lawrx, on Flickr
 new computer (5 of 24) by lawrx, on Flickr
 new computer (6 of 24) by lawrx, on Flickr
 new computer (7 of 24) by lawrx, on Flickr
 new computer (8 of 24) by lawrx, on Flickr
 new computer (9 of 24) by lawrx, on Flickr
 new computer (10 of 24) by lawrx, on Flickr
 new computer (11 of 24) by lawrx, on Flickr
 new computer (12 of 24) by lawrx, on Flickr
 new computer (13 of 24) by lawrx, on Flickr
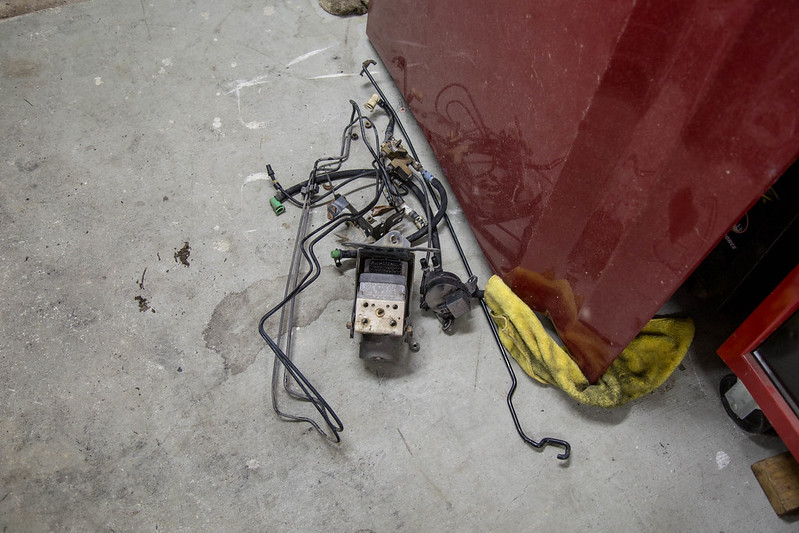
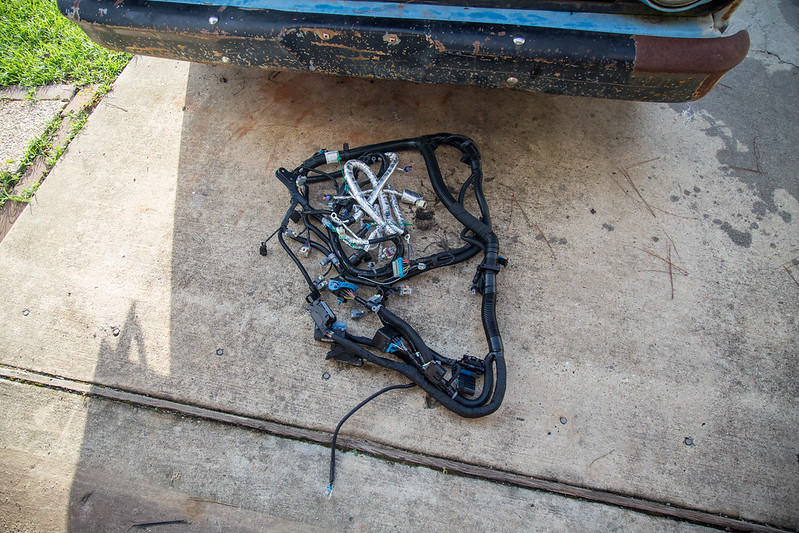
After getting the dash out I started pulling out/off the engine bay harness. Whats not needed will be stripped and taken out. The rest of the useable stuff will be lengthened/shortened when necessary to tuck it nice and neatly after tube front end is on. Have an idea for where im going to mount most of the major components, just have to test it out and see if it will work.
 new computer (14 of 24) by lawrx, on Flickr
 new computer (15 of 24) by lawrx, on Flickr
 new computer (17 of 24) by lawrx, on Flickr
 new computer (18 of 24) by lawrx, on Flickr
 new computer (20 of 24) by lawrx, on Flickr
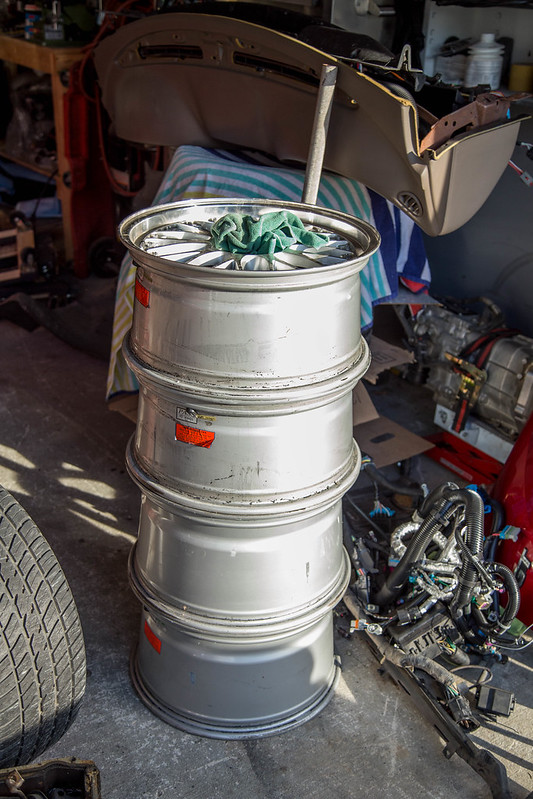
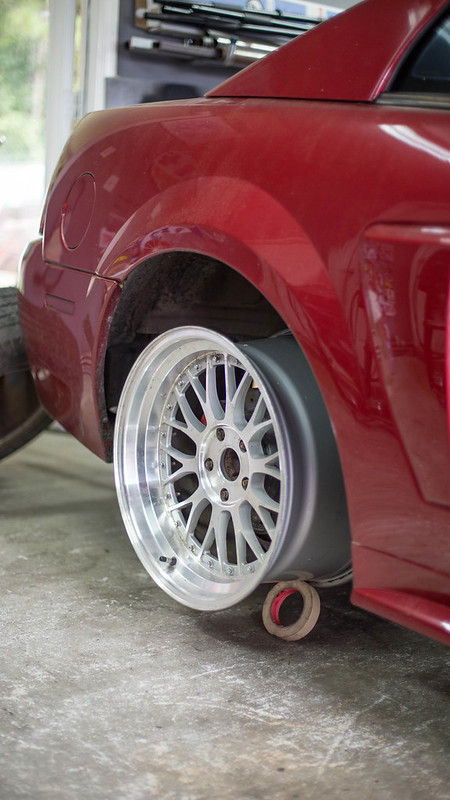
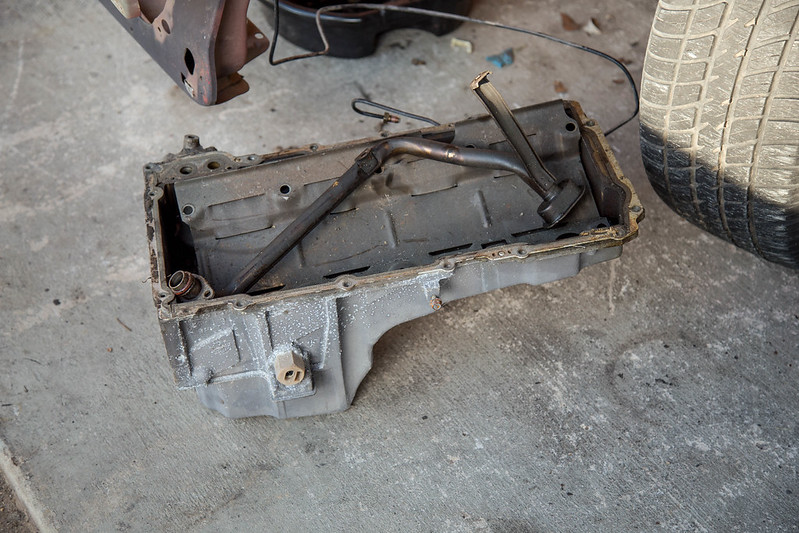
Saturday I spent most of the day helping out a friend with his Ls swapped turbo SN95 PROJECT. he just got it up and running and we were cleaning some things up and starting the tune process on it. Gave me some motivation for mine haha. While there I also picked up a set of wheels. They are junk XXR rep wheels (if you know me I **** replica wheels) but there sole purpose is to mount a set of tires on and drive on them while I sort everything out once its up and running. Basically a set of street wheels I will upgrade later down the road. He also had a spare truck oil pan that I picked up. I ended up selling the moroso to a local who needed it in a hurry.
 new computer (21 of 24) by lawrx, on Flickr
 new computer (22 of 24) by lawrx, on Flickr
 new computer (1 of 18) by lawrx, on Flickr
 new computer (2 of 18) by lawrx, on Flickr
 new computer (23 of 24) by lawrx, on Flickr
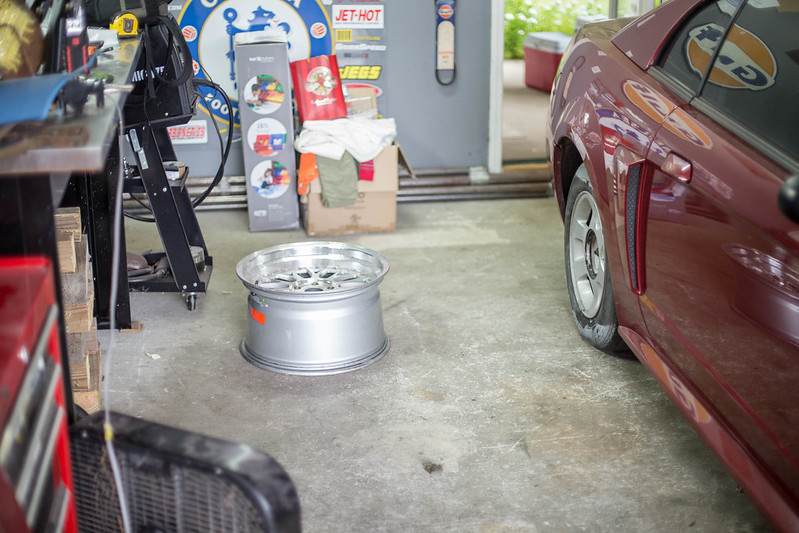
Come Sunday I was able to get some more work done while the baby and wife took a nap. First up I mocked up the new to me wheels. Perfect fit. I also had a new 5.3 harness come in ill be using for the pigtails to wire up the MS3 harness.Got it for pennies on the dollar so I don't feel bad chopping it up.
 new computer (24 of 24) by lawrx, on Flickr
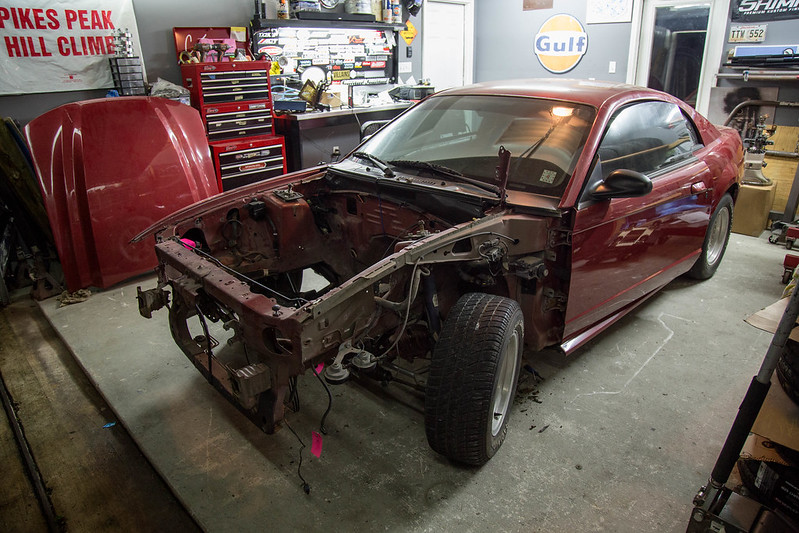
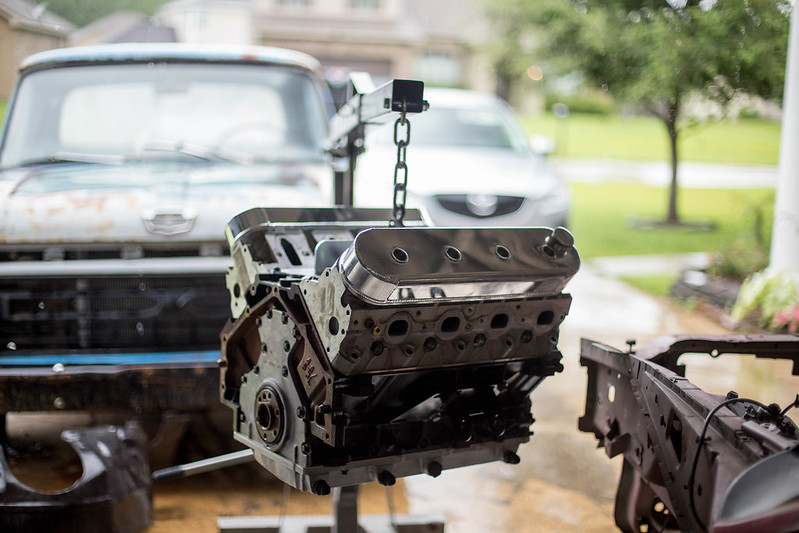
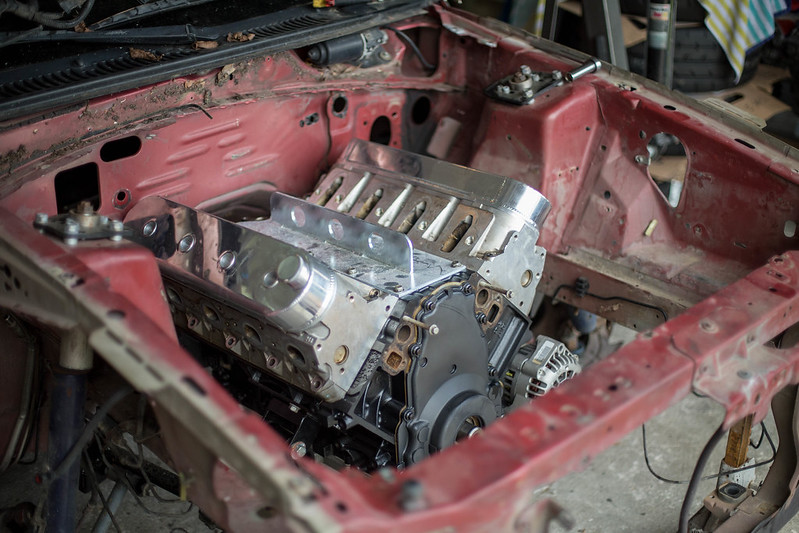
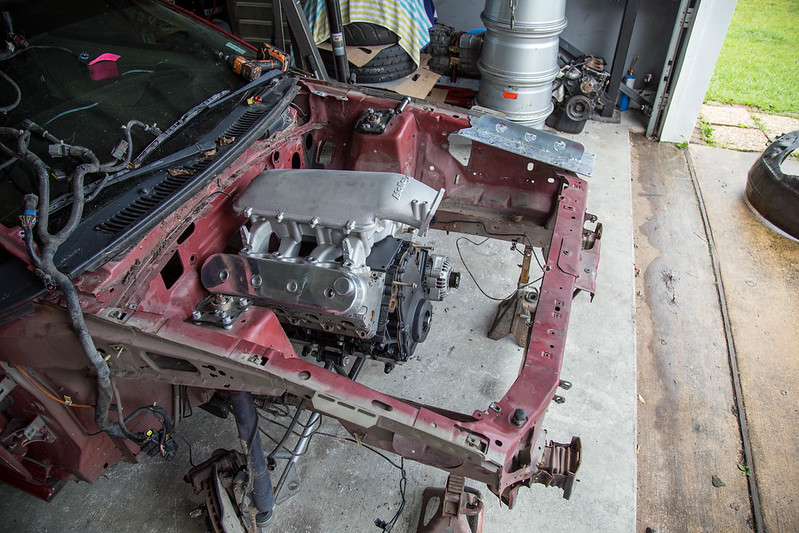
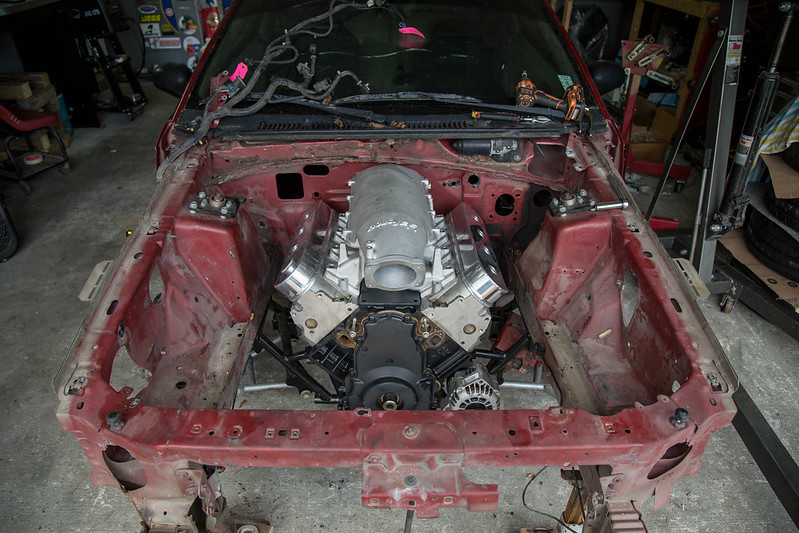
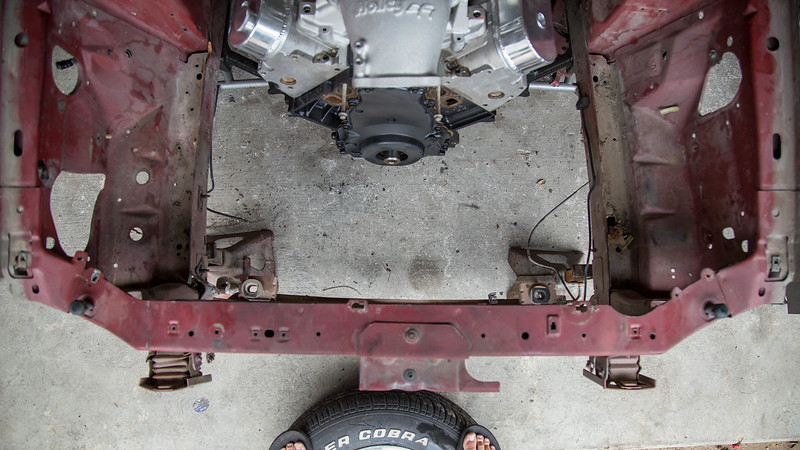
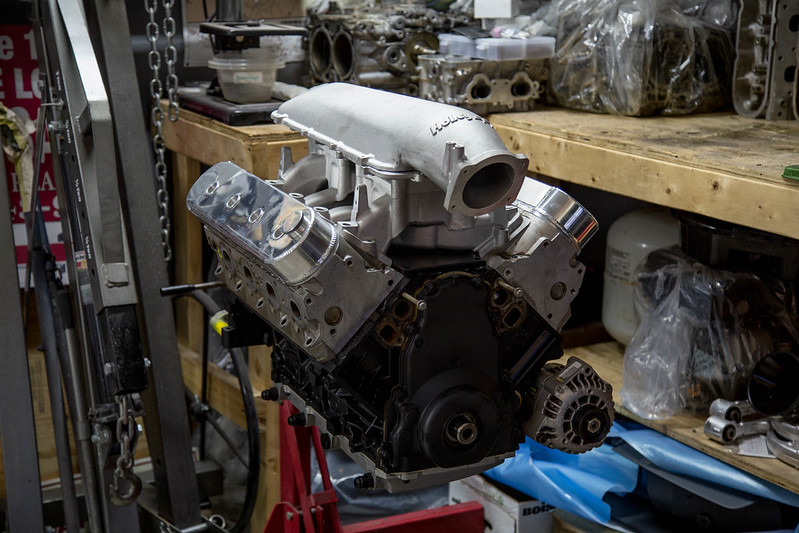
Next I mocked the motor up for various reasons. Plan out the turbo setup, plan where through the firewall I will be putting the harness etc. I also checked hood clearance to see if I had enough space for the high-rise. Looks like with some crossmember spacers I will be able to make it work.
 new computer (4 of 18) by lawrx, on Flickr
 new computer (5 of 18) by lawrx, on Flickr
 new computer (6 of 18) by lawrx, on Flickr
 new computer (7 of 18) by lawrx, on Flickr
 new computer (8 of 18) by lawrx, on Flickr
 new computer (9 of 18) by lawrx, on Flickr
 new computer (10 of 18) by lawrx, on Flickr
 new computer (11 of 18) by lawrx, on Flickr
 new computer (12 of 18) by lawrx, on Flickr
 new computer (15 of 18) by lawrx, on Flickr
 new computer (16 of 18) by lawrx, on Flickr
 new computer (17 of 18) by lawrx, on Flickr
 new computer (18 of 18) by lawrx, on Flickr
Leave a comment:
-
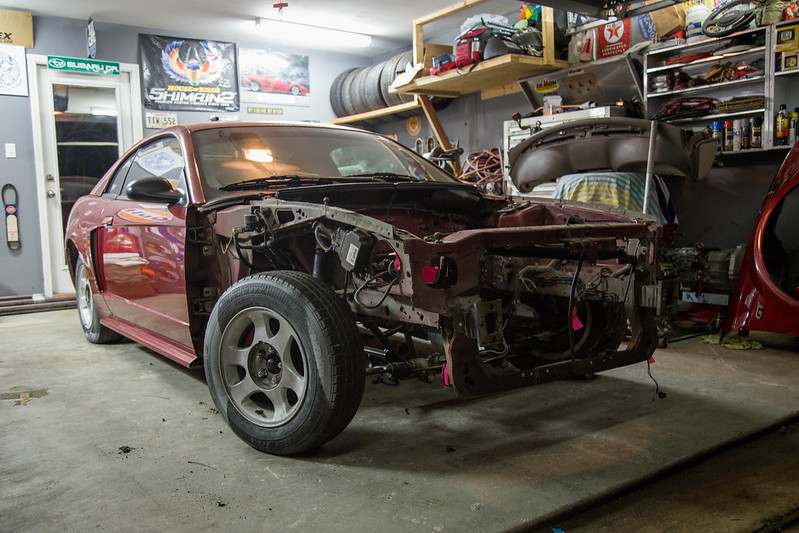
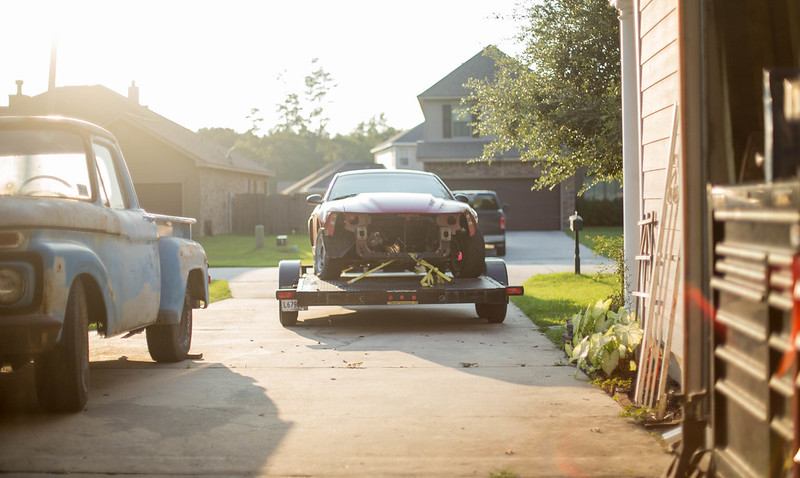
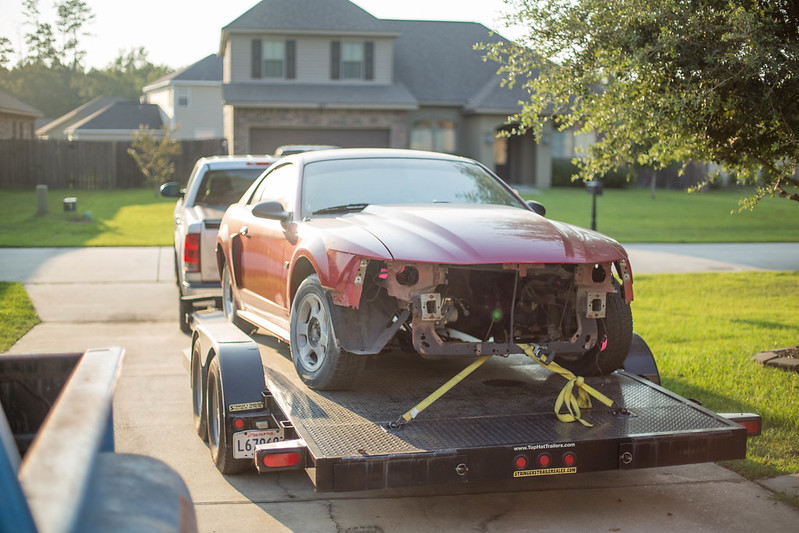
SHE IS HOME
That is all.
 new computer (1 of 2) by lawrx, on Flickr
 new computer (2 of 2) by lawrx, on Flickr
Leave a comment:
-
Yes, same or very similar process to mate a CD009 to a 2jz.Originally posted by Porterhousestk View Post
Rear end is staying the factory layout 4 link. No need to change as this setup has been deep in the 7s, must faster than i ever intend to go.Leave a comment:
-
Hopefully its not coming out too often hahaOriginally posted by 190Evan View PostLeave a comment:
-
very cool! Is this process similar to what would need to be done to mate that Nissan trans to a 2jZ? ive heard of it being done before but never seen pictures as nice as yours. Also, I was curious what your plans are for the rear end; keeping 4 link? or do panhard bar/ torque arm? either way, cool cars, great work!Leave a comment:
-
Yeah but also who wants excessive debris in their bellhousing dirtying up their clutch and pressure plate? I would have done the same, although I'm sure this thing will be coming in and out of the car seeing as it's a strip car it doesn't hurt to cut your clean up time!Leave a comment:
-
Its a pretty sweet piece. the instructions say to cut it right on that rib however that would have left a massive unsightly gap. My tight gap i think helps how good it came out. It was worthe the pain of grind test fit, grind test fit. Rinse . repeat.Originally posted by 190Evan View Post
Aluminum dust got everywhere but it turned out good. All for it to be mounted under the car where nobody will see it lol. Sometimes i **** my attention to detail. Spend way too much time on things that will never be seen.Leave a comment:
-
Holy crap I can't believe how good that looks. I know collins is very good about quality but that looks insane!Leave a comment:
-
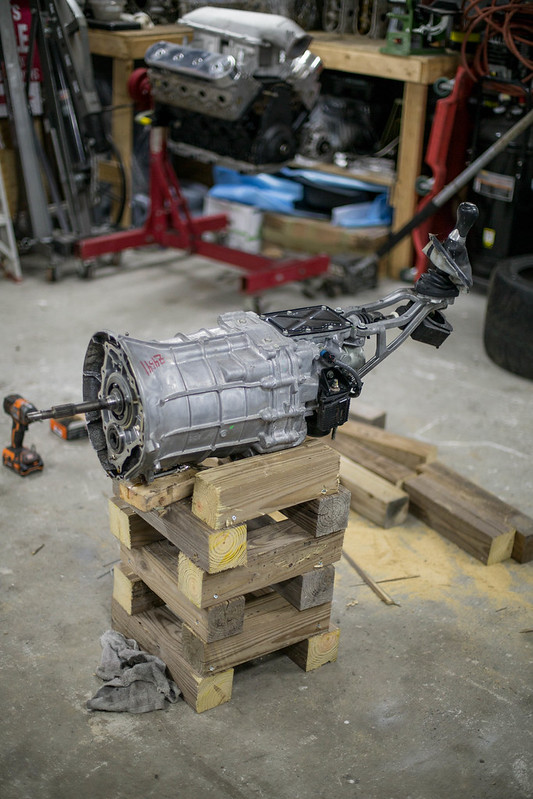
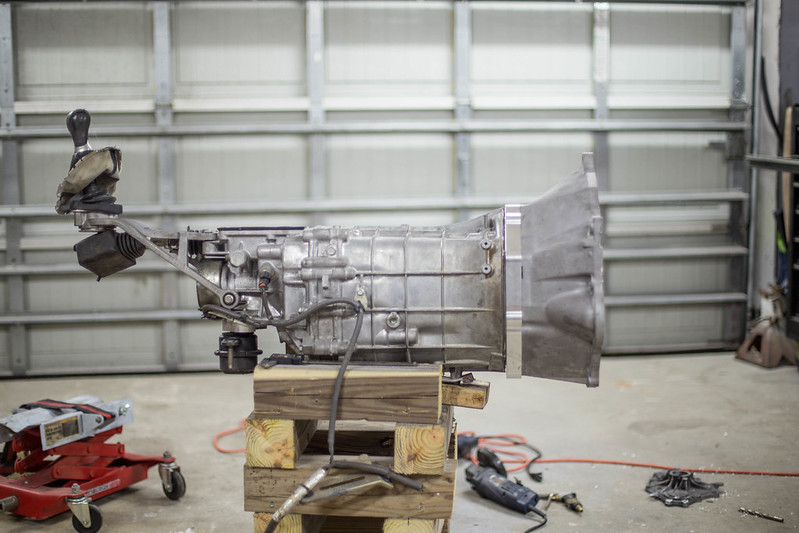
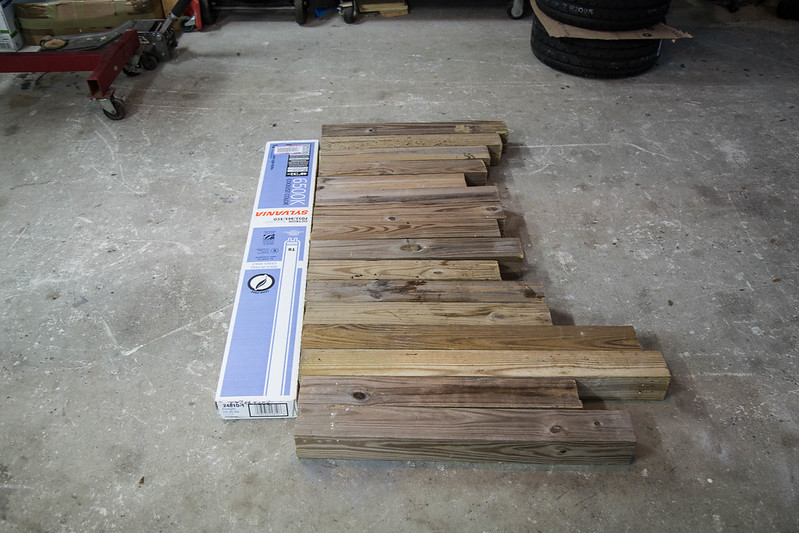
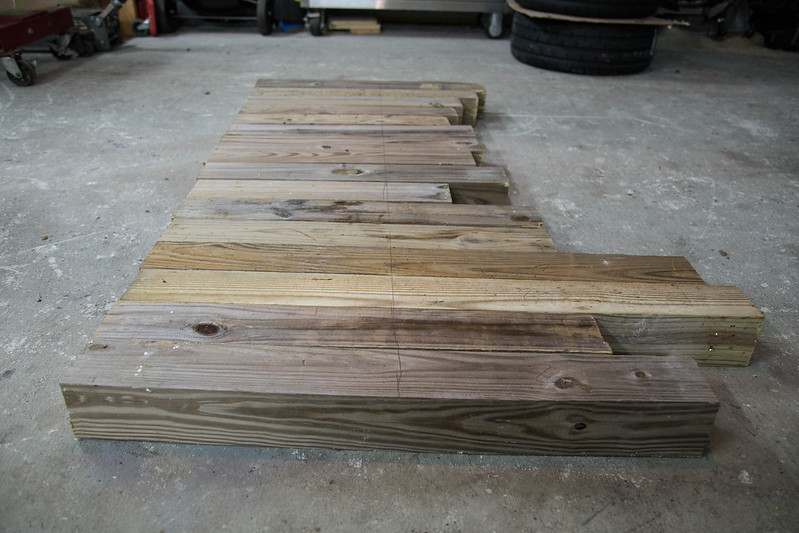
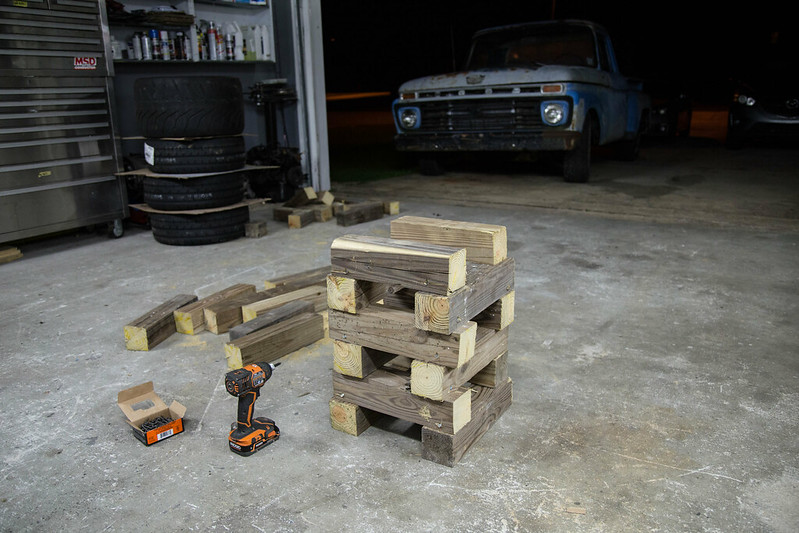
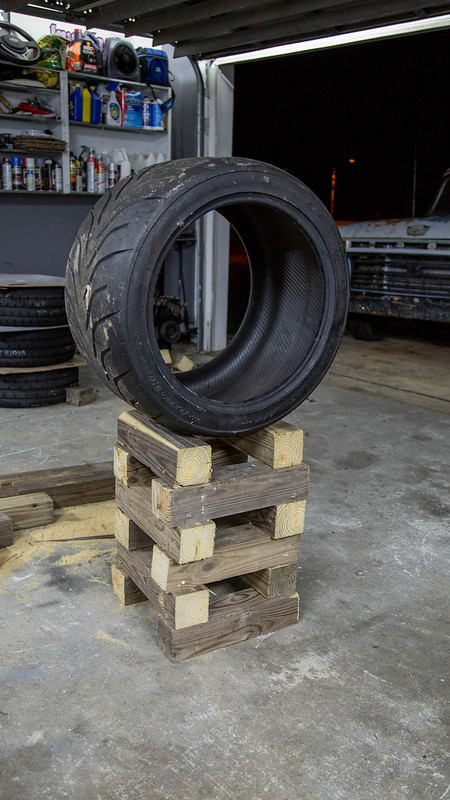
Snuck a few more hours work in tonight.
On my lunch break at work today I ran to lowes and got some more 4x4 to finish building my stands. Ole trusty daily with the roof rack worked perfectly. Who needs a truck anyway?
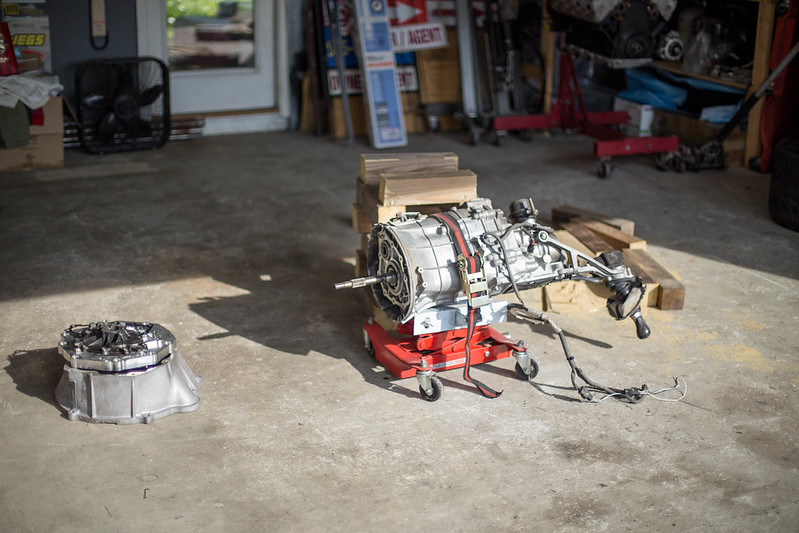
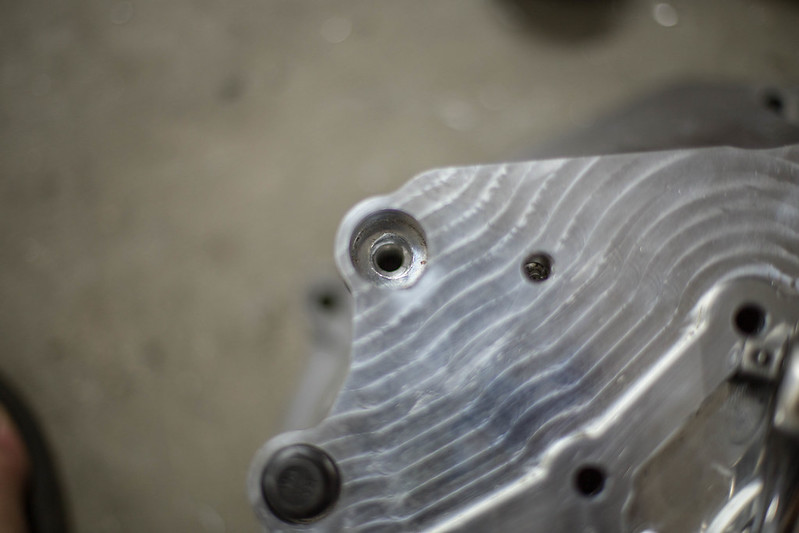
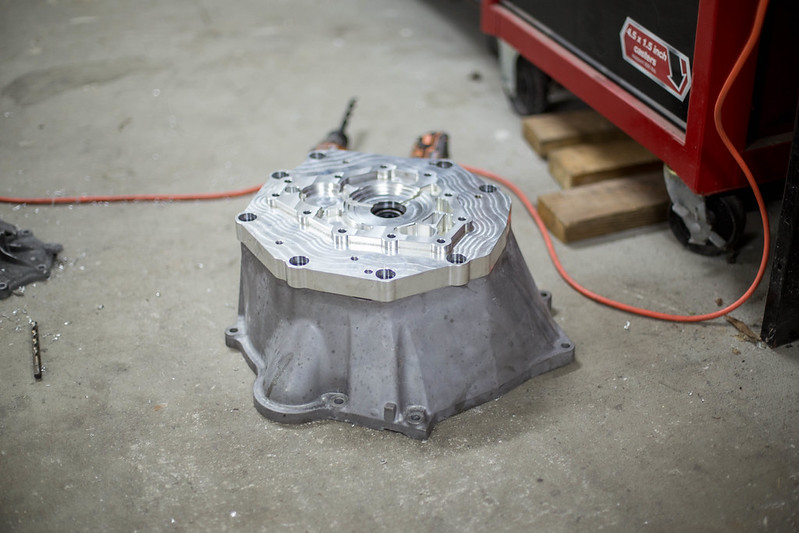
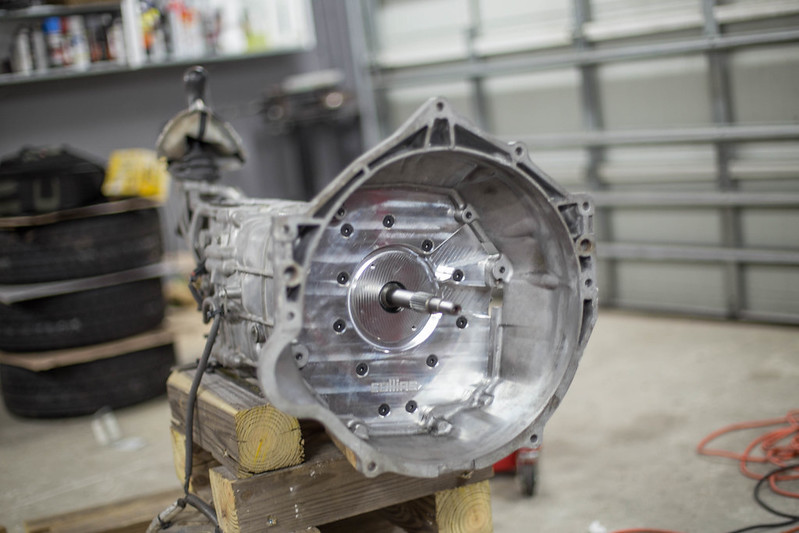
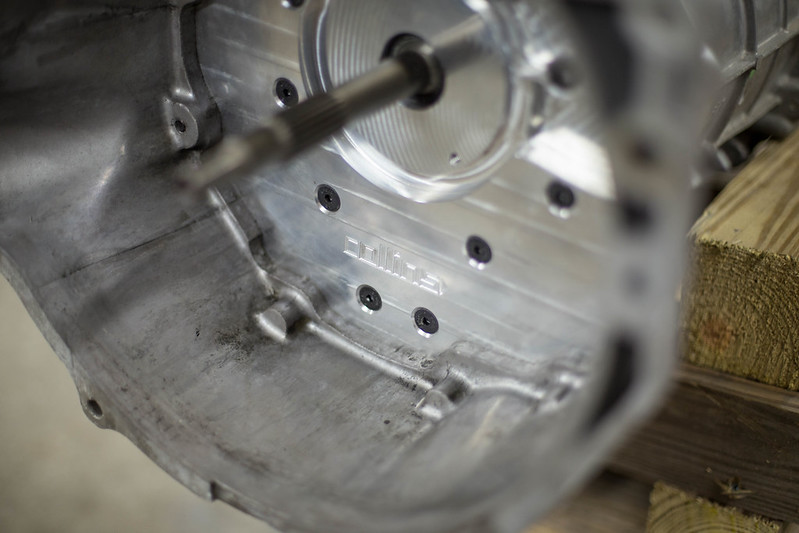
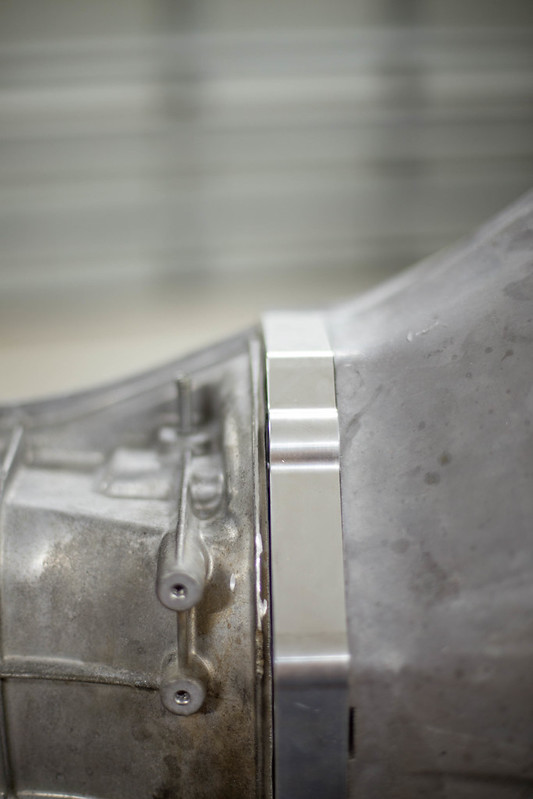
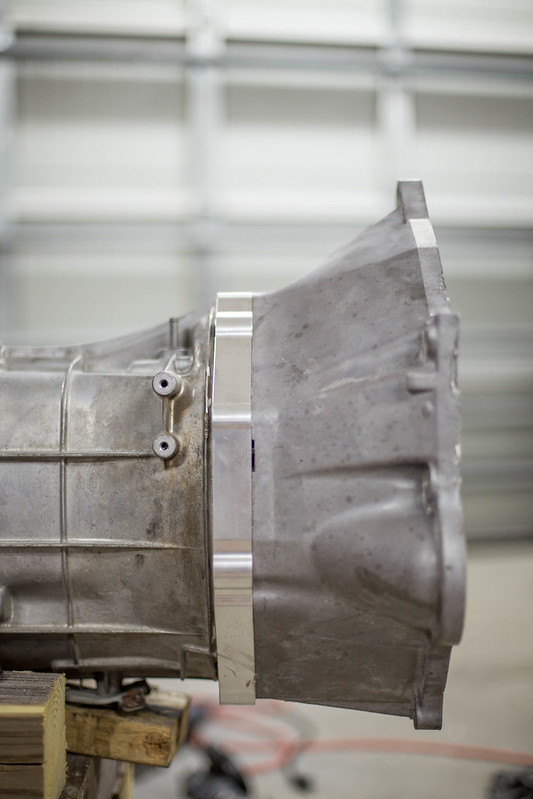
Once home I decided to forget building stands and finish installing the trans adaptor for the CD009 trans. If you don't remember the process involves cutting off the majority of the stock bell housing on the trans. They give you a precise measurement of where to cut, however this leaves a large 1/4" gap. Not having that. So I cut it a little short, and then mocked up adaptor, grinned some more. Rinse. Repeat, until she fits perfectly and there is a 1/16'' gap all the way around. Im pleased with that. With the trans case suitably trimmed it was time for final install of the adaptor.
Due to how the adaptor fits the t56 bell housing must be bolted to the adaptor before the adaptor is bolted to the trans. With the bellhosuing and adaptor combined its as simple as bolting that assembly to the trans and your all set. Now I just need a TOB and clutch assembly. The only issue I had with the whole install was 3 holes that the adaptor bolts to the bell housing with were ever so slightly off and needed to be opened up a bit to get the bolt threaded.
 new computer (1 of 10) by lawrx, on Flickr
 new computer (2 of 10) by lawrx, on Flickr
 new computer (3 of 10) by lawrx, on Flickr
 new computer (4 of 10) by lawrx, on Flickr
 new computer (5 of 10) by lawrx, on Flickr
 new computer (6 of 10) by lawrx, on Flickr
 new computer (7 of 10) by lawrx, on Flickr
 new computer (8 of 10) by lawrx, on Flickr
 new computer (9 of 10) by lawrx, on Flickr
 new computer (10 of 10) by lawrx, on Flickr
Leave a comment:
-
See previous post for updateOriginally posted by 190Evan View PostLeave a comment:
-
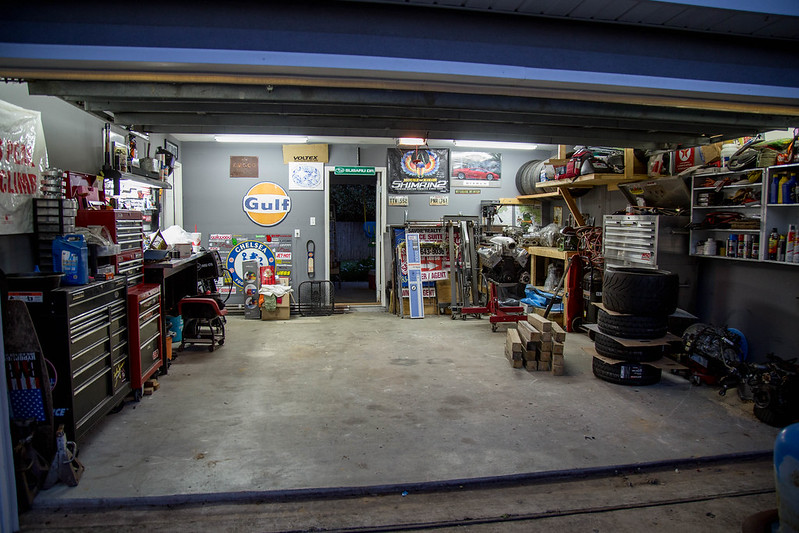
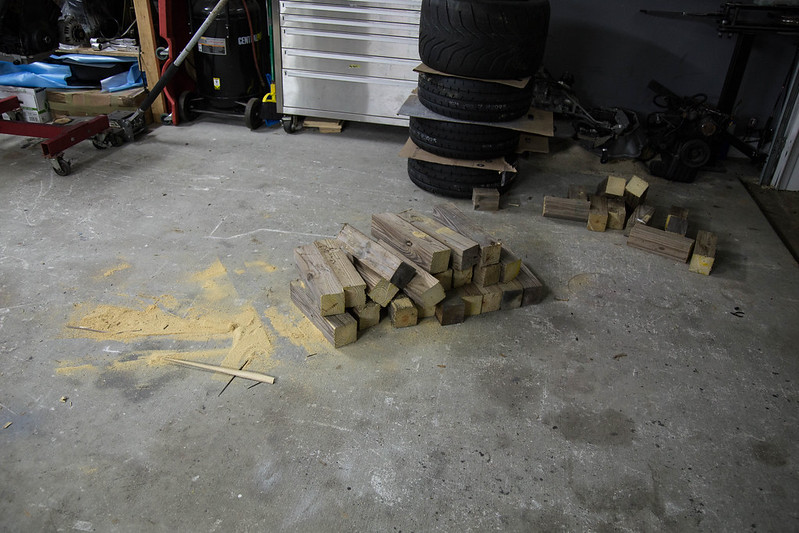
Mustang will be coming home soon!
My garage has been vacated and I now have space to bring it home. In leu of that Im using the excess fence post I chopped off to build some car stands to get the car off the ground and easier to work on till I pick up a small portable lift.
Thats all for now but there will be more progress being made in the coming weeks.
 new computer (1 of 8) by lawrx, on Flickr
 new computer (2 of 8) by lawrx, on Flickr
 new computer (3 of 8) by lawrx, on Flickr
 new computer (4 of 8) by lawrx, on Flickr
 new computer (5 of 8) by lawrx, on Flickr
 new computer (6 of 8) by lawrx, on Flickr
 new computer (7 of 8) by lawrx, on Flickr
 new computer (8 of 8) by lawrx, on Flickr
Leave a comment:
-
Did I miss an update or is this new news lmao? I don't have crazy experience with how LS heads work with boost but just looking at the numbers I was assuming on the previous post.Leave a comment:

Leave a comment: