Announcement

Collapse
No announcement yet.

E39 Build: 6.0 LS. Coils. Burnouts.

Collapse
X
 
  • Filter
  • Time
  • Show
Clear All
new posts

  • nsogiba
    replied
    Engine block cleanup and paint

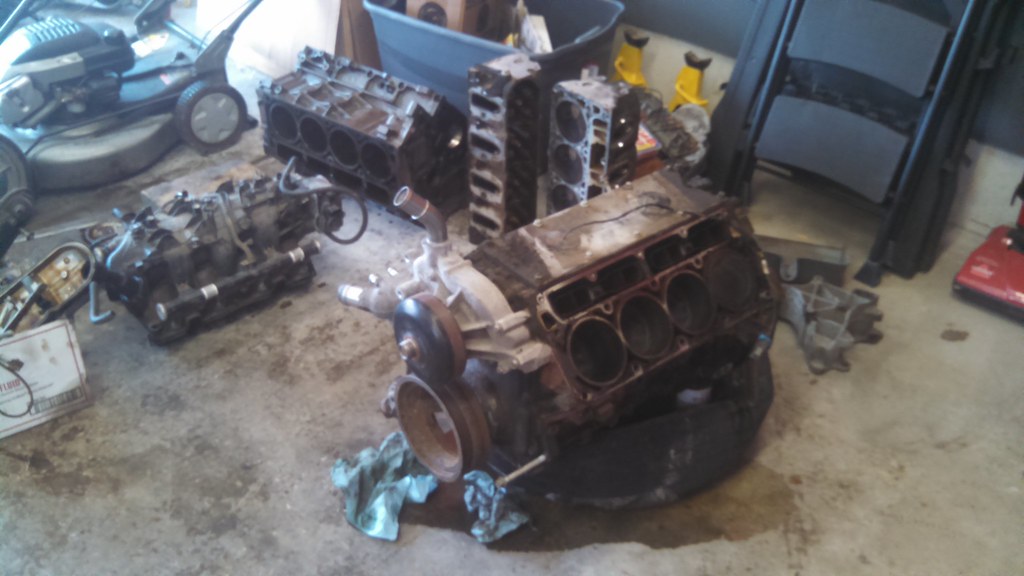
    Bottom end came back from the machine shop on Tuesday June 2nd, so I jumped right in.

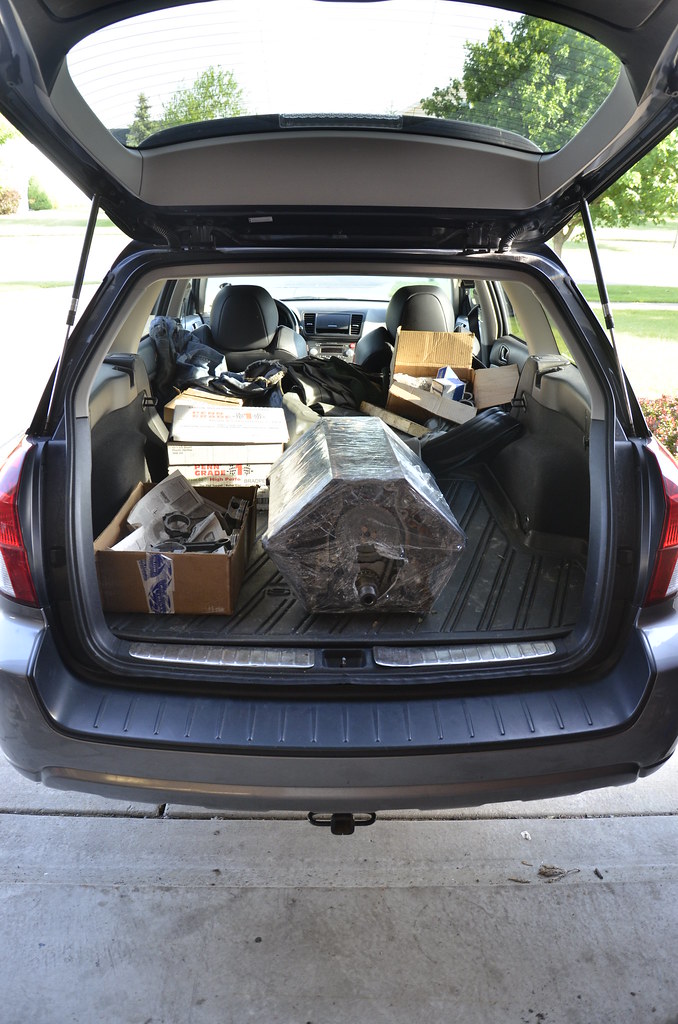
    _DSC3854 by Norbert Ogiba, on Flickr

    _DSC3855 by Norbert Ogiba, on Flickr

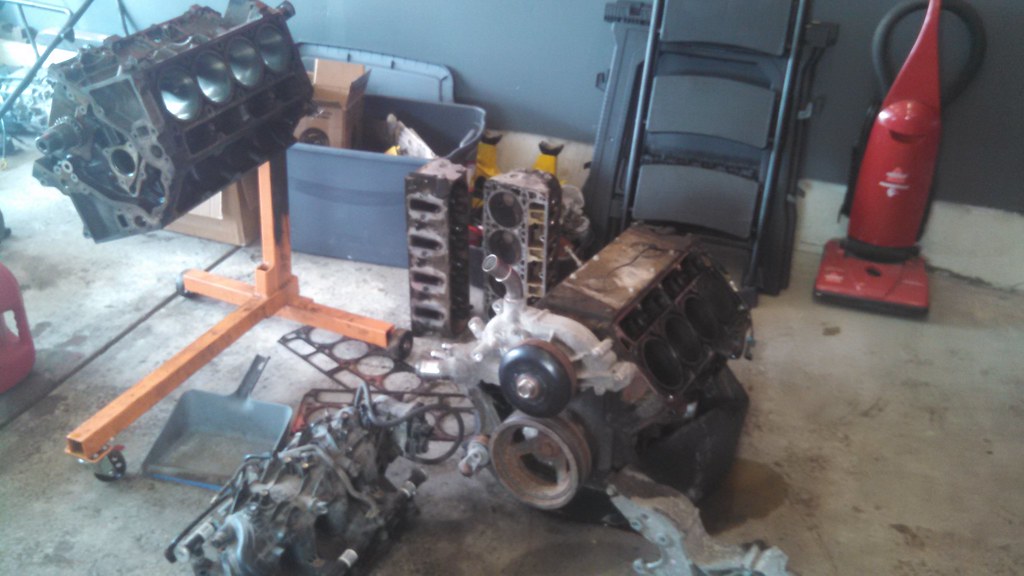
    Unwrapping the goodies
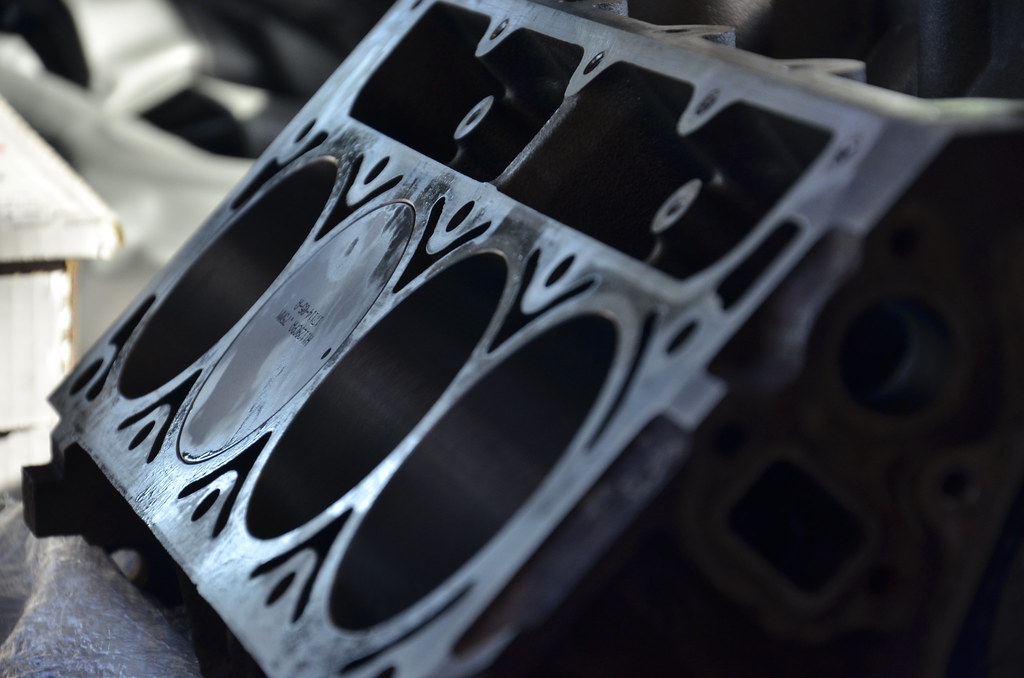
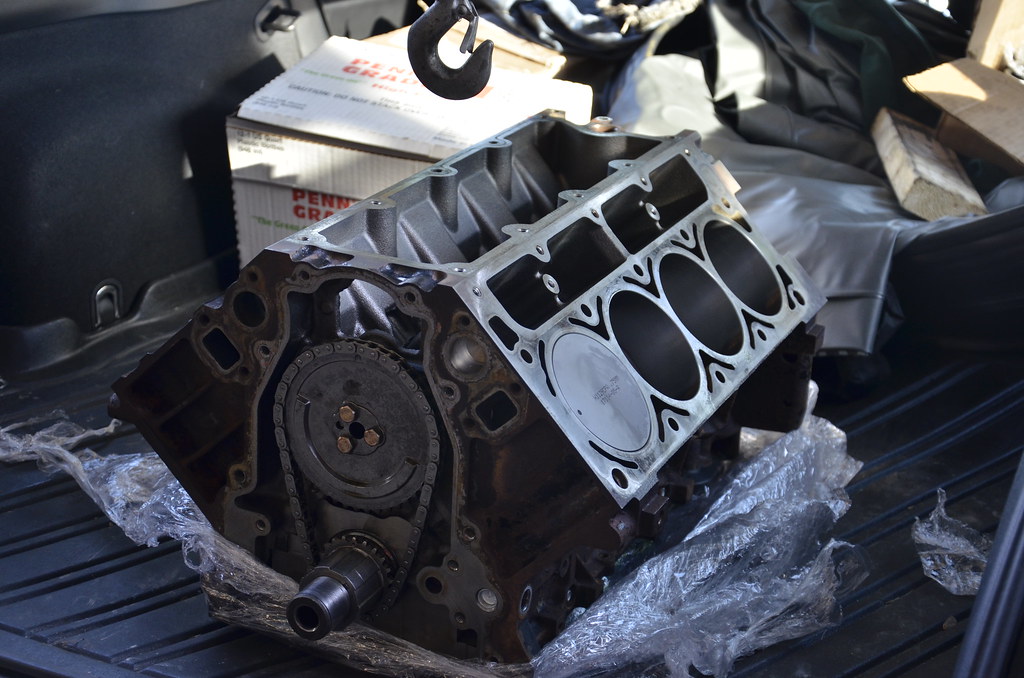
    _DSC3856 by Norbert Ogiba, on Flickr

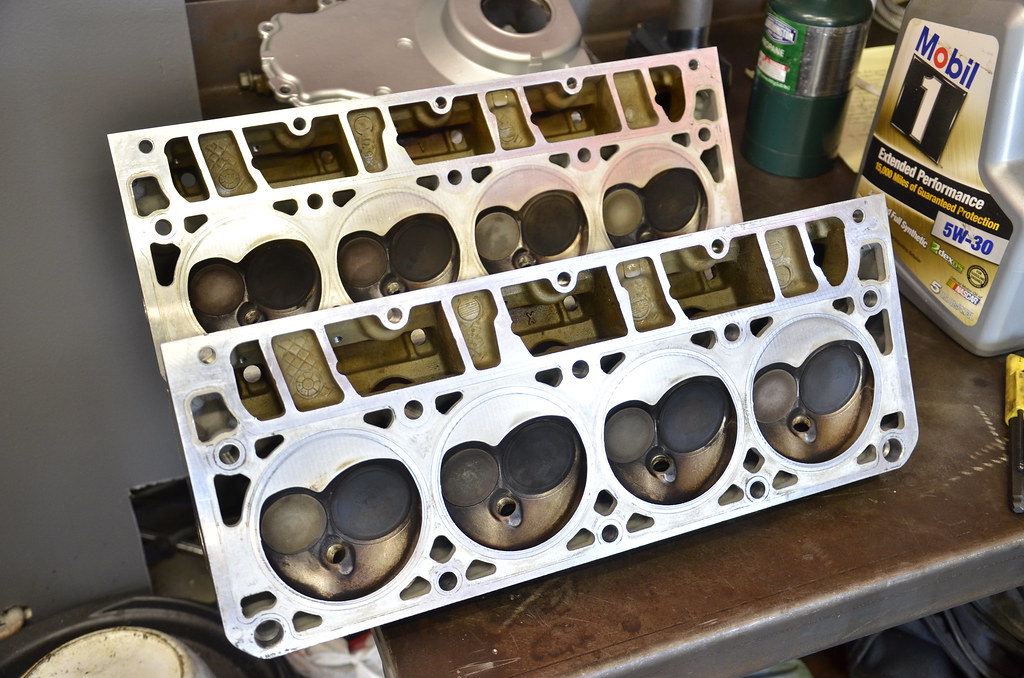
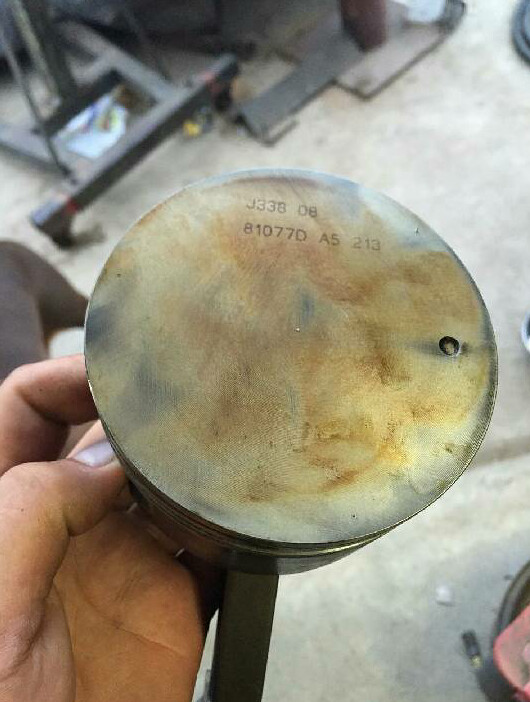
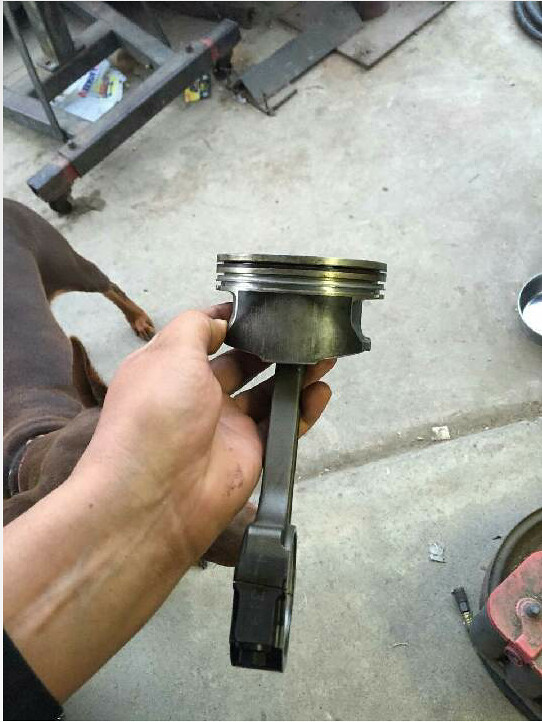
    Flat-top piston goodness. My builder oiled the motor lightly to prevent flash corrosion on deck surfaces
    _DSC3857 by Norbert Ogiba, on Flickr

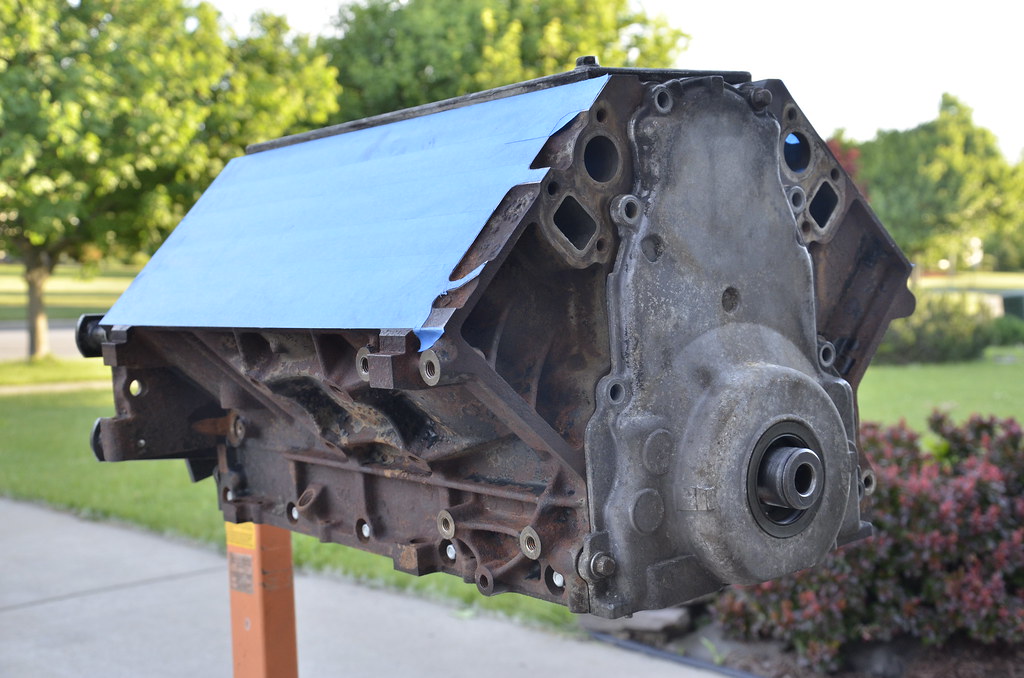
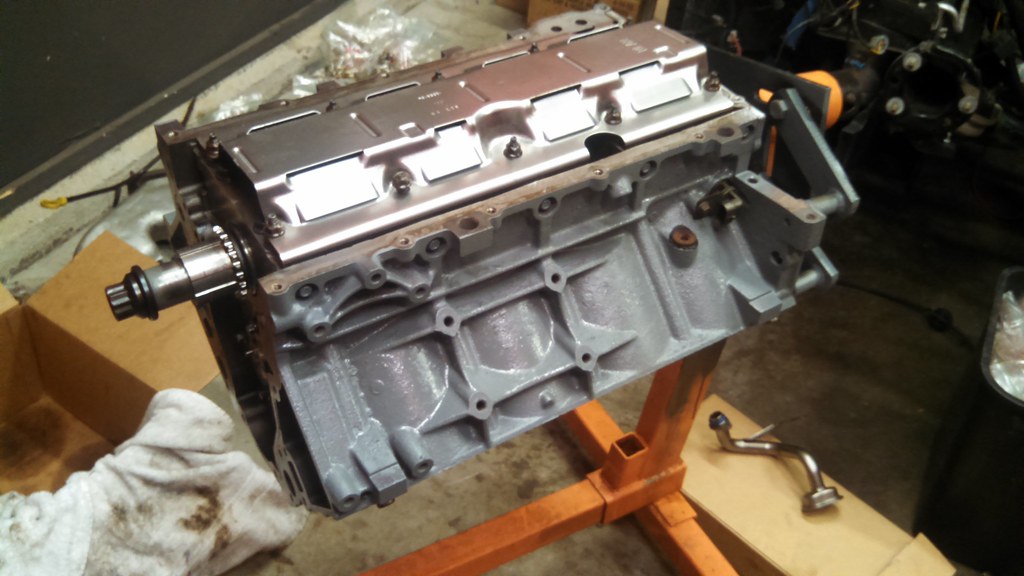
    Up on the stand, degreased, taped, and ready for paint
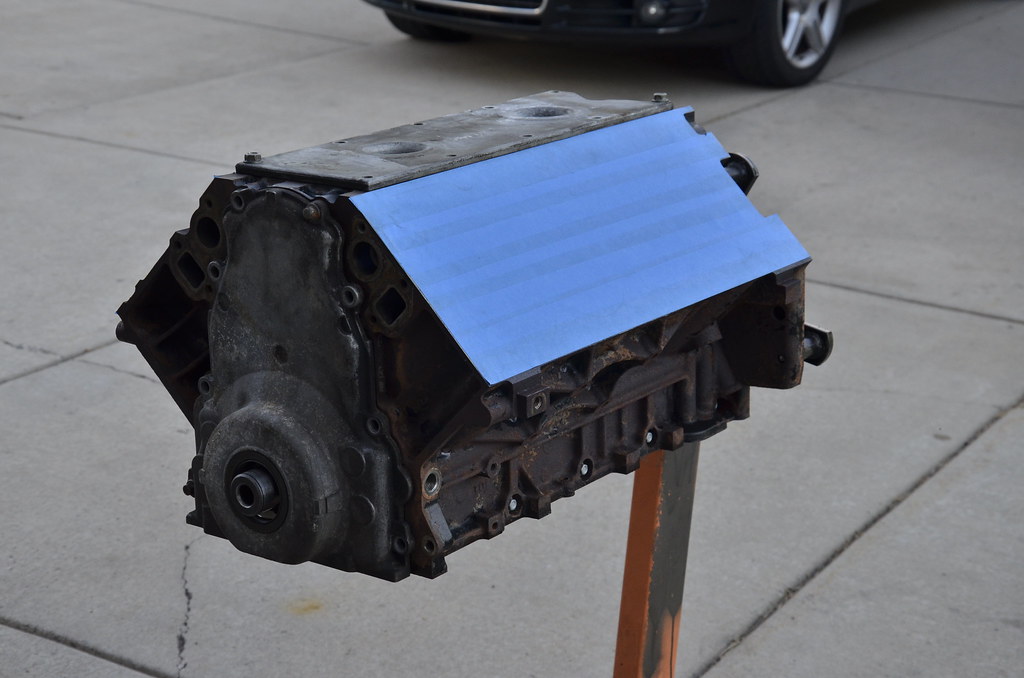
    _DSC3858 by Norbert Ogiba, on Flickr

    I had a set of nasty looking front and rear covers laying around, so rather than tape off those areas, I just snugged them up with 2 bolts to keep the paint out of the internals.
    _DSC3859 by Norbert Ogiba, on Flickr

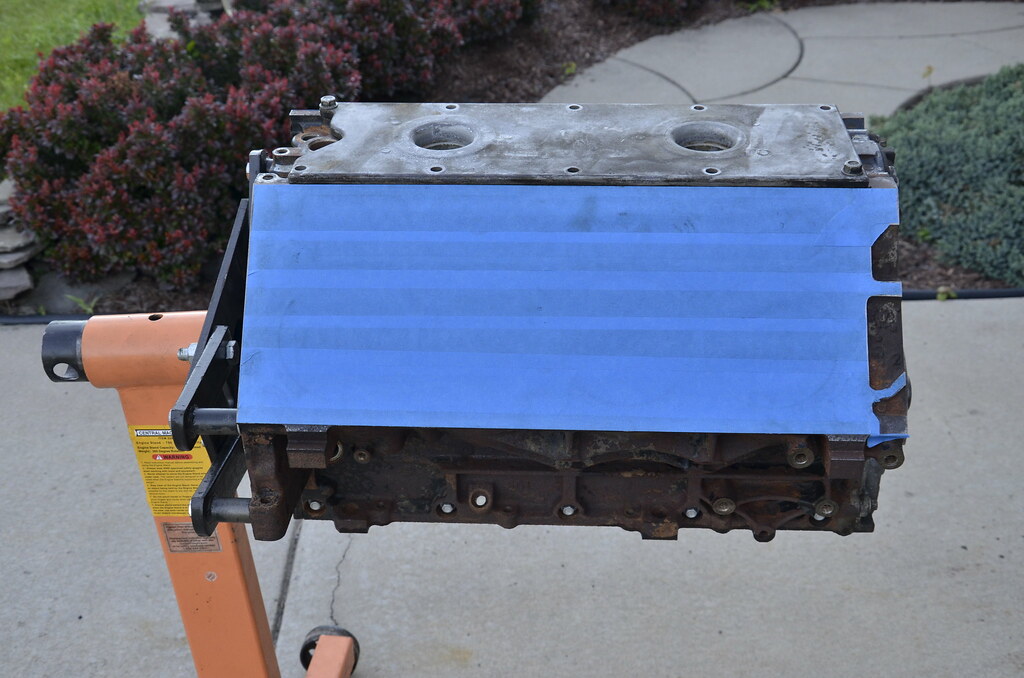
    _DSC3860 by Norbert Ogiba, on Flickr

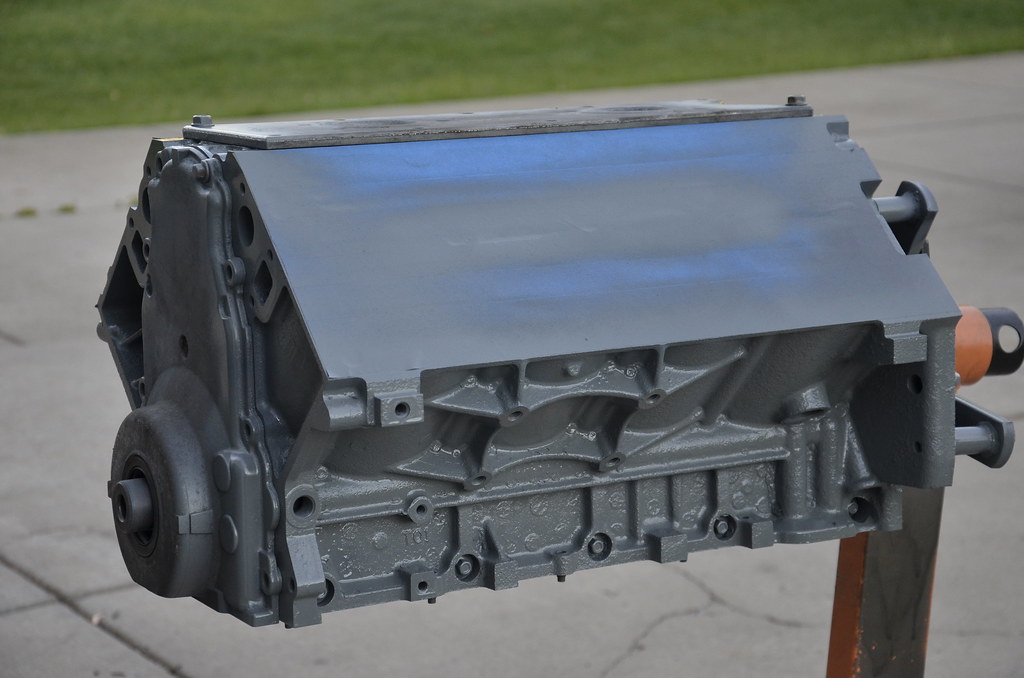
    I chose a high high engine primer to start with, followed by medium gray high heat engine enamel. The idea was a nice "clean" color that would make leaks easy to spot, and not draw too much attention. I was going to go with an aluminum alloy silver, but since this is an iron block, it wouldn't have looked "right" on the porous iron texture.
    _DSC3861 by Norbert Ogiba, on Flickr
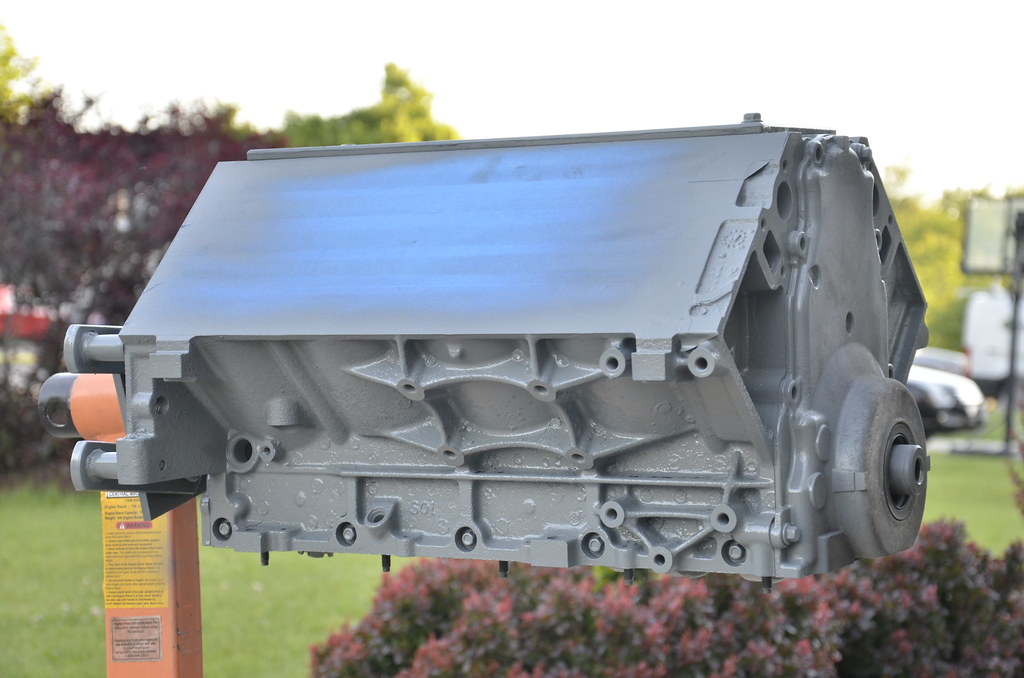
    .
    Certainly won't win any concourse awards but I like how it came out.
    _DSC3862 by Norbert Ogiba, on Flickr

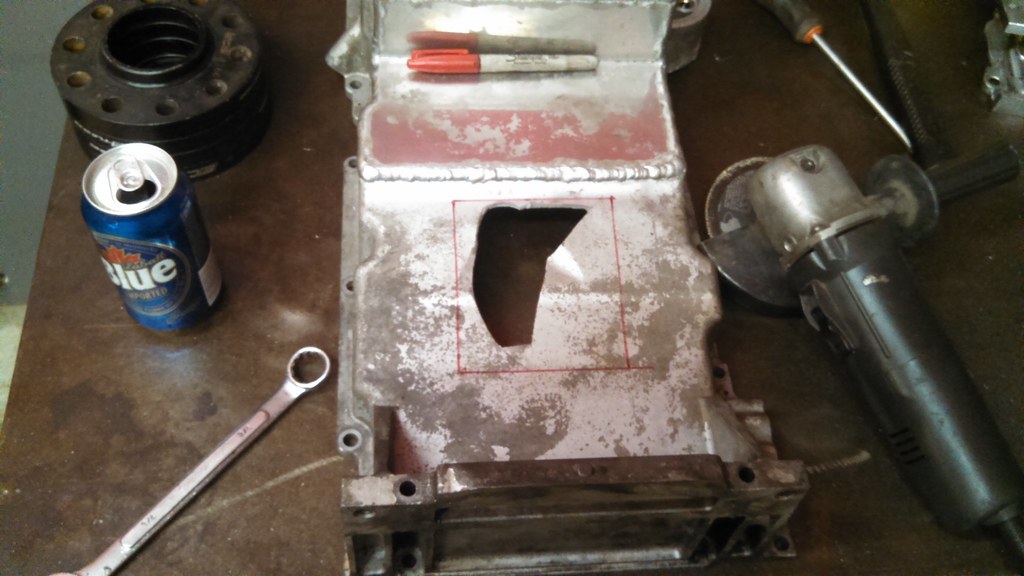
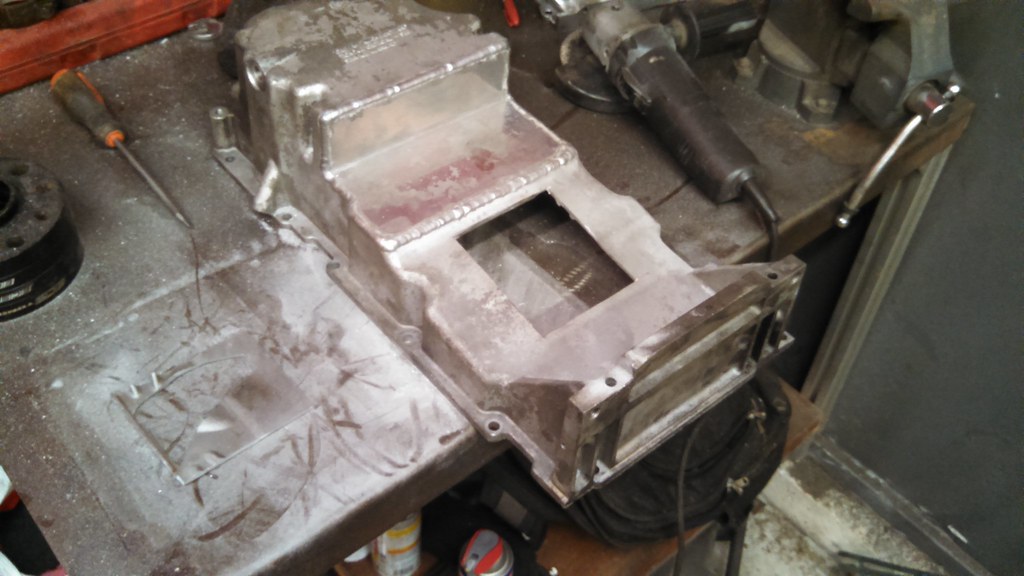
    Oil pan was welded up by a local shop and got a fresh coat of silver aluminum color paint.
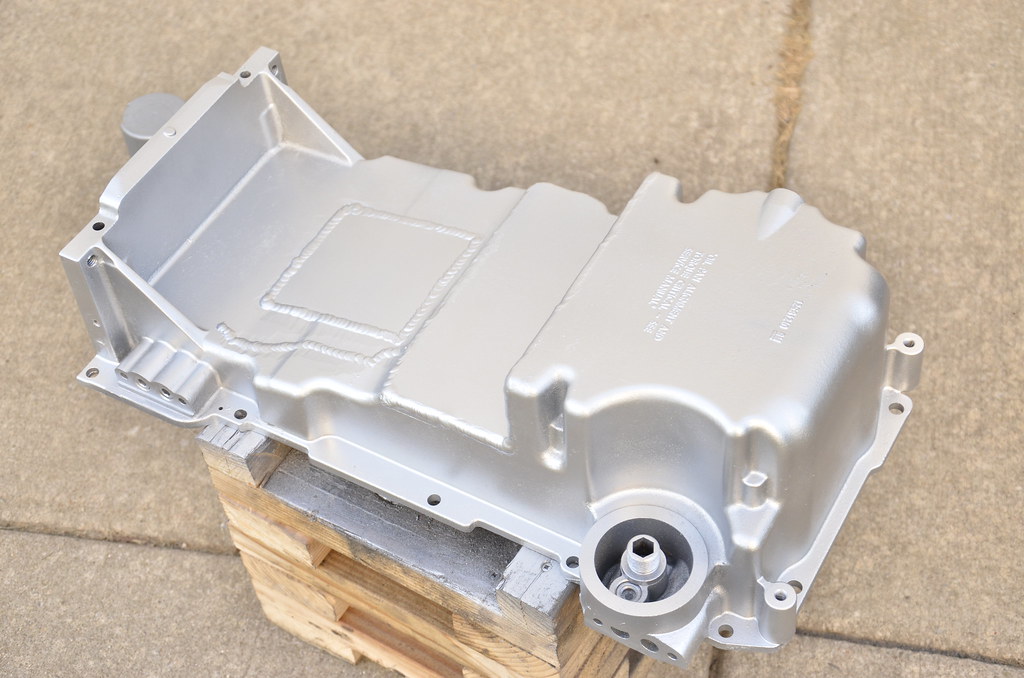
    _DSC3863 by Norbert Ogiba, on Flickr

    Leave a comment:


  • nsogiba
    replied
    Cylinder Head Cleaning and Reassembly
    Since one of my 317 heads was trashed from the bent/broken valve in the initial mishap, I decided to go down a different route with heads and grab a used set of 241s locally - they were very clean, low mileage, and the price was right. Although they don't technically flow as well as 317s, I was willing to give them a try since I did not have to mill them to bring up compression.

    The heads came assembled with stock springs and valves, but the previous owner had installed a set of stud-style rocker mounts (with loctite), so I spent an evening with a handheld MAP torch coaxing them out.

    IMG_20150530_200448_163 by Norbert Ogiba, on Flickr

    Before pictures - heads were removed from a 2002 Pontiac Trans Am with 50,000 miles.
    _DSC3835 by Norbert Ogiba, on Flickr

    _DSC3836 by Norbert Ogiba, on Flickr

    I cleaned all surfaces with a rag and isopropyl alcohol to remove grease and dirt, and then ran a plastic scraping tool over all surfaces to remove the last of the old gasket material. They came out looking very nice.

    Bare valve seat base
    _DSC3838 by Norbert Ogiba, on Flickr

    Seats installed
    _DSC3839 by Norbert Ogiba, on Flickr

    Brand new PRC dual valve springs with Titanium valve retainers.
    _DSC3841 by Norbert Ogiba, on Flickr

    Installed using my homemade spring compressor.
    _DSC3842 by Norbert Ogiba, on Flickr

    Before and after cleaning service on the heads, all done by hand. I actually really enjoyed this part.
    _DSC3844 by Norbert Ogiba, on Flickr
    The heads came out really nicely in the end. Of course I installed all new GM OEM valve seats and seals in addition to the dual springs and Ti retainers. The factory valve locks were in good shape and were reused.
    _DSC3850 by Norbert Ogiba, on Flickr

    Leave a comment:


  • nsogiba
    replied
    quick update - between the day job and working on the car I am pulling some 16+ hour days here (and will be for the next week)

    the good news is that things are moving right along with no issues (aside from misplacing my tube of RTV and spending 45 mins looking for it).

    Tuesday 6pm, motor picked up from builder. Bottom end (crank, pistons, rods) assembled, otherwise a totally bare block
    IMG_20150602_170056_314 by Norbert Ogiba, on Flickr

    Tuesday 11pm
    Block cleaned, masked, painted, all block coolant and oil plugs installed, oil tray on, cleaned and prepped oil pan/windage tray/pickup tube/oil pipes. Head dowels in. Crank and cam sensors in, along with valley cover and knock sensors. Had to call it quits as I was waiting on the oil barbell plug and a new timing chain. I love Summit Racing
    IMG_20150602_220307_082 by Norbert Ogiba, on Flickr

    Wednesday 11pm
    New timing chain installed and motor timed (LOL), cam bolts loctited and torqued. Oil pump installed, oil pickup tube inspected and installed (don't screw up that o-ring!) Rear cover and main seal installed, balancer pulled on to align front cover and main seal, both covers aligned and torqued. Oil pan and accessories installed, sealed and torqued, alignment checked. Deck surface cleaned, headgaskets and heads installed and ARP bolts torqued in sequence to spec. Wrapped up the night by installing and torquing 8 new spark plugs.
    IMG_20150603_221917_087 by Norbert Ogiba, on Flickr

    I am taking a ton of pictures with my other camera for documentation's sake but don't have time to make my usual very long winded post so those will have to wait until a few weeks from now

    Leave a comment:


  • nsogiba
    replied
    attitudes adjustments are free, hop to it and do work

    Leave a comment:


  • Miroteknik
    replied
    Wish I had your attitude.

    Such a great build dude.

    Leave a comment:


  • nsogiba
    replied
    so, a quick non pictorial update. I decided to go with some new pistons rather than reusing the LS2 stuff - and since the oversize units cost the same as the regular 4.00" bore, I decided to have the cylinders bored .030" over for a 370 build.
    So here's the rundown on the new motor
    2002 LQ4 Iron 6.0 pulled from "steak" truck - craigslist yeehaw special.
    Stock crank, .010 undersize mains
    Sealed Power Speed-Pro flat top pistons (4.030" Bore)
    Stock gen 3 rods, LS6 rod bolts
    New Clevite P rod bearings, cam bearings, main bearings, etc
    GTO oil pan, pickup tube, windage tray
    Sticking with the same cam, TSP 228R (228/228, .588/.588 @ 112*)


    Top end:
    317 heads milled .024” for 66cc chambers
    No porting, stock otherwise
    GM 6.0 MLS headgaskets
    ARP headbolts
    TSP pushrods, dual springs, titanium retainers


    Intake:
    Stock LS6 intake manifold
    LS6 throttle body
    3" pipe with stock LQ4 MAF, cone filter
    Stock LS6 fuel rail, with 42# Ford Greentop injectors


    Exhaust:
    CTSV cast iron manifolds with the cats removed, into OEM BMW exhaust with 2 secondary cats.
    3" QTP Cutout/exhaust dump before all mufflers/ resonators


    Motor is at the machine shop now, I will be doing the top end assembly myself. Still need to tie up a few loose ends before it's ready for the car, like this:


    Leave a comment:


  • phet_fresh
    replied
    Wow, so much respect your build.

    Leave a comment:


  • gearheaded
    replied
    Man I love what you've done here, and I got mad respect for your elf taught ingenuity! I'm also an engineer, I finding my fellow professionals who also crunch numbers and read diagrams by day, and let of steam with fabrication and construction/destruction by night.

    Keep it up!

    Leave a comment:


  • nsogiba
    replied
    buy my wheel spacers.

    Leave a comment:


  • B Rod
    replied
    Man, that sure sucks about the blown motor, but glad you are staying optimistic. Can't wait to hear it run on the new set up!

    Leave a comment:


  • TWM Performance
    replied
    Your build is meticulous and stunning. Thumbs up!

    - Renato

    Leave a comment:


  • nsogiba
    replied
    Which brings us to this past weekend. Was cleaning up the garage a bit on Sunday morning, on a whim decided to hop on the local Craigslist and do the usual search for "6.0". Lo and behold there was one locally for cheap, with a "slight knock", For my purposes, perfect! It came with some nice parts that will help recoup some costs. Loaded her up and had it home before noon. Not much info on the motor other than that it "came out of a steak truck" (LOL) and had aluminum 317 heads (so, it was at least a 2001+).

    Yanked the intake and heads and checked bores, they looked great for unknown mileage.


    Removed the remaining 15 valve springs at my super fancy cylinder head service bench. Wine and cheese come standard


    Awaiting these LS2 full floating rods/pistons, should be here tomorrow - can't say no to more compression while I'm in there!


    Tonight I'm borrowing a friend's engine crank to finally put the new motor on the stand. I had my old man drop off the power washer last night (and fixed a broken switch on it), so as soon as it's completely torn down, I will drag the block over to the neighbor's front yard and start cleaning it up.

    Leave a comment:


  • nsogiba
    replied
    autopsy continues. wife wants to see what happened and helps.


    ok, something to keep us busy while I wait for parts to come in. I found a set of flat-top Corvette LS2 pistons and rods, which will give me a nice bump in compression (i was running the factory "truck" dished pistons before)

    some pictures I had on my camera before the motor died. Life was so good!

    Finished my exhaust sometime in March and threw some VHT flameproof on it.


    few items came in from ECS


    the old coolant bottle didn't look great


    30 seconds later, voila


    New kidney grills to replace old slightly cracked parts


    I had a few extra minutes so I moved my hose reel in the garage to a more convenient spot. My wife kept banging into it with her car door and would have continued to do so until ALL the paint was removed from the door, so a change was in order.


    tidied up the garage, washed the car


    his and hers


    back to reality, some pictures of the motor pull


    After 90 minutes we were here
    [url=https://flic.kr/p/rn8WEq]

    Day 2 after work


    now the autopsy

    LH head, #5. Valve put huge gouges in the combustion chamber. Luckily, these heads are readily available (and cheap!) so replacement will be easy.


    luckily the timing chain was in one piece, so I was confident no other valvetrain was damaged (sure enough when I pulled the other head off, everything was great)


    the windage tray was not so lucky


    and for the grand finale...not one broken rod, but 2!


    When the first rod broke, a piece of something must have gotten into the path of the rod next door rod, and knocked him out too.

    Took a break from the motor work to bring home a new toy


    Technician117 finally sees the light and brings over some GM power


    Mockup - still need to decide final placement and plan new pads for the posts

    Leave a comment:


  • loekaaz
    replied
    Damn... such a shame. Good luck with finding a new engine!

    Leave a comment:


  • nsogiba
    replied
    So, some spring updates. I replaced the overflow bottle as the old one was discolored, replaced the kidney grills with new ones, and raised/adjusted/leveled the coilovers.

    Took the car to be tuned at New Era, Mike did a nice job, although it proved difficult to tune.

    Drove it to work every day for a week and generally enjoyed it. Went to Rochester to visit a friend:
    IMG_20150411_183216_524

    On the drive back, about 60 miles from home, I got a random miss that turned into a tap, which quickly turned into a light knock 30 seconds later
    IMG_20150412_112537_907

    Got it home, pulled it into the garage, and we get this
    IMG_20150413_184814_030

    IMG_20150414_204631_951

    Oil Pan Doritos
    IMG_20150413_190329_300

    IMG_20150414_204647_354

    All caused by this
    IMG_20150413_191344_548

    Spring broke, dropped a valve, valve met piston, broke the rod, and sent it through the pan and block. So, now I'll need a replacement block and heads - the valve made some big gouges on the inside of the combustion chamber - currently on the hunt for a dropout just like I had. The spring was a single beehive, PRC 1518 good to .600 (my cam is .588 on both intake/exhaust). I bought the cam, springs, and pushrods as part of a package deal sold by Texas Speed. Spoke to them and they will be replacing all 16 springs for me with a stronger set, along with other seals, seats, and retainers. Just kind of ironic since I only drove the car maybe 300 miles after putting it on the road...if it had happened just a few hundred miles sooner, it would have been late last year, and I'd have been able to spend all winter fixing it. But, it is what it is, so gotta move forward.

    Day after the motor blew - 90 mins in
    IMG_20150413_203311_878

    Another few hours on Tuesday got me here
    IMG_20150414_204740_522
    IMG_20150414_204610_208

    Had a buddy stop by and help me "put it in storage"

    _DSC3708

    _DSC3709

    So, it sits for now until I can find a new motor. I only had a chance to pull the one head, and it was trashed. Still need to put the motor on a stand and pull the pan and accessories/front cover to see if the lifters/cam survived.

    Leave a comment:

Working...
X