 Tweet
Tweet
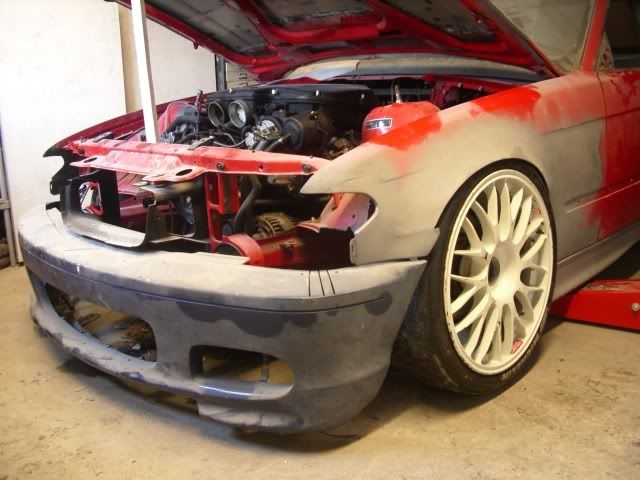
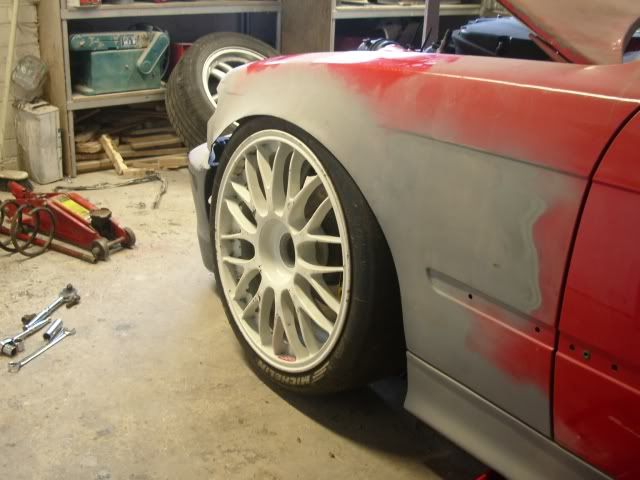
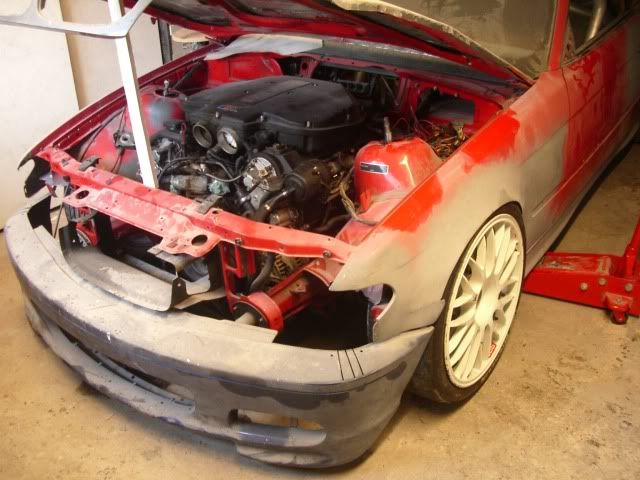
The project that never ends.
-
-
Looks promising. Your fab work is greatReal name is James

Comment
-
Very nice fab work!
whats with stanceworks forums and the plethora of lame gif's?Comment
-
Awe shit... I'm liking the body mods so far can't wait to see more
Say WhaaaaaaaaaaaaaaComment
-
Thanks for all the comments guys (both good and bad! LOL)
I'll try and get another 'catch up update' together later on today for y'all ;-)Comment
-
its different, i like itComment
-
So thought I'd throw a more detailed recap of the wheels, suspension and brakes together today to see where is going..
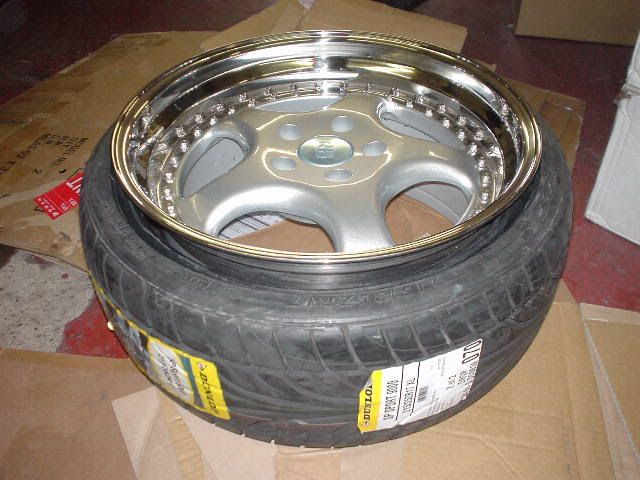
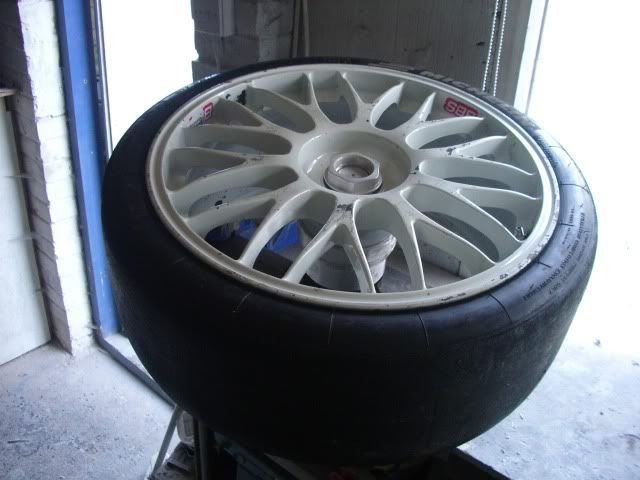
So back in the days I picked up a set of RH ZW1's in fairly conservative sizes of 8.5 & 9.5's.... I knew the widths were never going to make me happy to I widened the 8.5's to 10's and swapped them to the back.
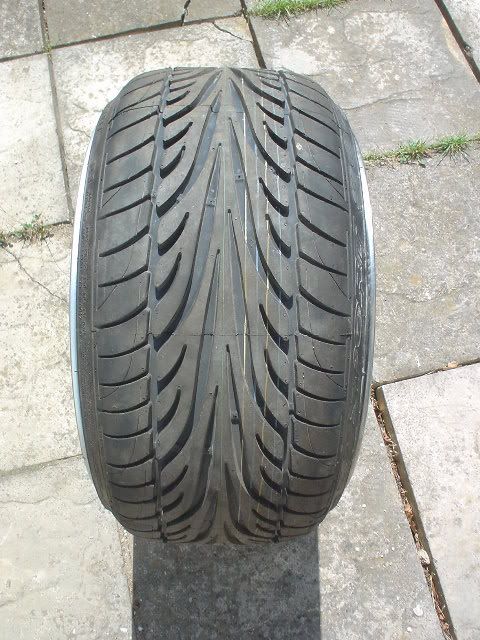
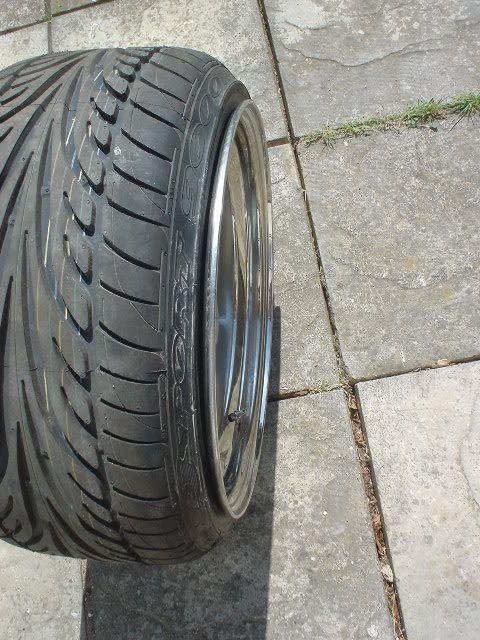
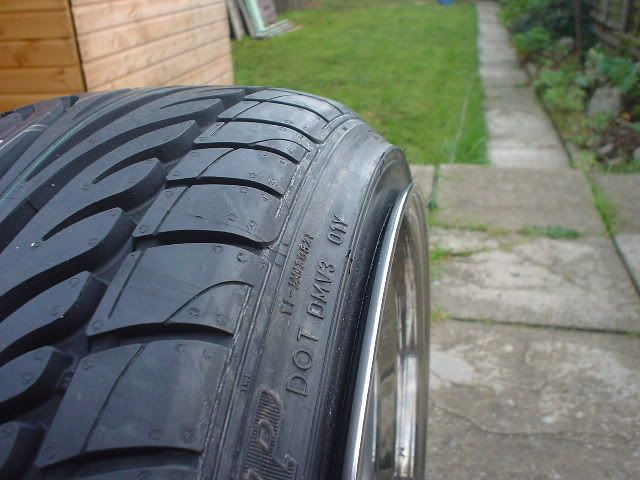
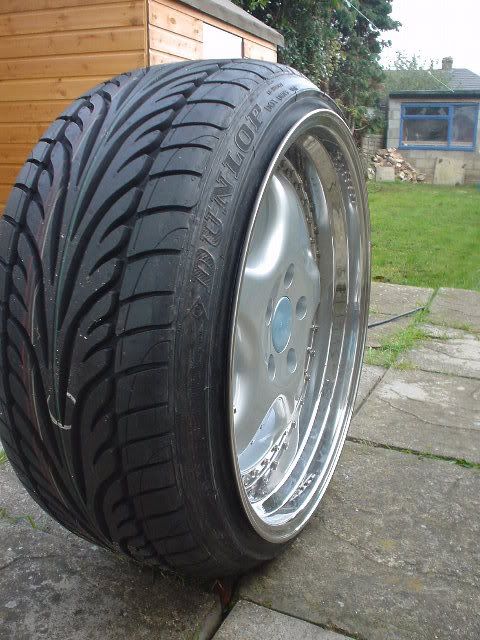
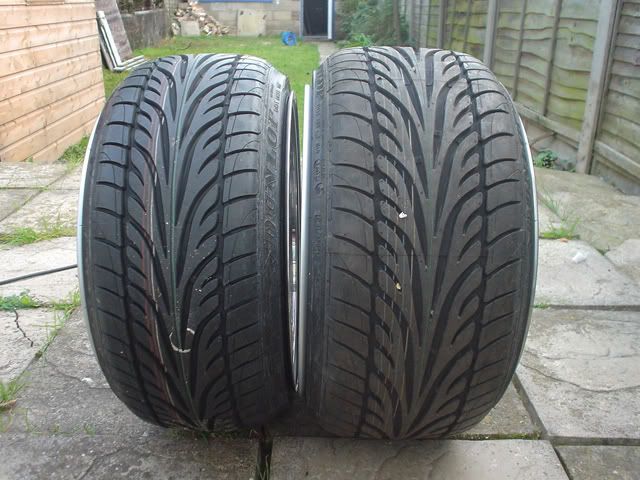
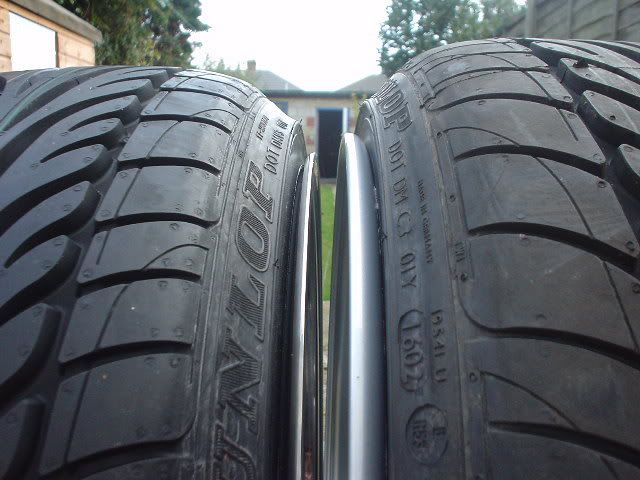
Built up the new 10 last week let the silicone set for a good few days and today was the day! 8) the tyre fella fitted them no worries but said he WOULD NOT inflat them due to the width of them on the rim...fair do's I thought he needs to cover his arse... so I took the uninflatted tyre around to Tesco and did it myself :lol: These are the 225's that were fitted to my 9.5's (that are doing on the front) now I'm planning on a 215/35 for the 9.5's :twisted: :twisted:

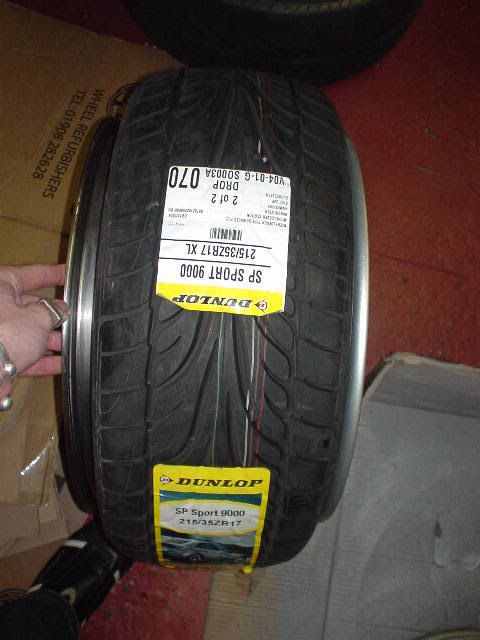
After deciding that my local garage that fitted the first 225 on the 10 couldn't be trusted to try and fit the new 215's on the 9.5's there was only one option to find another company that fitted of stretch tyres
A phone call during the week just to confirm they could fit me in on saturday the plan was hatched. Seems abit crazy to drive 140 miles, 2 1/2 hours round trip just to get tyres fitted but needs must!!!
Rocked up this morning just before 11 and explained what was what... I needed the remaining 225 taking off the 9.5 and putting on the newly made up 10 and then fitting the brand new 215's on the 9.5's.
The chaps set to work pretty much straight away getting the 225 off the 10 and getting the 215's onto the 9.5's..... now with a good dose of jemmy bars and such like the new 215's were on in no time! Leaving some poor dudes Civic up on the ramps half way through having a set of coilovers fitted! PMSL!!!
Check out these man..... how the f*** are they going to seal on the rims!!! :smt103 :smt119 :lol:
The first 215 took abit of work first needed to soften the side walls, this was done by using the bead breaker part of the tyre fitting machine just to lossen them up abit, next was to grease the crap out of the side to give them every chance to pop over the inner beads and seal.
Got the first one on with abit of hassle (about an 1 1/2 hours) and still the boys weren't losing their rags or getting discouraged with the work in hand!!! That fact alone makes these fellas worth their weights in gold! (and thats alot of f*** gold! LMAO)
On to the second 215...... boy..... there not much to say, the process was repeated and the they had the tyre popping over the inner beads with the balster but the f*** would NOT seal!!!! :x Customers came and went, people turned up and had a mooch around and went.... and the tyre still wasn't sealing there was one area that just wouldn't sit right..... heads were being scratched and a final plan formulated :twisted: 8) A dollop of rubber beading compund around the problem area and the tyre was popped on for the final (fingers crossed) time, its went on and was leaking air... I can imagine the look of frustration on my face would have been clear but then I was reminded that there was over 120 psi!!!!!!!!!!!!!!!!!!! in the tyre!! so no doubt it'd leak under any condition! As the tyres was slowly deflated to around 60psi the leaking had stopped and by the time it was down to 40 there was nothing, not a drop!
The beading compound was left to dry while the boys tucked into there chicken and I went to do some other shizzle ( ). When I got back the tyre was still inflated and it was looking pukka!!!
So I rolled up at 10.45 and left a 3.40!!! not once did they try and say it wasn't possible and try to give up, "I'm not getting beaten by a bloody tyre" was said plenty of time! :lol:
Had plenty of laughs, some head scratching and a bloody good day all things considered! But they were damn glad to see the back of me!!!!!
HUGE thanks to Style Dynamixs! Dont think any other garage would have had the patience these dudes had.... :smt023 :smt038
p.s: the actual pictures of the newly fitted up tyres will come tomorrow but you've seen the sort of s*** before.... today was all about the story
Roll the pictures......
Comment
-
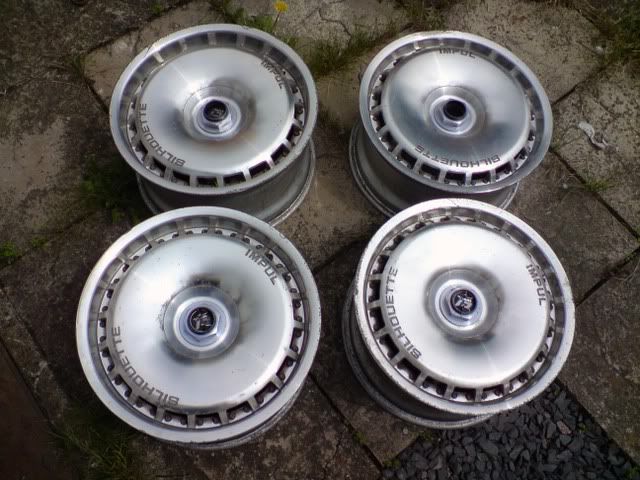
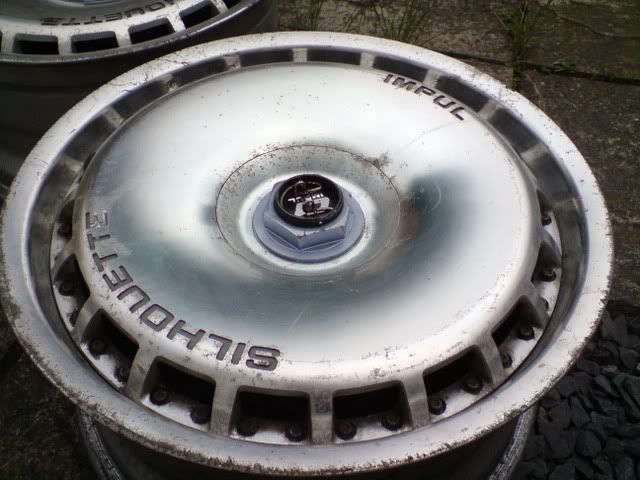
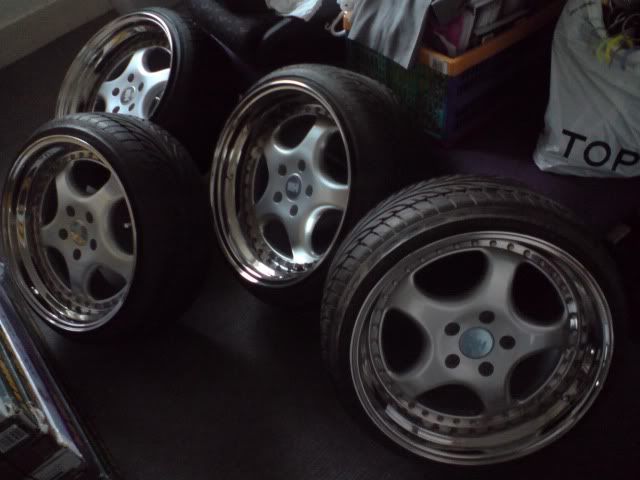
As the years went by LOL I started to fall outta love with the Zw1's and fancied taking the car in a different style direction...so I bought these and imported them from the USA
Went on a little road trip today to Essex to pick these up from the import dudes...
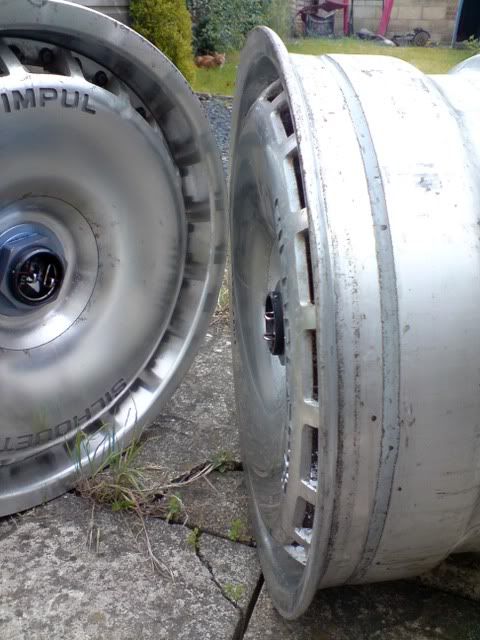
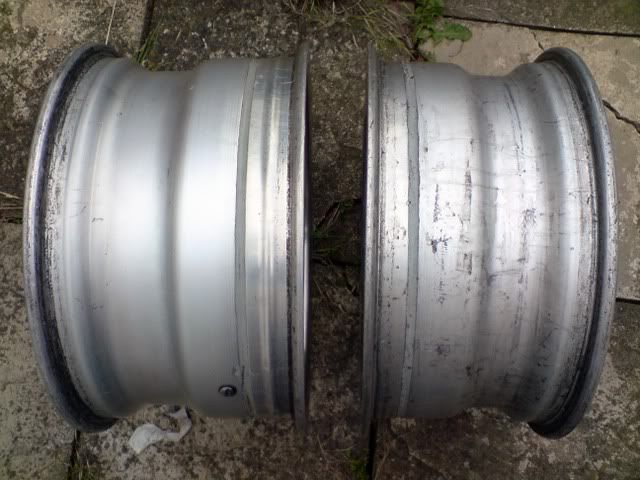
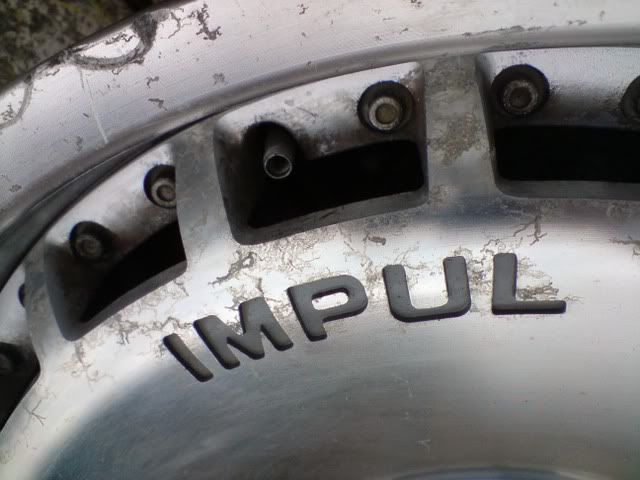
Picked up my Impuls! they are 8's & 9's x 17, 3 piece split rims. All need to good refurb which I fully knew about. 1 does have a flat spot on the outer rim so I'll need to get that fixed, also there is a deep gouge on another which'll need filling with weld as I'm planning to polish them up so I cant use any metal filler.
I'll have to sort out some PCD adaptors to go from 5x114.3 to 5x120 but that no biggie, to fill the arches I think the 9's will end up ET-10(ish) and the 8's something similar
PICS....................
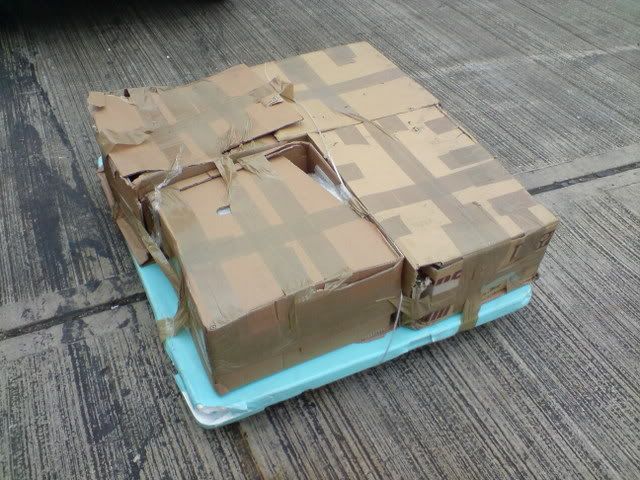


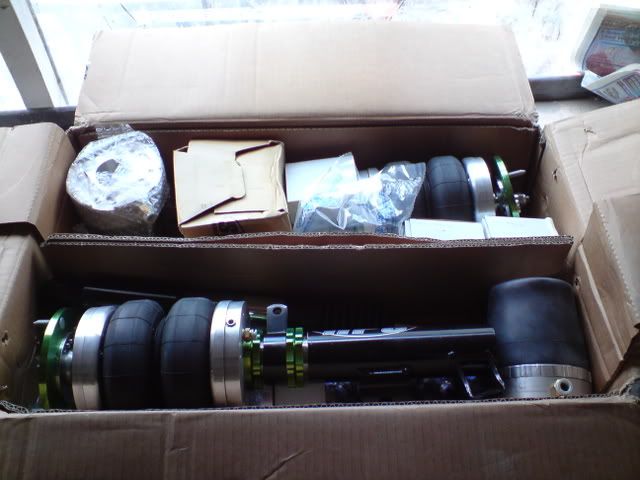
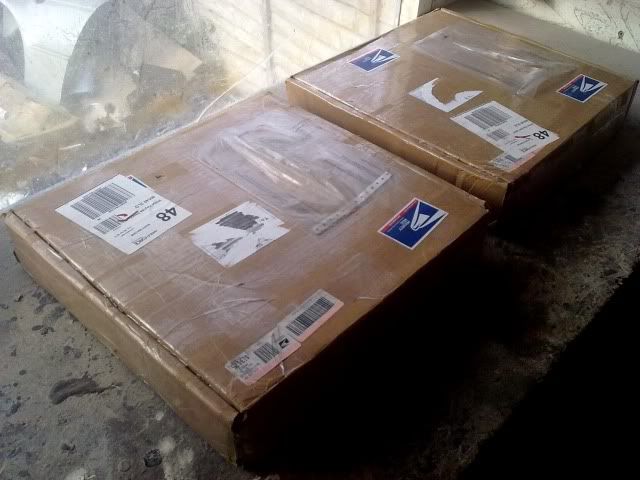
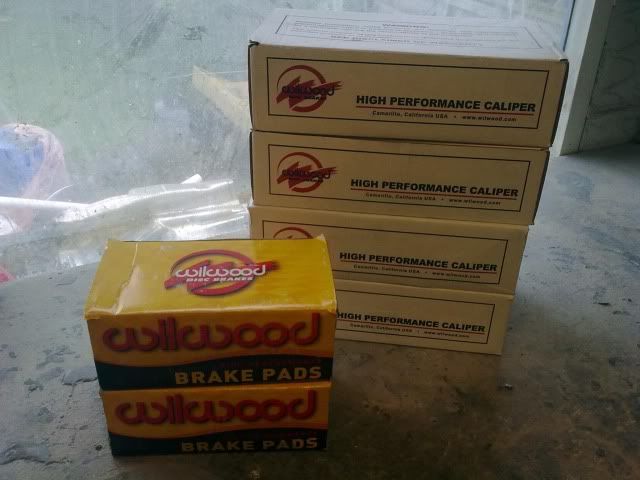
And also I had a couple of boxes (well 4 actually) arrived from the US... just a quick picture for now
Comment
-
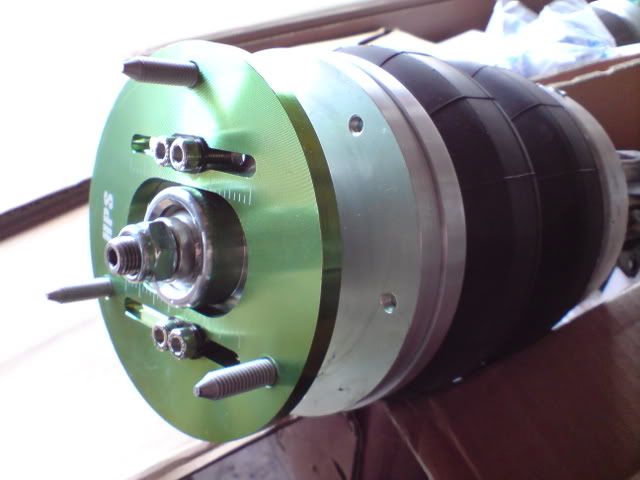
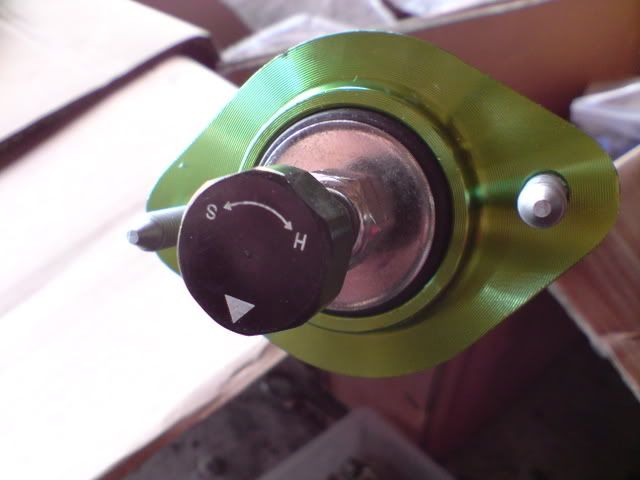
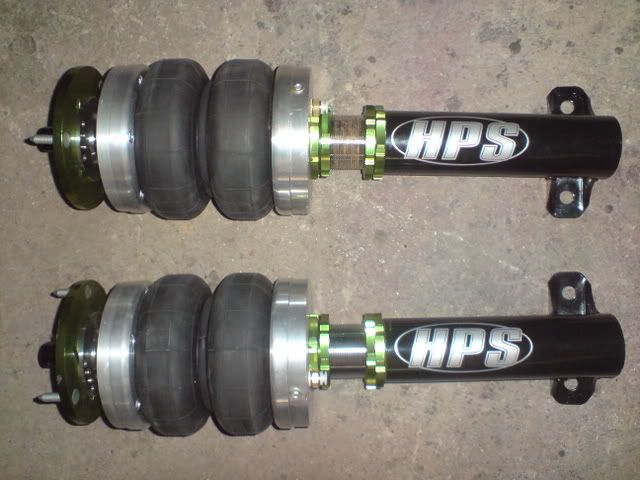
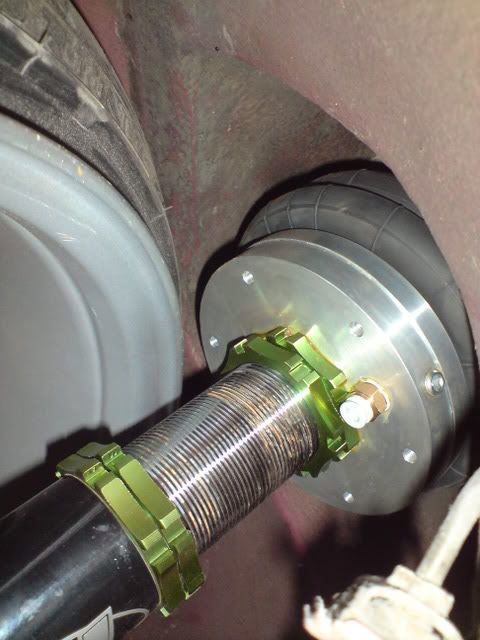
AIRRIDE:
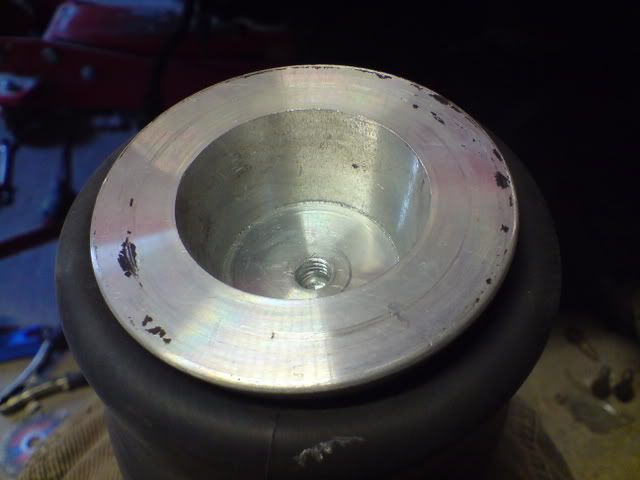
I've not really mentioned this in any great detail but here it is: It's made my a Swiss company called HPS their struts, tanks, bags are made in house and are fooking stunning!!! They piss all over what the companies in the UK have to offer I have to say! The struts are adjustable for dampening, the bags themselves are on coilover collars so you can get the dumped height absolutely perfect! I've gone for 10mm valves & lines with 2x 5 gallon tanks that you've seen in the boot buld & a single compressor.
They come with billet top mounts front & rear with camber adjustment on the front!! Billet coilover collars these things are the nuts! Yes certain big air ride players kits in the UK are ALOT cheaper but I wanted all out quality so I paid the price!!!! B)
Now the kit is sold as 'bolt in'.....its not! Haha
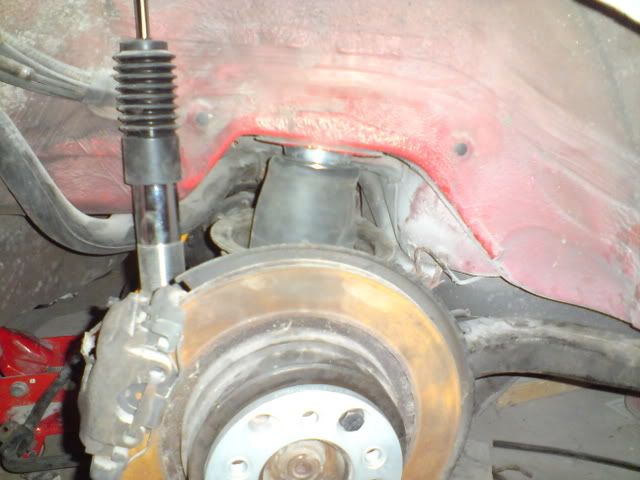
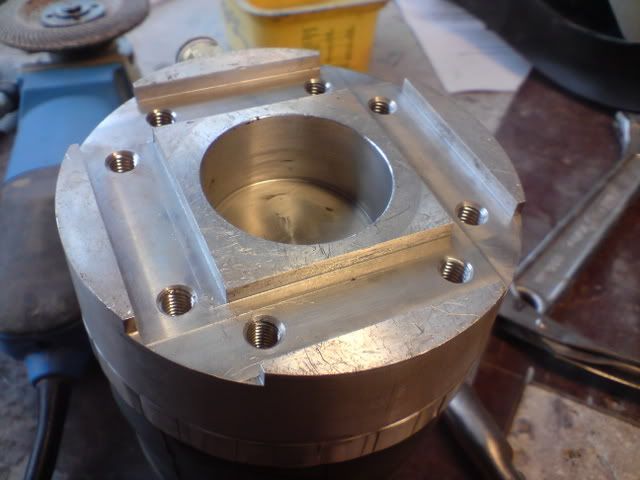
The rear bags needed some work to them to get them bolted up to the car, there were predrilled holes in the bottom of the rear bags but nothing for the top, the bag wouldn't fall out of the cup at the top but I didn't like the idea of it not being bolted in securely! Picky I know! LOL
First fix the bottom of the bag drill 4 holes in the rear trailing arm..
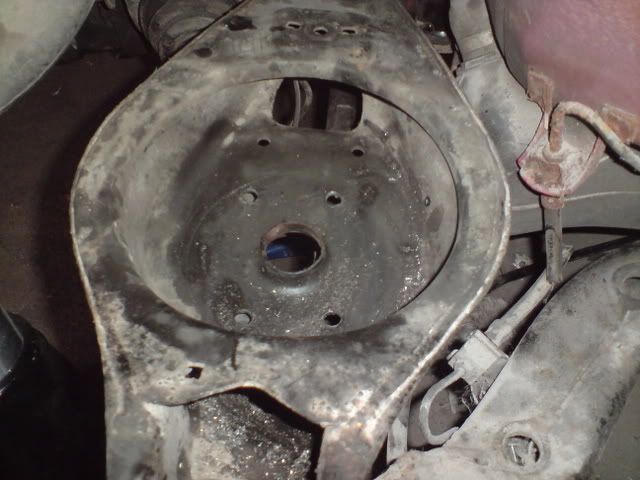
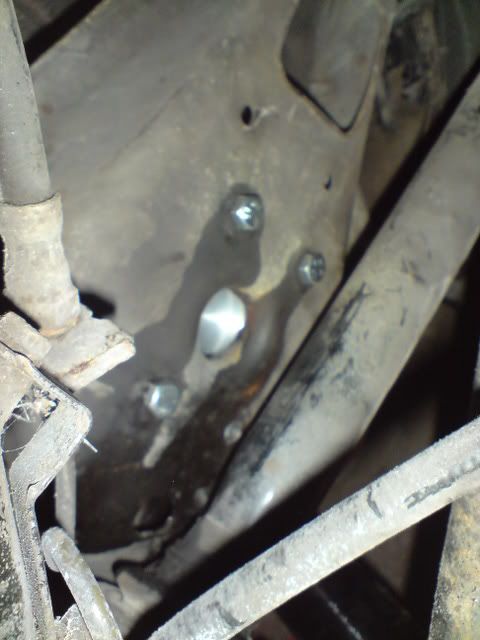
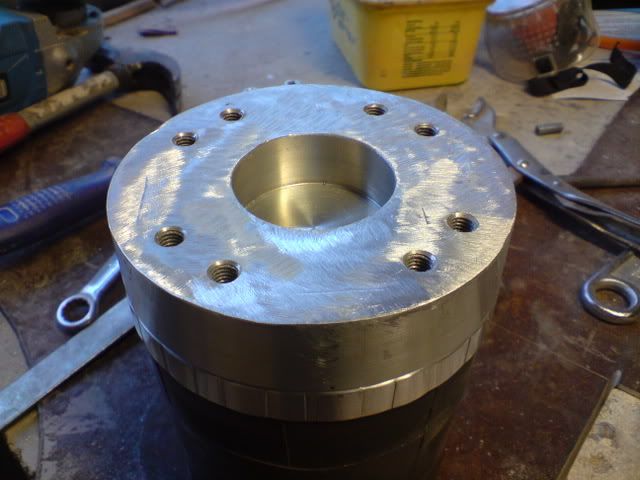
Only the other weekend I finally got around to fitting the top how I wanted! I know it might not be very clear what I've done but I've basically cut down the top spring cup, made up a kinda new top mount as pictured below then drilled into the top of the bag and threaded that so the bag screws up to the new mount holding the top of the bag secure
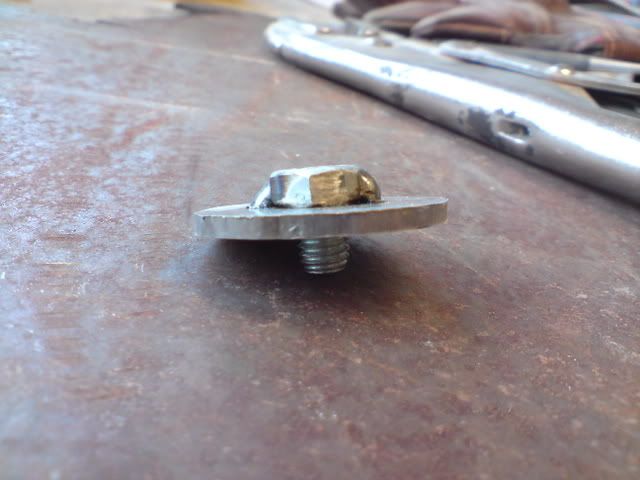
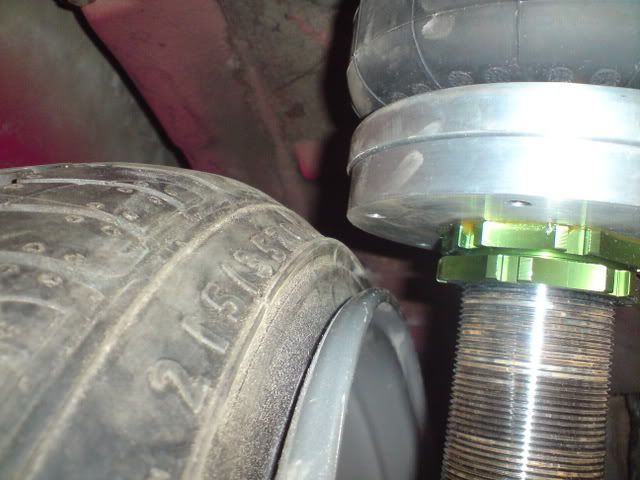
Drilled & tapped bag..
Top screwed in....
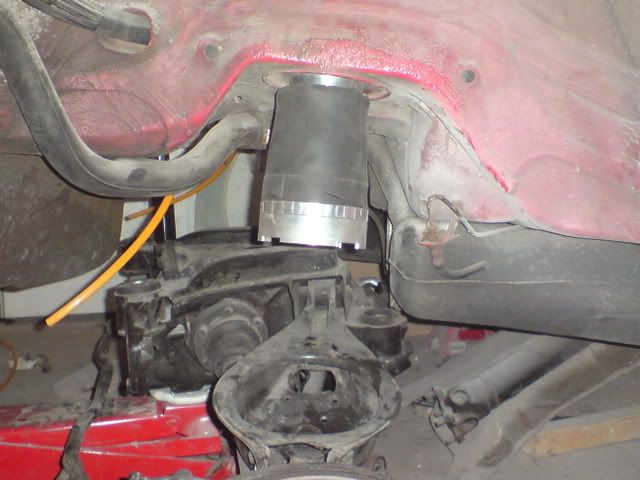
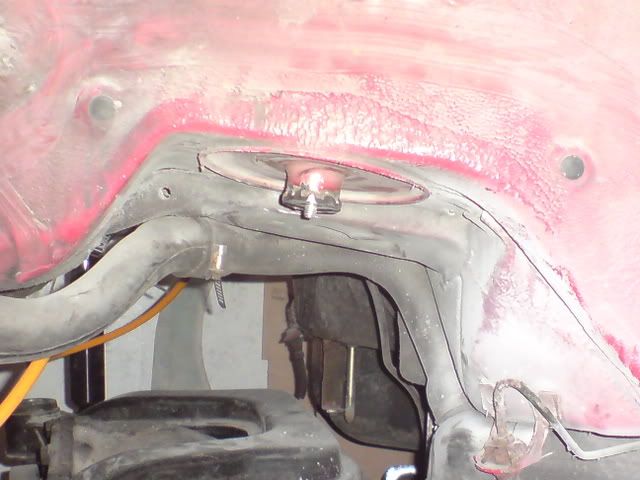
Bottom bolted in strut installed
The front bolted straight in and to be honest I've not set these up yet, all I know is they go loooooooooooooow!!!
The bags need raising because the front wheel is tucked TIGHT up against the arch and there's still travel! LOL I'm going to get them setup so I'm able to dump the car and not worry about hitting the arches

When I first installed the rear bags I was disappointed in how low I could get the car, the bags just didn't compress as much as I wanted! so.... to gain and extra 10mm
Bottom of the bag BEFORE
After
I cant find a damn picture of the wheel to arch before!!! GRRR!
But here's the after.... )has made quite a difference although you'll have to take my word for it! LOL
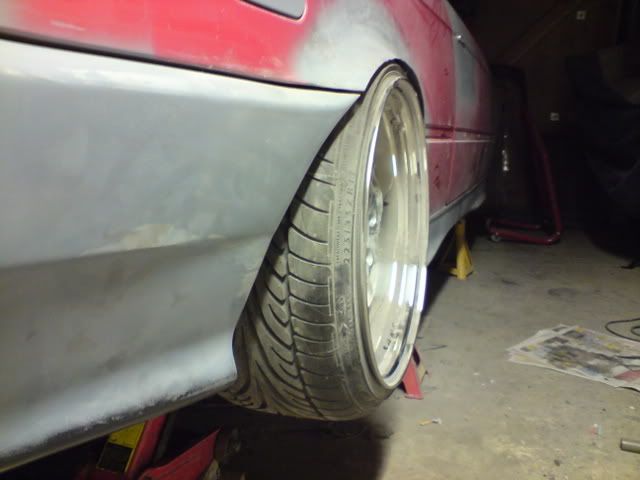
Ignore the bumper/arch lines.... still needs more work
I'm plumbing in the air lines etc... atm but think that's enough for 1 update!!! LOLComment
-
A recap to the last few weeks: RH ZW1's sold & also the 6 pot Wilwoods also sold. So now I've no brakes and no wheels! LMAO
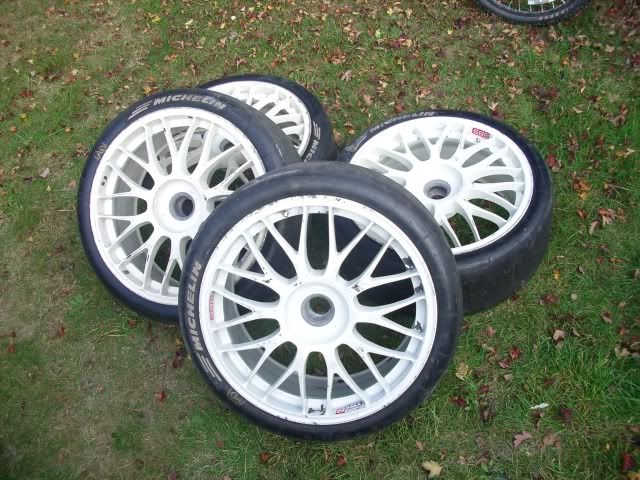
So here they are 8x25x19 magnesium BBS centre locking touring car wheels taken from Steve Sopers spares from his E36 touring car from back in the 90's
Ever since I had a set of centre lockers before for an old project car I had a hankering for another set and I thought my 'Euro-ness' would sway my need for another set! LOL guess not! They were bought from a contact I made in Italy and since I sold my RH's I could send the money over to this guy and get them bought
They are used and need to be blasted & re-powder coated. I 99.9% sure they will be white, it'll work well with the planned colour of the bodywork of the car.
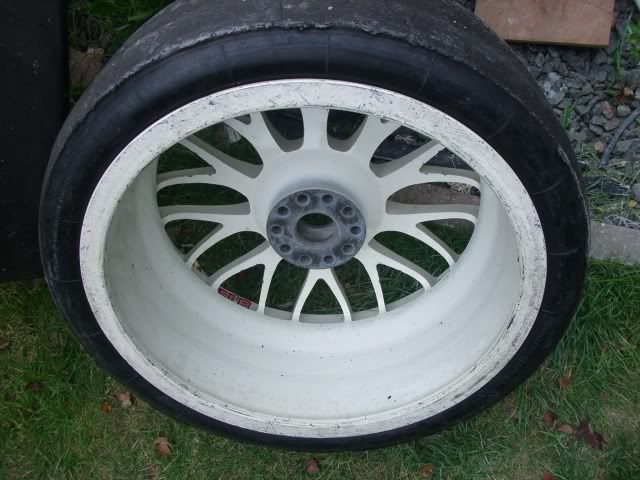
I wanted to give them a check over before I got too excited about trying to fit them to the car. So firstly I watched to check the true-ness off the wheels and also check for flat spots. I mocked up an old strut leg & hub from my old project car (which I had the centre lock adaptors made!) so I could mount the wheel proper to give it a spin
HOme made run out gauge LOL

1 of the wheels about 1mm of run out on the outer surface of the wheel. I want to check that is within tolerance but to me its not going to be a problem
After checking the wheels I thought it'd be rude not to offer 1 up to the car and see how fitment & space for the adaptor was going to pan out. I'd basically bought the wheels blind, only going on previous experience to gauge whether I thought they'd fit LOL meh, gotta take a punt ever now & then! Keeps things intersting but could of been a costly mistake! haha.
Thankfully it looks like everything will work out and I'll be able to run an adaptor I'm happy with from a strength point of view
The money shot!!!!!!!!!!
Comment
-
Lol they do try us cars sometimes
Comment
-
THEN THINGS STARTED TO GET REALLY INTERESTING!!!
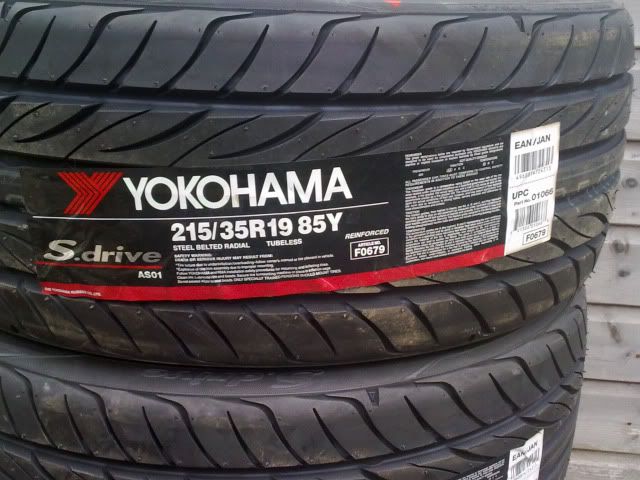
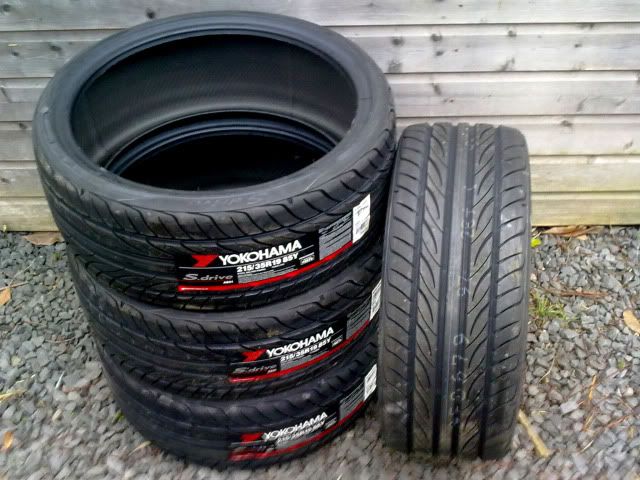
UPDATE:- YOKOHAMA SPONSORSHIP!!!
As mentioned above I really please to announce the Yokohama have agreed to sponsor the build of the car and have help by supplying a set of 215/35/19 S-Drive tyres. These arrived at work on Tuesday but have not had chance to make a post so here it is
I cant wait to get these mounted on the wheels, I think the size will work perfectly. No stretched business on these tyres as it wouldn't look right with the new styling of the car.
THings are progressing well, I'm currently sorting out a plan of action with the brakes and will be sorting out orders soon, so then it'll be full steam ahead with a local engineering company to make the hub adaptors to get the car sitting on its new wheels & tyres!
The now standard issue YouTube video [ame="http://www.youtube.com/watch?v=Wmqt8Cusub0"]Yokohama S-Drive 215-35-19 tyres.MPG - YouTube[/ame]

So over the last couple months I've been doing plenty of homework on kits and whats available and soon came to the conclusion I couldn't get them as big as I want - touring car wheels means touring car-esque brake setup!!!! So not having any luck getting kits in the sizes I wanted for an e36 its lead me to piecing together my own kits.
Of course at the same time I was looking at discs and what was out there, obviosuly you need to find calipers that work with the diameter & width of disc. So many times I found some lovely calipers that a) wouldn't work with the disc size I wanted or b) used something like a 36mm wide discs where I wanted to run a 32 (34 max) its was quite frustrating at times, thinking I had a plan of action on the calipers only to be scuppered on the discs and vis versa.
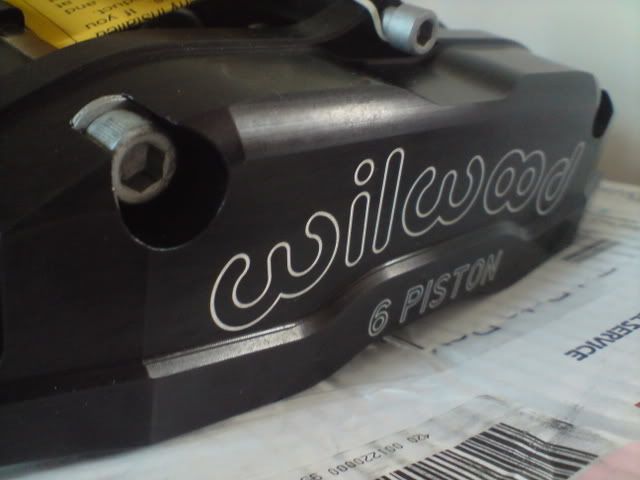
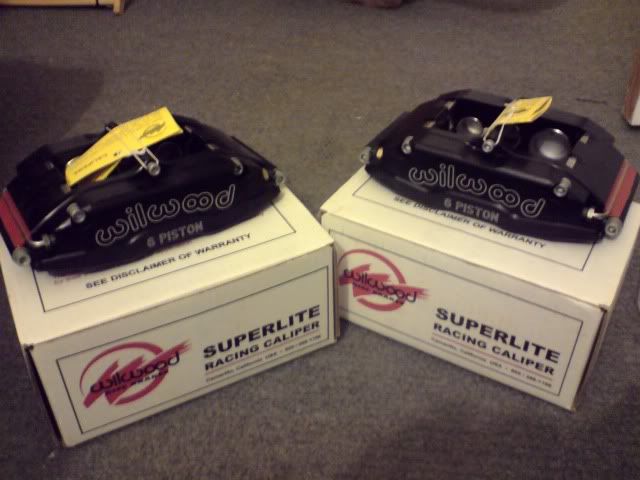
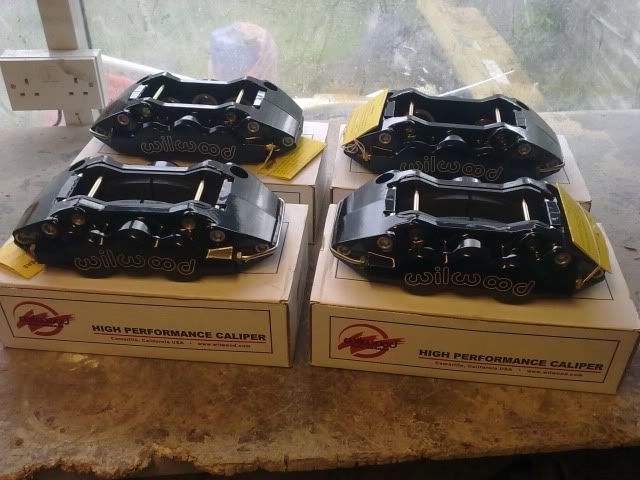
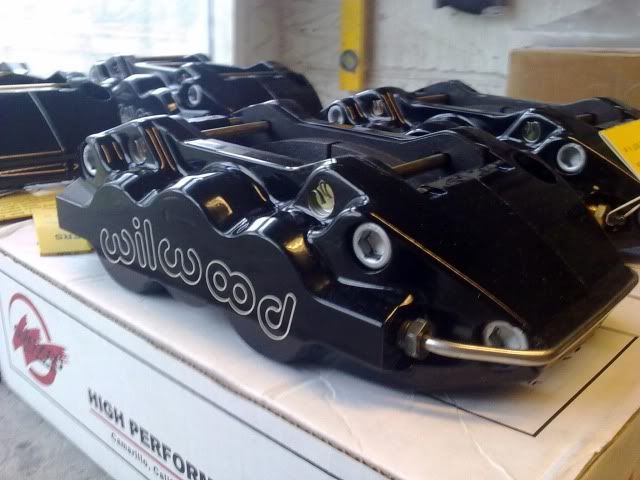
So after looking at various caliper manufacturers AP, Alcon, Brembo and went back to my own favorites, Wilwood http://www.wilwood.com having got one of there pedal boxes and having there SL calipers in the past I honestly cant knock there quality!
After LONG chats with Wilwood US direct they offered a very handsome sponsorship deal on the calipers (discounted, no freebies) I would of gone with there discs also but dont do the disc width I want in the diameter I want.
So... winging there way over the pond is a pair of Wilwood W6a's for the front and W4a's for the rear!! (6 pots & 4 pots respectively) The 4 piston calipers share the same bodies as the 6's so they'll match perfectly! (something I'm very fussy about)
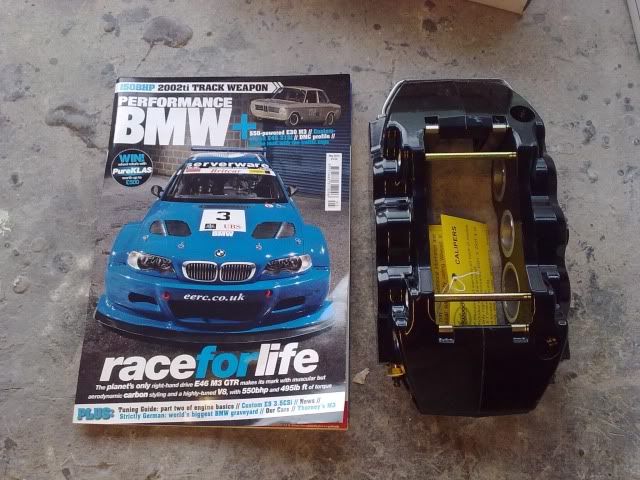
Library picture of the calipers:

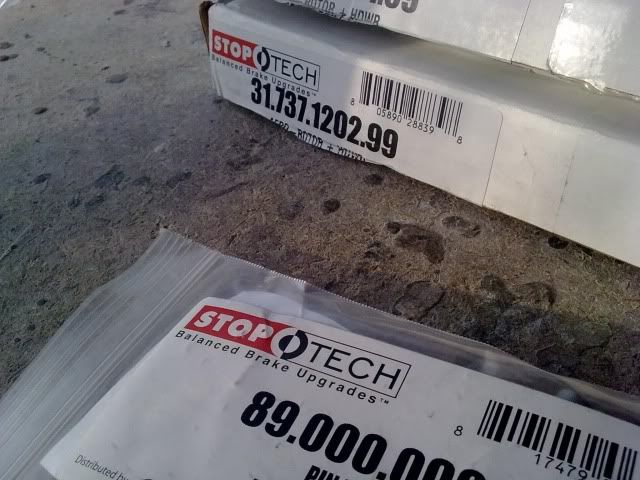
I'd finalised the disc sizes so it was just a matter of where to get them, I decided to use Stoptech discs in:
380x32 for the front and 355x32's on the rear, in x-drilled just to be flash.
I know grooved are better for track but LOL I dont see my tacking this car much/if at all!! because there's not a kit in those sizes for the e36 the brake bells will be custom made (the rear will have the handbrake (E-brake) bell intergrated in the rear bells so will work OEM) having the bells custom made I'll be able to give them the perfect offset to work with my wheels & hub adaptors.
Again after mucho internet trawling & quotes from UK & US companies I found US-AUTOTECH.COM a few exchanged email later they hooked me up with a price I couldn't refuse and an order was placed again they are on there way as we speak WOOHOO!!!
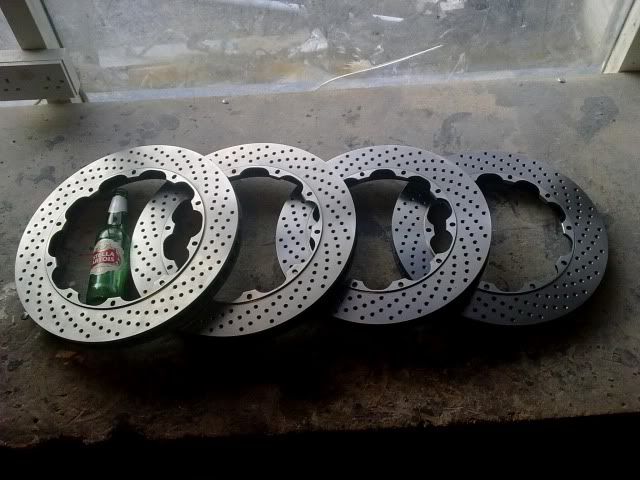
The discs (not calipers)

So, the bank account looking alittle worse for ware I now have the hardware on order needed to go an see my Engineering company to talk about the real interesting stuff, hub adaptors for the bad boy centre lockers.
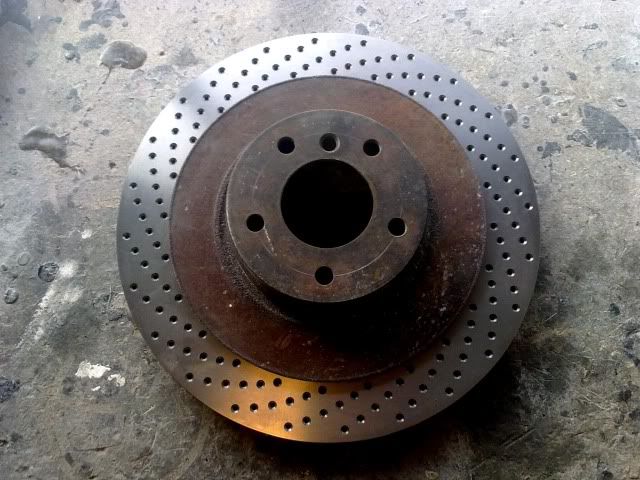
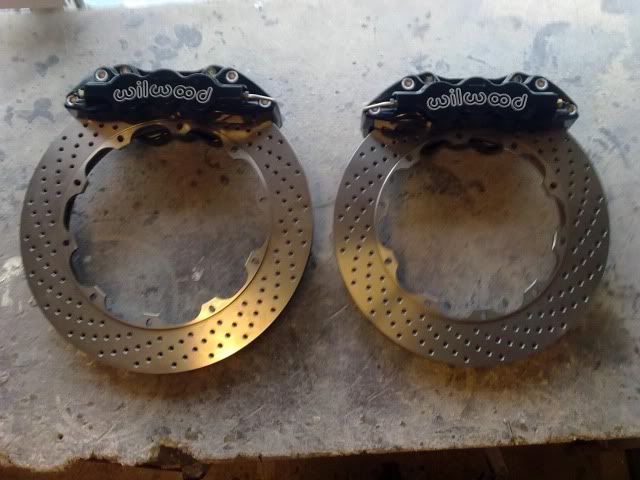
Little update on the brake front, a couple pages back you might of seen I'd place orders on some WIlwood calipers and some Stoptech discs. Well the discs arrived a few days ago, before I go any further I've gotta say a MASSIVE(!!!) thanks to fellow Eurowerkz member liilpa09 who acted as my brake depot stop over before sending them on to me. Mucho thanks!!
So with the thanks done, heres a few pictures of the stoptech rotors from http://www.US-AUTOTECH.COM crazy fast shipping and the cheapest place I could find anywhere in the world (yup no joke, I look frecking everywhere when I'm looking at buying parts!!)
We all like big box!!
Exxxxxcellent
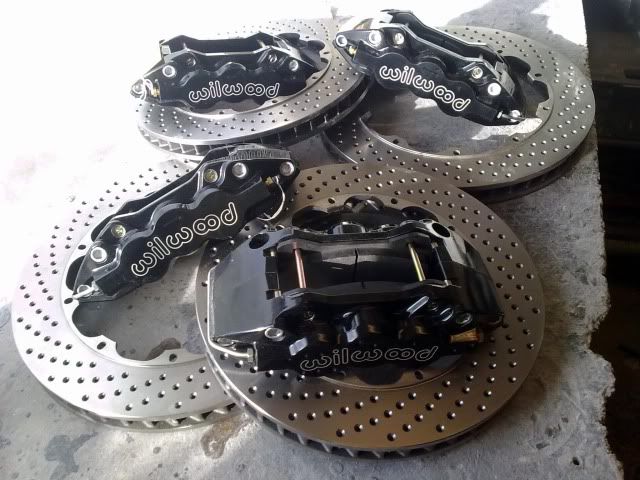
A picture comparison of the little baby rears - 355x32's! LOL
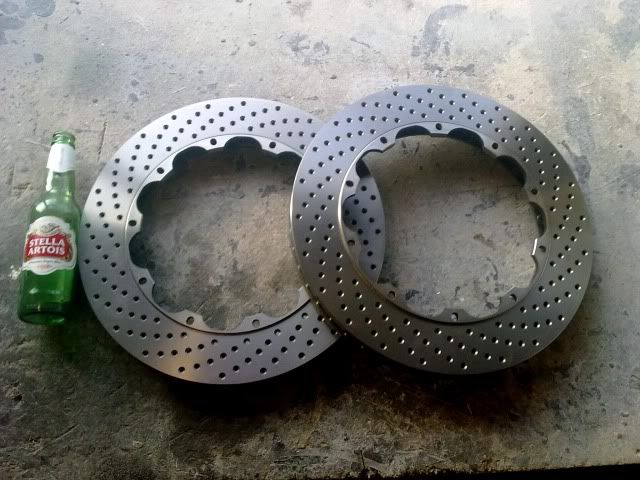
And the big boy fronts - 380x32's
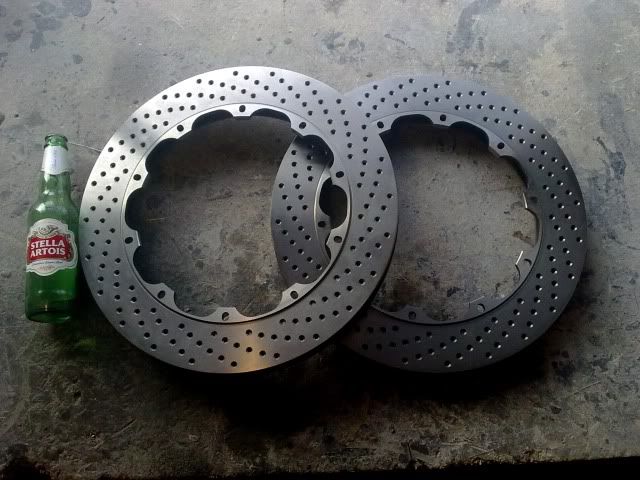
A couple more with a standard brake discs for size reference
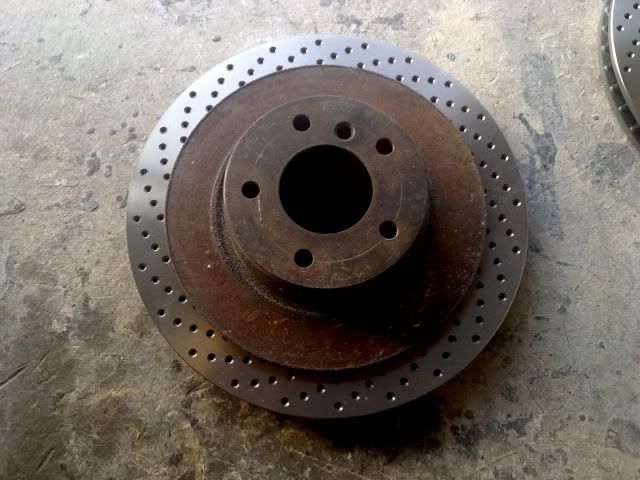
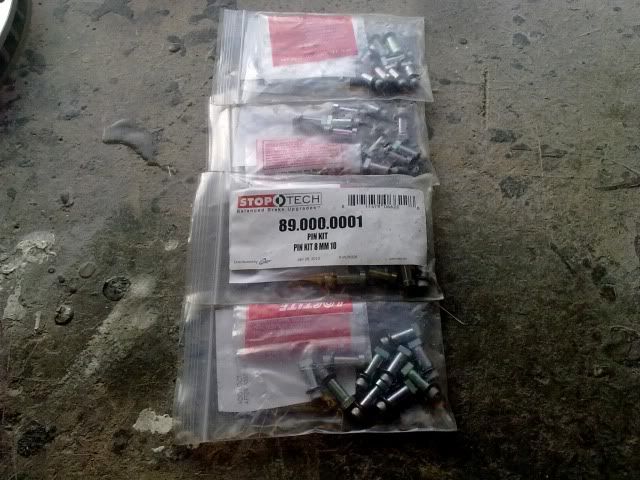
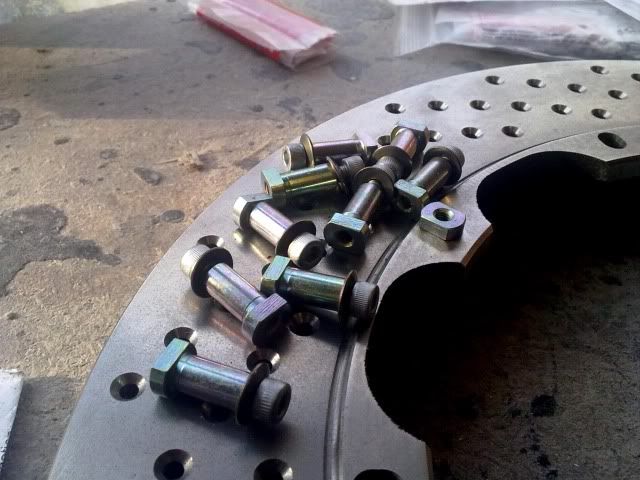
As you can see they are floating rotors (in the discs not the bells) so of course the appropriate hardware was needed to I can mount them up to by custom bells I'll be having made
The Audi badge ain't got nothin on my effort!! LOL
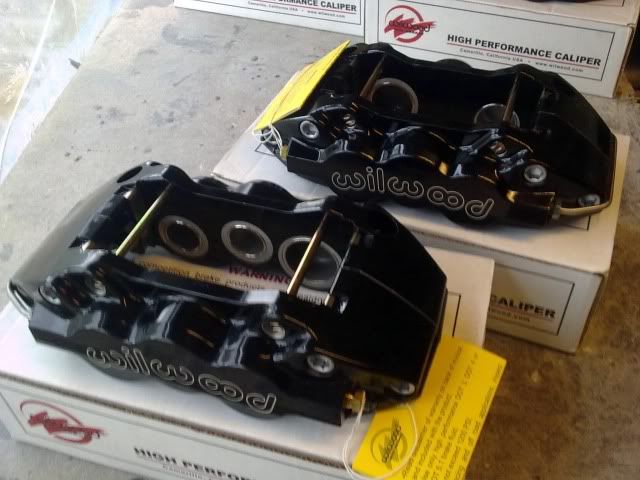
Calipers have arrived! :-D
Check out my website for the full backstory www.projekte36.com I've also added a new section to the site as well so check it out.
Pictures of the calipers...
Comment
-
AND TO BRING THINGS PRETTY MUCH UP TO DATE.....
Front hubs totally redesigned to let me tuck on the wheels and mock ups made, front track narrowed 20mm on custom wishbones.
Rear: Mock up adaptors made for the center lock wheels. Old euro flares cut out and inner arches cut back for tucking the rear wheels, new rear wing panels trail fitted. Rear track narrowed 20mm, trailing arms and rear arms modified, new rear airbags fitted on custom brackets.
Still to do: I want to get either get another pair of wings or just fabricate and weld in the down turns on the front wrong lips so again it gets rid of the old euro flare look.
All that just to fit a set of fricking wheels! Lol
Still along way to go on the stance but I'm happy with how things are shaping up

Comment
-
Dare I ask how much spent so far :::::::
Comment
-


Comment