-
Thanks guys!
Next up was to adapt my throttle cable to the pedal assembly. The throttle cable in question is a Lokar Stainless Steel bit. It's 4ft long, but can also be cut to length, so I just bought one that I knew would be a bit to long.

Here is the stock end of the throttle cable. Unfortunately the opening in the cable adapter is 3/16", and the pedal linkage is 1/4" wide. Also, the 'throat' of the adapter is very shallow, and so even if I widened it, it wouldn't allow the linkage to move through it's entire range of motion without binding.
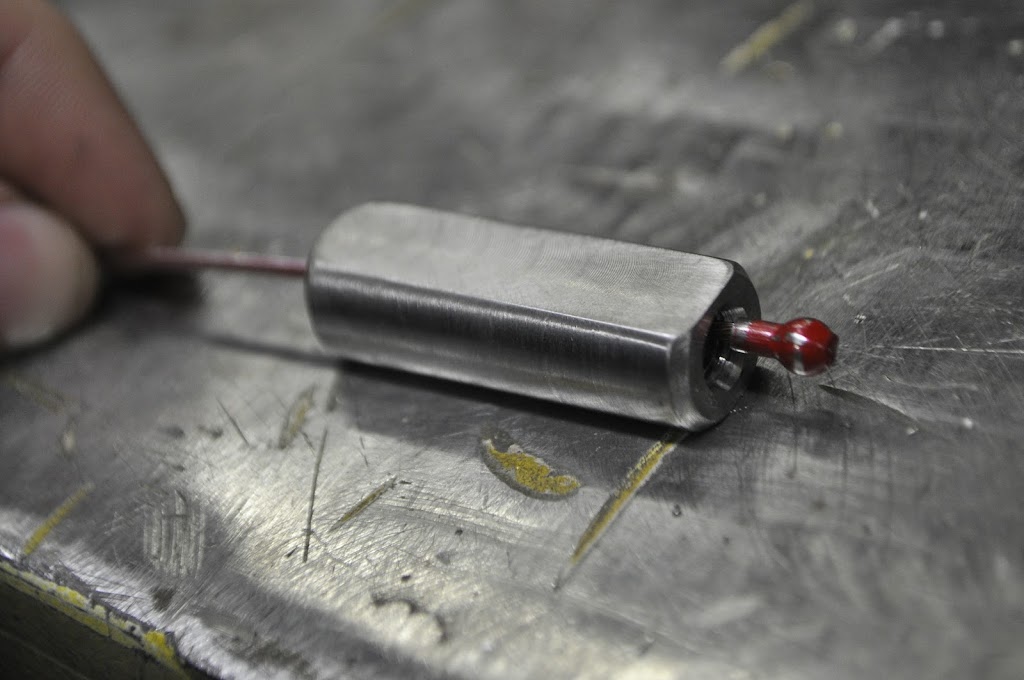
And here is the end of the cable. It's got a crimped on bulb, so I can just slip off the old fitting and replace it with one that will work with the Tilton linkage.

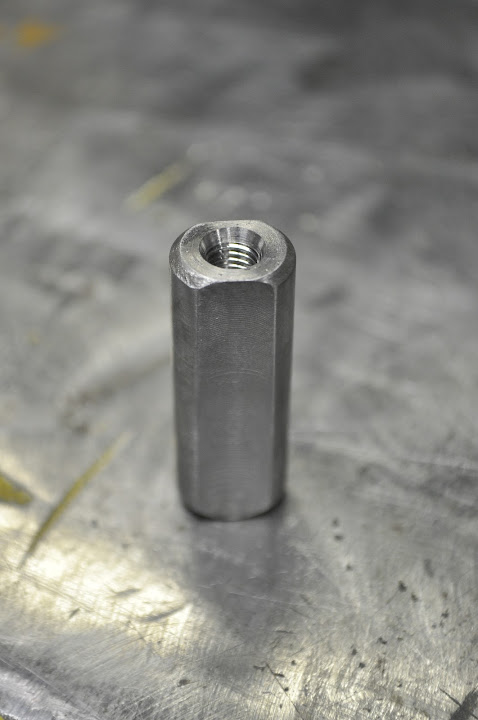
So I started with a 0.75" rod of 304 stainless:

And 1 hour later ended up with this:

It's 1.5" long and turned down to 9/16 diameter. Then I machined 1/8" hole all the way through, followed by tapping it 1/4-28 thread 1" deep ending in a 3/16" diameter chamfer to match up with the bulb of the cable. It also has two flat spots milled onto it so it can be held with a 7/16" wrench.
Threaded end:
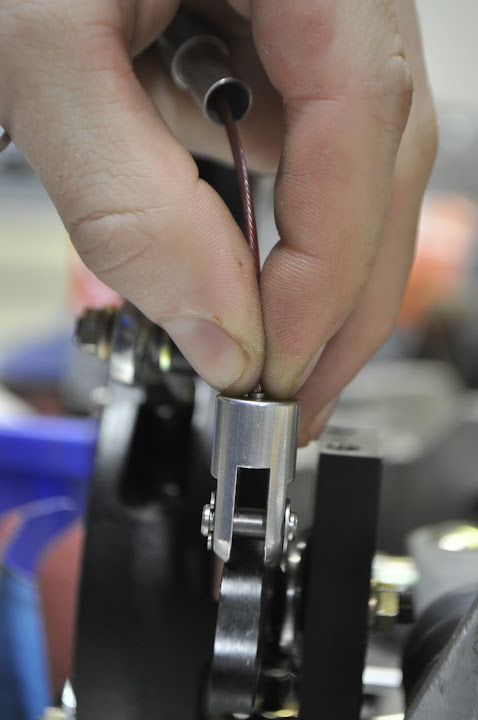
To install it first slide the cable through the end and sit the bulb at the bottom of the threaded section:
Then screw the heim joint into the threaded end and tighten the jam nut.

Lastly install the assembly onto the Tilton linkage.
With this end of the cable sorted out I just need to mount the outer shielding on the firewall and figure out the throttle body end of the cable.Leave a comment:
-
I got D�j� vu too... Absolutely amazing build though! Your attention to detail is impeccable.Leave a comment:
-
I am going home and building one of these, I can't believe I haven't done this before.Originally posted by TinkWithanR View Post
Awesome build too It's always awesome to see people doing things right the first time.

Leave a comment:
-
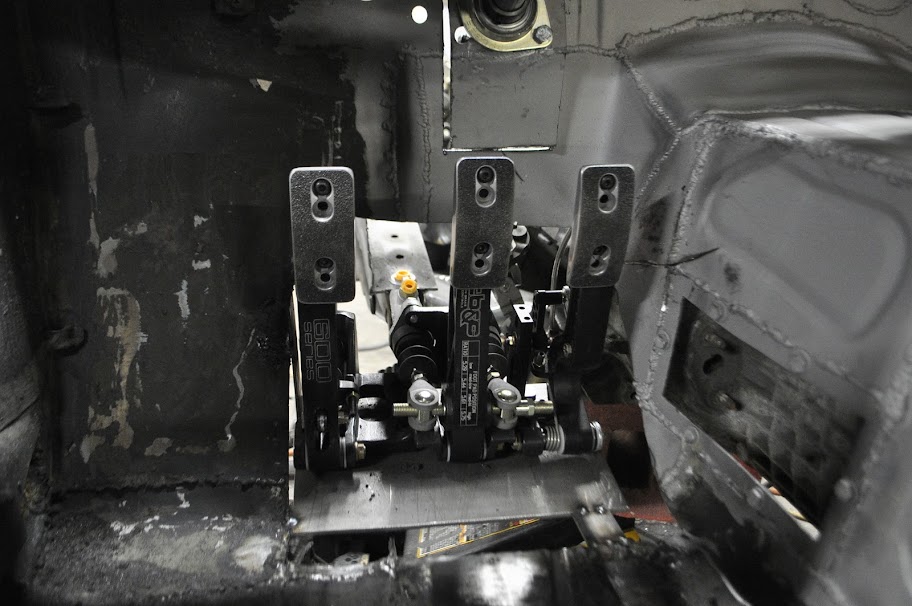
So as I alluded to earlier, I decided to deleted the stock pedal assembly and replace it with a Tilton floor mount assembly. There were a number of reasons I decided to do this. First, the itb setup meant that the stock brake booster wouldn't fit anymore. Likewise, with the G260 trans in place, the stock throttle linkage would be very close to the outer bell housing. By switching to the Tilton setup I am able to avoid those issues.
The pedals in question are are Tilton 72-603, which is a three pedal assembly. The brake pedal uses a balance bar, which lets you adjust the bias front to rear from the driver seat (with the optional cable adjuster). It also keeps the front and rear brakes on separate master cylinders, so if one of the circuits ended up getting damaged I will still have brakes to help bring the car to a stop.

If you look at the above picture, you'll notice that the pedal pads are also adjustable. There are 4 vertical positions and three horizontal, for a total of 12 per pedal. I am also thinking of machining a new gas pedal pad to help with heel-toe driving. I'll wait until I can try it out before going down that road though.

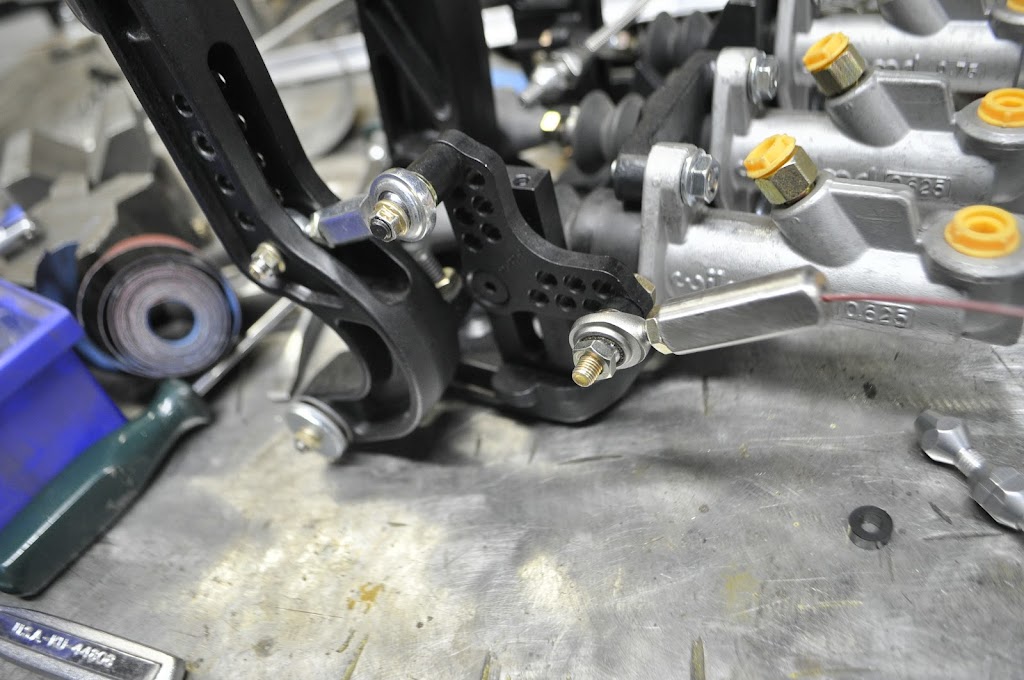
In the next picture you can see the throttle linkage assembly. The linkage, like the rest of the pedal assembly, is completely adjustable. This will allow me to dial in the throttle plate position relative to the gas pedal, avoiding a laggy or on-off feeling.

Of course the new pedal assembly isn't without it's issues. Mainly the fact that the driver side frame rail goes right through the same area, so it needs to be cut out and rerouted. Also the clutch master cylinder is much further off to the right than the old setup, so much so that it sticks into the driver side footwell. If it end up interfering with the steering at full lock I'll need to make up a simple linkage that moves the clutch master cylinder up and over, away from the wheel/tire. I'll wait to make that decision until the front suspension is back in though.
Here is the pedal assembly bolted in place:
Here you can see clutch cylinder, it sticks into the wheel well an inch or so.

And here you can see how much of the frame rail/firewall needed to be trimmed out. The frame rail will be remade with 1/8" or 3/16" steel boxed and welded flush much like the motor mounts, but out of the way of the brake and clutch cylinders.

I also picked up a new tool to help strip the old tar and POR-15 off the floor boards so I can make sure they are clean and rust free.

And the progress after ~15 seconds of grinding:

Then I got the steering column support bearing tacked in place. Ironically it fit in the stock location of the old column mount, it just needed to be angle downward slightly.


Then I took a break from work and took a few pictures with my other '02. Once I get Fiona finished I want to paint this one as a 'mini-me' and it in her glovebox or center console area lol.


Thanks for looking!Leave a comment:
-
Haha, you won't regret it. It's very rewarding to be able to envision something and then make it with your own two hands.Originally posted by tricha02 View Post
Lol thanks. It's definitely come in handy on many occasions so far.Originally posted by SheaMoose View Post
Crazy good I hope.Originally posted by FunkyWagon View Post
Thanks, I'm just lucky to have the opportunity to take on a project like this.Originally posted by willis View Post
Originally posted by j.kam View PostOriginally posted by ///e36 View PostOriginally posted by d.parker View PostOriginally posted by Zic View Post
Thanks guys! I'll try to keep the updates coming.
Nice, what year is it? Do you have a build thread or anything on it?Originally posted by Huffy View Post
Best show ever.Originally posted by tundmatu View PostLeave a comment:
-
Loving the progress and attention to detail. Im the same way with my mustang and Im just a little farther along, I believe than you are.Leave a comment:
-
Wow, just great
I think I have seen this on 02faq b/c on page three I had major deja-vu!
It's great how you just work through issues, not letting them stop you but just making it work to your way. Also that you're not afraid to do something and completely change your mind later.
Keep up the GREAT work!!Leave a comment:
-
Astounding work going on here. People as skilled and thorough as you are rare.Leave a comment:


Leave a comment: