Announcement

Collapse
No announcement yet.

1967 Pro-Touring 122 Amazon (Project Volvo X)540 Horsepower LS6/Tremec TKO600 5-Speed

Collapse
X
 
  • Filter
  • Time
  • Show
Clear All
new posts

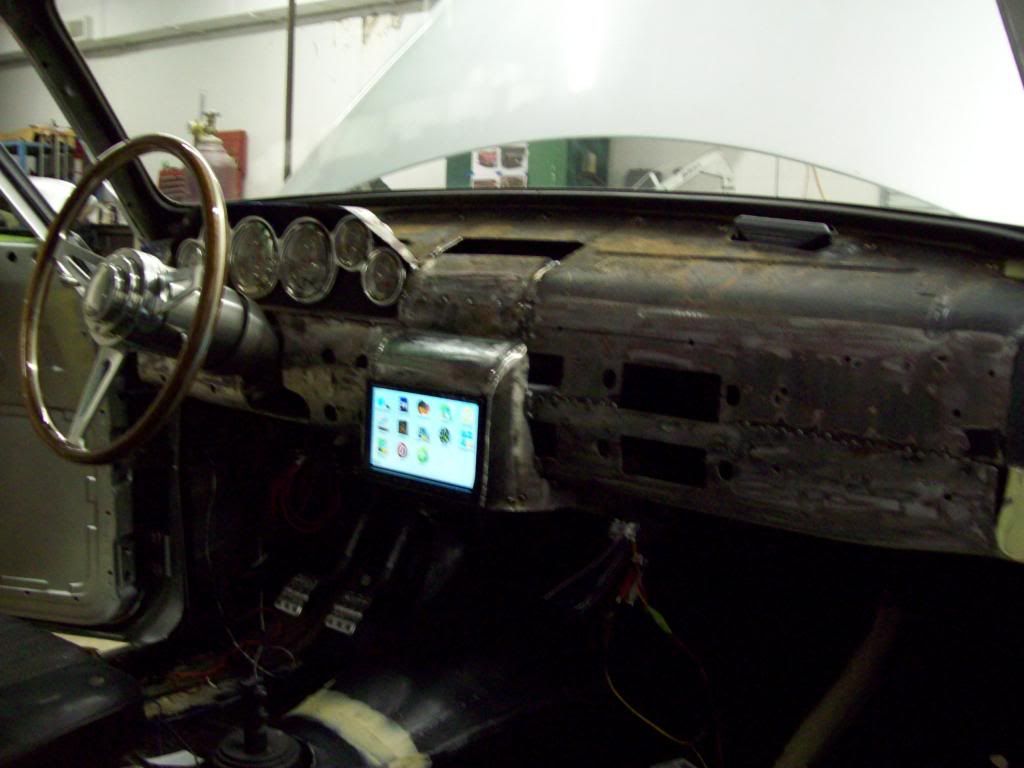
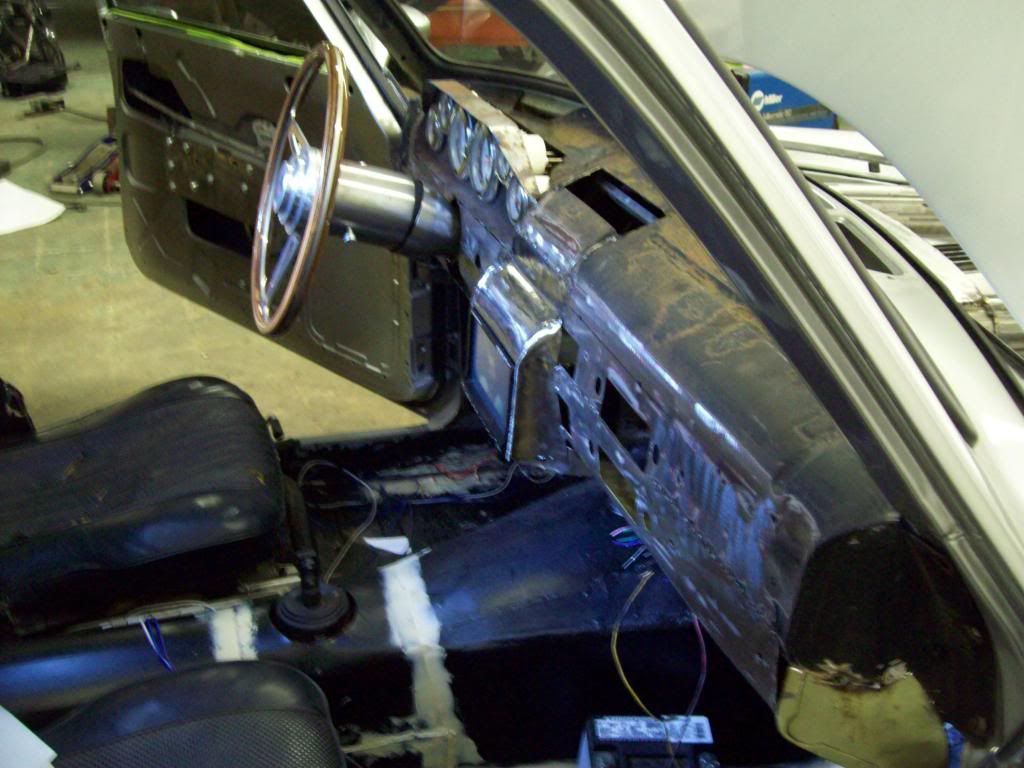
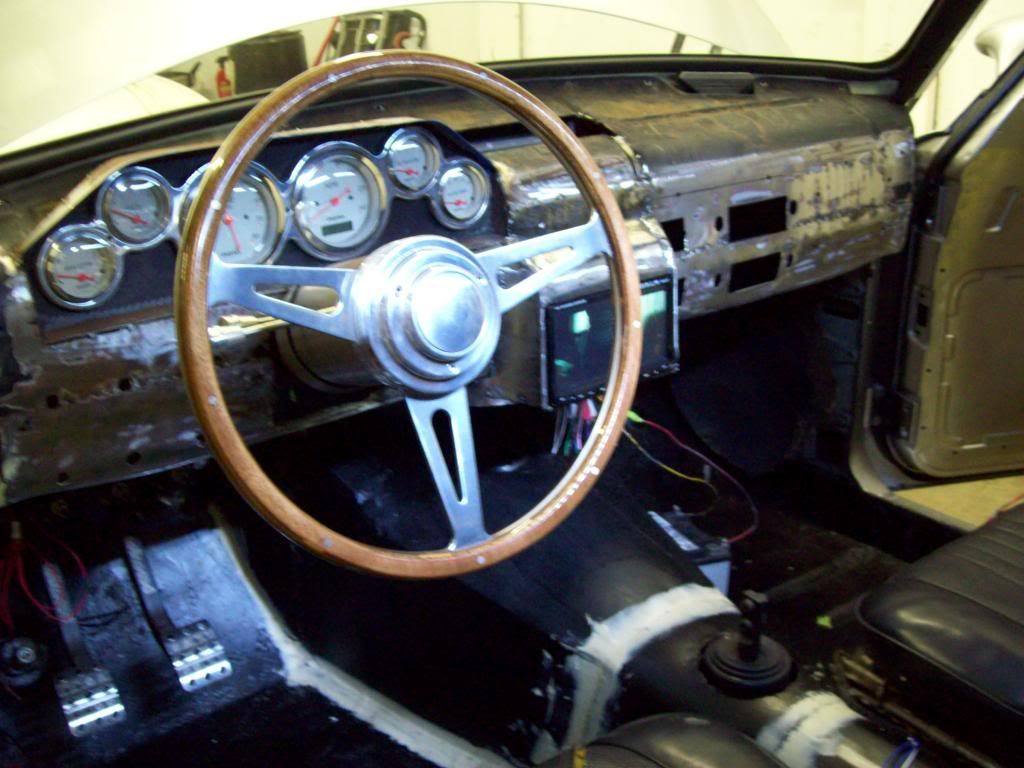
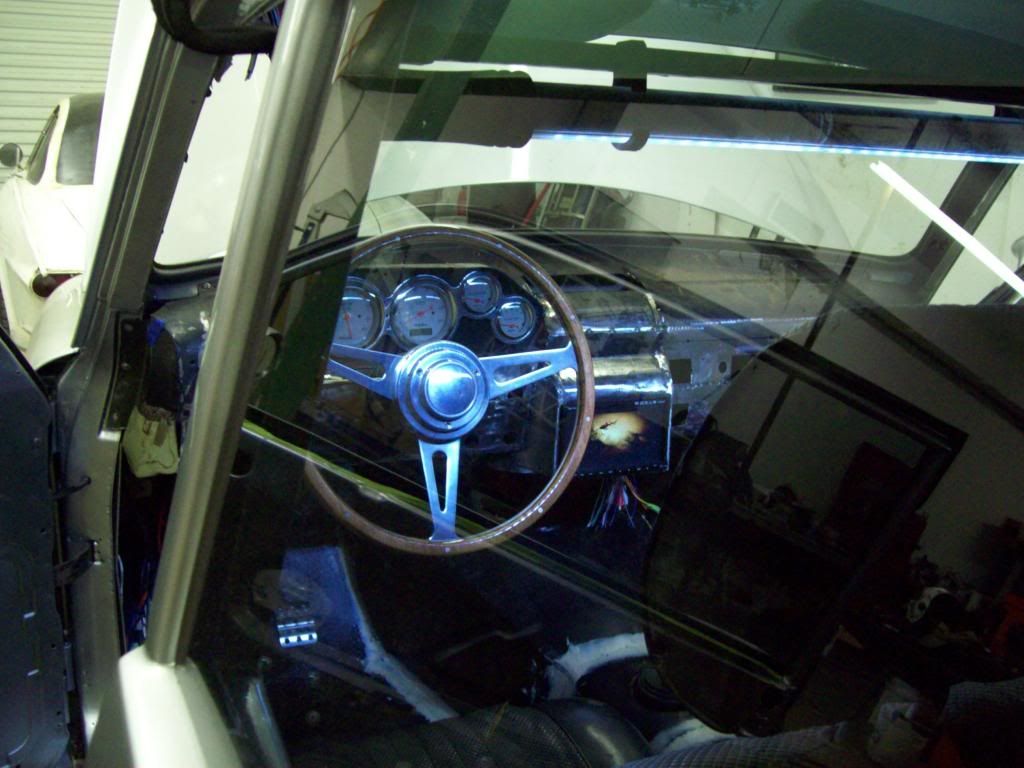
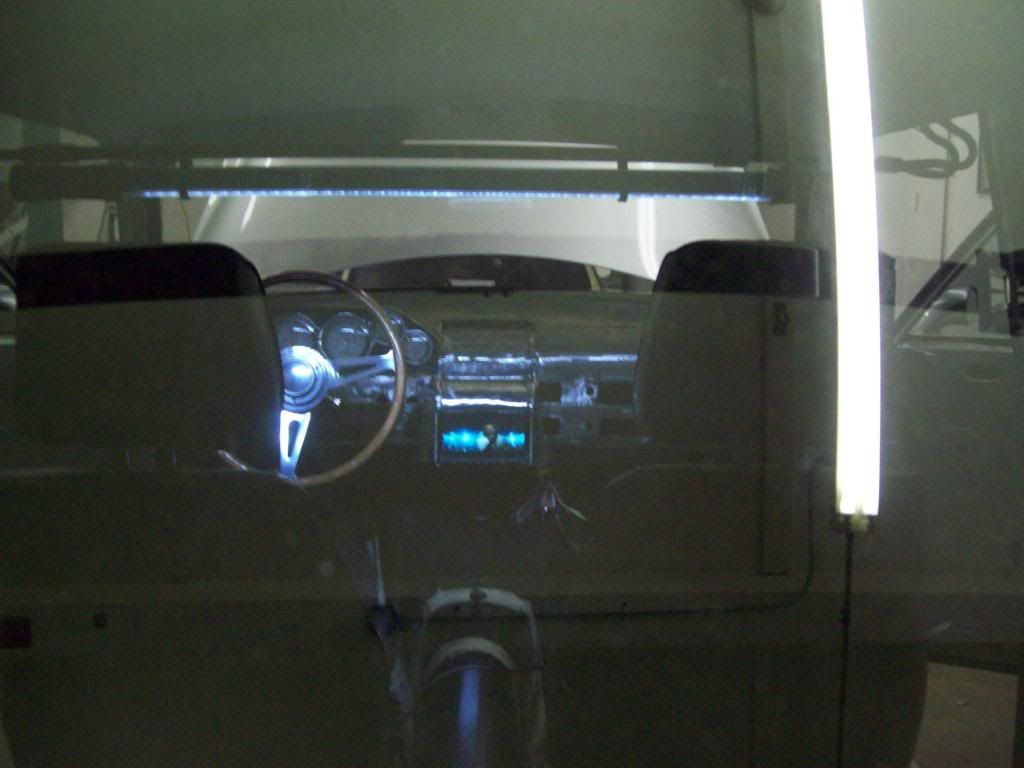
  • Here are some rough in pics of the Touchscreen Navi/Stereo system in the car, and it was a bit of a pain in the ass due to the Wiper Motor position, but it is in there.. I am not a big fan of Consoles in general, and I really wanted to avoid running one at all on this car, so this is bascically the setup I had to run.. I could have move the unit 4 inches toward the passenger side, and then I could have mounted it in the higher position I really wanted, but I wasnt going to do that.. I tried to mount it up higher on the dash like the modern cars, but that didnt change a thing with the wiper motor interference, so lower was the only way to go here.

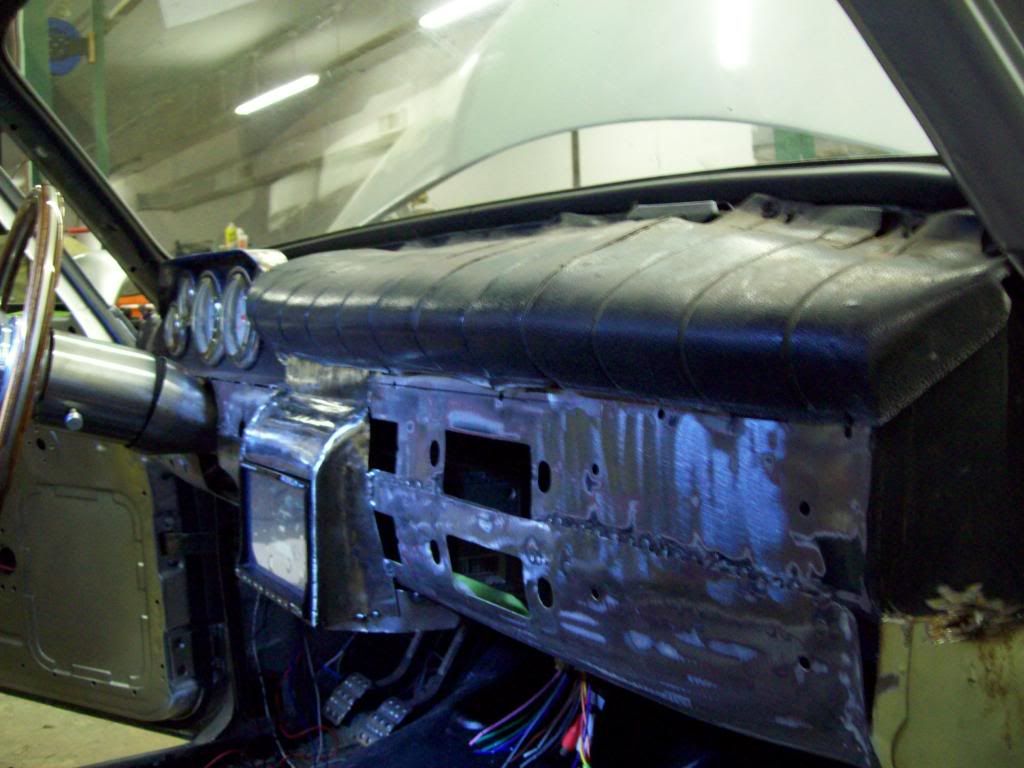
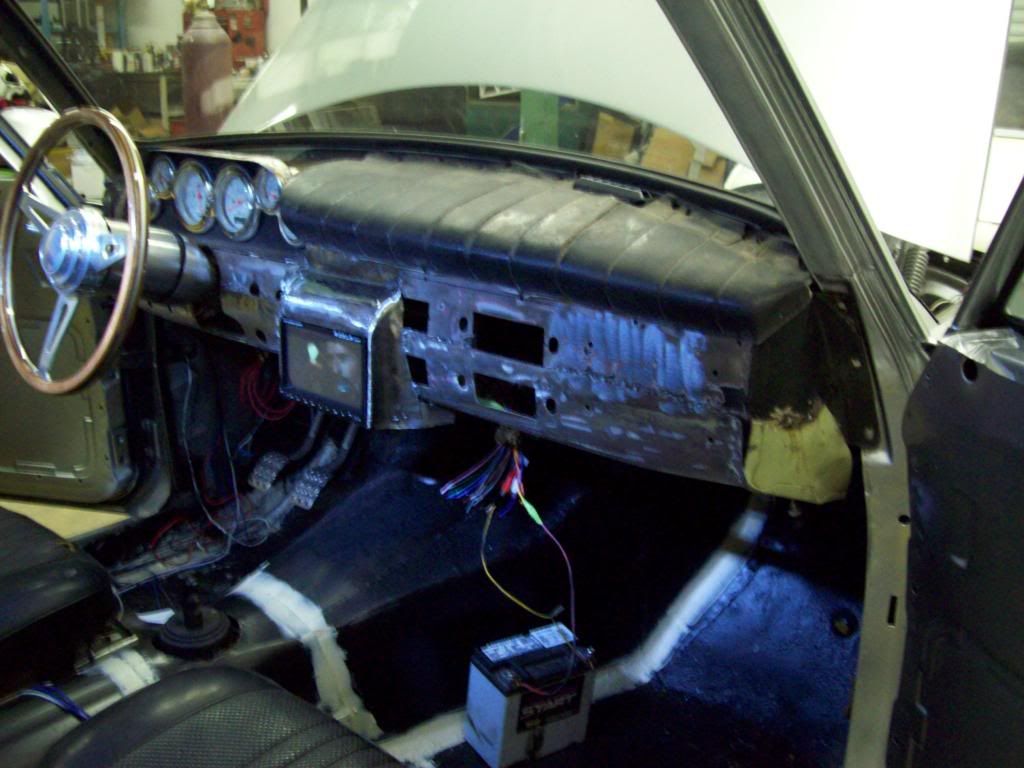
    Once the Leather Dash pad is situated, it will take away from some of the extension bulk, and I was considering having the leather actually come down the center of the dash, but I am not sure about that yet.. It isnt that noticable in the pictures, but on the sides of the dash extension, I have the metal rolled inward, so that it isnt just a straight out side wall. I also tried to mimic the roll of the top of the dash for the top of the extension, and that might actually work out nicely for a center AC Vent position now? Again, these are the rough in pictures, and I still have to fill in all of the extra factory holes in the dash, but I wanted to see if I can live with this setup, before I finalized all the welding and grinding..


    Comment


    • Well, we are having a few issues with the faux brushed aluminum paint process, and it isnt that it doest work, it is that there is a color change during the clear application.. The previous sample picture didnt have clear on it, and when we cleared the first few test pieces, the color shifted a few shades darker, and I cant live with that.. We cant leave the base without a clear, because it will not be durable at all, and will have basic touching and rubbing affect it.

      Here are some pictures of another single stage color that I am working with, and it isnt brushed at this time, but we will be experimenting with that.. Hopefully we will be able to lightly scotch brite it, without having to apply a clear afterwards. I have looked in to other process like Hydro Dipping, but that has to be cleared, and you get the fake plastic look I am trying to avoid. There is another process called Cold Metal Plating, and it is the process of actually spraying a mixture of 95 percent metal and 5 percent resin, but it has shows to have a heavy orange peel look, and I dont want that.. After it is applied, you can actually polish it like you would a chunk of metal, but I dont think things would look right if it had a polished cast appearance.

      These are not the actual pieces that we are doing for the car, so they are not straight and perfect, and they were not prepped like we are with the parts being used..


      Comment


      • I was never really a fan of volvo's until I saw these.. I must say these old school volvo's are pretty damn nice!
        great fab work.
        [COLOR=#ff0000]Lifetime Project[/COLOR]--- 1999 Mercedes C230 Kompressor, but converted to Turbo. Attempting to finish it up.
        [COLOR=#ff0000]The Daily[/COLOR]---2011 C350 4matic[COLOR=#ff0000][/COLOR][COLOR=#ff0000][/COLOR][COLOR=#ff0000][/COLOR]​

        Comment


        • Volvo X is moving forward at this time, but I have been out of the office trying to take care of alot of the finishing details.. The final version of the firewall conversion kits made it in, so I figured I would post some pics of how it turned out.. I am very happy with it, because it will save alot of sorting and build time on the customer builds... Here is how it works..

          This center piece pictured here shows you where the necessary cuts are.. It is made to self locate on a few body reference points, and that is how you will determine where your cuts are. After that, it will then mate up to the Volvo body to allow easy welding during the final install


          The two side pieces come in one piece flat plates that are done in a fold and weld system. You can see the relief cuts that will allow you to easily bend the pieces into the necessary shape, and the finished shapes tie in the new firewall to the factory inner fenders and floor pans. After you use the center section for the initial center section cut, you can then place these side piece on the new center section with the tab and slot system that located everything into the right placement, and that will allow you to drop the complete firewall assembly into place to do finaly trimming for the floor pan and fender well blending.


          When the complete unit is tabbed together, it will self locate on a few oem body points, and that will allow you to square everything up before welding into place. I am using a heavier guage metal, and by the time all the seams are welded up, it is very rigid. I am running a cross brace behind the firewall for extra bracing and that is what I am using to mount my new steeing column, so it is a win win there. I tried to come up with an easy system for this mod, because I wanted all of my customer builds to have some consistancy, along with allowing the hobbyist builder to have a starting platform. This firewall is made to work with the V8 motor and Trans Bell Housing, along with clear the LS V8 headers and new pedal assembly. My builds are generally running the Wilwood underdash master cylinder and pedal assembly, but I have an attachment that goes with this firewall kit for the oem appearance external power brake booster and external master cylinders.

          Comment


          • nice work as always


            fat orange text can be a little eye straining to read


            Once apon-a-time world famous Photochopper
            http://zammothechoppa.deviantart.com/ : )

            Comment


            • Greg
              1974 Volvo 142

              Comment


              • THIS...is a build thread. All others a simply car diary's...
                Like a glove

                Comment


                • Here is a quick update of how the faux Brushed Aluminum trim pieces are coming out.. They first had to be completely straightened out before they could begin the process, so there was some body work necessary, and that also allowed for much straighter pieces. With the steps we are using, it was necessary to go with a gloss black base coat, and it is the black base that you actually scotch brite the brushed pattern in before you coat with the final silver color. The silver color will then take the brushed appearance that is in the black base coat, and that eliminates any worry about scratching to much of the silver top coat off and exposing too much black if you were to attempt to pattern the silver color.


                  Comment


                  • Here are some updated pics of the black pieces above.. These pieces look much more realistic in person, and will give the overall look I am going for once they are installed on the car, because they will be part of an overall package versus individually focused on as they are in these pics..


                    Comment


                    • WOW that comes up reall good

                      i want to do a brushed ally and tan interior and i was willing to have the bits machined in reall ally

                      how is this stuff for wear resistance?


                      Once apon-a-time world famous Photochopper
                      http://zammothechoppa.deviantart.com/ : )

                      Comment


                      • Where can i get this brushed aluminium spray??? Looks amazing
                        38Motion-Member
                        VAG - Von der Wiege bis ins Grab

                        My Polo / Ibiza build
                        http://www.stanceworks.com/forums/sh...ad.php?t=46681

                        Comment


                        • Originally posted by SHT View Post
                          Where can i get this brushed aluminium spray??? Looks amazing
                          There isnt any such thing that I am aware of, and that is why we had to come up with a faux process.. It is actually a black base coat that has been brushed with a scothcbrite pad for the pattern, and then that is sprayed over with a House of Colors Chrome paint, and that adopts the brushed pattern that was put into the black base coat underneath. The House of Colors chrome paint is basically as thin as water, so it takes the brushed marks very easily, and then you clear coat it after that.. We added some flex additive to the clear coat, because that will help the durability of it all.

                          I hope that helps, but there is still an art to it, so I was lucky to find CF Designs to sort out this process for me.

                          Comment


                          • Originally posted by ZammoTheChoppa View Post
                            WOW that comes up reall good

                            i want to do a brushed ally and tan interior and i was willing to have the bits machined in reall ally

                            how is this stuff for wear resistance?
                            I guess the wear resistance would really have to do with the quality of the materials you use.. I do know some people that have used miscellaneous hydro dipping patterns and then cleared over them for durability, so I would assume that this would be just a durable if not more..

                            Comment


                            • Wow. That is a proper job. Well done.
                              Medium-low...

                              Comment


                              • ...and subscribed
                                1968 1600SP Beetle build thread

                                Comment

                                Working...
                                X