Announcement

Collapse
No announcement yet.

Refinishing Work Meister S1 3P "progress thread"- need some help too!

Collapse
X
 
  • Filter
  • Time
  • Show
Clear All
new posts

  • Refinishing Work Meister S1 3P "progress thread"- need some help too!

    Hey guys, I've lurked here for a while but finally got around to making an account.

    I picked up a second hand set of staggered Work Meister S1s in 3 piece form, 18x8 +56, 18x9.5 +62 (S2000 specs). They actually have a pretty fresh powdercoat on them that's in good shape, but I'm not a fan of the all white look or the black bolts.

    This is the first set of 3 piece wheels I've owned, so I thought this would be a good DIY to take them apart and put together.

    Plan is to polish the lips, leave the faces white, and replace the black bolts with gold ones. Hopefully given they were recently powdercoated, it won't take too much work to get the lips looking shiny.

    Just after I picked, all with a few other new parts


    Tires off the fronts, beginning to disassemble wheel #1. Tires were shot on the front, but rears have new rubber.


    D'oh! Previous owner rear mounted the faces. You can imagine my horror when I start to undo the last bolt and the face dropped hanging on by a thread.


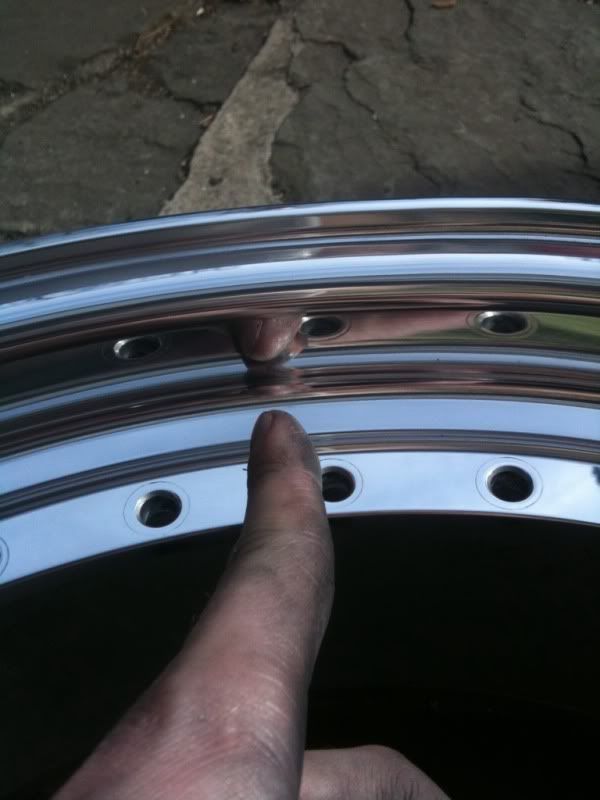
    So this brings me to my question to those of you that have done this before. As I mentioned, the previous owner rear mounted the faces. Normally, Work Meisters are sandwich mounted and this is how I'd like to put them together. However, because they were rear mounted, there are now marks on the back of the faces from the nuts being tightened on them. Will this prevent them from sealing properly if I sandwich mount them? Or should I just thank my lucky spades I don't have to split the barrels and rear mount them again? See pictures for reference.


  • #2
    just sand that area down if you're worried about it. doesn't have to be perfectly flat to seal, as it will be torqued with silicone over the top.
    025garage

    Comment


    • #3
      +1 sealant torque and you will be fine. I would just clean the backside up with a little sand paper.

      are you sure those are sandwich mounted wheels? typically when the face is sandwich mounted, the face has a bolt shelf that is inset on both sides. in your case the back of the face is flat which leads me to believe these are supposed to be rear mounted. Not entirely sure if that was their original intent, but to me those faces look to be rear mounted on purpose.

      I would check the serial number on the wheels if you can locate one and give in a call. the way those faces were machined and the way the back of the face tapers in like that - imo does not look to make sense under a sandwich mount config
      sigpic
      1990 Nissan fairlady Z32 - long term build
      1982 euro porsche 930 turbo

      "A less- assuming enthusiast probably wouldnt even think that this Z ran because of how naked the engine compartment was. The motor looks as if it just floats there, with nothing else in sight." Super Street 9/2012

      http://www.stanceworks.com/forums/sh...ad.php?t=19185

      Comment


      • #4
        Originally posted by motocaddy View Post
        just sand that area down if you're worried about it. doesn't have to be perfectly flat to seal, as it will be torqued with silicone over the top.
        Thank you, will do.

        Originally posted by 1badg35 View Post
        +1 sealant torque and you will be fine. I would just clean the backside up with a little sand paper.

        are you sure those are sandwich mounted wheels? typically when the face is sandwich mounted, the face has a bolt shelf that is inset on both sides. in your case the back of the face is flat which leads me to believe these are supposed to be rear mounted. Not entirely sure if that was their original intent, but to me those faces look to be rear mounted on purpose.

        I would check the serial number on the wheels if you can locate one and give in a call. the way those faces were machined and the way the back of the face tapers in like that - imo does not look to make sense under a sandwich mount config
        By all accounts I've heard, Meisters come sandwich mounted from the factory. However I'm not absolutely sure, so I will definitely look more into it now, thank you.

        Comment


        • #5
          Well heidi ho

          Called Work Wheels USA...all Meisters are rear mounted. I've been duped!

          Comment


          • #6
            yeah you can tell from the way the face was designed. i was pretty damn sure that was a rear mount
            sigpic
            1990 Nissan fairlady Z32 - long term build
            1982 euro porsche 930 turbo

            "A less- assuming enthusiast probably wouldnt even think that this Z ran because of how naked the engine compartment was. The motor looks as if it just floats there, with nothing else in sight." Super Street 9/2012

            http://www.stanceworks.com/forums/sh...ad.php?t=19185

            Comment


            • #7
              I didn't even have to use a hammer.

              Since the rear barrel has a light coating on it, I didn't want it to accidentally come off when I applied the stripper on the lips, so I decided to split them. Probably not a bad idea to apply a fresh bead of silicone anyways.

              Last edited by Sirhodjibob; 02-08-2013, 12:47 PM.

              Comment


              • #8
                So I spent today using a can of Jasco to strip the powdercoat off the lip- it works, albeit very slowly and painfully. The cold weather definitely is not helping.

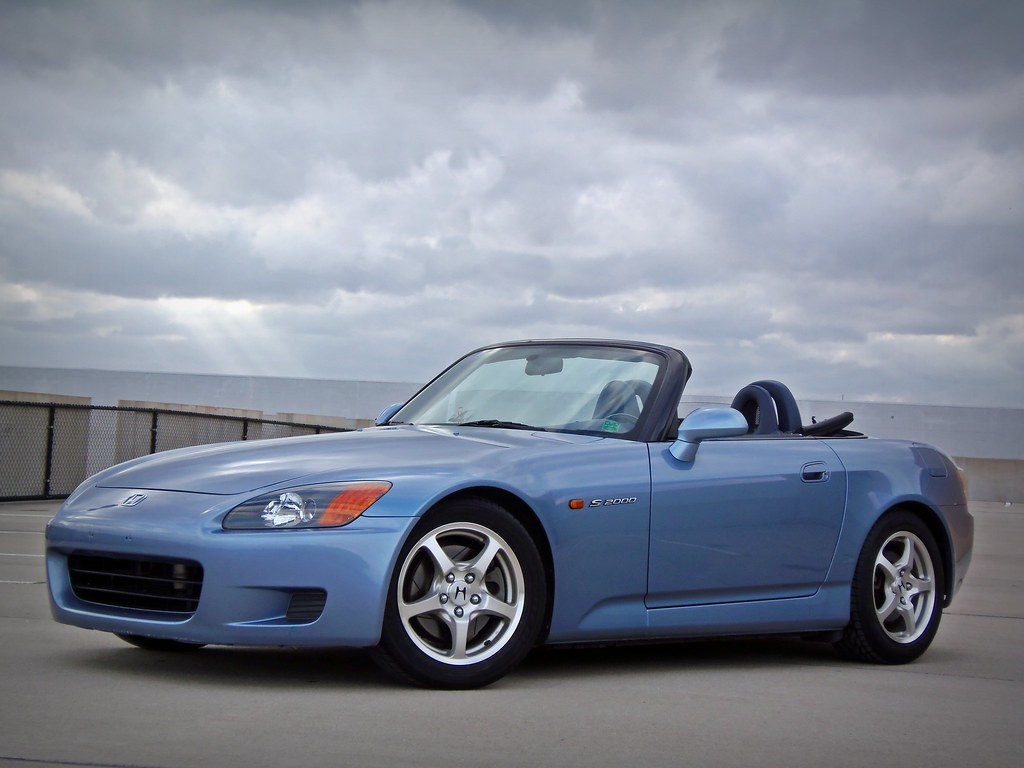
                Only question is should I just polish the lips or just go all out and polish the faces too? Here is the car it's going on, front lip is already in the mail.


                As you can see, the white faces don't look bad, but polished would look so blingtastic lol
                These are 2 piece Miesters:

                Last edited by Sirhodjibob; 02-08-2013, 11:36 PM.

                Comment


                • #9
                  Is anybody familiar with Work Wheels' Metal Buff Finish? Would I be able to replicate that kind of shine in a garage job or am I wasting my time? What is it that makes that finish look so special?

                  Comment


                  • #10

                    Comment


                    • #11
                      you can get it like that but you need to do it right.. is that powder or paint on your wheels? if it's paint, id strip with dumond safe strip.. if it's powder, get it blasted with walnut, not sand, it's less abrasive and will cause you less work to get the pock marks from sandblasting out.

                      after you start sanding (if there are casting marks start lower, if it's pretty slick you can probably do 800 or 1000) then, finish with 1500 wet and 2000 wet.. once that is all done you can do two things....
                      1) hit it with a series of mops and polishing rouge or.......
                      2) use Diamond Brite Truck Box polish. http://www.autozone.com/autozone/acc...er=628871_0_0_

                      here is two examples 1) i have done with mops, the 2) with just 1500 wet then the diamond brite.
                      1)

                      2)

                      Comment


                      • #12
                        You suck! i was literally about to post a diy thread for work meisters.... i disassembled mine, wire brush all silicon off. Wet sanded lips 220-2500, polished with turtle wax polish compound, then mothers mag polish. also have tunershop usa m7x32mm gold hardware. faces are pearl white with adams gold top coat, new valve stems, inner barrels are now painted black aswell. As for the face mounting, mine are r disk and were all reverse mounted. so i have the same markings from the lock nuts, its fine.
                        Last edited by 05subysti; 02-12-2013, 03:39 PM.

                        Comment


                        • #13
                          Originally posted by C.Johnston View Post
                          you can get it like that but you need to do it right.. is that powder or paint on your wheels? if it's paint, id strip with dumond safe strip.. if it's powder, get it blasted with walnut, not sand, it's less abrasive and will cause you less work to get the pock marks from sandblasting out.

                          after you start sanding (if there are casting marks start lower, if it's pretty slick you can probably do 800 or 1000) then, finish with 1500 wet and 2000 wet.. once that is all done you can do two things....
                          1) hit it with a series of mops and polishing rouge or.......
                          2) use Diamond Brite Truck Box polish. http://www.autozone.com/autozone/acc...er=628871_0_0_

                          here is two examples 1) i have done with mops, the 2) with just 1500 wet then the diamond brite.
                          It's powdercoat. I'm using Jasco to strip it off...they didn't have any aircraft stripper at the Lowes I went to. However it seems to be working ok, although a bit more time consuming than I had hoped for.

                          I'm roughly following this guide for polishing
                          [ame="http://www.youtube.com/watch?v=Cw9bBQwAgOI"]http://www.youtube.com/watch?v=Cw9bBQwAgOI[/ame]

                          I have some Mothers mag & aluminum polish I'm going to hit it with when I'm done.

                          Originally posted by 05subysti View Post
                          You suck! i was literally about to post a diy thread for work meisters.... i disassembled mine, wire brush all silicon off. Wet sanded lips 220-2500, polished with turtle wax polish compound, then mothers mag polish. also have tunershop usa m7x32mm gold hardware. faces are pearl white with adams gold top coat, new valve stems, inner barrels are now painted black aswell. As for the face mounting, mine are r disk and were all reverse mounted. so i have the same markings from the lock nuts, its fine.
                          here are my pics.
                          Wow those look awesome! I wish I could fit lips like that on my S2000. Please don't let my thread stop you from making yours, I would love to see how you did it and I'm sure there's a lot I could learn.

                          I **** to say it, but I also ordered gold bolts for mine lol. Although my centers are a different shade of white- it's Honda's championship white, so it has a slight cream tint to it.

                          Comment


                          • #14
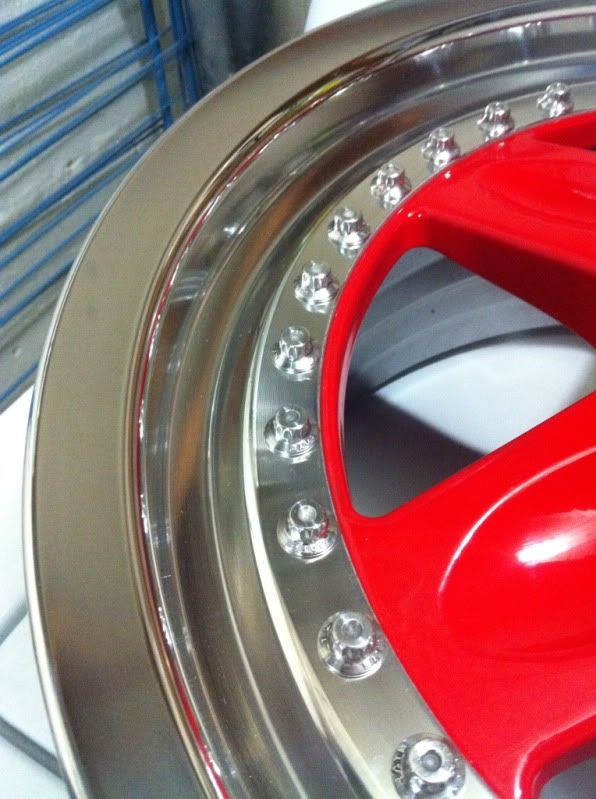
                            Got the powdercoat stripped off the 1st lip


                            Gonna need a lot of sanding...


                            Preview

                            Comment


                            • #15
                              Spoke decals, centering rings, and uber cool license plate frame arrived. I'm official now haha

                              Comment

                              Working...
                              X