 Tweet
Tweet
I remember finding this thread when you first put the plastidip on! Congrats on the little one, hope to see more progress! definitely sub'd
-
-
Subbed. Pretty awesome thread man, you are very dedicated! Congrats on the newborn.1991 BMW E30 325i TouringComment
-
This is so good, keen for more!Comment
-
Originally posted by ramong24 View PostOriginally posted by Grime View PostOriginally posted by imschwaggy View PostThanks guys! Making progress when I can, but most of my work is going to happen over the long winter since it's still nice enough to golf right now haha.Originally posted by SebastienPeek View PostComment
-
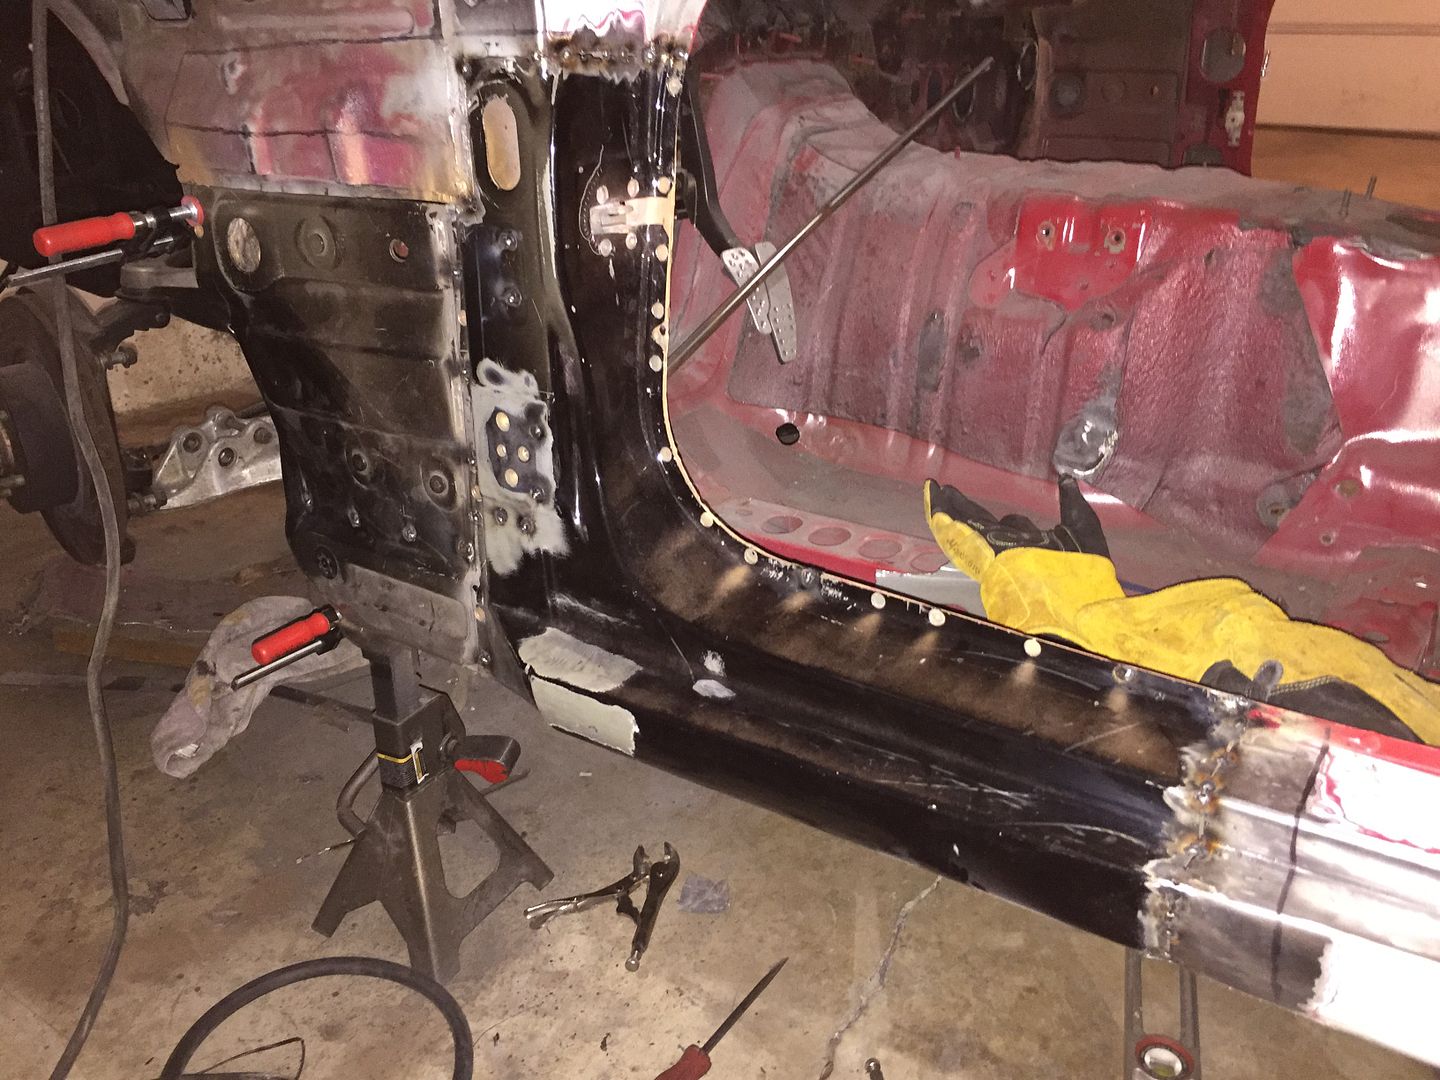
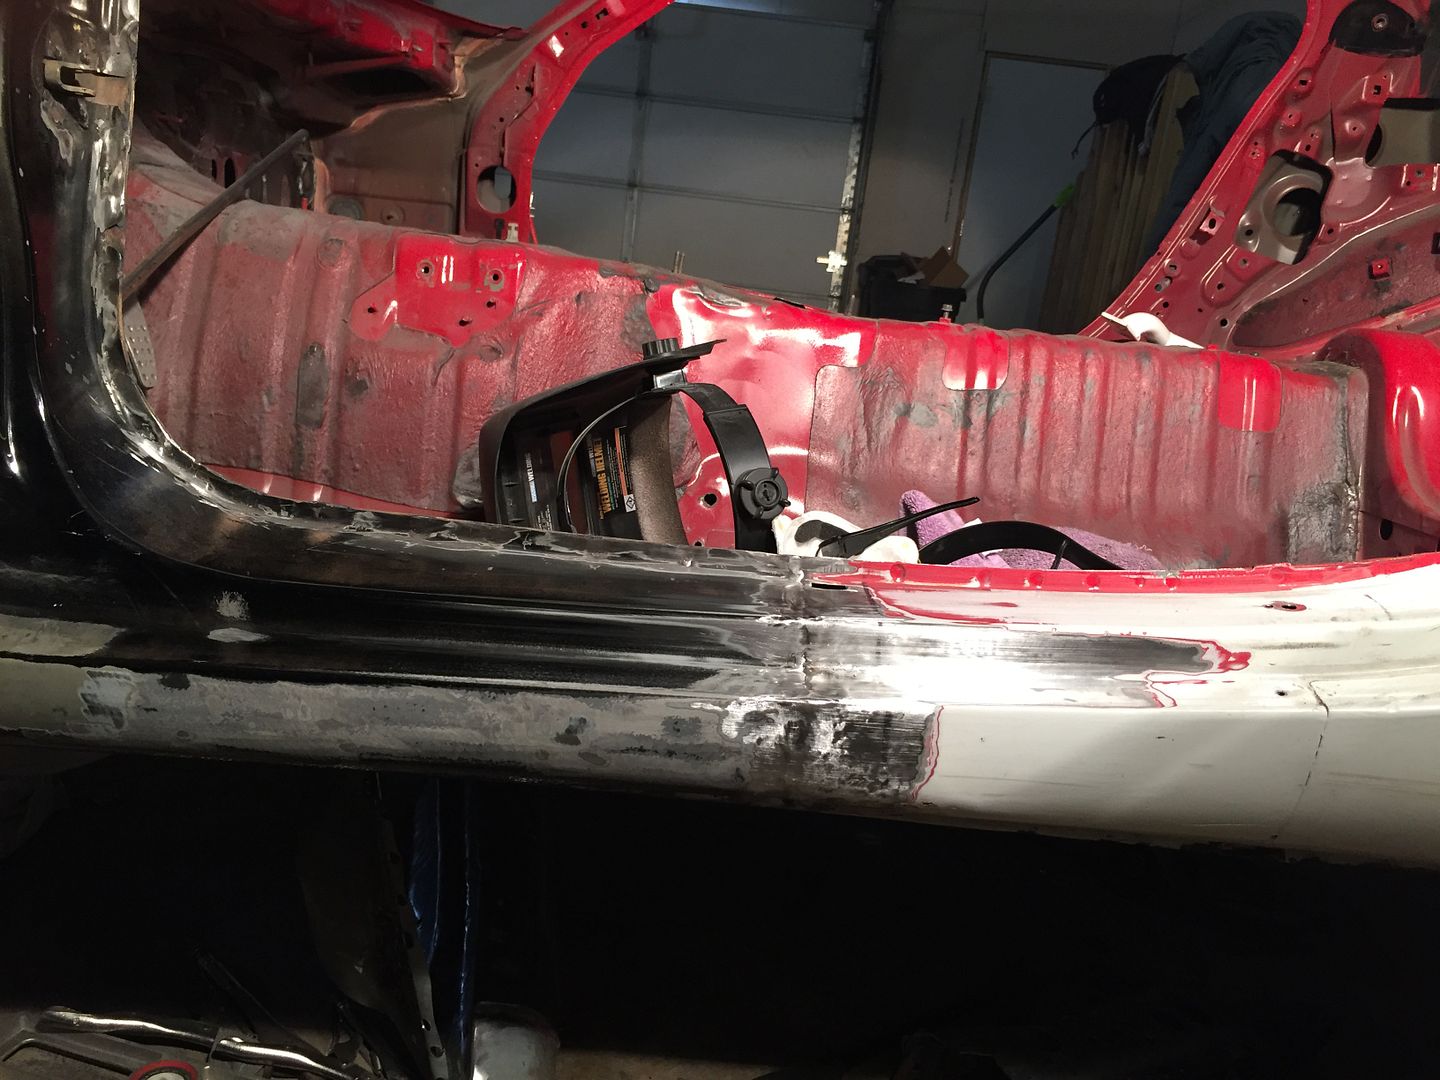
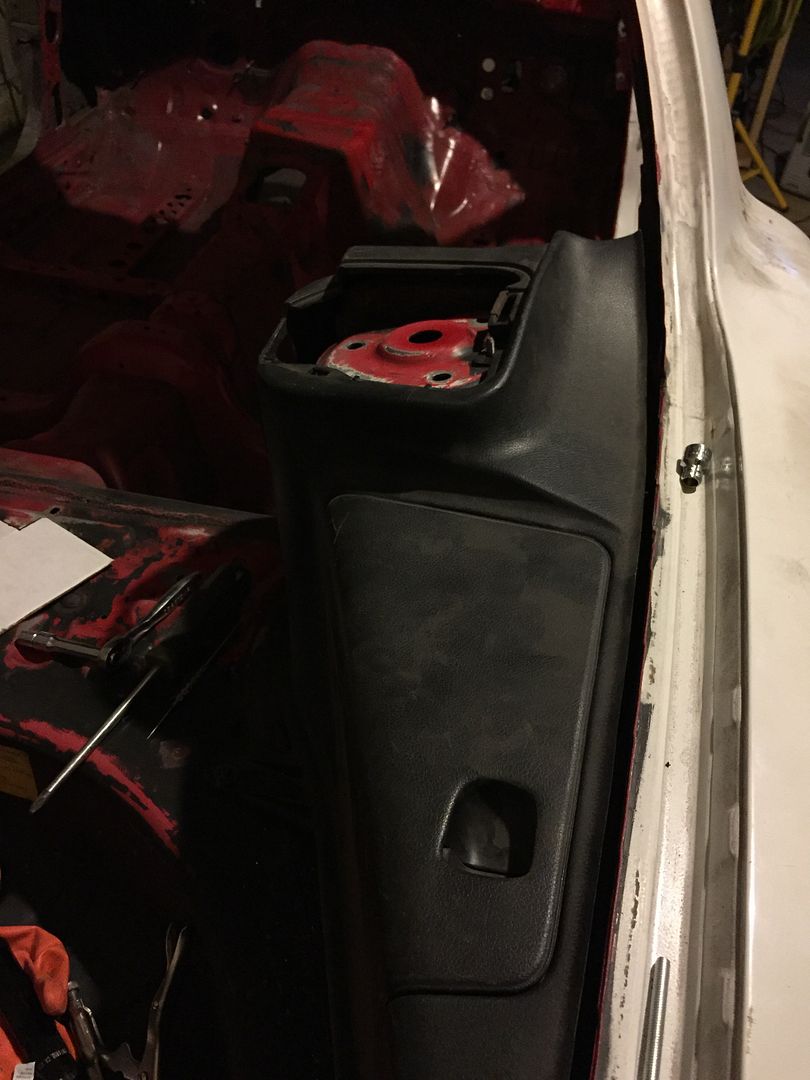
I was able to get some of the main structure replacement done on the door jamb. I think it turned out pretty well and am happy with how it's going so far
I made my cut on the car where I wanted the new piece to integrate in. I chose here so I could use the hole in the panel to line up the new piece correctly
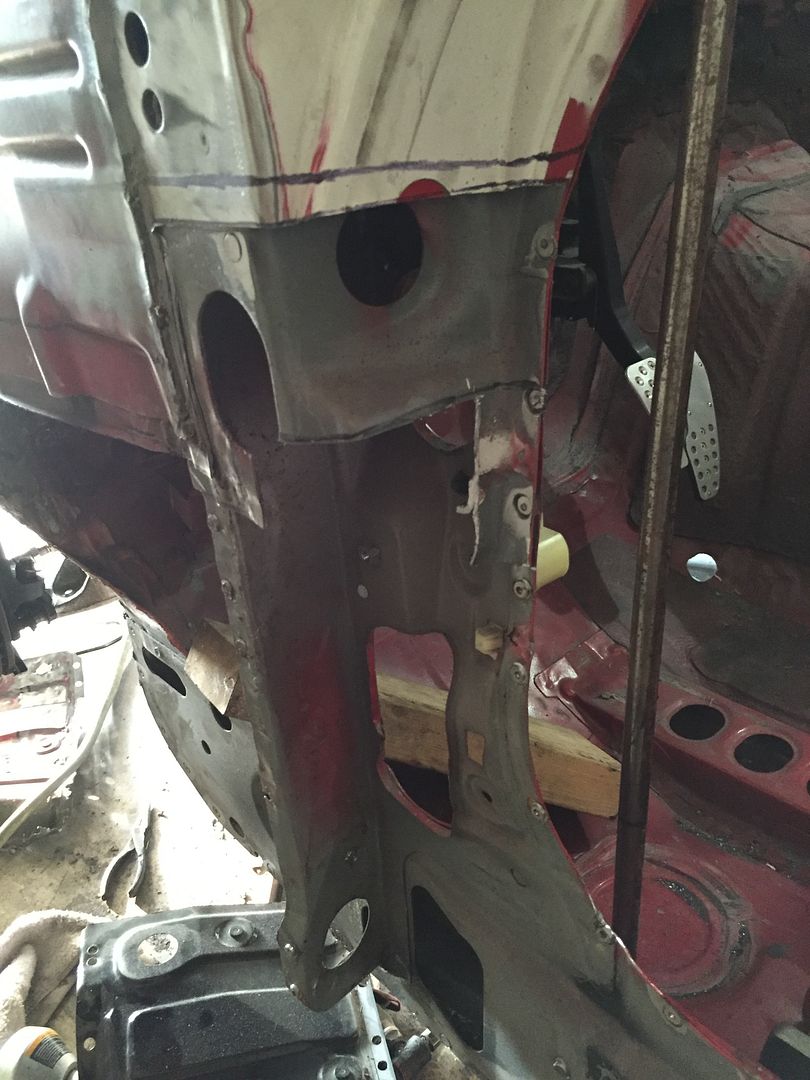
Quick mock up of the new part after cutting...made a mistake near that top hole as can be seen. Oh well, this will be hidden anyhow
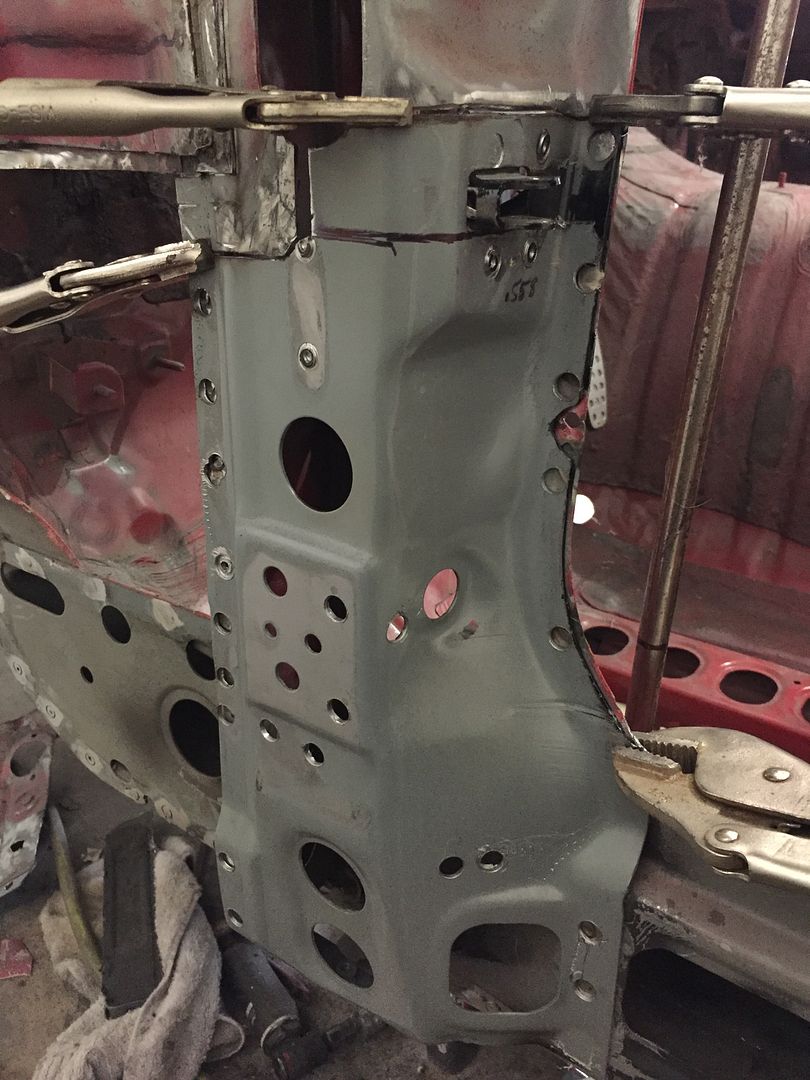
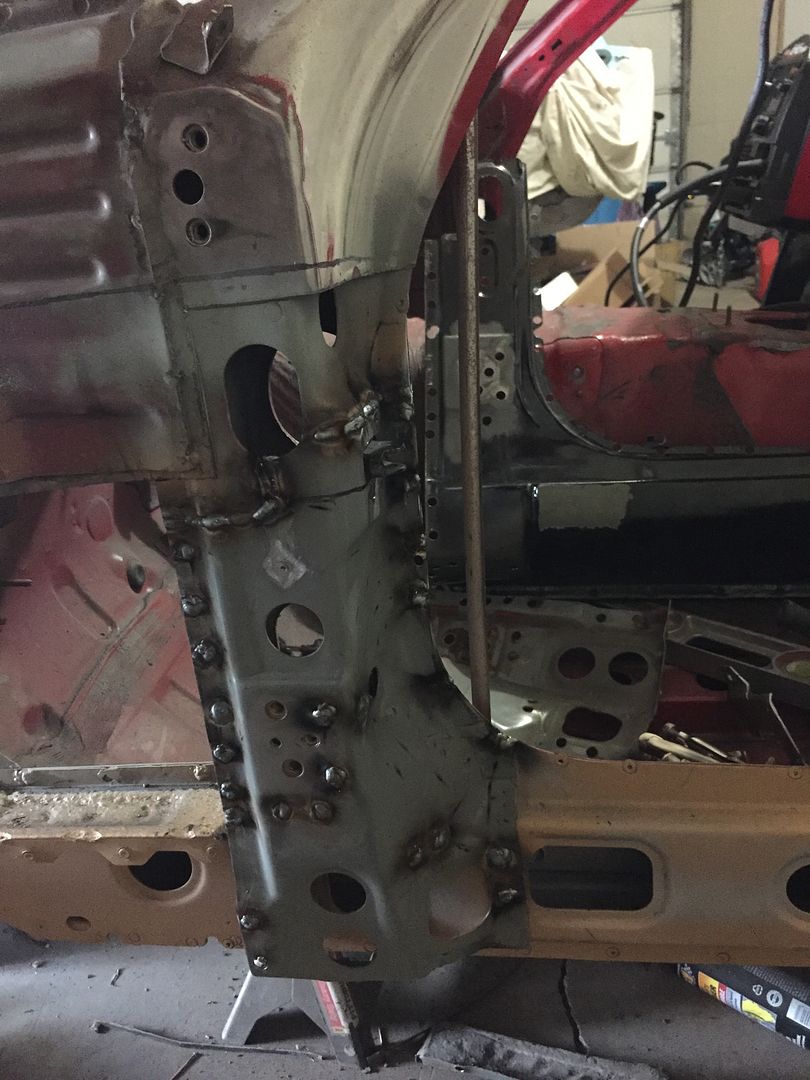
Welded in the supports that were bent

Tacked the new jamb support in place. Made sure it lined up measurement wise and that my tri point brace still fit correctly..it did
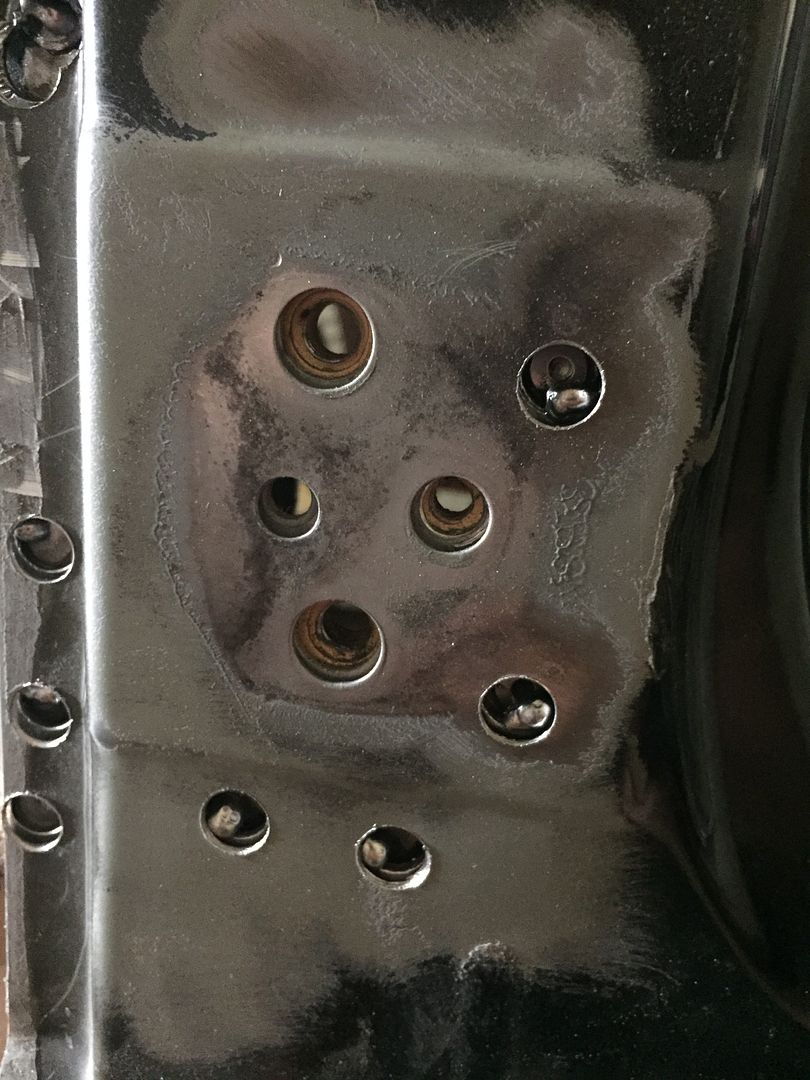
Holes for the hinge line up through all of the panels as well
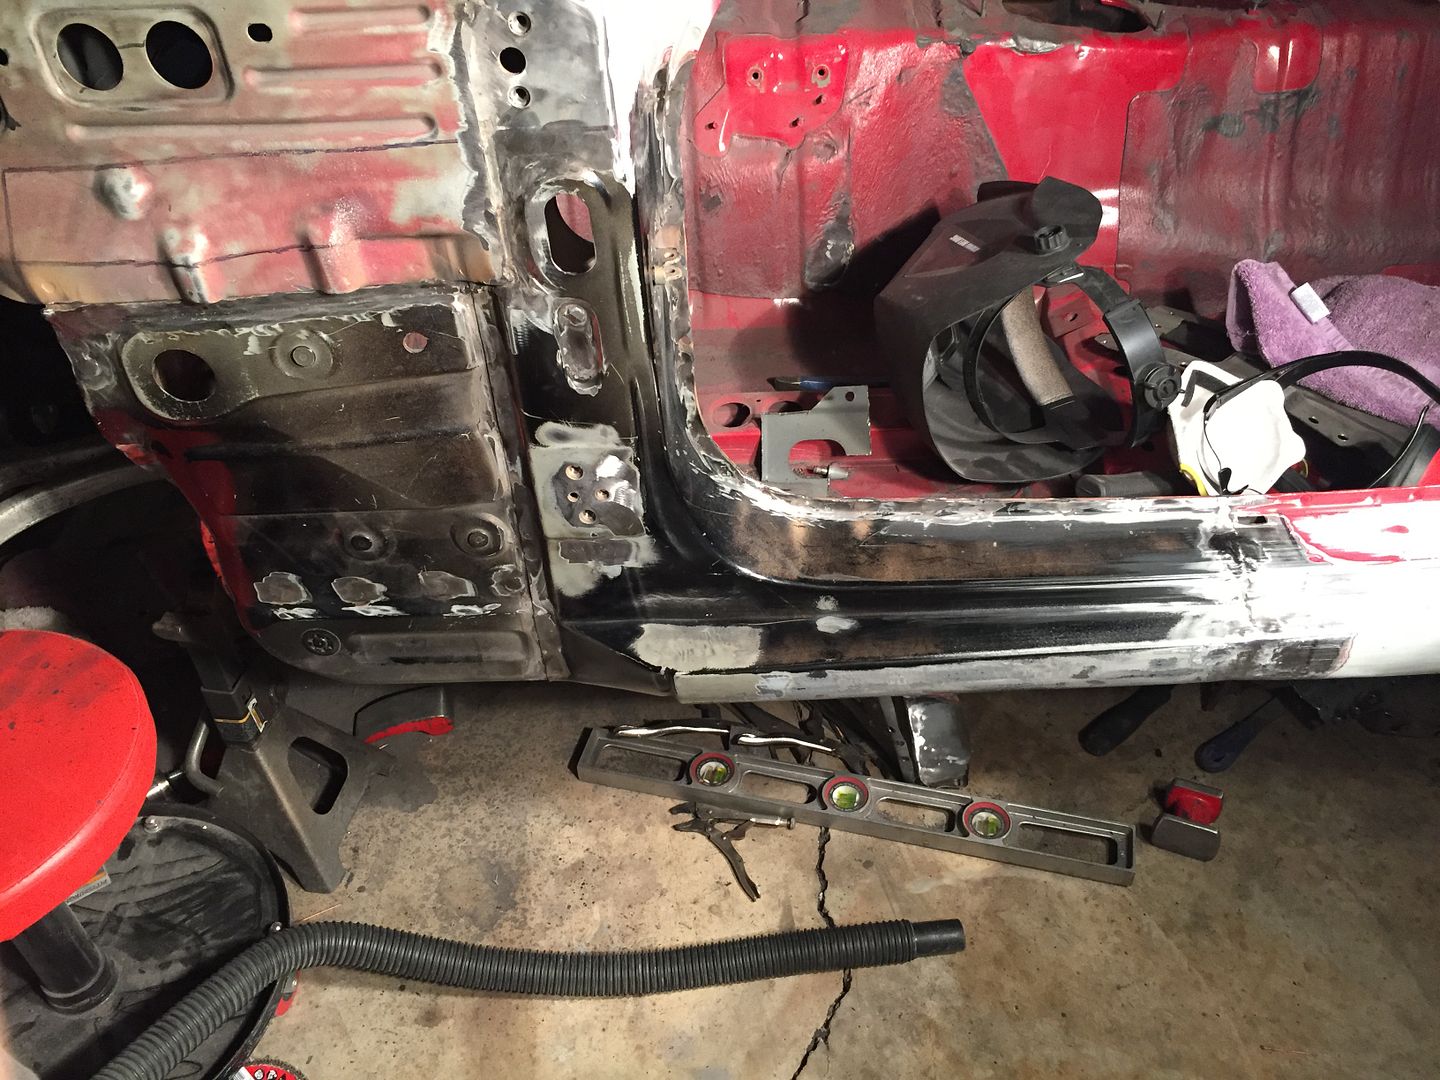
More welding
And then grinding
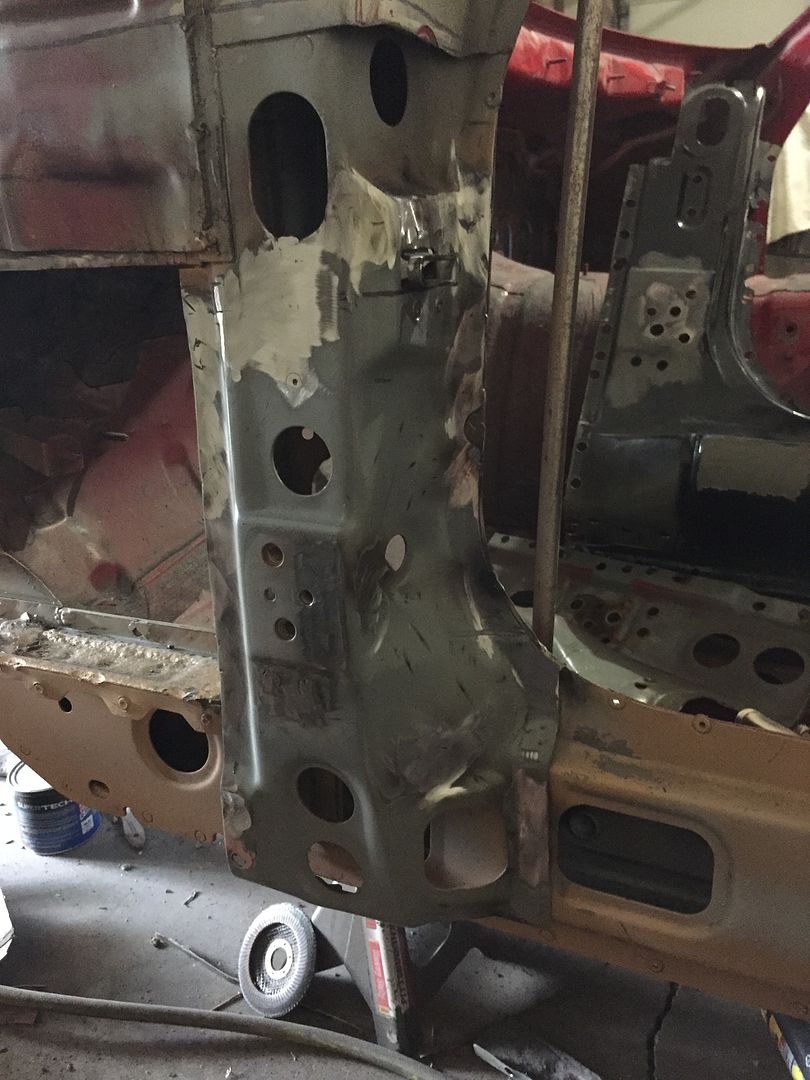
A little more work and Ill be able to put the out jamb in finally!
And as usual this guy has taken up some of my time too :p
Comment
-
Gotta get this back up to date! Standby for status updatesComment
-
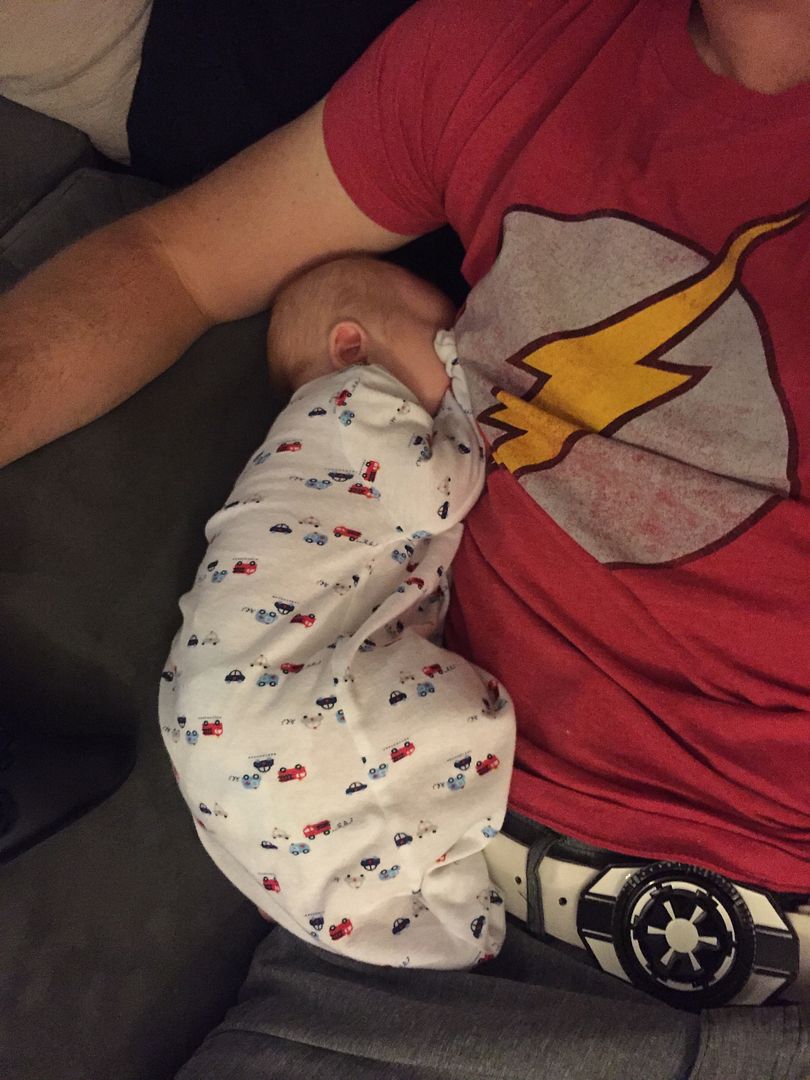
Just to give a little update and a reason why there have been no updates...I've been busy for the month and a half, and here is part of the reason why (other than work and my son).
So to begin, I'm an idiot and don't know how to drive apparently. Got a tune and intake for my Golf R (the daily) and decided to mess around with my friend in his STI...well, I missed a shift and went from second to first. FAIL. Car started missing and I limped it to my friends house to check it out. Zero compression in one cylinder, sweet! So had it towed home and finally found the issue.
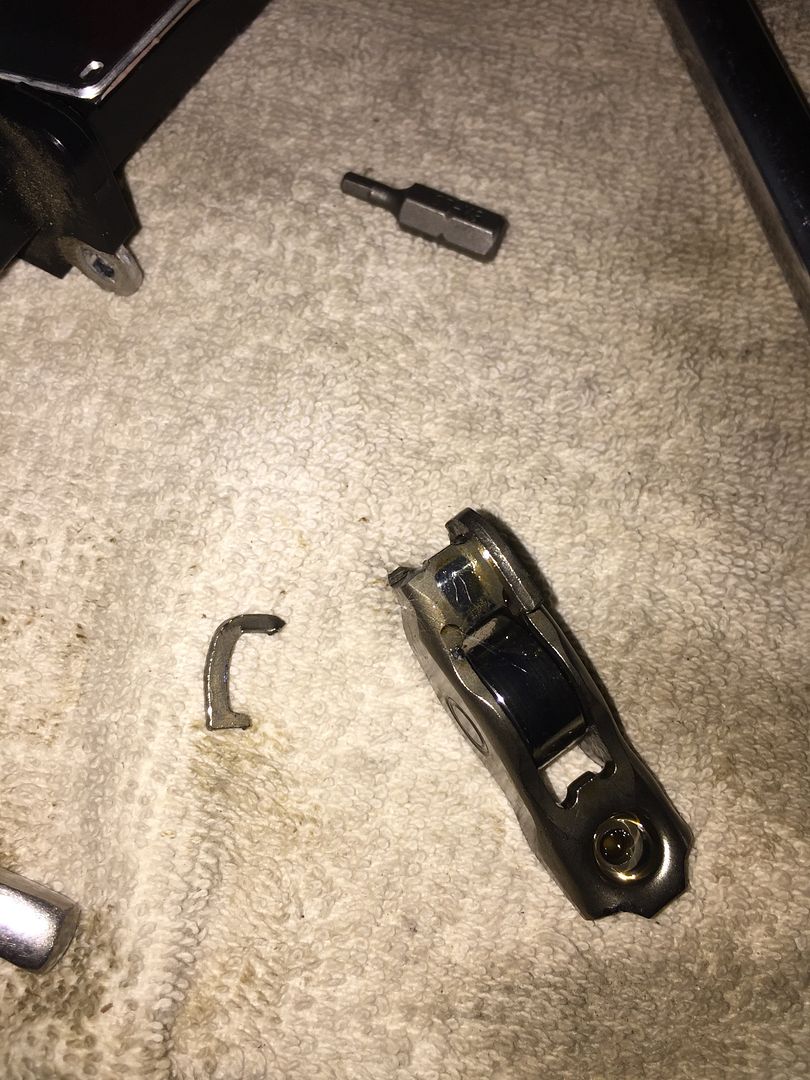
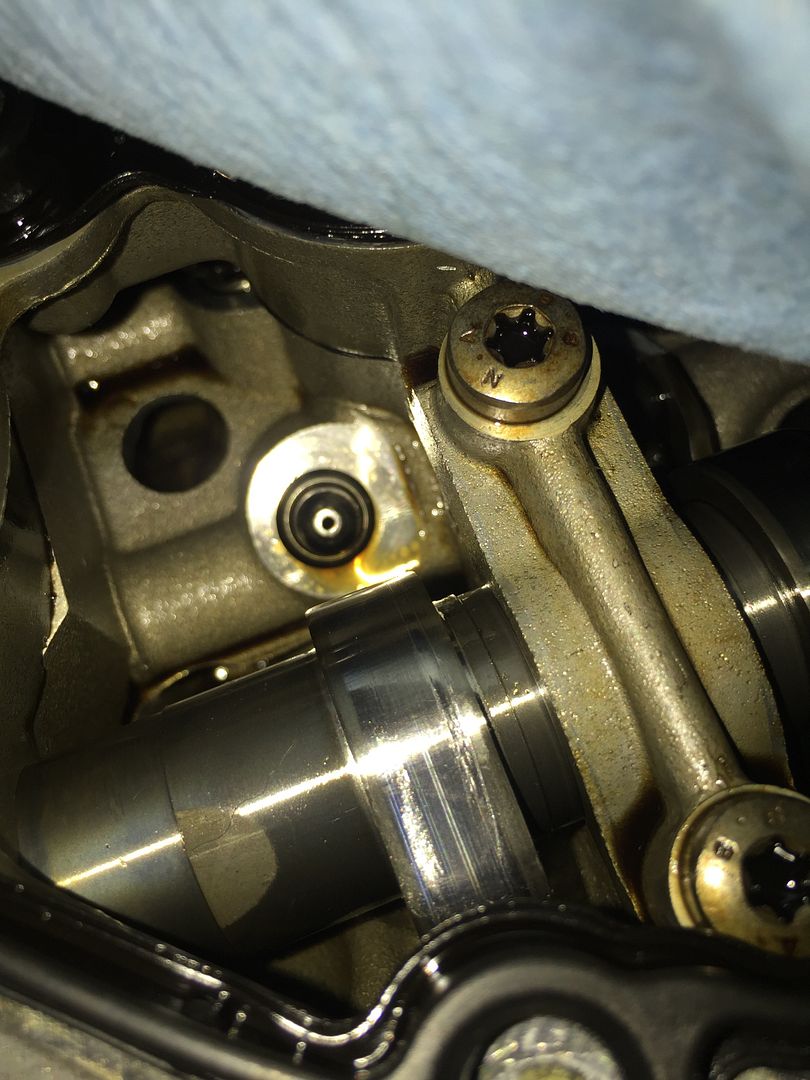
The cam lobe got scratched pretty good from the rocker arm being pinned against the head and the valve. I ended up ordering a new rocker arm and sanding the lobe slightly to smooth it out. The car ran fine after that with no abnormal noises, however, there were metal shavings in the first two oil changes (did two within 100 miles) and that freaked me out (nothing in the third one, it was shavings from where the arm rubbed against the head I believe). But anyhow, this whole ordeal left a bad taste in my mouth towards the car unfortunately. I felt like I would always be worried something would go wrong. Soo, this happened
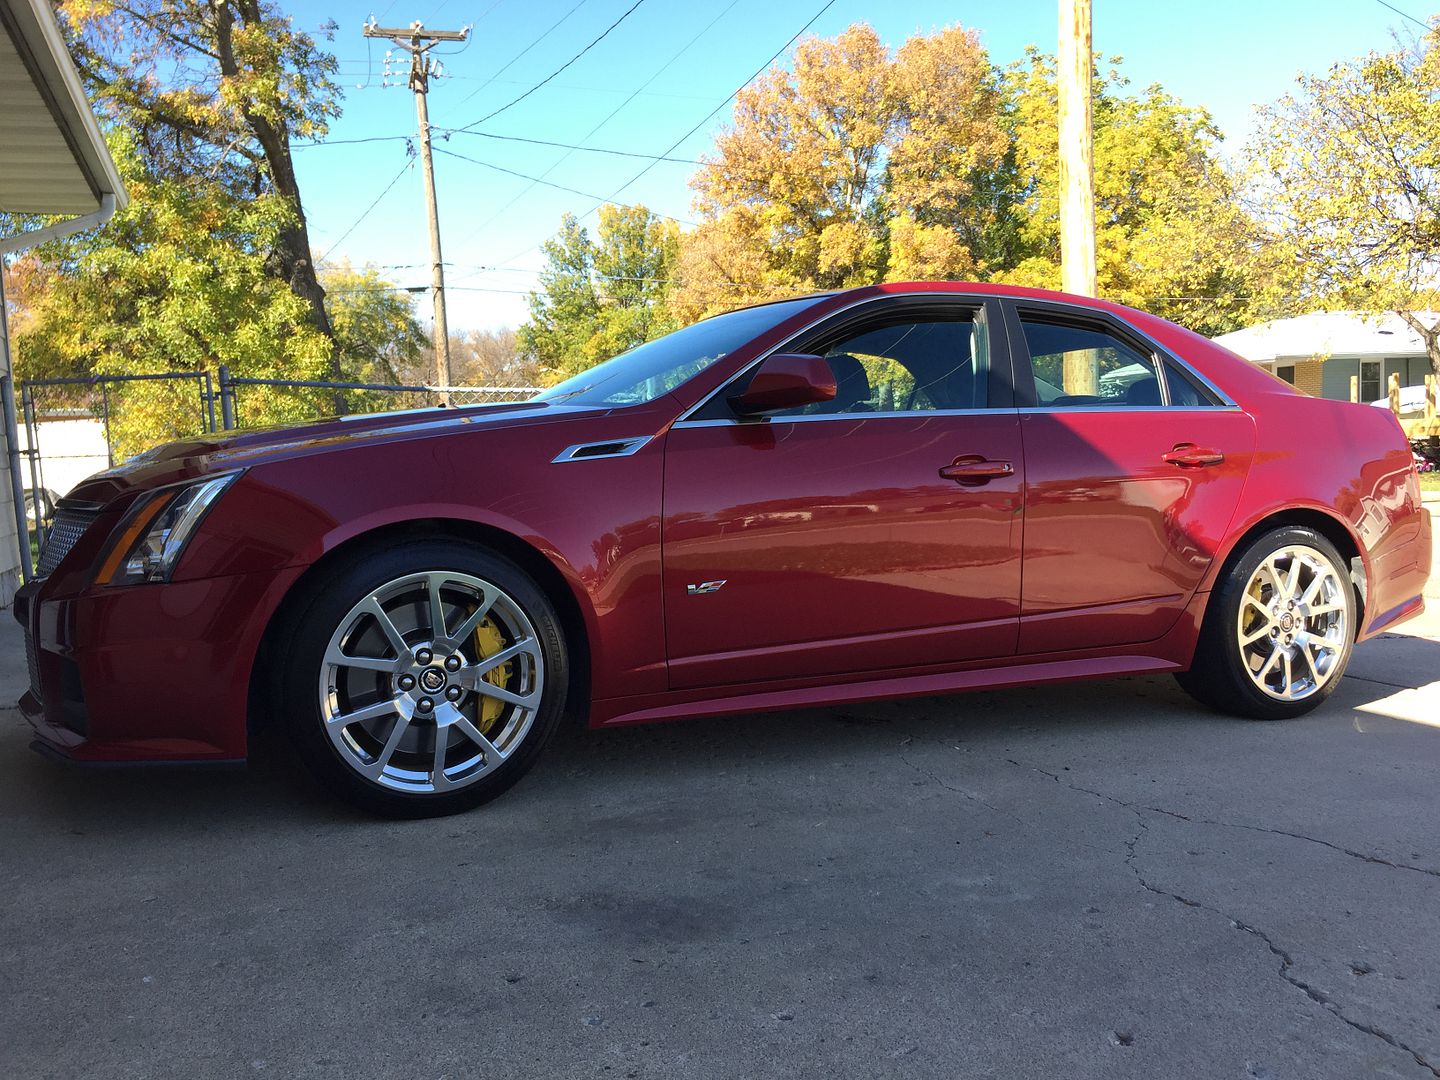
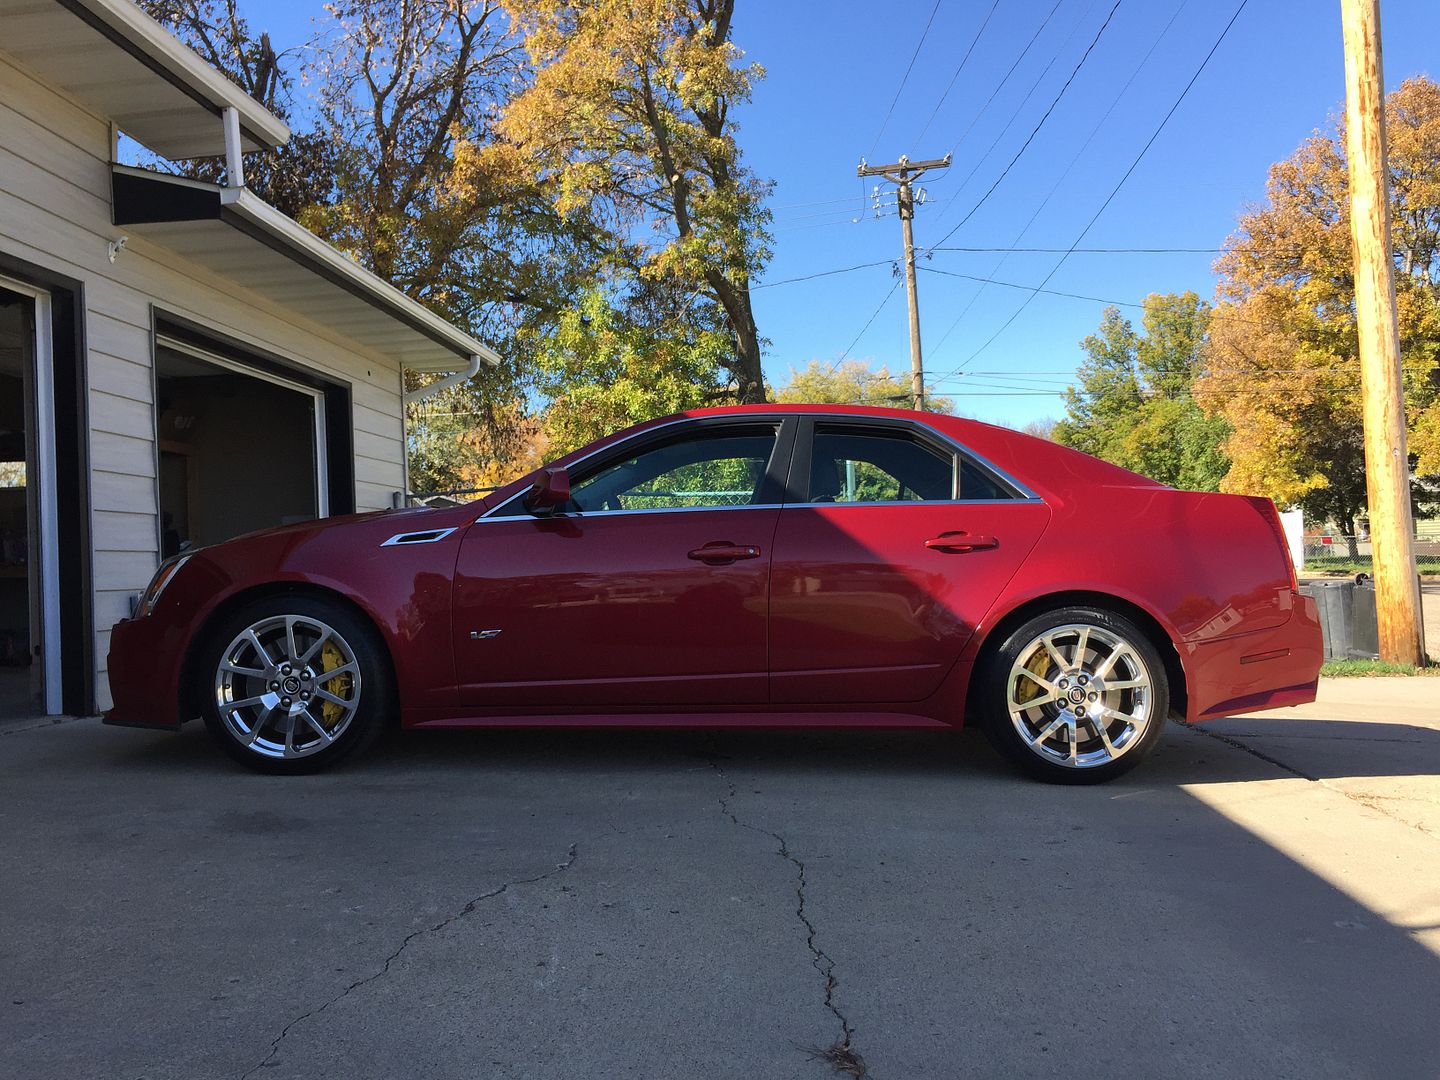
My plan was to trade in on a truck so I could have more room and tow the rx7, but I'm dumb and have wanted a cts-v for a long time (even before I got the Golf), I just didn't get one because of the winter weather up here. While searching for a truck I saw this posted up locally at one of the dealers, so I went to check it out...and took it home after trade in. It's a 2012 auto with Recaros/No sunroof and only 23k miles on it. Honestly red was my least favorite of the color choices on the CTS-Vs, but that was all based on pictures. Once I saw the red in person I fell in love. It's one of those that pictures do no justice for and it has grown on me over the past month. I would have still loved to have a white one (my favorite), but this car showed up at the right time and with low miles so I jumped on it. AND I FREAKING LOVE IT. Everything I want from a daily and if I didn't have so much into the RX-7 I would probably have it as my project car too. Enough babbling though, this is what I love
Comment
-
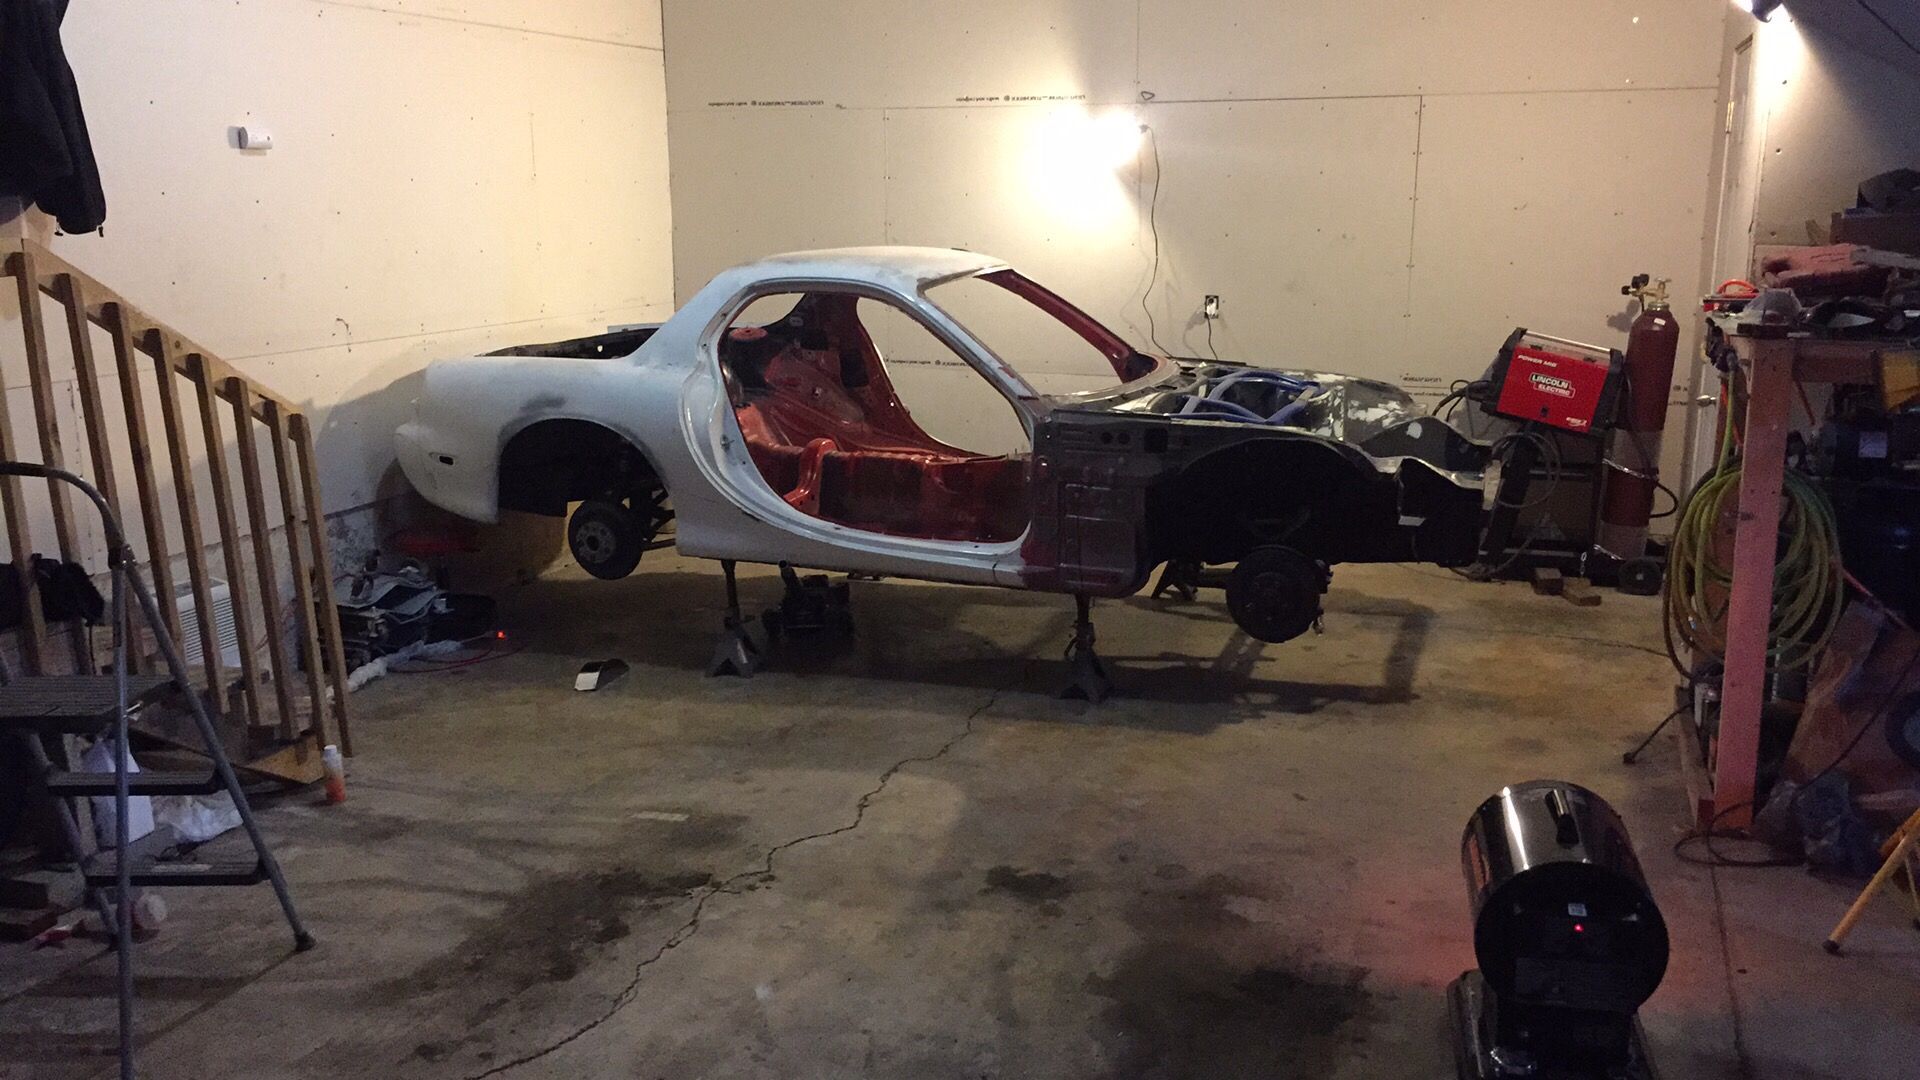
Definitely didn't realize I hadn't updated this in so long. I've made some decent (not great) progress over the winter so far. Playing catch up here, but here goes.
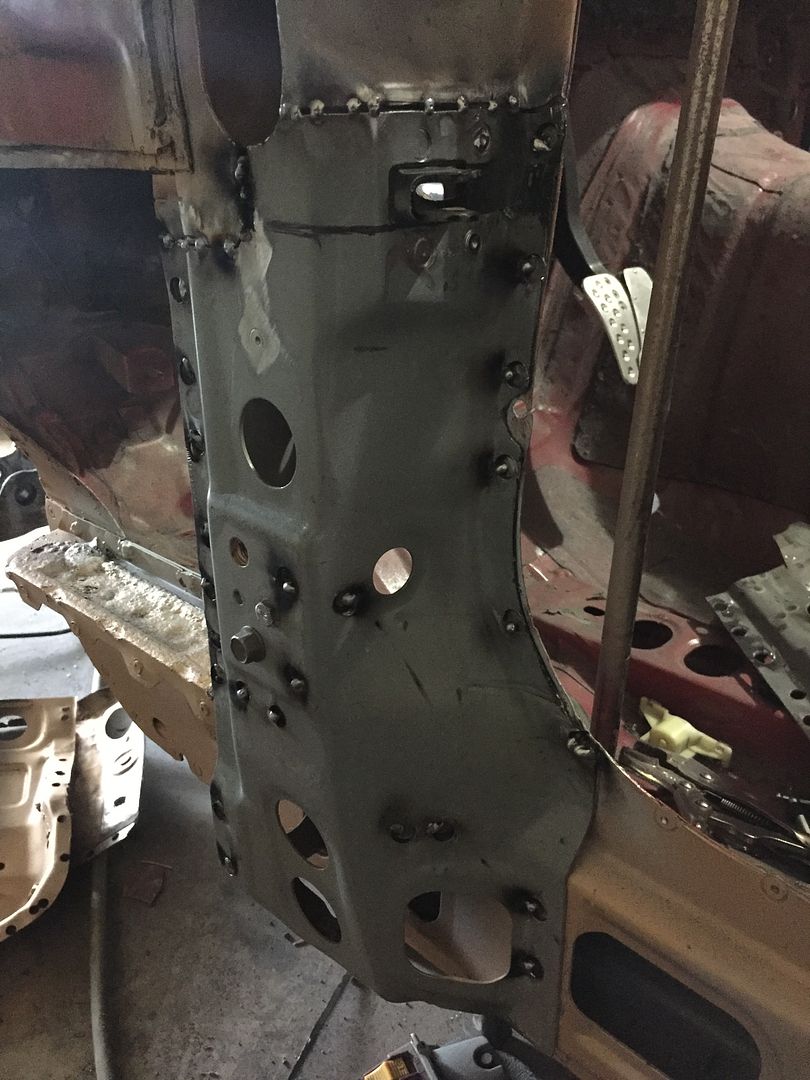
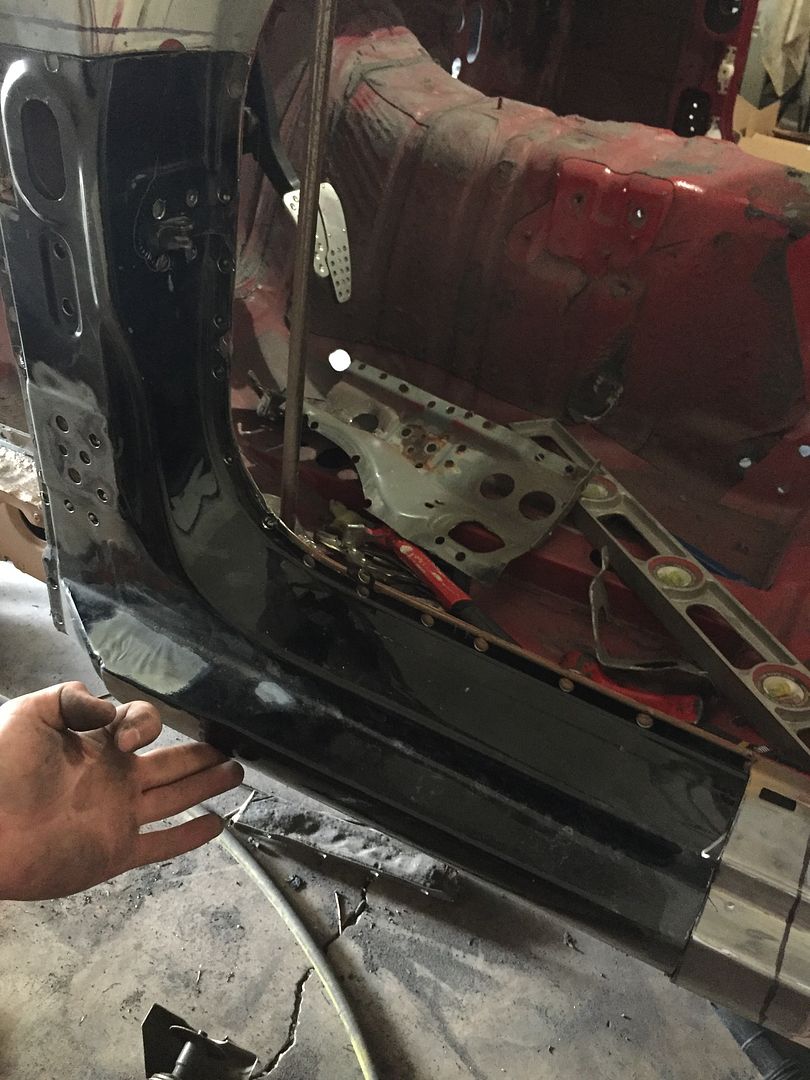
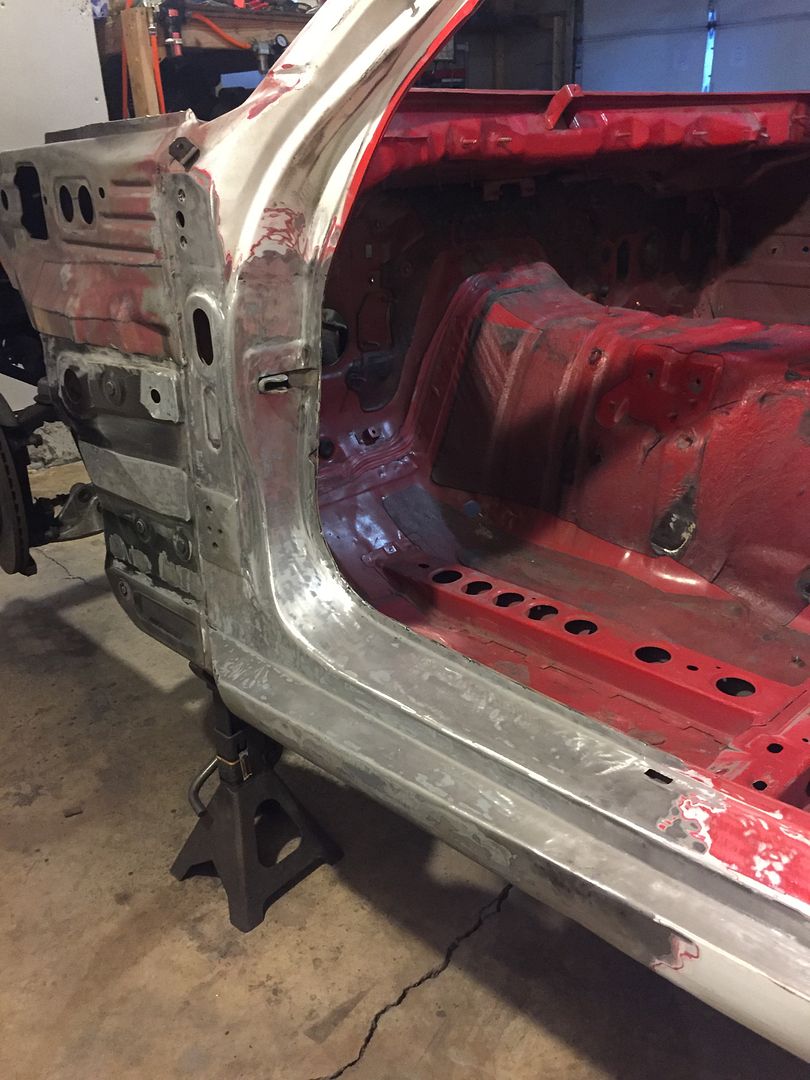
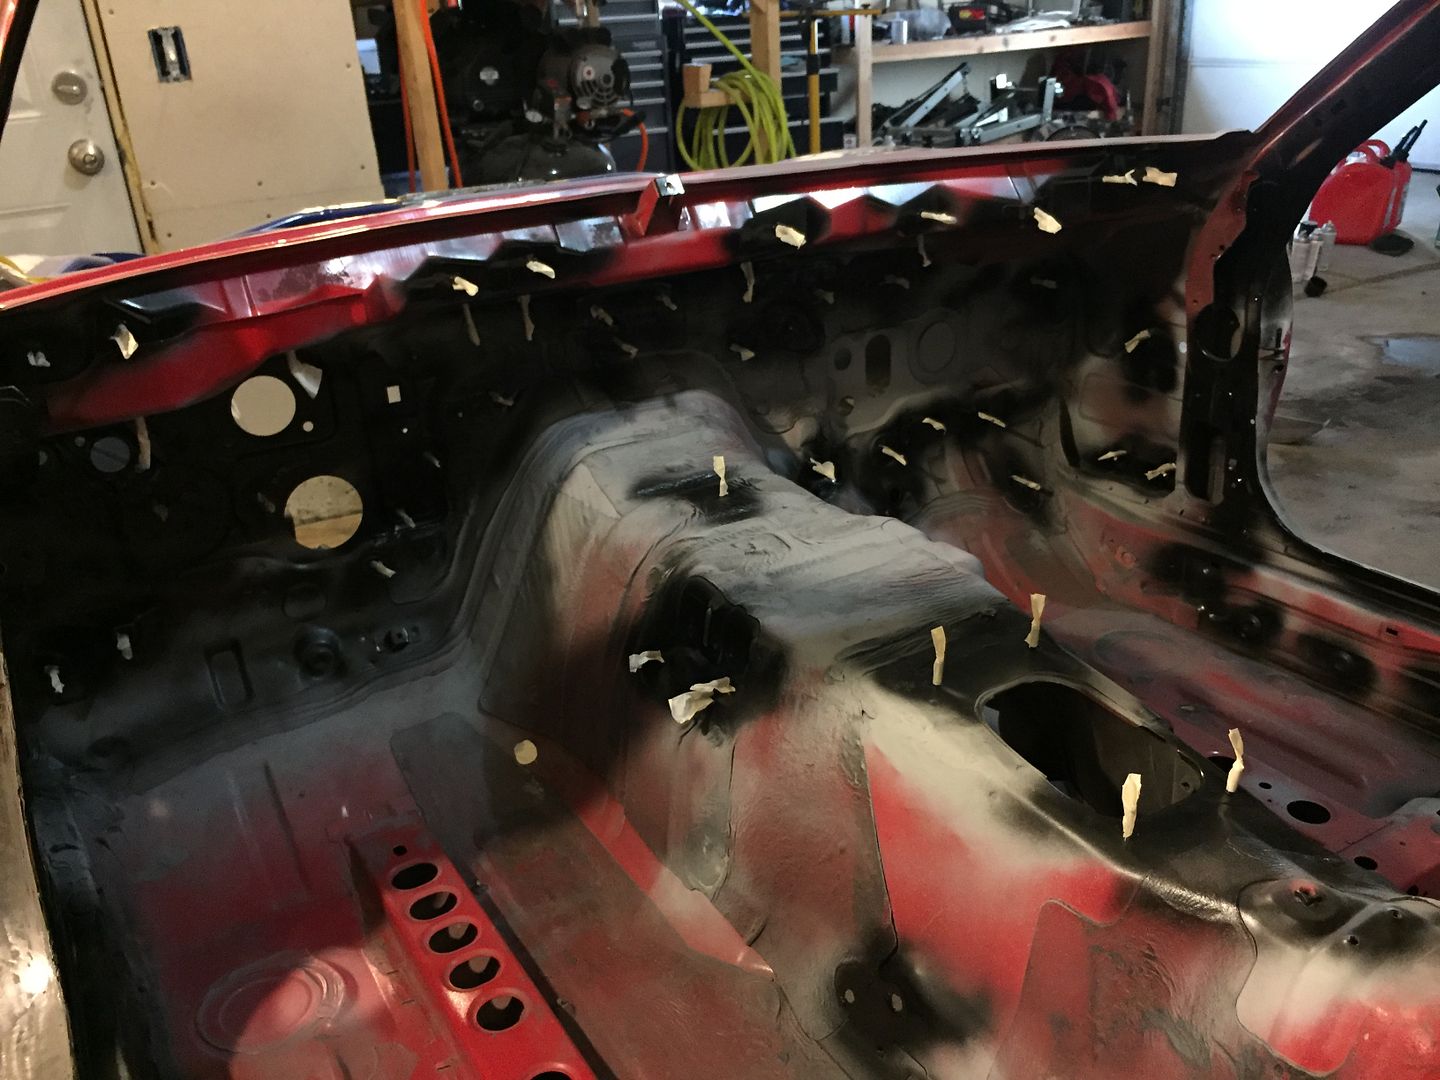
I finally finished up the door jamb. I think it turned out pretty decent for my first time doing something like this.

Finished the welding and started grinding
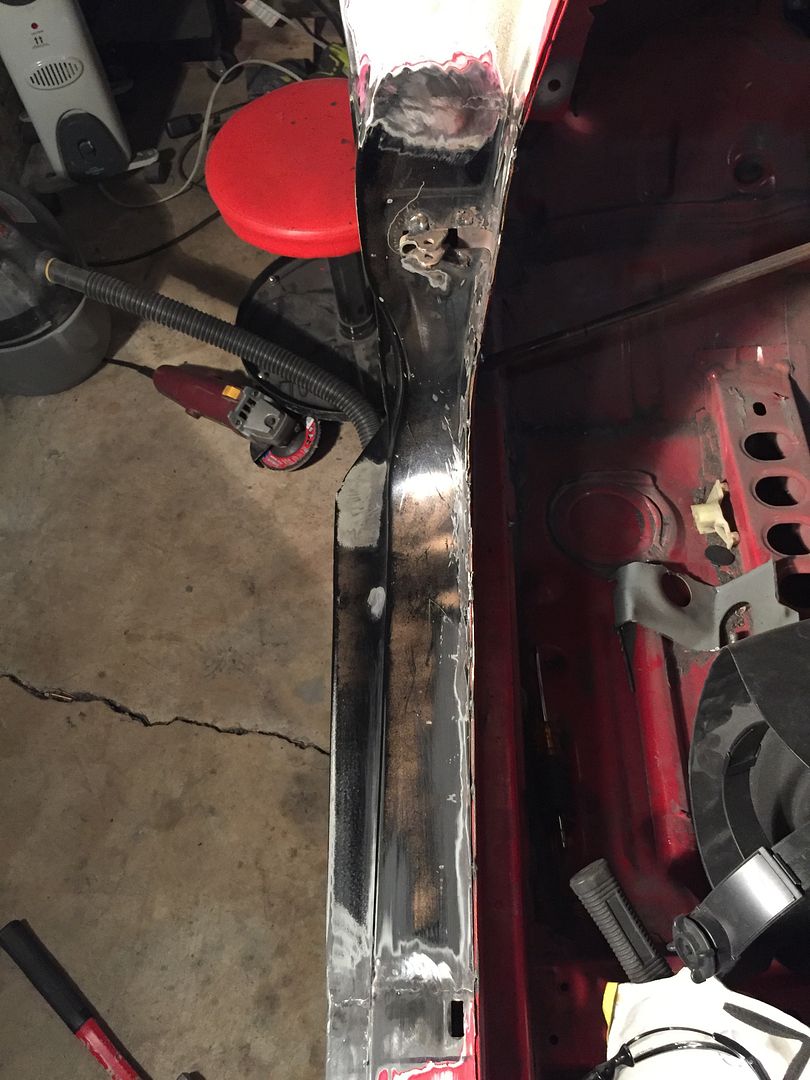
Taaddddaaaaaaa! Almost looks normal. I test fitted the door and it lines up well enough. Not 100% perfect, but I think it's about the best it can be considering how bad it was before. The bottom latch area (the one I replaced) needed to come out a tad bit so I went ahead and hammered the backside to bring it out some. It was either that or use a small spacer between the hinge and body. Nobody will ever know it was jacked up besides myself and anyone that has followed this thread though lol
Comment
-
So I had a lot typed up for this next update, but apparently I accidentally hit the back button and lost it all. Not typing it all again. Here are pictures

Comment
-
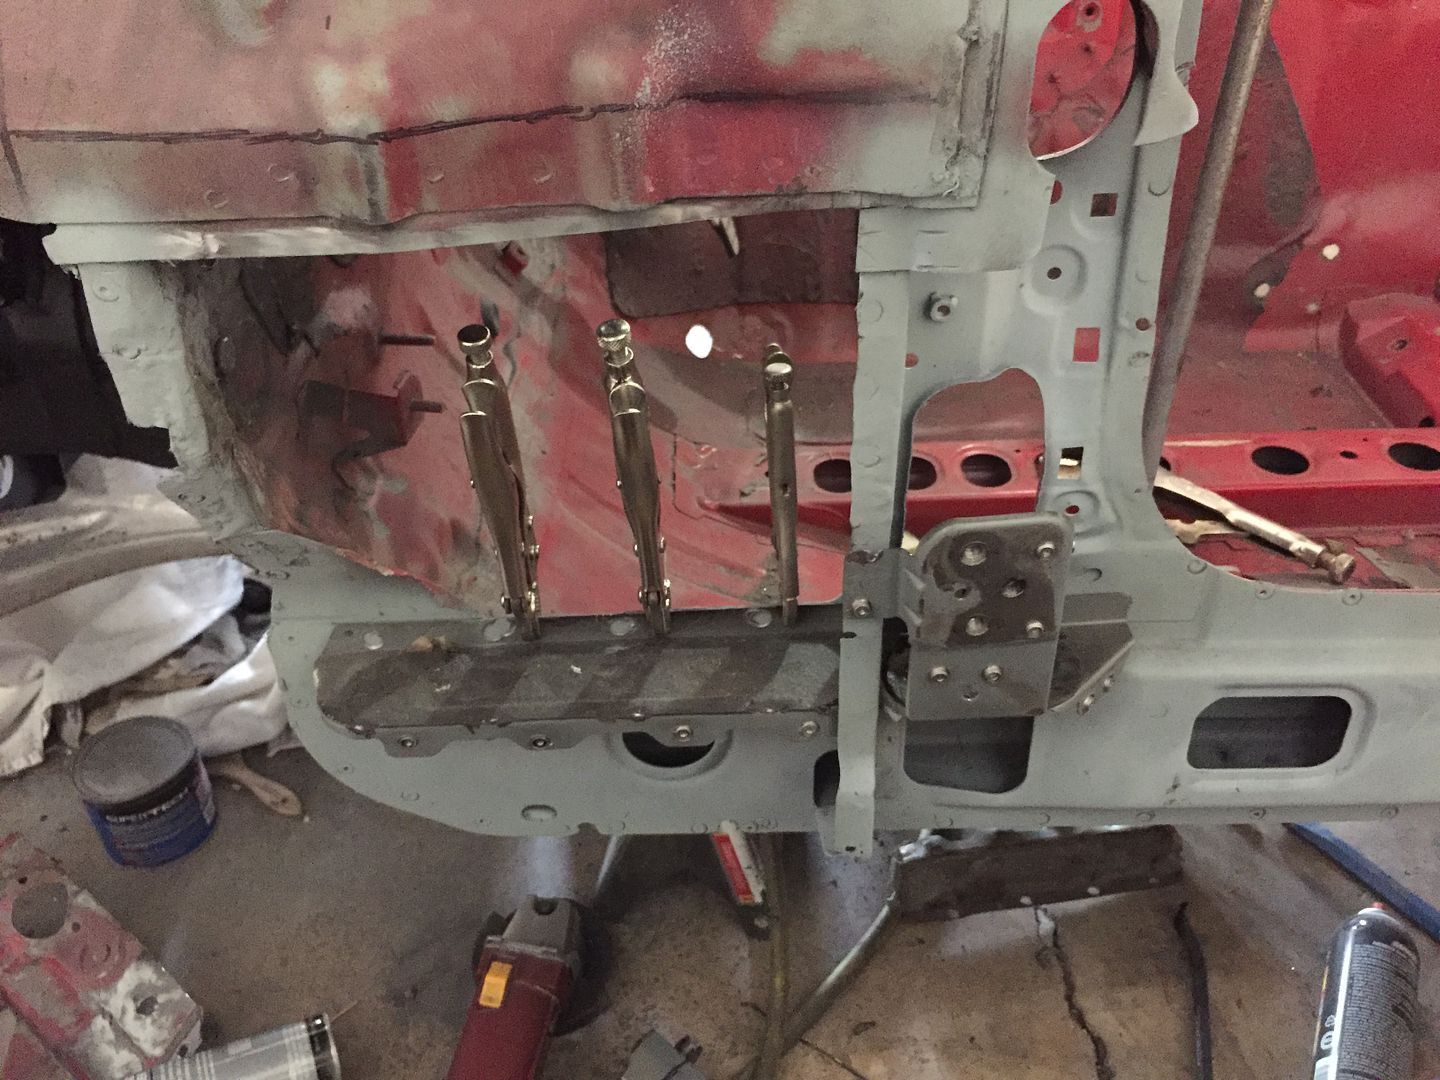
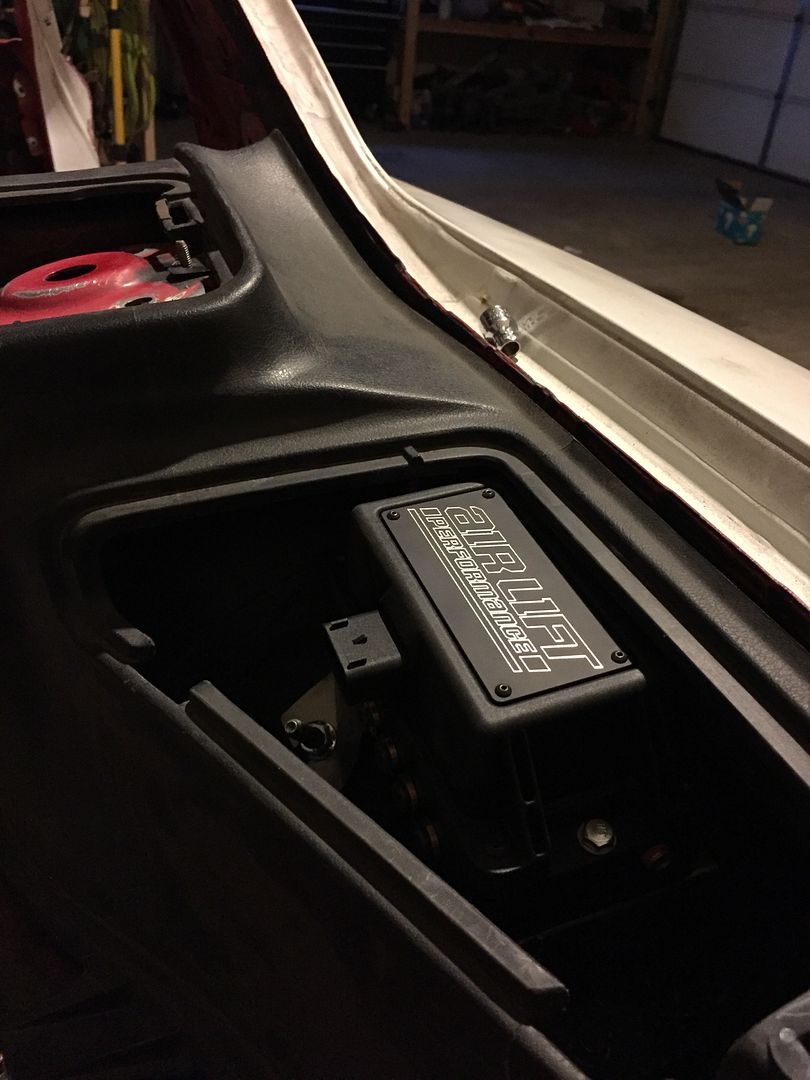
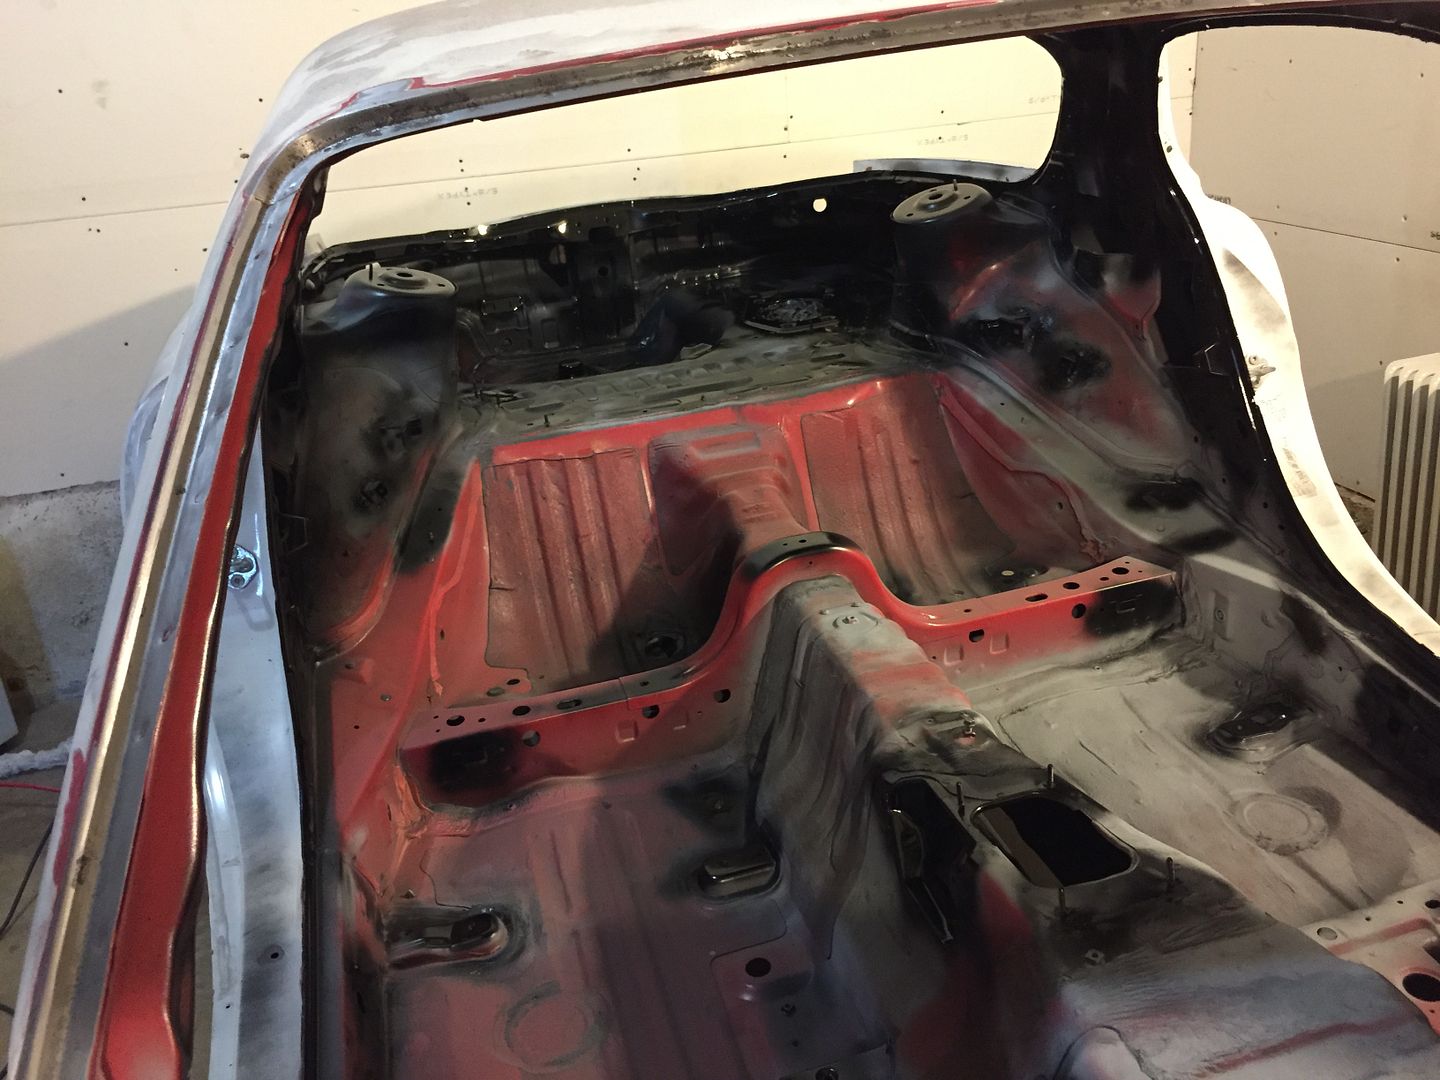
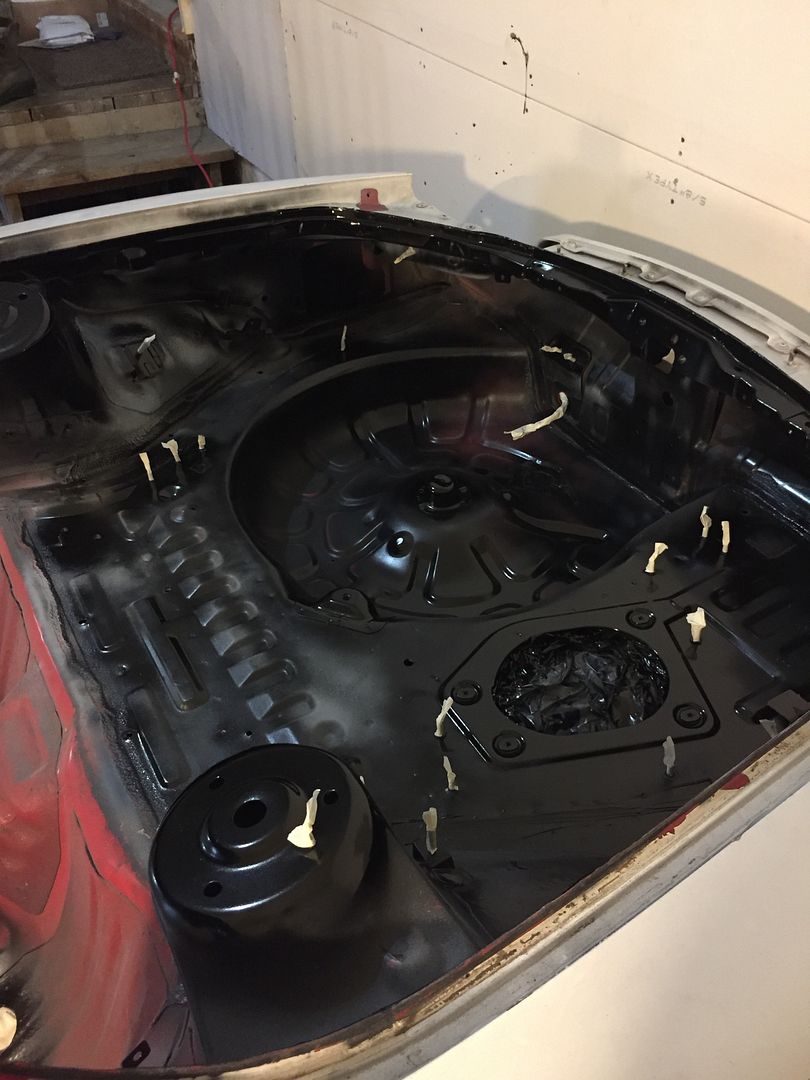
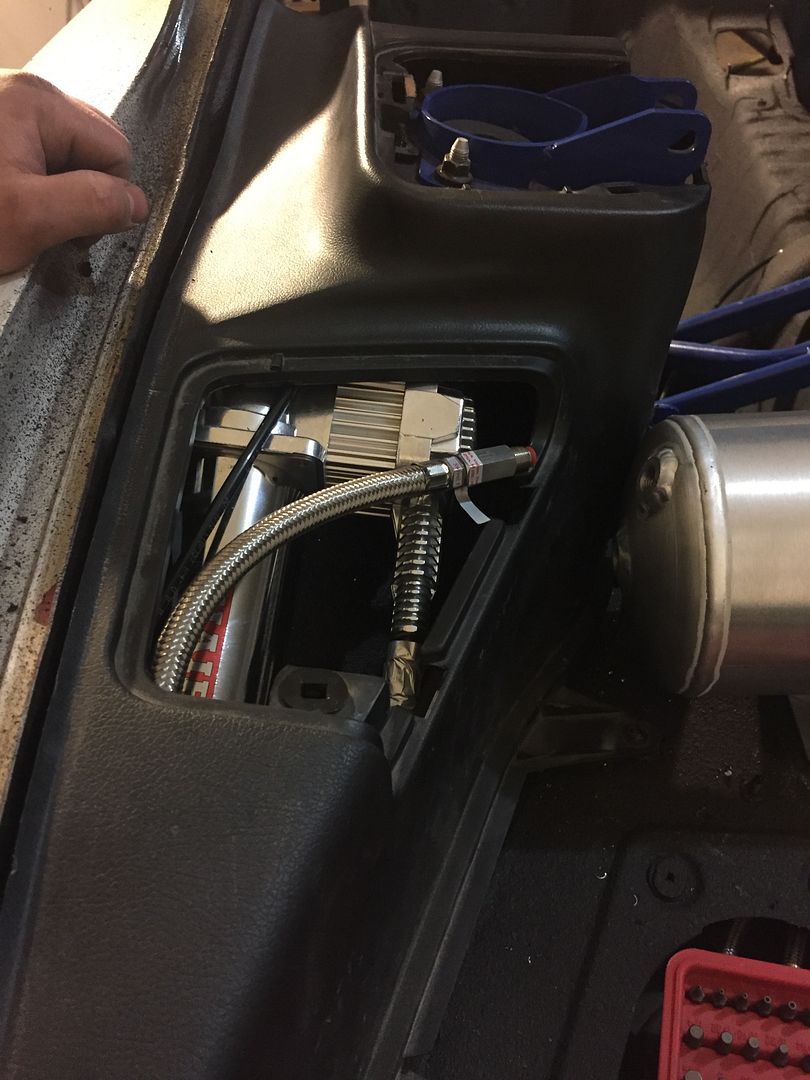
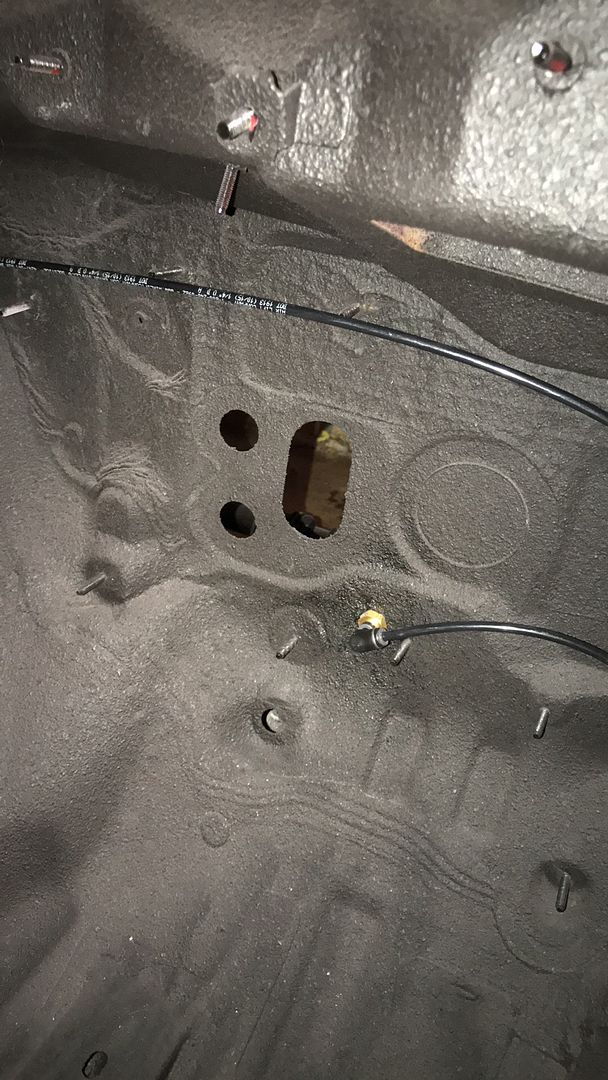
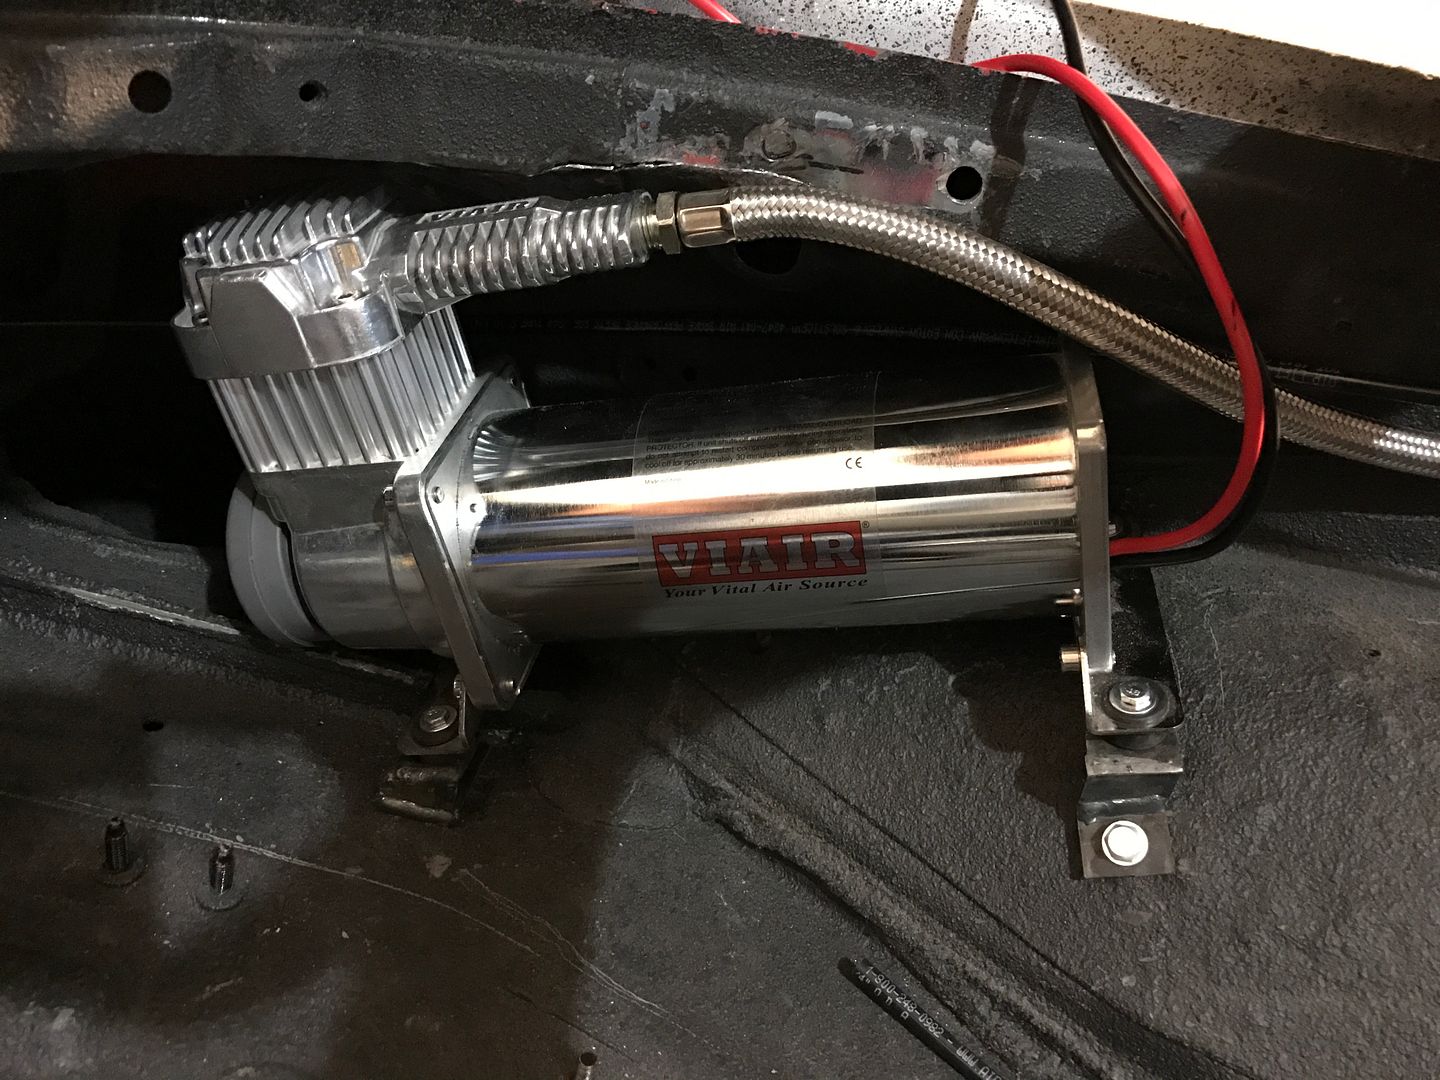
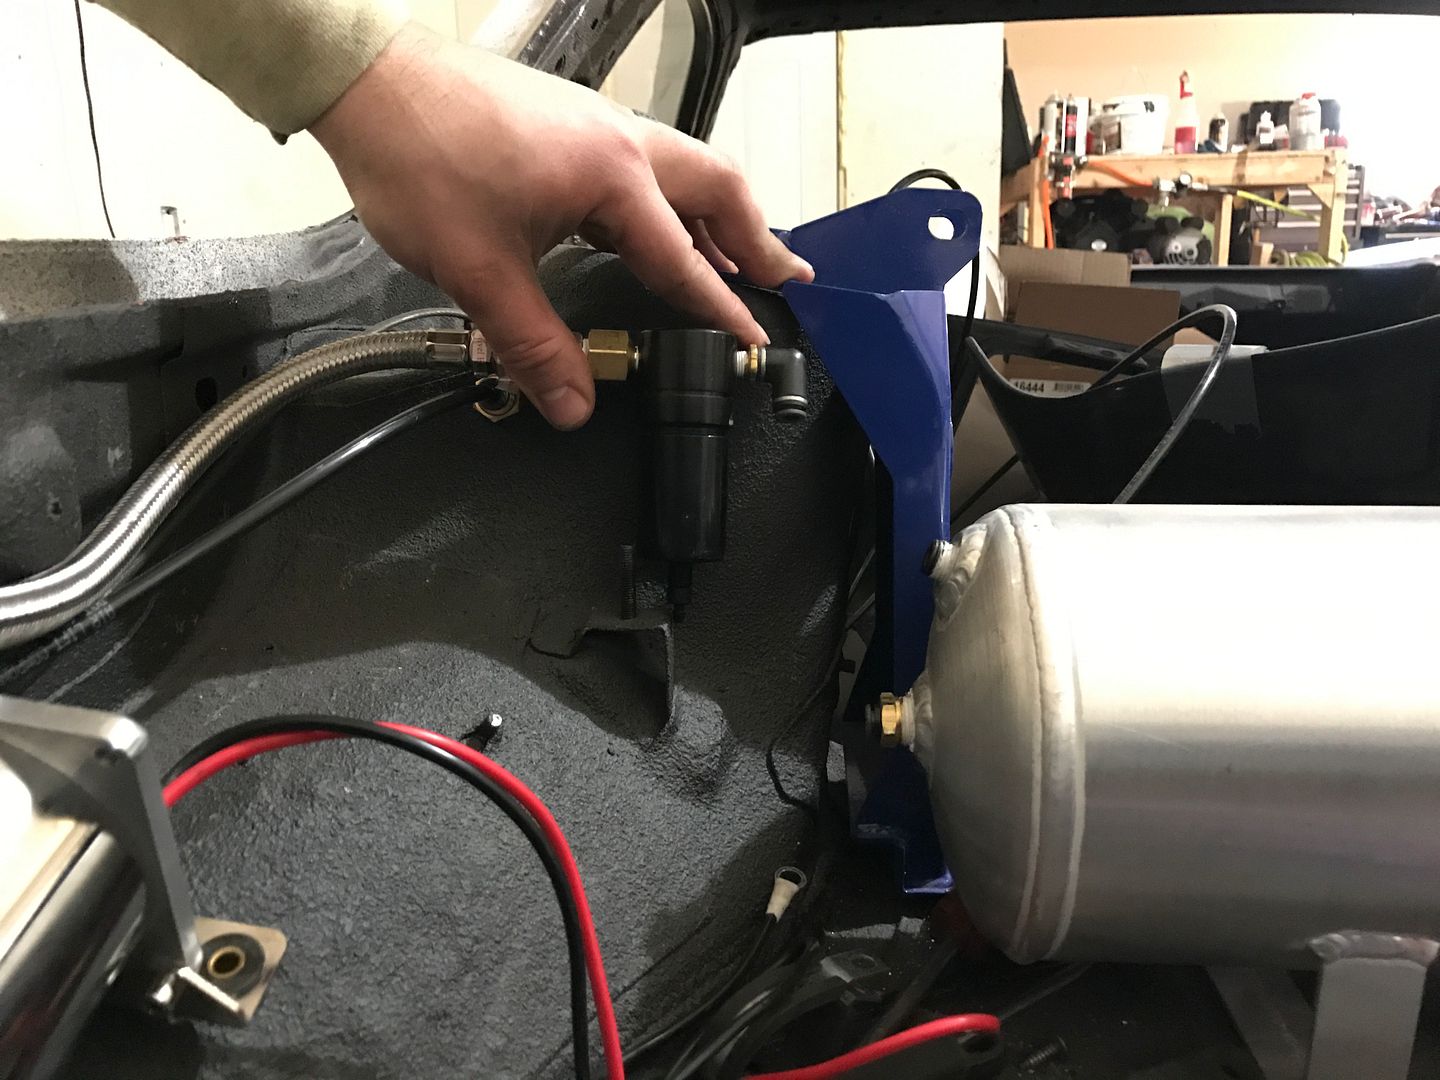
Okay frustration has ended, back to typing. Now that the interior was painted I could start mounting the air components. I'm not sure you guys have noticed, but the rx7 is a tiny car without a large abundance of interior room, so I wanted everything hidden as much as possible. The tank is going right against the strut bar while the valve setup and compressor are hidden under the plastics.
Doing some measuring and mockup
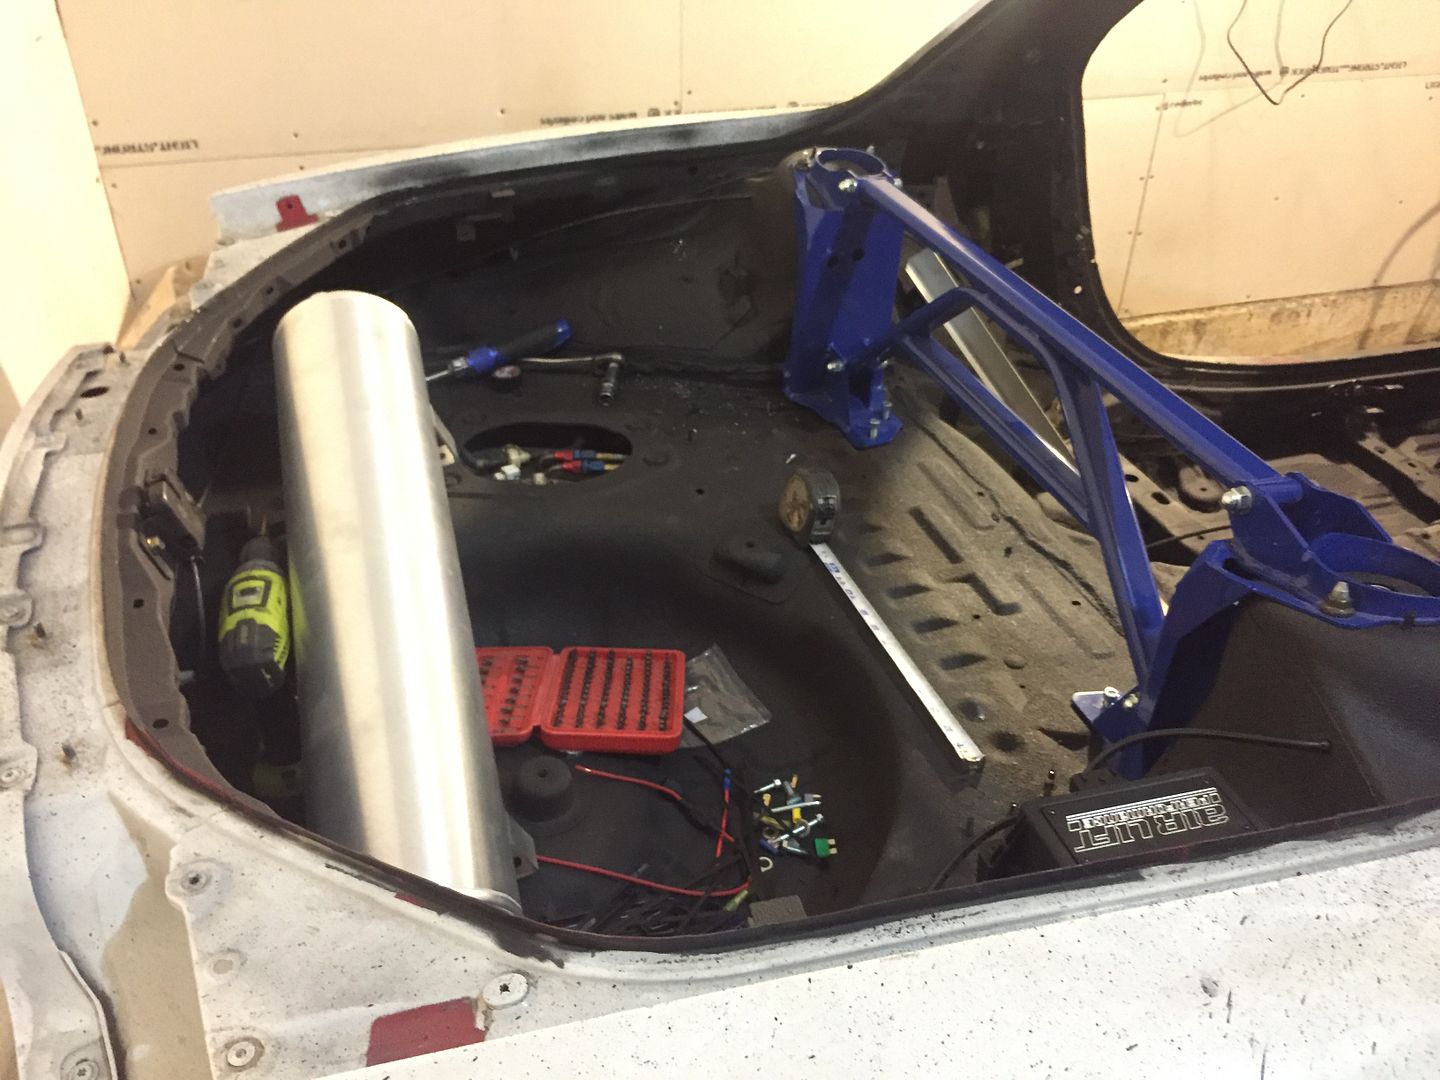
Trying to figure out how the hell this compressor is going to fit here lol
Maybe like this?
That might work!


Anndd you gotta wait to see the final mounting position of the compressor. It is mounted now, but I did some other stuff first. So follow me on a legit tangent for a while
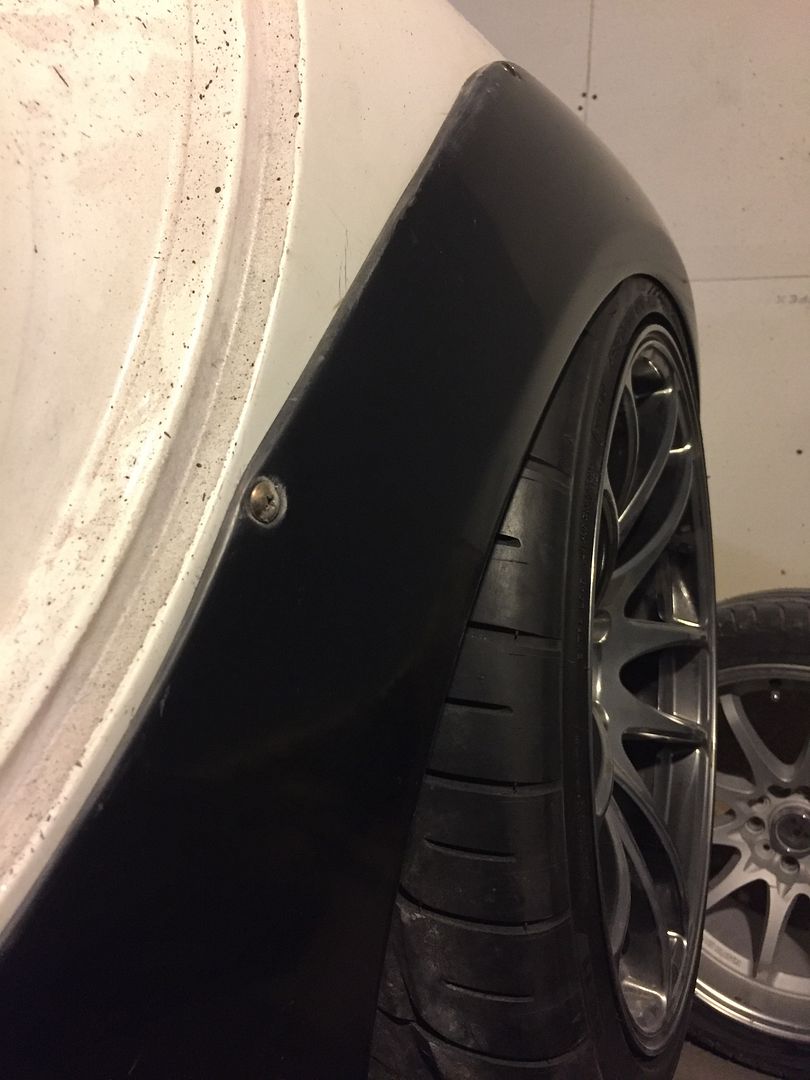
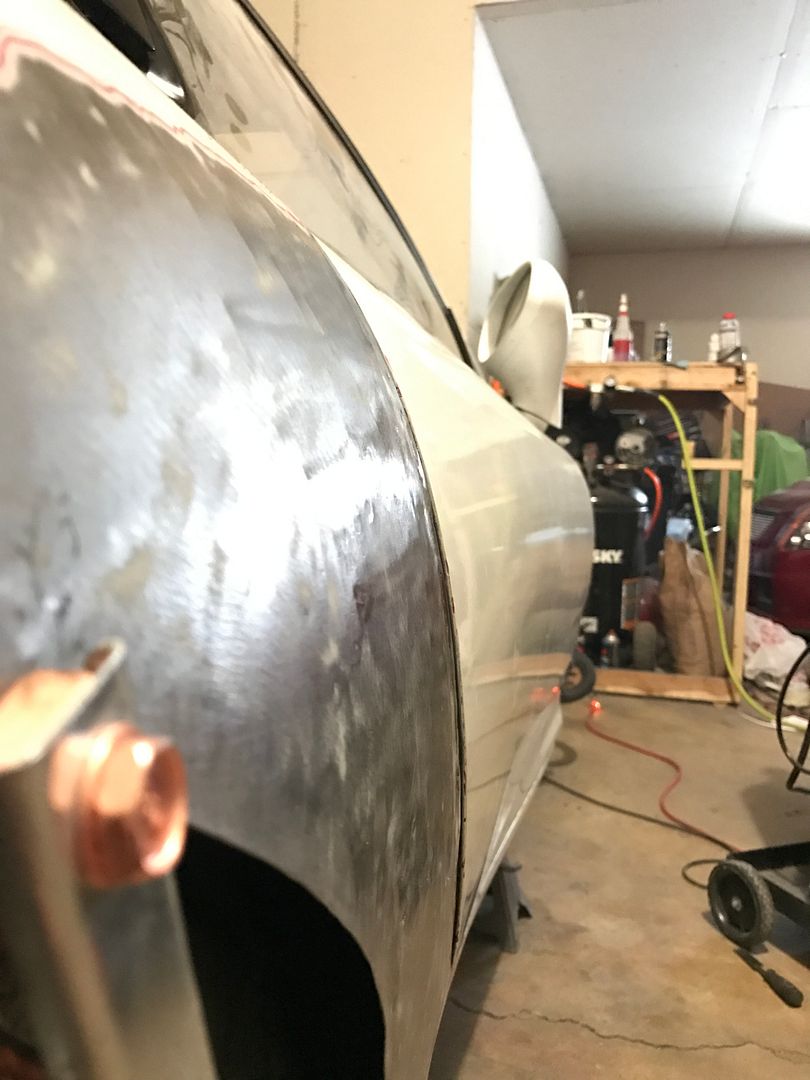
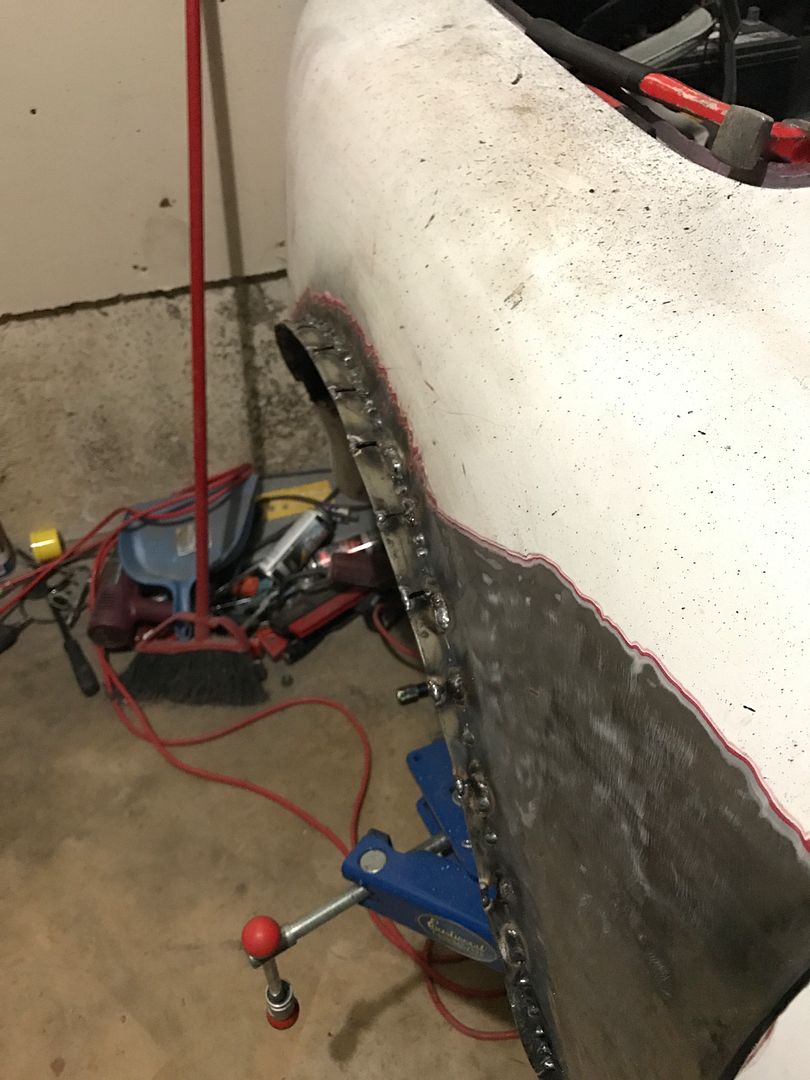
Started that widebody install! At first I considered just rolling and pulling the shit out of the fenders...but then things got crazy

Fuq that fender yo
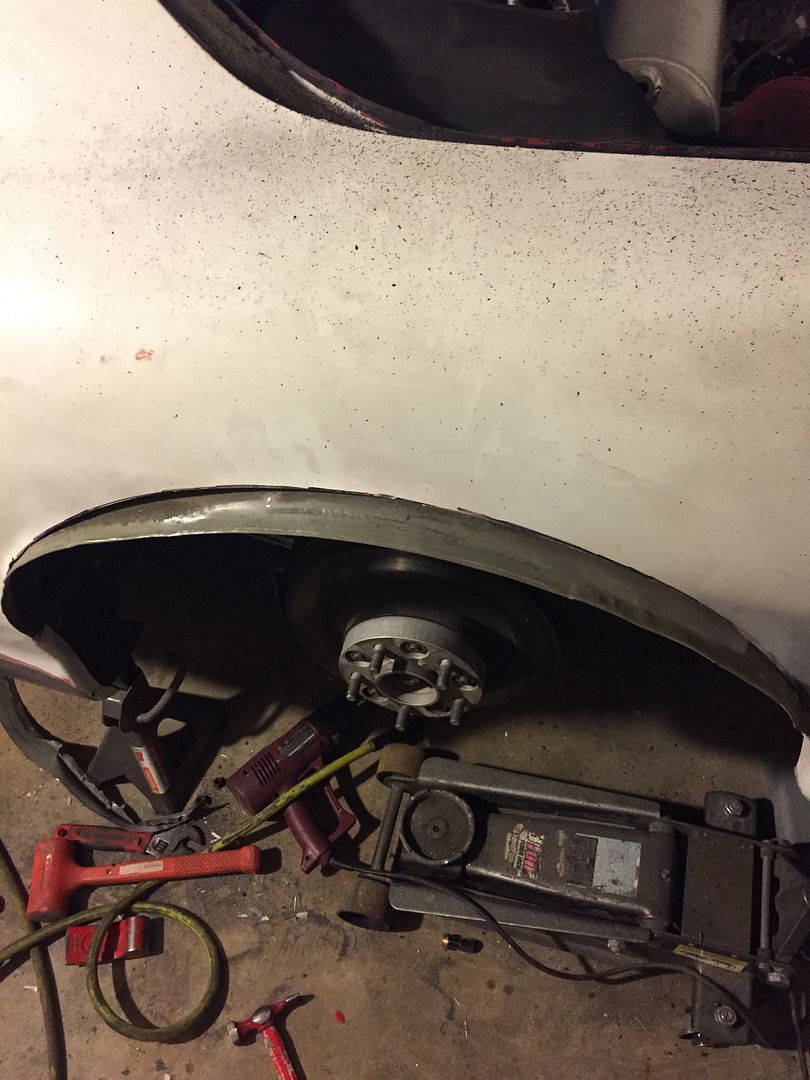
Using my mockup wheel from my dsm widebody project
Comment
-
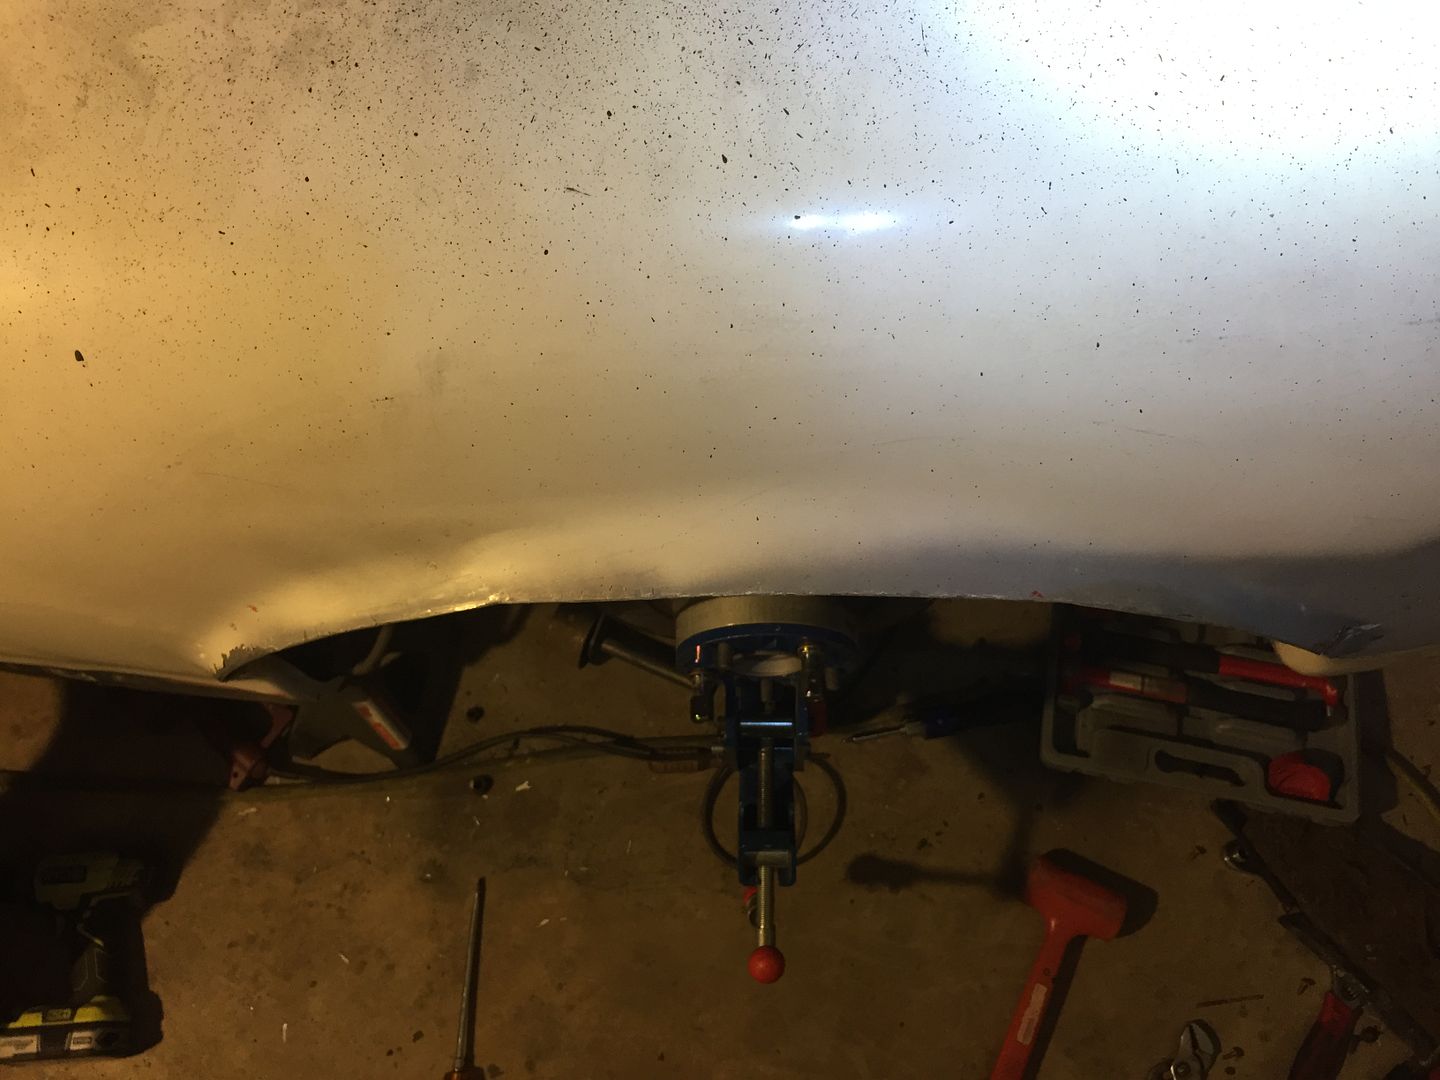
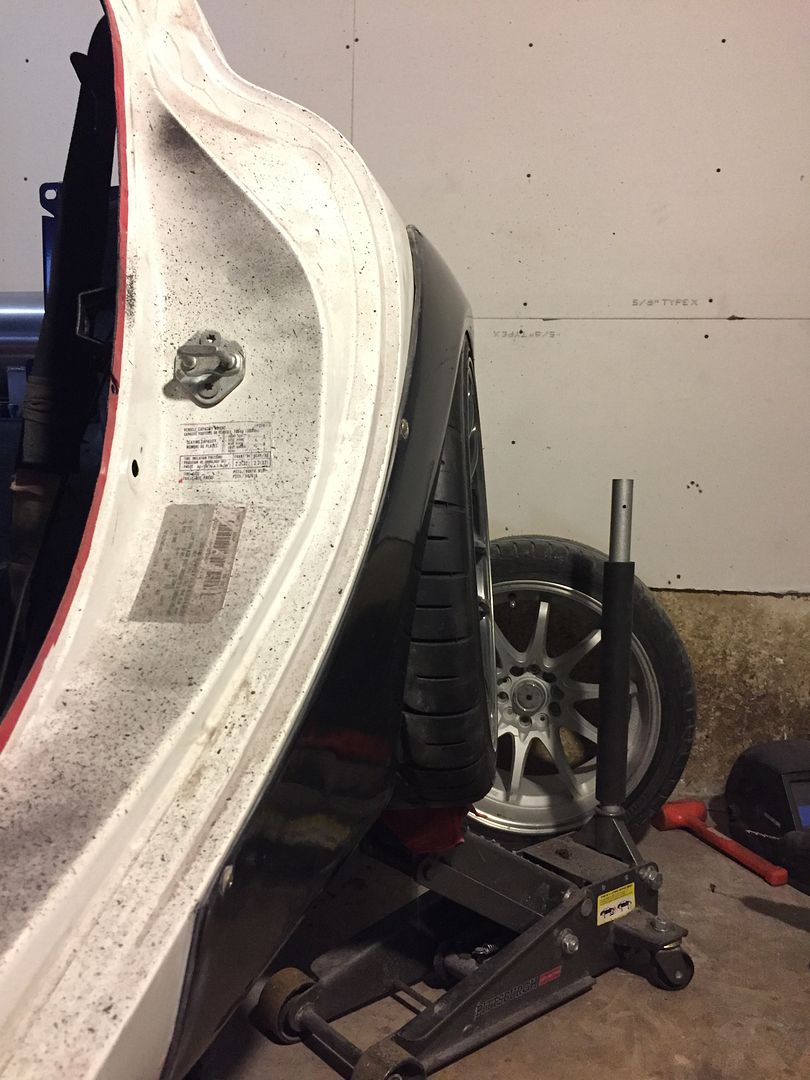
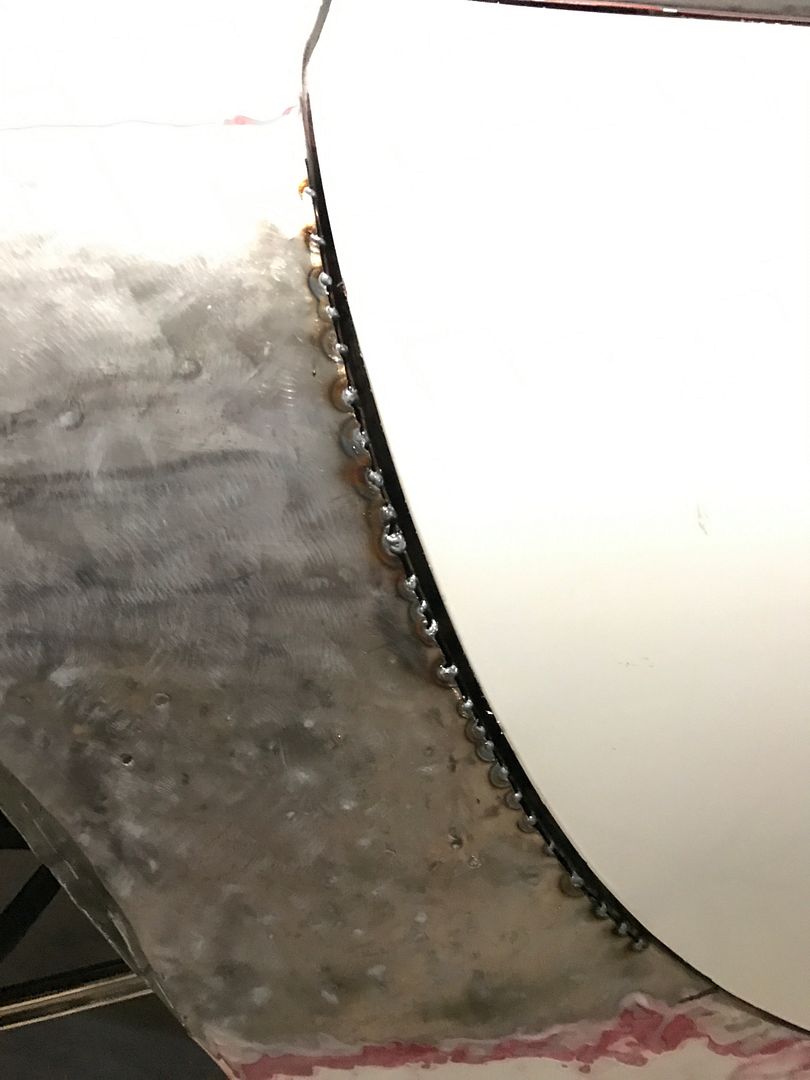
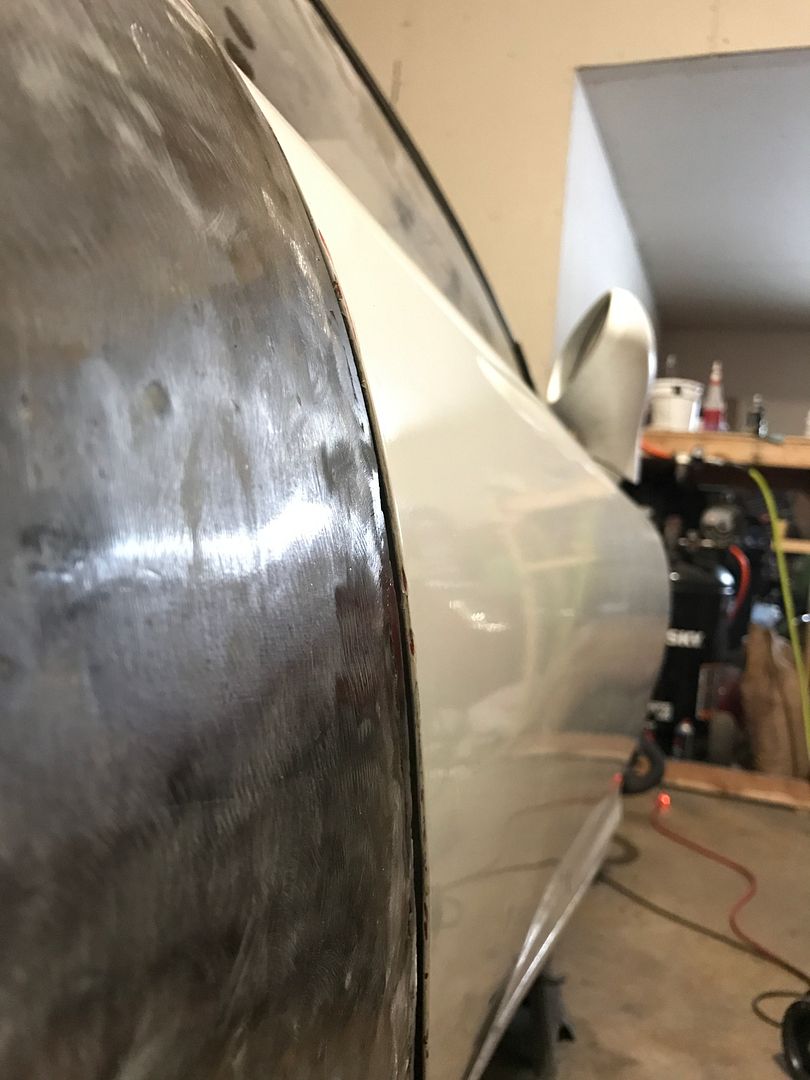
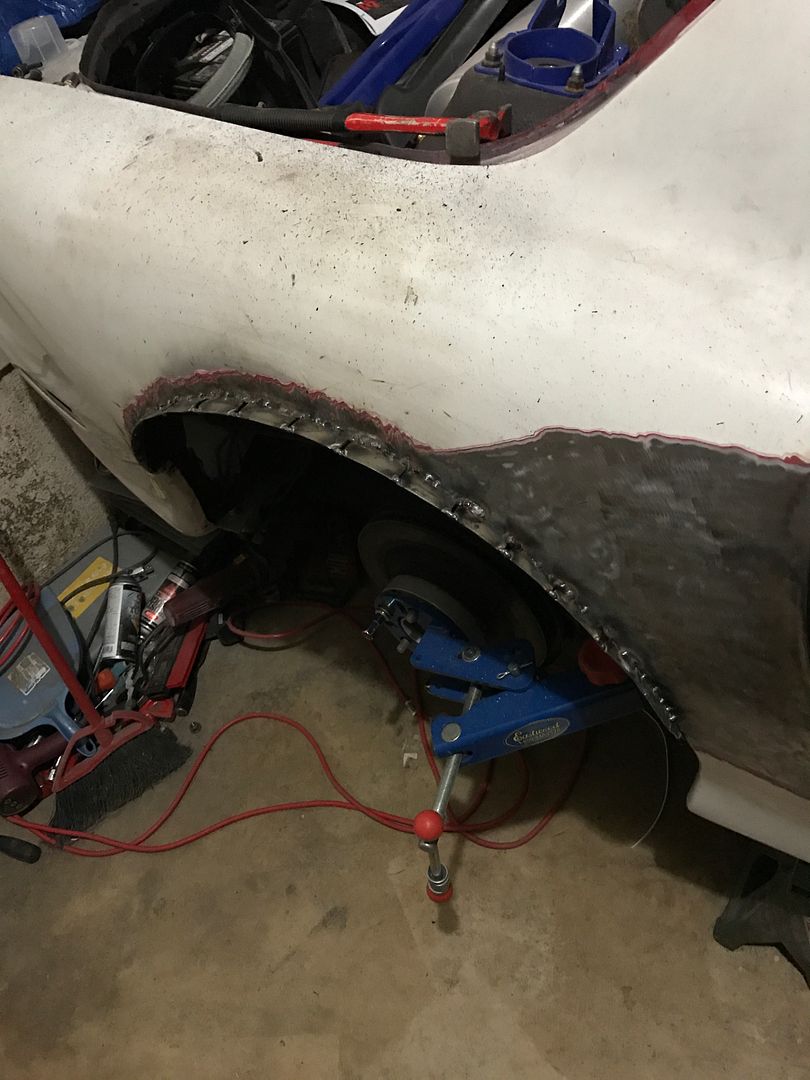
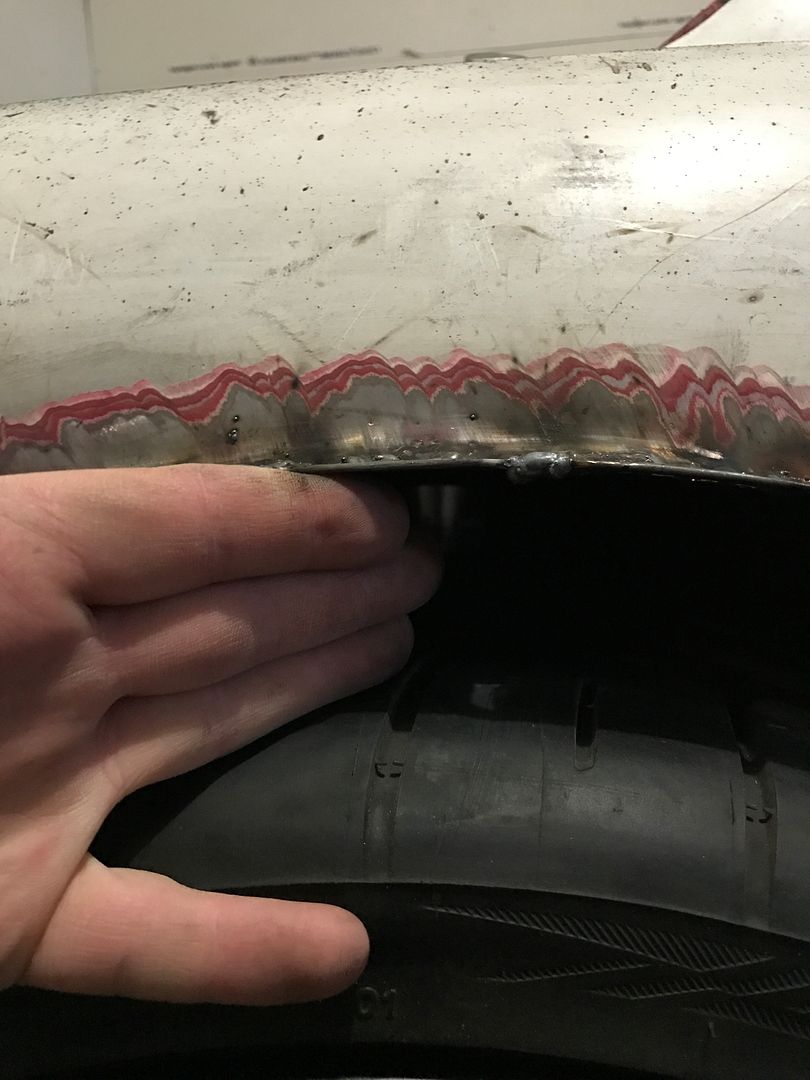
I wanted some kind of protection to keep water/dirt out of the fender area with the overfender on, so I cut the outer panel and then pulled up the inner panel to it. It had to be sectioned as seen here, but it worked out alright.

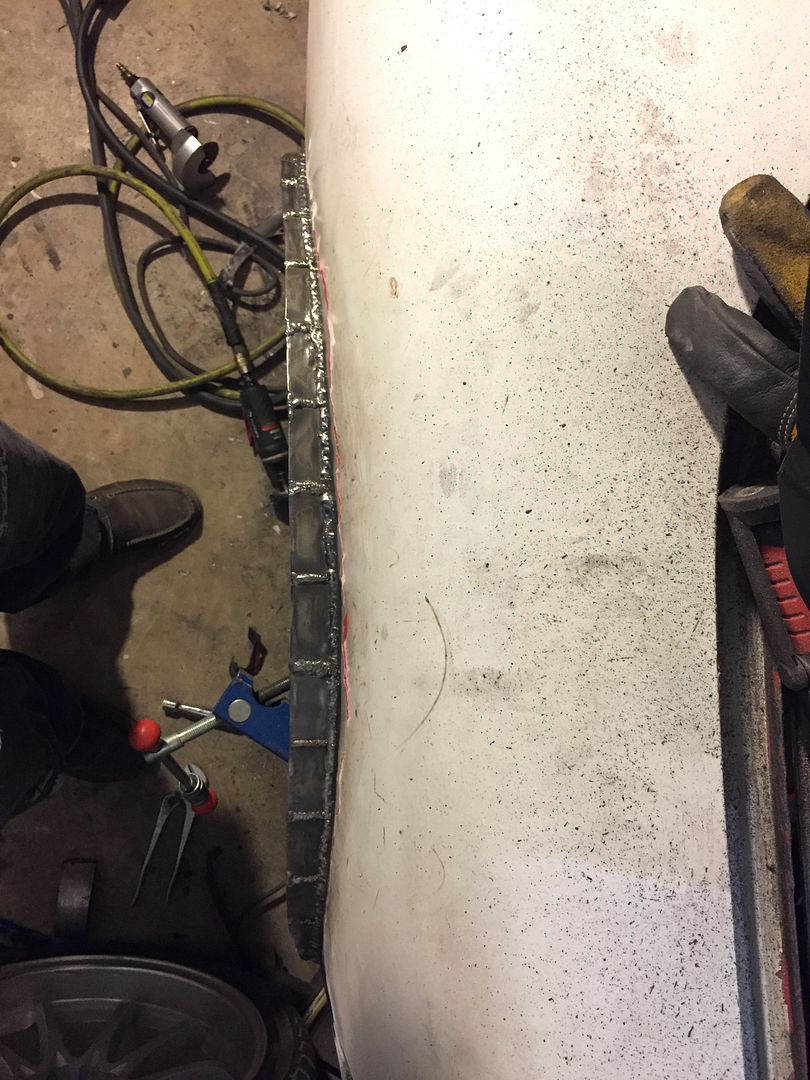
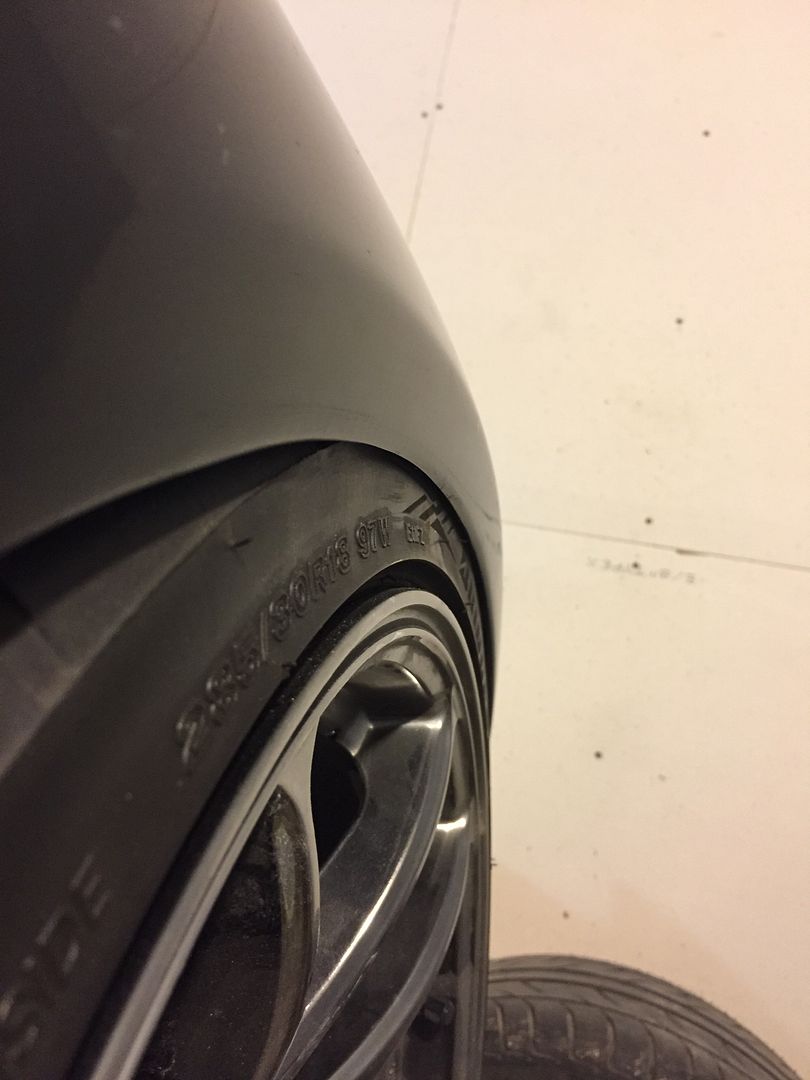
This should be plenty of clearance
Looovvee how this is going to turn out when done. It gives me some motivation to finally finish this thing.
Comment
-
OH MY FUQ. WHY DOES THIS KEEP HAPPENING??!! Accidentally closed the tab this time and erased everything I had typed.
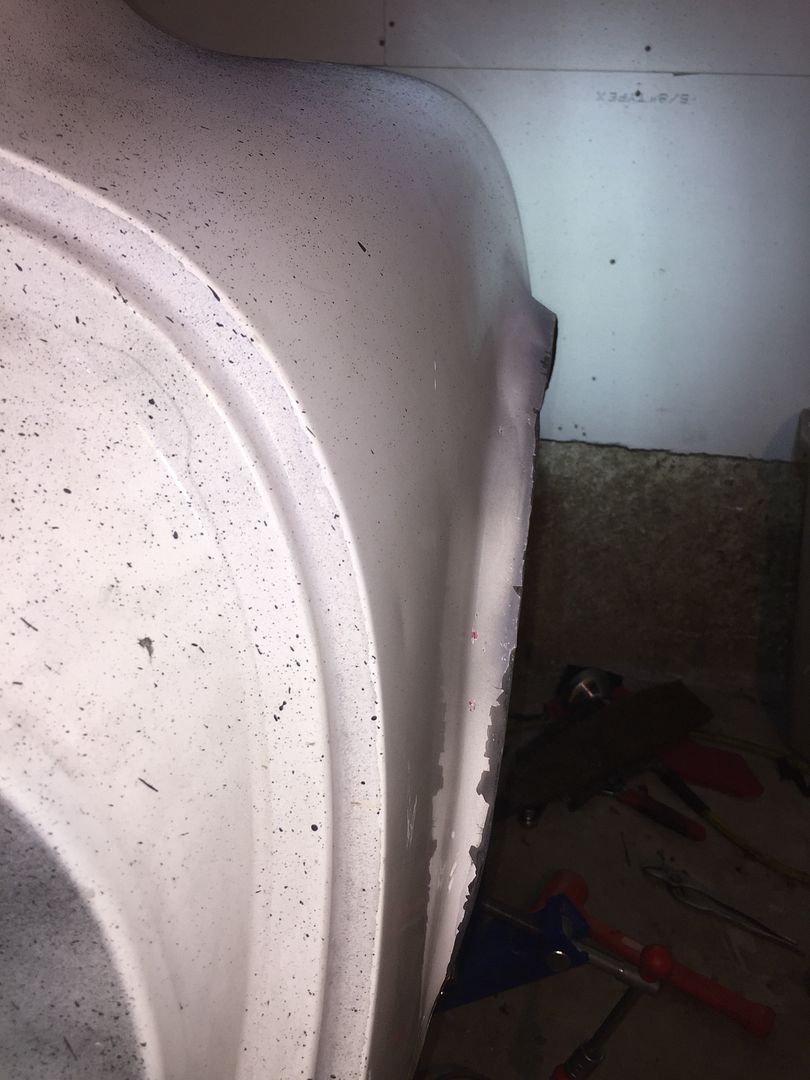
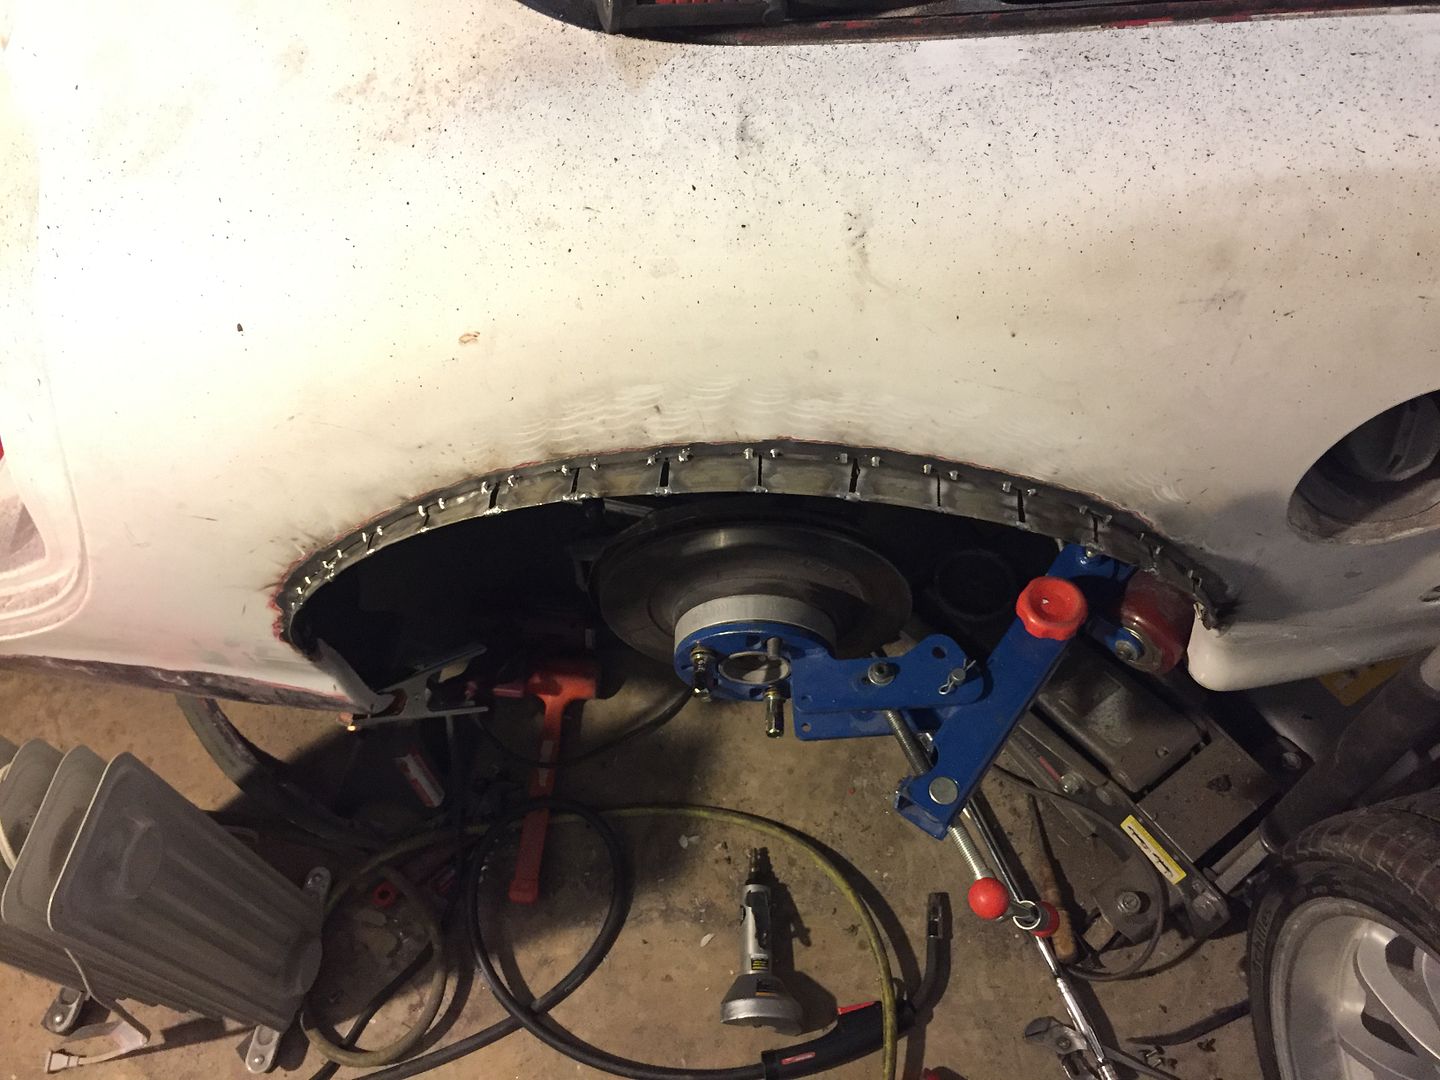
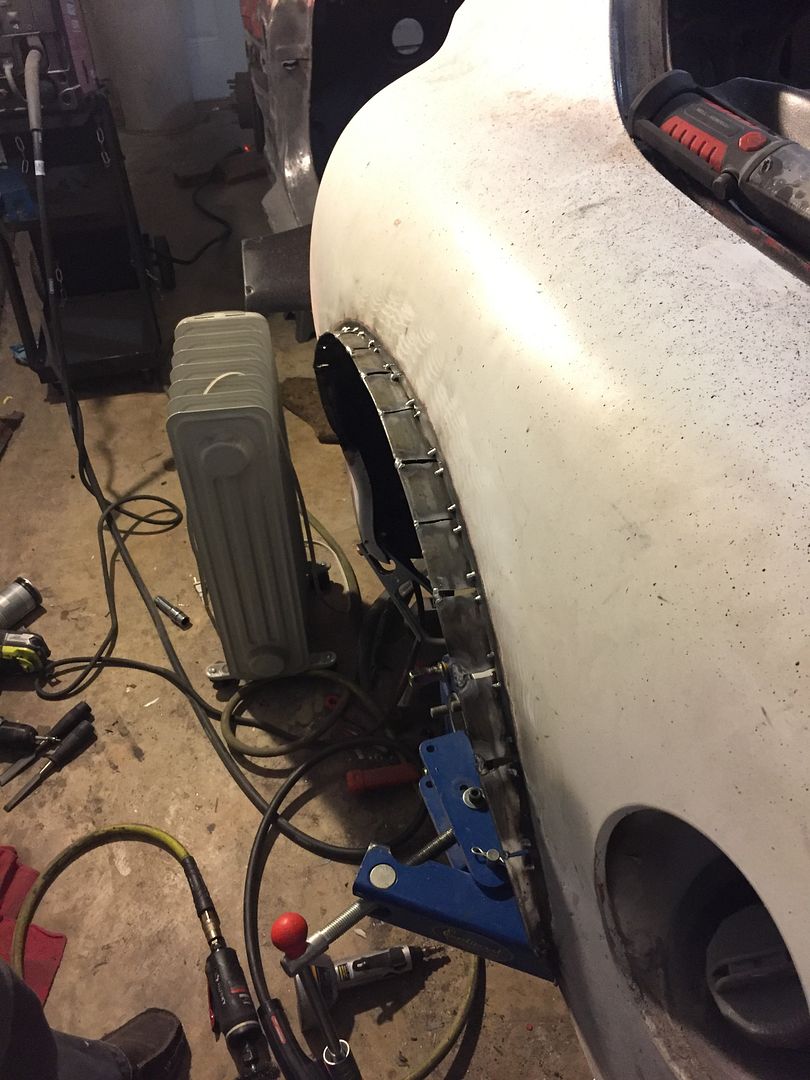
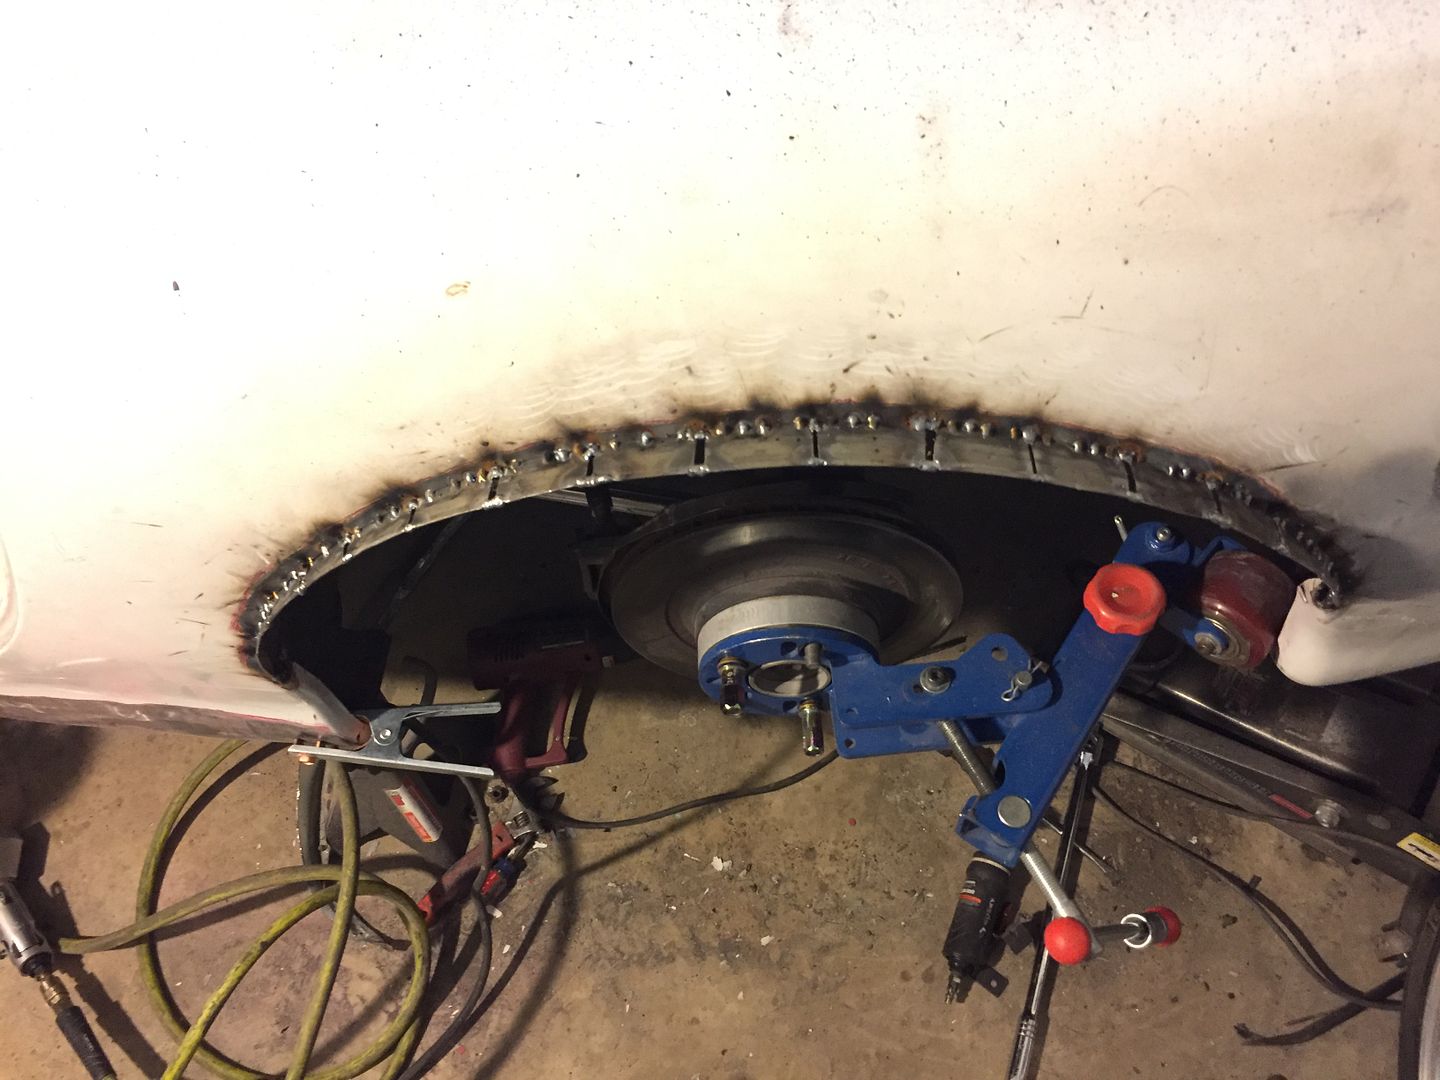
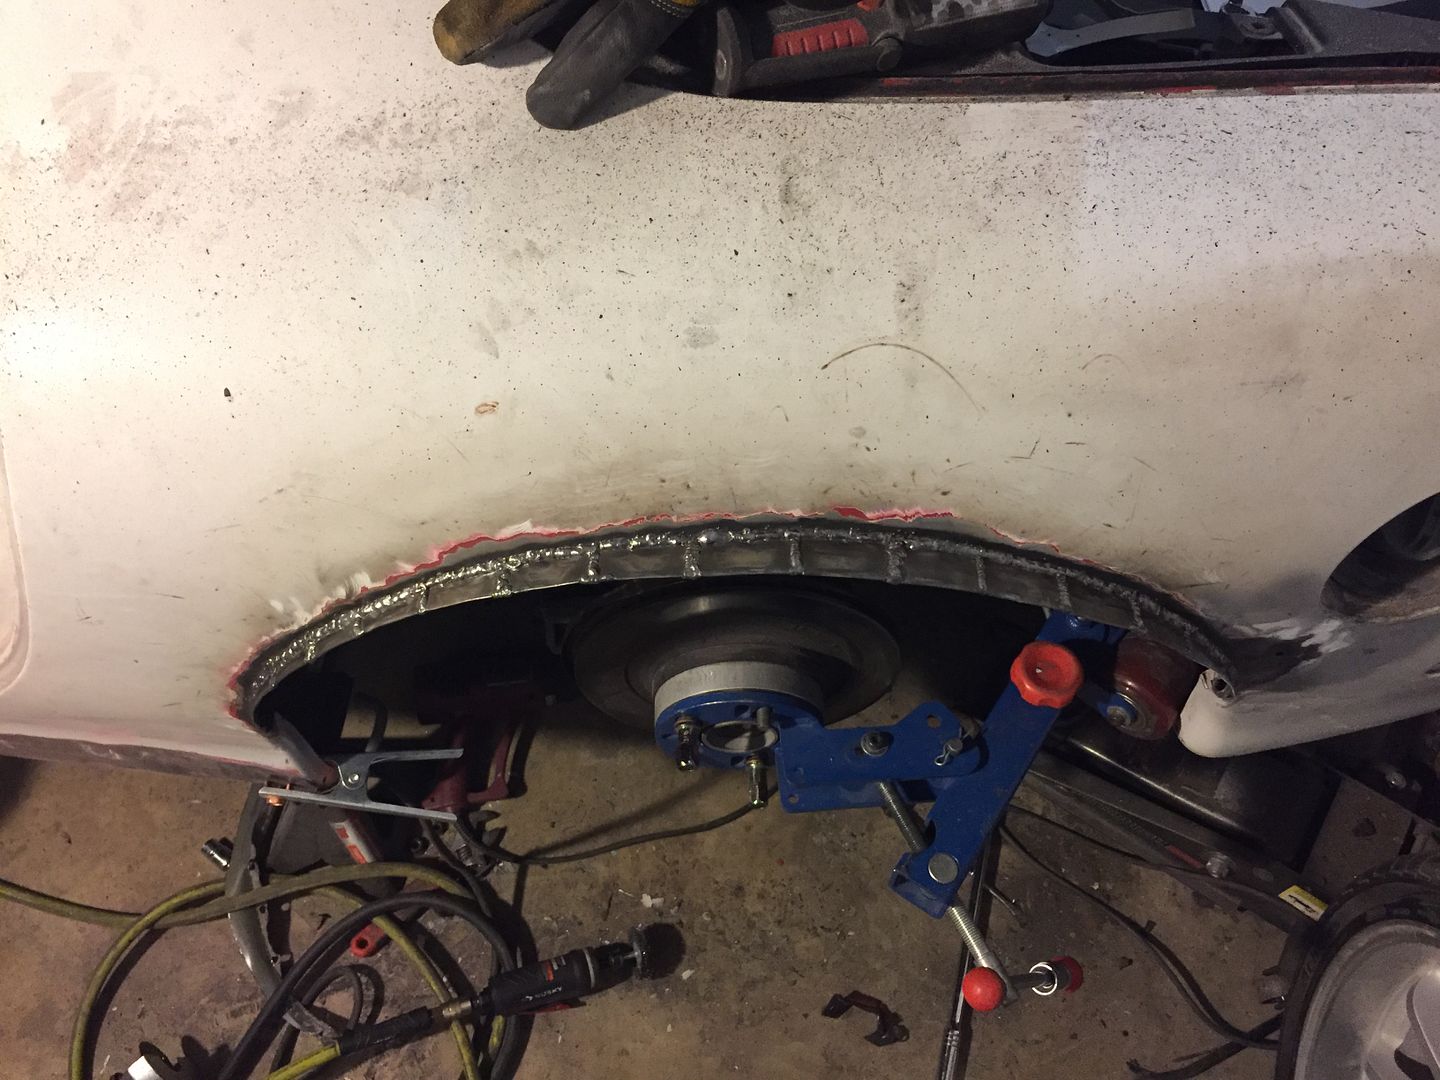
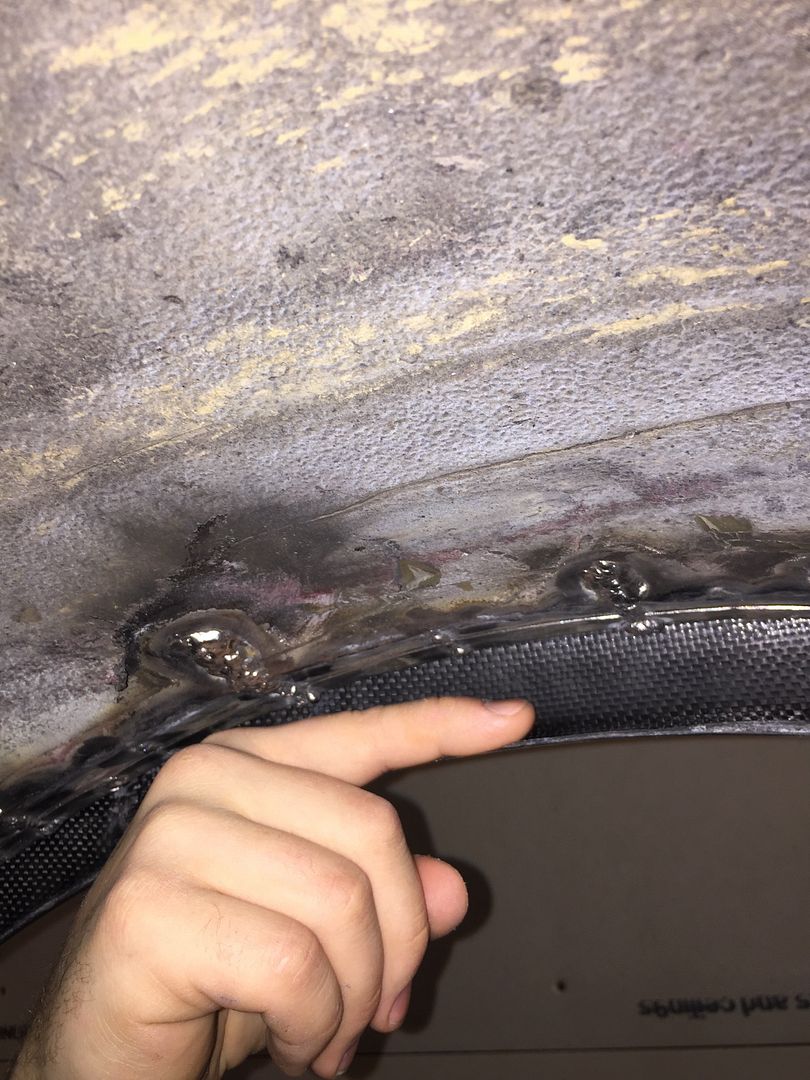
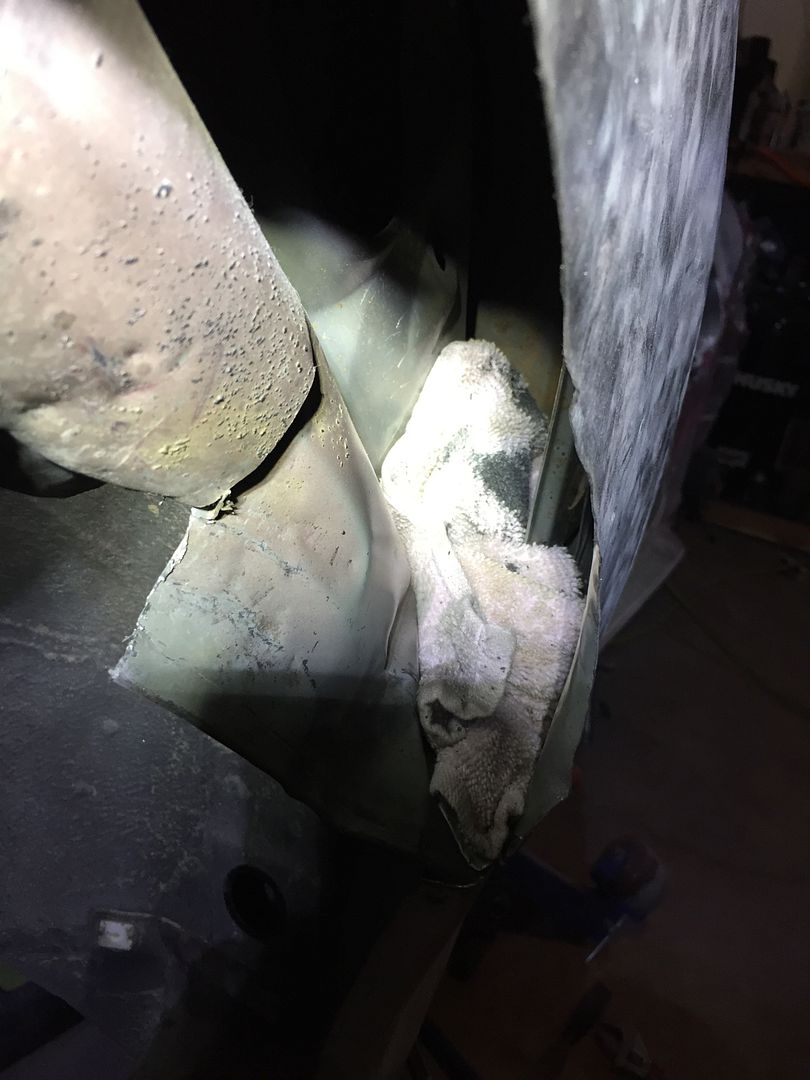
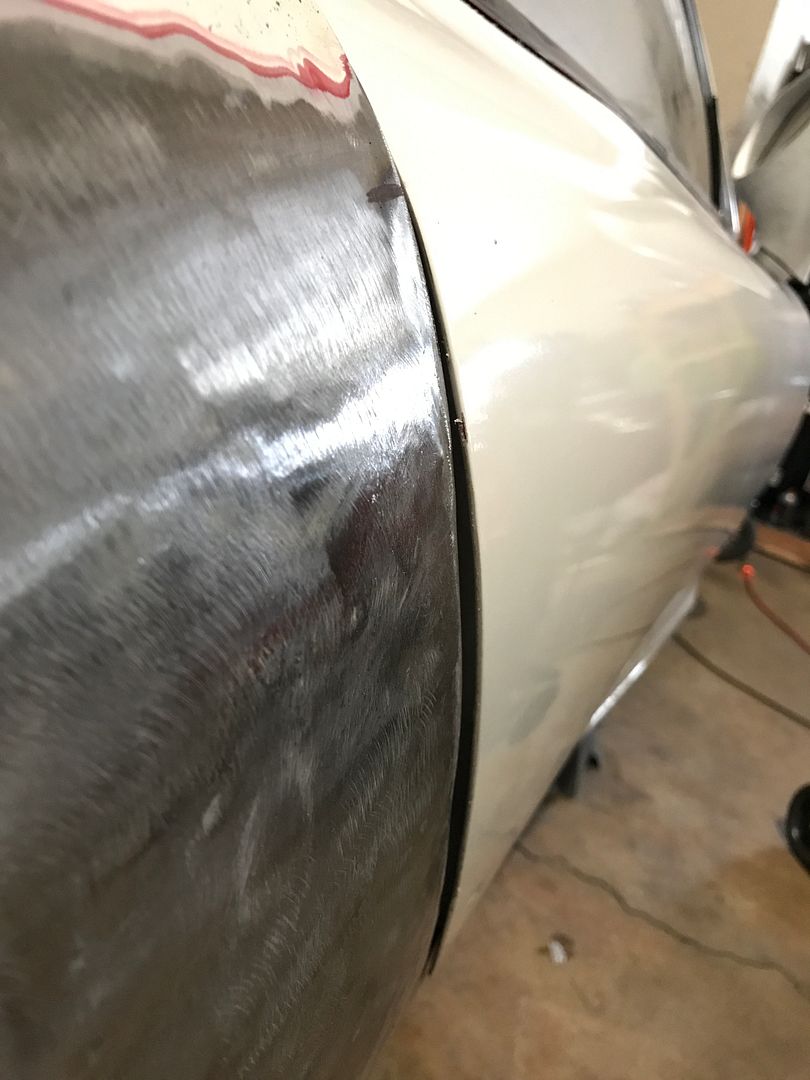
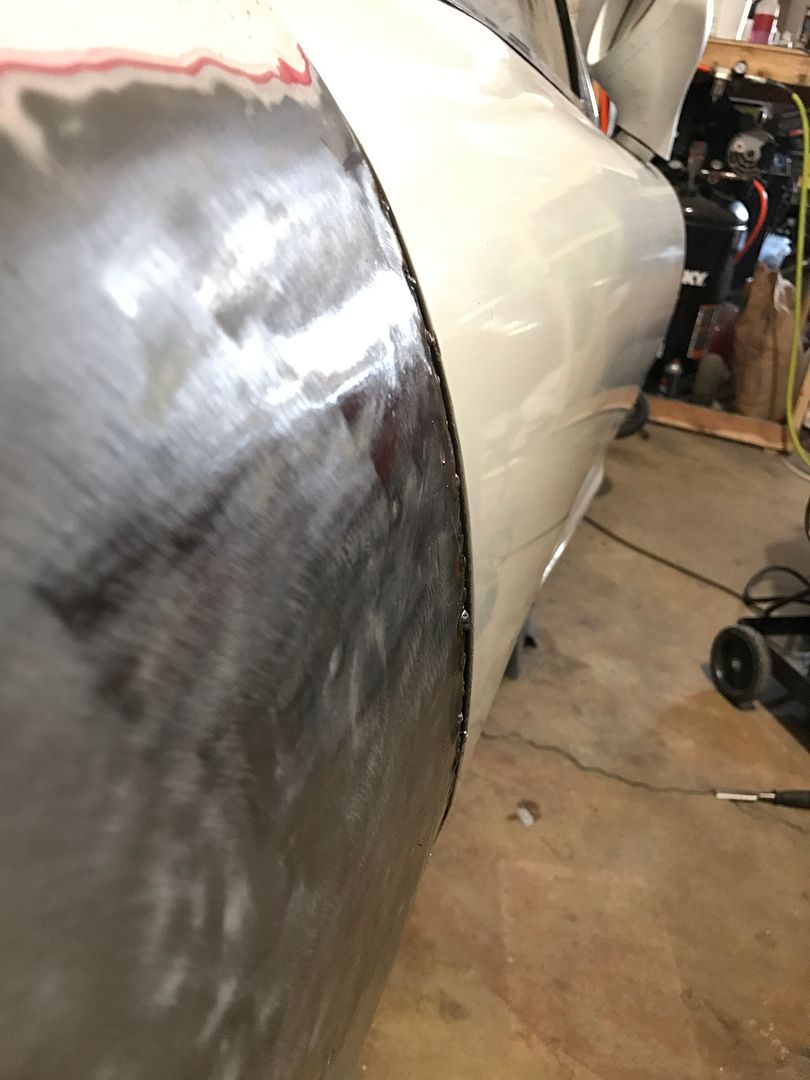
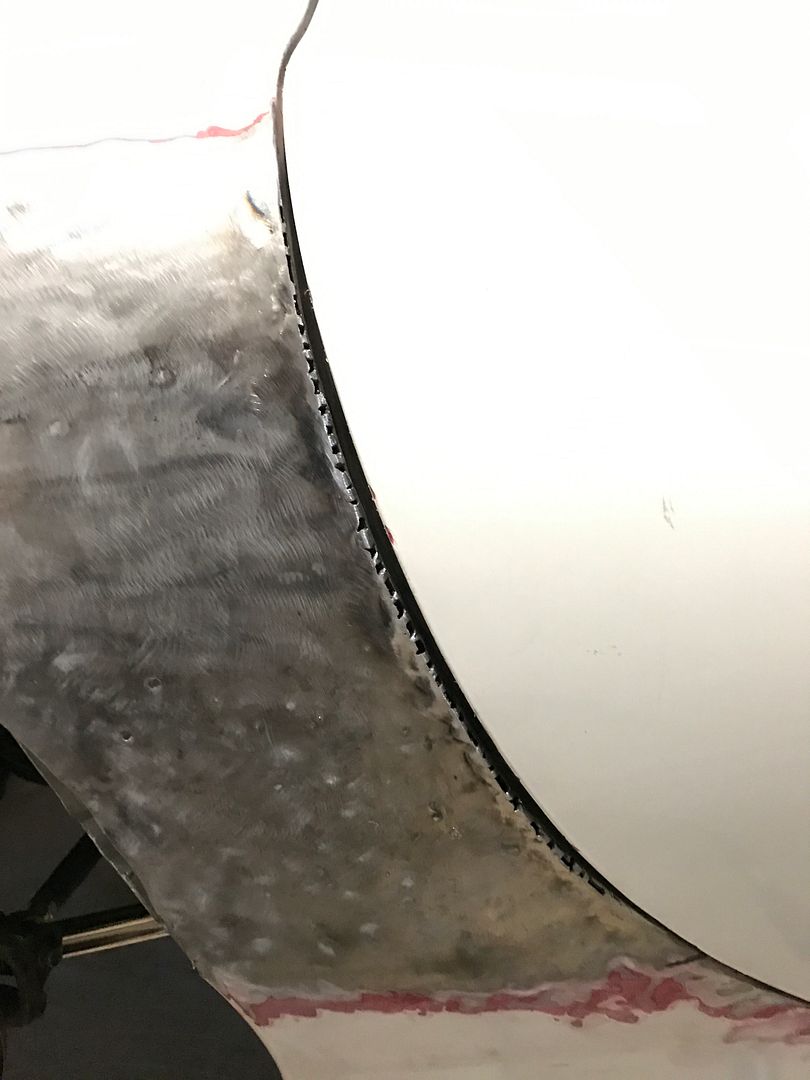
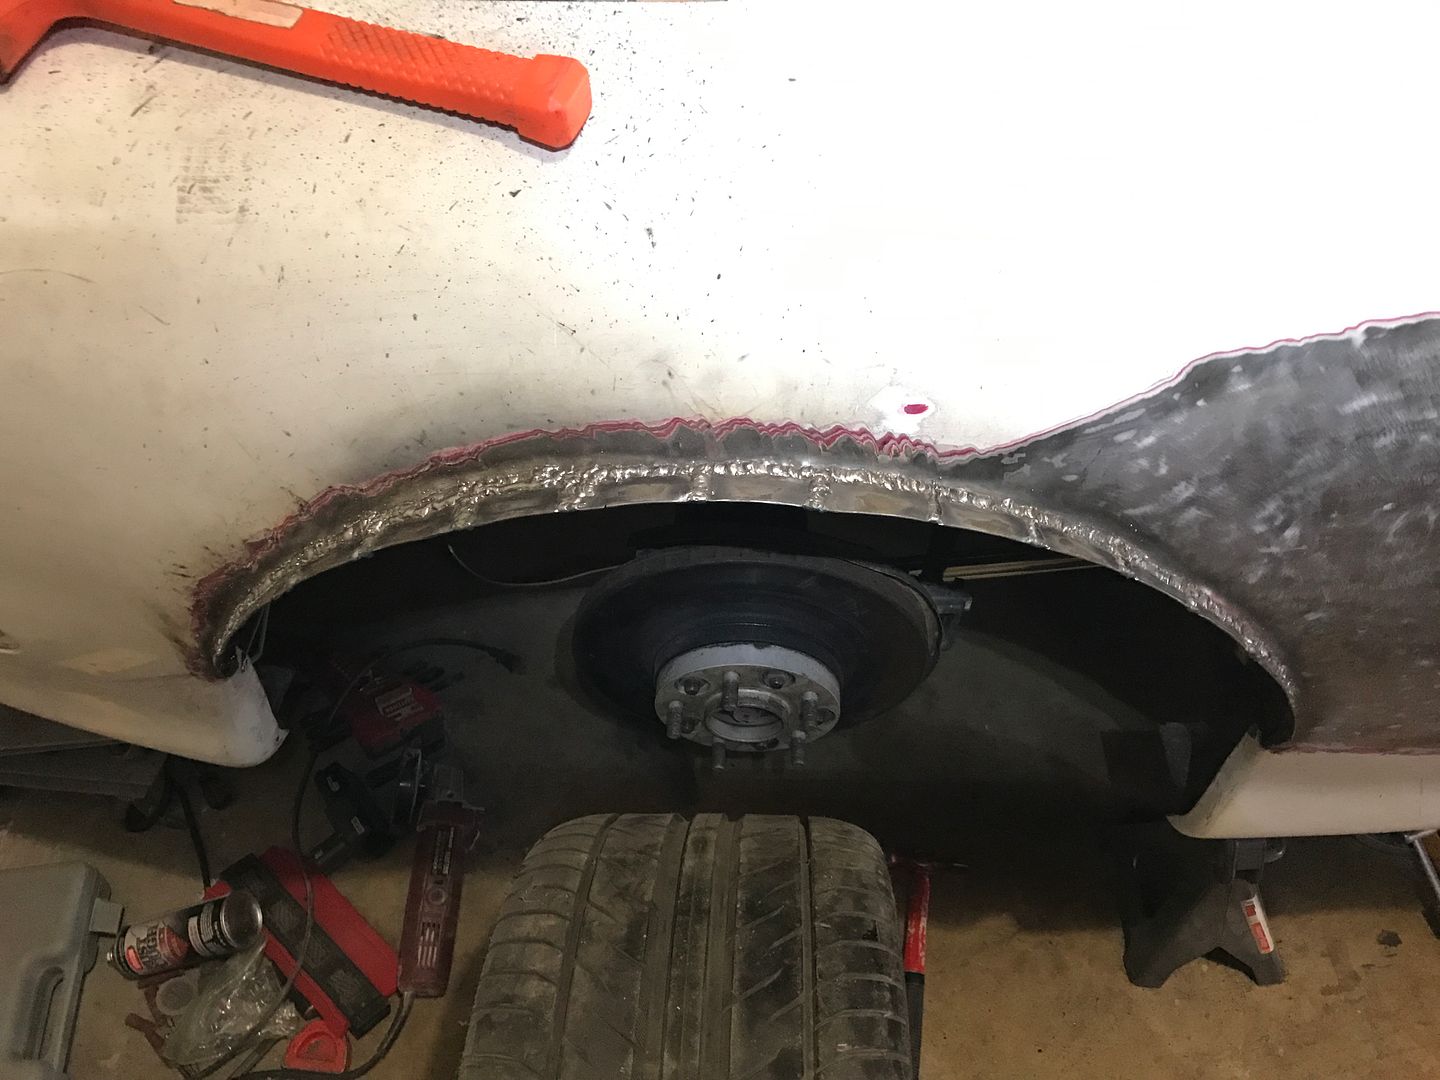
Short synopsis again. I started working on the other side. There was bodywork. I started fixing it, dropped my dolly inside the car, cut the crap out of the metal and got it out, ***** the door to fender gap, cut the fender seam and pulled it and then rewelded it. It's not perfect, but better than it was.


Comment
-
I'll be moving this summer to my next base so I figured I would start looking for a winter vehicle/offroad vehicle/toy hauler. My next base will be in either Wyoming or Montana so there are mountains galore at both places. I planned on just selling my beater civic after winter and then buying a Cherokee at my next base to have some fun in. I started talking to my brother (a huge jeep guy) and he said he would part ways with his 04 Grand Cherokee...so I now have a vehicle to tow the rx7 with!
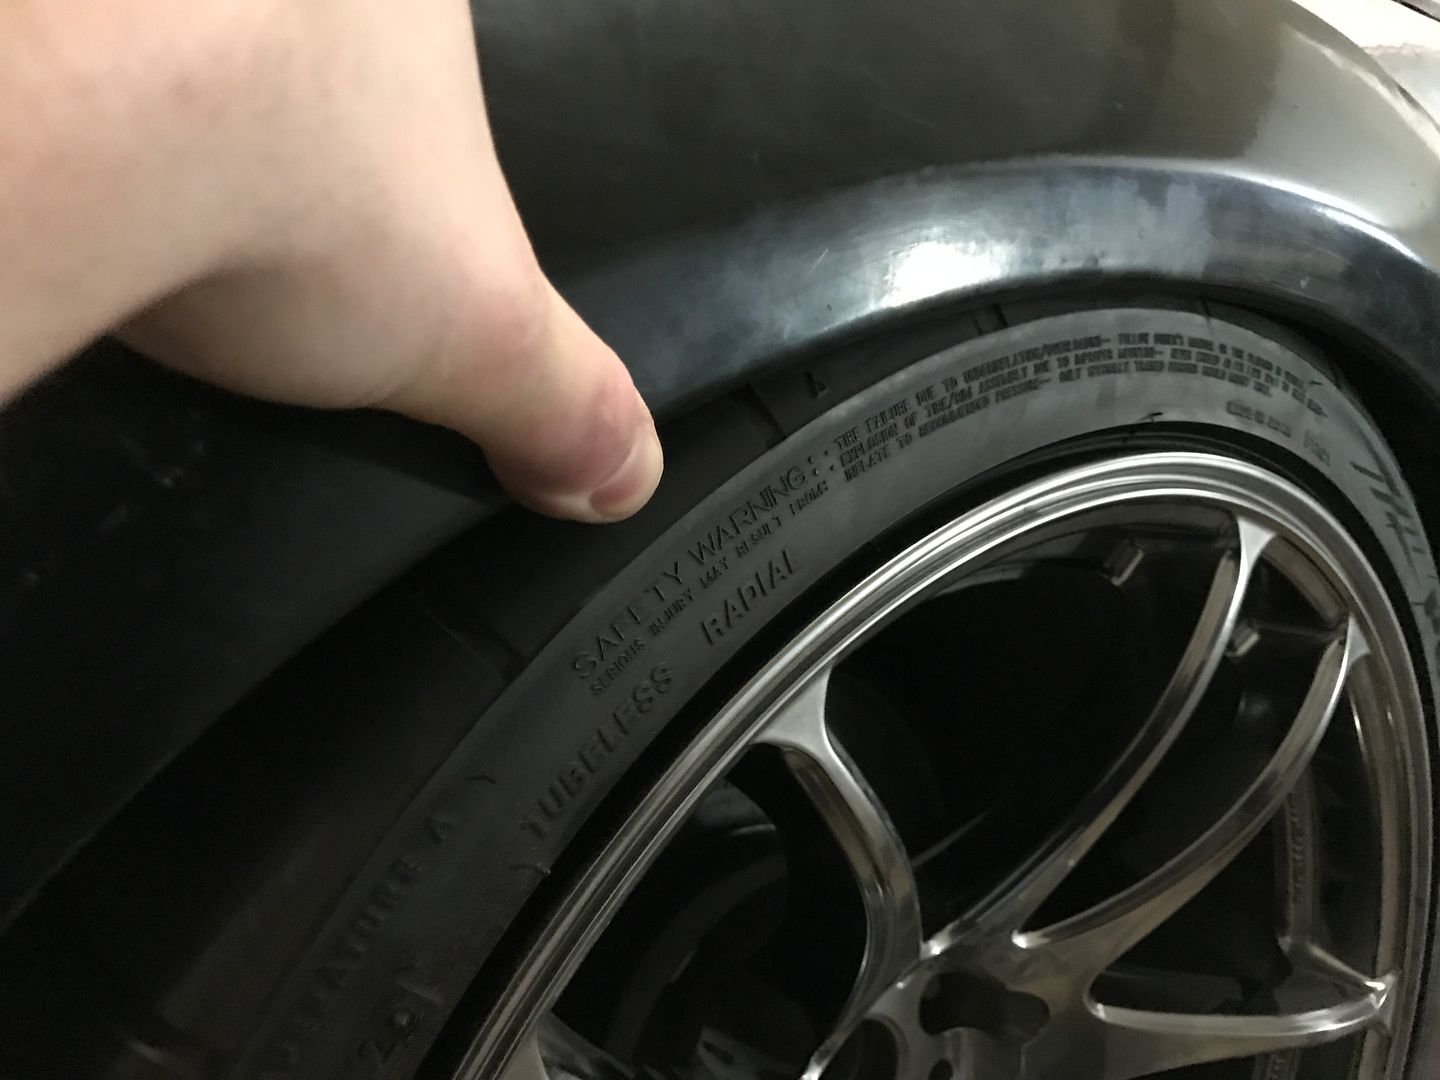
In other news though, aka the rx7, I think I may have decided on a color finally (for now anyhow, my mind changes weekly). It is called Suzuka Grey and has what I am looking for from a "white" car. Bright white in the sun, yet grey looking in the shade. The one thing about white that has been deterring me from painting the car that color is the depth that you lose, all of the lines of the car kind of blend in when sun hits it. I think this color will still show the lines of the car in any lighting
So that's that. I ordered some fittings for my air setup so I can run the lines how I want. It cleans things up fairly well and gives me peace of mind for the lines going through the body.
Comment
-
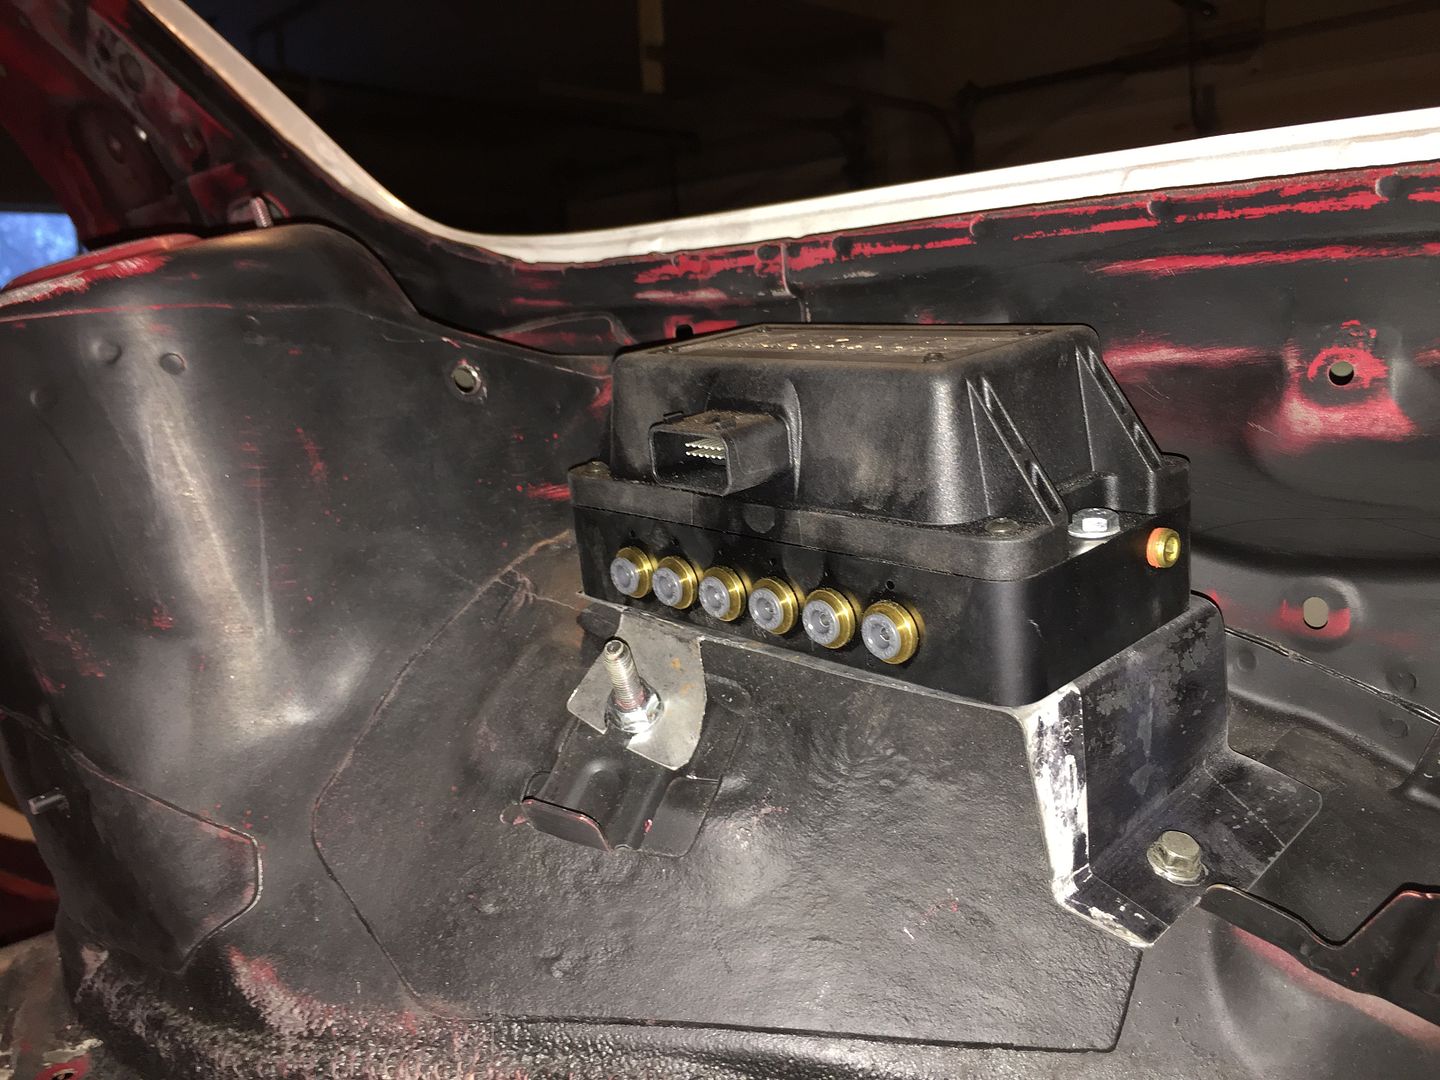
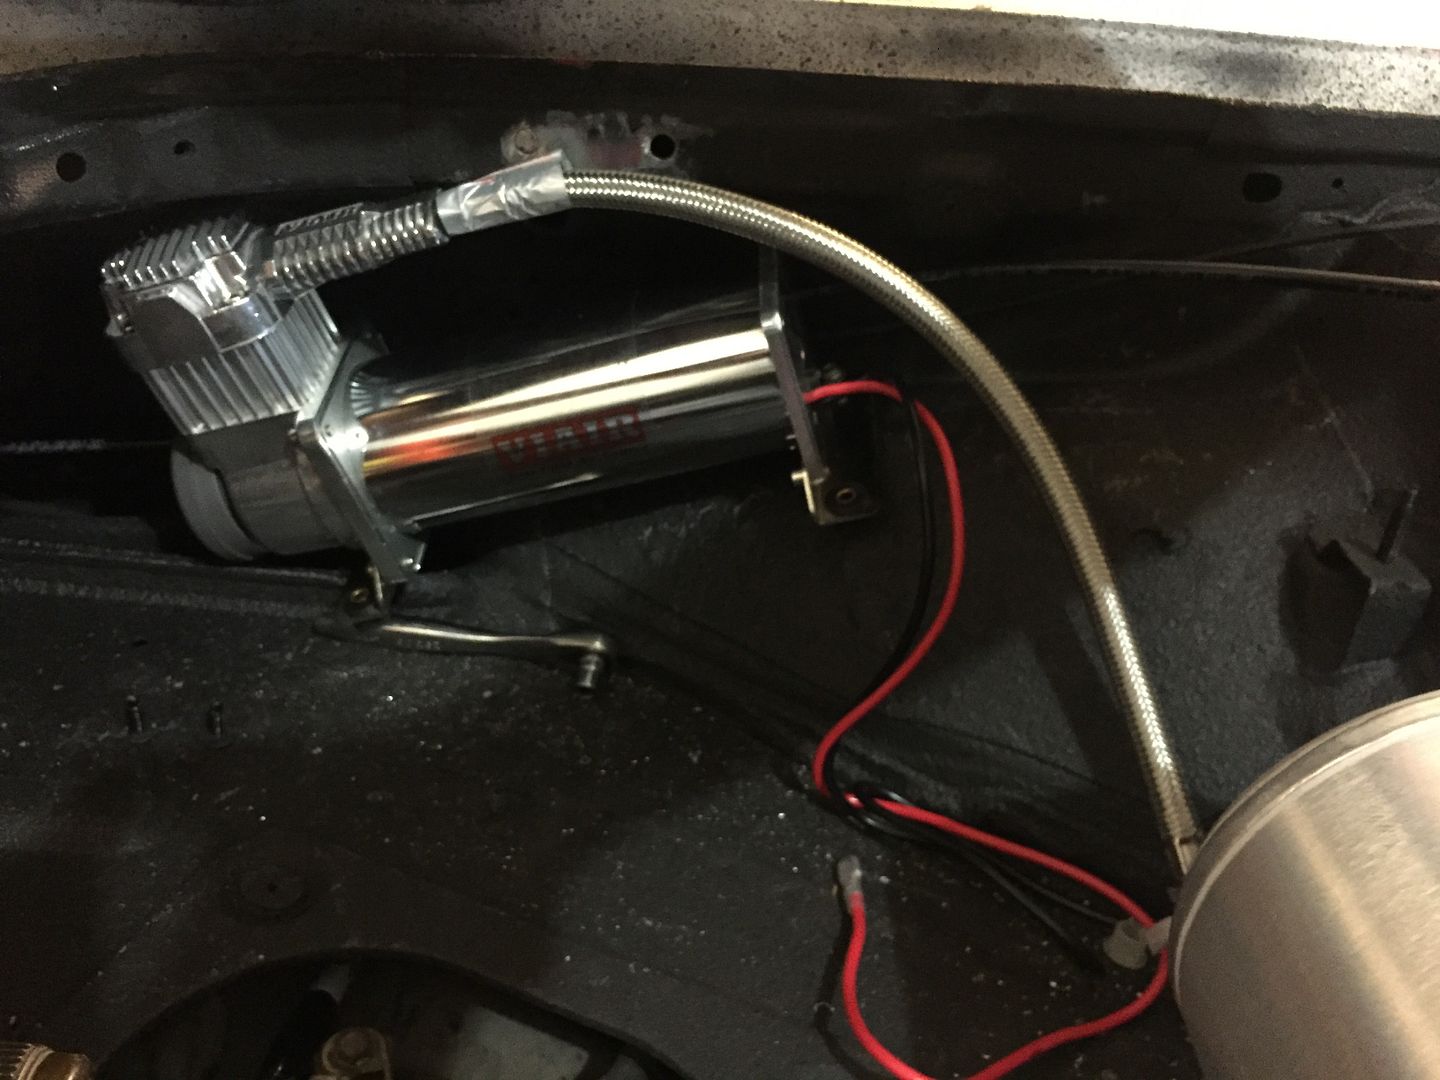
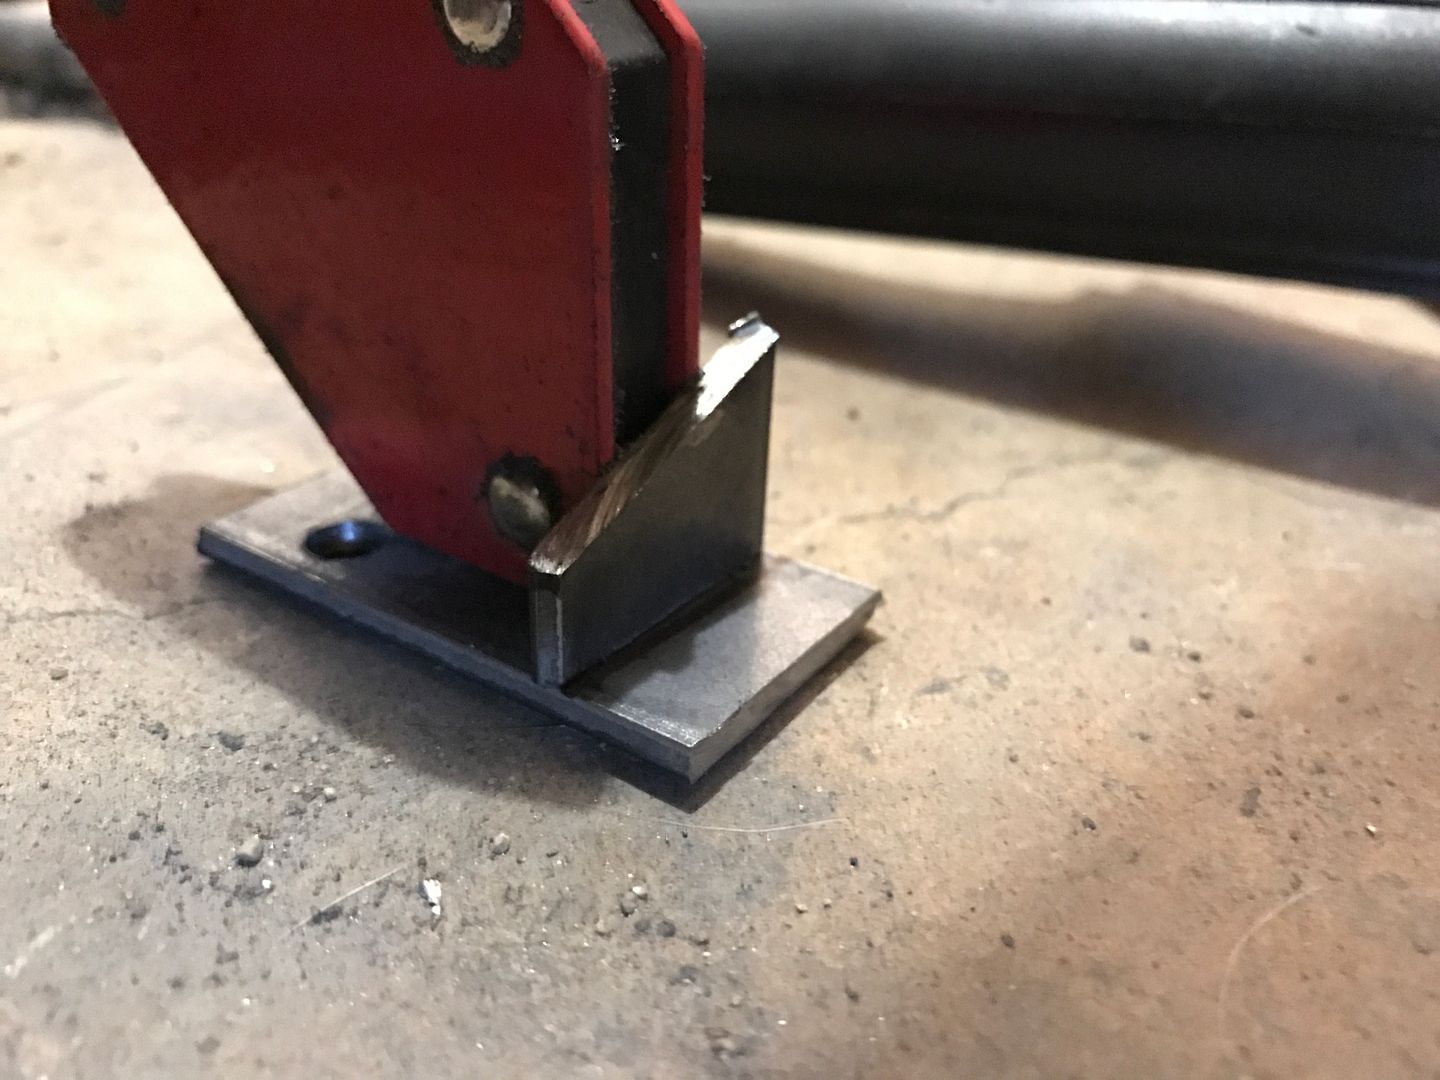
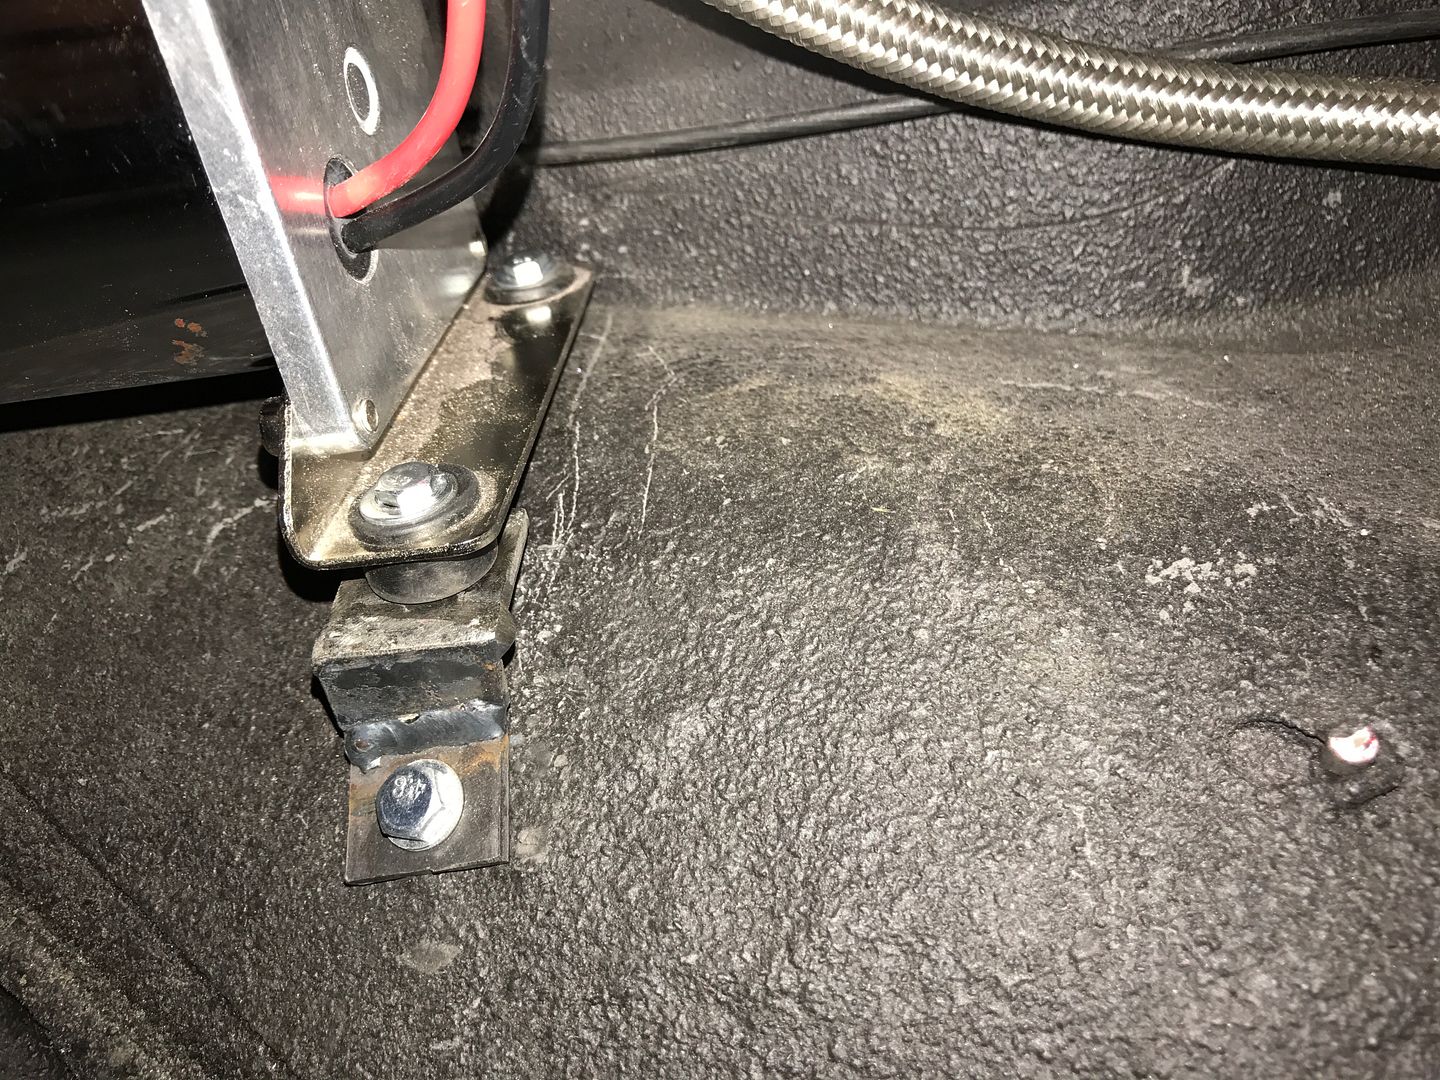
Started working on the compressor mounting again and made some great progress. I now have it mounted pretty solidly using three of the mounting points. I would like to use the fourth point, but I dont see any way of getting back there to secure it down.

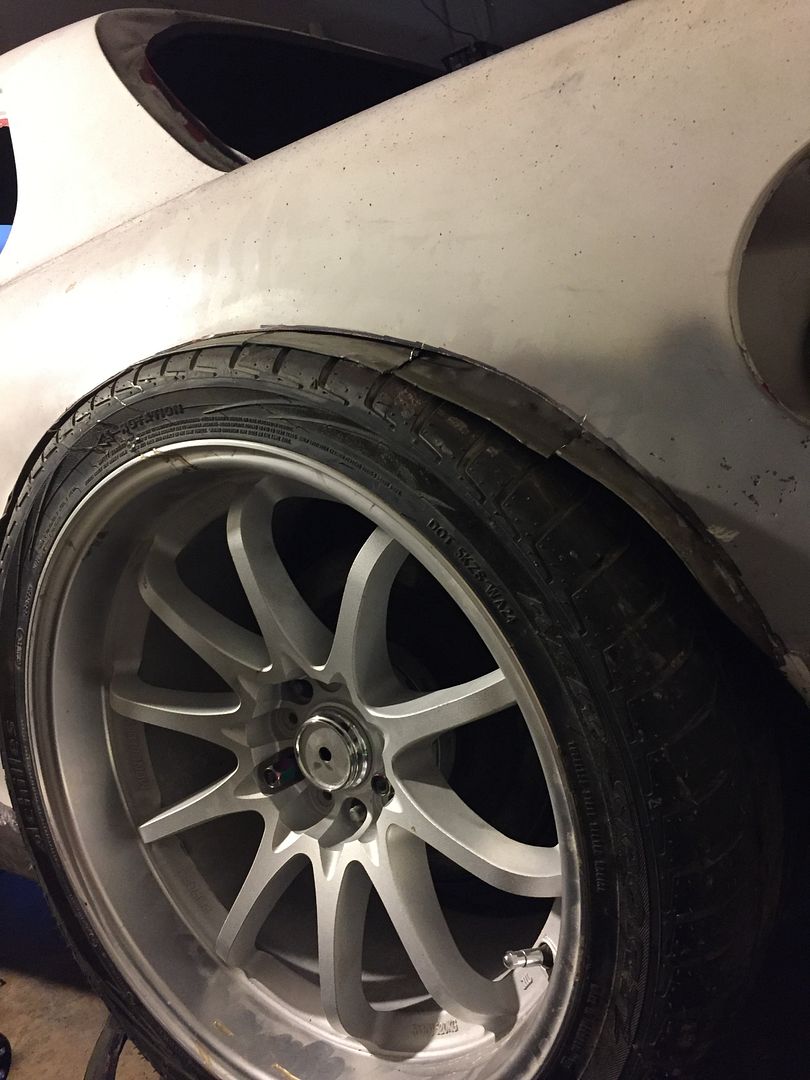
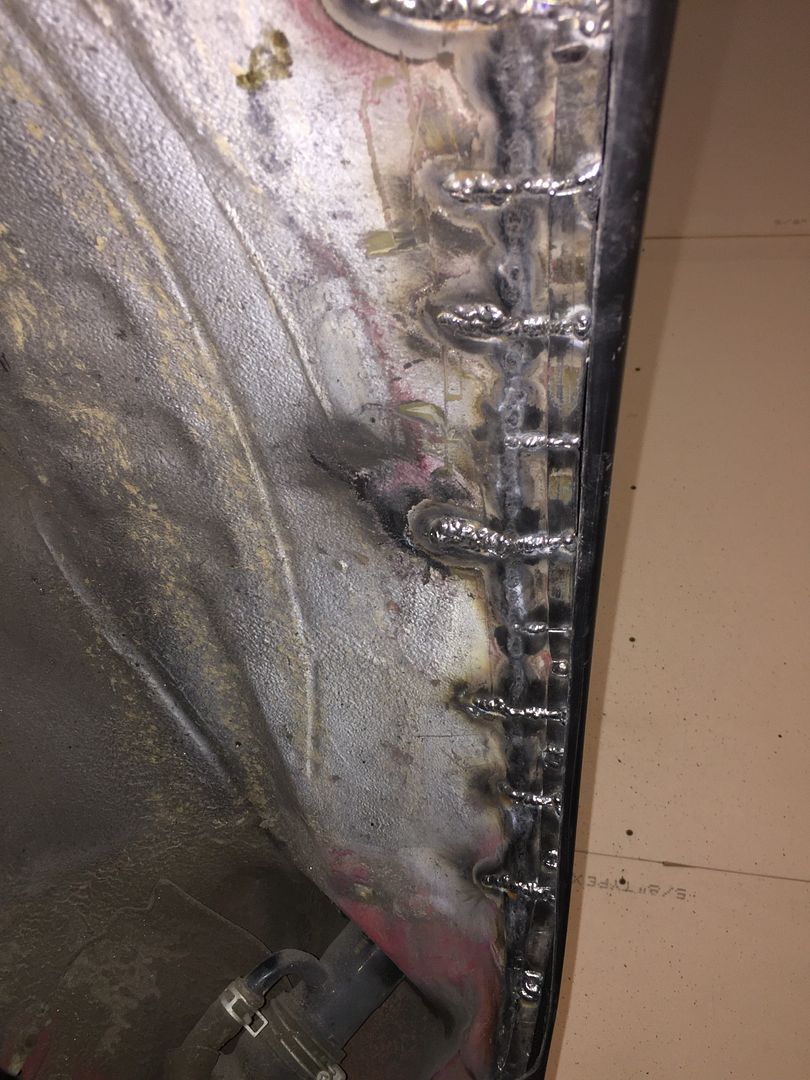
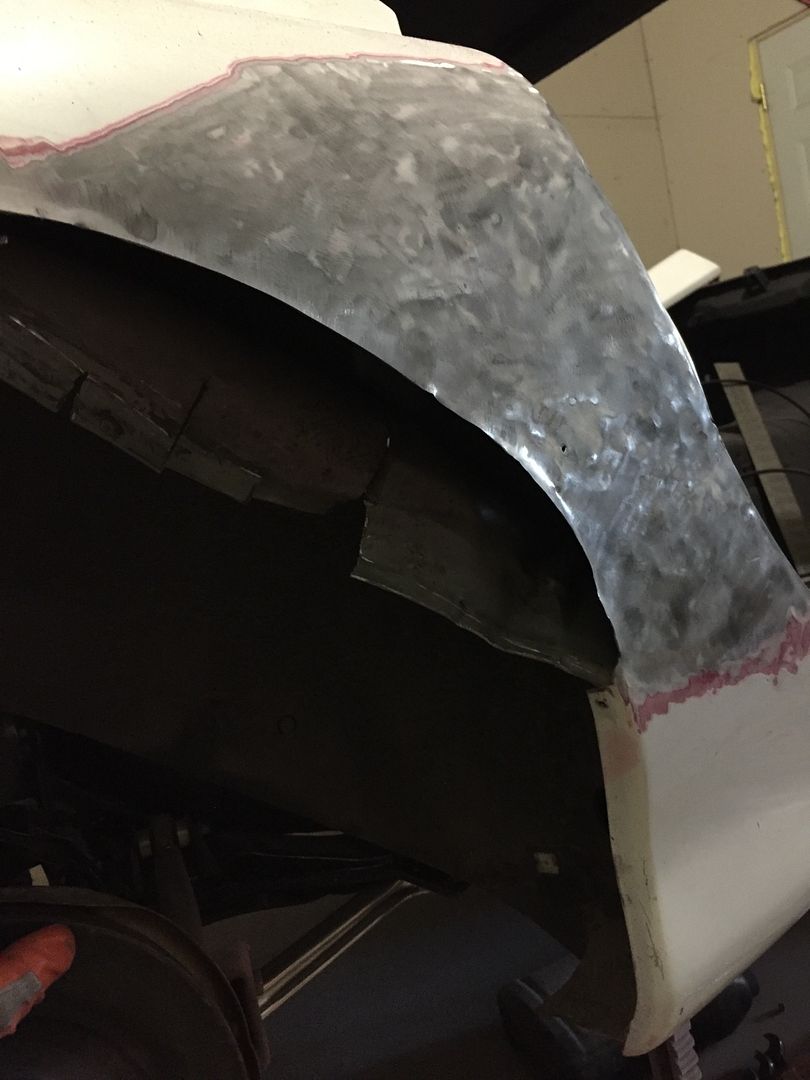
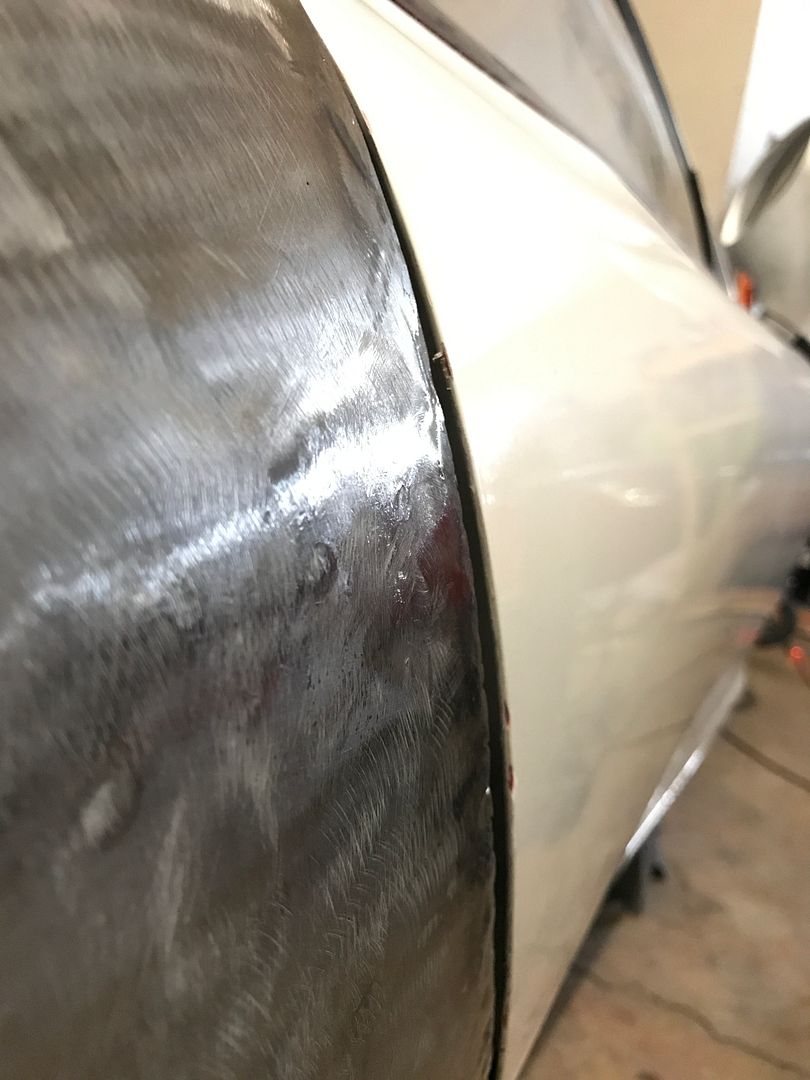
I got the other fender cut and welded as well. This one didnt come out as clean as the other side (I tried to match the contour of the other one and didnt cut enough metal out, so I had to hammer up on it and that in turn caused the metal to distort a bit near the welds. It isn't a big deal since it's all covered up anyhow, but it bugs me so I will probably try and make both sides match somewhat by hammering each one equally lol. It will be smooth once finished without any waviness though, I'm too picky to let that happen even with it being covered up.
Comment
-
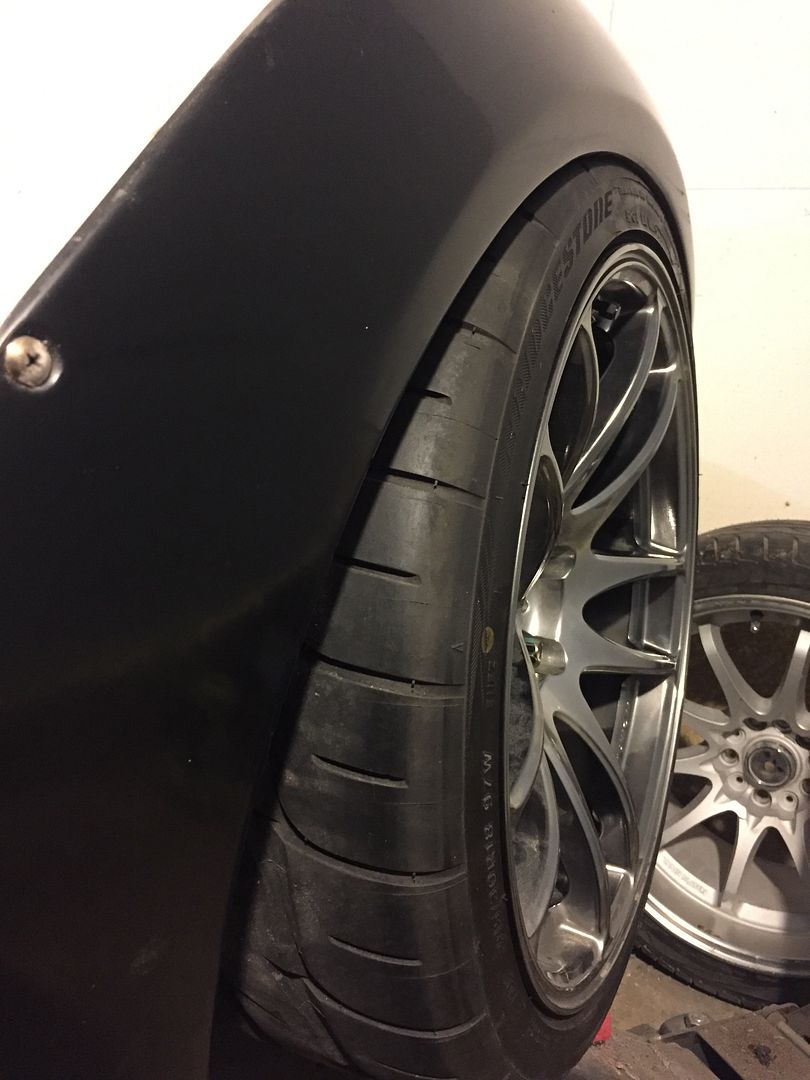
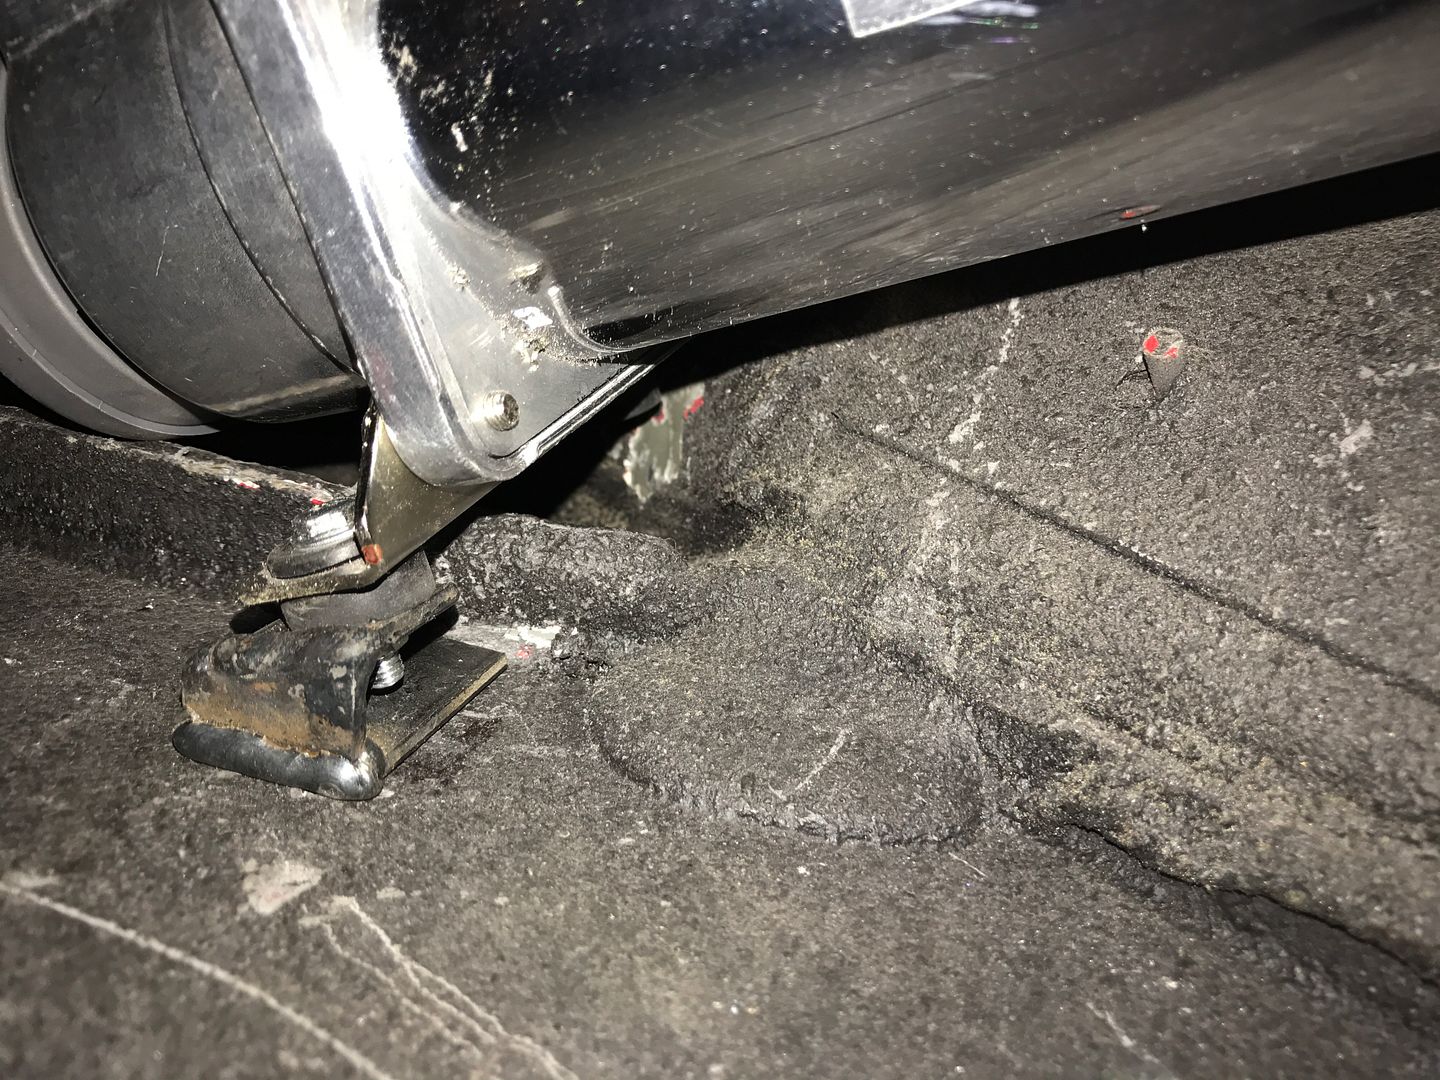
At this point I tried to figure out what my next step would be. I really want to get the car on the ground so I can start visualizing what it is going to look like together, so I started working on the strut height. In the case of a bag failure, I dont want the tire colliding with the body. To get around that I needed the fully compressed height of the shock to put the tire right below the fender line (of the actual body, not the overfender). The issue with that is the control arm has a protrusion that catches on the shock perch. I ground off that part and it still hit, so I then proceeded to clearance the perch a bit and all is well now! Gotta do the other side now and Ill be golden
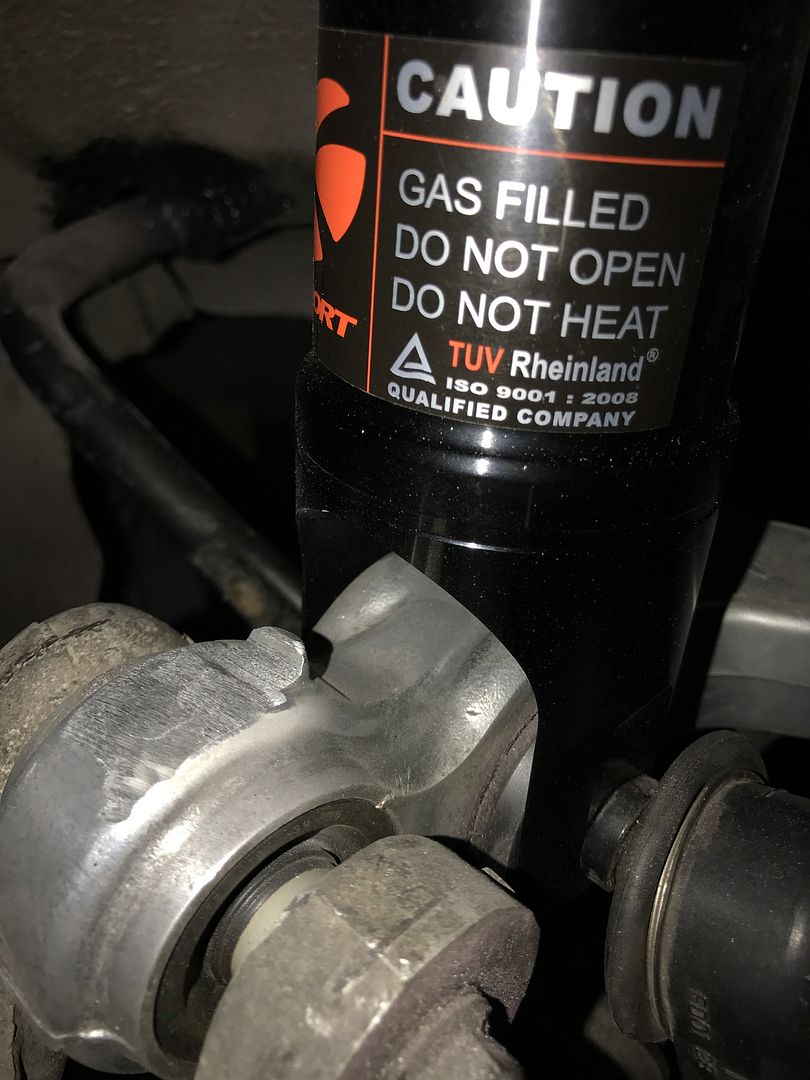

This was the height fully compressed with it hitting the control arm...not good enough.
This should do it!
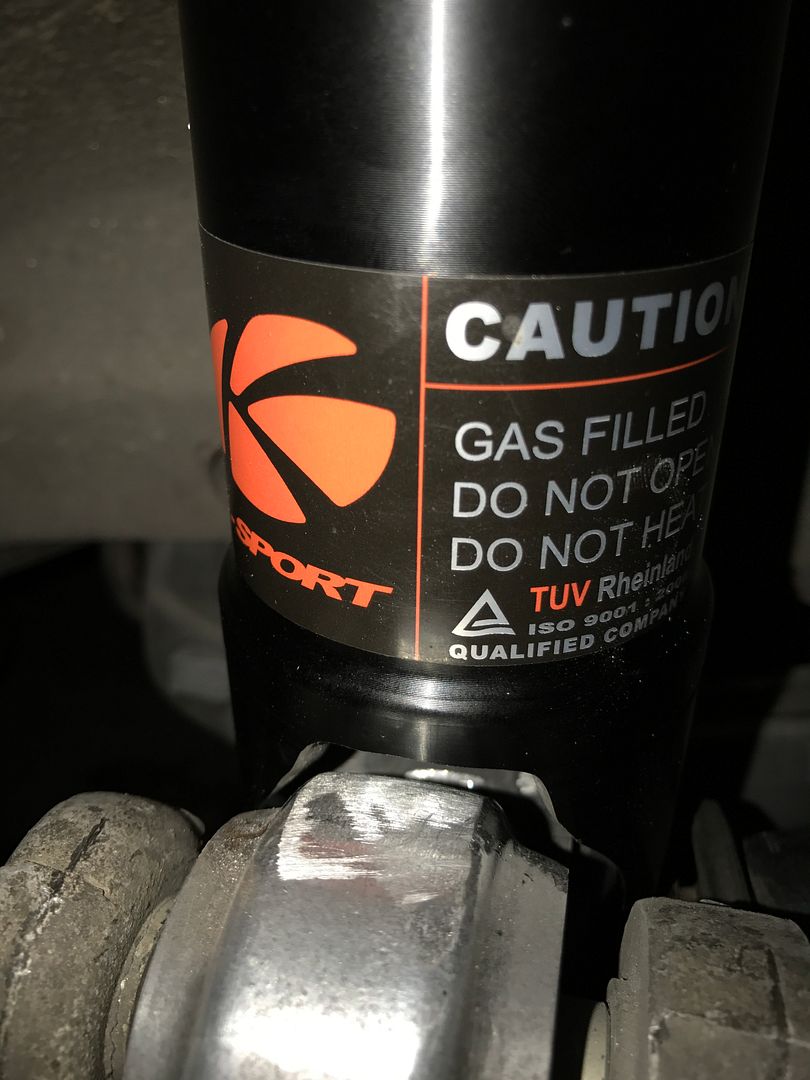


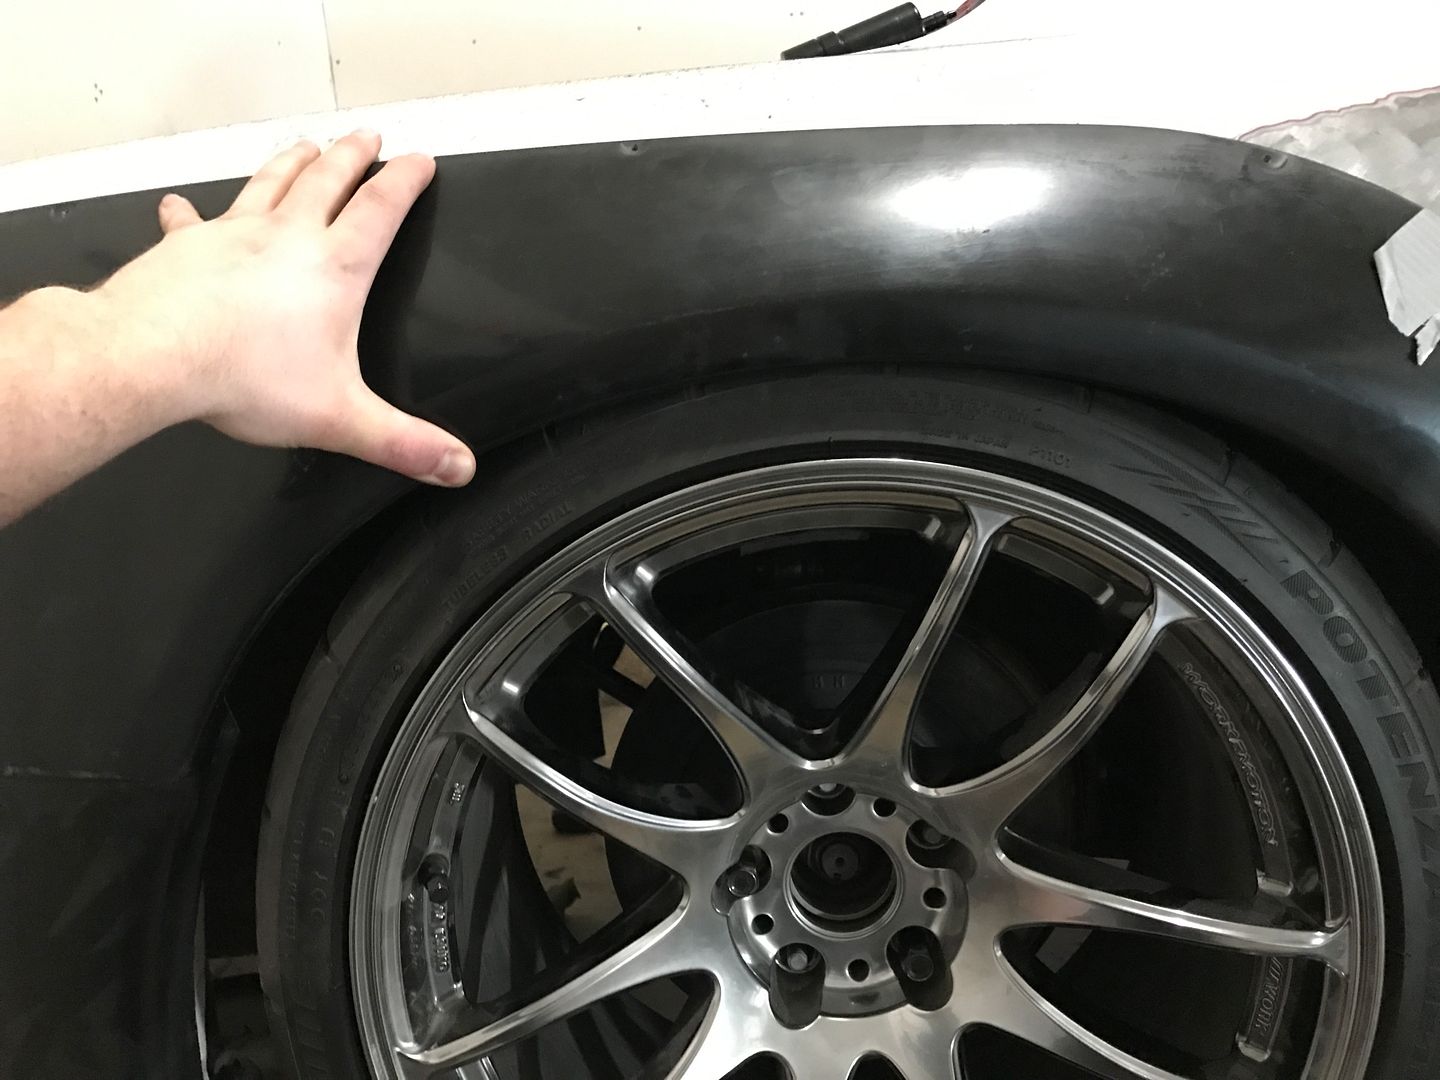
I am extremely happy with that fitment and height so I will probably try to keep it around there. I can go lower than that or higher than that without hitting the control arm so that leaves me adjust-ability with the bag pressure and shock height to dial in the stiffness I want.
Also, important! Give my page on facebook a like to see more current updates since I don't get to these as often these days.
www.facebook.com/tr8rfd/Comment


Comment