Announcement

Collapse
No announcement yet.

Audi A1 by mgpdoc ••

Collapse
X
 
  • Filter
  • Time
  • Show
Clear All
new posts

  • mgpdoc
    replied
    And here is another reason, we removed the front fenders, other than cleaning beneath them.

    Untitled by mgpdoc, on Flickr

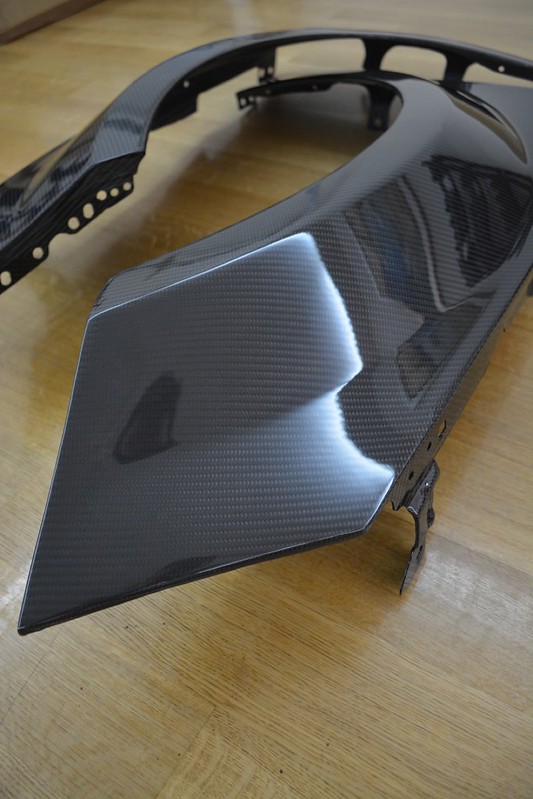
    Yeap, new front fenders / wings.

    Untitled by mgpdoc, on Flickr

    Untitled by mgpdoc, on Flickr

    Not only are they completely carbon fiber, so very light and gorgeous, at least imho, but also, +20mm wide and fit on the oem mounting points. More on that later.

    Untitled by mgpdoc, on Flickr

    They are exceptional quality, couldnt be happier.

    Untitled by mgpdoc, on Flickr

    Untitled by mgpdoc, on Flickr

    Sure

    Untitled by mgpdoc, on Flickr

    The molding was so good, even the little audi logo passed from one to another. Good job

    Untitled by mgpdoc, on Flickr

    As for the weight, one fender was 0,371kg, and the other one 0,389

    Untitled by mgpdoc, on Flickr

    Untitled by mgpdoc, on Flickr

    In comparison, the oem ones are 1,4 to 1,5kg each. The amount of weight saved is not much as an absolute number due to the fenders being so small in this car. However, percentage-wise, it is quite impressive. Which is something to be expected with cf, and i have seen it in my A4s with the hood and trunk installed, in the past.

    So onto installing these over the clean arches.

    Leave a comment:


  • mgpdoc
    replied
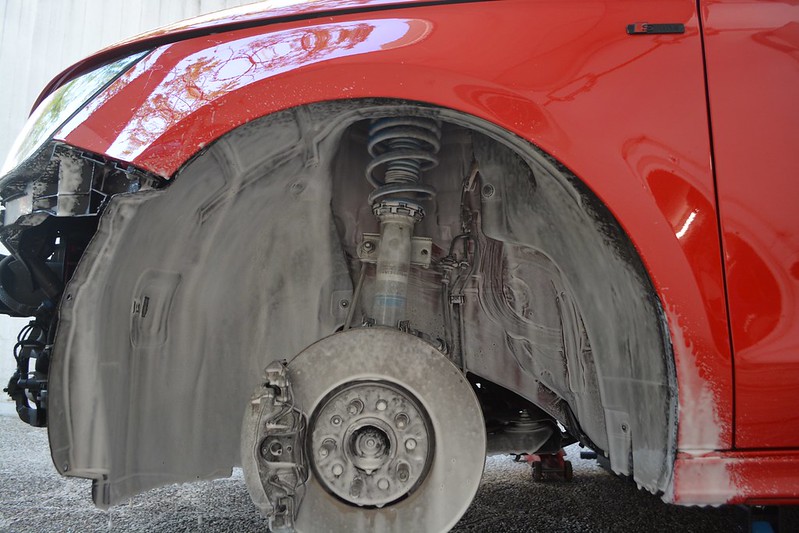
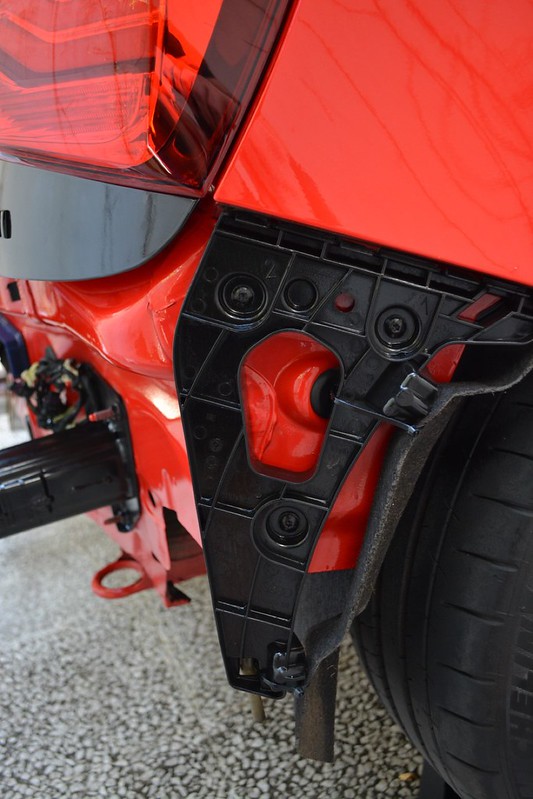
    Then, it was time to clean the arch liners.
    Then remove them arch liners and clean under them.
    Then remove the fenders, and clean under them.
    And then, even more importantly, install fenders back on. But more on that later.

    Onto the pics

    State of them before

    Untitled by mgpdoc, on Flickr

    Untitled by mgpdoc, on Flickr

    Let's attack them

    Untitled by mgpdoc, on Flickr

    Not entirely perfect but that is ok for now, you ll see why later.

    Untitled by mgpdoc, on Flickr

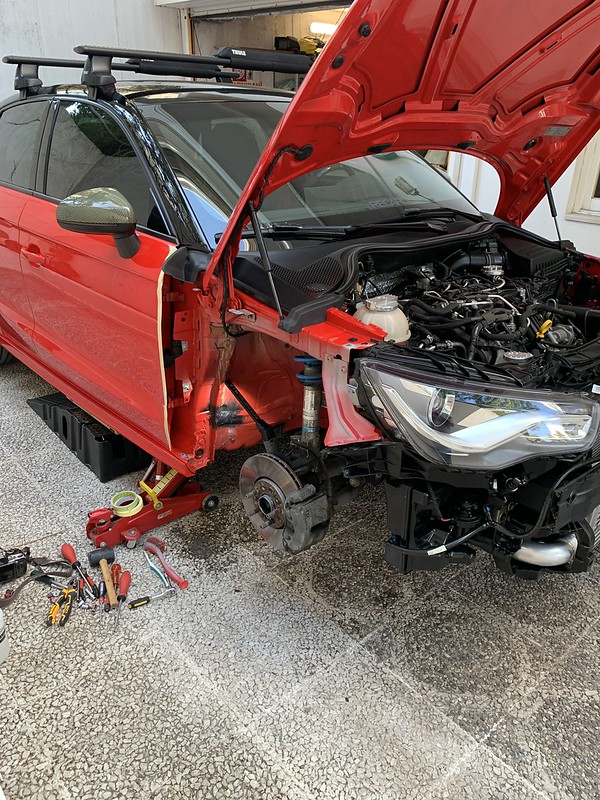
    Let's remove some fenders then

    Untitled by mgpdoc, on Flickr

    No how to here, not online, and dont have the workshop manual for this, so I figured it out as I went. Pretty straightforward, and I have already done that on my A4 to install RS4 fenders in the past.

    Out it went

    Untitled by mgpdoc, on Flickr

    These fell off

    Untitled by mgpdoc, on Flickr

    Time for more cleaning then.

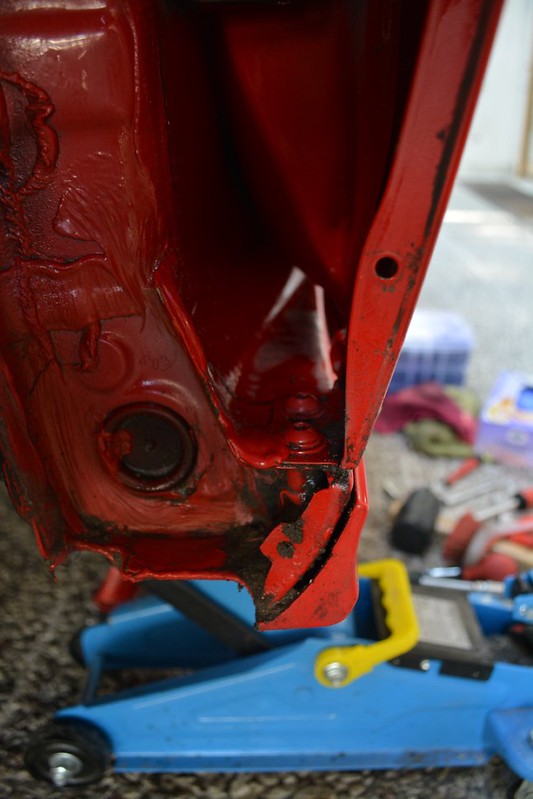
    Crusty

    Untitled by mgpdoc, on Flickr

    No going back now

    Untitled by mgpdoc, on Flickr

    Clean everything although not visible

    Untitled by mgpdoc, on Flickr

    Untitled by mgpdoc, on Flickr

    Untitled by mgpdoc, on Flickr

    Untitled by mgpdoc, on Flickr

    From this

    Untitled by mgpdoc, on Flickr

    To this

    Untitled by mgpdoc, on Flickr

    The other side was no different, if anything it was worse

    Behind this cover there is a surprise

    Untitled by mgpdoc, on Flickr

    Surprise joined the chat

    Untitled by mgpdoc, on Flickr

    After some amount of time, bolts were visible below the dirt

    Untitled by mgpdoc, on Flickr

    And fender was removed

    Untitled by mgpdoc, on Flickr

    Ok somewhat better now.

    Untitled by mgpdoc, on Flickr

    Leave a comment:


  • mgpdoc
    replied
    Bought some detailing supplies, for a new project i had in hands, which I also buffed and polished.

    Untitled by mgpdoc, on Flickr

    Untitled by mgpdoc, on Flickr

    Untitled by mgpdoc, on Flickr

    Untitled by mgpdoc, on Flickr

    Untitled by mgpdoc, on Flickr

    Check my other threads, for the Peugeot, or my instagram page, @mgpgarage for faster updates on those.

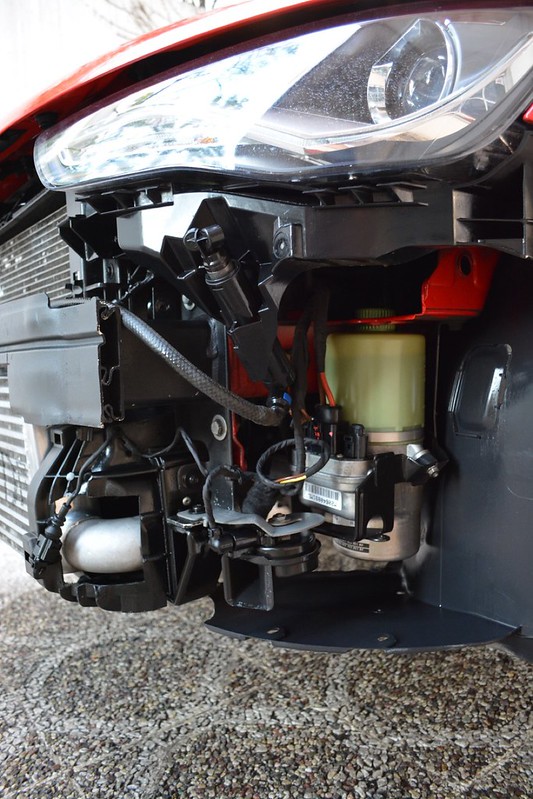
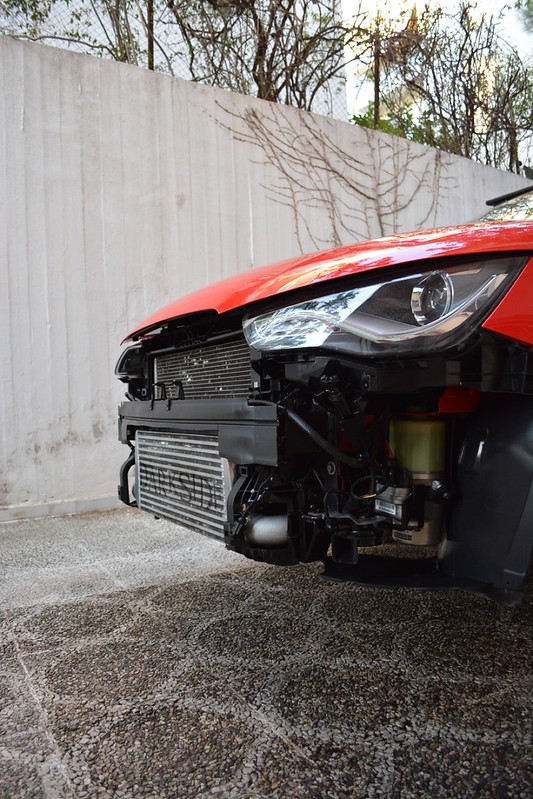
    Now onto the A1, next on the list, was to do to it, what was in the rear bumper. So moving to the front end. And it was time to remove not only the front bumper, but also the front fenders (or wings). And it wasnt without good reason. But we will get to that later on.

    So let's see the process of how it went.

    First, remove the bumper

    Untitled by mgpdoc, on Flickr

    Rear side of the bumper, never gets washed

    Untitled by mgpdoc, on Flickr

    Untitled by mgpdoc, on Flickr

    Not anymore

    Untitled by mgpdoc, on Flickr

    Untitled by mgpdoc, on Flickr

    Untitled by mgpdoc, on Flickr

    Up in the air for better cleaning

    Untitled by mgpdoc, on Flickr

    Some close ups of the dirt we were up against

    Untitled by mgpdoc, on Flickr

    Untitled by mgpdoc, on Flickr

    Untitled by mgpdoc, on Flickr

    Untitled by mgpdoc, on Flickr

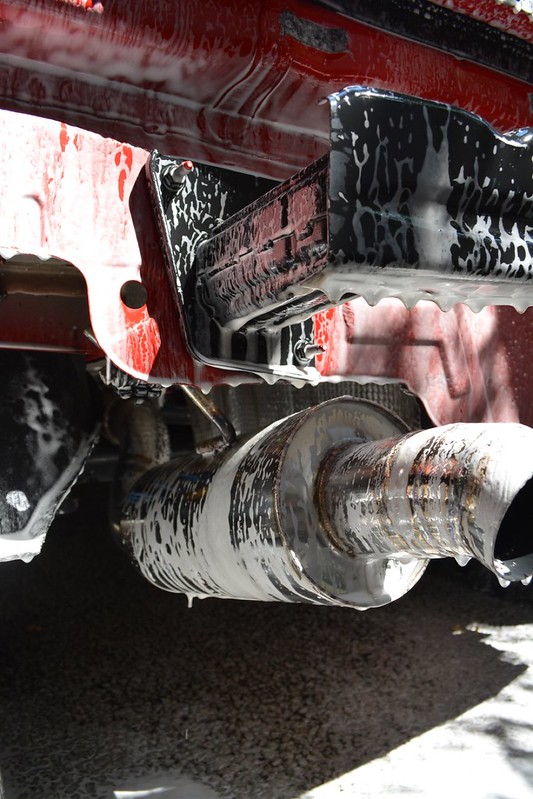
    Snow Foaming and Apc with brushes to the rescue

    Untitled by mgpdoc, on Flickr

    Untitled by mgpdoc, on Flickr

    Some metal polish on the IC

    Untitled by mgpdoc, on Flickr

    Untitled by mgpdoc, on Flickr

    Untitled by mgpdoc, on Flickr

    Here's how that came out

    Untitled by mgpdoc, on Flickr

    Untitled by mgpdoc, on Flickr

    Untitled by mgpdoc, on Flickr

    Iintercooler looked fresh after the metal polish by hand, and the bar after a lick of paint

    Untitled by mgpdoc, on Flickr

    Untitled by mgpdoc, on Flickr

    Untitled by mgpdoc, on Flickr

    Please with how that came out from this

    Untitled by mgpdoc, on Flickr

    To this

    Untitled by mgpdoc, on Flickr

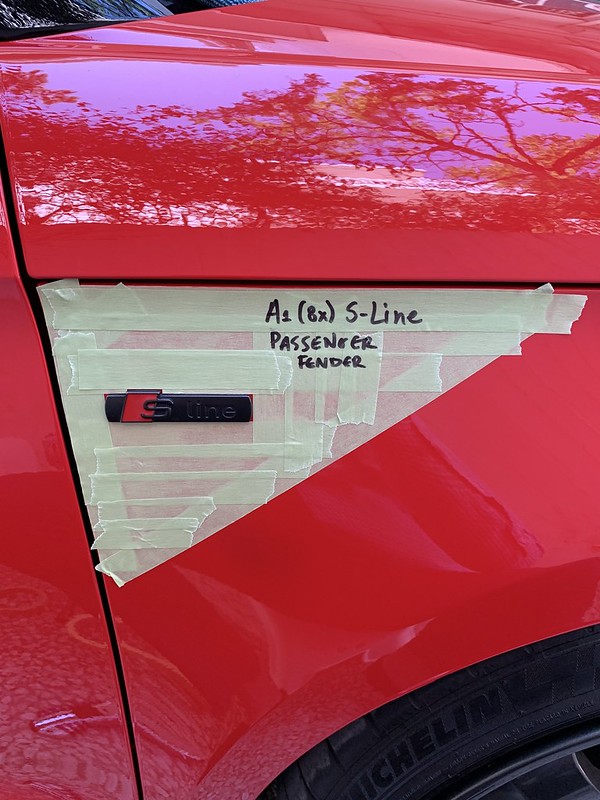
    And then I made a template.

    Untitled by mgpdoc, on Flickr

    For both fenders.

    Untitled by mgpdoc, on Flickr

    We'll see why in the next post.

    Leave a comment:


  • mgpdoc
    replied
    Hello there, some more updates and rather major ones, to report on the daily car. It's been 7,5 years now of ownership and with gas prices going to where they are now, I am very glad I opted for a TDi back in the day.
    That said, i wanted to, let's say treat the car a bit more than I usually do. So let's see how it went down.

    Car was hiding from me, but I found it

    Untitled by mgpdoc, on Flickr

    The plan was to clean areas that are hidden from regular everyday wash, which let's face it, the car gets more often than not. These areas are potential spots for rust to begin in the years to come, and also, it feels great, knowing the car is clean wherever it can be. If you can improve something, why not. That is my point of view.

    So, the first plan was to remove the rear bumper and clean what's underneath it. Hadnt done this in a while, and I knew it would involve a lot of work, although some part of it had been washed when I cleaned the underbody. But that too, happened almost a year ago, so there would be dirt under there. Say no more, onto the pics.


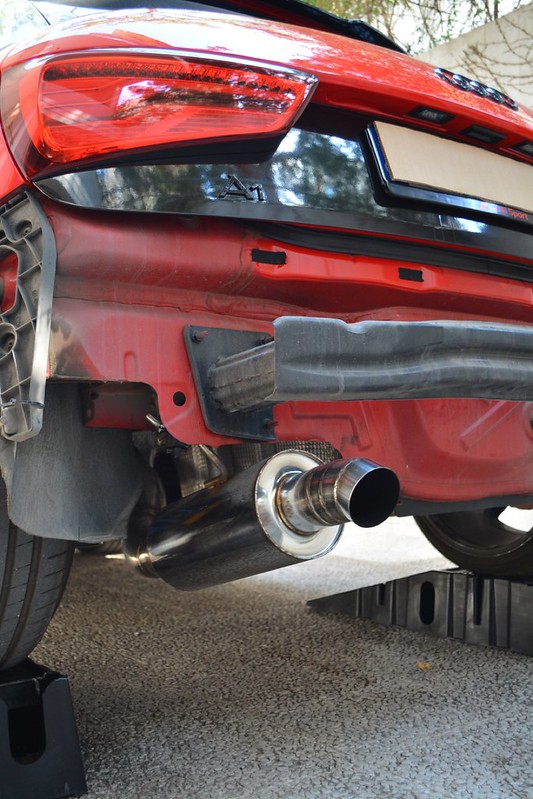
    Bumper removed and cleaned inside and out

    Untitled by mgpdoc, on Flickr

    Here is the general overview

    Untitled by mgpdoc, on Flickr

    Untitled by mgpdoc, on Flickr

    Some close-ups from the dirt

    Untitled by mgpdoc, on Flickr

    Untitled by mgpdoc, on Flickr

    Untitled by mgpdoc, on Flickr

    Untitled by mgpdoc, on Flickr

    Untitled by mgpdoc, on Flickr

    Untitled by mgpdoc, on Flickr

    Untitled by mgpdoc, on Flickr

    Untitled by mgpdoc, on Flickr

    Untitled by mgpdoc, on Flickr

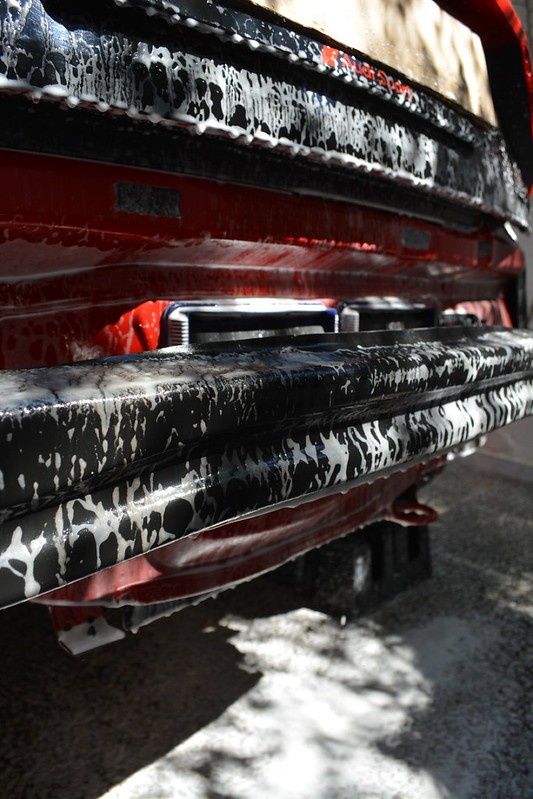
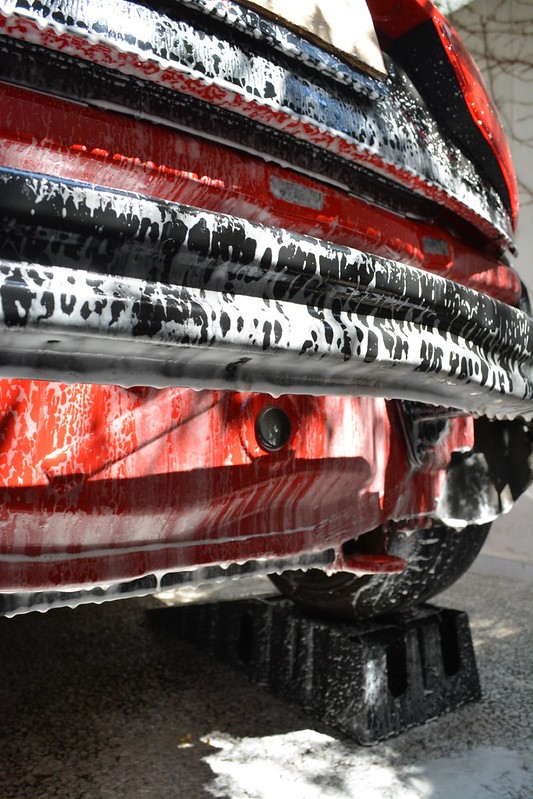
    Various cleaning agents, snow foam, repeatedly and brushes of many kinds to agitate and get everywhere possible

    Untitled by mgpdoc, on Flickr

    Untitled by mgpdoc, on Flickr

    Untitled by mgpdoc, on Flickr

    After cleaning what was there, I also removed the rear crash bar, for deeper cleaning, and also give the bar a lick of paint to prevent some surface rust

    Untitled by mgpdoc, on Flickr

    Untitled by mgpdoc, on Flickr

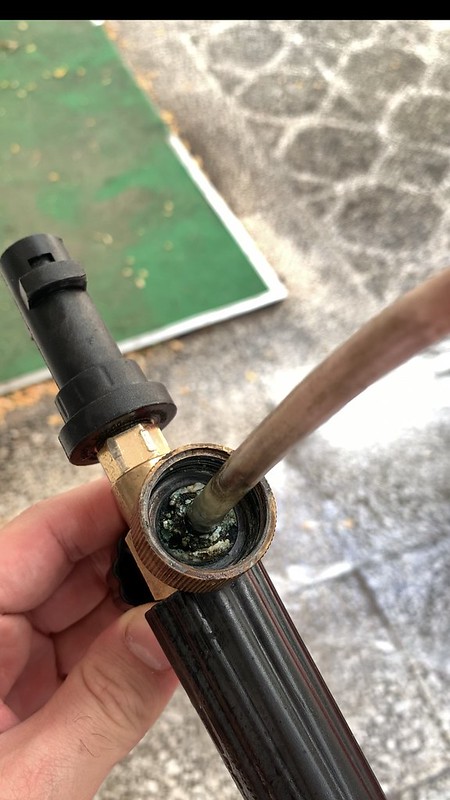
    While I was there, I noticed one of the snow foam cannons had some issues in the spray pattern. And cant blame it why.

    Untitled by mgpdoc, on Flickr

    The other one was better

    Untitled by mgpdoc, on Flickr

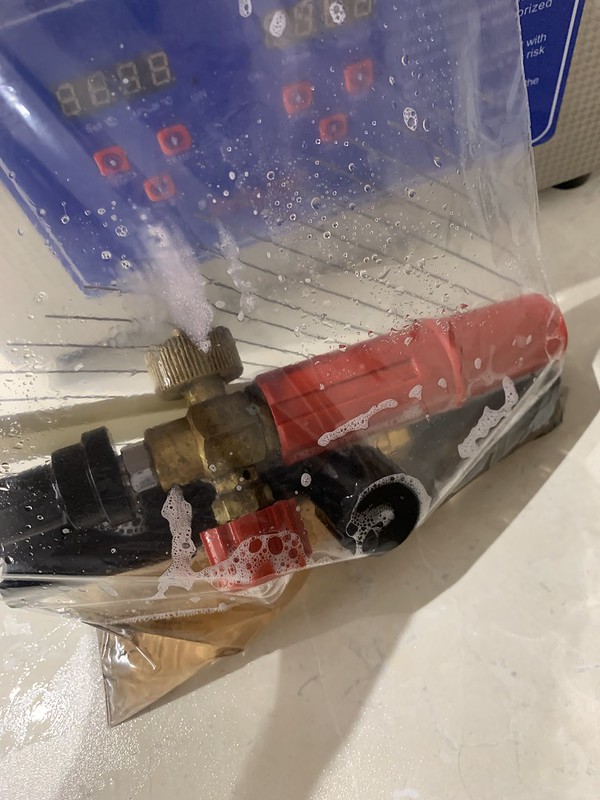
    However game them both some good baths in the US cleaner

    Untitled by mgpdoc, on Flickr

    They came out great, and then gave them some lubrication like i always do to what i clean, most of the times.

    Untitled by mgpdoc, on Flickr

    Untitled by mgpdoc, on Flickr

    Untitled by mgpdoc, on Flickr

    Some photos of the finished work

    Untitled by mgpdoc, on Flickr

    Untitled by mgpdoc, on Flickr

    Untitled by mgpdoc, on Flickr

    Untitled by mgpdoc, on Flickr

    Untitled by mgpdoc, on Flickr

    I also applied some wax for protection after the cleaning.

    Untitled by mgpdoc, on Flickr

    Untitled by mgpdoc, on Flickr

    Untitled by mgpdoc, on Flickr

    Really pleased with how it came out

    Untitled by mgpdoc, on Flickr

    Installed the bumper back on, knowing it is clean on the underneath - priceless

    Untitled by mgpdoc, on Flickr

    Weighed the car, not bad not bad.

    Untitled by mgpdoc, on Flickr

    Leave a comment:


  • mgpdoc
    replied
    So another update to show you, is about the mirrors on the A1. I have been running CF ones for some years now. The work done by that guy was not the best as it seems, since through time, the fabric lifted, and got some white marks, even though the car is kept in parking at all time when not driven. However I thought i'd do something different.

    So here goes.

    Gave it a quick wash to work on a clean car

    Untitled by mgpdoc, on Flickr

    This new set came in handy for the job ahead

    Untitled by mgpdoc, on Flickr

    Old setup

    Untitled by mgpdoc, on Flickr

    Untitled by mgpdoc, on Flickr

    Untitled by mgpdoc, on Flickr

    Took everything apart

    Untitled by mgpdoc, on Flickr

    Then it was cleaning time, as always

    Untitled by mgpdoc, on Flickr

    Untitled by mgpdoc, on Flickr

    Scrubbing with a toothpaste, wipe over and then compressed air. Then dress everything up with something to keep the plastics hydrated.

    Untitled by mgpdoc, on Flickr

    Untitled by mgpdoc, on Flickr

    Time to install these

    Untitled by mgpdoc, on Flickr

    Untitled by mgpdoc, on Flickr

    Untitled by mgpdoc, on Flickr

    Real carbon kevlar in gloss finish

    Untitled by mgpdoc, on Flickr

    Installed

    Untitled by mgpdoc, on Flickr

    Untitled by mgpdoc, on Flickr

    Untitled by mgpdoc, on Flickr

    Untitled by mgpdoc, on Flickr

    Untitled by mgpdoc, on Flickr

    Untitled by mgpdoc, on Flickr

    They change colours from yellow, to almost green, I am in love. Cheers guys

    Mike

    Leave a comment:


  • mgpdoc
    replied
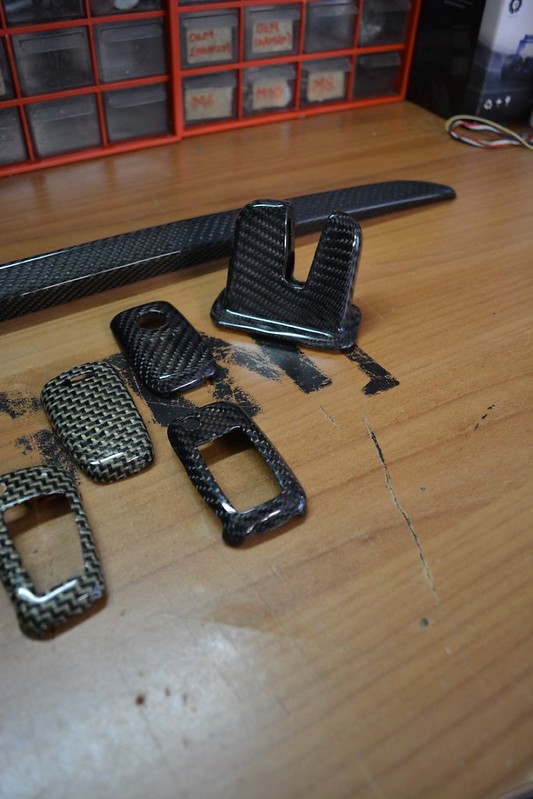
    Received some things

    Untitled by mgpdoc, on Flickr

    Both for the VW key and for the Audi keys

    Untitled by mgpdoc, on Flickr

    Untitled by mgpdoc, on Flickr

    Cleaned the interior of the muffler, which on a tdi car, is a thing

    Untitled by mgpdoc, on Flickr

    Redid the red tint on my tails

    Untitled by mgpdoc, on Flickr

    Carried the A4 headliner trimmed in a new material - who knows what - without issues, love the thule bars so handy

    Untitled by mgpdoc, on Flickr

    Bought these for the next maintenance service. Also some seat covers for the tilletts of the A4 when it goes to the repair shop.

    Untitled by mgpdoc, on Flickr

    They also fit the recaros nicely

    Untitled by mgpdoc, on Flickr

    Sorry for the blurry photo.

    Cheers guys

    Leave a comment:


  • mgpdoc
    replied
    Originally posted by scweet14 View Post
    love that both cars get so much love, not trying to **** but why do you run Rota wheels and not legit brand? Seems kinda ass backwards with the attention to detail and quality work
    Yes, you are correct. I have thought about it myself multiple times. Have been running OZ and Enkeis at the same time i run Rotas. I could be running Rays instead of the latest one, and also compomotives instead of the other design, which is where the original design was from. At the time of purchase it was easier to get these not money wise but country wise. The rays i had to import them from US or Japan, and would end up costing two times the initial price due to custom fees, and so i went with buying from UK which at the time, was in EU. not anymore though, so there goes that customs fee- free card as well. Also, as for the compomotive one, i couldnt get the fitment i wanted for the A1. and still cant for 19s that i want for the latest A4.

    I was very hesitant at first to go for Rotas. Nowadays Rotas cost the money of OZ at least where I am at. But prices are international on the web. Quality wise, I have zero complains from the three sets of Rotas I have used. Daily driven, track driven, nothing, luckily. However, like you said, it doesnt make sense if you see Rotas in my cars. However now i guess you know why. I regret selling my OZs and my Enkeis SO MUCH.

    Also, you will see some updates on the Golf, which is still with me, and also, in the other A4.

    Cheers

    Mike

    Leave a comment:


  • scweet14
    replied
    love that both cars get so much love, not trying to **** but why do you run Rota wheels and not legit brand? Seems kinda ass backwards with the attention to detail and quality work

    Leave a comment:


  • mgpdoc
    replied
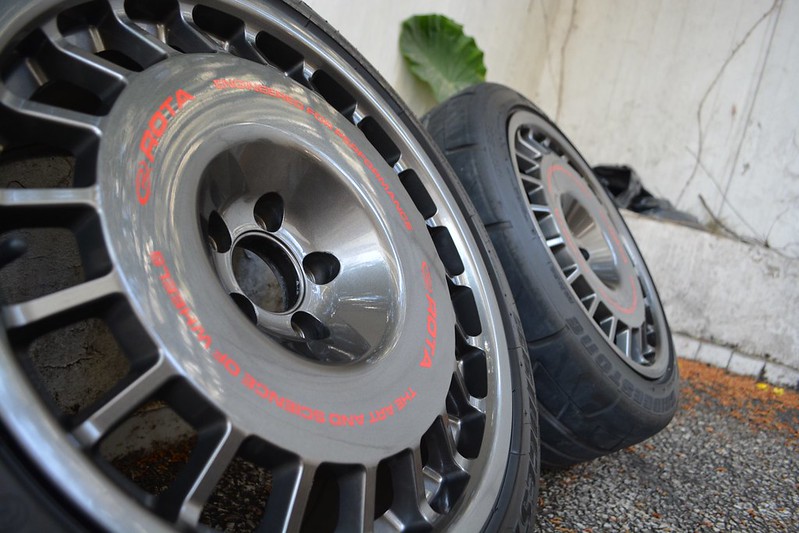
    So gave my wheels a change. Out with the 17s


    Untitled by mgpdoc, on Flickr


    Side by side


    Untitled by mgpdoc, on Flickr


    Still love these wheels too


    Untitled by mgpdoc, on Flickr


    Untitled by mgpdoc, on Flickr


    Been a while since i last put them on


    Untitled by mgpdoc, on Flickr


    Also tried the 50:50 look for fun, but didnt work out


    Untitled by mgpdoc, on Flickr


    Yeah, no


    Untitled by mgpdoc, on Flickr


    Better all uniform


    Untitled by mgpdoc, on Flickr


    Then I also did some weight removal at the back due to lack of passengers there and also other places.


    Untitled by mgpdoc, on Flickr


    Untitled by mgpdoc, on Flickr


    Untitled by mgpdoc, on Flickr


    Untitled by mgpdoc, on Flickr


    Untitled by mgpdoc, on Flickr


    Untitled by mgpdoc, on Flickr


    Untitled by mgpdoc, on Flickr


    Untitled by mgpdoc, on Flickr


    Refurbished all my fire extinguishers for each running car in the fleet


    Untitled by mgpdoc, on Flickr


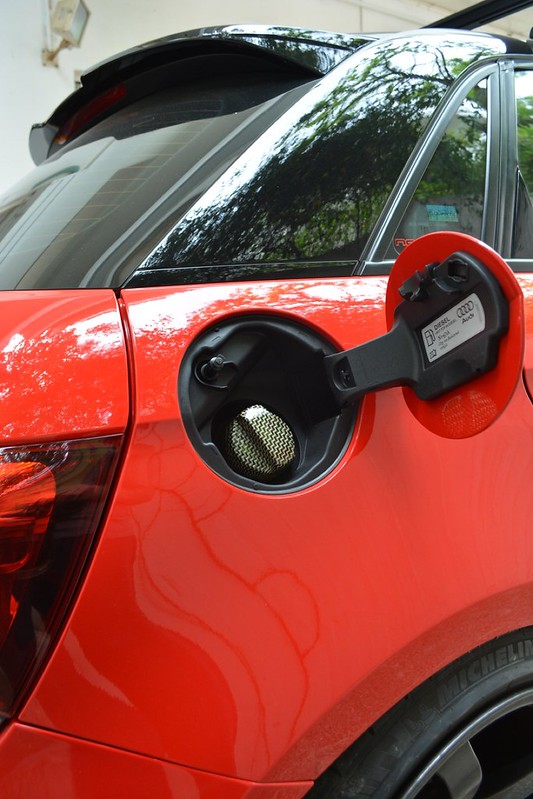
    Good to have a diesel fuel car in these petrol price times


    Untitled by mgpdoc, on Flickr


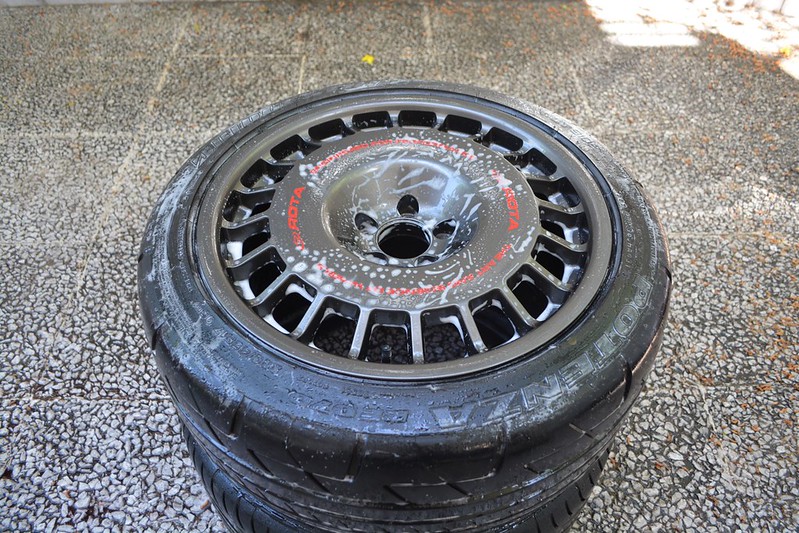
    Prior to storing the wheels i gave em a good clean and also wax polish to seal them off


    Untitled by mgpdoc, on Flickr


    Untitled by mgpdoc, on Flickr


    Untitled by mgpdoc, on Flickr


    Untitled by mgpdoc, on Flickr


    Untitled by mgpdoc, on Flickr


    Stella Artois caps didnt look half bad, lol


    Untitled by mgpdoc, on Flickr


    Lastly, I installed the cf and kevlar parts received. Plenty more on the way


    Untitled by mgpdoc, on Flickr


    Untitled by mgpdoc, on Flickr


    Untitled by mgpdoc, on Flickr


    Untitled by mgpdoc, on Flickr


    Untitled by mgpdoc, on Flickr


    Untitled by mgpdoc, on Flickr


    Cheers guys

    Leave a comment:


  • mgpdoc
    replied
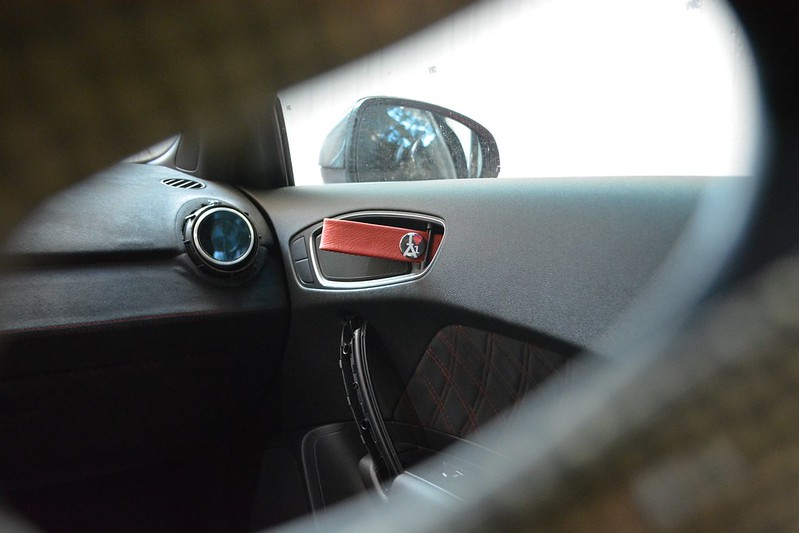
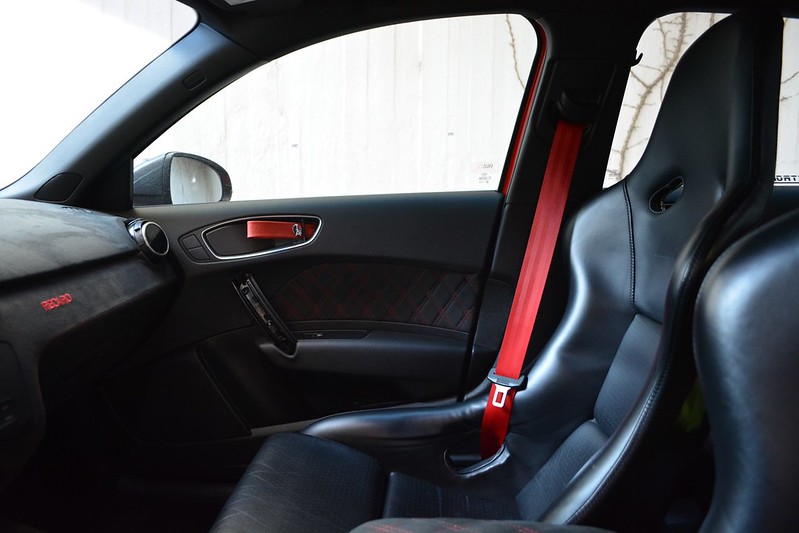
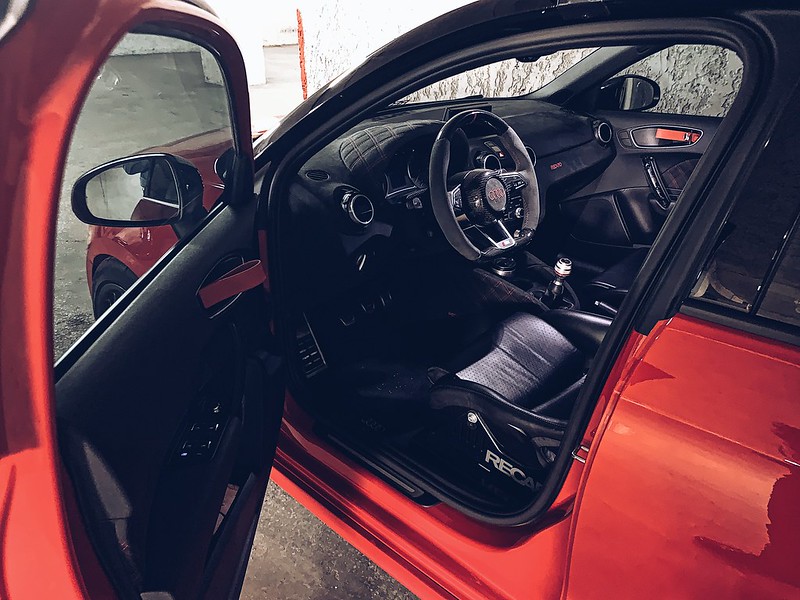
    Another idea I had for some time now, is to make some clubsport/gt3 style door pulls like i have done in my Audi A4 about 10-12 years ago.

    I had some leather red ones unused i made back then , and thought why not.

    Untitled by mgpdoc, on Flickr

    Treated them with some Koch LeatherStar to bring some life to them

    Untitled by mgpdoc, on Flickr

    Started with this

    Untitled by mgpdoc, on Flickr

    Then had to take the door card out

    Untitled by mgpdoc, on Flickr

    Untitled by mgpdoc, on Flickr

    Untitled by mgpdoc, on Flickr

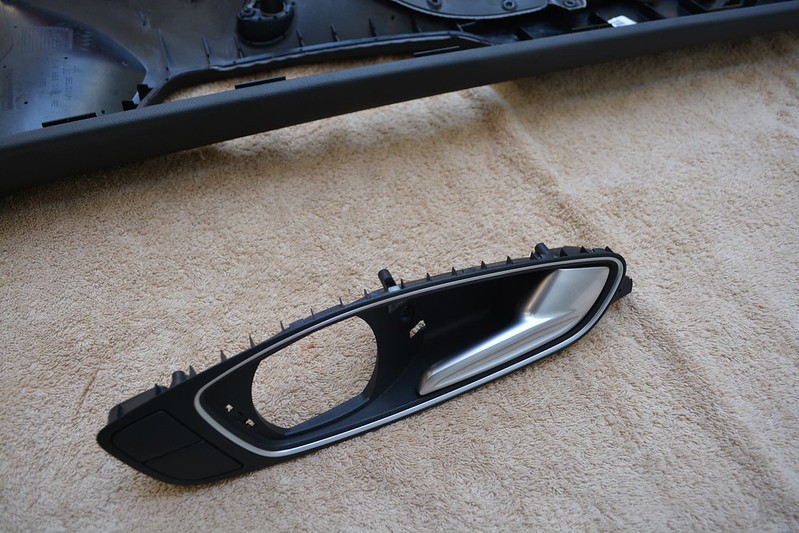
    Then remove the holder for the door pull assembly

    Untitled by mgpdoc, on Flickr

    Untitled by mgpdoc, on Flickr

    Removed the oem door pull

    Untitled by mgpdoc, on Flickr

    Was left with this

    Untitled by mgpdoc, on Flickr

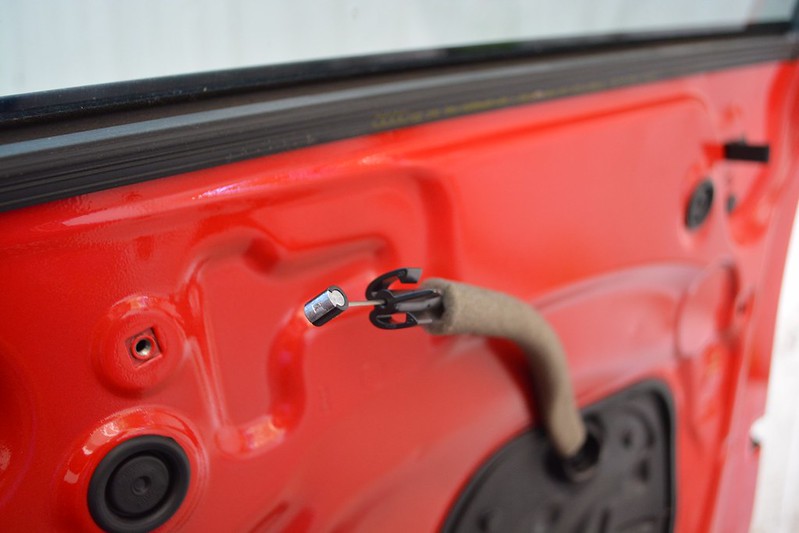
    Trimmed some plastic, and then i had to make something like a dowel pin for the strap to go around it. Made that out of of some long appropriate rods, wrapped with heat shrink wire tube for an oem finish.

    Untitled by mgpdoc, on Flickr

    The strap would have to pull this

    Untitled by mgpdoc, on Flickr

    Like that

    Untitled by mgpdoc, on Flickr

    Installed

    Untitled by mgpdoc, on Flickr

    What is left now, for the perfect look, is to fabricate some block off plates, to cover the mechanish side, probably in cf, or alcantara, we shall see, I am thinking how it will be adressed .

    Till then some pics of how it came out

    Untitled by mgpdoc, on Flickr

    Untitled by mgpdoc, on Flickr

    Untitled by mgpdoc, on Flickr

    Untitled by mgpdoc, on Flickr

    Untitled by mgpdoc, on Flickr

    Where are the door trims and vent trims i hear you ask. Well, they are ready and should get them soon

    Untitled by mgpdoc, on Flickr

    Untitled by mgpdoc, on Flickr

    Cheers, happy Easter to all of you

    Follow me on Instagram, @mgpgarage for daily updates, cheers !

    Leave a comment:


  • mgpdoc
    replied
    Some more updates then.

    My latest set of oem floor mats was a bit tired looking

    Untitled by mgpdoc, on Flickr

    What is more, given the limited options given at the dealer the stripe didnt actually fit with anything in the interior.

    Untitled by mgpdoc, on Flickr

    So i chose to go for some custom floormats from a local upholstery shop. Here is my choice i went with.

    Black carpet, black leather stripe, red stitching.

    Untitled by mgpdoc, on Flickr

    With Audi rings logo

    Untitled by mgpdoc, on Flickr

    I then swapped the OSIR clips

    Untitled by mgpdoc, on Flickr

    Front ones

    Untitled by mgpdoc, on Flickr

    Rear ones

    Untitled by mgpdoc, on Flickr

    Really happy with how they came out

    Untitled by mgpdoc, on Flickr

    Leave a comment:


  • mgpdoc
    replied
    Originally posted by hinrichs View Post
    new muffler looks great and sounds good.
    Thank you mate !
    Some people that saw it in person, told me it looks way better IRL than in photos. Some times it is hard to capture the real thing, I am not good at photos etc.

    Thanks !

    Cheers

    Leave a comment:


  • hinrichs
    replied
    new muffler looks great and sounds good.

    Leave a comment:


  • mgpdoc
    replied
    Also, for anyone wanting faster updates, i made a page for my project cars, on instagram, it is called @mgpgarage .

    Let me know if you like it, and how i could improve it. Cheers

    Leave a comment:


  • mgpdoc
    replied
    Sound clip of first start up on the shop after installation

    Leave a comment:

Working...
X