Announcement

Collapse
No announcement yet.

Z32 project, "six month build"

Collapse
X
 
  • Filter
  • Time
  • Show
Clear All
new posts

  • anti.engineered
    replied
    next project was extending the upper rad support. The factory support is pretty lame and I wanted to close it off to tidy it up and make it as clean as possible.


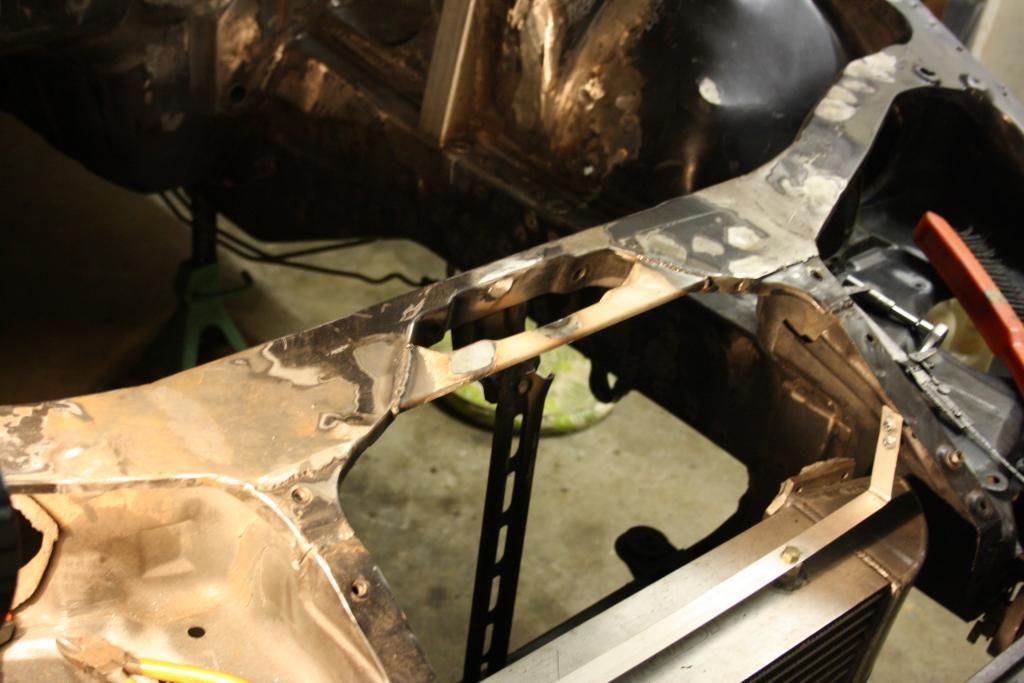
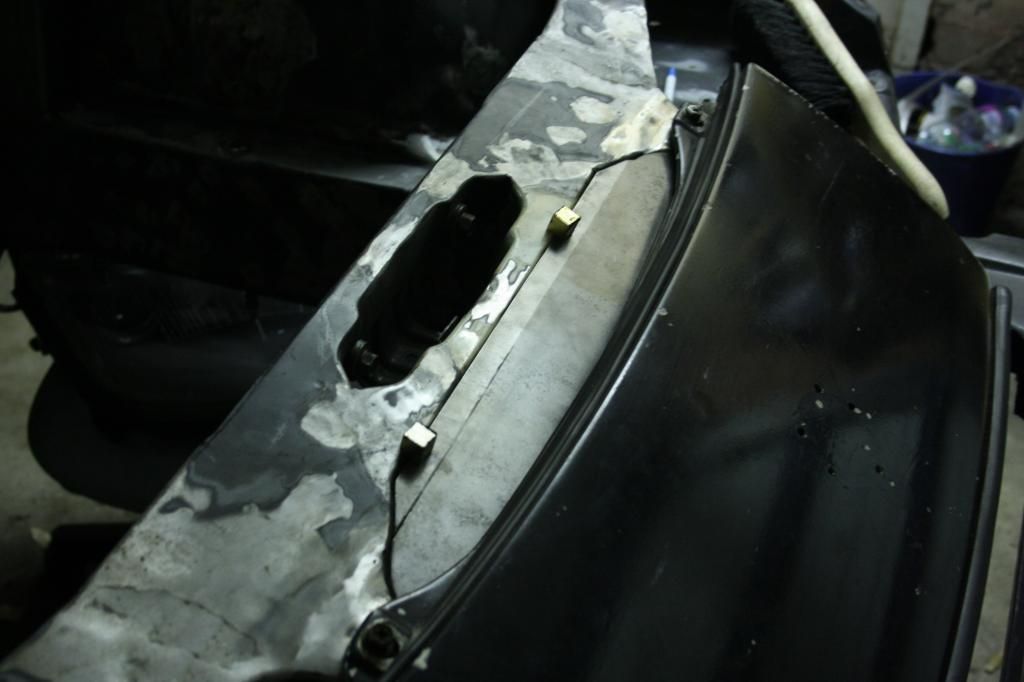
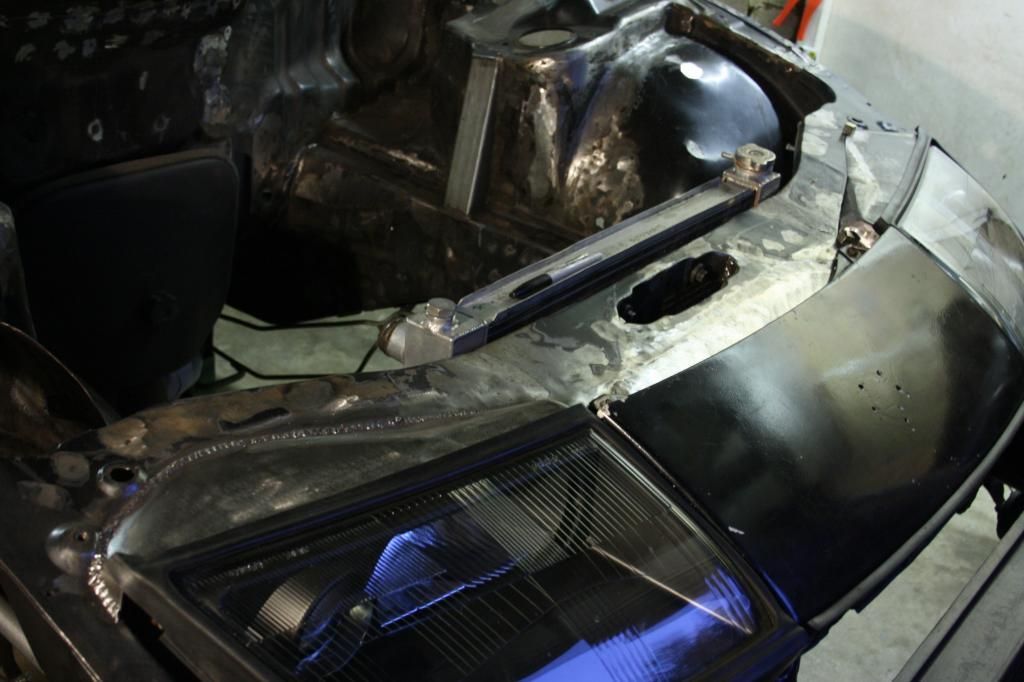
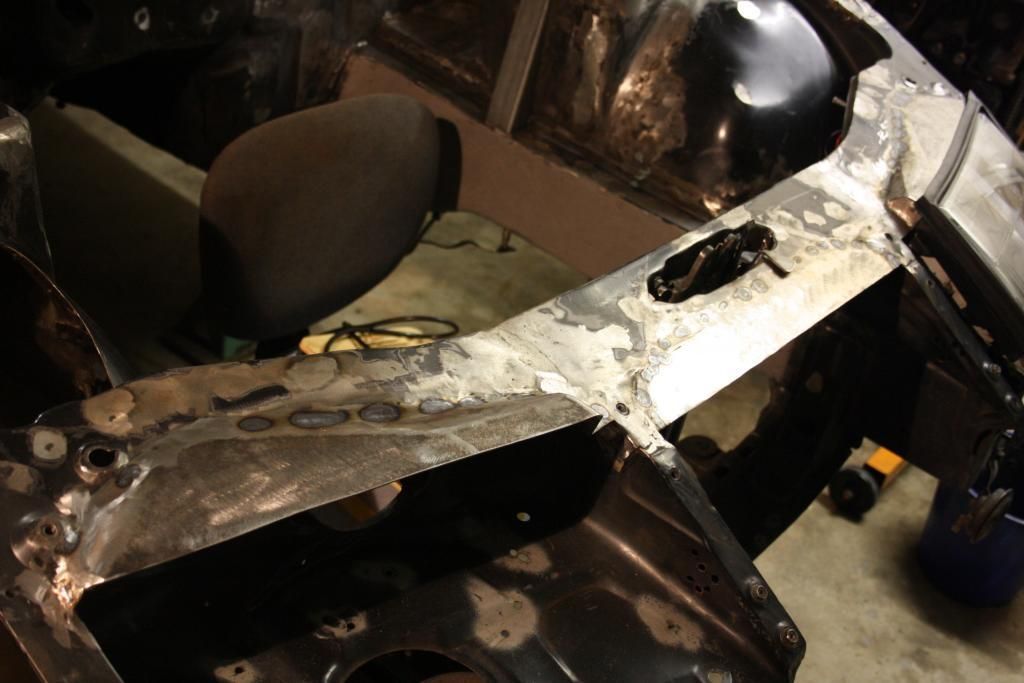
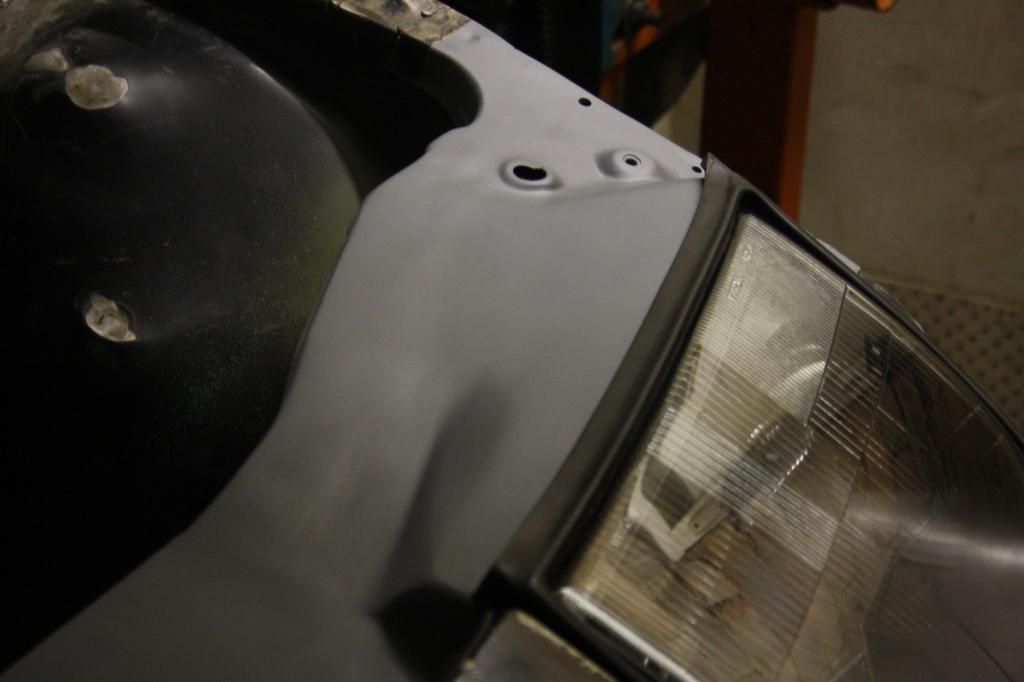
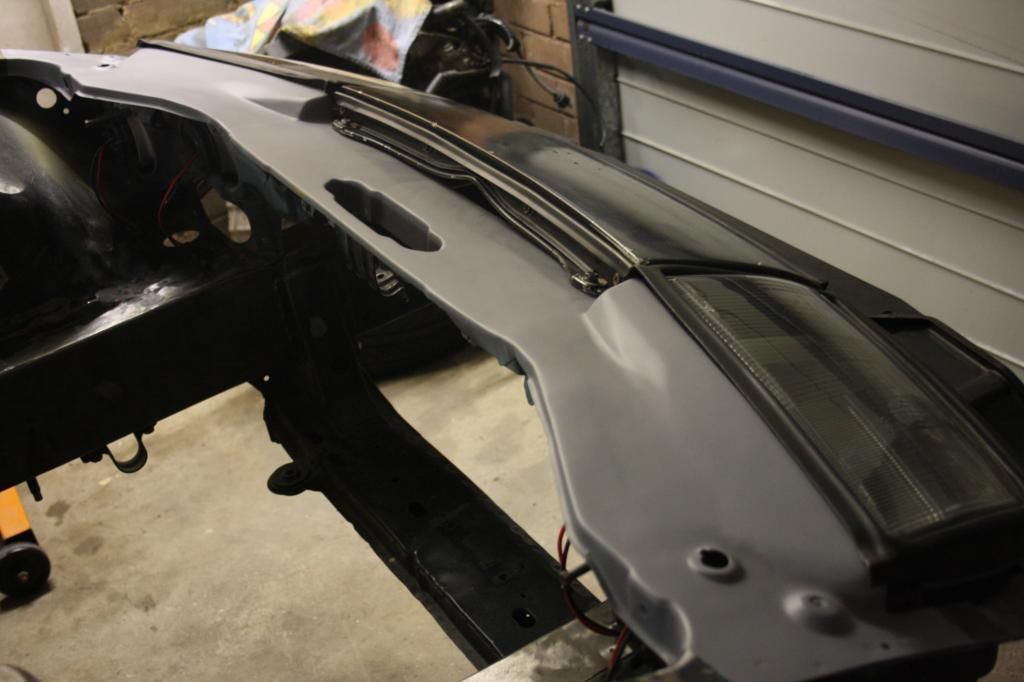
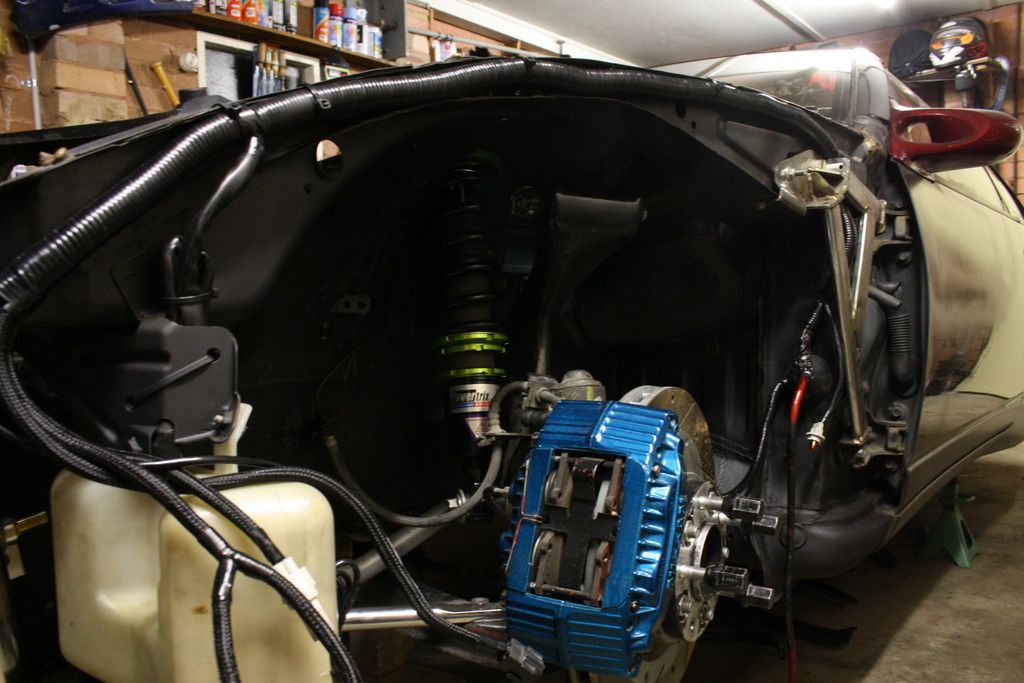
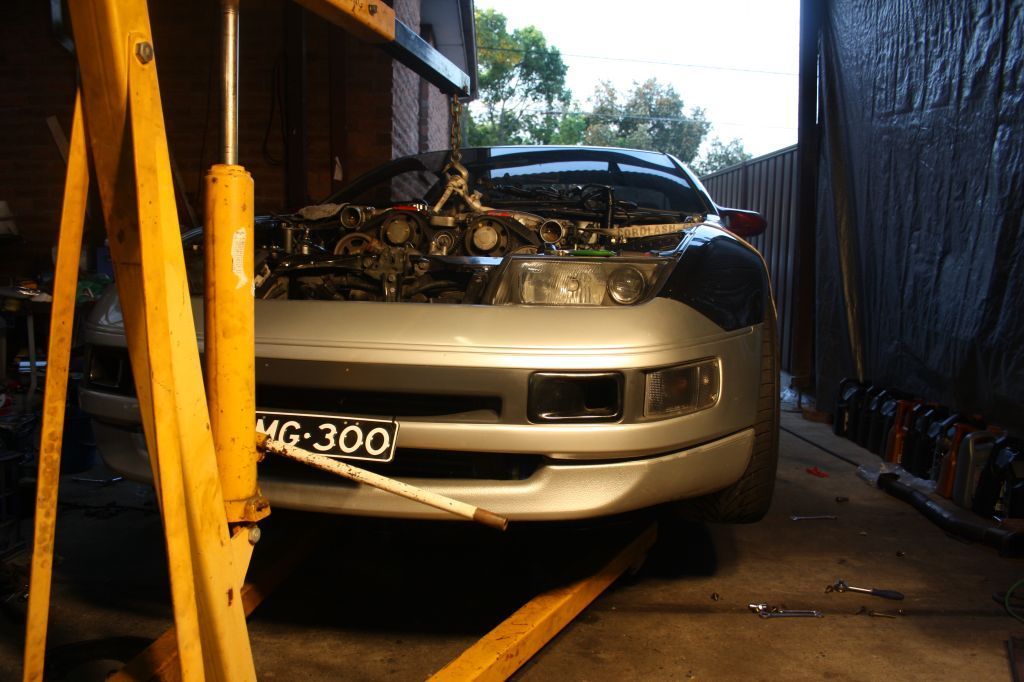
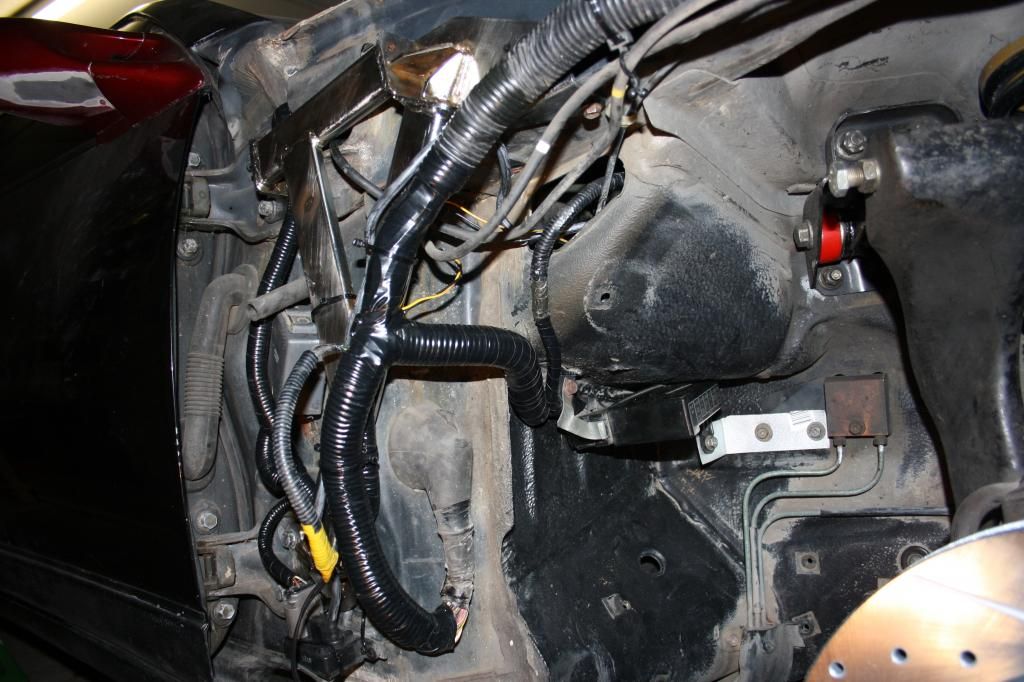
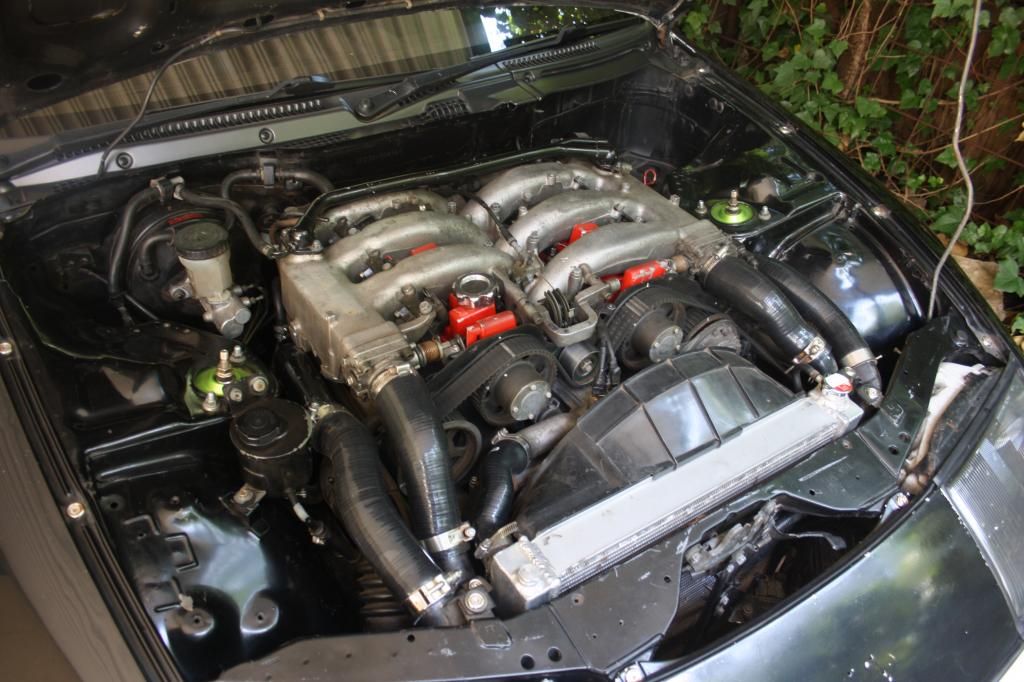
    As you can see there's a big gaping hole behind the nose panel. A few people have closed this off before but I wanted to take it a step further and extend the support over the backs of the headlight housings too.


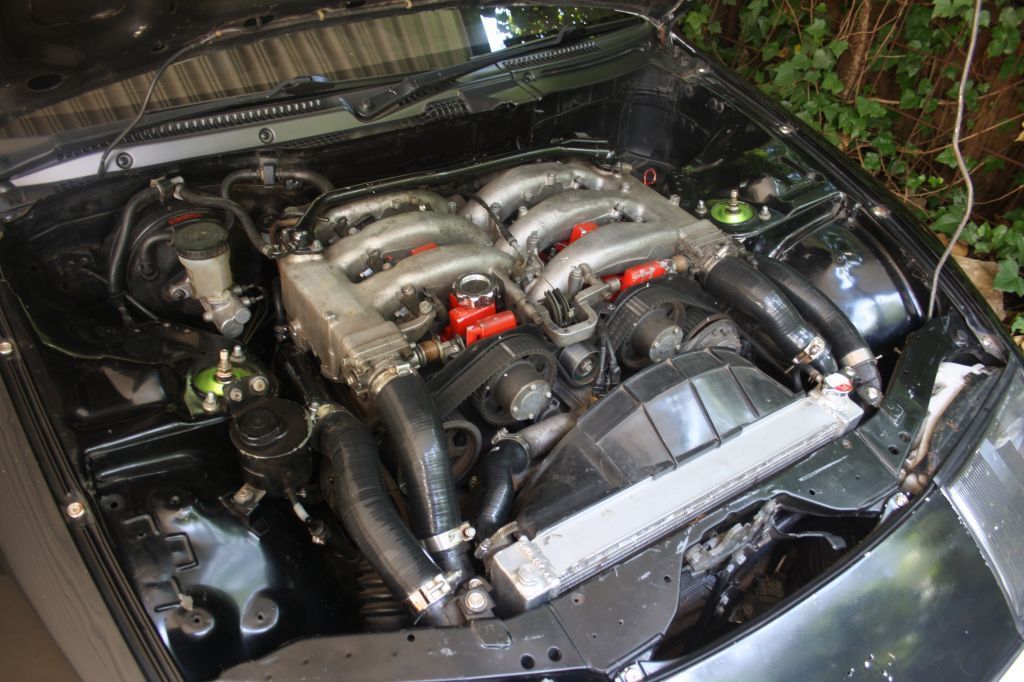
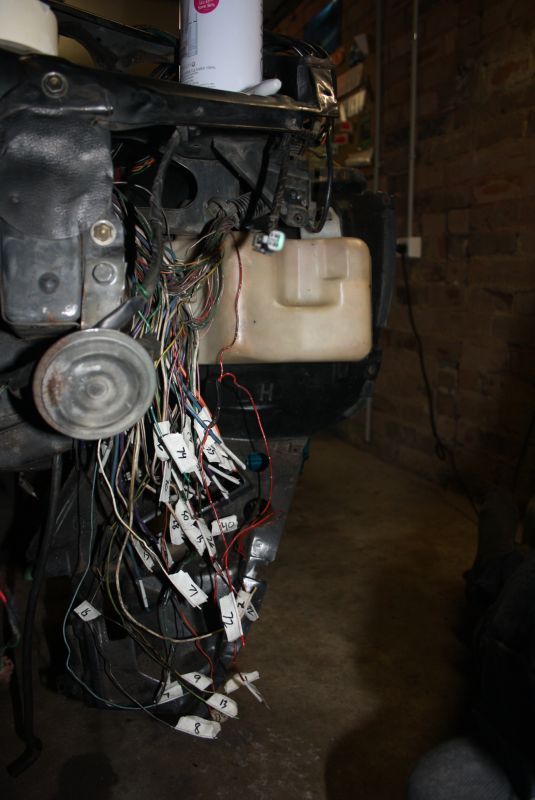
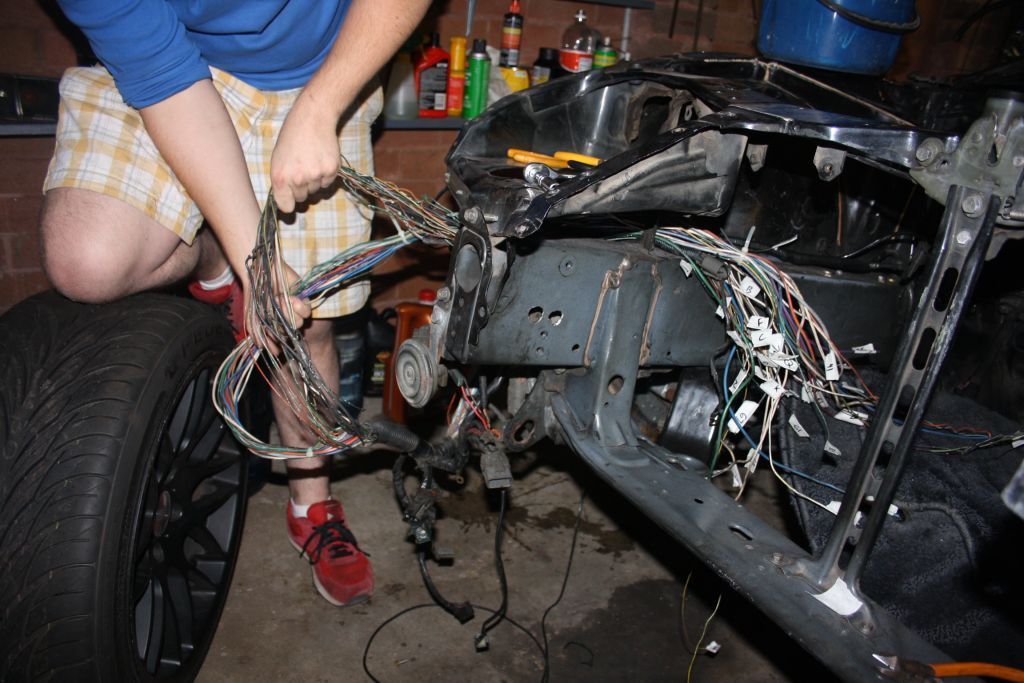
    part 1, cut up a wreck.


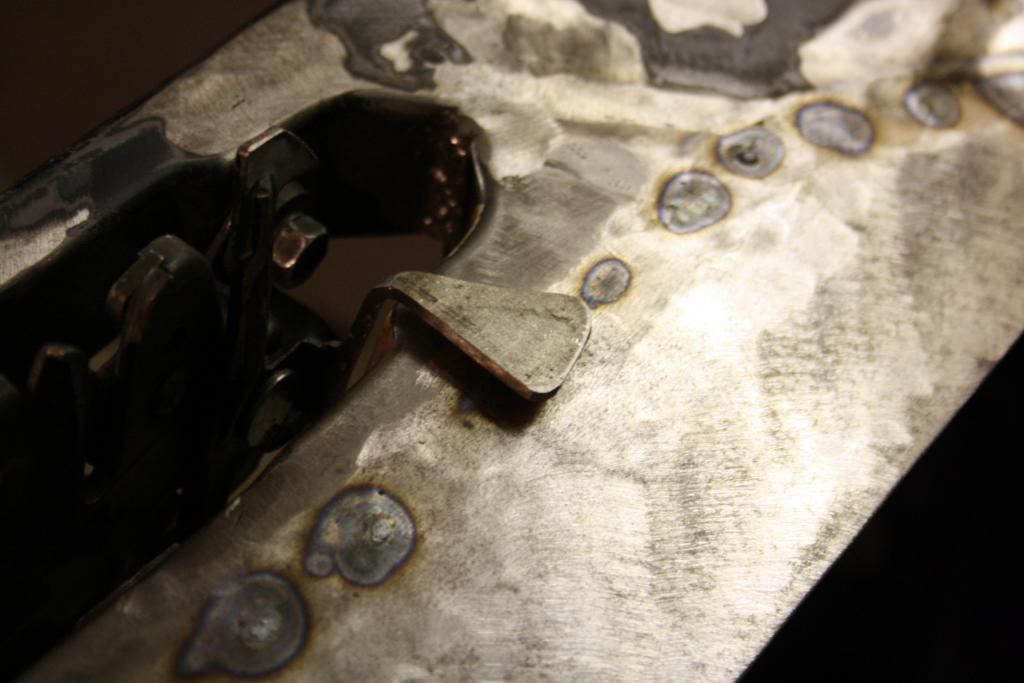
    The hood latch is staying and I wanted to mirror its cut out while closing off the surrounding area. like a permanent, welded in air guide. I'm really not into hood pins from an exterior aesthetics standpoint and there's no way I'd put them in so I could clean up the looks of the bay.


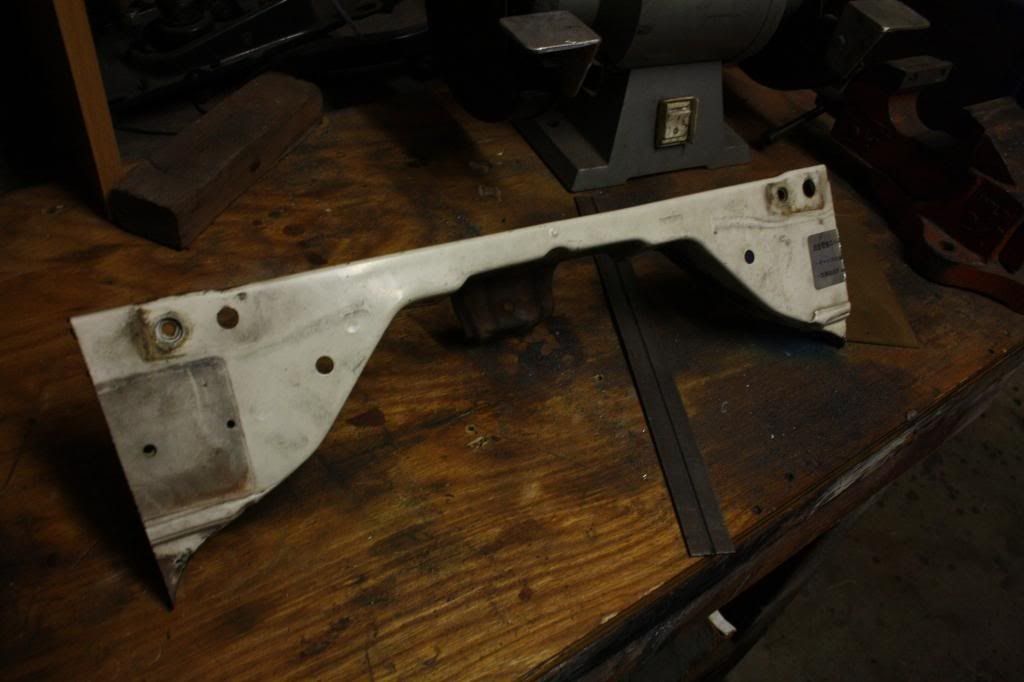
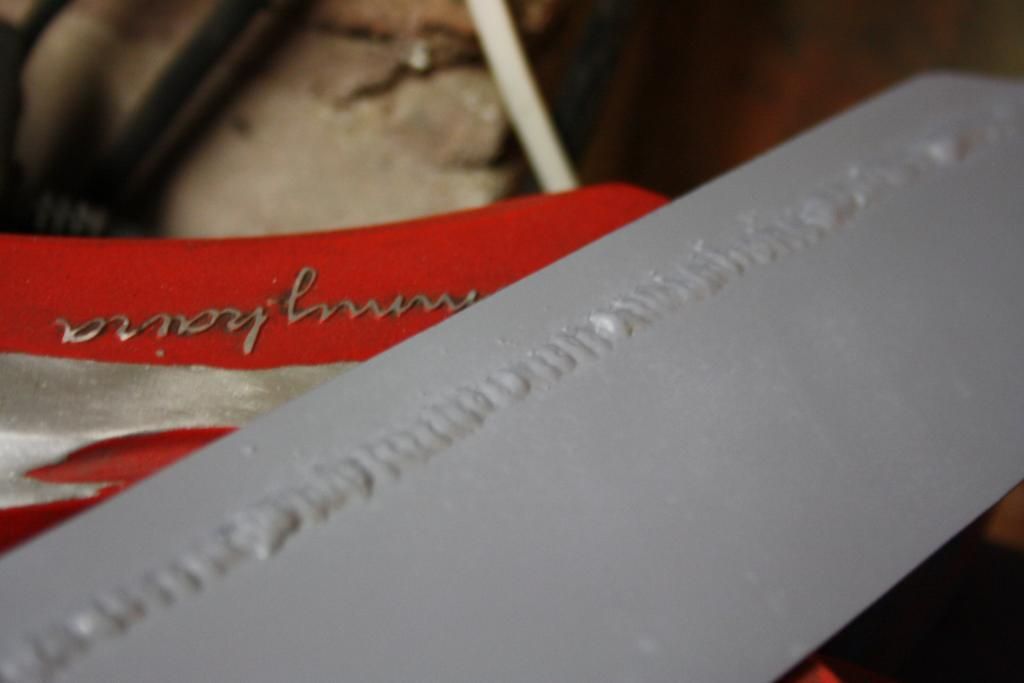
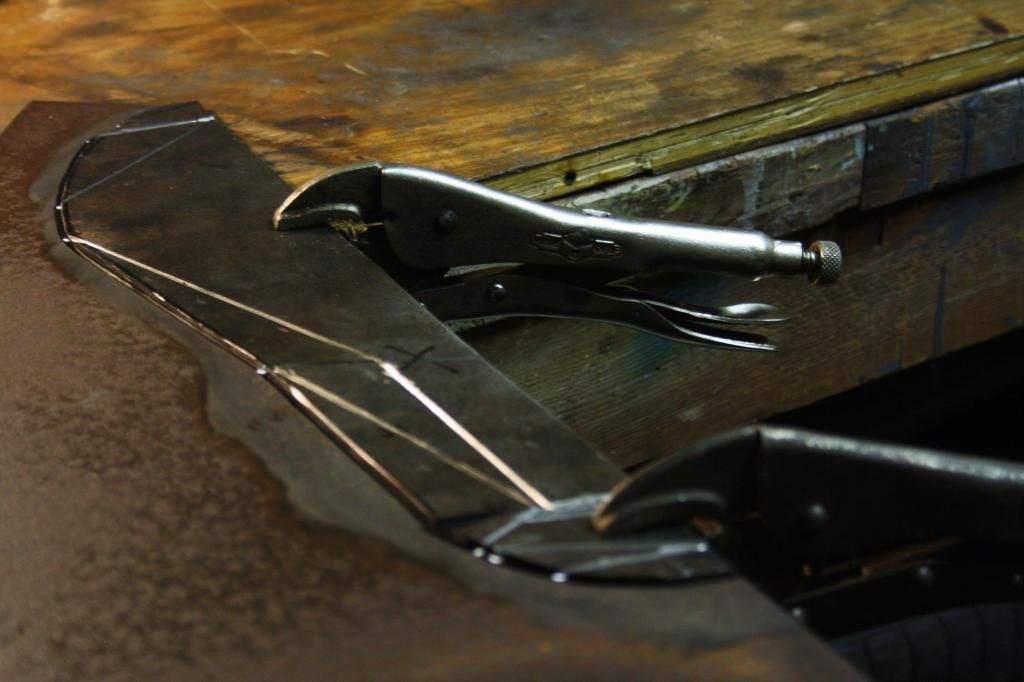
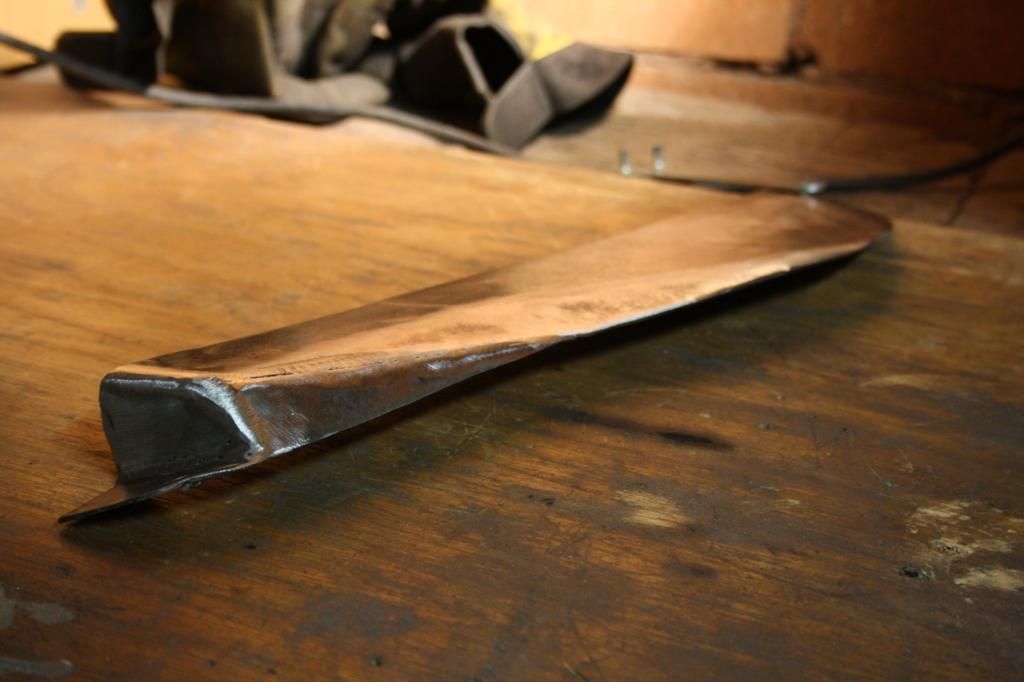
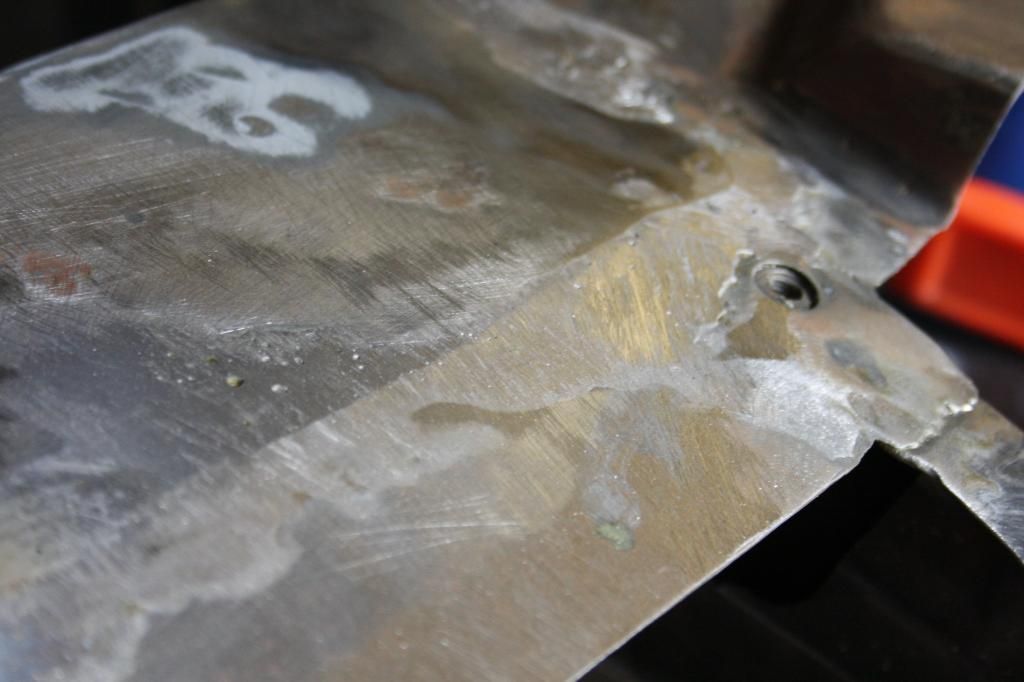
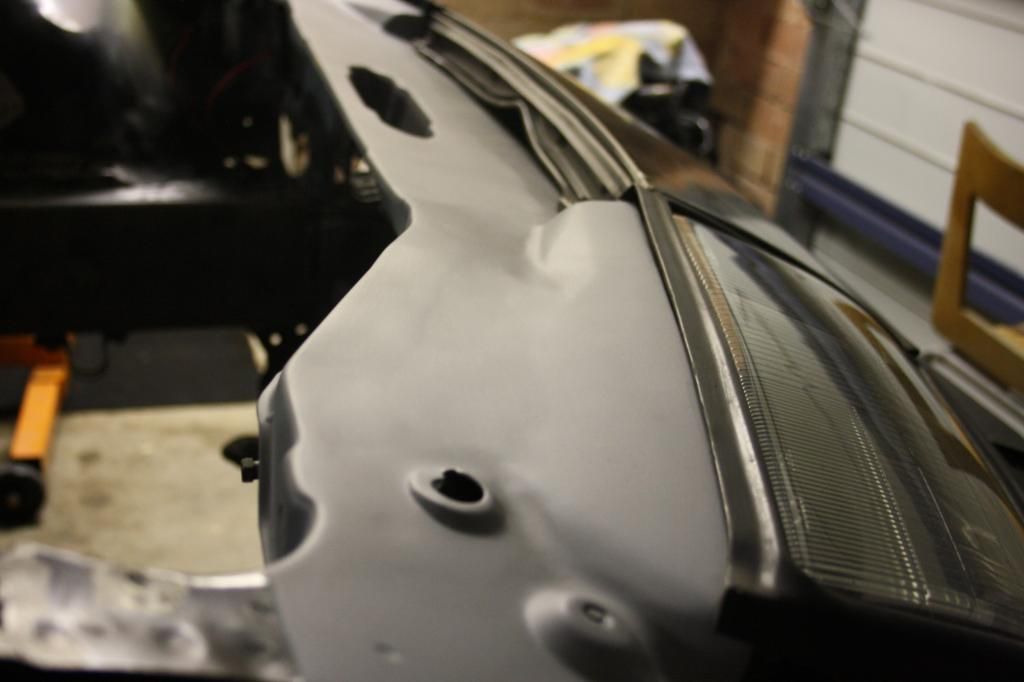
    What better way to do that then with the exact same OEM shape... the doner car's front end was bent up, amazingly only the centre of the rad support coming out unscathed. Getting better with the MIG, but still room for improvement.


    continuing from the last piece, the centre rad support extension was bent up. It covers up to just under the nose panel, so there're no gaps visible once the car is assembled.


    simple bends and simple weld makes for a happy anti


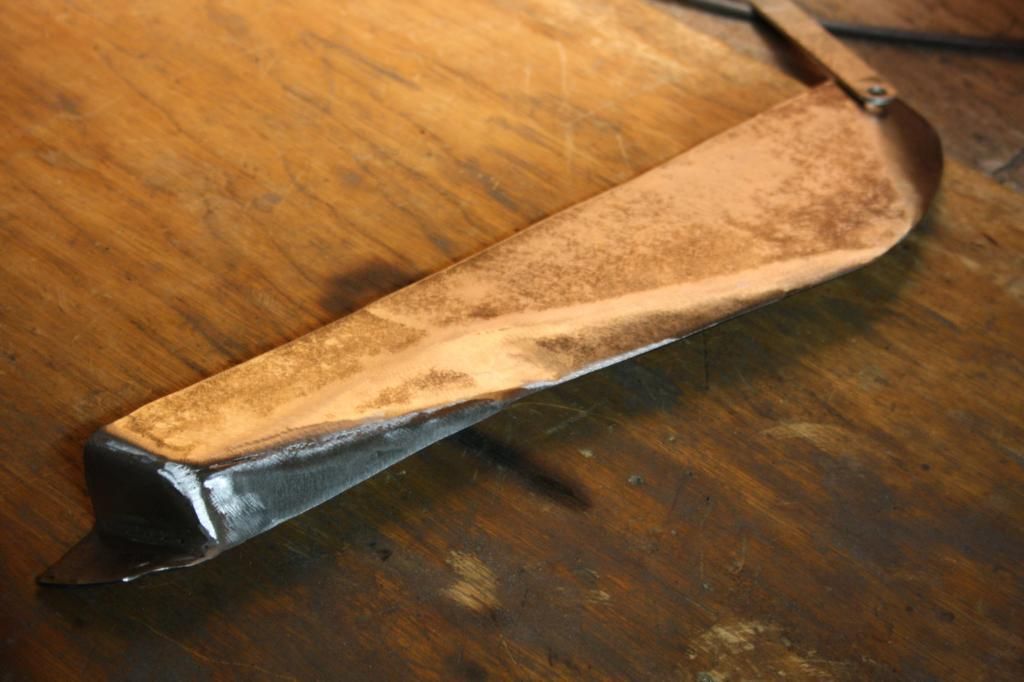
    before the piece permanently attached I fully welded the underside so the bend could be smoothed down later on.


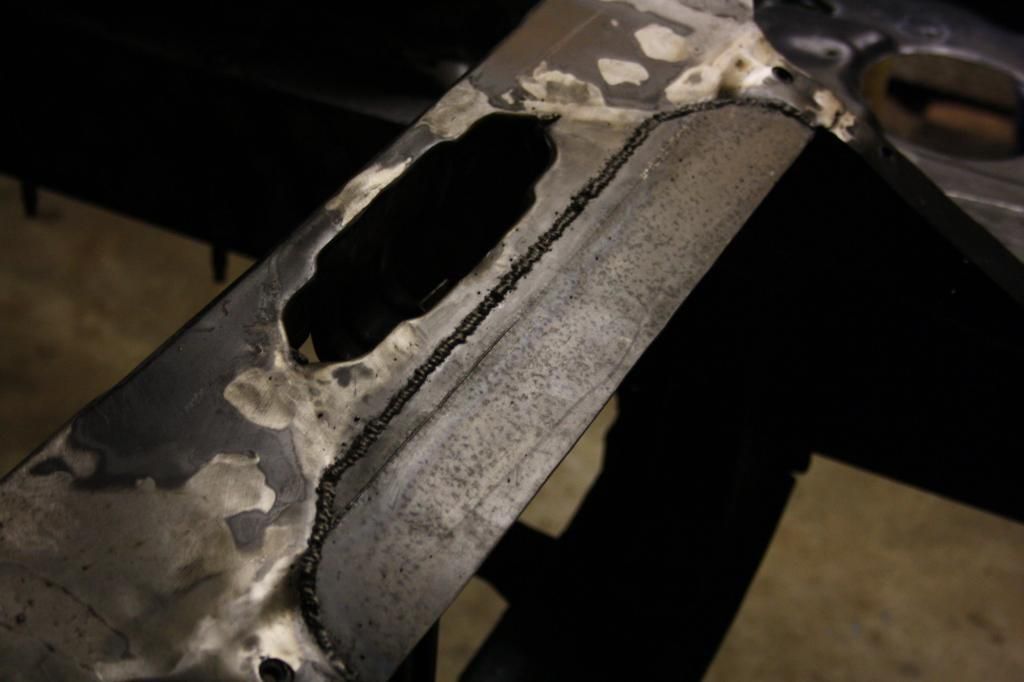
    plenty of "measure twice, cut once" went into final positioning of the panel


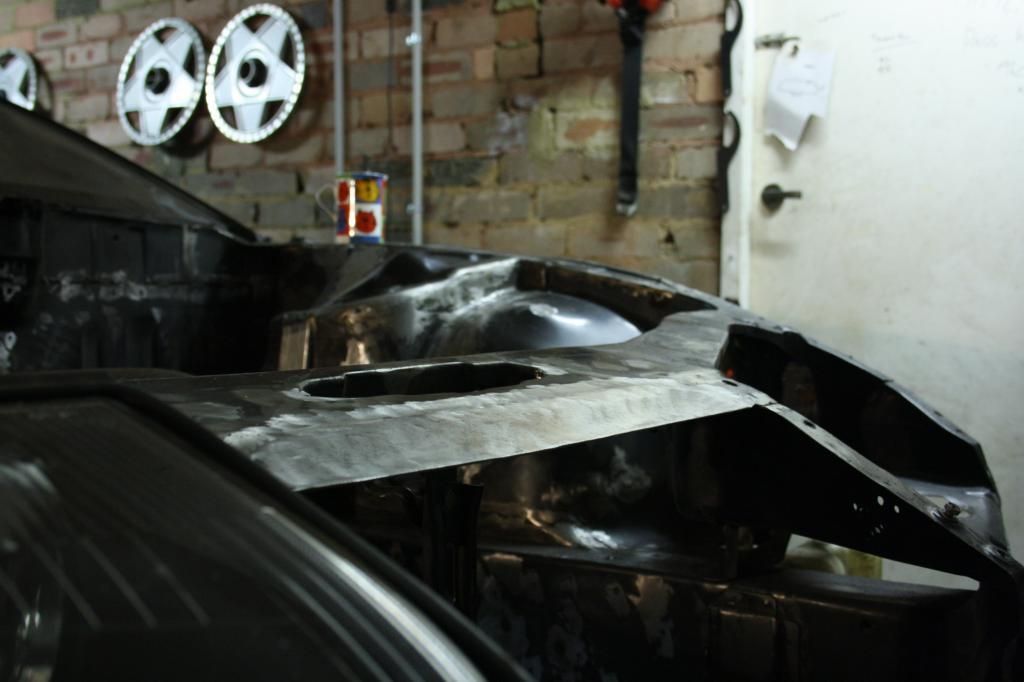
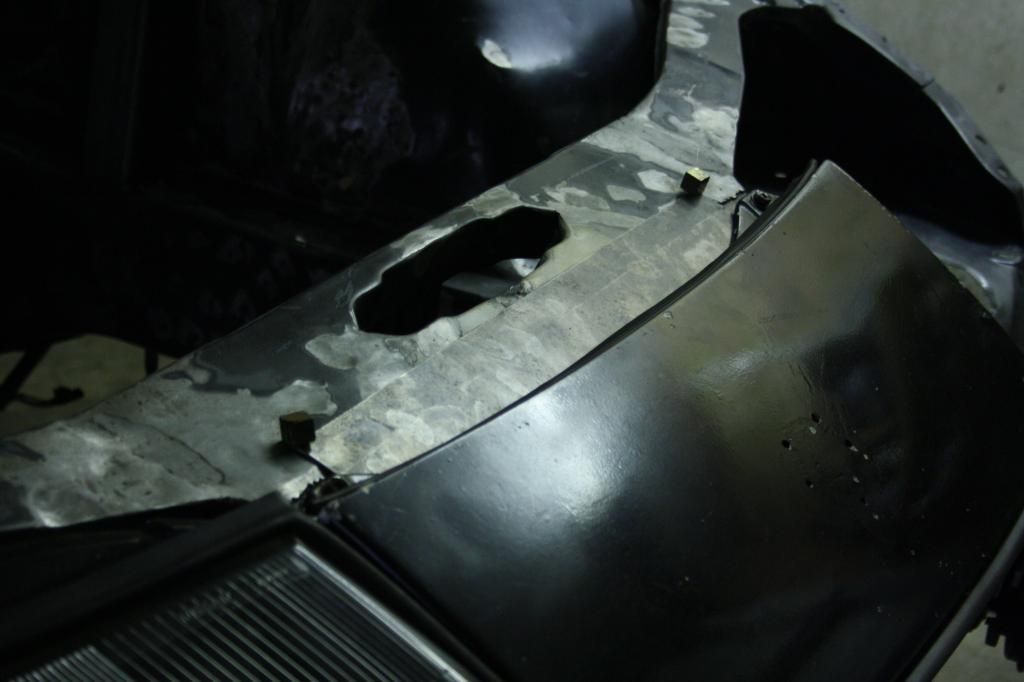
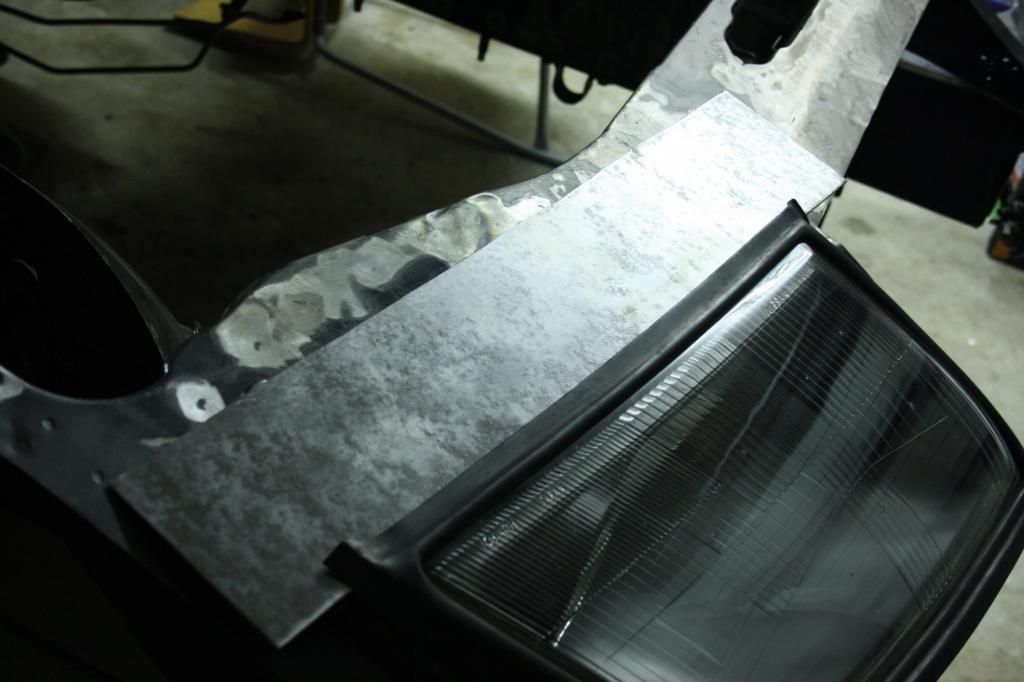
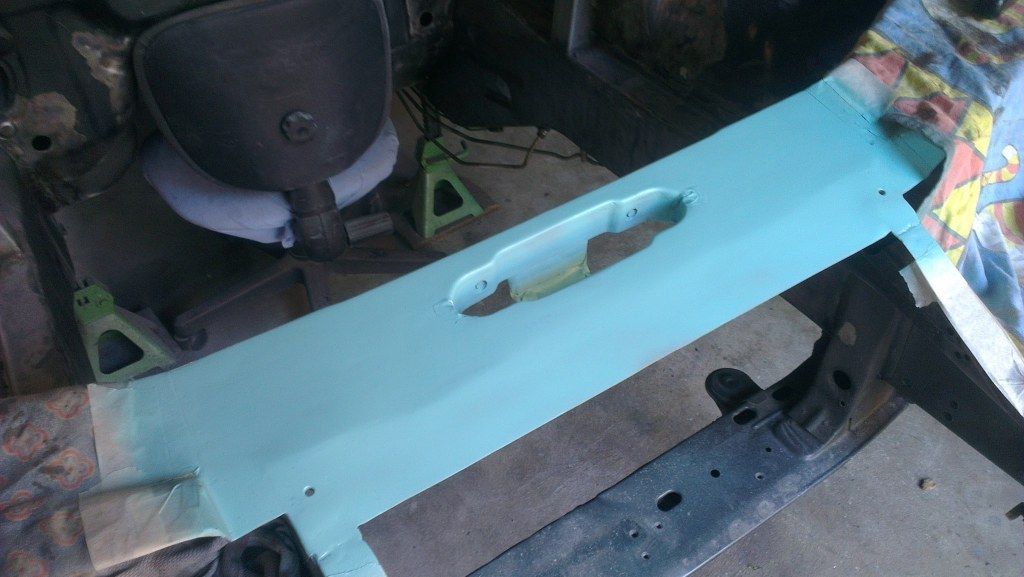
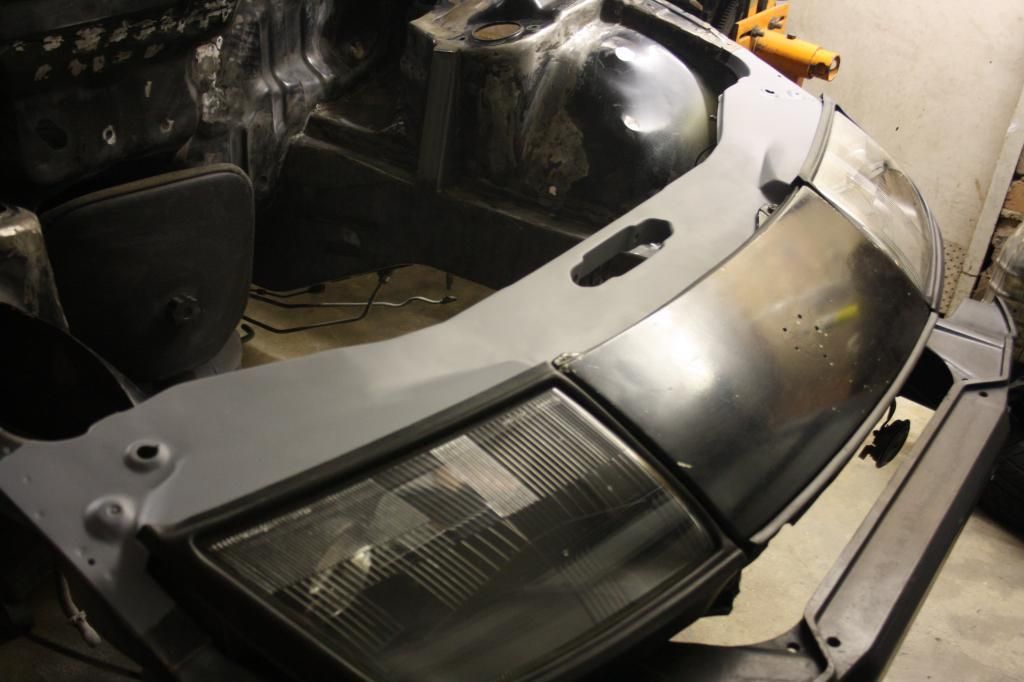
    aaaand fully ground down ready for a touch of lead, filler and primer. next bit was extensions for the upper rad support to cover the backs of the headlights.

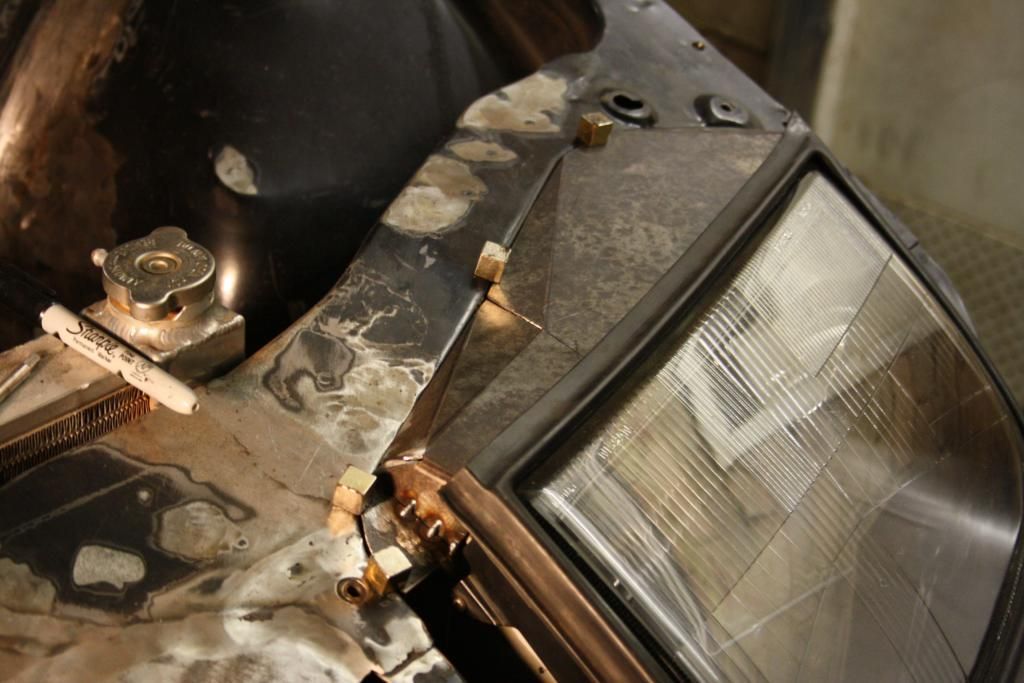
    this will mean the entire upper rad support is the same width as the new centre section and some uglyness behind the light will be covered up.

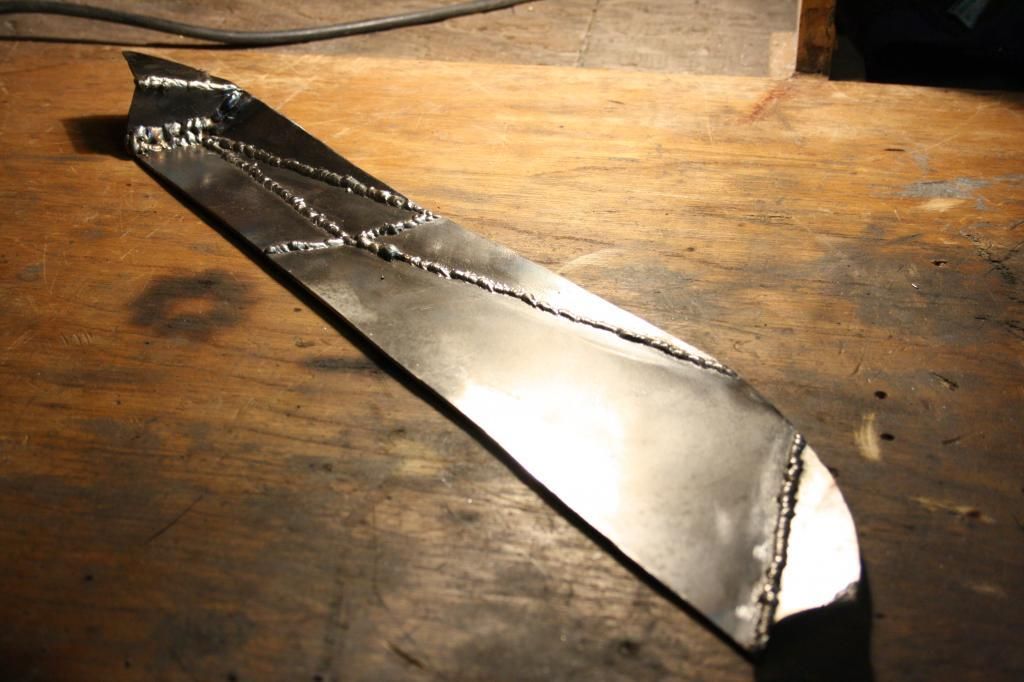
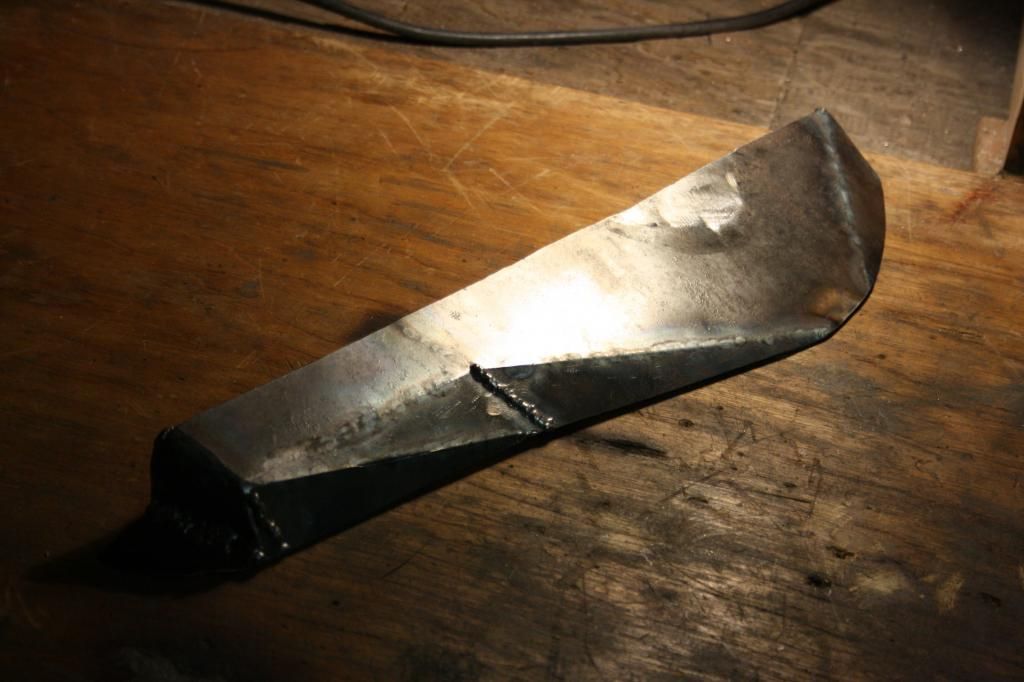
    in terms of the actual process I started with a rectangular piece of 15 gauge (1.8mm) mild steel and slowly bent it to suit. this was actually a much more complex shape than I initially thought and by the end of it there were a good 25 or so bends.


    also not to plan was my inability to bend this stuff by hand, haha. to overcome this I traced out a straight line on the back of the panel where I wanted to bend it, then ran a cutting disk back and forth along said line a few times to thin the metal. it then bent exactly where I wanted with ease


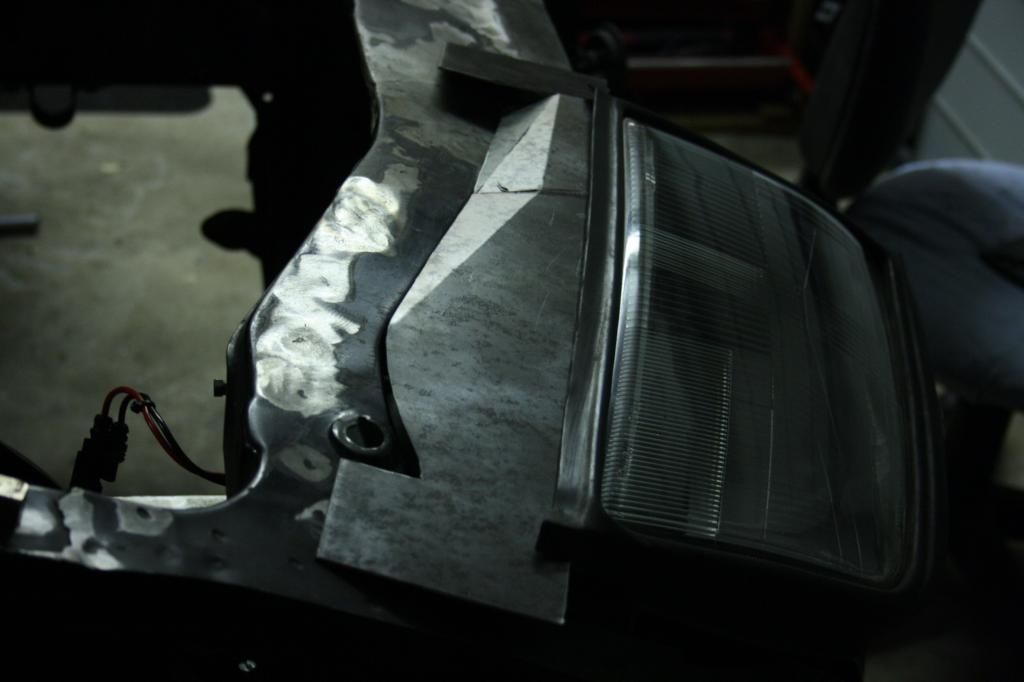
    at first the plan was to work from the rad support towards the headlight, until I realised it would be ten fold easier to work back from the only straight edge (underneath the headlight weatherstrip) rather than to create one.


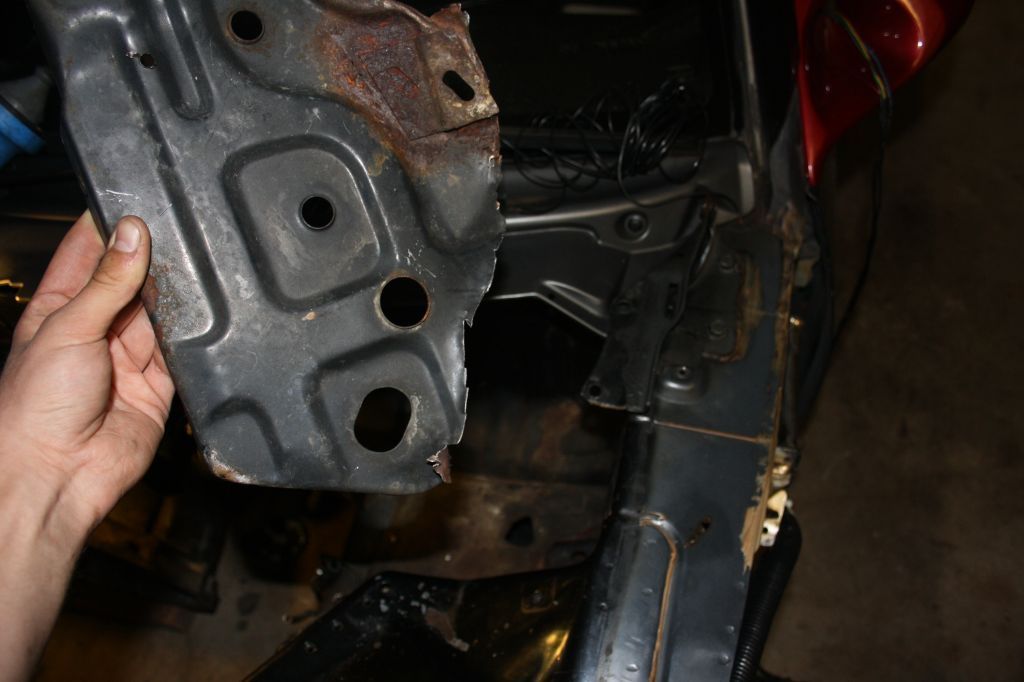
    the back of the headlight had have as much height taken off as possible. this including removal of the top weatherstrip retaining bracket with workaround devised, cutting down some a sizeable amount of glass below it and converting the underside mounting brackets from studs to nuts. the latter means the headlights can be slid straight in without having to lift the front section to slot through the pair of studs. every little bit helps, it's a tight fit.


    with one side completed the plan was to flatten out the piece and use it as a mirror template for the other side. then reform, back weld for strength and additional thickness then grind down topside to hide the obvious fold lines. it can of course finally be welded into the car.


    So I went and did just that.


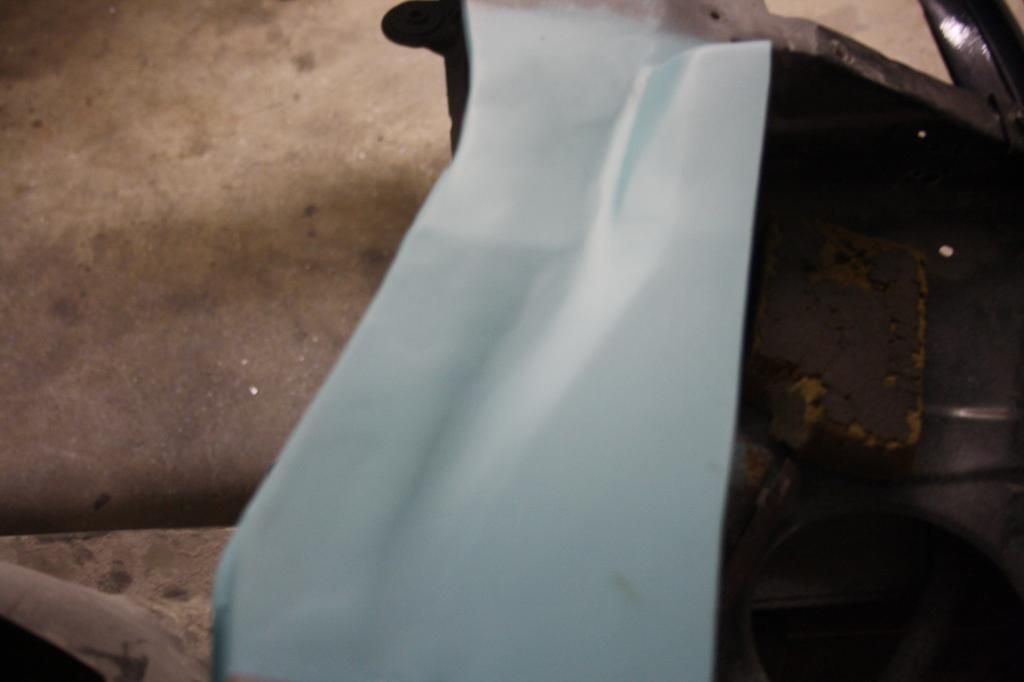
    Back cut, bent up, trimmed to suit. Unfortunately in the end despite my best efforts I was unable to make the covers from one piece of material. After I was finally happy with the positioning the two innermost sections were made separately as the original pieces turned out too small

    You can see the new portion tack welded in place. funny talking point in my garage is the gold plated magnets I use to hold metalwork in place. they are disconcertingly strong, left over from a home made rail gun project of mine when I was a kid, haha.


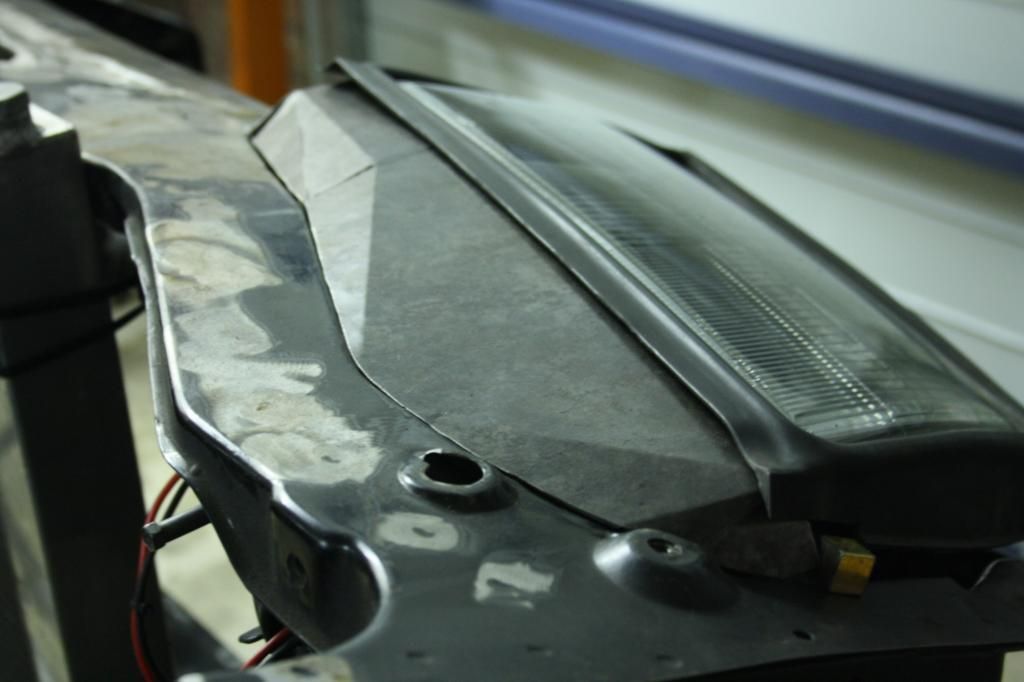
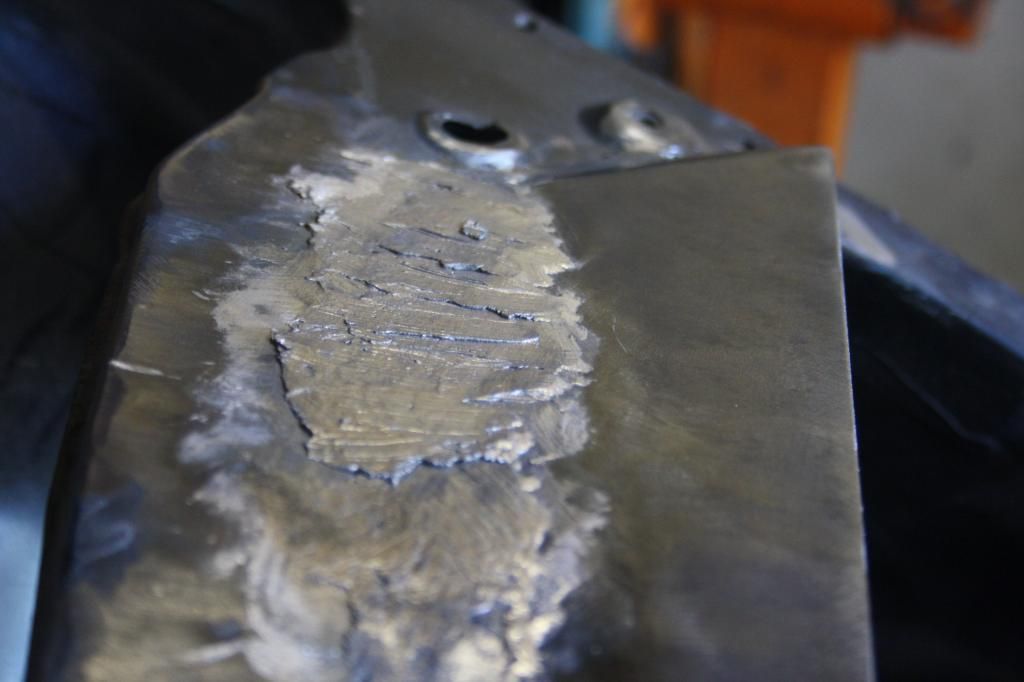
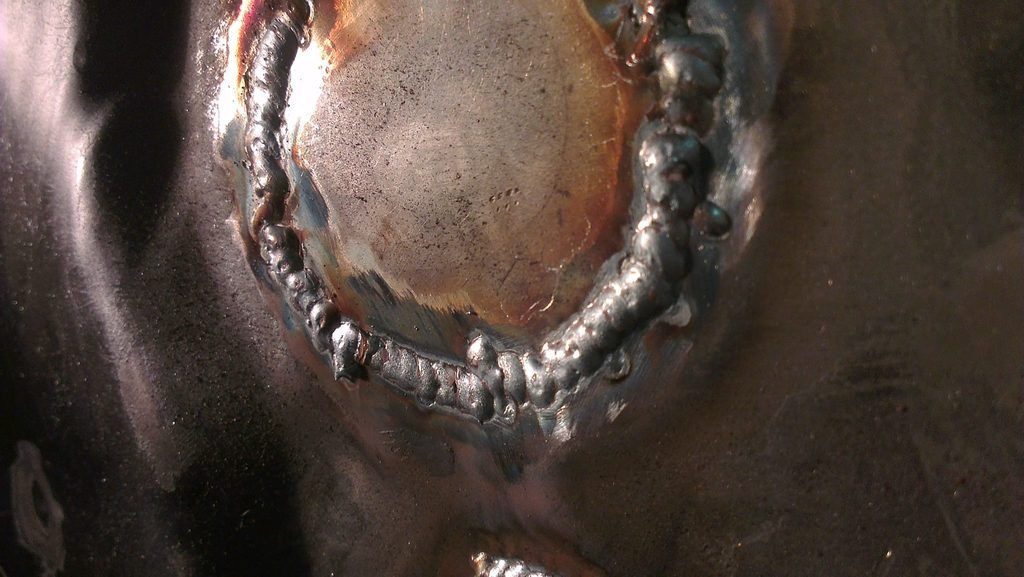
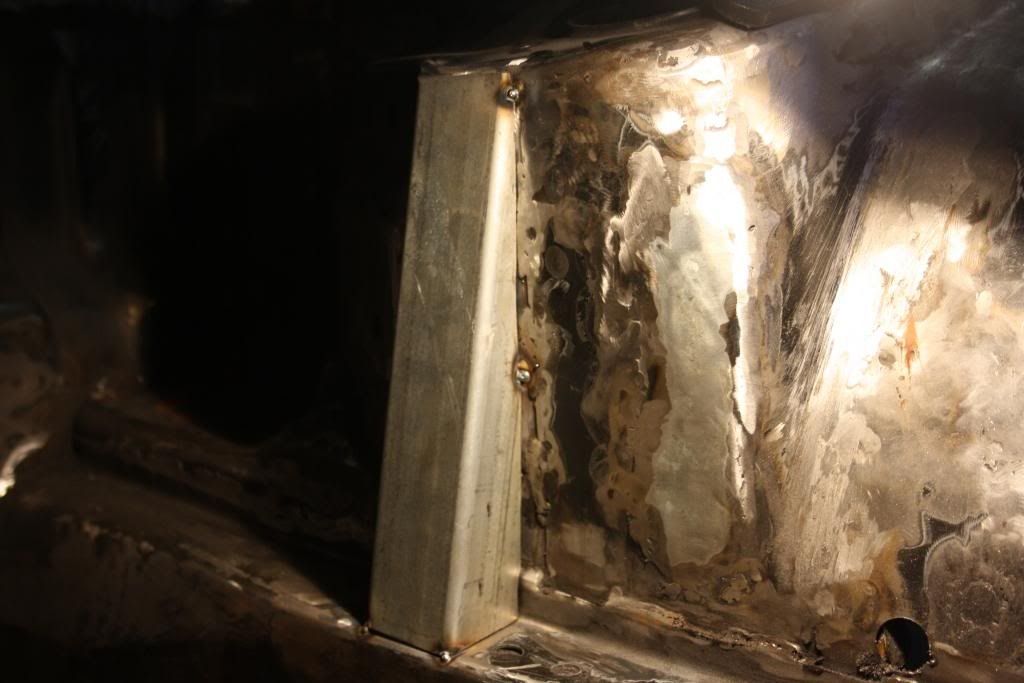
    Back welded (and top where necessary) and ground down


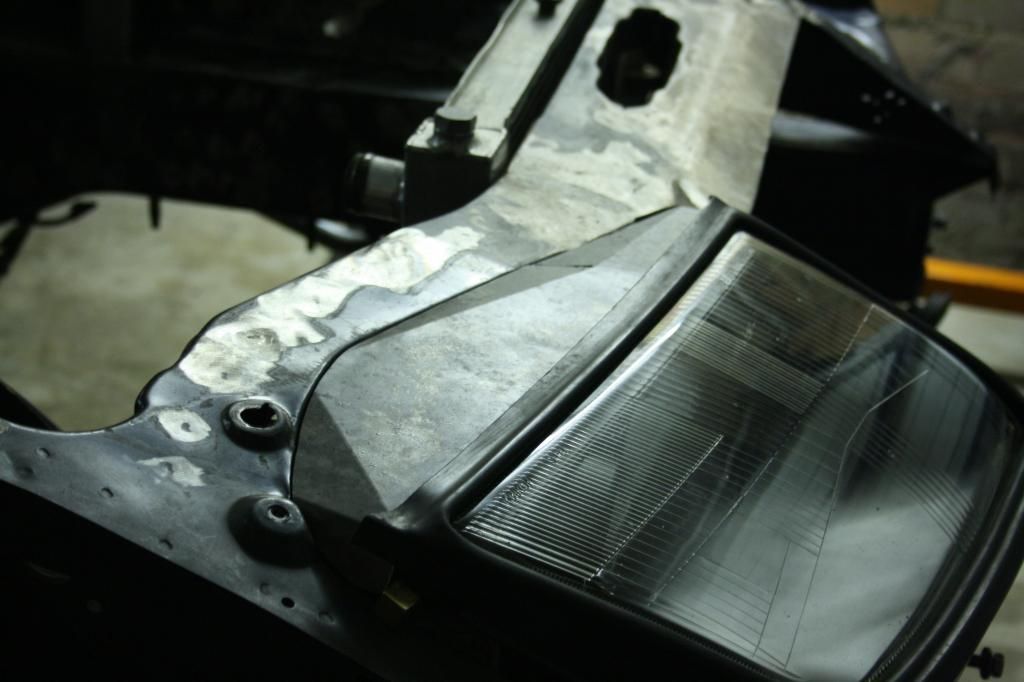
    The passenger side headlight was welded in first. hugely satisfying after all the work to actually start the final welding!


    getting better with the mig


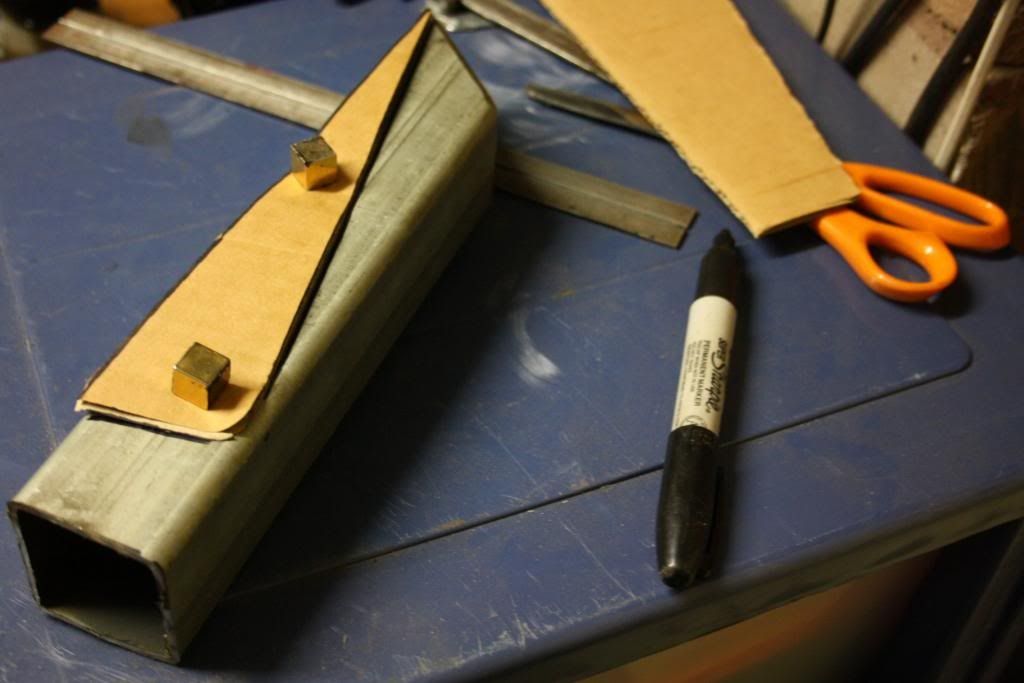
    One of the parts of the front end seal up project was that I had to make a custom hood latch lever as the original unfortunately fouled on the new metalwork. Things you never could have called yourself doing when you buy a car...


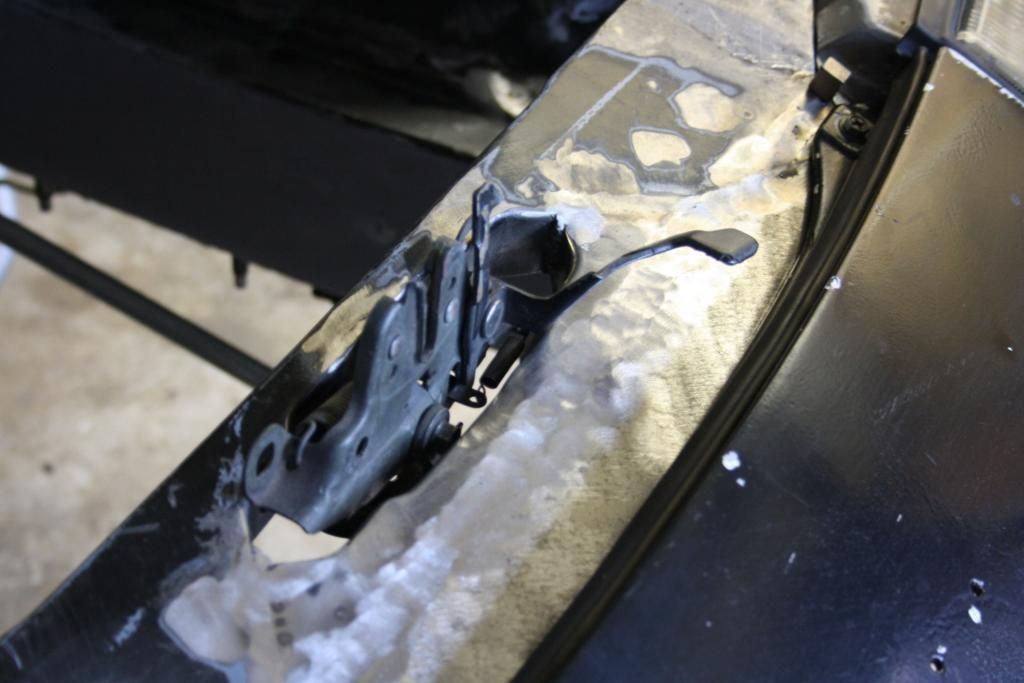
    Chop chop, had to redrill the locating spring for said lever and mount it further inboard too.


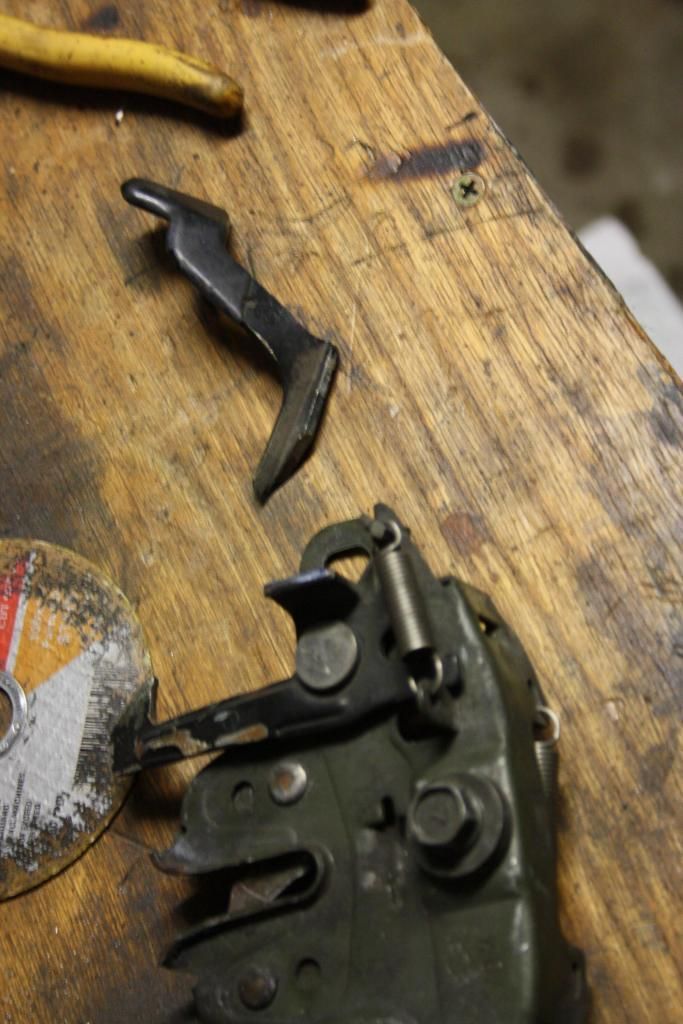
    New lever was cut from the same box section steel that I made the front tower supports from.


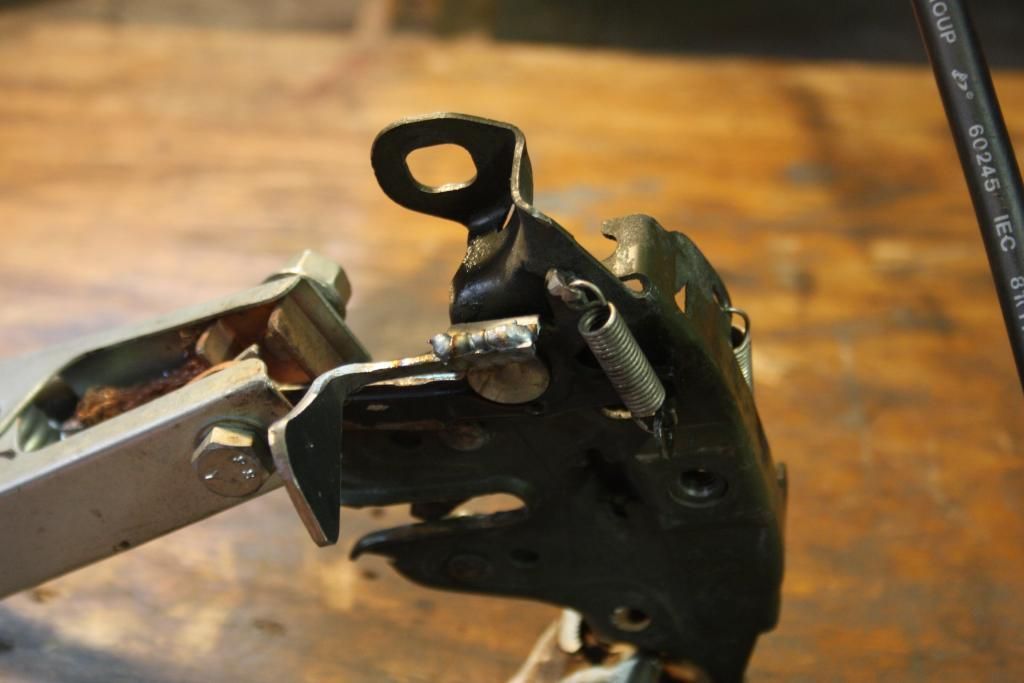
    welded up, clears now and is reachable. not sure what to do about final shaping at this point. suggestions are welcome?


    as you can see, once the covers were welded in and ground back I back welded the underside for some extra strength.


    So next up... digging out the lead work. I'm sort of getting the hang of it - it's all about heat modulation. There's a small window between the lead filler being not hot enough and crumbling under force and too hot and simply running. workable temperature is reportedly between 180 and 250*C.


    When working the filler down, filing 100% is the go. Cuts through more material faster and the chunks coming off are too large to be airborne which is a plus (poisonous and such). sharp eyes can see where the transition between filler lead and steel below.


    Finally, after a final skim coat with regular body filler to make it 100%, PRIMER. P-R-I-M-E-RRRRR. This was a really satisfying thing for my bomb-hit-it-bay.

    With the outer sides left the driver's side was tackled first. Body soldered, filed, soldered, filed, filed, filed, filler skim coat, sand, skim coat, sand, sand, sand, high fill. with all that said and done I wasn't entirely happy with the outcome first time around;


    sorry for the shitty photo. as you can see, there was a very visible dip present through the transition from OEM to aftermarket metalwork.

    after looking at it from many angles (none of which left me any more satisfied) I cracked on with the passenger side, determined to go at it a different way.


    Layering on the lead here. after a bit of practise this is how the raw filler looks, being applied by blowtorch and roughly shaped with wooden paddles. the excess is then filed down and finally smoothed with high grit sand paper. Hard work but if in 1000 years the remains of my car are found, these leaded components will likely be all that's discernible.


    much better

    a wire wheel made short work of the high fill and bog and I redid the driver's side shortly after.


    and there you have it, custom upper front end finished.


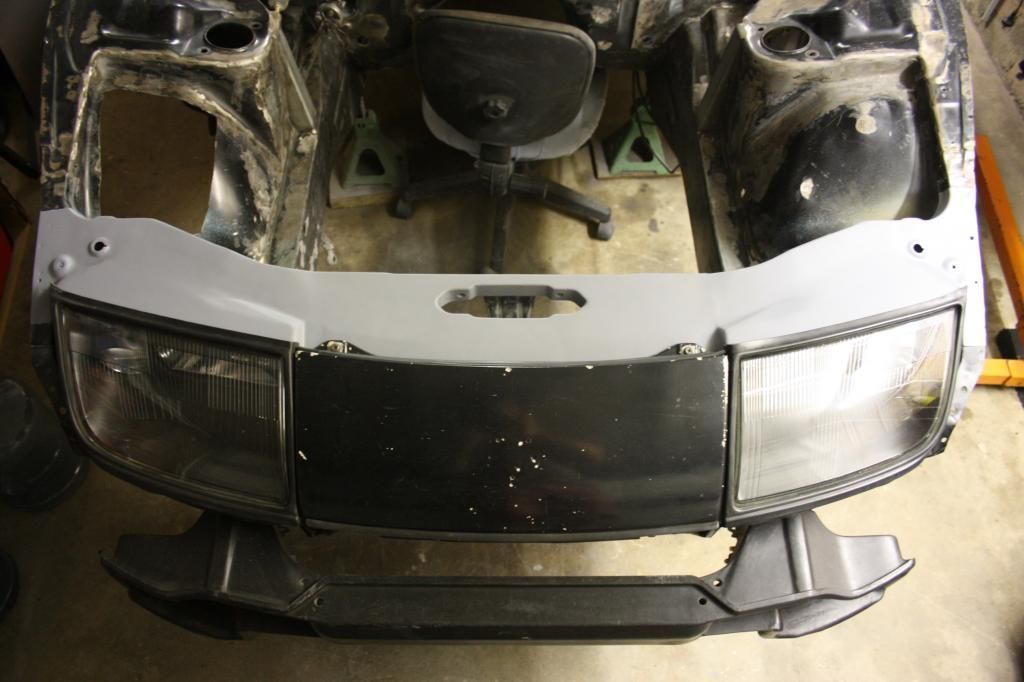
    I am very happy with it. Some time down the track as a cherry on top I want to close off the ridge in the underside of the nose panel (visible in the last photo) and have it flush with the metalwork. Silly to have that little detail off after all that work.

    -A

    Leave a comment:


  • LCG
    replied
    Originally posted by anti.engineered View Post
    Sire Pink Panther.


    Subscribing.

    Leave a comment:


  • anti.engineered
    replied
    So now the fun shit starts. I tucked just about everything out of the bay while I had the last motor and promised myself that I'd redo the metalwork if the motor ever went. So when it blew very shortly after I pretty much couldn't hold myself back.

    I bought myself a gas MIG and things started out really easy.


    Out came the battery tray.


    and my buddy cut out a big lump of ugly from my driver's side wheel well not long after I cut another big ugly lump form the strut tower just behind it.


    Trying to learn to weld on paper thin vertical metal was seriously, seriously damn hard. This was one of the better runs but I did cut out a bunch of shitty stuff that I did and ended up redoing it. Not proud but it is what it is.


    For the remaining hoses that have to run outside the bay I am doing everything I can to make them disappear. In the case of the power steering feed line that means routing via the frame rail.

    So after looking at the bay with a few things done and a whole lot of shit left to go I was sick of it being such a mess. About this time a wise car guy taught me to do just one thing at a time and nothing else 'til it's done. If you don't you end up with a whole lot of mostly completed jobs, no accomplishment and you never really know where you're at in terms of progress.

    In the beginning I just hopped from one part of the bay to another cutting off studs, welding up little holes all over the place and it didn't take long for the whole thing to look like a big damn mess.


    so I started breaking up each part of the bay that was getting modded and decided to not work a different section 'til whatever part I last started on was done. this started out with some box section supports being welded into the strut tower, replacing the small flimsy factory crap.

    There were a few parts of the metalwork that fell under the "that'll take longer to make look nice than it will to cut out an fabricate a replacement." the piddly factory strut tower supports fell under this heading


    dicing up some replacements from 50x50mm box section


    fitted up and tacked... the strut tower itself is far from flat, so there's a fair amount of flap wheel finishing involved to get it even close. should be a good amount beefier and help make up for a lack of front strut brace.

    -A

    Leave a comment:


  • anti.engineered
    replied
    Alright time to really catch this thread up. With the old motor going kablooey and me reeeeally taking my time building up the shell I've also put some good money into the new donk. I just want a street car, nothing mental and not a lag machine and still totally liveable. Mid-range cams, hydraulic lifters maintained but still eating air like tom brady eats pussy.

    - 0.5mm (20 thou) oversize JE pistons
    - Eagle rods
    - ARP main and L19 head studs
    - ACL race bearings
    - Ferrea 1mm oversize intake/exhaust valves
    - Ferrea valve stem steals
    - Ferrea titanium valve guides
    - Ferrea bronze valve guides
    - JUN valve springs
    - JUN 264*/9.5mm camshafts (god these were dear)
    - Tomei 1.2mm head gasket
    - Tomei adjustable exhaust cam gears
    - BDE intake cam gears
    - New OEM hydraulic lifters x 24
    - acid dipped block, decked block/heads etc etc (standard race rebuild stuff)

    very soon my buddy and I are going to be going loco on the heads. he's been building engines at home with his dad since he was a kid so so I'm really looking forward to taking this on with him. my approach will be something along the lines of "cut the guts out of them."


    forged pistons are one of those things that you hold and just think are thoroughly cool. these weigh next to nothing and are machined to such precision that even german engineers would get a little excited at the sight of them.


    love the packaging on this JUN stuff. came with a super nice decal too (not that I'll use it, but still). these were actually quite cheap too (by JUN standards anyway, lol).


    these fucking weren't


    Keen to get started on the porting. The bottom end is just about good to go so there'll be nothing stopping me having this thing together. Truth be told though I'm in so deep with the shell that I've really let the motor build go slowly. Even if it was ready tomorrow I still probably wouldn't have the motor permanently in for another year.

    Lastly, something I'm super looking forward to using;


    I picked these up as part of a big single kit made by a fabricator on the other side of the country for his own personal Z32. now I don't have that much interest in lag machines so when it initially went up for grabs I wasn't that keen 'til I realised what I could turn it into a compound kit. I get my jollies from taking on shit found on the road less travelled and for those into boosted cars that love response but also dig power, you can't beat a compound. I was never keen to get into the massive amount of fab to make it work happen for the first time on a VG, but with this as a starting point it's a total game changer. i'll be enlarging the wastegate port to 60mm then making up the rest of the plumbing for tie the two turbos together. the primary (small) hairdryer will sit in the standard low mount position, and larger unit in the battery tray.

    -A
    Last edited by anti.engineered; 06-27-2015, 08:18 AM.

    Leave a comment:


  • anti.engineered
    replied
    great to see it cleaned up and out of the way, yeah. hopefully when I go over it and replace the solders it should be as good if not better than OEM.

    Leave a comment:


  • Hellalime
    replied
    Jesus man, the effort here is sweet, nice Z man

    Leave a comment:


  • TeckniX
    replied
    Some serious work always involved with wiring, but good to see it all cleaned up

    Leave a comment:


  • anti.engineered
    replied
    So because I'm a smart guy I decided I should do I rewire. All in all I spent more than two months doing this, approximately two days a week. Bear in mind I'd never done this before and was figuring out the method as I went along. Luckily for me I had by buddy along side me for the whole job from start to finish - we were both unemployed, haha. This task became as much his baby as it did mine - I don't even know how parts of it are done because he wouldn't let me "ruin it", lol.

    this is by far the greatest and most consummate task I have ever attempted on my Z32. No single mod has ever taken so long, been as complicated, required as much on the spot thinking or dedication as this one.

    few reasons I did this:
    1) accessibility - having the boxes in the fender/behind the bumper is a pain
    2) reliability - they have potential to get wet there
    3) doing things properly - less dodgy than stuffing them where the loom will allow
    4) cosmetics - there's a very large collection of wires that runs across the rad support which I was able to remove
    5) performance - I had the large relay box under the nose panel, blocking air flow to the radiator
    6) space - between the twin intakes, washer reservoir, catch can and power steering reservoir I have very little unused real estate behind my front bar!
    7) because the benefits are undeniable compared to the argument against

    This is how it started, we got up to about 100 different connections cut.


    Felt really good to reef out all the wiring from across the rad support. all the wires were either pulled back, or extended and pushed through the passes from the fender well to the cabin - so they could reach the passenger footwell.


    fuse box cut out, ignore my beater clothes haha.


    modified ECU panel to hold the boxes in their new locations:


    I set up a negative terminal box next to the ECU in a spare space so I could with ease run all the earths to one place that wouldn't leave me with corroding ring terminal issues. The large red cable pictured goes to the block, box and battery negative. honestly it's probably not necessary; the chassis is more than a sufficient earth, I carried out the task this way for personal (irrational) peace of mind. don't mind the orange cable ties; quick mockup solution.


    Repurposed: I removed the bracket that holds these two plugs near the rack, modified it and bolted it back on inside the driver's wheel well. the wires now route back through to the cabin via where the AIV's used to be located. the sub looms on the other side of those connectors (going to the components) weren't modified, so replacements are a quick plug and play. the same can not be said for the ABS sensors unfortunately; they were hard wired to the front end loom.


    The gearbox loom was also hard wired into body loom, fed through reused OEM heat shielding with the starter motor positive wire:


    The only wiring remaining in the front end is for the headlights, parkers, fogs, afm, horn, indicators washer reservoir and exterior temperature sensor. now that it's not a part of another wraparound loom, the whole section can hang off the car. It was lengthened appropriately to be fed through the fender brace for extra neat points.


    Done, dusted, finished.


    Except it's not. Since starting my new job I've been hanging out with some very experienced technicians and learnt a bit about wiring which I wish I knew earlier. the whole rewire was carried out with solder, and I am now unfortunately aware that solder will not be competent long term securer of the connections.

    I'll be going through the new loom, cutting out all the solder joints and either de-pinning both ends of the wire to insert a full aftermarket replacement (thus removing the extension) or installing crimps. I have put in a large order for at Motec for their motorsport crimps, sent off for a set of ratchet crimpers as well as a few more supplies.

    fun times.

    -A

    Leave a comment:


  • anti.engineered
    replied
    alright so last little bit of "round one" with the zed.

    when i picked up the car, I planned to sit pretty with some bolt ons and 15 PSI or so on stock turbos. it started with a FMIC that came with the car, uninstalled and without pipework which made it lots of fun to fit haha. on the induction side I was running a HKS Vein Pressure Converter which I picked up off of Yahoo! Japan. It's a piggy back pincercept ECU which measures manifold air pressure, translates that reading into an AFM voltage, and feeds that to the stock ECU (so the car still thinks it has an air flow meter) - this allowed me to run my twin K&N's under the headlights, probably my then favourite mod to the car! mounted next to the VPC it in the glove box was a GReddy Profec B Spec II.


    on the back flow I was running china spec dumps attached to custom made front pipes, 200 CPSI cats, a UAS x-pipe resonator and VeilSide Evolution axle backs. i had the front pipes made up by Castle Hill Exhaust for ground clearance, an expensive but worthwhile investment over the 1" gap above the tarmac I had before. unfortunately I managed to smash all the way through my cats recently and it's letting quite a bit of exhaust into the cabin...


    after a while it started eating me that I'd be bumbling around with turbos more than 20 years old, so I started exploring my options. my buddy put his hand up to help me pull the engine at his place so I put in the order at Concept Z Performance for some disco potato high flows. they're a good budget mod, and give some extra go than stockies for all the effort of replacing them. as you can imagine, this is an engine out job, heh.


    i picked up a set of JECS 550cc injectors, had them sonic cleaned then flow tested. i set up a twin feed/return fuel system on the stock rail and FPR with braided nylon lines, bolted it all up together and dropped in a nistune chipped ECU so it'd run.


    maintenance

    the motor had a fresh 120 click service when I received it. the following deletes were also carried out in order to make the motor as simple and clean as possible:

    - fuel damper
    - egr
    - aiv's
    - prvr
    - pcv's
    - carbon canister
    - under manifold water hoses
    - air conditioning
    - NA power steering conversion (full 4ws removal)

    there was also 56mm rad thrown in the mix for good measure, along with a new fan clutch. all intake hoses through the system had been replaced with silicone.

    driveline

    - F1 racing stage three six puck button clutch
    - F1 racing chrome molly flywheel
    - UAS one piece braided clutch line
    - one piece steel drive shaft, brand unknown (came with the car)
    - stock pulleys, differential and gearbox

    it's amazing how much you can condense so much work...

    so next up ka-blooey went the donk. car got tuned and made 400 whp on the stock internals before the incompetent tuner fried my ring lands on redline #28.


    so this really badly gutted me at the time. i had recently moved out of home and while working two jobs + studying had a little cash to play with but sure as hell not enough to build a motor. i really didn't want to drop another 25 year old shitter in again for fear of the same thing happening again and to make things worse, had previously i promised myself that if the motor came out I'd extend the wire tuck and paint the bay too. self imposed i know but maintaining standards are important to me

    so i the car went straight back to that same buddy's place, we yanked the old motor old motor and i moved back with my parents so i could go to town on the thing.


    love that snap


    so i got it home and over time things got a little out of control. "well you may as well do that too" mentality and all that jazz.


    -A

    Leave a comment:


  • anti.engineered
    replied
    man a pretty extensive in length one if I'm honest, hah. I've been meaning to get this thread up to date for an age so lemme get my ducks in a row and I'll put up a bunch more content.

    This will always be a street car and will be thrashed silly in the rain, so whatever means necessary to keep cancer out I'll be very glad to go to. Just getting a few conflicting practices undertaken from different manufacturers to do the job. There are a heap of modern cars these days that have completely exposed seams on the underbody and I just don't get why they can get away with it while others seemingly can't.

    Leave a comment:


  • DER E30
    replied
    Originally posted by anti.engineered View Post
    so like I said, that's how it started off. not long after the second to last photo my motor puked up all over the room of a dyno room and that sort of sent the build off on a tangent.
    That sucks!!!

    What's the tangent?

    Leave a comment:


  • jazig.k
    replied
    Awesome build!
    Are you keeping the car on the road? That would be a good reason to seam seal the car, to hide the stitching...

    Leave a comment:


  • anti.engineered
    replied
    so a little about the bay. a while ago now while the car was enjoying more off-the-road time and I started on a basic wire tuck. engine in, no after market looms, just a simple tuck 'n' hide. that's how it began haha

    this was stage one

    - fuse box went in front of the radiator on custom bracket
    - ptu (ignition module) behind front bar also on bracket
    - NA power steering conversion (full removal of four wheel steering and all associated plumbing)
    - battery in boot
    - fuel filter rear mounted
    - boost controller/map sensor under battery tray
    - all electrics in the driver's corner of bay (relay box, oem boost sensor, wiper speed regulator, etc) moved to driver's fenderwell
    - clutch bleed hard line removed and bypassed
    - engine loom split and run underneath intake manifold
    - all wiring for unnecessary devices removed from car
    - AC deleted

    there was a whole lot of this


    here's the initial engine harness. it was pretty simple to split up both banks and route them on top of the fuel rail.


    here's a quick shot of my driver's side wheel well. the concept is simple enough; everything is undone, the whole loom from that corner pulled down through the pass, then bolted back up to the car.


    stuff like the loom for the wipers and hose for the fluid was run through the fender well to underneath the windscreen cowl through the drainage vent.


    I pulled the engine with a good buddy of mine, swapped in some new turbos and while I was there performed an NA power steering conversion. no more ugly HICAS four wheel steering solenoid and leaky, heavy plumbing.

    all this while, my pile of parts to powder coat kept growing. not a cheap exercise though!


    fuel filter rear-mounted above the diff.


    all in all, this is how the bay ended up with motor #1. all the work was carried out engine in with no real plans to paint the bay. no custom harnesses, welding or paint work. while I wasn't completely happy with this I needed the car to go, so I promised that if the motor ever came out I'd go the whole nine yards.


    starting point. total mess.


    unfortunately I never really got to make the most of the hard work carried out because I never had the chance to pretty up what was remaining under the hood. ah well.

    so like I said, that's how it started off. not long after the second to last photo my motor puked up all over the room of a dyno room and that sort of sent the build off on a tangent.

    much more to come.

    -A
    Last edited by anti.engineered; 11-26-2014, 02:21 AM.

    Leave a comment:


  • KEVIN.E
    replied
    i fcks with this dude you're going in. can always appreciate some backyard mechanics

    Leave a comment:


  • anti.engineered
    replied
    unfortunately not for a very long time rebarrelling project is last on the to do list as I have wheels that satisfy me for now. after paint. don't hold your breath.

    Leave a comment:

Working...
X