Announcement

Collapse
No announcement yet.

Charged E36 318is build

Collapse
X
 
  • Filter
  • Time
  • Show
Clear All
new posts

  • #46
    Hi Folks,


    Long time not on here, a mix of being away for hols, moving into a new work shop and having limited internet access are the main causes . The workshop is slowly coming along and hopefully in the coming weeks will take shape. Once in I can run everything under the one roof which should make internet communication better for all and result in being more efficient .


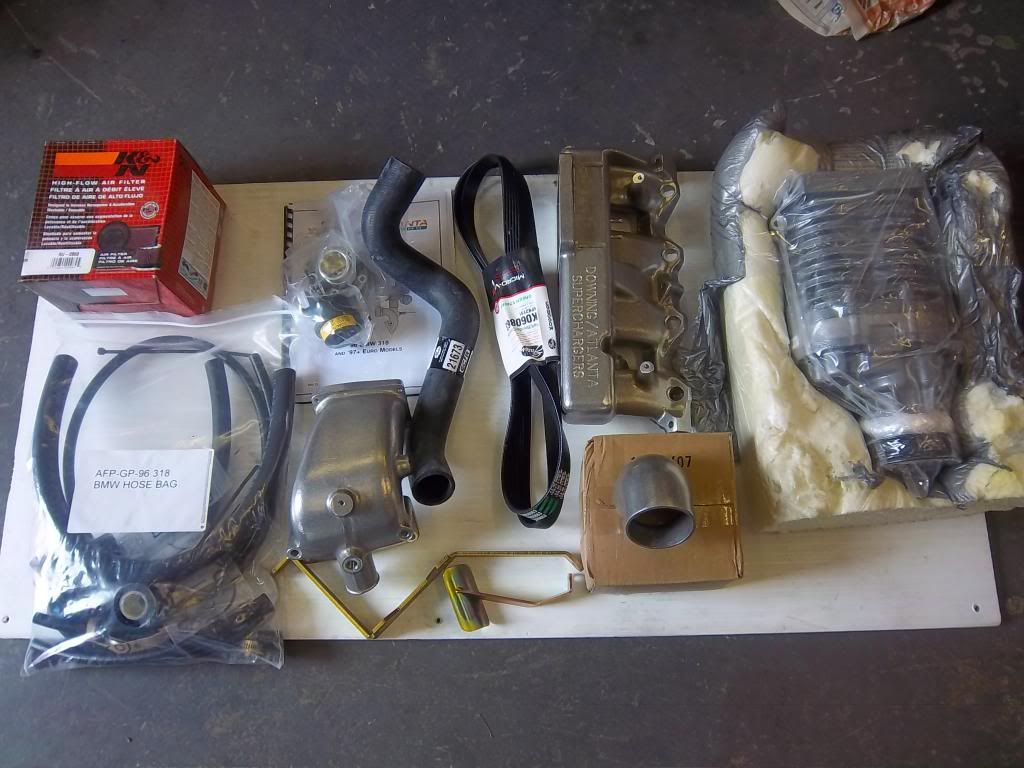
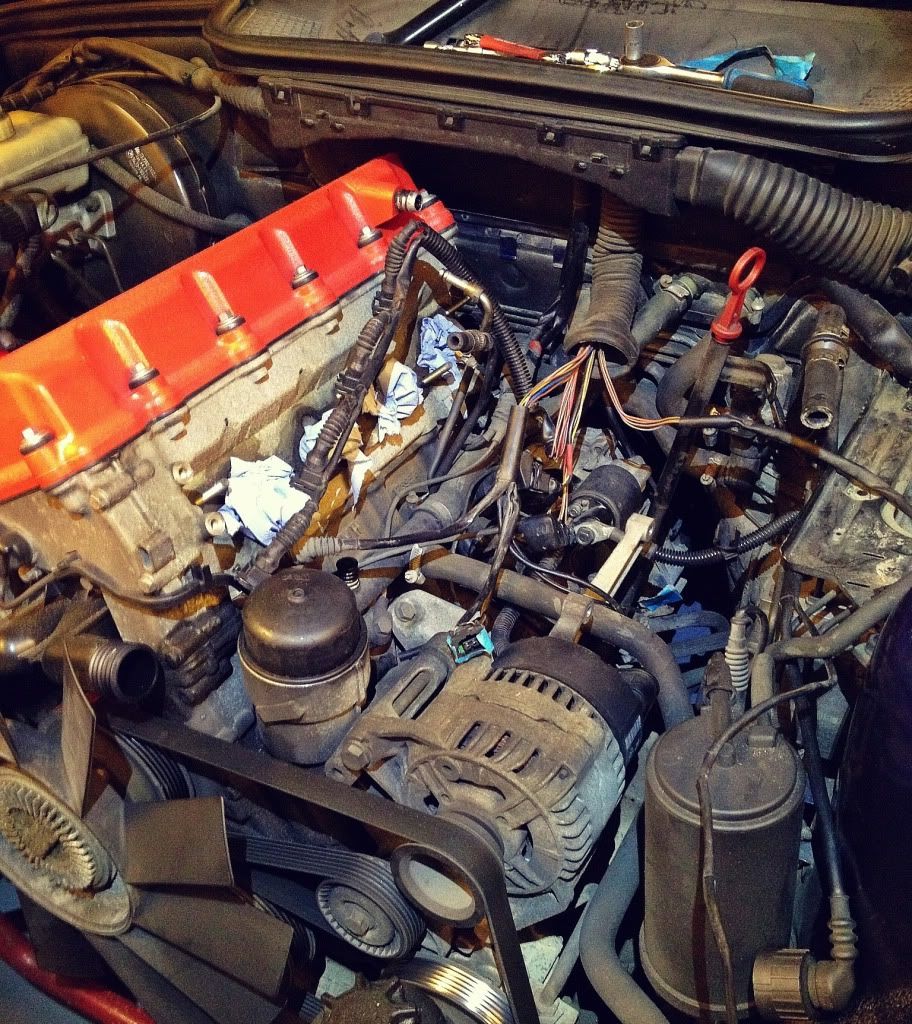
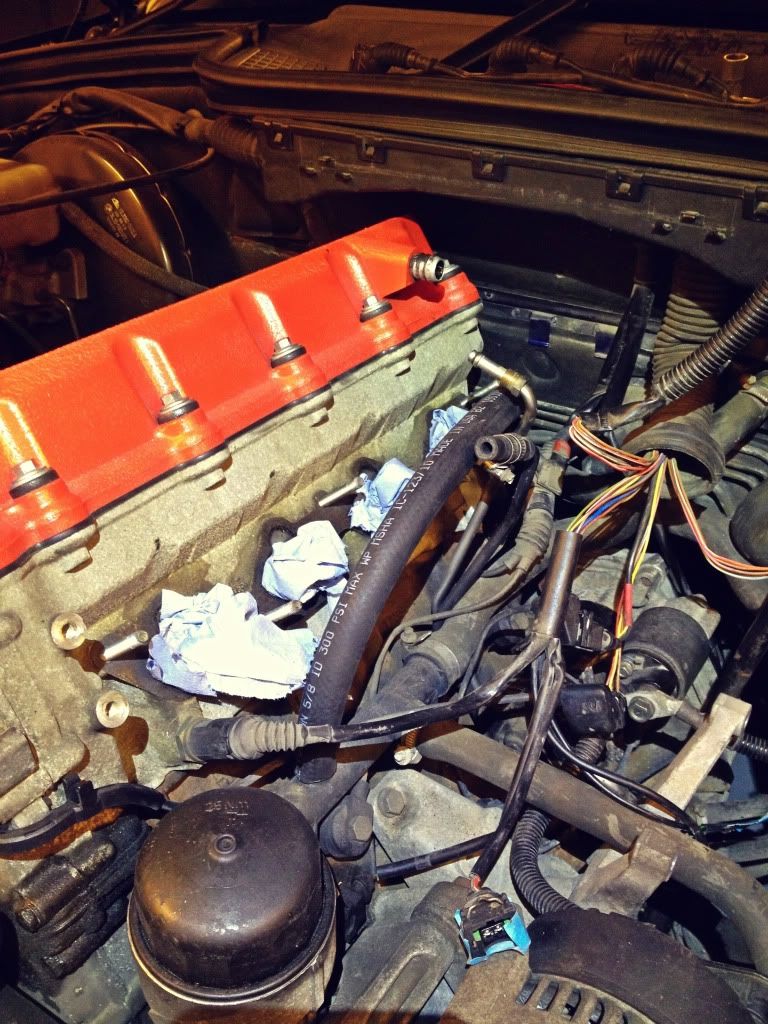
    Not much has happened with the E36 of late due to not having the time (good complaint). As some or many may already know I sold the DASC to a customer and installed it on his car. I may hear you asking "WTF?" however I found the holy grail of mods for the little M44 4pot which is a brand new never used DASC kit still in all its original packaging and ready for plucking . I shall let the one picture I do have do the talking, unlike the last DASC this one shall be getting fitted and very soon indeed .


    New DASC :


    Thanks for looking


    Welcome back to Instagram. Sign in to check out what your friends, family & interests have been capturing & sharing around the world.

    Comment


    • #47
      The DASC conversion has begun


      Thanks for looking


      Welcome back to Instagram. Sign in to check out what your friends, family & interests have been capturing & sharing around the world.

      Comment


      • #48
        Hi Folks,


        So far I managed to get the starter out and sent off for a refurbing etc, whilst this was being done it was a case of not being able to very much other than removing the steel fuel return line and replacing it with fuel hose as this is rerouted up to the rising rate fuel pressure regulator and then from there into the fuel rail itself. I gave the flywheel a look over whilst the starter was out and did some mocking up of the Downing intake manifold to make sure it was not going to cause problems for the new water how that has to run directly under it.


        STARTER OUT :


        STARTER BACK IN :


        WATER HOSE RE ROUTING :


        Thanks for looking


        Welcome back to Instagram. Sign in to check out what your friends, family & interests have been capturing & sharing around the world.

        Comment


        • #49
          So with running around half the country looking for an E46 320d saloon for a friend I have not had much time at all to really get stuck into the charger completion. Yesterday evening was Kells to look at a "MINT :" 2004 320d, when I say I spent 25 seconds looking at it I am 100% honest it was such a ball of sh@t I just walked away without saying a word, got in the van and drove off :.


          Today we went to Roscommon to look at this car http://cars.donedeal.ie/cars-for-sal...w-320d/5682697 all I would say is anyone in the market for a 320d it's no where near as clean as it looks or the owner says.


          So that was left there gladly and back to Wicklow it was, whilst on the way back I got a call to go look at a 2002 320d with reasonable mileage, condition (apparently) and price so went to Dublin viewed the car that turned out to be a lovely grey/maroon color (can't remember name) and drove it home. Needless to say that ended the 2 week car hunting saga. In-between the running around here is what I have managed to get done.....


          OLD WATER PIPE & RETURN FUEL LINE REMOVED :


          NEW RETURN FUEL LINE TO GO IN :


          CHARGER INLET MANIFOLD ON FOR MOCKING UP :


          RRFPR (Rising rate fuel pressure reg to be mounted :


          INLET MANIFOLD BACK OFF FOR ASSEMBLY OF CHARGER AND BYPASS VALVE :


          More to come but for now...ZZZzzzzzzzzzzz


          Welcome back to Instagram. Sign in to check out what your friends, family & interests have been capturing & sharing around the world.

          Comment


          • #50
            Well I managed to get some more done to the car over the weekend thankfully, one of the other jobs that needed to be done outside of installing the SC kit was to swap out the M44 Alternator for an M42 item due to the M44 part missing a very vital thread hole for one of the SC idler pulleys to bolt into.


            This is by no means a hard job and I was lucky to have had an M42 Alternator there otherwise it meant things were going to get delayed more so.


            Below you shall see in the pictures the very small differences and the reason for having to do the Alternator swap in the first place.


            M44 & M42 Alternators :


            BELT PULLEY INSTALLED :


            NEXT TRIAL MOCK FIT : Everything looking good so far.


            With the SC temporarily fitted I had to make sure the fuel lines were going to be free enough and in the case of the metal line and have enough slack in the case of the rubber return fuel line, once I was happy with these and tested fitted to the fuel rail I taped them together (otherwise the rubber line goes walkabout) and moved on to check out the fitment of all the other hoses and dipstick chute. The dipstick chute is a PITA as it does not line up exactly right with the new Aluminium bypass valve elbow so some reluctant bending is needed in order to get this bolted and secured to the elbow.


            Next jobs were :


            Fit throttle body

            Relocate IRV sensor (No longer fits on the throttle body)

            Route vapour canister line

            Route vacuum lines to and from bypass valve

            Reconnect and mount DISA valve

            Other fidgety bits


            But it was time for some coffee before any more work was done as it was now 00:00 Friday night and I had not had a straight run at this install from the moment I started so I wanted to make as much of a dent in it as possible and get it finished due to the car being my daily driver.


            Thanks for looking


            Welcome back to Instagram. Sign in to check out what your friends, family & interests have been capturing & sharing around the world.

            Comment


            • #51
              Well finally got the SC all plumbed and up and running since the last post I made, got it finished on Monday evening after all the messing with looking for cars last week.


              I left off at the last post with having to relocate the IRV and do some more pipe work as well as fit the throttle body, Induction kit, and lots of other smaller pieces in order to get it completed. So at 6pm on Monday evening I decided to bite the bullet and get it finished after all it is my daily driver.


              So here we go with the 2nd last if not last update on the SC install . I needed to mount the bracket in the picture that came in the kit so as I could then bolt the MAF support bracket in also. Downing have pretty much thought of everything and 98% of it is spot on too, the only things which are a slight let down were their solution around the DISA which was to tie to the dip stick chute and also the problem most DASC owners complain about which is the throttle cable layout. In time I shall address these and see can a more appropriate solution be found.


              ONE OF 2 SUPPORT BRACKETS FOR THE MAF :


              In the next picture you can see what I mean about the DISA being cabled to the dipstick chute and this in their install manual was listed as one of the last things to do after the charger is in along with the bypass elbow etc etc. I was raging I didn't pay attention to the manual earlier on the conversion and spotted this as I could have installed it way before the end.....oh well it's in now .


              DISA VALVE IN BEHIND THE ALTERNATOR :


              IRV VALVE GETTING RELOCATED AND PLUMBED :


              Once all the pluming and connecting of plugs was done a the more rear of the engine/bypass elbow I was moving toward the front cross member, after a little bit of fiddling and swapping the M44 intake below for an M42 item it meant that I would not have to cut and extend the MAF sensor wiring harness....NIIIIICE!!!!. Once this was installed it was onto fitting the K&N kit and air temp sensor. Once these were done the MAF was twisted around until the MAF support bracket fitted snuggly to the smooth underside and held everything firmly in place.


              GETTING THERE :


              AIR TEMP SENSOR FITTED INTO K&N :


              more to come..........


              Welcome back to Instagram. Sign in to check out what your friends, family & interests have been capturing & sharing around the world.

              Comment


              • #52
                Hi folks,


                So the last of the install was completed on Friday evening with little remaining to be done, the IRV relocation was completed then followed securing the MAF bracket and getting the intake end of things finished and secured properly.


                Jubilee clips were put nearly every bar some vacuum hoses running from the downing inlet manifold to the RRFPR, these are a very snug fit however today I picked up some very small jubilee clips to fit to them tomorrow to be safe that there will be no leaks. Cable tie ends were trimmed and then it was onto getting the top fan cowling cover fitted, this need to be trimmed down in order to clear the new prouder sitting top rad hose. Out came the dremel (great little tool) and got to work trimming down to size trial fitting after each adjustment so as to ensure a reasonably snug fit yet clearing the hose.


                Once this was done it was time to fill up the rad and bleed the cooling system, then came the first start. She started perfectly after the second turn once fuel had made its way to the fuel rail and into the injectors. The suck from the K&N filter was something and in its self sounded menacing. I need to get a cold air feed up to the filter and hopefully shall get to this at the weekend. I am in two minds about either keeping the induction kit setup albeit changing it to a GREEN filter or getting the complete stock airbox back in there with two cold feeds going to it. But that shall be for another day. I have done 70 miles in it so far and tbh has taken it easy until I get to around 150 (just me being careful). The same was done with Harry's conversion.


                So here is the rest of the pictures that I had managed to take before it was time to get the skates on and wrap up for the night. It could be a placebo effect however to me the front end certainly feels heavier which in turn feels nicer, however like stated could be placebo effect as I had lifted the whole SC assembly in to the car and it was certainly heavy.


                MAF and K&N Secured :


                M42 Intake Bellows fitted & throttle cable secured :


                IRV relocated to under the throttle body :


                Top radiator cowling trimmed down to fit over the taller rad hose :


                Car bought outside to bleed the cooling system :


                All done :


                Next jobs : Interior & replacing the steering shaft flex disc as it's knackered big time. After that then small things like tail light seals, new front windscreen and rubber, exhaust and sunroof delete.


                Thanks for looking


                Welcome back to Instagram. Sign in to check out what your friends, family & interests have been capturing & sharing around the world.

                Comment


                • #53
                  Small update to the "IS", I fitted an Ultra Racing front strut brace to it after some slight under bonnet modification with a Dremmel . Basically where the under bonnet light mounts on some E36 bonnets hinders the closing of the bonnet with this brace installed so out came the Dremmel and removale of the light mounting under the bonnet was done. The first picture shows the cutting that was done however it is not the finished article, the cuts are now much neater looking now .


                  BONNET PREP :


                  Ultra Racing Brace installed :


                  Thanks for looking


                  Welcome back to Instagram. Sign in to check out what your friends, family & interests have been capturing & sharing around the world.

                  Comment


                  • #54
                    Couple of pictures with the newly installed coil pack conversion thanks to Nigel for doing it, if it wasn't for him it would still be sitting on the shelves! And to Valdas for bits


                    60mm DEFI Boost gauge installed also :


                    And this Suede beauty thanks to EddieM3 :


                    Thanks for looking


                    Welcome back to Instagram. Sign in to check out what your friends, family & interests have been capturing & sharing around the world.

                    Comment


                    • #55
                      New 10mm spacers fitted all round, wheels looking more snuggly fitted now. JOM NJT hubcentric 10mm spacers installed with JOM extended wheel bolts.


                      Thanks for looking :smile:


                      Welcome back to Instagram. Sign in to check out what your friends, family & interests have been capturing & sharing around the world.

                      Comment


                      • #56
                        Not much happening with the Super4 daily at present however the first steps to a stealthier front end have been taken :


                        WHATS NEW :


                        Thanks for looking


                        Welcome back to Instagram. Sign in to check out what your friends, family & interests have been capturing & sharing around the world.

                        Comment


                        • #57
                          Well I decided this evening would be the evening to change my very knackered engine mounts, the charger accelerated they're condition so much so that the left hand side mount had split in two.


                          Like always I have had these AKG Motorsport uprated mounts sitting in the corner for quite some time. These as you will see are the black version which = street use. So without any more delay here are some pics etc.


                          TOOLS NEEDED :


                          Trolley jack

                          Axle stands

                          1/2" ratchet

                          1/2" 6" extension

                          1/2" 16mm deep socket

                          Flat head screw driver


                          HOW TO GO ABOUT IT :


                          This was done on an M44 lump so is specific to the how too, however it shall roughly be the same throughout the E36 range.


                          1. Jack up the car


                          2. Place axle stands on both sides in suitable positions, lollipop bush holders work.


                          3. Release jack and lower car onto stands


                          4. Get a piece of timber, I used 4x2 and place on the trolley jack pad.


                          5. Slide trolley Jack under the the sump and jack until taking the engines weight.


                          6. Remove front wheels (easier access)


                          7. Pick a side to start on and then take your ratchet, extension and 16mm socket and get under the car. Locate the bottom engine mount nut, for this you shall be sliding the 16mm socket through the holes in the front wishbones.


                          8. Once the lower nut is undone go back up top and get plenty of extensions and a knuckle with your 16mm socket attached and undo top mount nut. See below.


                          9. For the M44 you shall have to remove the fan cowling and rubber intake boot as the fan blades could get broken. There maybe other items that need removal depending on application/model.


                          10. Slowly jack the engine always making sure that no wires or pipes are snagging anywhere. Jack the engine until you can pull out the old mount. My passenger side one was split in two!


                          11. Once out install the new mount paying particular attention to the way the old one came out. The bottom of the mount has a guide pin for slotting into the subframe so be sure it is sitting in place correctly before lowering the engine onto its new mount.


                          12. Tighten the new mount up top and from underneath and proceed to the other side.


                          For the passenger side you may want to remove the air box and pipe work altogether in order to make access to the top engine mount nut easier.


                          UNDER HERE :


                          You are undertaking this work at your own risk (I am in no way responsible for any work you carry out) and this "how to" is not gospel. If unsure of what you are doing bring the car to a garage and have them do it.


                          I would also like to claim, I have successfully created the worlds largest VIBRATOR by installing these uprated mounts.......talk about extreme!!!!


                          Sent from AutoGuide.com Free App


                          Welcome back to Instagram. Sign in to check out what your friends, family & interests have been capturing & sharing around the world.

                          Comment


                          • #58
                            Picked this up today, it's not as clean as it looks in the photo and requires some work. I bought as (surprise, surprise) it's light and plus I wanted to see if I liked a carbon bonnet on the car before shelling out for a new item towards the end of the year.


                            Have to say I love how it looks against the Avus and on weekends I shall be able to spend some time freshening it up.


                            Thanks for looking


                            Welcome back to Instagram. Sign in to check out what your friends, family & interests have been capturing & sharing around the world.

                            Comment


                            • #59
                              Bye bye Rota's hello BBS RC's and possibly something else if all works out. Thanks to Satumashirt who as always is a pleasure to deal with.


                              Thanks for looking


                              Welcome back to Instagram. Sign in to check out what your friends, family & interests have been capturing & sharing around the world.

                              Comment


                              • #60
                                Some badge fitting done today, the carbon bonnet without it was doing my head in so I took 5 minutes out and sorted it.


                                2 wholes were drilled using smallest bit first and working the way up to a bit size slightly smaller than the tabs on the back of the OEM bonnet badge.


                                The tabs were then covered in a door rubber lube, the badge was gently pressed into place so it could rest by its self. Then out came the rubber mallet and very thick deep pile microfiber cloth which was placed over the bonnet badge. A few taps later with the mallet and it was not going anywhere. Nice snug fit, some bonnet polishing also started but I shall speak more of this later.


                                COUPLE OF PICS :


                                Thanks for looking


                                Welcome back to Instagram. Sign in to check out what your friends, family & interests have been capturing & sharing around the world.

                                Comment

                                Working...
                                X