 Tweet
Tweet
congrats
-
-Christian.
'91 318iS AW2/blk slow garage queen/build...
'02 ///M3 carbonschwartz 6MT daily beast
'37 Chevy pickup-garagequeen... -
Massive update
I've been MIA this winter, to keep my build a secret, but mostly just because I was too busy working on it to be able to post. I've put in more work on this car in these last few months than I have in the 3 years I've owned it. And I think the end result speaks for itself. I've done too much to be able to go over it all, so here's the readers digest version.
So it all started in August of 2015. When I had attended the last show of the season, I finally made the move on something I've always wanted for this car. Camber. For those of you that are unfamiliar with Fit suspension, it's essentially impossible to get camber. The front is macpherson strut, which won't allow for a camber plate due to the top hat design. The rear is a torsion beam where the hubs are welded on, unable to be shimmed for camber like xB's etc. So prior to this, I had -3 up front, and -1 in the rear, given to me by two pairs of camber bolts up front and the rears natural camber setting. My goal was matching double digit camber, so I had my work cut out for me.
Phase 1: Custom fab of the rear beam and extending front LCA
 IMG_5798 by nickwochok, on Flickr
Front lower control arms were extended 30mm. Not pictured are my extended outer tie rods with bump steer adjustment.
 IMG_6017 by nickwochok, on Flickr
 IMG_6018 by nickwochok, on Flickr
 IMG_6019 by nickwochok, on Flickr
Here's the rear beam design. Pardon the poor pictures and rust, but here's the general idea. The hub is welded onto a plate, which can slide on the beam, allowing me to center the rear wheel at various heights. Also attached to the hub, are two eccentric bolts in slots, which allow for toe adjustment. At the top of the hub is a bolt used to adjust camber. Those 3 adjustments give me *almost* the perfect amount of adjustability I need. We didn't properly anticipate how low I was going, so currently I have toe in, and the rear wheels aren't totally centered. I'm looking to revise this design soon.
 IMG_5753 by nickwochok, on Flickr
 FullSizeRender by nickwochok, on Flickr
 IMG_5758 by nickwochok, on Flickr
This was the end result. -6 up front, -9.5 in the rear. Looked cool, but wasn't close to where I wanted to be. So I've got more work to do
Phase 2: New Wheels
 IMG_7234 by nickwochok, on Flickr
I had some Weds Kranze Cerberus I's imported from Japan through Threepiece.us (I didn't even know these were made in 4x100 so I hopped on these when I saw them) and they were supposed to be a square set up, but those idiots didn't notice that two of the wheels were a half inch wider. Specs were supposed to be 17x8 +25 square, and two ended up being 8j, while two were 8.5j. So long story short, after fighting with Jake for a while I got him to send me the correct size lips for free. Waited several months for them, and once I got them, I quickly relipped them myself and got tires mounted. Unfortunately, due to all of the custom suspension work in the rear, my hubs were pushed out atleast an inch, so I have to run very weak specs if I want to tuck. Lets see how hard I can tuck these babies with my custom coilovers:
 IMG_7886 by nickwochok, on Flickr
Umm yeah I think that will do keep in mind that the suspension is at full droop here
Phase 3: Double digit front camber
After doing some hard thinking and research, I figured out how I was going to get the front camber I was after. It was as simple as slotting my lower mounts.
 IMG_7903 by nickwochok, on Flickr
As you can see, a plate has been welded on, and the lower hole has been extended into it.
 IMG_7915 by nickwochok, on Flickr
This is the stupid amount of camber I got from them. Not sure how much this is exactly, but my rear is at -10 for reference. I ended up needing a 25mm spacer to be flush again
Phase 4: Interior and bodywork
 IMG_8164 by nickwochok, on Flickr
I wrapped several interior pieces in 3M rosewood vinyl to match my Nardi Deep Corn. Also had custom Clazzio seat covers made. For those of you familiar with my car, all of my fenders were ruined. So I had all of the bacon repaired, as well as having them pulled more so I can really tuck the hell out of these Weds. I'm omitting pictures of this because you'll see it all at the end.
Phase 5: Test drive and break your oil pan
 IMG_8545 by nickwochok, on Flickr
So I set my ride height to "control arms laying on the ground" and went out for her maiden voyage. Don't know what I was expecting.
 IMG_8580 by nickwochok, on Flickr
I broke my oil pan only 5 miles from my house on that very rock I dragged into the parking lot. And it was 5 days before Wekfest Chicago.
 IMG_8586 by nickwochok, on Flickr
Car might have been immobile but it sure looked cool.
 FullSizeRender by nickwochok, on Flickr
At 1am with the help of the best tow truck driver ever and officer friendly, we got my car onto a flatbed to bring home.
 FullSizeRender by nickwochok, on Flickr
Initial inspection of the oil pan. That red Miata in the background has been my daily over winter. Only reason why doing all of this work was possible.
 IMG_8606 by nickwochok, on Flickr
Here is what we find. Yikes. So now its 3 days before Wekfest.
 IMG_8646 by nickwochok, on Flickr
I changed the oil pan, raised the motor 1cm, and made an 1/8" thick steel skidplate. A puny rock wasn't going to stop me now.
Phase 5: Wekfest
 IMG_8656 by nickwochok, on Flickr
Managed to make it to Wekfest in one piece, thanks to all the preventative measures I took. Really enjoyed the show and everyone's cars. It was seriously a high quality event. I'm not going to post any show pics here other than this cellphone pic to prove I was there.
Comparisons:
I've made some comparison collages so you guys can see what a difference the camber really made.
 IMG_8712 by nickwochok, on Flickr
 IMG_8711 by nickwochok, on Flickr
 IMG_8090 by nickwochok, on Flickr
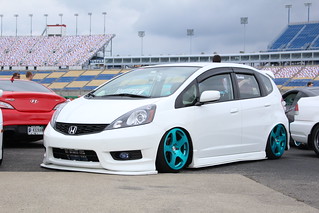
My final numbers are -12 all around. Coming from -3/-1 to -6/-9.5, having -12 is pretty insane and I love it. Not to mention tucking lip all around, which was another one of my goals for the car.
Post to be continued...Follow me on Instagram @FitTheStance
Comment
-
Photoshoot
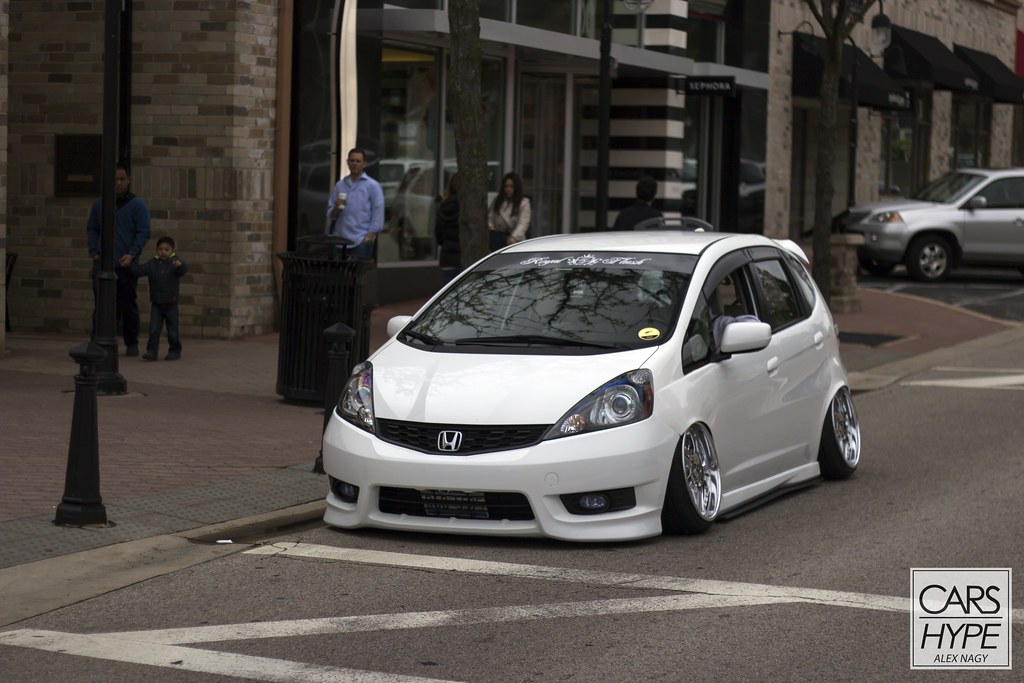
So the real reason for me posting today, is I finally got a photoshoot done. A 9 month journey is finally over, and I'm so proud of the outcome. So sit back, relax, and enjoy my static Fit.
 IMG_9410 by Alex Nagy, on Flickr
 IMG_9438 by Alex Nagy, on Flickr
 IMG_9459 by Alex Nagy, on Flickr
 IMG_9462 by Alex Nagy, on Flickr
 IMG_9468 by Alex Nagy, on Flickr
 IMG_9481 by Alex Nagy, on Flickr
 IMG_9485 by Alex Nagy, on Flickr
 IMG_9493 by Alex Nagy, on Flickr
 IMG_9534 by Alex Nagy, on Flickr
 IMG_8849 by nickwochok, on Flickr
 IMG_8843 by nickwochok, on Flickr
 IMG_8853 by nickwochok, on Flickr
Thank you everyone for looking! If you want more often updates than this, follow me on IG @fitthestanceFollow me on Instagram @FitTheStance
Comment
-
All I can say is wow. Love everything about it man.Comment
-
So cleanComment
-
Amazing work man! Not usually a wood grain fan but looks good with your seats and wheel. Should match the shift knob as well!
Comment
-
Awesome build man! That is an amazing amount of work. I dig the poke look when you were wheel lip to fender but thats just me. Keep up the good workComment
-
Car looked great at Wekfest. Glad you posted this to show all the fab work that went into this setup. Let me really respect what all it took for you to get to this point.
 WekFest Chicago - 2016 by Kole Grove, on Flickr
Comment
-
Thanks everyone I really appreciate it! I can't wait to attend more shows this season so more people can see the car. I also plan on doing some more to the interior and lowering the rear more as well.Follow me on Instagram @FitTheStance
Comment
-
saw your car on stickydiljoe's wekfest video, looks great dude!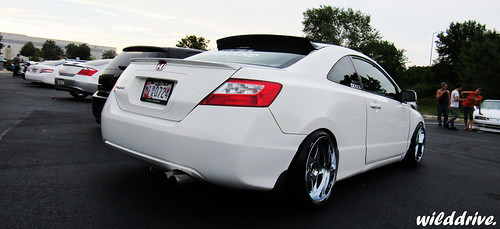
follow the squad!
Youtube:https://www.youtube.com/channel/UC91K2XpPO1ljzJHnPigT7OA
Instagram: : https://instagram.com/ihate0sc/Comment

Comment