Announcement

Collapse
No announcement yet.

Another E36 build

Collapse
X
 
  • Filter
  • Time
  • Show
Clear All
new posts

  • #16
    When I last posted it was snowing outside, now the snow is gone and Im starting the drift car convertion slowly.


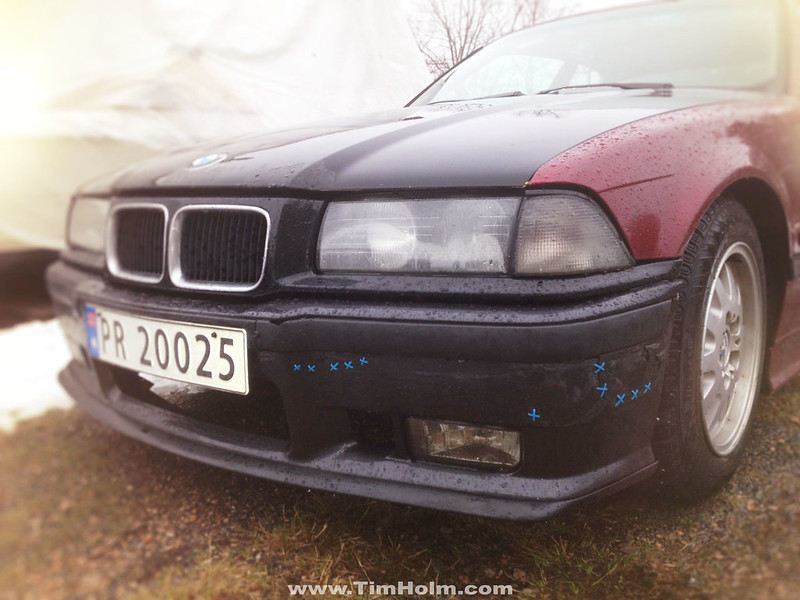
    first step. Battlescars. not mine though. PO had tried to repare the front fender with some black glue like substance, looked like shit and it was cracking up. zip ties looks way better on this car.


    Im trying to sell some stuff to finance a hydro handbreak so Im selling these.
    dont have any Idea what they are other than that there 19" and fit an e36


    Then I went to the breakers yard for some wheels. they had 2 e36s. both sedans, a 316 and a 318is.


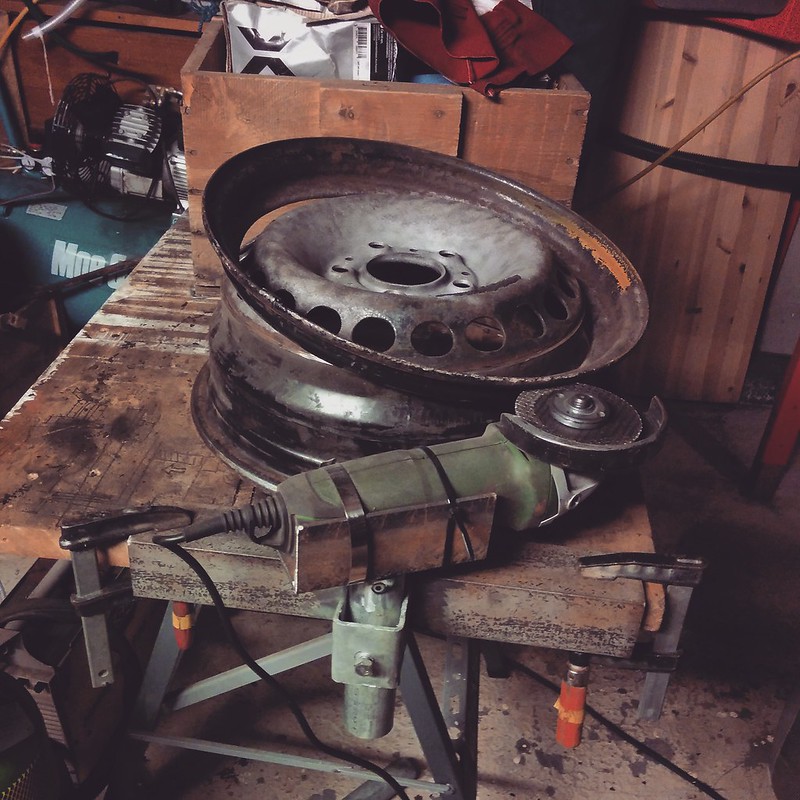
    the is had some rusted 15"s with continental studles wintertires on them, so after some negotiations I got the 15"s and and M front for 1000kr. 160$. the fender is in desent shape. Ill respray it once I get some cash.


    I'll practice banding wheels on these ones. there rough and a bit wobbely around 80 kph so Its not a big loss if I fu*k up. its nice to have some 15"s to put on the rear for cheap drift thrills


    http://www.stanceworks.com/forums/sh...=55145&page=99

    Comment


    • #17
      it finally stopped raining!! so I could paint my fender and polish the car


      spent the day claybaring and laying down layers of paint and clear. It was getting dark when I started polishing.

      I had to snap a picture of it on the car before I drove home


      In the sun the morning after. Its not 100%. to be honest I think 80 is more realistic, but im hapy with it as a temporary solution. looks good for a 120kr. 20$ painjob.
      and I havent polished it yet


      A few years ago I payed 1500kr. 250$ for 2 fenders on my first car. that was a diamantswartz 318i sedan. It was a little bit closer. but not that much better.


      Last edited by Tim Holm; 03-11-2014, 10:34 PM.


      http://www.stanceworks.com/forums/sh...=55145&page=99

      Comment


      • #18
        Ive been spending the best part of 2 days grinding of the rust on these 15"s, not the nicest or roundest of rims but its a common size around here. so It'll be easy to get cheap drift wheels


        the extent of the problem


        ready for rust-oil and paint


        glamour shot from before i started working on them


        I should get my paycheck tomorrow, so I'm officialy in the marked for some 17 or 18" rims


        A small mod I came up with in photoshop.


        sorry about the lazy edits, but atleast its better than raw iphone pics
        Last edited by Tim Holm; 03-18-2014, 05:14 PM.


        http://www.stanceworks.com/forums/sh...=55145&page=99

        Comment


        • #19


          drift built is progressing. bought and installed a hydro handbrake this week.
          did a quick sketch to show how its plumbed

          Untitled-3


          And here it is. it has a lock on it, but I removed that to so it would clear the seat.
          Im keeping the mechanical one to pass the EU control so theres no need for the lock.

          IMG_1212

          IMG_1247


          Had to move the window switch to make room, drilled holes and then cut between them.
          I actually prefer having it this way cus before my leg was in the way.

          IMG_1248

          IMG_1249


          Wielded a bracket for the handbrake to sit on, I need to work on my wielding skills I know.
          I was thinking about putting nuts to the underside but it would have to be higher, so i wielded another plate to to the top to make it thicker then drilled and threaded the holes. so its low and super solid now.

          IMG_1257

          IMG_1256


          the position is perfect, clears all the switches and controlls. no problems when putting the car in reverse, only thing is I have to watch my index finger when pulling the mechanical handbrake.

          IMG_1297

          IMG_1298

          Should have measured twice

          IMG_1301

          IMG_1383


          On to the dirty work !

          Cars without ASC has one line. if you have 2 you need to join the lines before the handbrake then split them again after.
          That might fuck your ASC though, Im not sure,


          Its line NR 3 you want

          IMG_1382

          made a hole and fed the line trough

          IMG_1384

          And then this

          IMG_1387

          IMG_1388


          Off course this happened.. and because Im a retard I'd cut the line just long enough.
          Luckely Id been lazy with the routing so I managed to make it work.

          IMG_1390

          other than that everything went fine.
          Then the threads in the T coppeling came out... and this was pretty late so I went on a rather long mission to see if i could find a place that had one and that still was open.
          But no luck. So I had to take the Opel to my night job :/

          the day after my dad picked up 2 T's so I drove over to his job to borrow the wielder to make my tire changer. Ill post about that later.
          got home around 4 and changed the T. It was raining pretty heavily by then but I figured Id be able to bleed the brakes before I had to leave at 5.
          So I got the wheel of and then the nipple broke... great.. just what i needed :P

          Finally today.
          I drilled out the nippel then tried to get it out with a bolt extractor. that broke in the hole.
          so now I had a hardened piece stuck in the bleed nippel.. hooray
          Found a 2mm drill bit and made a small hole on ether side of the broken extractor,
          eventually I managed to get the piece out so now i had a hole that looked someting like (ooo)

          now I'd learned. I heated the caliper til it was really hot then sprayed the nippel with wd40 to cool it down so it would shrink. then I hammered a screwdriver into the hole and twisted it. Snap! it turned!! and I managed to get it out!!
          that only took 4 hours.. put in a new nippel and bled the brake on that side.

          for the other side I took no chances, wire brushed around it, WD40, gave it some good knocks with the hammer, and lots of heat. that one came out smoothly.
          swapped it for a new one and bled.

          Now it works!! locks up great with a firm yank on the handle. Ill post a video or someting later


          Oh and i mounted the Lip and sideskirts

          IMG_1080 copy

          IMG_1097 copy
          Last edited by Tim Holm; 05-09-2014, 09:43 PM.


          http://www.stanceworks.com/forums/sh...=55145&page=99

          Comment


          • #20
            I'm interested in that build!

            Comment


            • #21
              so I made this little thingy to save some cash on tire changes. and its much needed as I blew up my first rear tire on Sunday. good times
              Ill get some more pics if anyone's interested. looks pretty madmax in my opinion

              IMG_1460 copy

              IMG_1443

              and I bought 2 of these things to pry of the tires from the rims once they are loose. is actually pretty easy. and only takes a few minutes to do. might be harder on lower profiles I suspect.

              I just bought a sett of TA Technix adjustable coilovers. used but never mounted.
              hope to have them soon. plan is to go to my first driftday on sunday and make an ass of myself.

              coilies super cheap. and probably pretty crap. but I just want the stiffness and lower ride hight.

              10402915_1473550422881428_4889745051981857022_n

              From what I find on the net they are adjustable form 35-65mm wich sould be plenty low enough for now.
              Norwegian roads aren't to friendly to slammed cars...

              The old bimmer has rolled 280k now, not sure about the engine but about 100 less I think.
              IMG_1463 copy


              http://www.stanceworks.com/forums/sh...=55145&page=99

              Comment


              • #22
                quick update from today

                I found some 15" aloys that look like steelies on the breakers. and got them for cheap.
                I've polished the rims on my motorcycle so I knew what to do with them.

                wirebrushed of the paint

                IMG_1572 copy

                then jacked up the car and put a rim with a block of wood on it under the diff so the wheels could spin free.
                mounted the aloy and put it in 5th.
                it was pretty easy sanding down all the little imperfections from the casting like that.

                IMG_1574 copy

                now after a few hours of work, ive polished and painted them. still needs another coat but you get the idea.

                IMG_1595 copy


                Im going to my first drift training on sunday! so me and a buddy will get the coilies mounted and wield the diff tomorrow (saturday). maby even get some rack spacers installed. but we'll see

                Also and I might get my hands on some Borbet type A's soon


                http://www.stanceworks.com/forums/sh...=55145&page=99

                Comment


                • #23
                  Some good progress there!

                  Your tyre changing tool is cool.


                  Comment


                  • #24
                    this weekend I got some help from Marius to get the diff wielded and the coilovers mounted.
                    We did'nt make the drift practice but we did go to see it, I talked to some of the drivers and aparently you have to ware a racing suit and helmet, and it was actually pretty expensive...
                    next one is in 2 months, so Ill see if Im ready for it by then.

                    first of we tried to remove these bolts. but not all of them wanted to come out so we ended up cutting the heads of.

                    IMG_1603 copy

                    IMG_1604 copy


                    IMG_1605 copy

                    eventually we did get the diff out and steam cleaned

                    IMG_1610 copy

                    when we opened it up it was a bit different then I had expected. Ive seen loads of pictures of wielded diffs but aparently its a bit different with and LSD.
                    my 325 had 25% lock originaly. so what we did was just wield up everything in there. and wield the gears to the housing.

                    IMG_1619 copy

                    when we put it back together it was just locked. so clearly someting was wrong.
                    opened it up again and removed the clutch plates from the top side. I would idealy like to have removed the ones from the botom aswell, but we'd wielded it shut.
                    put it back together again and now it seemed to work ok.

                    We went of to get the bolts, but every place was closed by that time. so on sunday we got some used ones from a guy Marius knew. and we got it bolted inn.

                    when I pulled out the old rear dampers the rubber bushings came out with them so as a temporary fix I wielded some washers to the mount to keep the shock absorbers in place.

                    IMG_1624 copy


                    And finally!!

                    IMG_1643 copy

                    its as low as I could go on the adjustable sett. still not low enough :/ but I think it would help with some bigger rims. Im just rocking 15"s at the moment.

                    these did turn out pretty good though

                    IMG_1638 copy

                    IMG_1645 copy


                    we went out drifting as soon as we got the diff mounted. and apparently we'd rushed it beaus it was spewing oil all over

                    IMG_1649 copy

                    we hadnt mounted the axle propperly so It wasnt sealing in the oil. I got out a big hammer and fixed it today. but I'll have get some more oil in there soon.
                    Last edited by Tim Holm; 05-26-2014, 05:27 PM.


                    http://www.stanceworks.com/forums/sh...=55145&page=99

                    Comment


                    • #25
                      How it sits now. might be a tiny bit to low in the back I think.
                      195 60 R15s on it now. Had it on 65s before so it actually is lower than it looks..
                      IMG_1671 copy

                      Temporary solution from the top. its pretty getto I know. but Im saving up for powerflex bushes. think I'll go for the black ones because racecar.
                      photo2 copy

                      I managed to hit one of the 2x4 blocks I use to get the jack under the car a few days ago. it riped of the sideskirt and bent the frond fender a lot!! I did get it fixed though.

                      And I keep breaking the zip ties that hold the front fender on.. the joys of having a low car I guess
                      Last edited by Tim Holm; 06-05-2014, 09:30 PM.


                      http://www.stanceworks.com/forums/sh...=55145&page=99

                      Comment


                      • #26
                        Time for an other update I think

                        first of here's a heavily edited iphone picture.

                        IMG_1971 copy

                        and some shitty pictures from a "drift meet" at the local spot.

                        IMG_2052 copy


                        So literaly a few minutes after these pictures my radiator blew up! it spat the chrome grill over one car lenght away!

                        IMG_2071 copy

                        IMG_2069

                        we got it towed home I did a damage assesment.
                        upper rad hose and heater hose blown.
                        expanton tank is also blown to hell.
                        in short the rad is dead...
                        nr 7 and 4.


                        Luckely I just got my tax return so ordered a new M3 Mishimoto rad form Drftworks with rad hoses.
                        But I need a seperate expantion tank so Ive ordered one from ebay.


                        got some new bushings for the back to swap out the wielded ones.
                        these are e46 m3, they are suposed to be more solid and stiffer than stock.
                        I was considering buying powerflex, but its way more expensive and its not a good thing to have to static bushings there or you'll rip out the metal.
                        IMG_2094 IMG_2095

                        and I got a shortshift installed.
                        Managed to beak the tip of my knife trying to get the little plastic shit that locks it in pace,.. then I checked on google, and what you do is use 2 screwdrivers and twist it 45% clockwise. came out super easy when I did it that way :P

                        the shortshift feels very nice, and way tighter than the original. and I dont hit the hydro with my thumb when shifting to reverse anymore witch is a pluss.
                        IMG_2093


                        seems like i might have a rubbing issue
                        IMG_2017 copy


                        I should get the rad next week. expansion tank will take longer so Ill see what I can come up with, Using the motorcycle to get around atm., its not brilliant with the rain we had lately
                        Last edited by Tim Holm; 07-04-2014, 10:46 AM.


                        http://www.stanceworks.com/forums/sh...=55145&page=99

                        Comment


                        • #27
                          bought a Mishimoto rad to repace the broken one,
                          its a LOT bigger, and Im guessing better.


                          somehow wile I had the intake manifold of to check the water hose something fell into sylinder nr 4, so when I started the car up it fucked the valves..

                          So engine rebuild time


                          It looked bad. all all the valves were leaking and the piston was mashed.


                          ended up getting two m52 blocks, and overhauled the head.
                          Im building the m50 iron block into a 2.8 or maybe 3L this winter.
                          form what Ive heard the 3L stroke might be a bit to long for high revs with boost.

                          pics from the rebuild and install of the m52b25nv, (thats a m52 alu block with m50nv head.) coming soon


                          http://www.stanceworks.com/forums/sh...=55145&page=99

                          Comment


                          • #28
                            Guess its about time to update this thing again

                            Its been a while now but we liftet the engine and trans out by hand, its not that heavy for 2 people(so glad its not a 2JZ)
                            IMG_2338 copy

                            sendt the head in to get the seats replaced then I went over all the valves to make sure it was good.
                            IMG_2416
                            left it over night and it was still pretty full

                            I put the head on one of the m52 blocks I bought (So I should have a bit higher comp)
                            and put the engine back in the car
                            IMG_2652

                            IMG_2657

                            video from the start up. no headers :P thats me looking all scruffy from lining up the motor mounts


                            When I started bleeding the coolant system I found out that this little fucking elefant had a hairline crack all the way trough it, its made from aluminium so there must have been some pretty high pressure in the coolant system.
                            IMG_2763

                            offcourse its at the back of the engine and allmost impossible to get at.. but I finnaly got it out and got a new used one from an engine at the scrap heap. sorry to whom ever buys one without it

                            So after all that shit here it finally is in all its crappy glory, now with 20mm spacers.
                            needs a bit of a roll in the back
                            IMG_3015

                            IMG_2884


                            Bike in the backgroun is my caffe racer project from 2 years ago 1974 Yamaha XS 650
                            here is the LINK for that

                            and the compact is my daily driver I bought while the 325 was broken. its only a 316 but it lights up the tires on dry asphalt
                            I'll get back to that one soon
                            IMG_20141212_122407

                            Oh and I bought a used TIG wielder a while ago, here is my latest creation
                            DIY sheet metal roller for banding steel wheels
                            IMG_20141211_233540

                            This years winter projct a 1967 VW beetle that had been parked in a barn for 30 years
                            04_229232640_xl 04_891975098_xl by Tim Holm, on Flickr


                            http://www.stanceworks.com/forums/sh...=55145&page=99

                            Comment


                            • #29
                              Some shit is going down


                              Last edited by Tim Holm; 01-07-2015, 10:03 PM.


                              http://www.stanceworks.com/forums/sh...=55145&page=99

                              Comment


                              • #30
                                finished the first wheel, still needs another layer of paint but you get the idea.
                                7j to 9


                                http://www.stanceworks.com/forums/sh...=55145&page=99

                                Comment

                                Working...
                                X