Announcement

Collapse
No announcement yet.

A faster grocery getter - 04 WRX Wagon

Collapse
X
 
  • Filter
  • Time
  • Show
Clear All
new posts

  • #16
    Originally posted by milwaukeeandy View Post
    lovin the car! VS-XX's really do look good on anything
    Thank you sir. Yeah, I'm super stoked they worked out as well as they did. I really had no idea how they'd look on there when I ordered them.

    A bit of an update:

    I messed around a little yesterday (maybe for an hour or so). I got rid of some ugly zip ties and untangled some vacuum lines. I called up Extreme Turbo Systems down in Vancouver, WA to inquire about who does their anodizing work. They put me in touch with a company down in Oregon called Advanced Precision Anodizing. Long story short, it looks like they're going to be able to suit my needs for anodizing. Hopefully, I'll be headed down there sometime within the next month or so and dropping off a box of stuff.

    In preparation for all that goodness, I took a trip over to harbor freight and picked up some cheap chisels/punches/spot weld drill bits and other assorted goodies. I'm going to try and get rid of that god awful battery tray today. Pictures of the damage to follow.

    I appreciate all the enthusiasm from you guys. It makes it a lot easier to go stand in my cold garage and chug along on this project. Hope everyone enjoyed their holiday season!

    Comment


    • #17
      Ok - Put in a few more hours into the hoopty today.

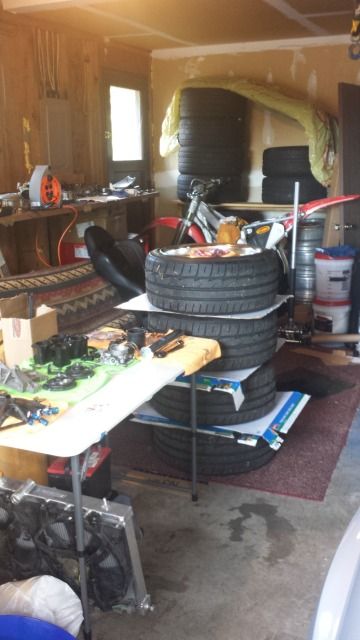
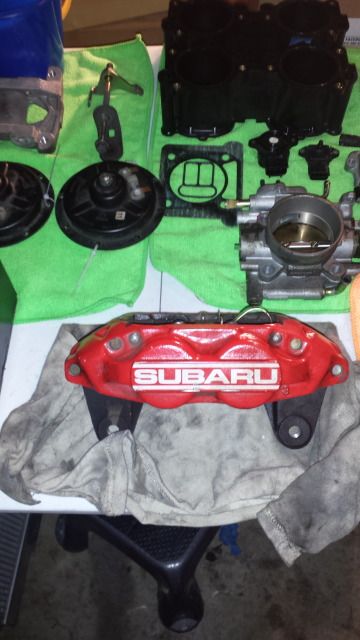
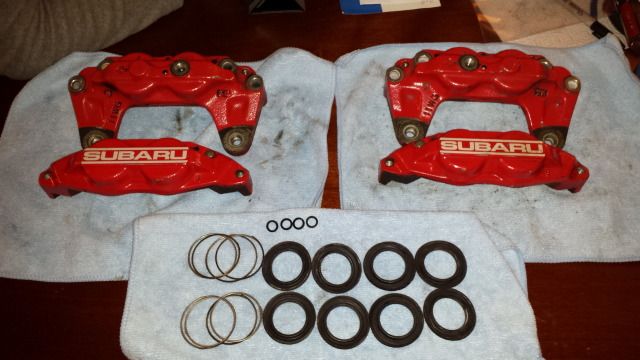
      I was able to get it up onto jacks, take the wheels off, and stack them up. I started taking off the calipers in preparation for powder coat, but stopped for the evening after I got the front passenger side one off. Since the 'SUBARU" lettering on the USDM 4/2 pot brakes is a decal, and not raised like the JDM ones, I think some custom flair is in order. Luckily, the shop that is going to do the powder coating has a really kick-ass pinstripe artist. I'm going to have him write out 'SUBARU" in a really nice script font in the space where the decal currently is. I haven't seen it before, so hopefully it'll be cool.


      I also worked up some courage and went head first into deleting that battery tray. No turning back now, it's gone. Unfortunatley, I was a little over zealous a couple times with the spot weld drill bit, and went through the sheet metal at the bottom. Not a huge problem, it's got to have plates welded in there anyway, but It still bothers me to mess stuff up that didn't need to be.
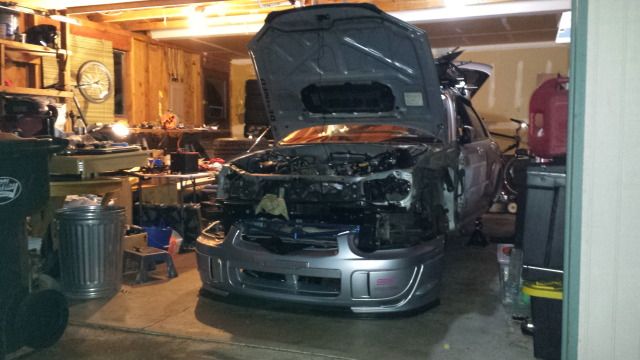
      I'm at the stage right now where I need to make a choice about how to proceed in the engine bay. (I'm really not interested in doing a full shave and tuck as I'm still top mount and stock location turbo and I'll remain that way until I blow my motor up.) The sides and mounting holes in the strut towers are going to need to be filled/welded anyway. Upon inspection of the inside of my wheel wells, I've rubbed pretty hard inside already. So, do I just weld in the pieces on the sides of the motor to clean it all up, or do I just put in the extra money/time while I'm at it and tub it? Input/opinions welcomed.

      Comment


      • #18
        Love it! I'm very interested to see how the calipers turn out. Sick car man

        Comment


        • #19
          Originally posted by Stately View Post
          Love it! I'm very interested to see how the calipers turn out. Sick car man
          Thanks man. I'm hoping to have everything off and back from powder coat by the end of February. My goal is to have the car back up and running around April.

          Comment


          • #20
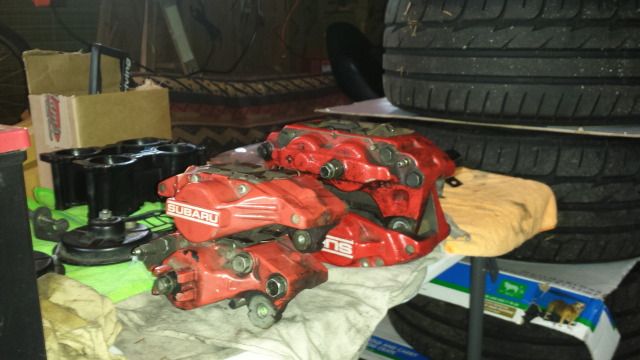
            Got a little more done today, but not much. I took off the rest of the calipers and zip tied the brake lines vertical so they wouldn't piss all over the floor.


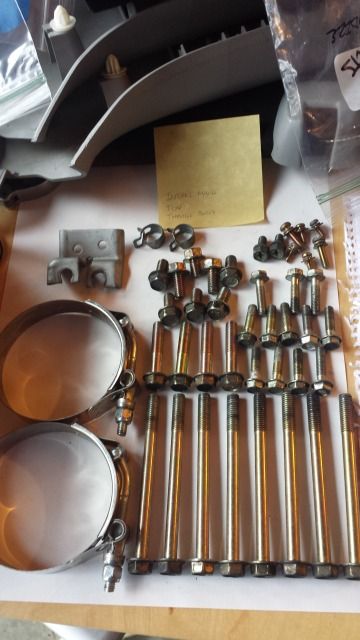
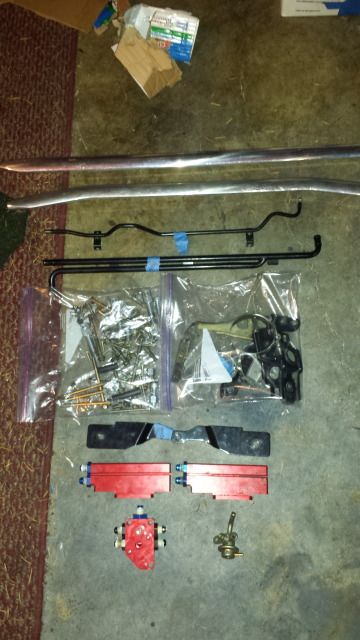
            I then spent the rest of the time organizing all the things that are being anodized. I had originally split all components and hardware into individually labeled zip locks. Anodizing them like that would drive the cost up. I unloaded each bag, and organized it with a label and took a photo so I could keep track of what goes where. Like this:


            That took the better part of an hour or so. Other than that, I made a complete inventory of everything that's going to be anodized.


            Full list of everything being anodized in gold:
            Front strut tower bar
            Rear strut tower bar
            TMIC breather hard line
            Radiator coolant hard line
            JNA horn bracket
            JNA oil cap
            IAG dip stick
            Alternator cover hardware
            TMIC hardware
            Intake manifold hardware
            TGV hardware
            Throttle body hardware
            DBC bracket
            Turbo coolant reservoir hardware
            Radiator support hardware
            Headlight hardware
            Radiator stays
            TMIC mounting brackets
            Fuel rails
            FPR
            Fuel distro block
            AN fittings
            Hella horn grill hardware

            Next thing to sort out is gong to be stuff that's going off to powder coat. The calipers were the last things I needed to take off to have ready. Now all I need to do is use some JB weld and get smooth down the alternator support bracket (from where the AC compressor used to attach) and sand it down.

            Comment


            • #21
              Normally **** the wagons. This makes me not **** them. This actually is fucking awesome dude. Good job.

              Comment


              • #22
                Originally posted by Thom View Post
                Normally **** the wagons. This makes me not **** them. This actually is fucking awesome dude. Good job.
                Thanks man. I'm stoked to hear that people think what I'm doing is cool.

                I met up with a buddy of mine tonight who is a commercial electrician. He's going to give me a hand sorting out the loom and coming up with a cohesive plan for cleaning up all this wiring.
                I really want to move the fuse box into the glove box, and utilize the hole in the firewall where the AC used to go into now that I've got the dash out.

                Looks like I might just pull the motor and put it up on a stand to make this easier. Oh god, this just keeps getting more and more involved..

                Comment


                • #23
                  Favourite shape subaru has every produced and a wagon. You sir are doing it right, If the wheels were a tad wider with a bit more low i would be happy.


                  http://smeeezus.tumblr.com/

                  Instragram @Smeeeb

                  Comment


                  • #24
                    I love everything about this car.

                    Comment


                    • #25
                      Originally posted by Smeeeb View Post
                      Favourite shape subaru has every produced and a wagon. You sir are doing it right, If the wheels were a tad wider with a bit more low i would be happy.
                      Thanks man. Unfortunately, the rear fenders on a wagon are flat almost. Mine are rolled and pulled pretty hard already, so 9.5" wide +39 with -2 camber is the sweet spot. Otherwise, if I went wider (which I would have loved to do) I'd have to run something past -2, and I'm just not into that quite yet.
                      As far as low goes - I'm wrestling with the idea of tubbing the car right now. Regardless, it's going lower before it drives again this spring.

                      Originally posted by DC Customs View Post
                      I love everything about this car.
                      Thanks man, I appreciate the kind words.

                      Comment


                      • #26
                        I disassembled the four pots today as best that I could with what was available to me.


                        The four bolts that hold the two halves together were *really* on there. I had to have my room mate hold the caliper onto my work table with both hands while I used a 3 foot pole on my ratchet to get them broken loose. Upon inspection, the bolts were really corroded and gross. I tossed all eight of them into a mason jar and hosed them down with brake clean. A couple passes through the threads with a wire brush and a tooth brush got everything cleaned up nicely. The brake pads still looked very much alive, so I won't need to replace those this time around, which is nice for the wallet.

                        Unfortunately, the pistons are not willing to come all the way out. I used a flat head wrapped up in painters tape to coax them out a ways, but they're probably going to need compressed air to pop them out. I don't have a compressor right now, so that'll have to wait. Otherwise, as usual, all the components I could get off (seals/gaskets/etc) were put into labeled zip-locks and put aside.

                        I probably won't be doing much work until after the New Year, so I put everything away and called it a day after that.

                        Comment


                        • #27
                          I tried, but I couldn't sit still today and I was able to get some work done on the wagon.
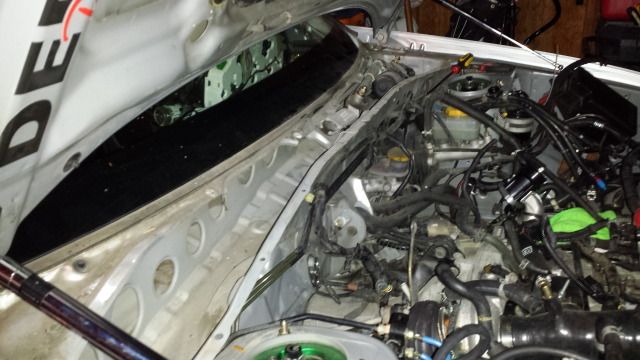
                          Out of curiosity, I decided to see what was in the wiper cowl. Fortunately, the only thing in there is the wiper motor. Otherwise, it's a big long covered space which looks great for hiding "stuff". The measurements of it are about:
                          5 1/4" deep at the deepest
                          5" wide at the widest
                          52" long


                          This should be plenty of room for me to hide hard lines and be able to keep the ABS.
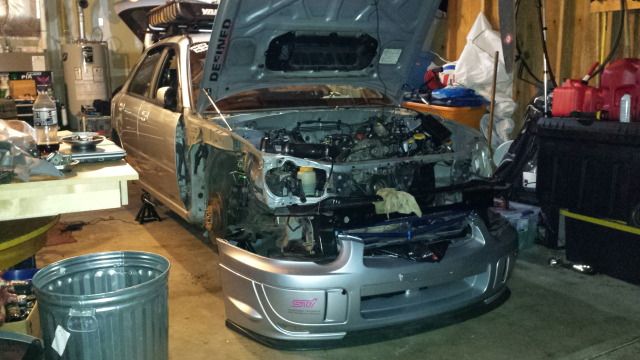
                          Other than that, I took the front fenders and headlights to make it a little easier to lean up against the car and into the engine bay.


                          I also took some rough measurements of the ABS module and Fuse box. The ABS module is about:
                          3 1/2" wide
                          5 1/2" tall
                          7" long
                          I'm thinking that I should be able to put it underneath where it is right now (upside-down.) As long as the orientation of the module doesn't matter, I should be able to fit it upside-down behind the bumper and out of the way of the fender well. Then I'll have to have hard lines made, routed in a group along the inside of the body and up into the cowl next to the strut tower. In theory, this sounds reasonable, but I have no idea in practice how it'll work out. I can't really think of any complications besides air in the ABS? If any of you know anything I don't about this, please speak up.

                          The fuse box measured at about:
                          3 1/2" wide
                          4 1/2" tall
                          7 1/2" long
                          That should be able to fit in my glove box and leave a little bit of room for something else small in there. I'm hoping to be able to use the hole in the fire wall that the A/C used to be in to extend out and route the harness.

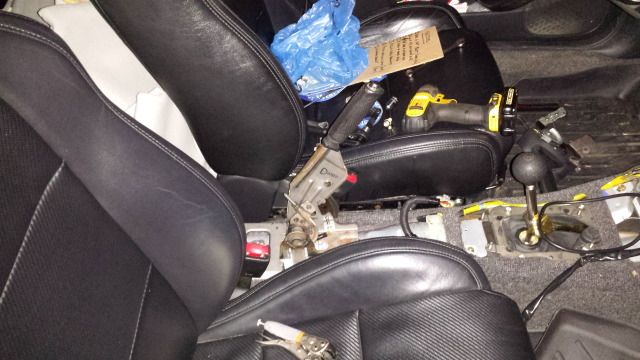
                          Other than that stuff, I took a few minutes and switched out the E brake for the 05 STI one. This E brake sits closer to the driver's seat and matches the hole in the center console I'm swapping in.

                          Comment


                          • #28
                            Got some more work done today!

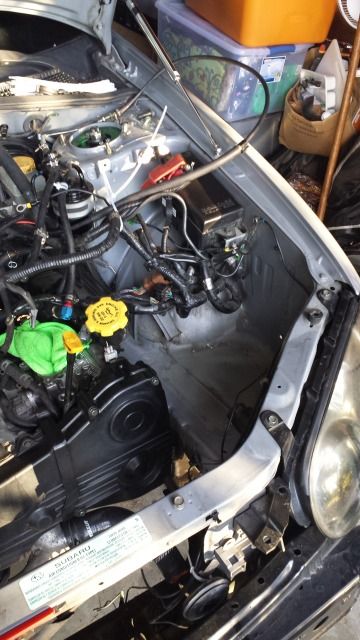
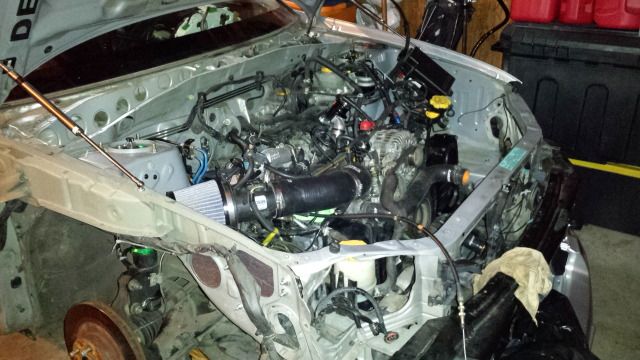
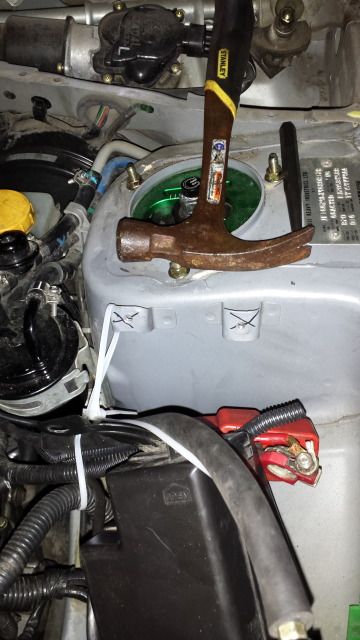
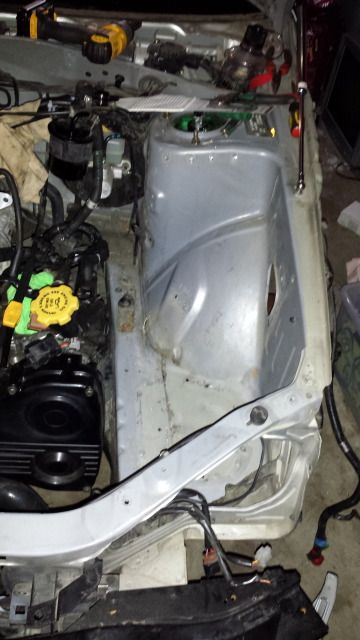
                            I decided to focus on the driver's side and clean up as much as I could. I started by marking all the brackets that I wanted to delete with an "x." I then took a sharp punch, and put a good dent into the center of the spot welds so that my drill bit would have something to bite into. Then I drilled it out a little with a regular titanium bit, followed by a spot weld drill bit, and knocked the brackets off with a chisel/hammer.


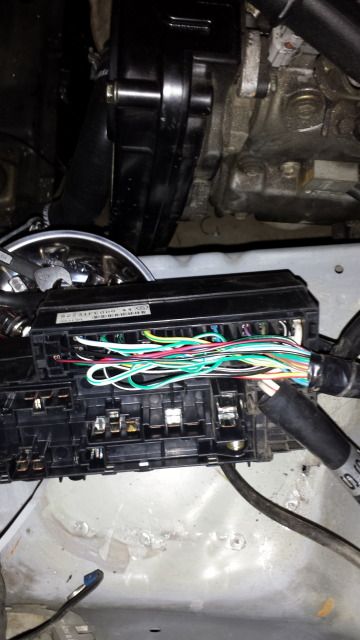
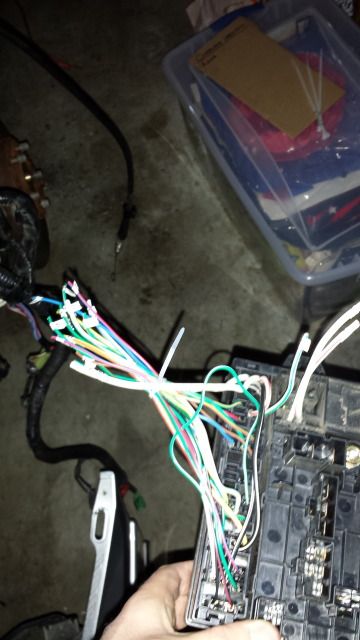
                            I also decided to tackle moving the fuse box from the wiring harness.


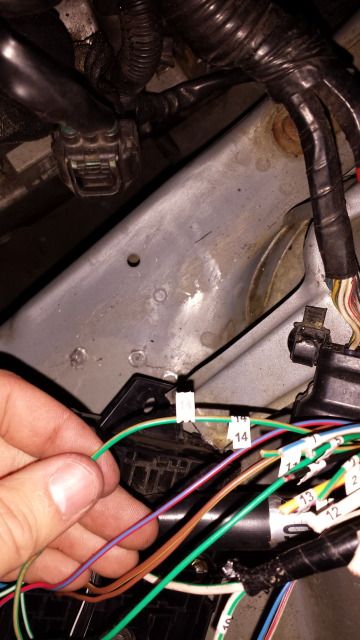
                            I split the box open, and unplugged what had connectors on the back, and brought those outside the fender and hung them down along side the hub. For the stuff that wasn't on a connector and part of the actual harness, I cut away the shrink wrap holding it all together, and untwisted it as best as I could. I then took little wire labling tags, and labeled each wire individually.


                            After I had two of the same numbers on a wire, I cut in the middle of the two numbers and zip tied the loose ends on either side.


                            Here is the driver's side after today's work:


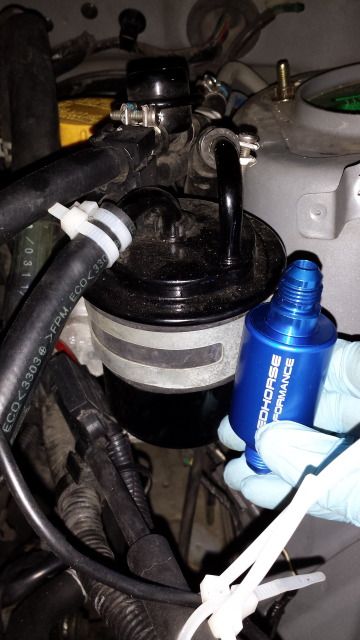
                            I was also able to find this in line fuel filer made by Red Horse Performance at my local auto parts store. It's already got -6 AN fittings on either end, which is perfect, as the rest of my fuel system is all -6. It is MUCH smaller than the stock fuel filter and should be pretty easy to mount inconspicuously.


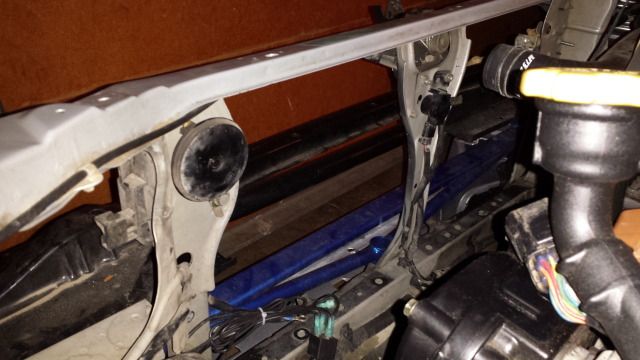
                            I also took a few minutes and reversed the position of the stock horn, and stock alarm speaker so that they're not visible from the outside of the engine bay. Here is a shot of them from where the headlight is. Nothing major, but I think it cleans it up just a little bit more.


                            Happy New Years.

                            Comment


                            • #29
                              very nice work man, love your car.
                              im also a fan of your attitude
                              '83 Porsche 944 build

                              Comment


                              • #30
                                Originally posted by dirtmcgirt View Post
                                very nice work man, love your car.
                                im also a fan of your attitude
                                Thanks! I'm trying to have fun with this build. Not always easy,but I'm trying!

                                Comment

                                Working...
                                X