Originally posted by C-Hutch
View Post
-
Thanks man! I will probably see you around at school this fall. Gonna be tough trying to build while living away from where it is.Originally posted by hfabricius View Post
Thanks man. Got a little better over the next few classes:Originally posted by speakerboy View Post
Gonna miss not being on the TIG machine :'(
Yes it will lay rocker when I am done.Originally posted by CubbyChowder View Post
Messing around a bit in photoshop to try to get my bed proportions down:

Overall length of a long bed is 101 inches front to back. This would be 87 inches total. I would take roughly 7 inches off behind the wheel arch and about 7 inches off in front of the wheel arch. I used the ruler tool to measure how many pixels from front to back then set it to scale in inches and remeasure with the new lengths. What do you guys think? Here is long, mid, and short for reference:


I think the short beds look like chodes.
Anyways, drivetrain and rad core and inner fenders are off. Window tracks and vent window rebuild pretty much done and patched some more rust. Updates in the next few days. Thanks for the kind words everyone.Leave a comment:
-
I'll be following this one, excited to see what you do with it. Sorry if I missed it, is this going on bags?Leave a comment:
-
I am so jealous, I want that truck! My c10 was just totaled by a tractor trailer, so I'm hoping I can find an early 60's to replace it. Keep up the good work!Leave a comment:
-
This is looking awesome! I can't wait to see further progress and the other things that you have in store for it.Leave a comment:
-
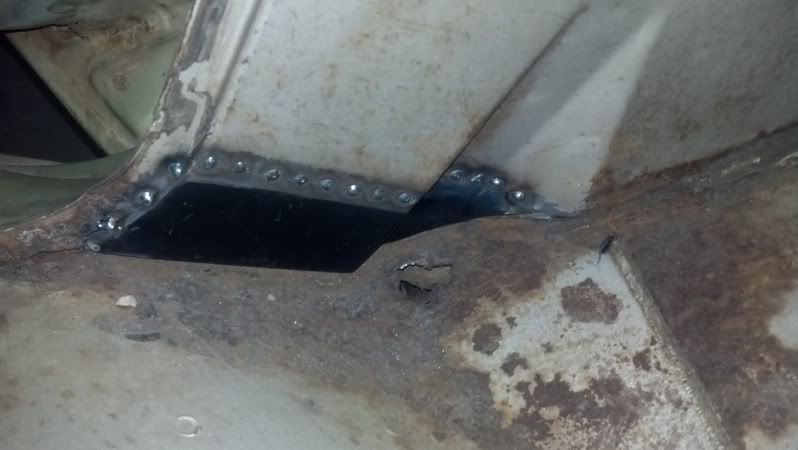
Got all my rubber seals and stuff in and have started working on that and some other things. Ran into some issues with the window track for the division bar being pretty crappy so had to order some other stuff and do some prep for the new seals. I started poking around at the rust and it as a bit worse than I thought so I ordered some patch panels:
(crappy camera in crappy lighting so bear with me)

It is really tight in the foot well so I put a cut off wheel on a pneumatic dremel thing (sounds like a dentist drill and makes my teeth hurt) to give me a little more room where I need it:

Zip zap rap Dave the turntable slave

These big honkin' panels:

More zippin' and a zappin'

Swoop
Not perfect but I am very proud of it for my first patch panel. I don't have any fabrication or rust repair experience at all so I am learning. I am loving it though. Probably should have gone all the way to the sealing surface but I didn't want to drill out spot welds. Gonna make some patch panels for the floor and the bottom of one of the doors and do the other foot well.
I also picked out all my old seam sealer and put naval jelly on it to remove any rust. Then coated with POR15 and applied some seam sealer to try to keep the water out. The 50 year old stuff wasn't cutting it. This was just a pain in the ass really. Cleaning out drip rails and stuff.
Really nasty stuff to deal with. Went into it thinking I could smear off excess with my finger. Once it gets on the gloves it just doesn't want to come off.

Windshield sealing surface was really gross. It was like plumbers putty goopy stuff on everything:
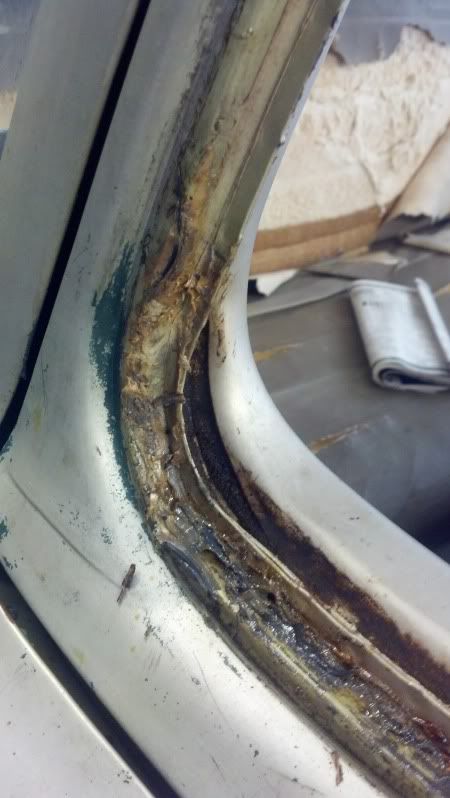

Cleaned up nice tho with no rust underneath:
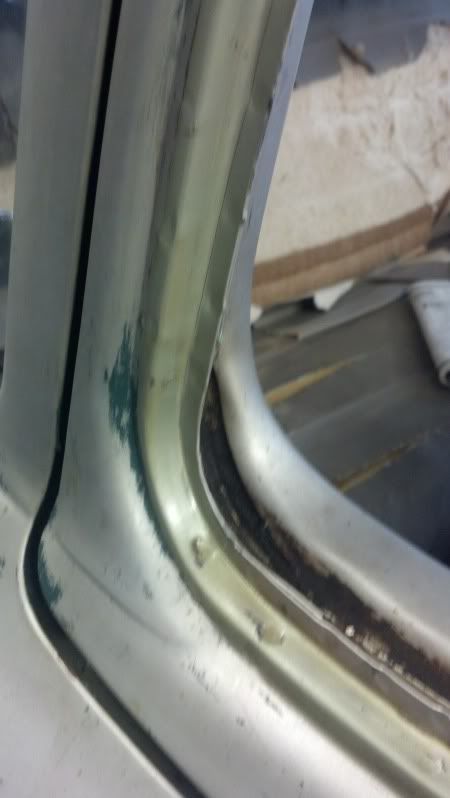

Also got the rear glass in with the new seal:

Here is the seam on it. It was cut-to-length:

Going to tackle the rest of the rust and installing the windshield in the next few days. Been letting it sit in the sun with the seal on it for a while. Supposed to be a massive paint with the wrap around windshield and I might break it but whatever yolo swag 420 blaze it

Took the seat out because I almost burned the garage down with it in there. Also trying my hardest to not let my garage get too dirty. Which seems to always happen.
Oh and I am in an intro to welding class and this is day two doing stainless on the TIG machine. SO much harder than MIG. Especially aluminum. We won't post any pictures of that:
 Last edited by csermonet47; 07-30-2013, 09:44 PM.
Leave a comment:
-
Thanks guys. Got the bed off and put all the other parts in storage. Cleaned up the frame a bit and looking good. Not much to do until I order my rubber seals and stuff. There is nothing to the rear end of this thing.


It is way faster now and does mega burnouts. Maybe have another burnout video in the future ...Leave a comment:
-
ooh now this is going to be great! *squirms in chair at work*
good luck!Leave a comment:
-
Made some good progress today. Got the fenders, cowl pieces, hood, and nose panel off. Only broke one bolt. This thing is nicer than I originally thought. This is the first time these panels have even been removed. Factory seam sealer all in tact still. It is a shame that it was resprayed. Doesn't get much more honest than this:
Relatively clean under the cowl thing piece. Dang mud dobber nests everywhere. You can see in the top right the little u shaped pieces of metal. They are used to space out the panels to make them fit right. I guess they had pretty bad tolerances from the factory:

The other side has the original factory assembly number on it:

Wet towel and some scrubbing making it look like new:

Original undercoating still there:

Seam sealer still sticky and fresh looking:

A lot of times this area rusts out really bad and makes everything hard to get right. This is good to go though.

Cotton in the radiator still. I wonder if they had any slaves.

Stopping point for the day:

Sleek and aerodynamic cutting edge technoligies

Bed comes off in the next few days and putting a lot of those parts into storage. Need to order some seals to redo all the windows and stuff.Last edited by csermonet47; 07-13-2013, 06:06 PM.Leave a comment:


Leave a comment: