nice work as always
fat orange text can be a little eye straining to read
-
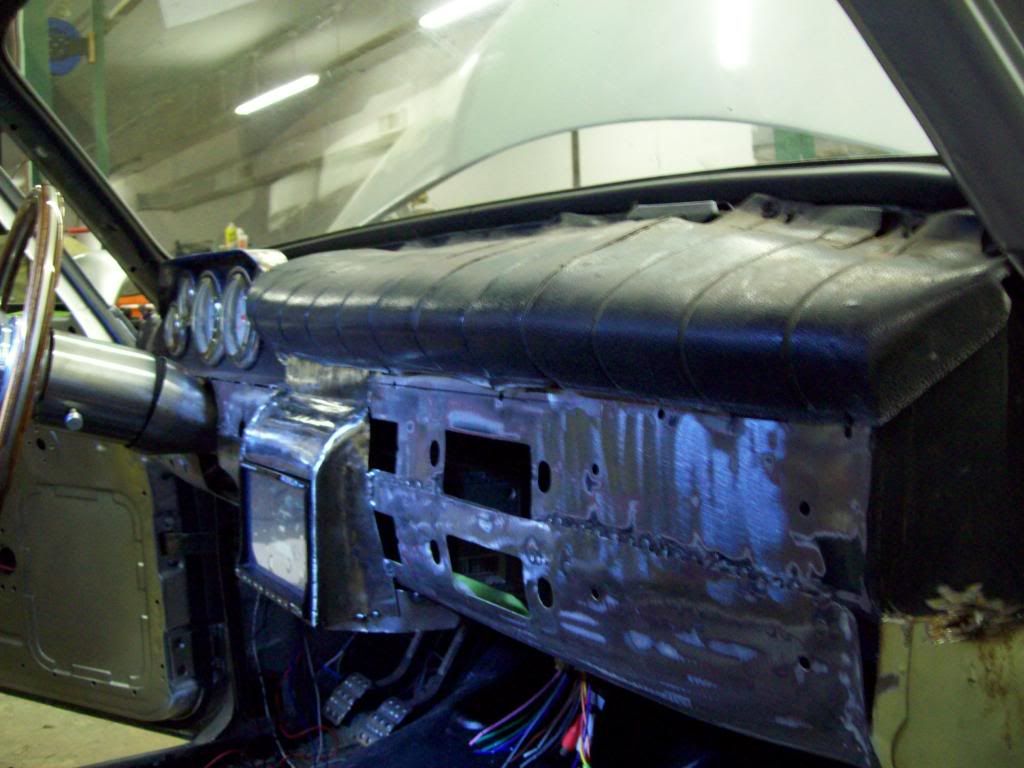
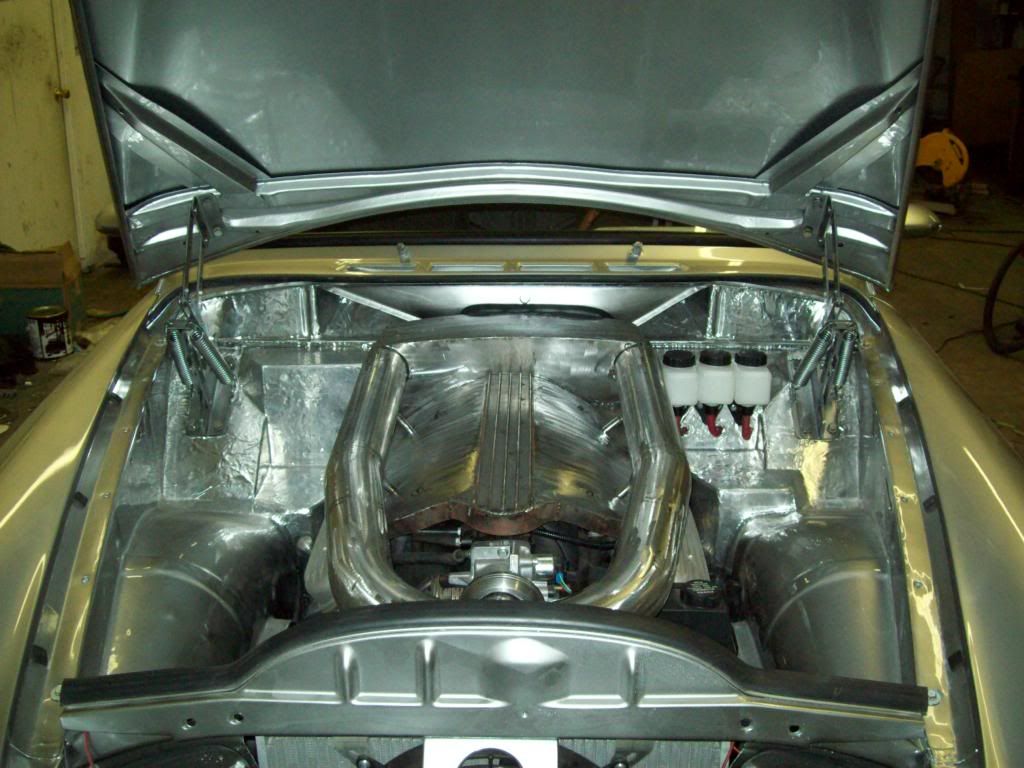
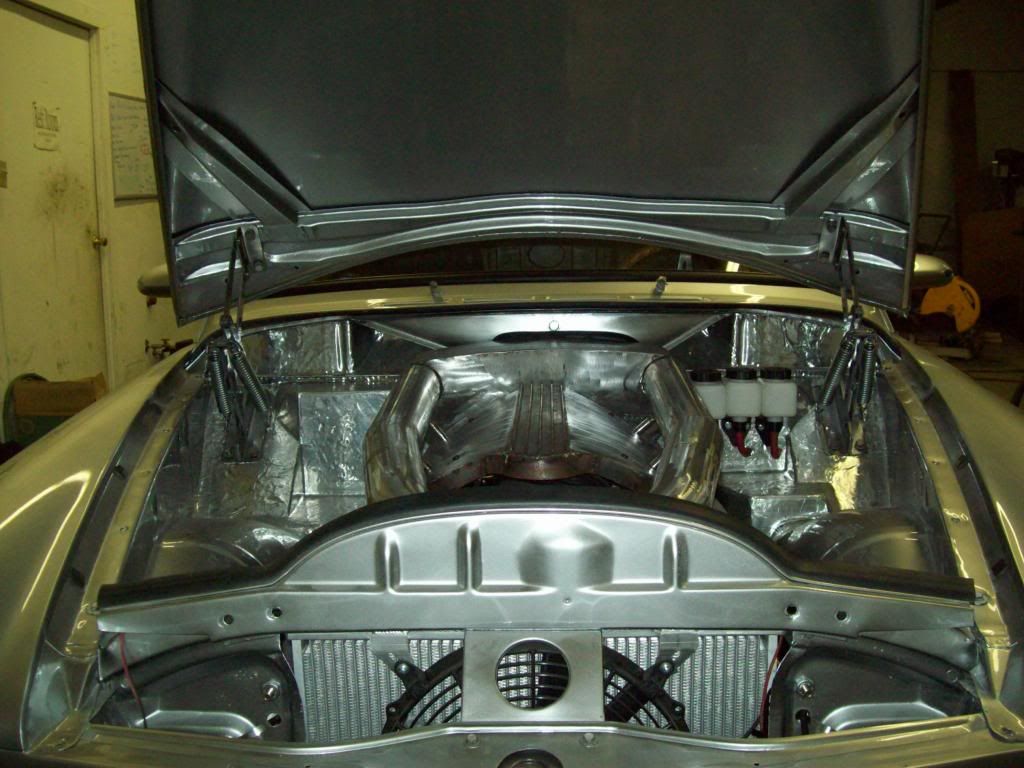
Volvo X is moving forward at this time, but I have been out of the office trying to take care of alot of the finishing details.. The final version of the firewall conversion kits made it in, so I figured I would post some pics of how it turned out.. I am very happy with it, because it will save alot of sorting and build time on the customer builds... Here is how it works..
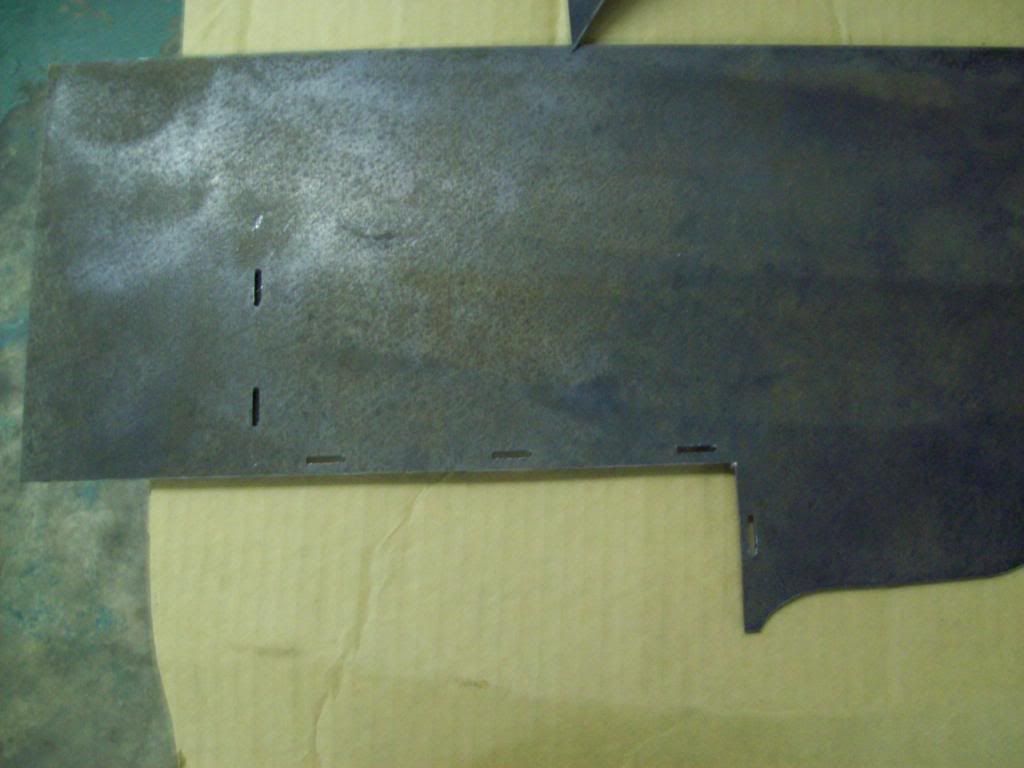
This center piece pictured here shows you where the necessary cuts are.. It is made to self locate on a few body reference points, and that is how you will determine where your cuts are. After that, it will then mate up to the Volvo body to allow easy welding during the final install
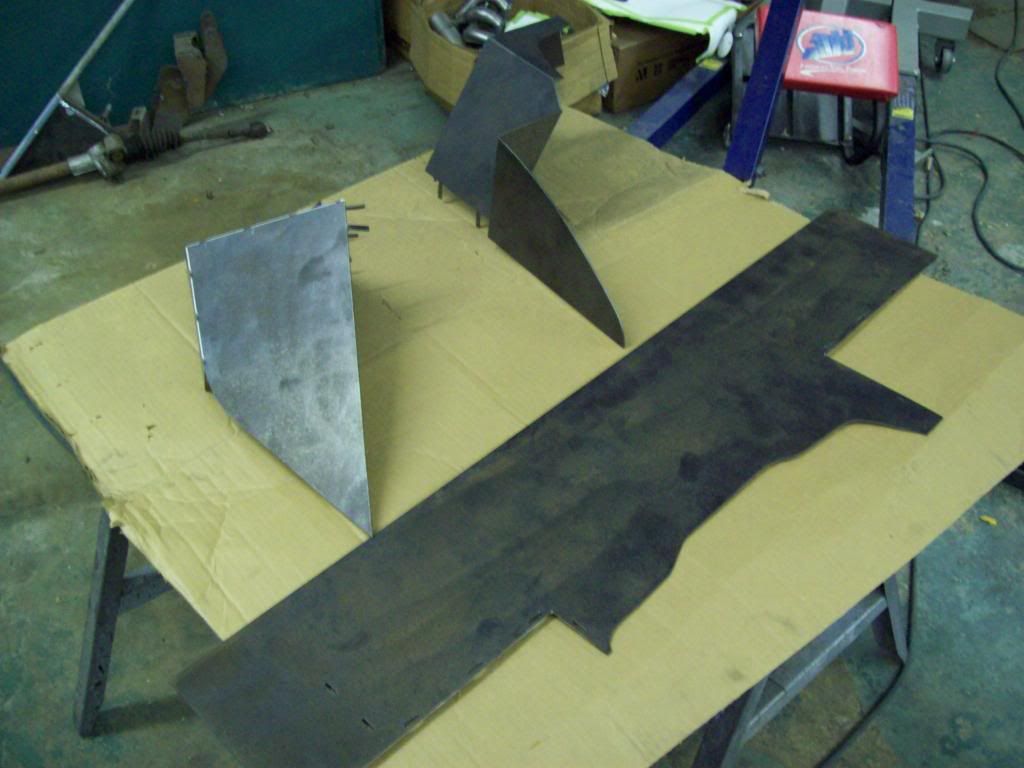
The two side pieces come in one piece flat plates that are done in a fold and weld system. You can see the relief cuts that will allow you to easily bend the pieces into the necessary shape, and the finished shapes tie in the new firewall to the factory inner fenders and floor pans. After you use the center section for the initial center section cut, you can then place these side piece on the new center section with the tab and slot system that located everything into the right placement, and that will allow you to drop the complete firewall assembly into place to do finaly trimming for the floor pan and fender well blending.

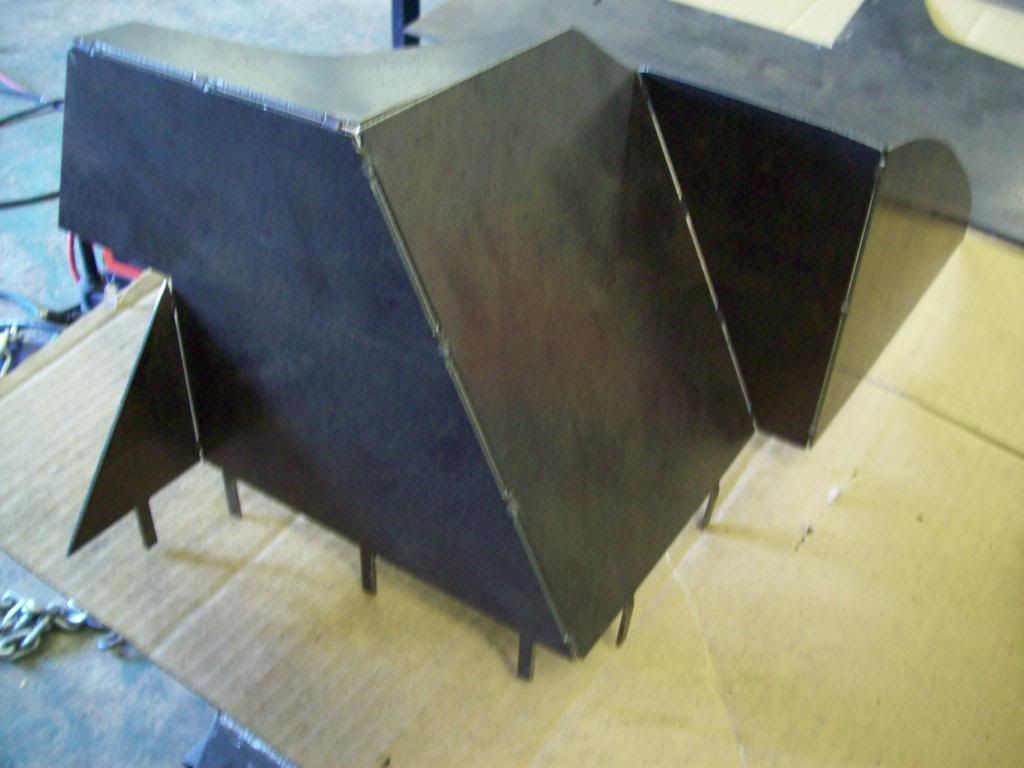
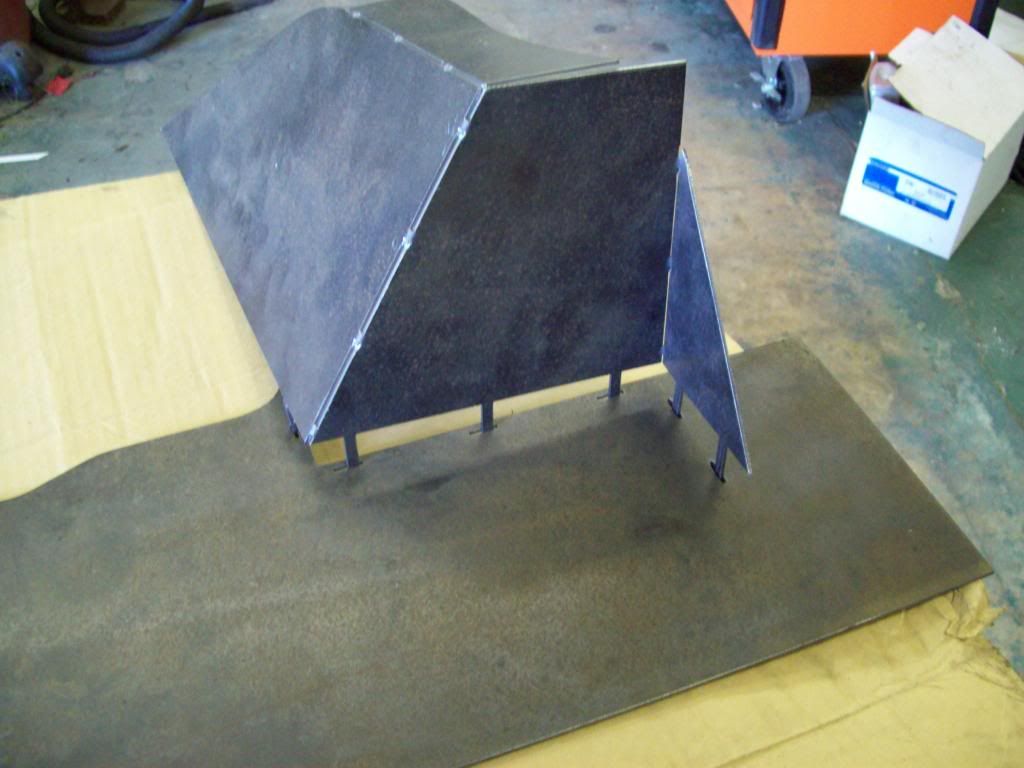
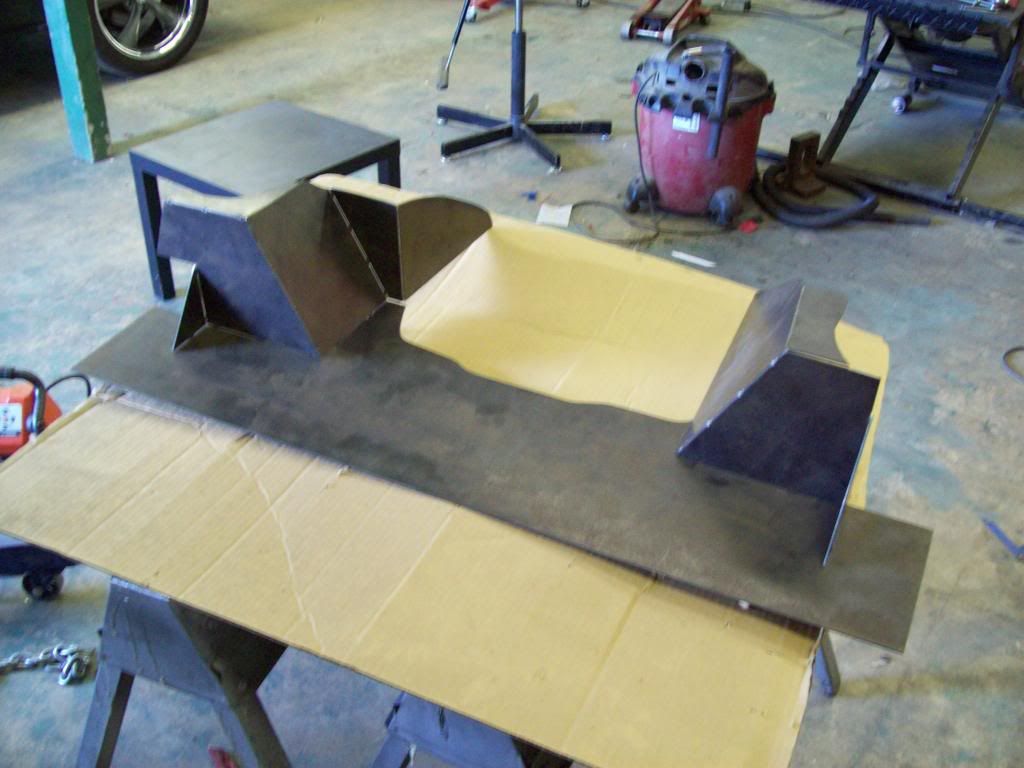
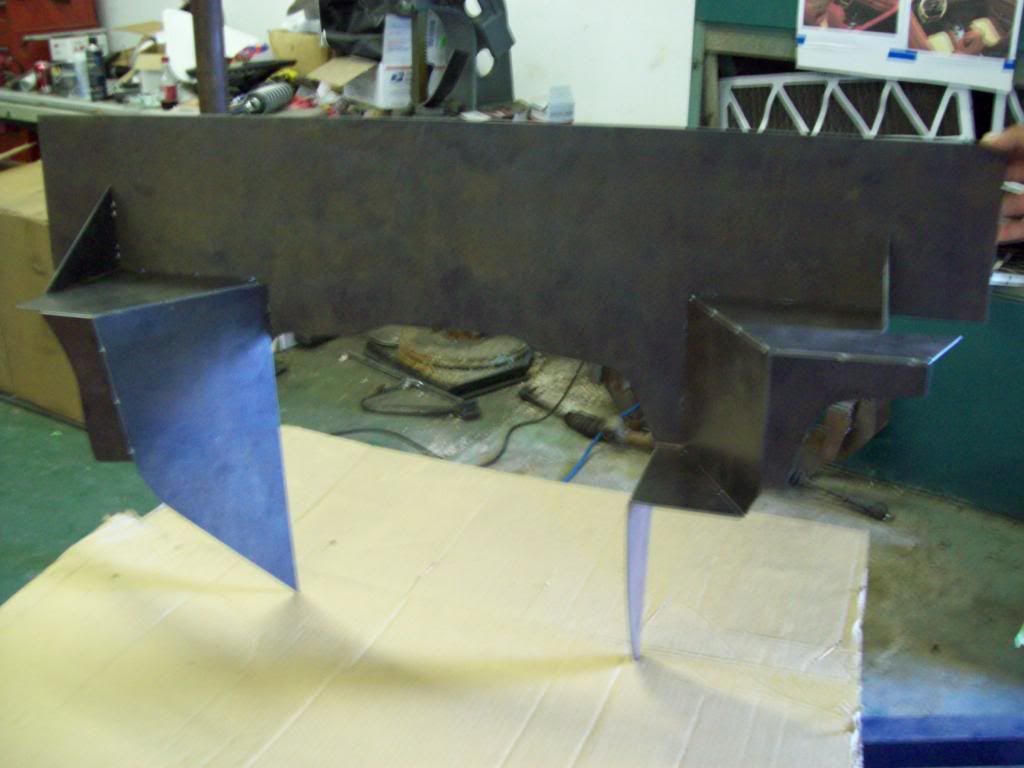
When the complete unit is tabbed together, it will self locate on a few oem body points, and that will allow you to square everything up before welding into place. I am using a heavier guage metal, and by the time all the seams are welded up, it is very rigid. I am running a cross brace behind the firewall for extra bracing and that is what I am using to mount my new steeing column, so it is a win win there. I tried to come up with an easy system for this mod, because I wanted all of my customer builds to have some consistancy, along with allowing the hobbyist builder to have a starting platform. This firewall is made to work with the V8 motor and Trans Bell Housing, along with clear the LS V8 headers and new pedal assembly. My builds are generally running the Wilwood underdash master cylinder and pedal assembly, but I have an attachment that goes with this firewall kit for the oem appearance external power brake booster and external master cylinders.Leave a comment:
-
I was never really a fan of volvo's until I saw these.. I must say these old school volvo's are pretty damn nice!
great fab work.Leave a comment:
-
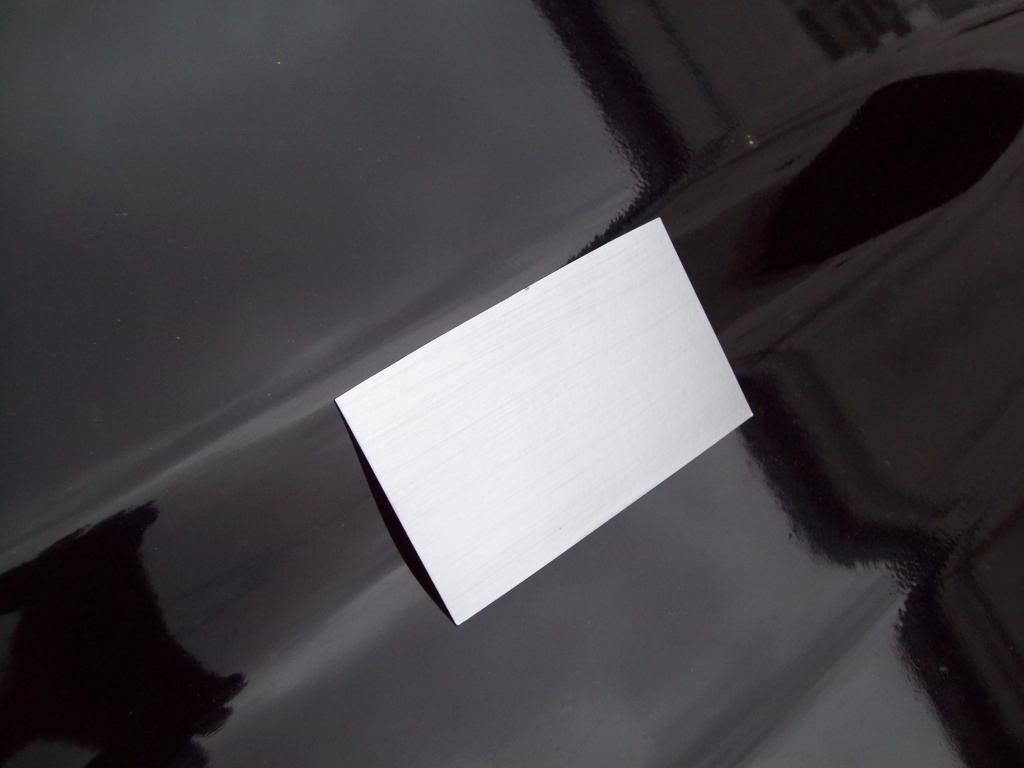
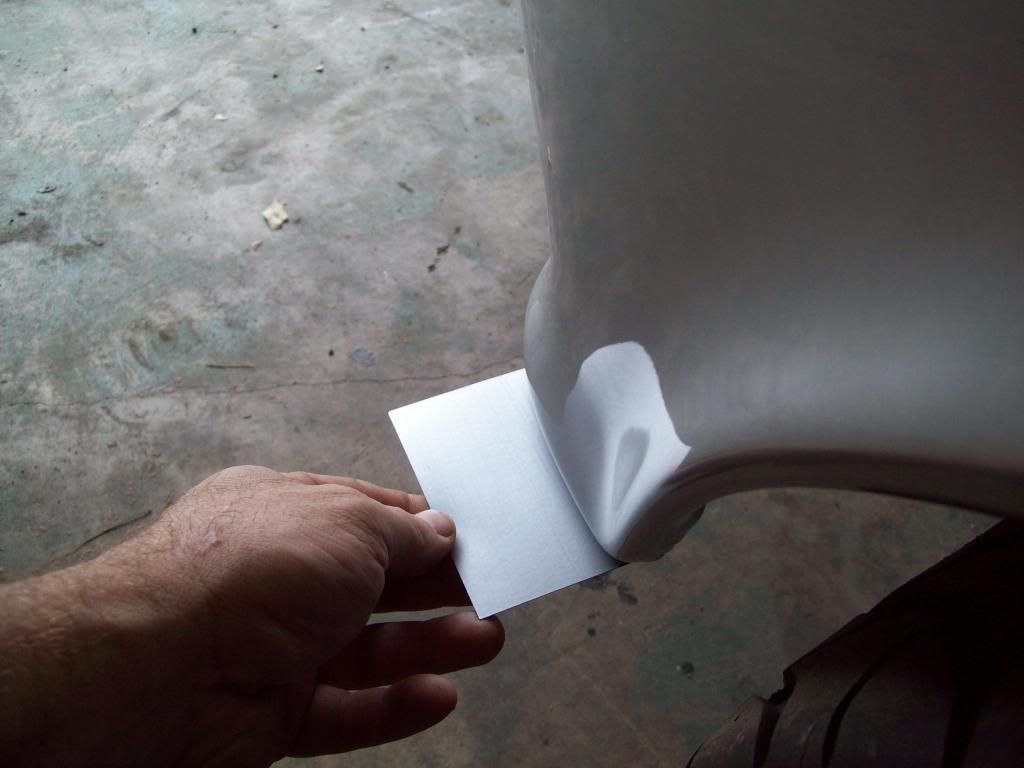
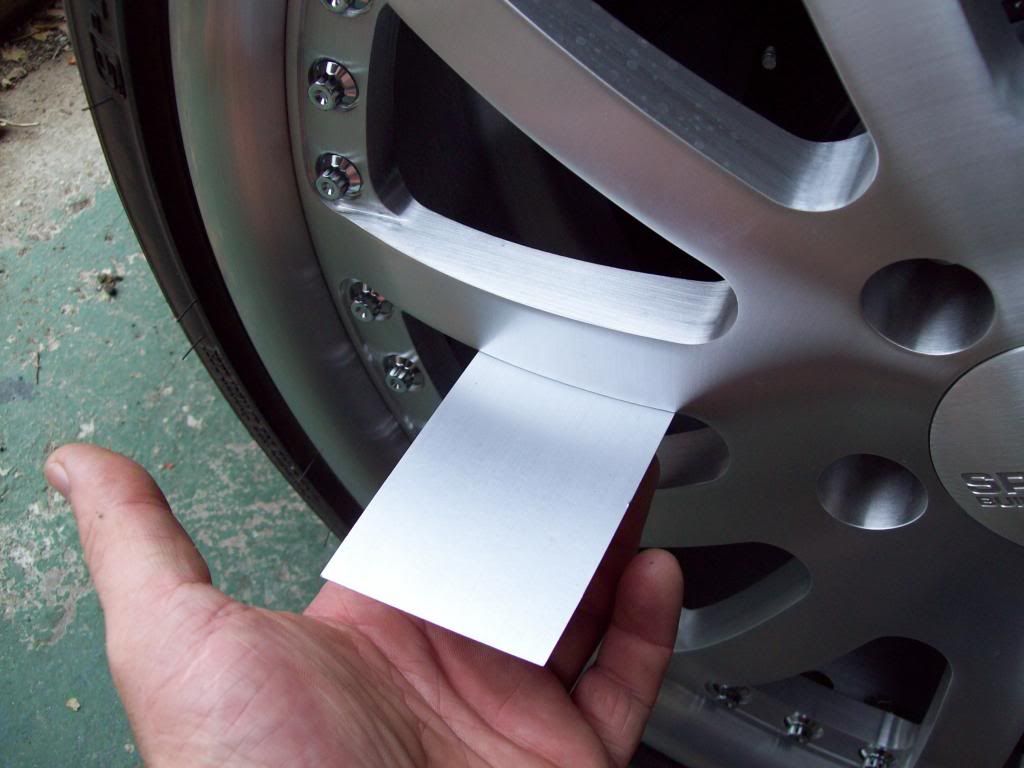
Well, we are having a few issues with the faux brushed aluminum paint process, and it isnt that it doest work, it is that there is a color change during the clear application.. The previous sample picture didnt have clear on it, and when we cleared the first few test pieces, the color shifted a few shades darker, and I cant live with that.. We cant leave the base without a clear, because it will not be durable at all, and will have basic touching and rubbing affect it.
Here are some pictures of another single stage color that I am working with, and it isnt brushed at this time, but we will be experimenting with that.. Hopefully we will be able to lightly scotch brite it, without having to apply a clear afterwards. I have looked in to other process like Hydro Dipping, but that has to be cleared, and you get the fake plastic look I am trying to avoid. There is another process called Cold Metal Plating, and it is the process of actually spraying a mixture of 95 percent metal and 5 percent resin, but it has shows to have a heavy orange peel look, and I dont want that.. After it is applied, you can actually polish it like you would a chunk of metal, but I dont think things would look right if it had a polished cast appearance.
These are not the actual pieces that we are doing for the car, so they are not straight and perfect, and they were not prepped like we are with the parts being used..
Leave a comment:
-
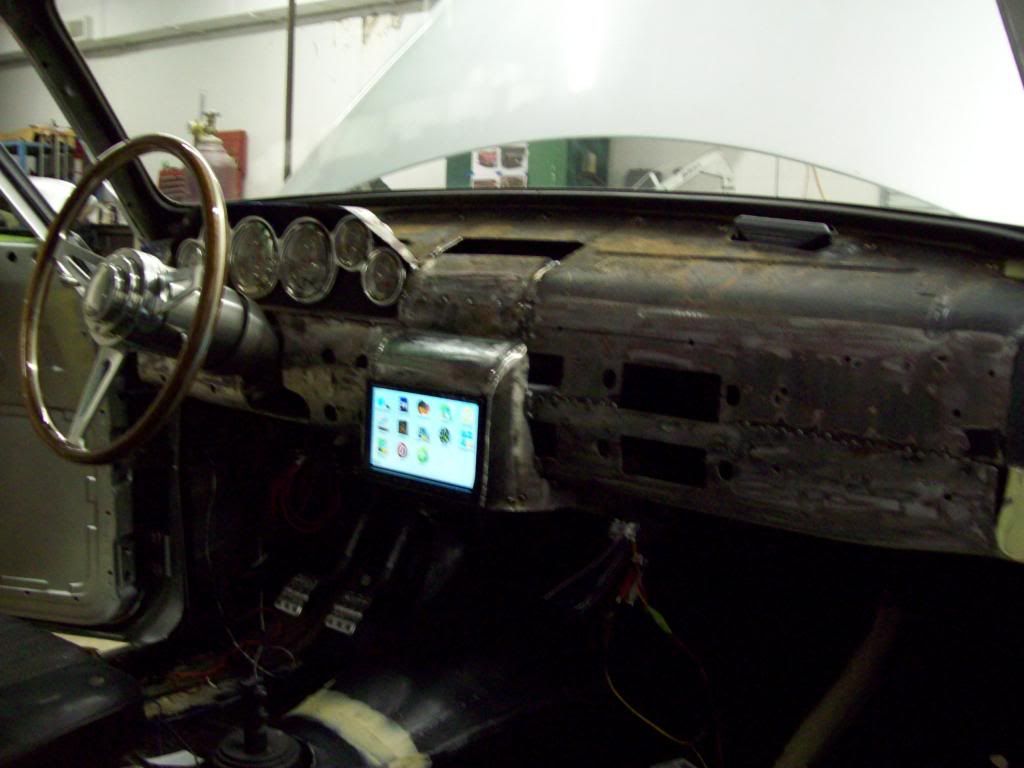
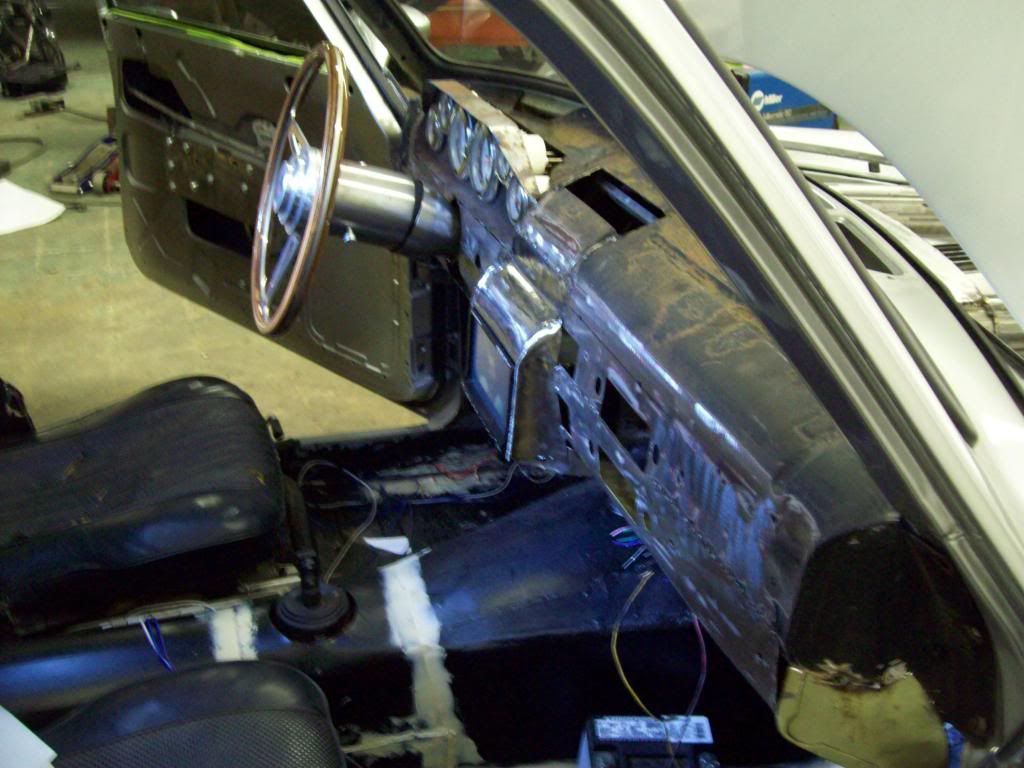
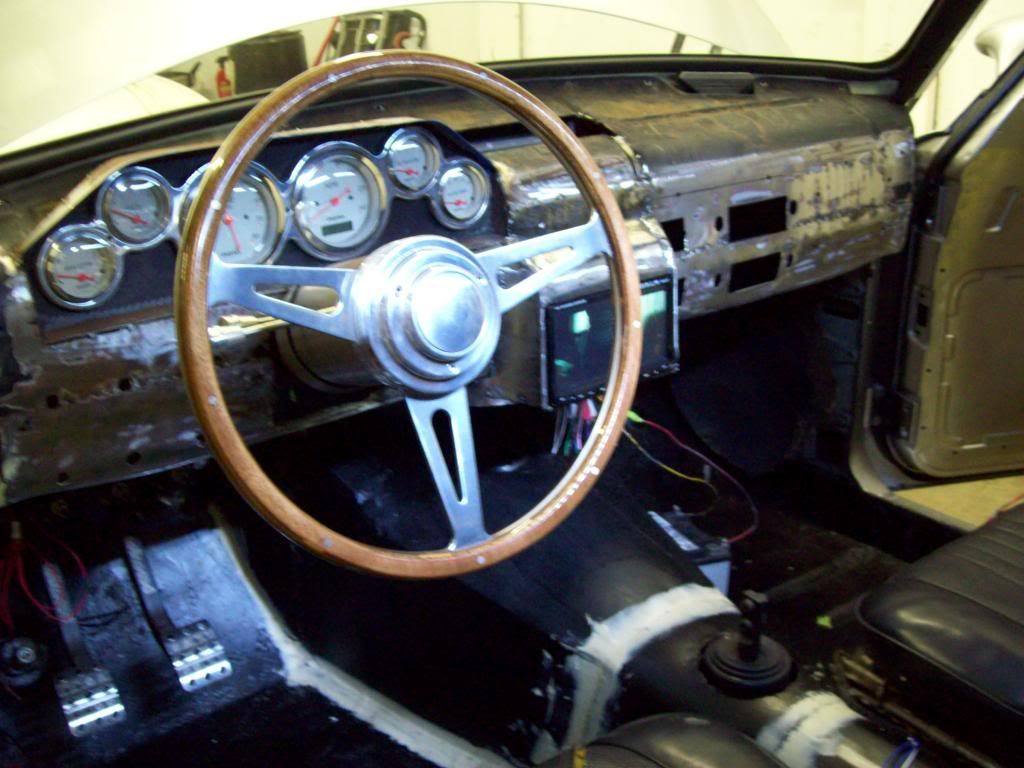
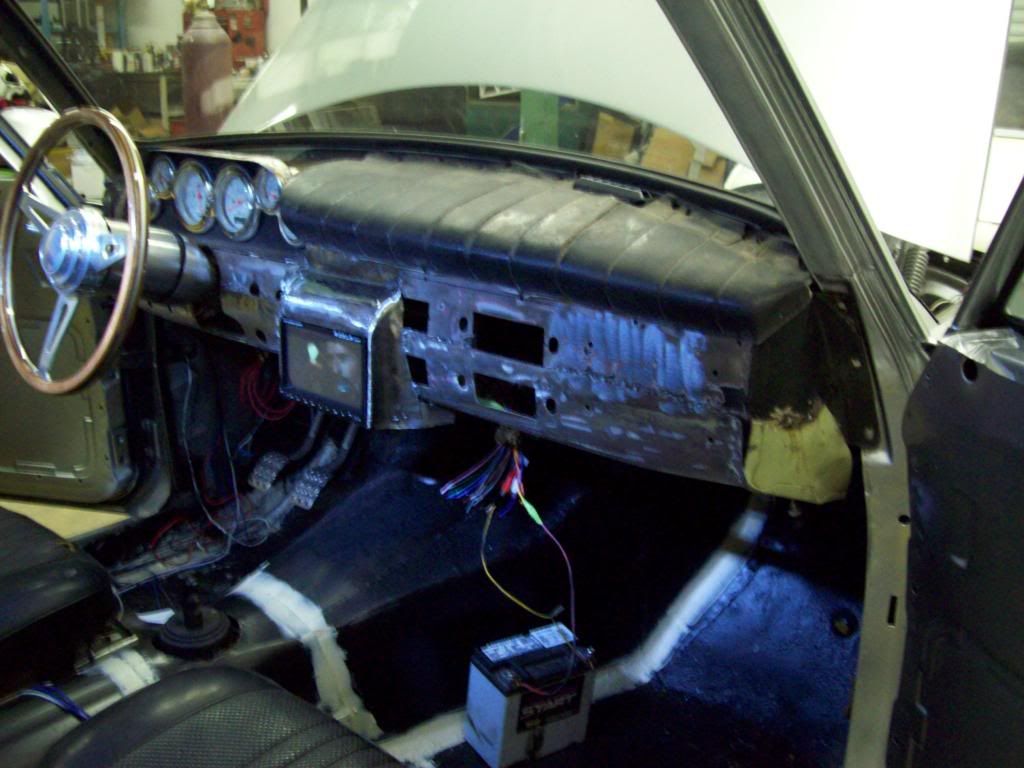
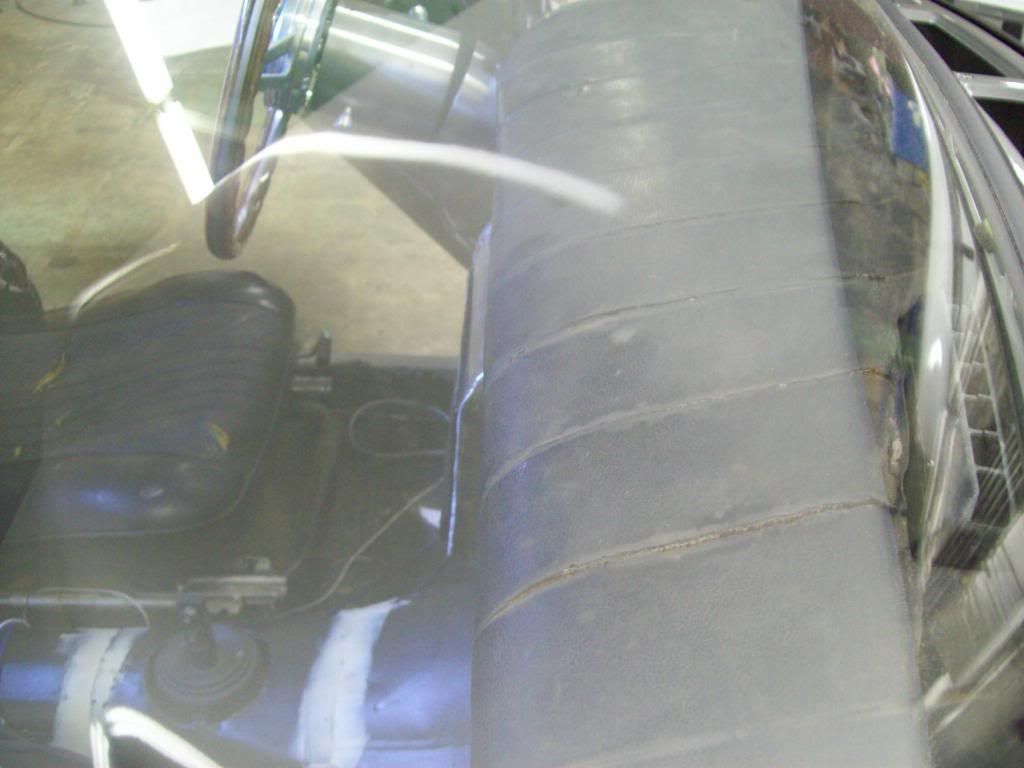
Here are some rough in pics of the Touchscreen Navi/Stereo system in the car, and it was a bit of a pain in the ass due to the Wiper Motor position, but it is in there.. I am not a big fan of Consoles in general, and I really wanted to avoid running one at all on this car, so this is bascically the setup I had to run.. I could have move the unit 4 inches toward the passenger side, and then I could have mounted it in the higher position I really wanted, but I wasnt going to do that.. I tried to mount it up higher on the dash like the modern cars, but that didnt change a thing with the wiper motor interference, so lower was the only way to go here.
Once the Leather Dash pad is situated, it will take away from some of the extension bulk, and I was considering having the leather actually come down the center of the dash, but I am not sure about that yet.. It isnt that noticable in the pictures, but on the sides of the dash extension, I have the metal rolled inward, so that it isnt just a straight out side wall. I also tried to mimic the roll of the top of the dash for the top of the extension, and that might actually work out nicely for a center AC Vent position now? Again, these are the rough in pictures, and I still have to fill in all of the extra factory holes in the dash, but I wanted to see if I can live with this setup, before I finalized all the welding and grinding..
Leave a comment:
-
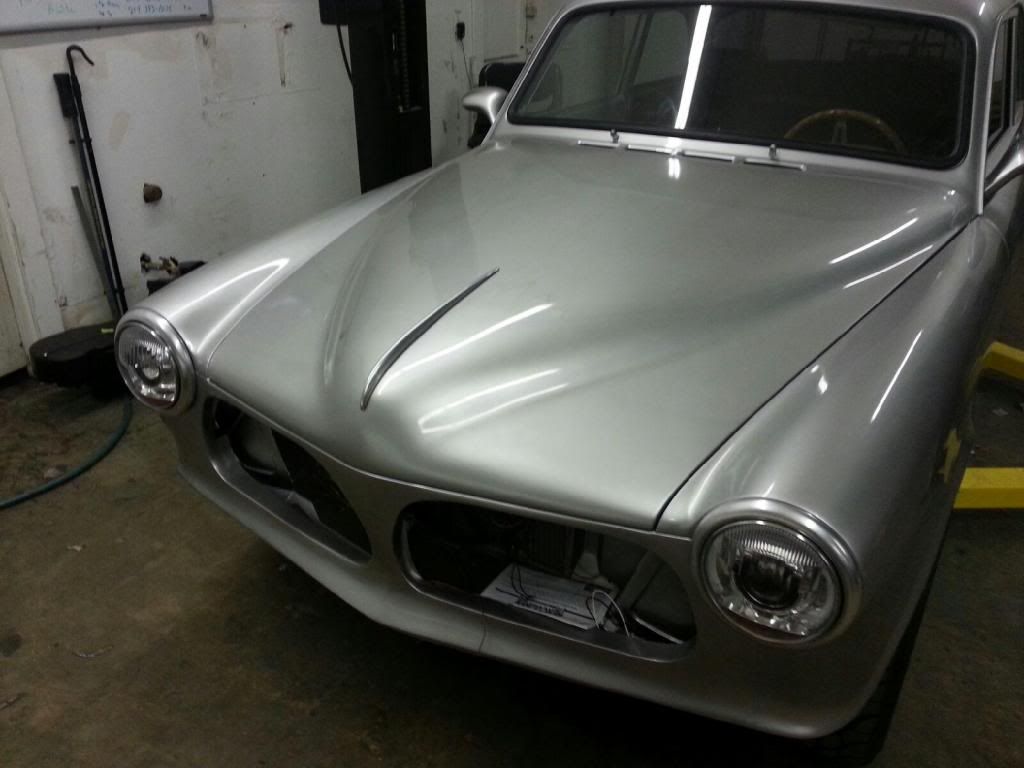
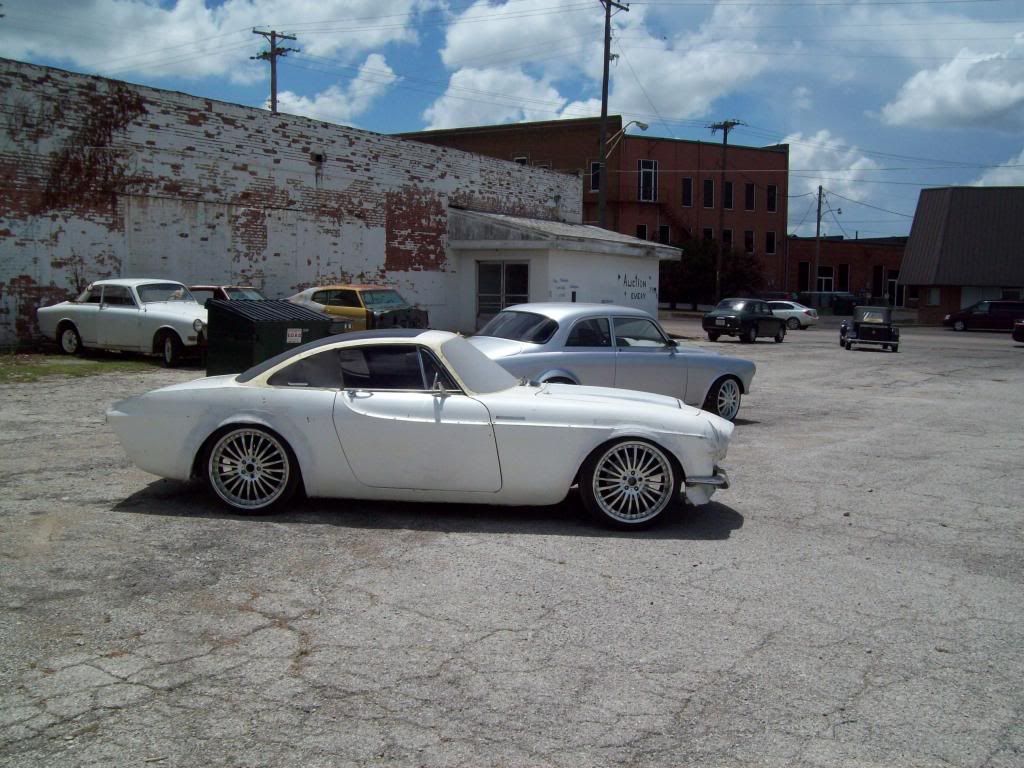
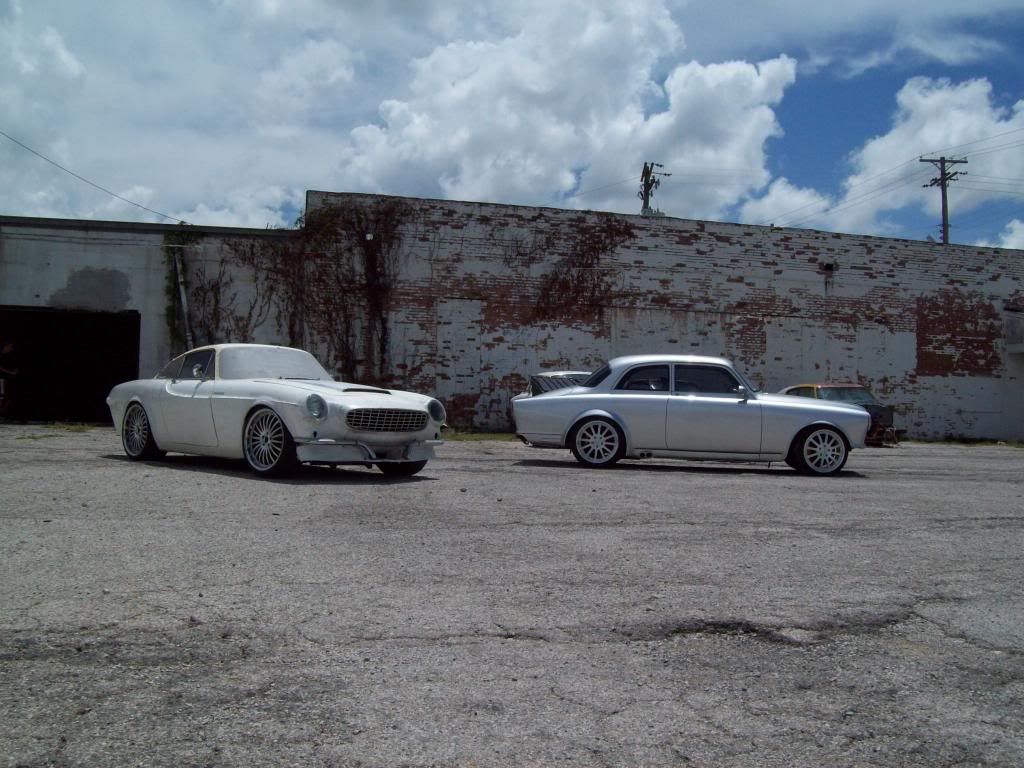
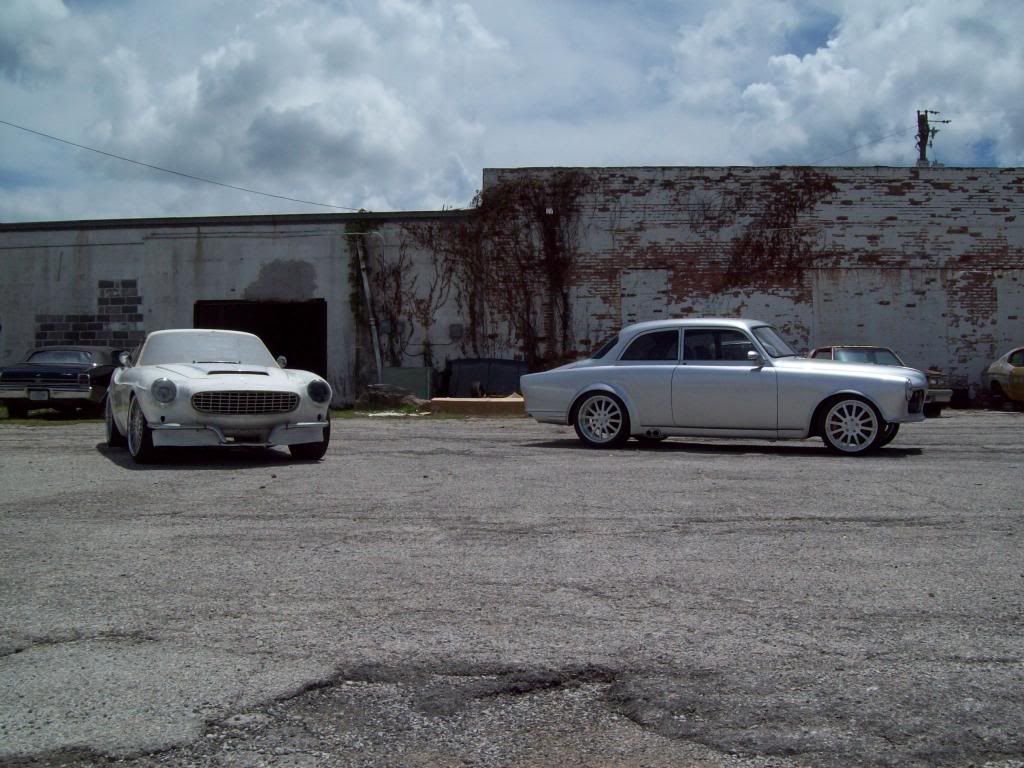
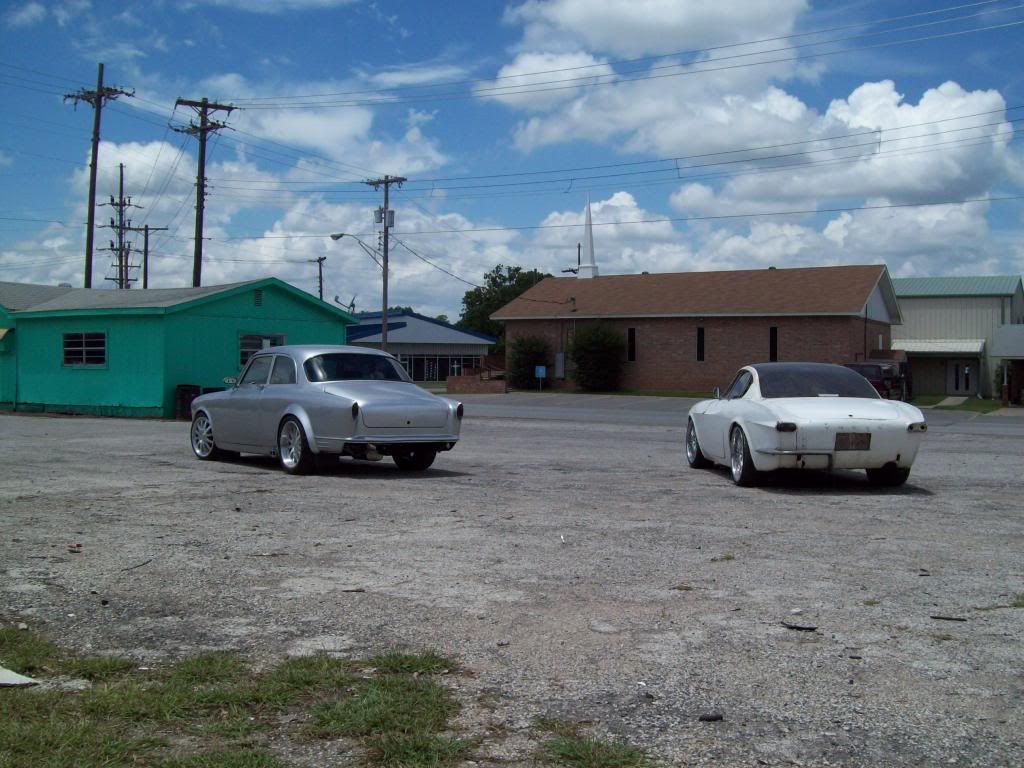
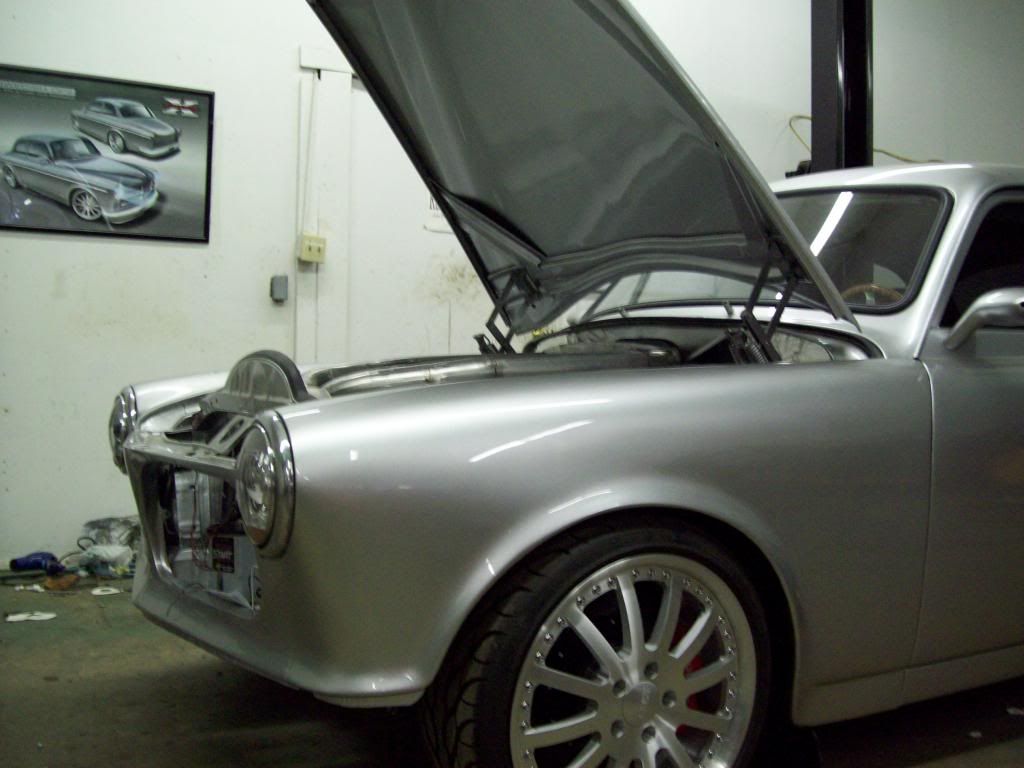
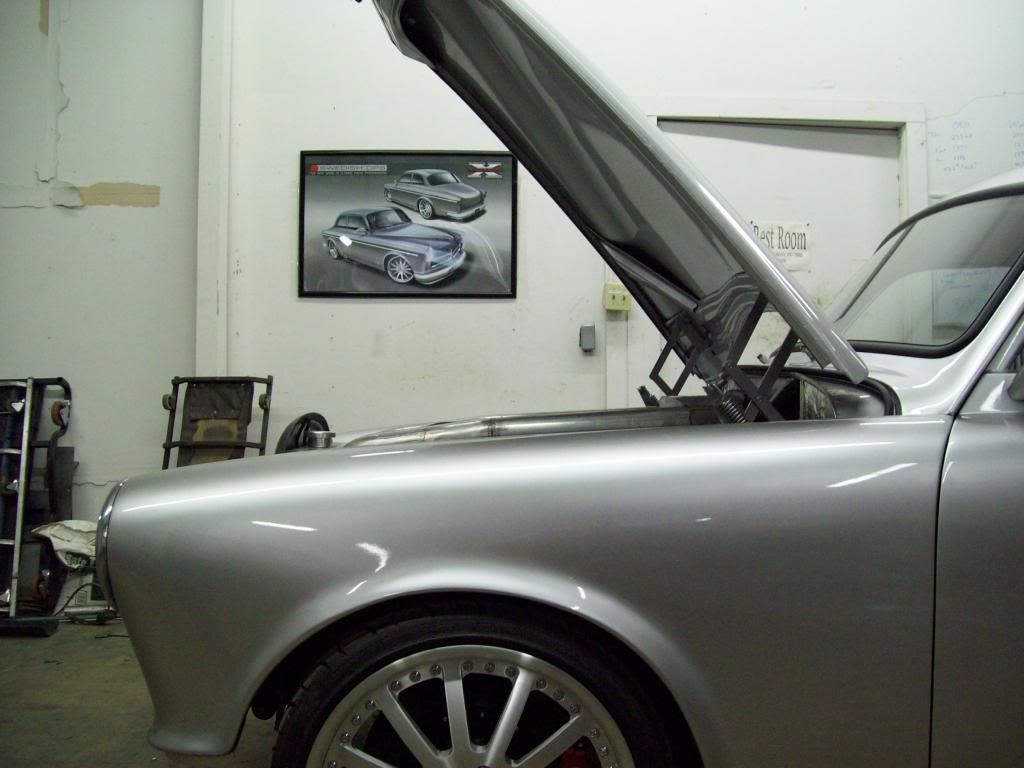
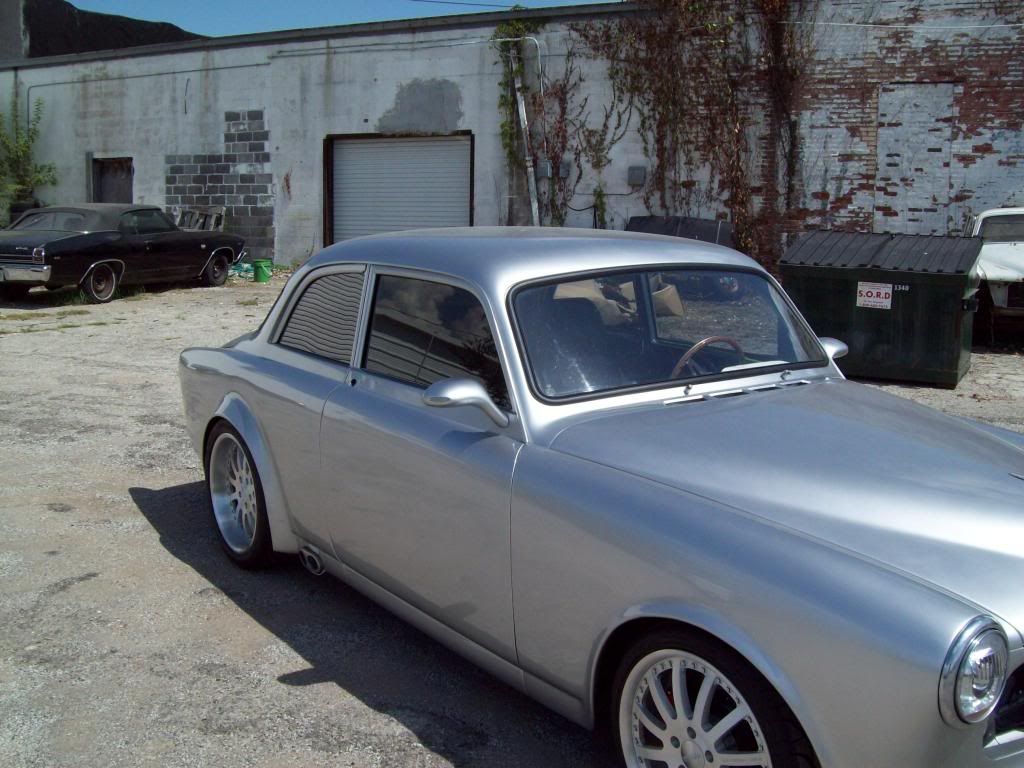
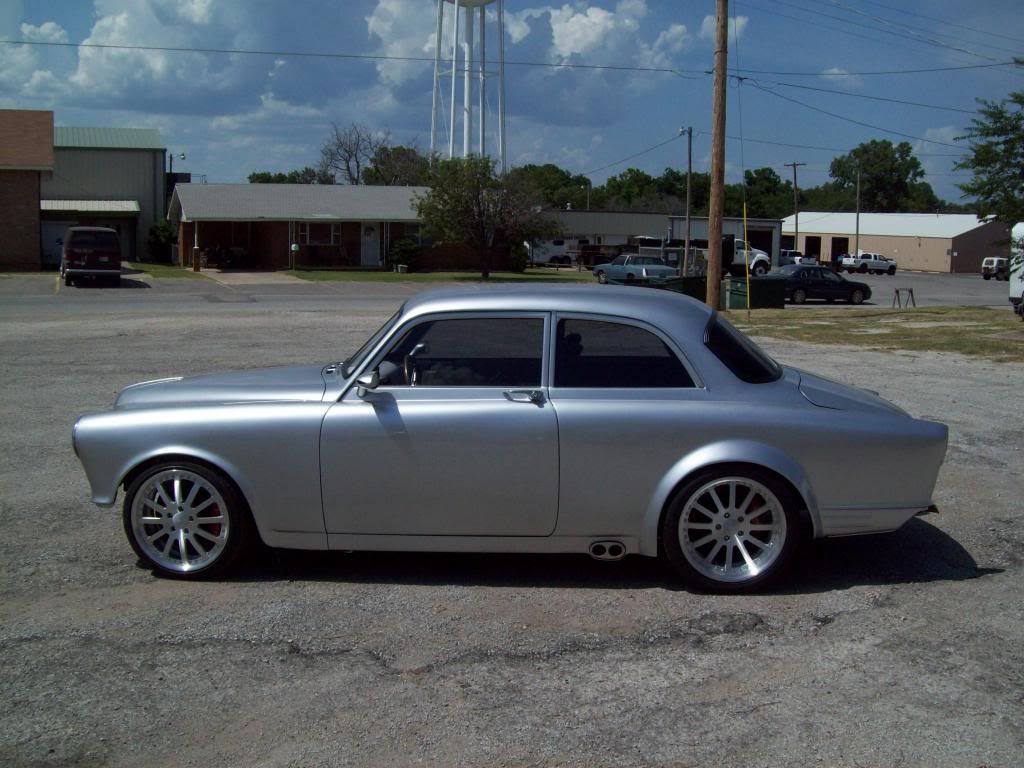
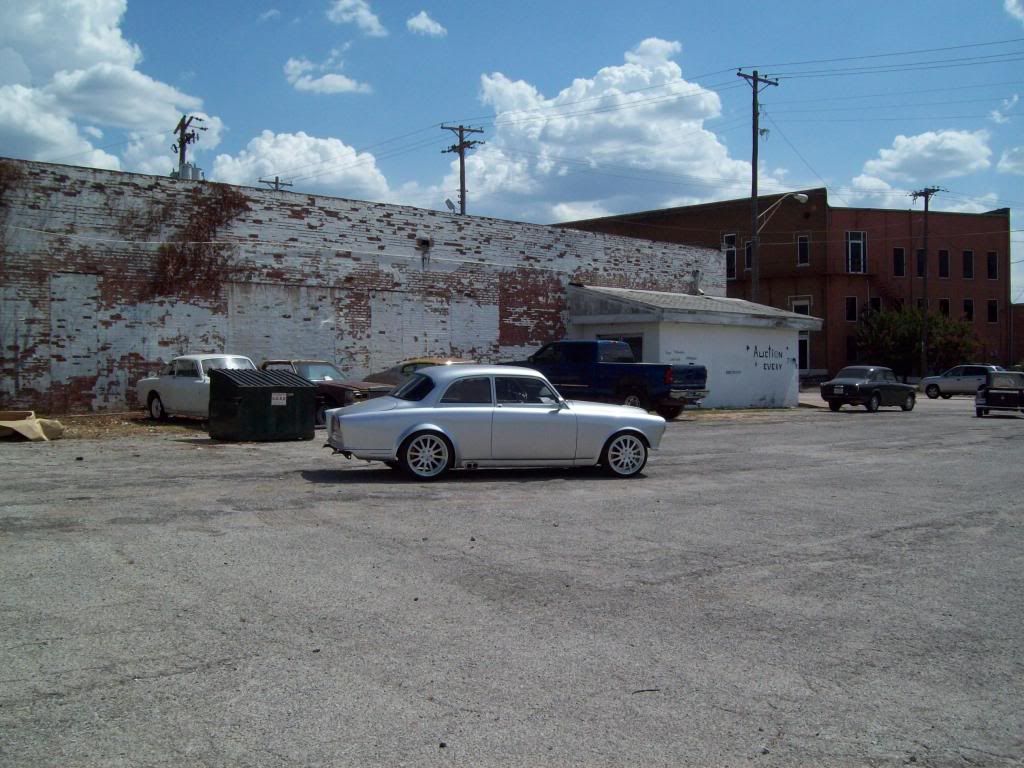
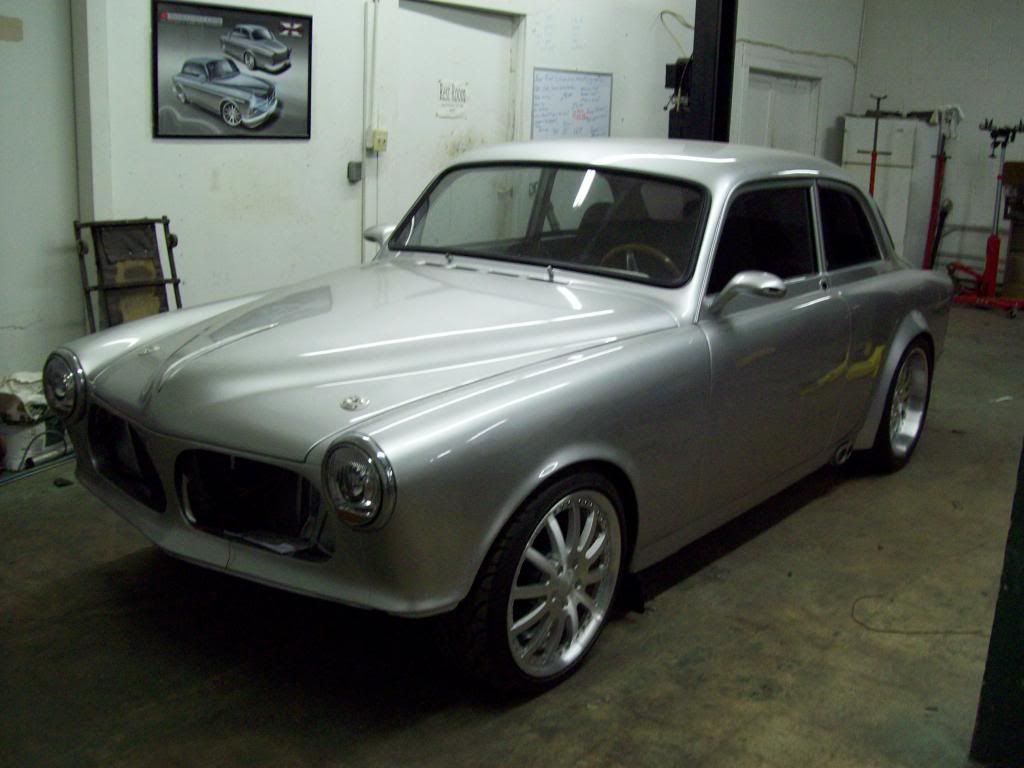
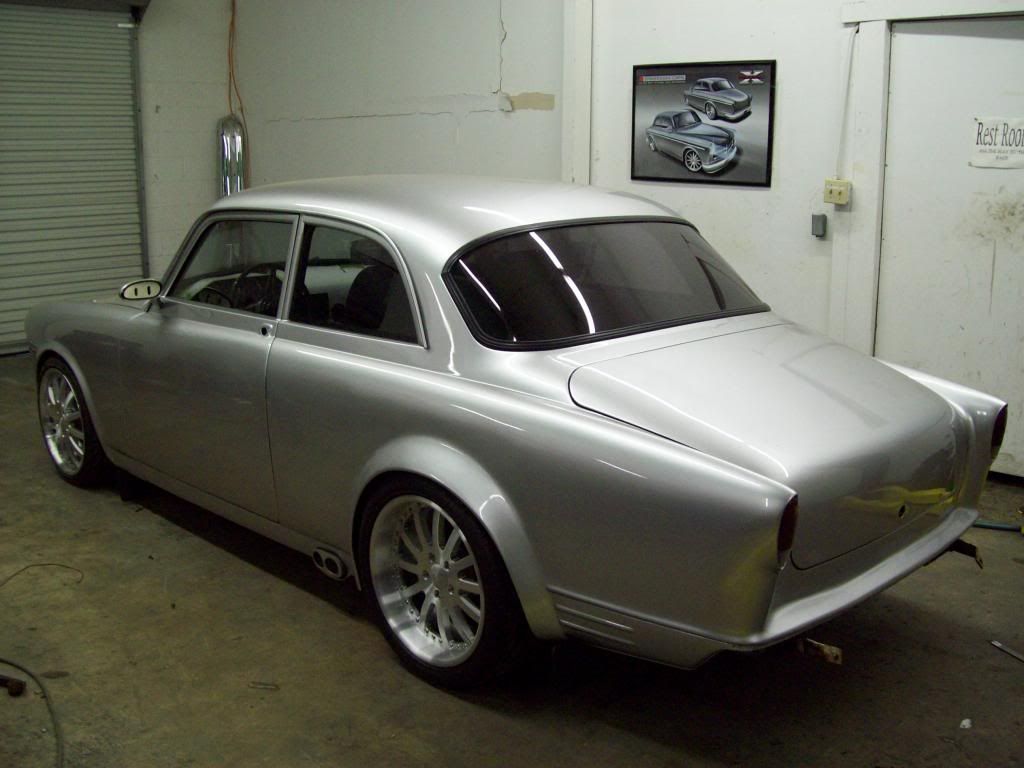
While doing some spring cleaning and setup so I can get prepared for the start up of my customer builds, I needed to roll Project Changling outside, and I really forgot how Sleek that car is.. And it even looks pretty damn good in all its Masking Tape glory.. lol I am at the back door of having all the final production components completed and in, so then it will be customer build time, and this Project Saint Marie and a Very Nice 1800es build, so the updates should resume on those cars very very soon.


 Last edited by Iamtheonlyreal1; 07-17-2013, 05:27 PM.
Leave a comment:
-
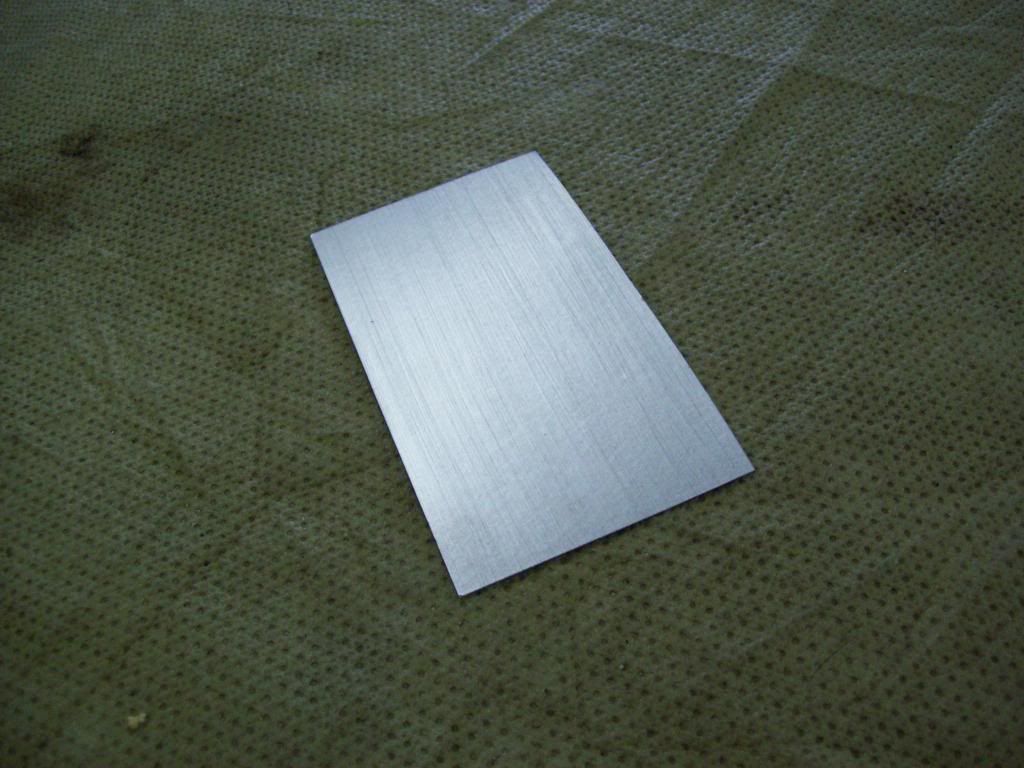
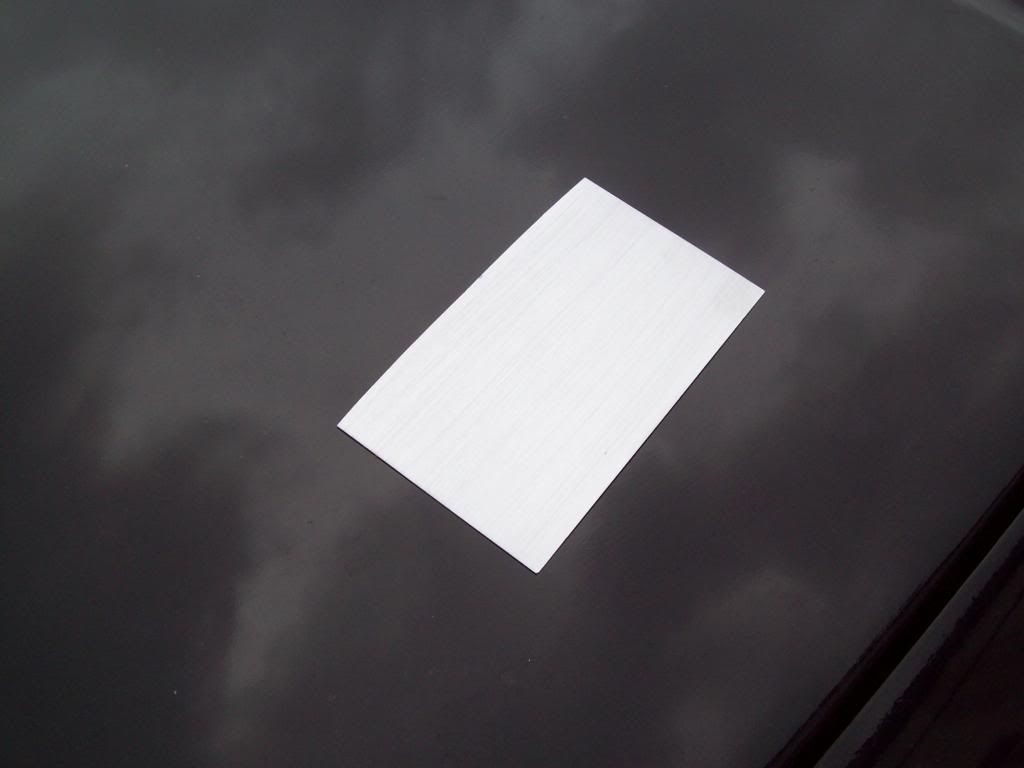
Here are some pictures of the first Test Spray of the Faux brushed aluminum paint work for the bumpers and trim, and I think it is all looking like it is going to work out great, and that is painted on a cardboard test card without any of the satin clear on it yet.. Once the satin clear is applied, there should be just a bit more of a glow/sheen look, and that will really mimic the brushed aluminum look.
Leave a comment:
-
Some of the body trim pieces are suppose to make it back this next week, so I needed to get the Air Cleaner Assembly wrapped up, so I can get my painter started on that. Just a quick catch up on the the Bumper and Trim plating process that I have going on now, because I havent really touched base on what I have decided to change there. I did not send all the trim out for actual Brushed Chroming as I had intended, and that was really due to the shear cost, and the fact that the plater said the bumpers may not come out perfect. I was quoted over 8k for the plating by the time shipping kicked in, and that was with no guaruntee that I would have some perfect pieces, so there was no way I could possibly justify the cost there. I have a very qualified painter that does alot of custom motorcycle work, and he said that he has done a Brushed Aluminun or Brushed Stainlees look in a painted process, so that is the way I am going here. It will actually be a better match to the appearance of my Brushed Aluminum Wheels, and the parts will be perfect, because he can use glazes and primers to block all the imperfections out. These will be done in a Satin/Flat Clear, so all the parts will have the same overall glow of the wheels, and that will also keep all my trim/bumpers uniform in appearance. I will be posting pics of this process, and it is much more economical than the plating, especially if I ever needed future repairs. I have seen sample/test pieces, and they look great, so I think this will be a much better approach.
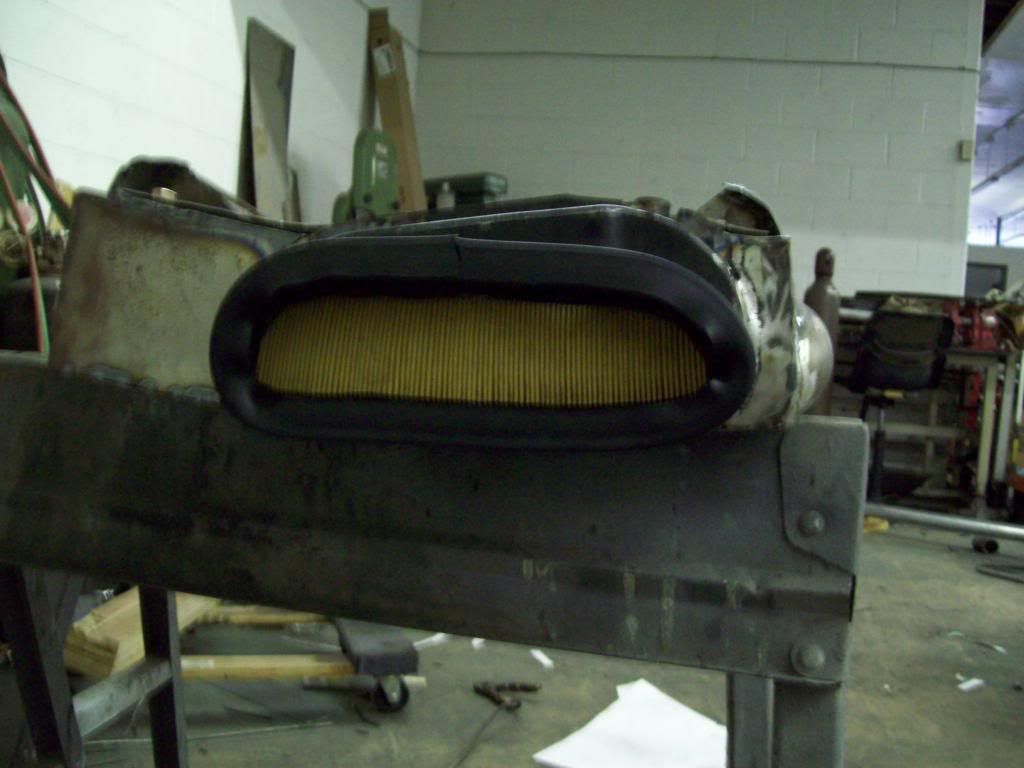
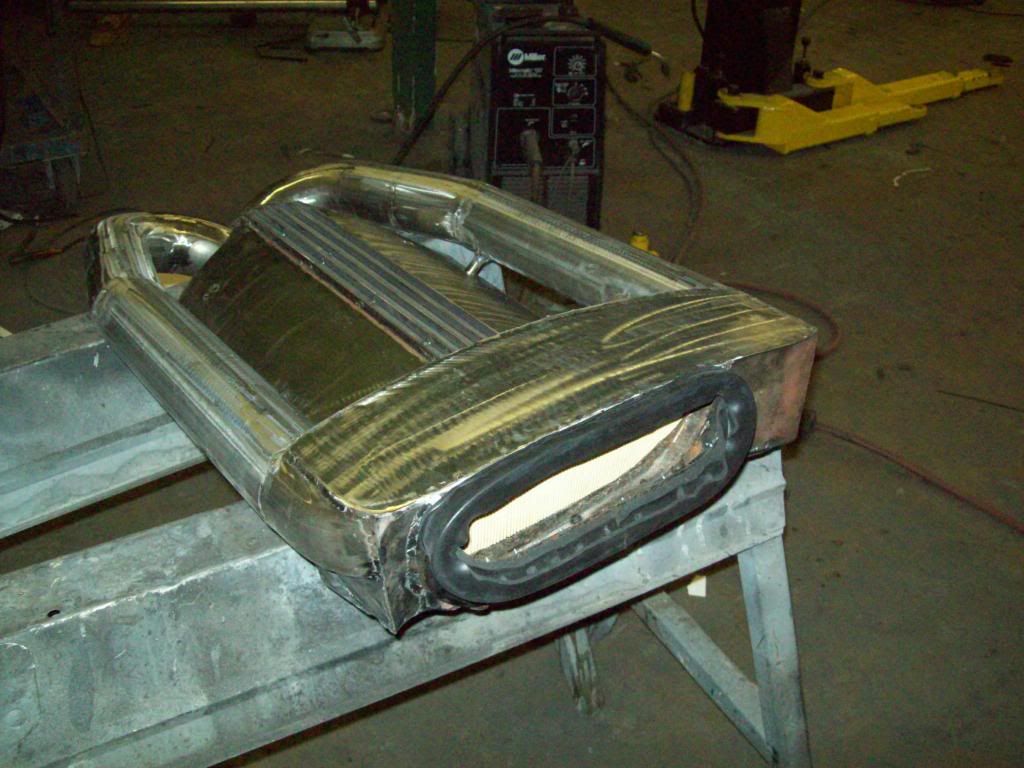
Here are some pictures of how my Air Intake System work, and in these pics, you will see the filter position and how it basically works.. I would do some more finish grinding and welding on it, but my painter likes to do that himself, so I will leave it for him..
Here is how the Seal and Drain system will work, and it is pretty basic, because I used the Original Amazon Heater ring for my seal/drain.. I will be adding a tube and one way baffle for the draining, and it should work just fine.. I will be making the actual drain hole larger, so it will be more than capable of draining the water sump before over flow. The seal is a weatherstrip profile that I have found on another car, but I had to do some removal and triming to remove some of the bulk, and you can see that I have just a bit more finish trimming to make it look nice. I still have to drill the holes for the Mass Air Flow Sensor at the front, and the Intake Air Temp sensor in the rear box somewhere, but they will be hidden on the lower unseen parts of this setup.
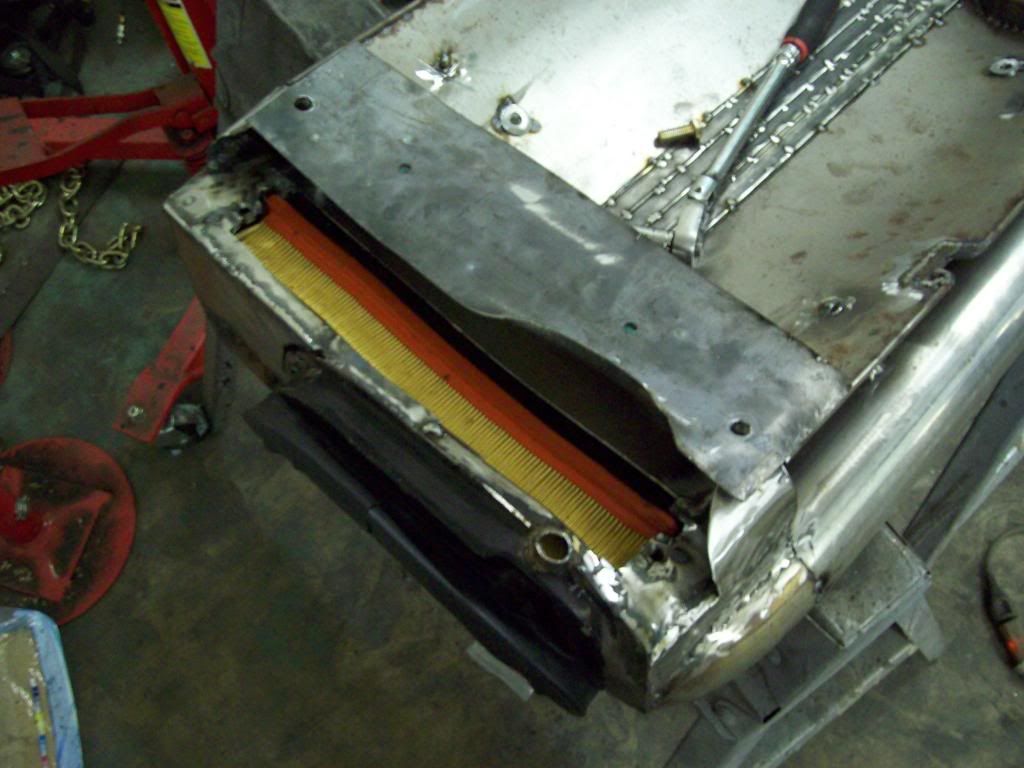
Here is how the gasket seals on the original Cowl Vent/Heater Supply fixture, and it is only solid mounted and sealed to the Inake, so it will have the ability to move around on the body during engine torque. I am pretty sure that it will be best to use some sort of grease or lubricant on the seal to body position, and I will have to do a bit of experimenting with that if it is necessary.
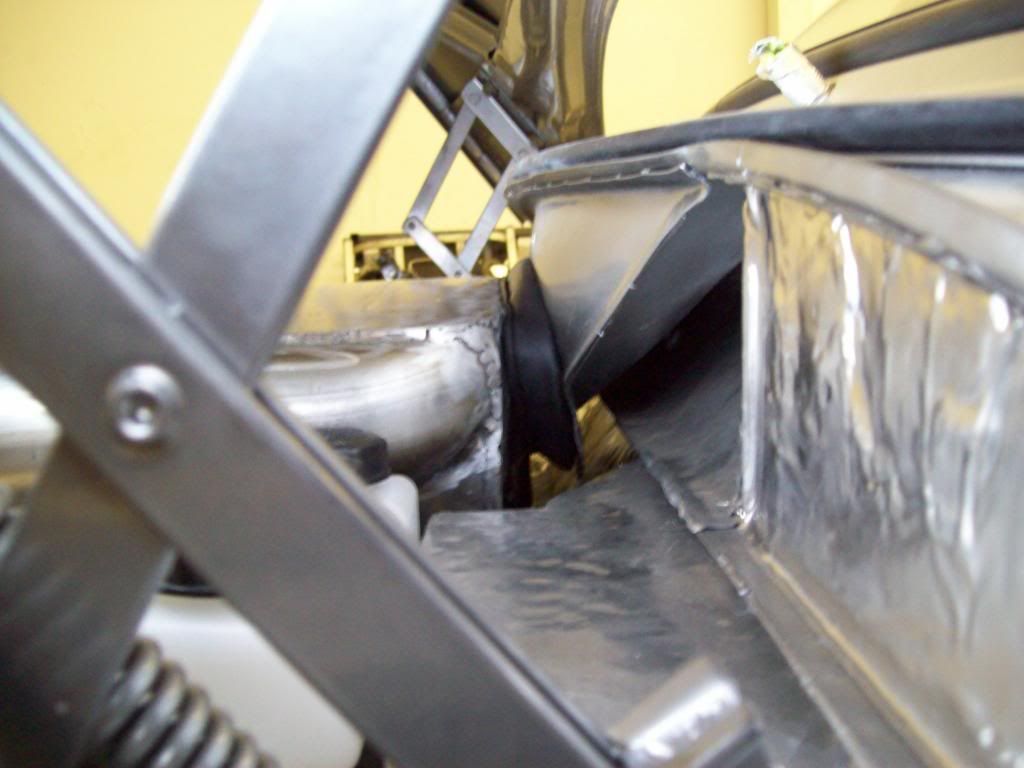
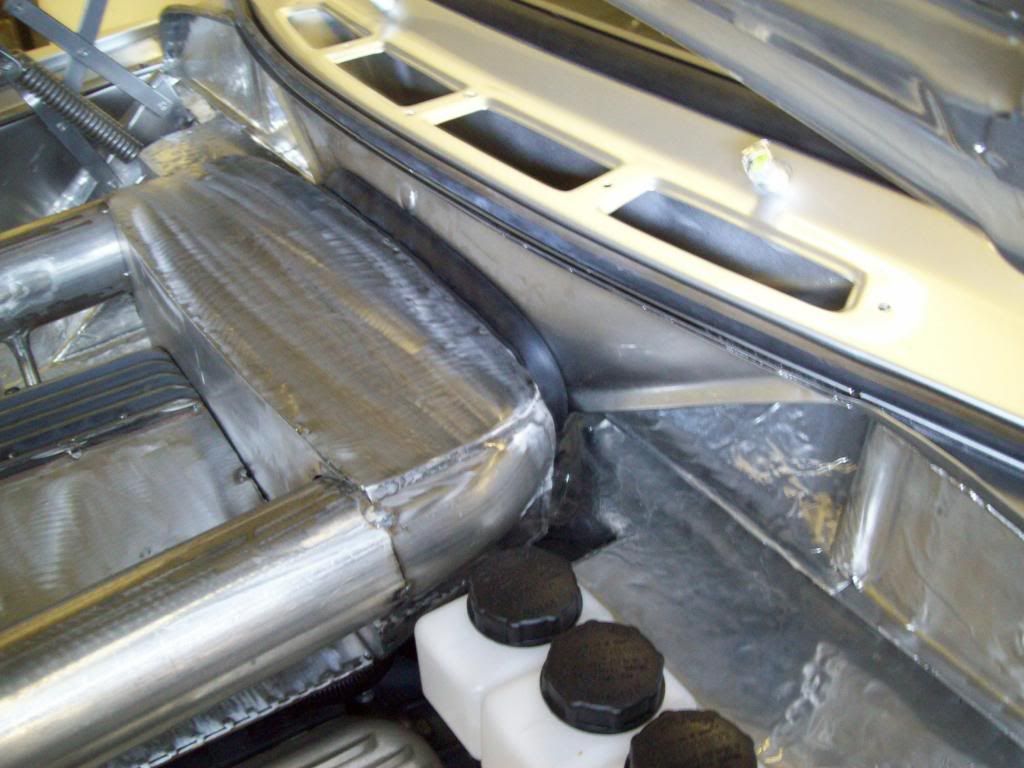
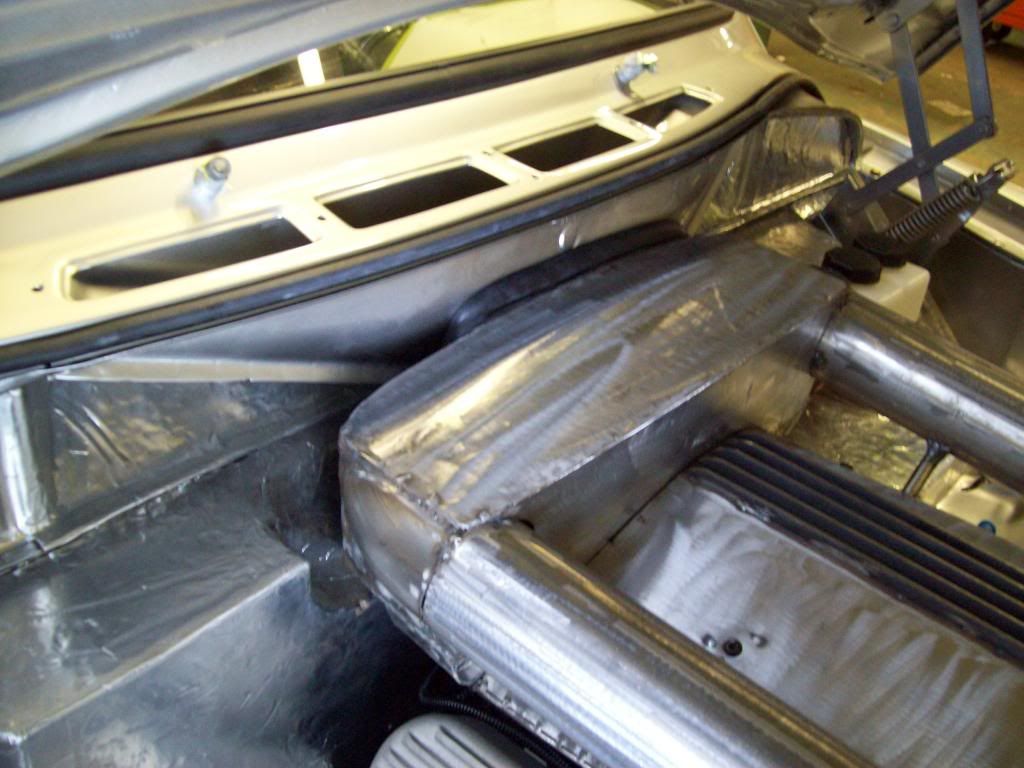
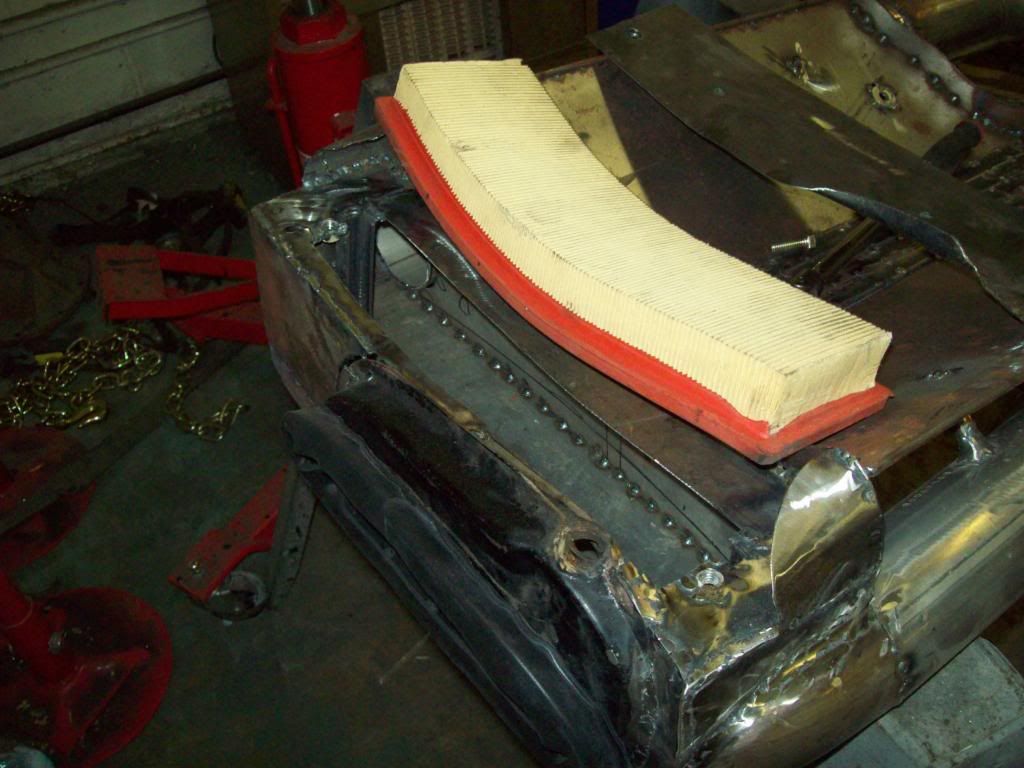
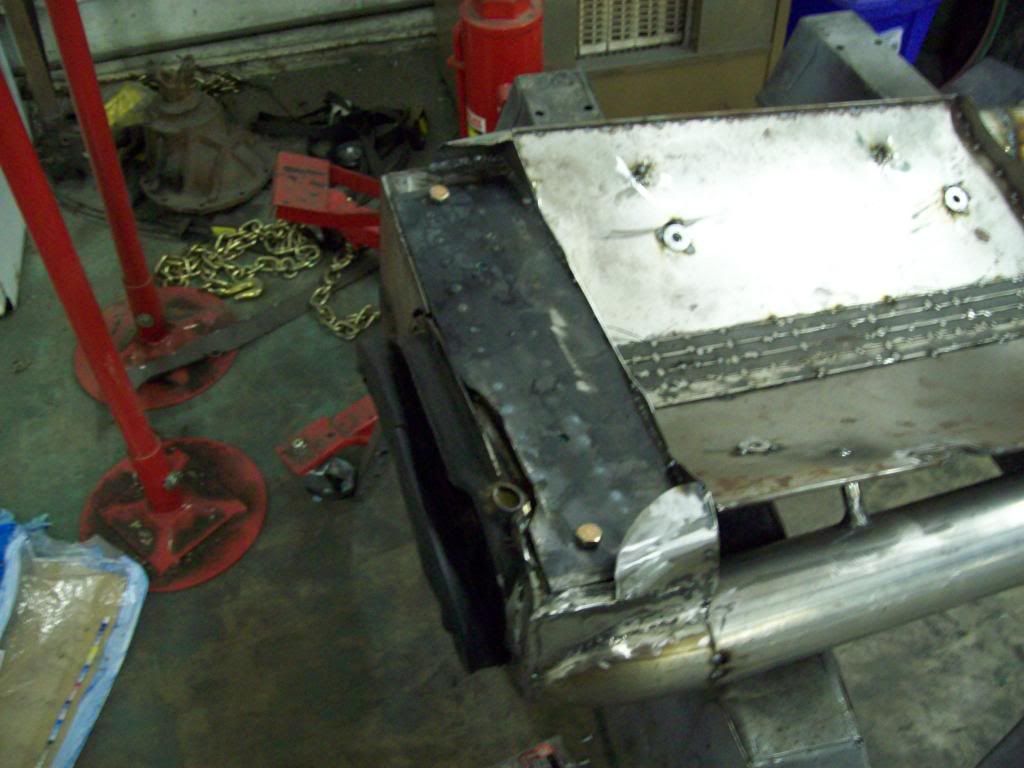
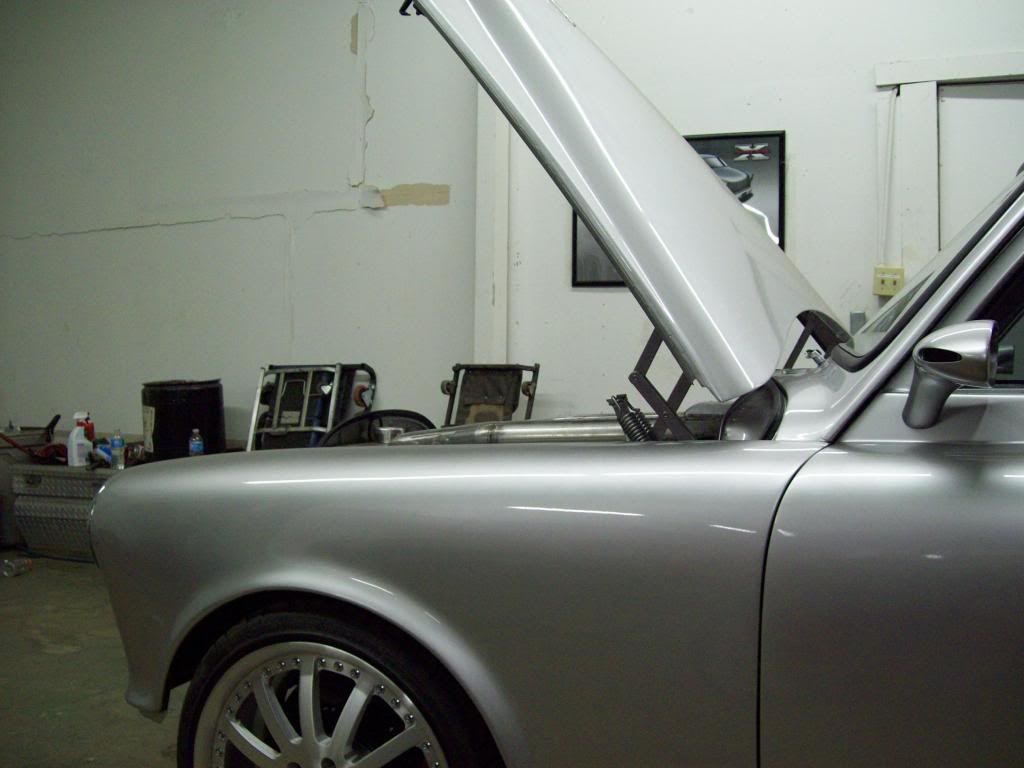
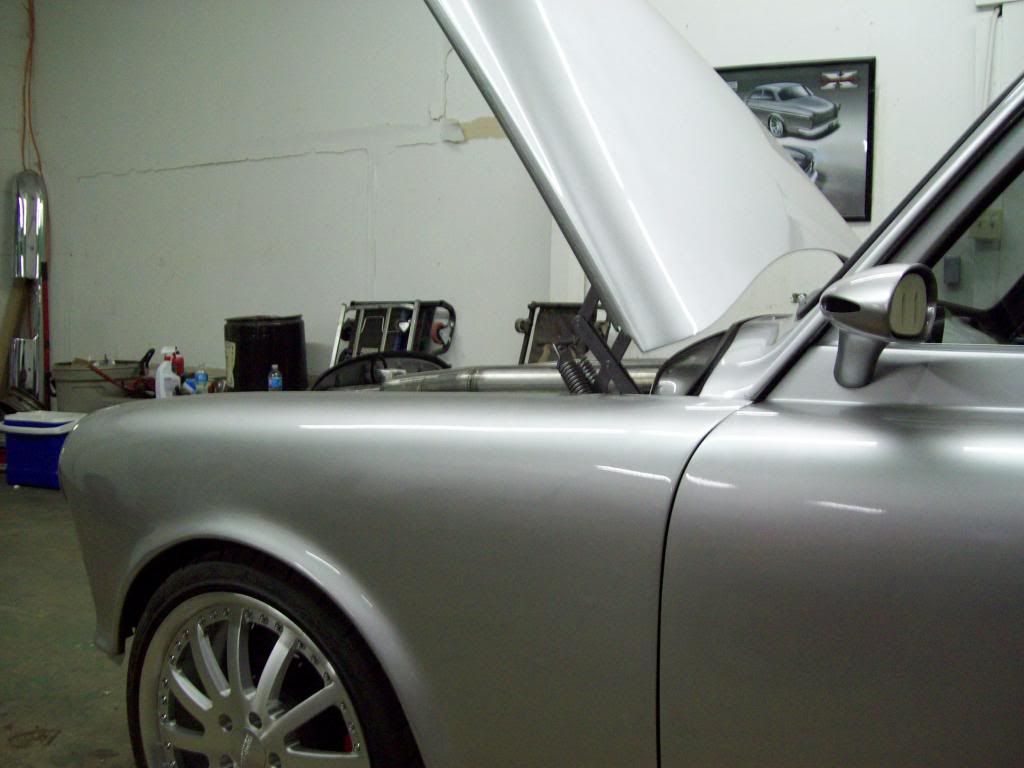
I tried to make sure that my intake tubes and filter box wouldnt interrupt the fender contours while the hood is open, because I dont really care of mismatched contours and angles, so this is how it all lays out compared to fender tops. With the filter box, I actually kept the curvature and contour of the cowl sheet metal, so it isnt just a rectangular box stuffed in the hole.. I think features like that really make things look like they are in place, rather than just some items you fabbed or pull off the shelf, especially when you can nothing sticks out as out of place as you walk up.
I am not absolutely sure on how I am going to paint the Intake and Valve Covers yet, but they will be in the same metal theme as the rest of the car, so the Tubes will more than likely be a Brushed Aluminum, while the box and center section will be body colors. I was debating on painting the Valve Covers body color, and then doing something with fin patterns of the valve covers and center intake, but how I need to do it hasnt hit me yet.Last edited by Iamtheonlyreal1; 07-13-2013, 04:32 PM.Leave a comment:
-
I would rather have a modded Odd car, than a modded Cookie Cutter, and that is why I didnt build another 1st Gen Camaro, Mustang, Chevelle, ect... LOLOriginally posted by HooWybrow View PostLeave a comment:
-
Great build of an odd looking car (in my eyes). Love the drivetrain and how everything has been executed. Keep it up.Leave a comment:
-
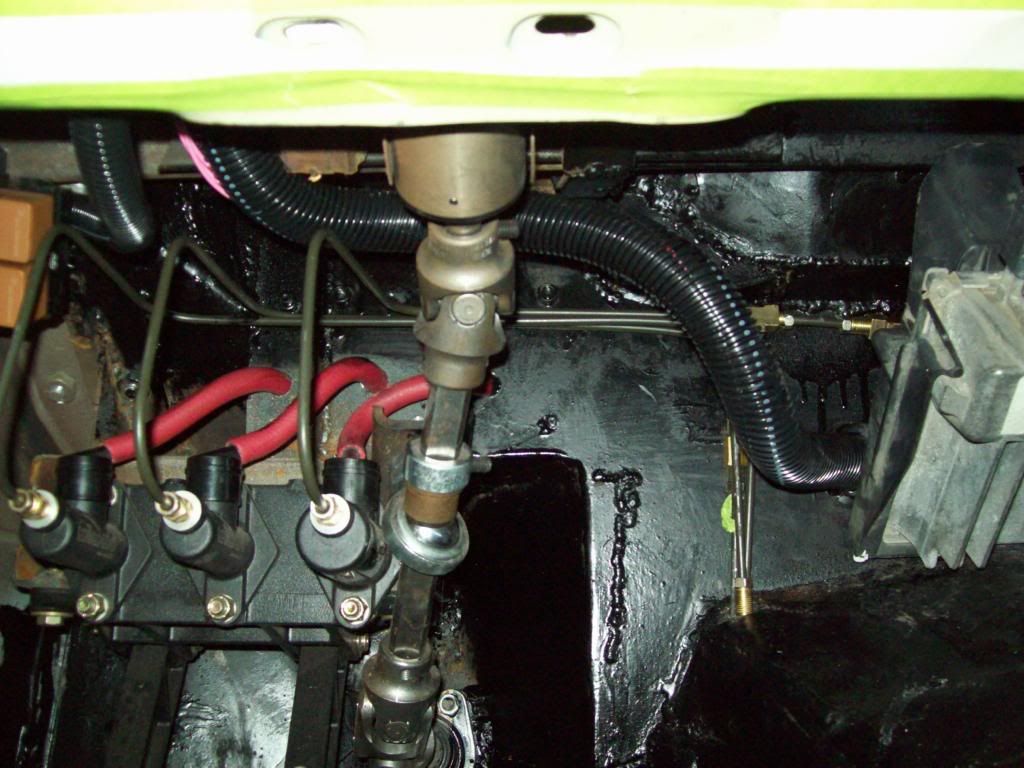
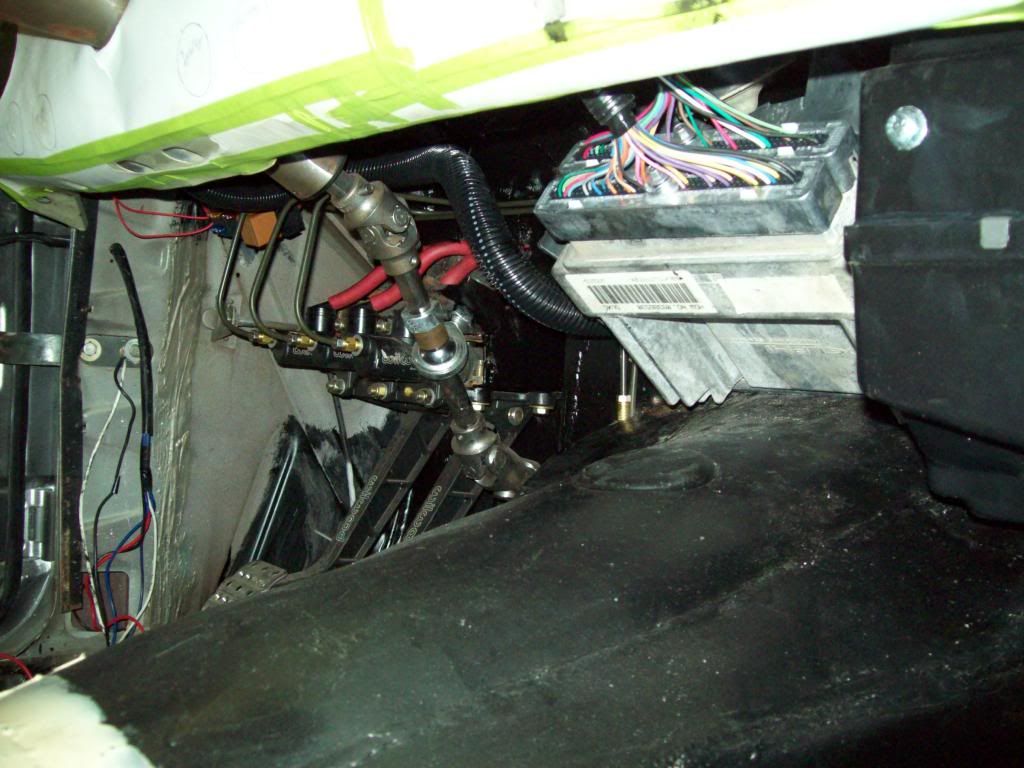
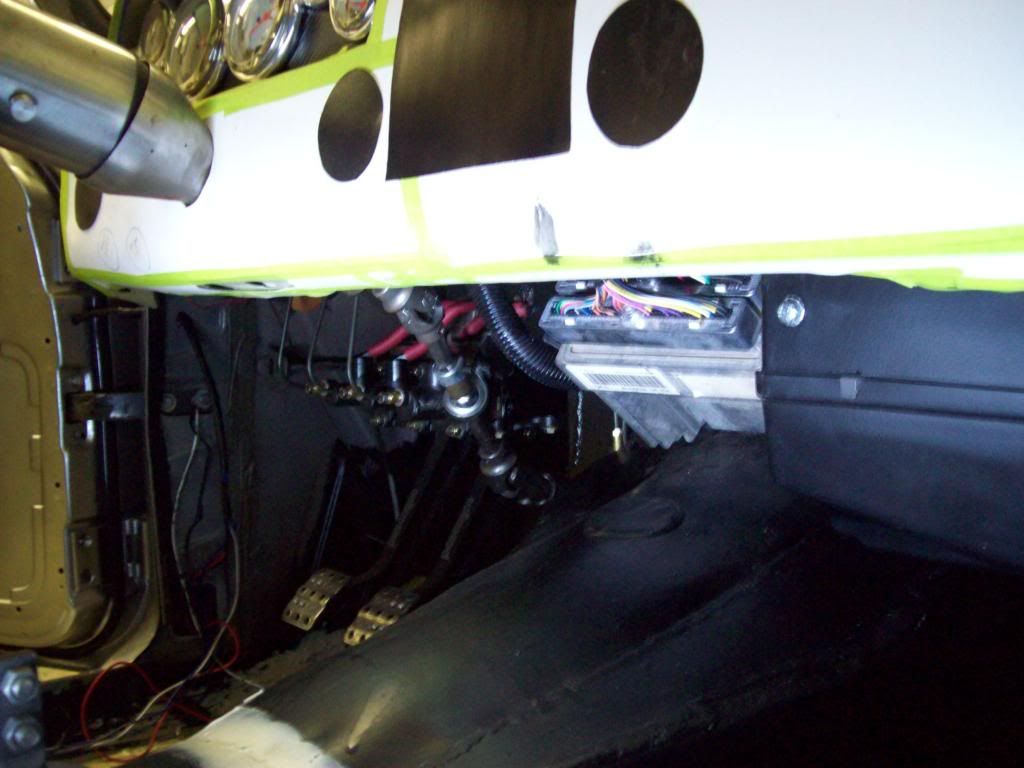
Here are some pics of the brake/clutch mechanism and plumbing, and you can see that I chose and under dash master cylinder setup, which was chosen to keep the engine bay clean. I ran my hydraulic lines on the back side of the firewall, and down through the top corners of the Trans Tunnel, and that allowed me to tuck everything out of the way, along with being able to service something if needed. I have some rubber grommets to seal the holes and secure the brake lines, but I am waiting till I recoat and insulate the firewall before I hard mount the lines. The fitting that is showing sitting on top of the trans hole is my Clutch Line, and I have not sized it yet, so that isnt where that attachment will be at all.

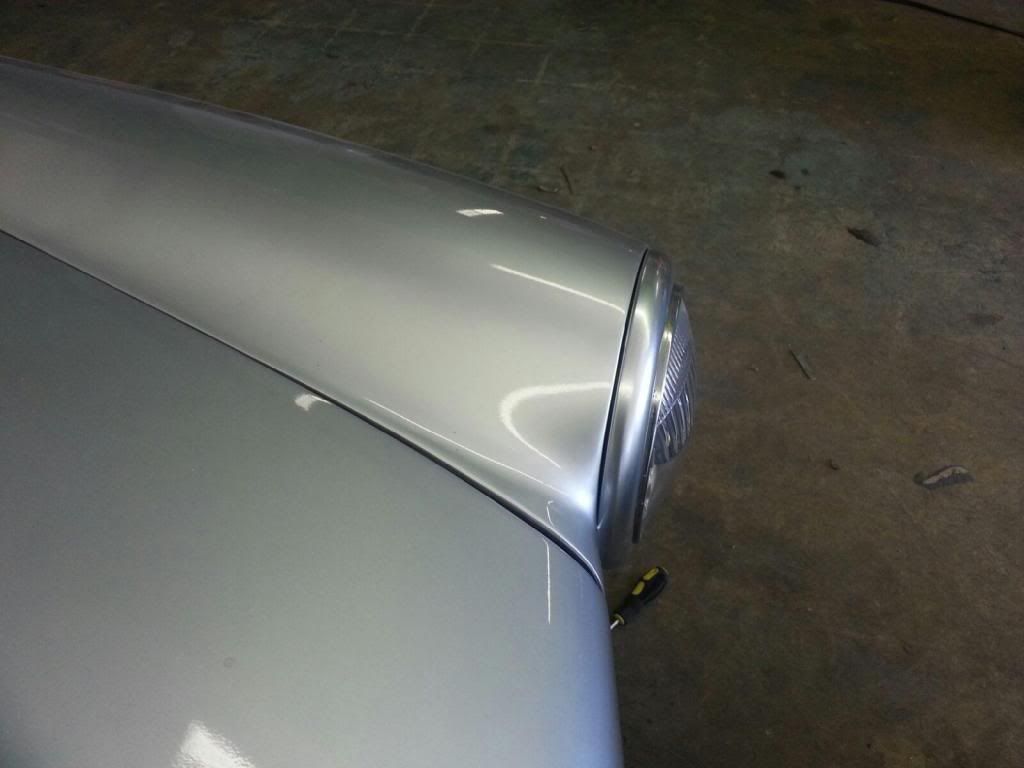
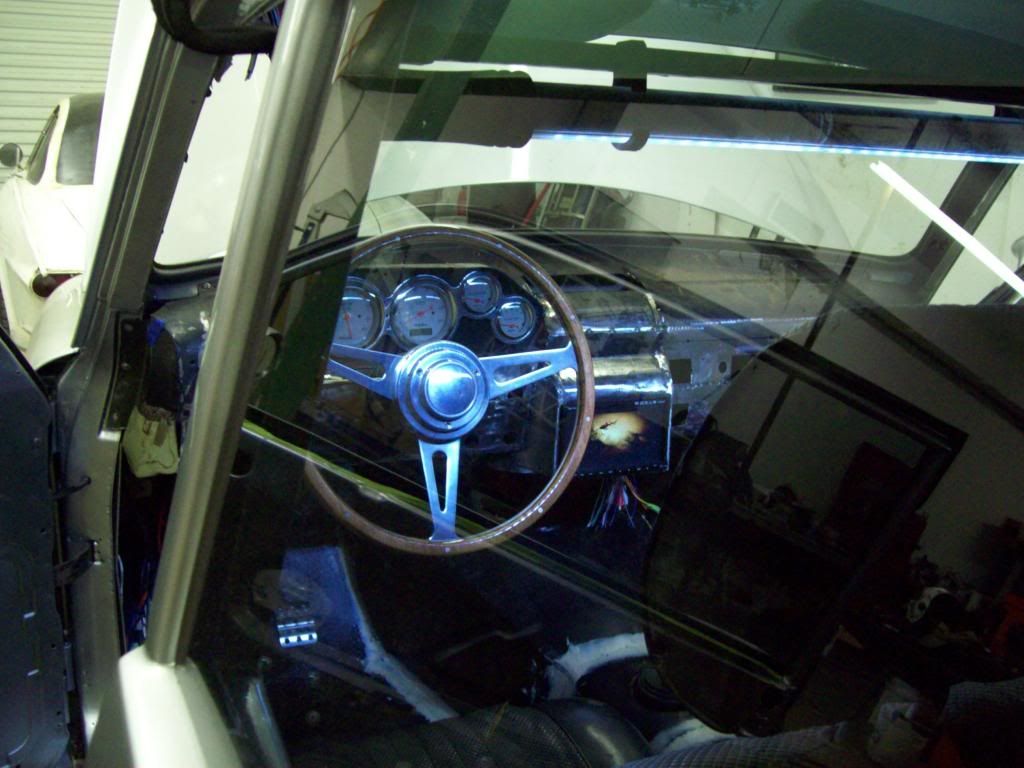
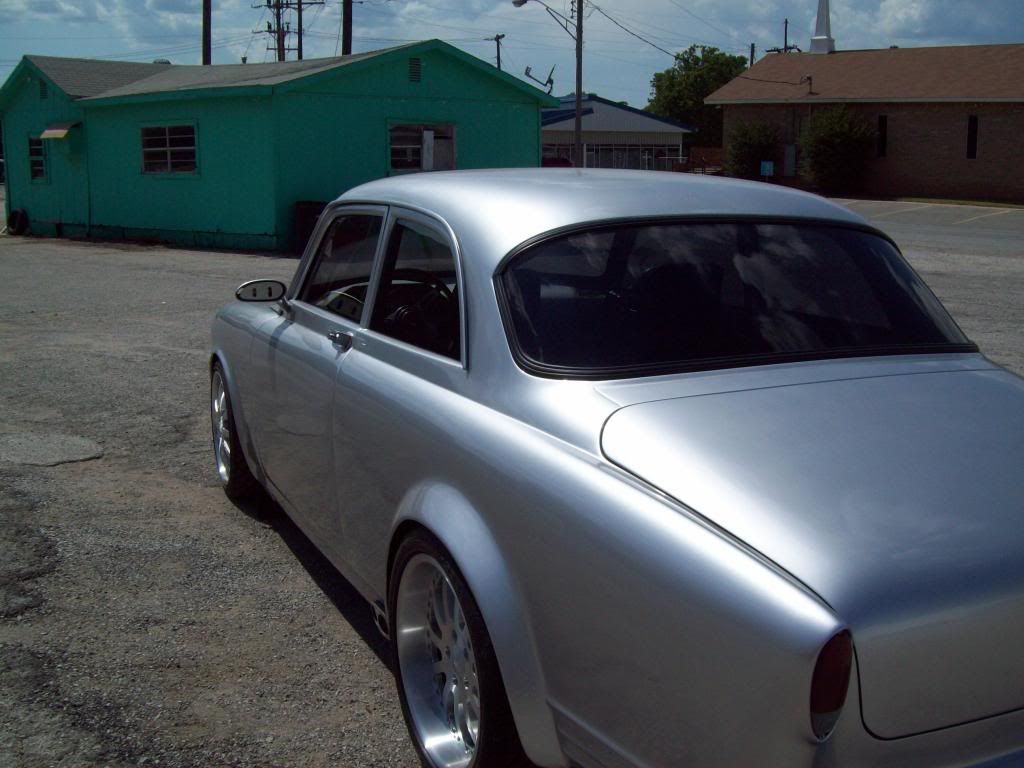
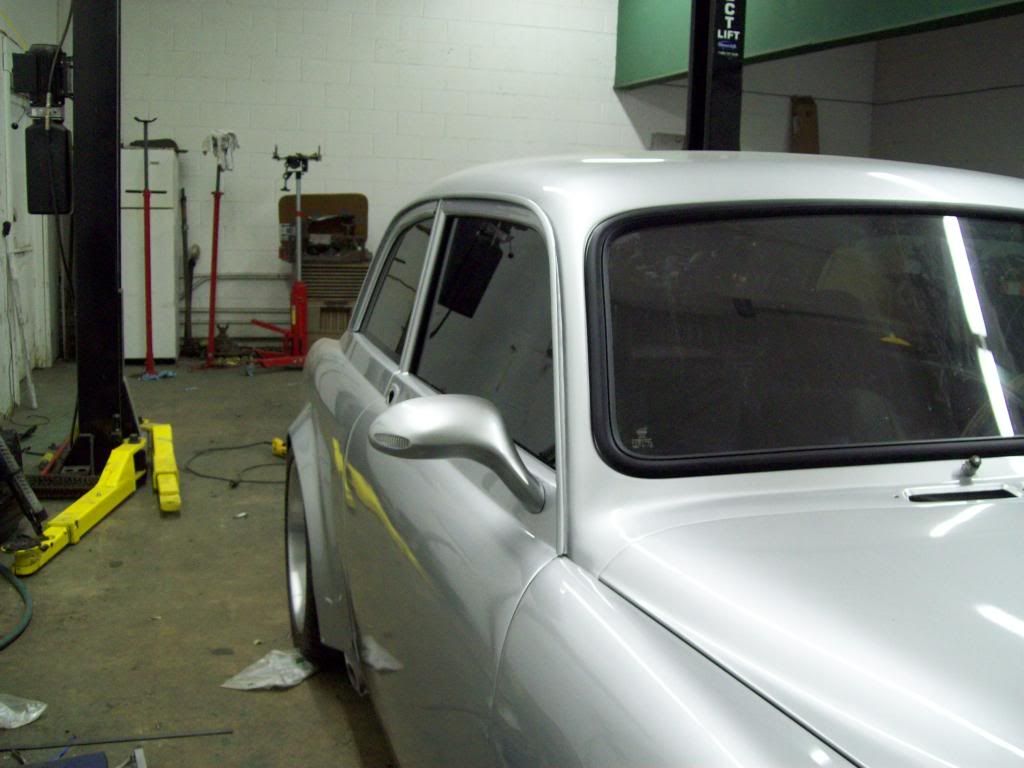
Here are some real world perspective pics of the new Door and Quarter glasses, because it is hard to see the full affect with pictures being taken in a small shop. I dont have the quarter glass trim permanently attached at this point, so they are not as flush to the B-pillar as they will be when installed properly. The rear glass will be removed again, so I can change the tint to something that is a closer match to the side windows, because it is just a couple of shades darker than the side glasses.


Leave a comment:
-
A friend of mine made me this quick YouTube Slide Show Video of some of the Volvo X transformation, and it came out pretty good, so I thought I would post it.. When you are dealing with this stuff everyday, you dont realize how far things have come, because you are bombarded with the here and now.. LOL
[ame="http://www.youtube.com/watch?v=xLjU_S5urDE"]1967 Volvo 122 Amazon (Volvo X) 540 Horsepower Pro-Touring Build - YouTube[/ame]Last edited by Iamtheonlyreal1; 07-27-2013, 11:08 PM.Leave a comment:
-
Here are a couple of YouTube video's of how the power windows work, and you can see they are actually pretty fast actuating, and that is being run off of a small motorcycle batter that has been used for all the adjusting and testing, along with new and tight weatherstripping. Once I get a full sized battery, and the new weatherstrip seats a bit better, the upward motion will smooth out alot better.. You can hear the weatherstripping grabbing onto the new glass in the second video, and that is the reason for that one slow spot.
[ame="http://www.youtube.com/watch?v=IwsXZYZOGvY"]1967 Volvo 122 Amazon Vent Window Delete and Power Window Conversion Kit. - YouTube[/ame]
[ame="http://www.youtube.com/watch?v=OYSize99jJk"]1967 Volvo 122 Amazon Vent Window Delete and Power Window Conversion kit. (Inside View) - YouTube[/ame]Leave a comment:
-
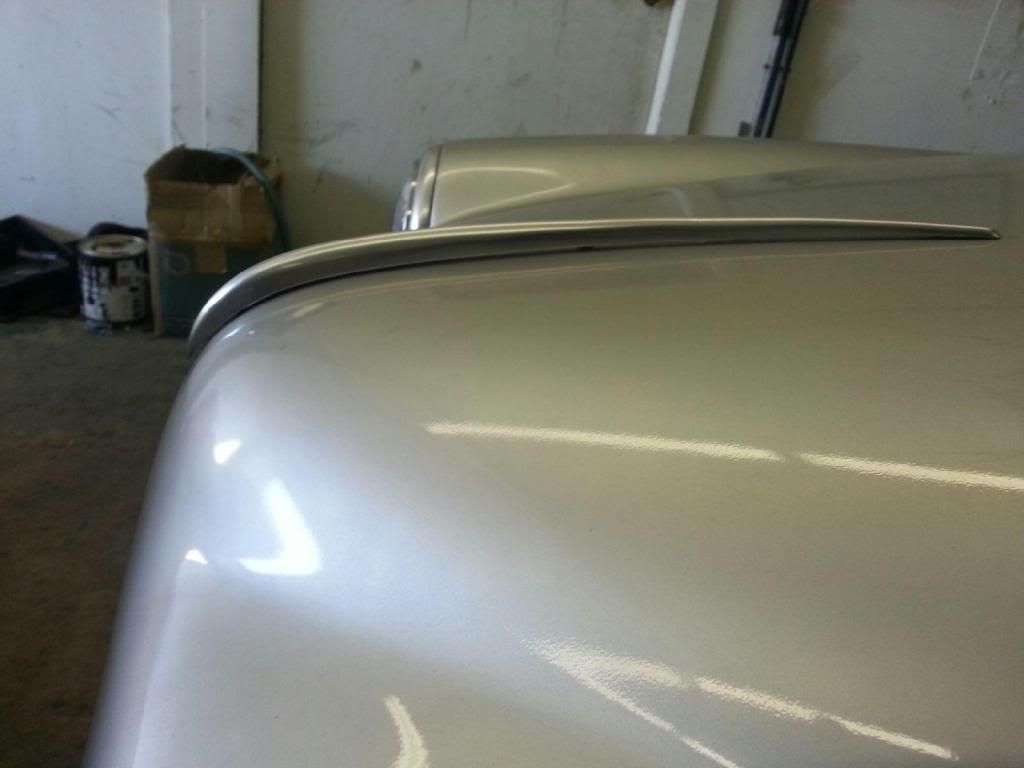
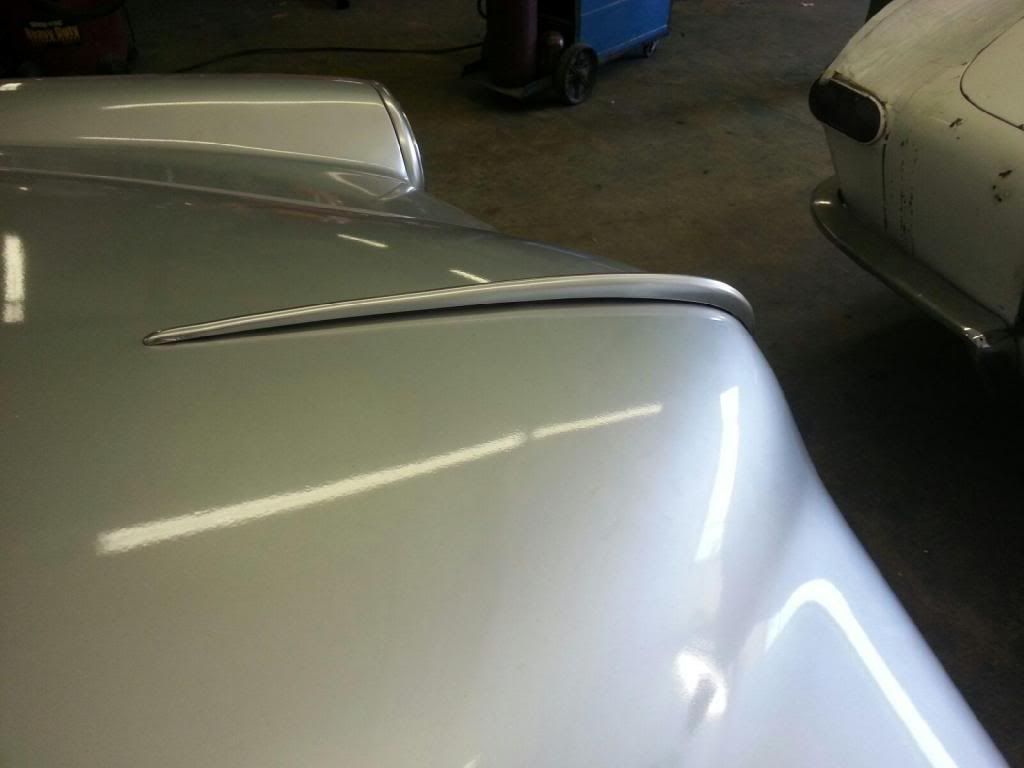
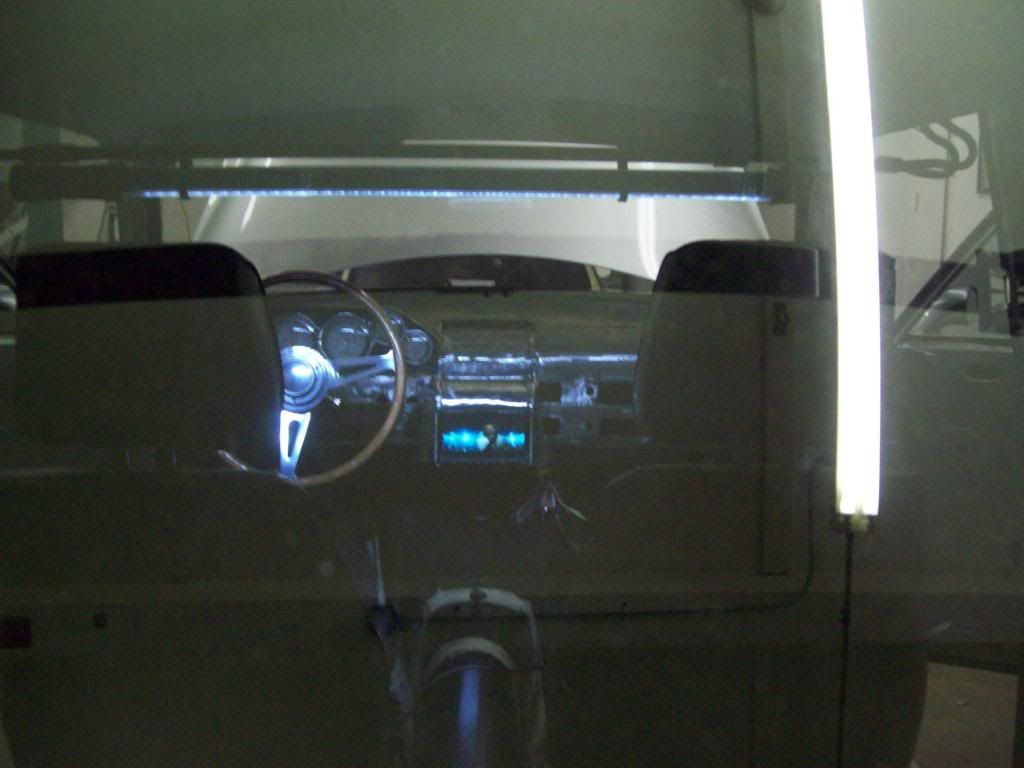
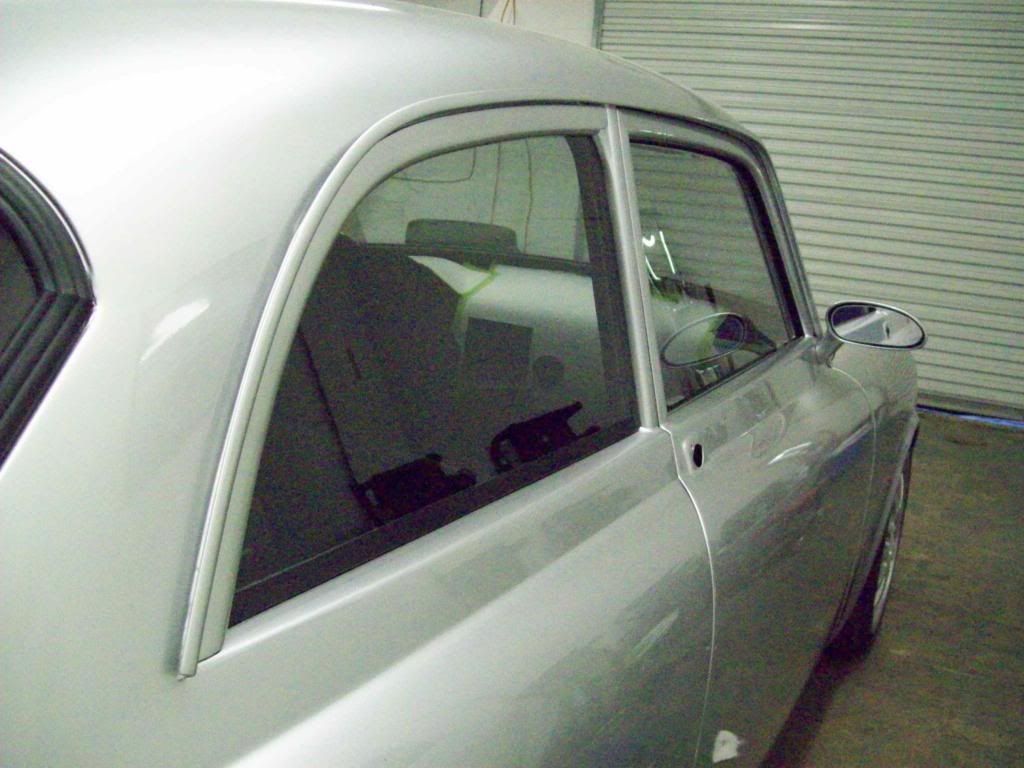
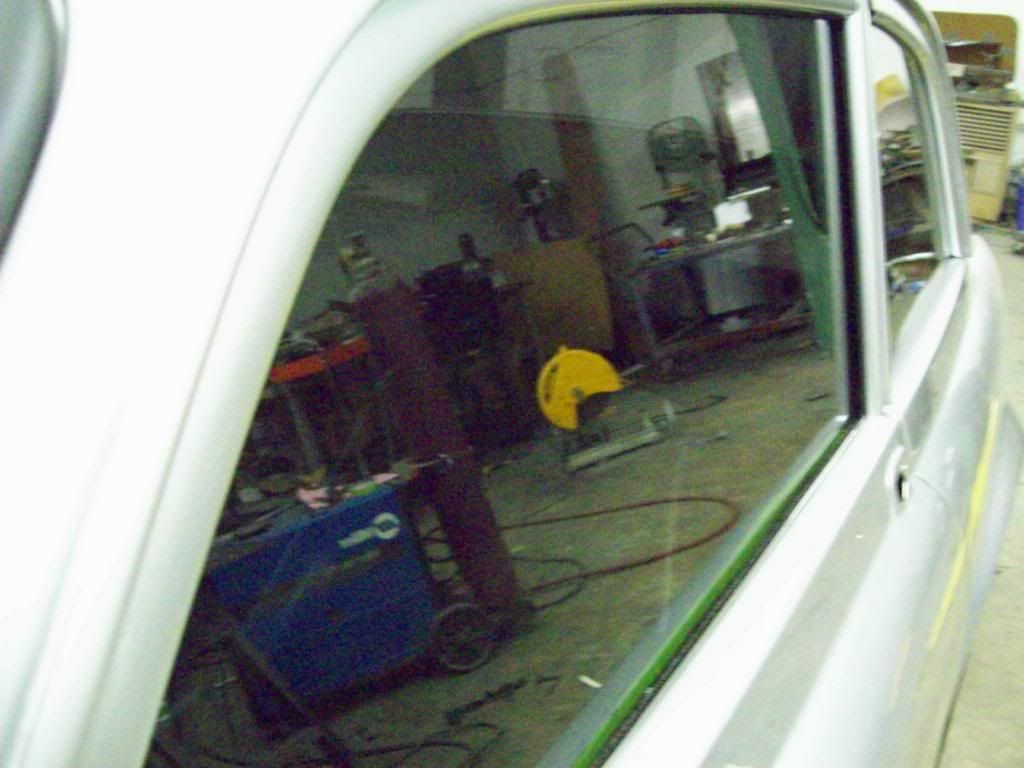
My glass guy couldnt make it this week to install the quarter windows, and I couldnt wait to see the outcome of the new style glass, so I 2 way taped the glass and my finish rail mouldings in place. You will see that the top rail mouldings are not perfectly in place, because the two way tape holds them out just a bit, so they will actually fit much better when they are glue to the quarter glasses. The black out on the front and bottom edges is just electrical tape, so there is a more satin appearance that will be gone, when the black border is added to the back side of the glass.
I also tried to take some better pics of the window channel kit, but it is pretty flush looking, so it is hard to really capture it.


Leave a comment:


Leave a comment: