Announcement

Collapse
No announcement yet.

Touring International

Collapse
X
 
  • Filter
  • Time
  • Show
Clear All
new posts

  • Earl
    replied
    I did some work yesterday.

    I started by pressing my hubs in.

    First I put a very thin coat of anti-seize on the inner race of the bearing and then I tapped the hub with a mallet to get it started


    After that I used my homemade tool (a nut and bolt with misc washers) to draw the hubs in


    They went in very smooth and without too much effort.


    Then I applied a thin layer of anti-seize to the hub to prevent corrosion between the hub and rotors


    After that I installed the Adams Rotors, along with the stainless ECS rotor screws


    After that I planned to start doing the rear swaybar


    I ran out of time before I had to leave but I got the end link brackets installed


    I was looking at how to get the end links on the bar and it seemed impossible to me. The hole in the end link is half that of the bar. Supposedly dish soap is the way to go so I may try that Friday when I get back out there=)

    It is slowly but surely coming along now

    Leave a comment:


  • Earl
    replied
    I got out to the shop after work today.

    I started by installing the wheel bearing snap rings with a thin layer of anti-seize so they don't seize like my last set was


    As you can see, some painting was in order.

    I started by scuffing the rust and flaking spots with a scotchbrite pad. I then masked everything off.


    I then sprayed them. I am really happy with the outcome.


    More progress will happen tomorrow afternoon

    Leave a comment:


  • Gab87
    replied
    Miam

    Leave a comment:


  • Earl
    replied
    Originally posted by 244Brick View Post
    You'll love me in 40 years
    Forever and always


    Lets see how this holds up on the sway bar


    The bar seems to be made out of either a very dimples piece of stock, or it just got that corroded over time. The surface texture plus the gloss black paint has a sort of hammered/wrinkled look.


    Fine by me=)

    Leave a comment:


  • 244Brick
    replied
    Originally posted by Earl View Post
    Thank you=) I am a huge fan of wrinkle paint too as you can see haha
    You'll love me in 40 years

    Leave a comment:


  • Gab87
    replied
    Yes

    Leave a comment:


  • Earl
    replied
    haha I saw that you also like wrinkle black

    Leave a comment:


  • Gab87
    replied
    Originally posted by Earl View Post
    Thank you=) I am a huge fan of wrinkle paint too as you can see haha

    I love you already

    Leave a comment:


  • Earl
    replied
    Originally posted by Gab87 View Post
    Very good project

    I love peint motor wrinkle
    Thank you=) I am a huge fan of wrinkle paint too as you can see haha

    Leave a comment:


  • Gab87
    replied
    Very good project

    I love peint motor wrinkle

    Leave a comment:


  • Earl
    replied
    I sprayed the sway bar last night and will take pics when I get home


    I also got my studs re-installed in my rear hubs and I put the rotor screws in so I don't forget them Saturday

    Leave a comment:


  • Earl
    replied
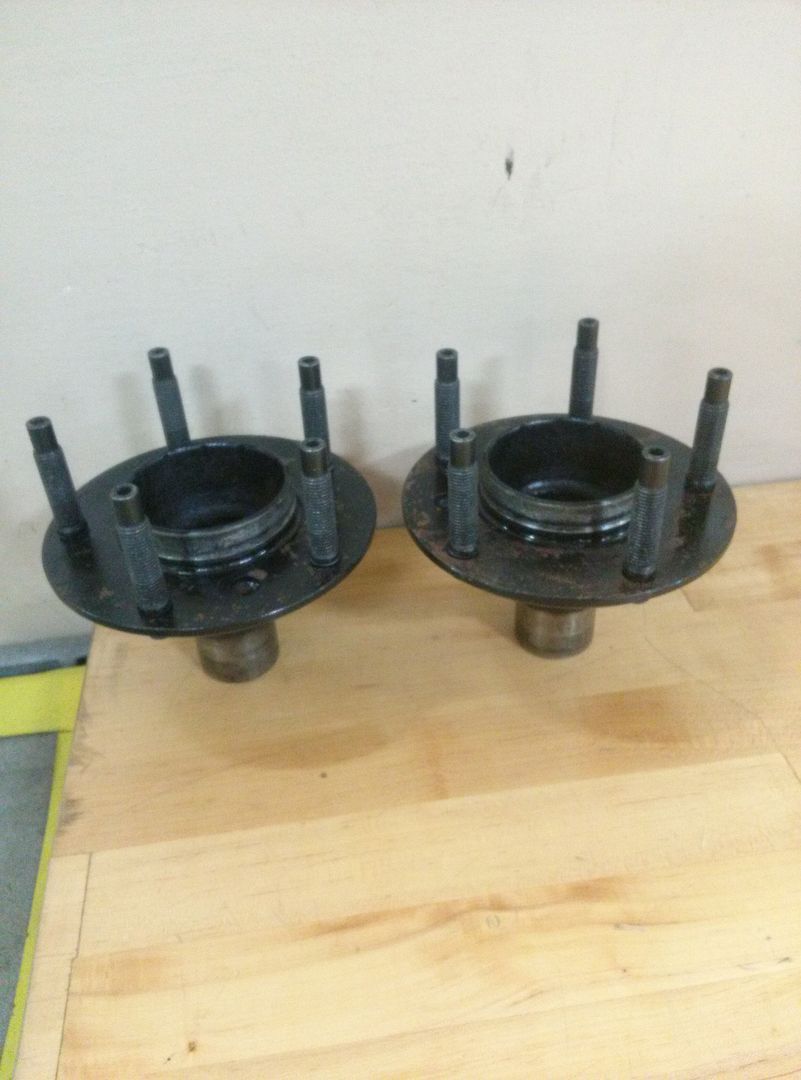
    I took some pictures of how the hubs turned out. They're good enough for me. Much better than before


    I also just sandblasted my rear sway bar at work and will be spraying it tonight or tomorrow=)

    Leave a comment:


  • Earl
    replied
    Before


    After


    I painted them last night and will take pics of them dry today.

    Leave a comment:


  • Earl
    replied
    More front and back pictures of the badges


    Saturday I started by installing my m44 crank pulley


    I was very happy to see that the trigger wheel was the same as the m42 pulley. I never even thought to make sure before switching over.

    After that I threw the intake manifold on temporarily to get it off of the bench and to see how it is all coming together.


    It is much bulkier than I would like but it is about as good looking as it is going to get without making a log style manifold.

    After that, my friend John arrived and I decided to attack the rear wheel bearings. These were a nightmare. Getting the hubs out was pretty quick and simple. The inner races were on them pretty tight and pounding them out wasn't working. We set them to the side so that we could work on getting the outer races out of the trailing arms.

    We were having a terrible time removing the snap ring for holding in the bearings. We ran to Napa to get a snap ring pliers in hope that they would work great. Well the pliers design for holding the tips wasn't exactly up to par and they kept turning when we were removing the snap rings. I ended up getting fancy with a straight pick and two screw drivers to work them out.

    After that, we figured the outer races would come out with brute force. That wasn't working. We then tried multiple ways of pulling them out of the arms with no luck.


    The piece of uni-strut bent before the race even budged.

    We went off to the hardware store and bought a dremel, figuring it would be our saving grace. It worked excellent for removing the inner races from the hubs. We moved onto the outer races and couldn't quite reach all the way through.

    The new neighbor to the shop then came home and upon introduction, recommended we use his air chisel. He walked on over with it and zipped them out in a matter of seconds........I should have introduced myself sooner.

    After all of that, John pressed in the new bearings. I brought the hubs to work so that they can be sandblasted and repainted. I will install them Saturday afternoon.

    How the car currently sits
    Last edited by Earl; 05-05-2014, 04:53 AM.

    Leave a comment:


  • floatingdino
    replied
    Looks swish

    Leave a comment:

Working...
X