Announcement

Collapse
No announcement yet.

DSM + Big Turbo + Stance = My Build

Collapse
X
 
  • Filter
  • Time
  • Show
Clear All
new posts

  • DSM + Big Turbo + Stance = My Build

    Let us start at the beginning, a little more than a year ago last month. Much of this does not pertain to stance until a rather terrible thing happens, but then the fun begins..aka new wheels. Anyhow, this is the build. Love it, **** it, spit on it, make love to it, whatever... Doesn't matter to me This is the journey of my 1995 Eclipse GSX


    Now a little background of how I got into DSMs


    I was in love with my red 1995 GST and planned on keeping it and doing the AWD swap because I ***** FWD. I bought all of the swap parts except for the transmission. I started collecting parts like fuel setup, turbo, ecmlink, etc. It was super clean for having 190,000 miles on it and ran perfect. Never had a problem with it the whole time I owned it. It had a few bolt-ons but nothing major done to it.

    Here it is shortly before I sold it


    What it looked like when it left my house


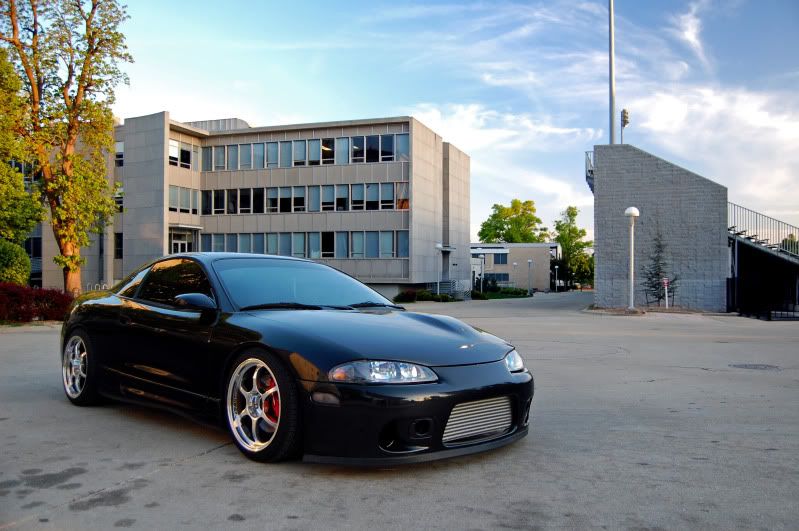
    Sometimes I think I should have just kept that car and done the AWD swap but then I consider how much I like the GSX and I change my mind..Now, a little about the GSX since that is what this build thread is even for.

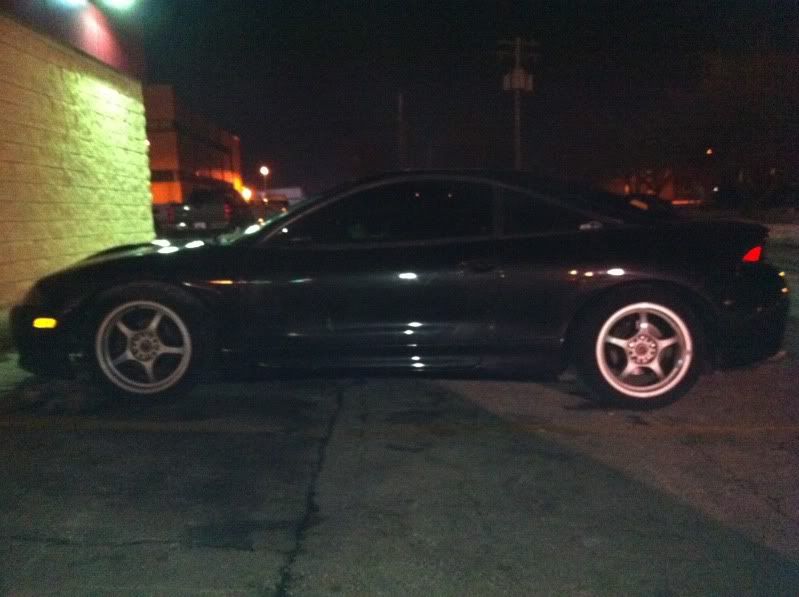
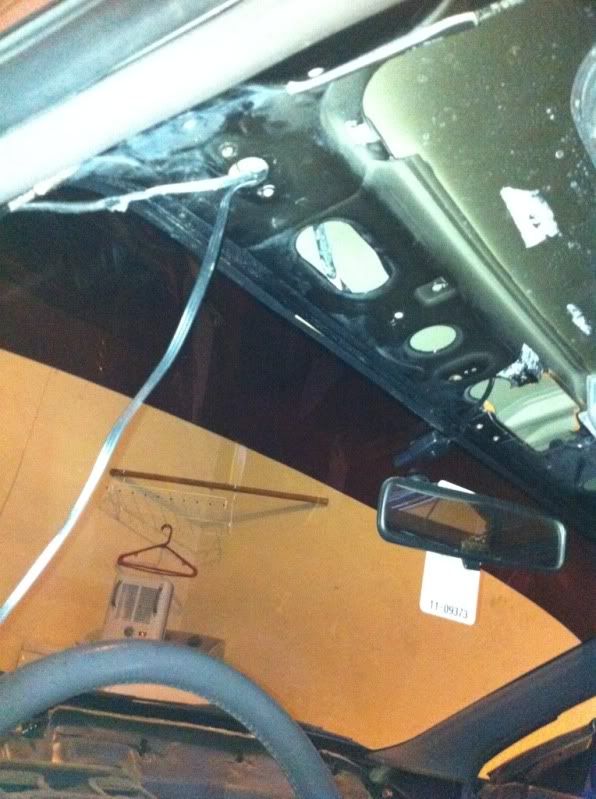
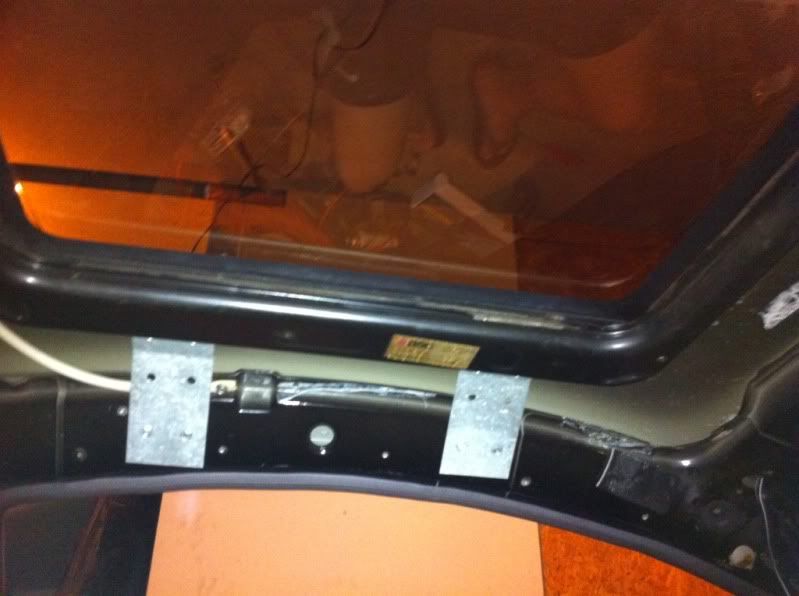
    A local guy owned the GSX and I knew a little about it from friends and such. 50 trim turbo, cams, gram lights, lowered, looks amazing, etc. Well one night sitting at Hooters, a friend mentioned that the guy is trying to sell it and I immediately became interested. When I got the guys number I never really thought that a week later I would own a new car. Talked to the guy that night and got the low-down on the car. 1995 GSX with 115,000 miles and a fairly new paint job. It had been sitting for a good while and was recently moved to the guy’s friend’s house because it was about to get towed from the place it had been at. I went to look at it on a snowy day, the car was covered in snow and sure enough it wouldn’t even start. He said the e85 was probably bad since it had been sitting so long. The front bumper was taped on and there was barely any interior in the car. Inside was trashed, no headliner, carpet, nothing. Had an aftermarket sunroof in an original hard top car (Probably the most saddening thing about the whole car). The turbo had no filter on it and therefore had some shaft play and the HID wiring was a mess. None of this bothered me though; I was infatuated with the car for some reason. I should have just walked away then but I couldn’t, I wanted the car. Now you may be asking yourself why I was stupid enough to buy this car, let alone pay $4500 for it. Well, because underneath all of its problems, it had a good amount of cash in it, with many of the parts on it things that I already had and could then sell and make back my money.

    Here is what was on the car when I bought it:
    Turbonetics T3 50 Trim Turbo (Already had H1C)
    Turbonetics T3 Manifold
    Custom 5-bolt O2 Housing
    3” Turbo-back Exhaust
    1050cc FIC Injectors (Already had 1200cc RC Injectors)
    Aeromotive AFPR (Already had)
    255 Walbro Fuel Pump (Already had)
    Gram Light 57c wheels (Had wheels on the GST)
    Tokico Blue Shocks and Springs (Had Tein SS Coilovers on the GST)
    HKS 272 Cams
    Greddy FMIC (Had a VRSF FMIC)
    Greddy BOV
    Ecmlink V3 (Just bought, came in 2 days before I bought the GSX)
    Speed Density Setup
    Double Synchro 1-2 by Jacks Transmission
    ACT 2600 PP (Already had same PP)
    ACT Street Disk (Already had Southbend Clutch)
    Rebuilt Head 10k ago
    1G CAS
    AEM Uego Wideband
    Autometer Boost Gauge

    I think that pretty much covers the majority of parts on it when I bought it. I sold my nearly stock 190k mile GST for $4,000 and bought the 115k mile GSX with mods for $4500. As you can see, I had quite a few spare parts and ending up selling some to recuperate my money. I then sold Ecmlink w/ ECU ($525), the Greddy FMIC ($250), and 255 Walbro Fuel Pump ($55) for a total of $850 which covered the difference in the car price and the taxes on the GSX. I then had a spare clutch, AFPR, all awd parts, and turbo. I swapped out the suspension from the GST to the GSX and then bought stock wheels to sell with the GST so I could keep my aftermarket wheels. So began the journey of fixing the numerous problems with the GSX and greatly increasing my knowledge of DSMs.


    February 13, 2011 – Getting the car
    The night I got it home…almost

    The guy was bringing it to me and it got a flat. Awesome. So, we decided that he would buy a new tire for it but I didn't feel comfortable putting just one new tire on an awd, so I decided to buy two...or four. The lady at firestone did her job well; I bought 4 new tires with road hazard warranty and a lifetime alignment (which I had on my old GST).
    245/45/17 doesn't seem to fit very well...


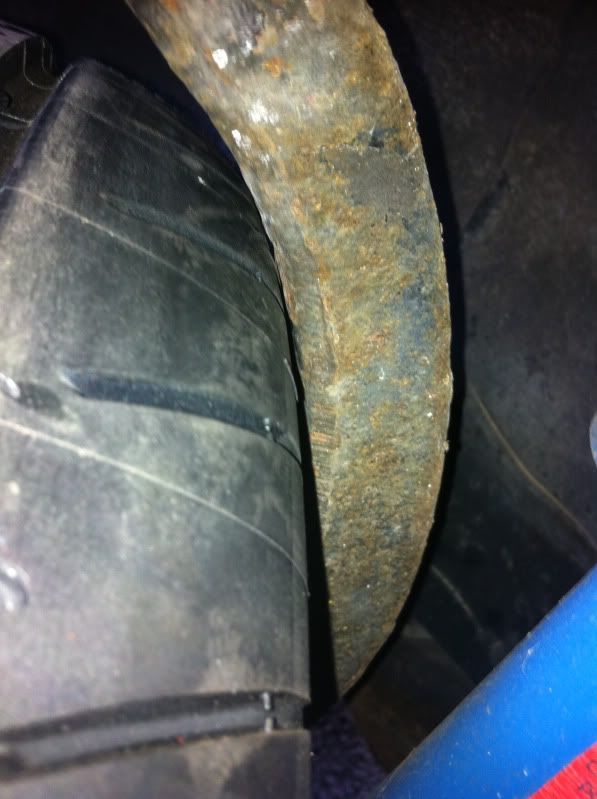
    So, added 3mm spacers and solved that problem
    Finally get it home after the whole tire fiasco and begin the work.

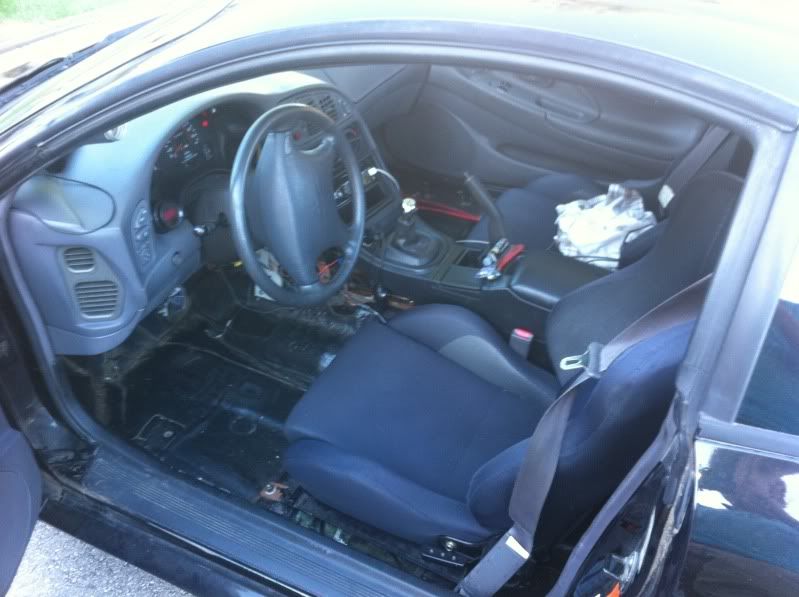
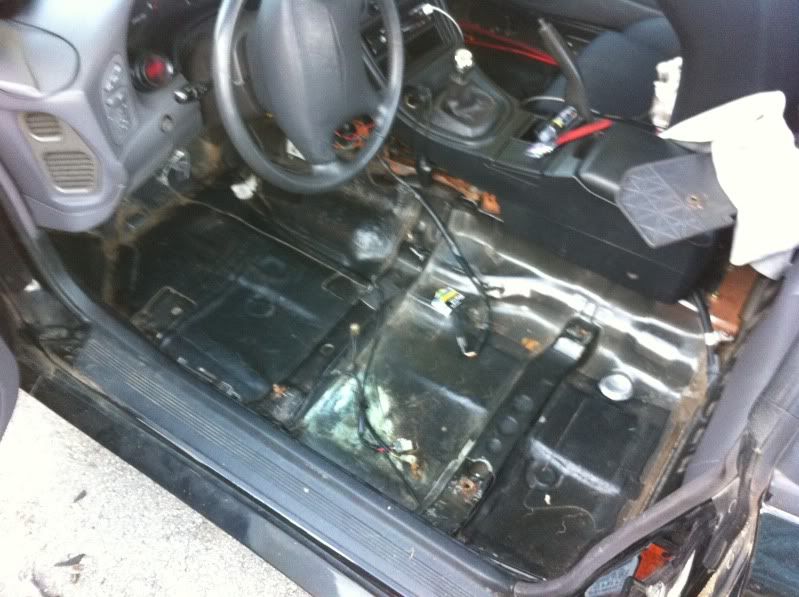
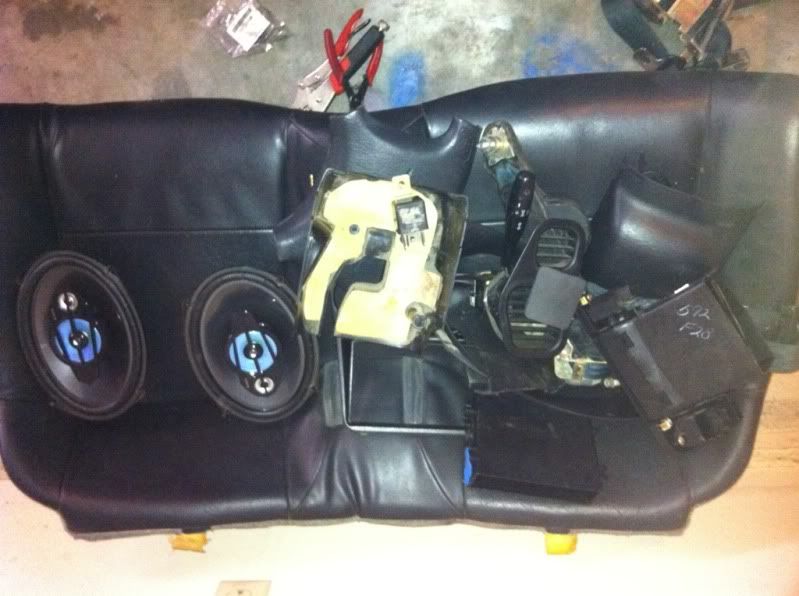
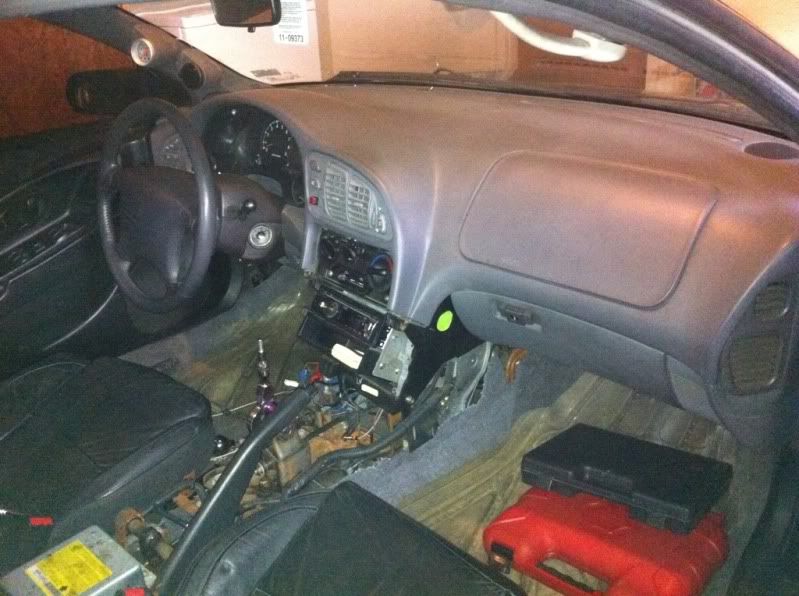
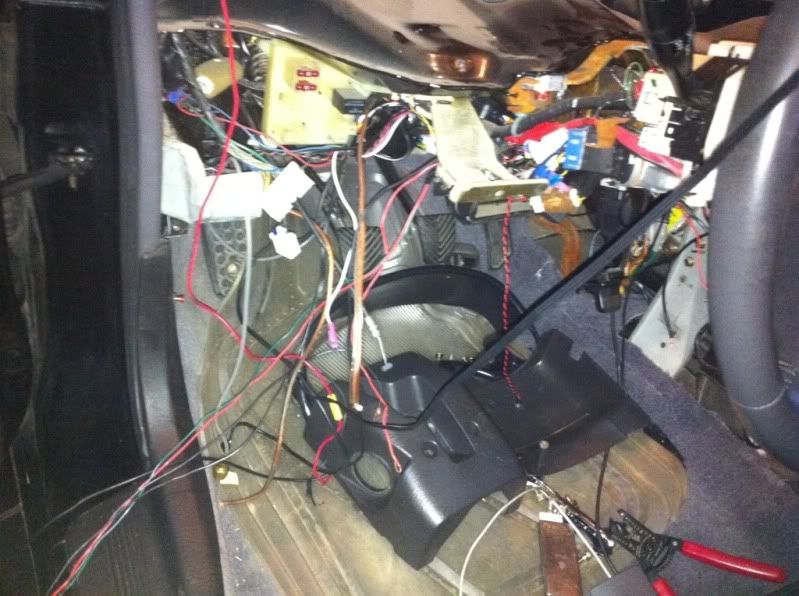
    Just to give you an idea of the interior when I bought it…


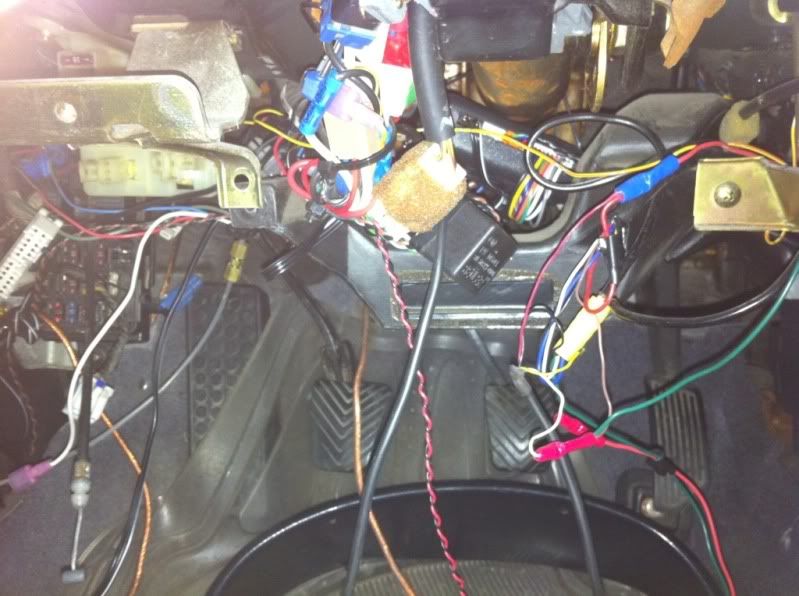
    I worked on getting interior back in the car by searching craiglist and found someone parting out a 2g talon so I went and got most of the interior parts I needed. The HID wiring was terrible as I said before so I cleaned that up. The front bumper was hanging on with very little tape so I just went ahead and took it off.

    Now I made a few goals to be done on the car when I first started posting the build…let’s see which ones I actually completed.

    To be continued in build thread: This week
    Completed interior (Swap my black interior in along with seats) – Fail, swapped in seats and center console and that’s it.
    Fix oil leak – Didn’t get it within a week but tried, turned out to be the oil return for the turbo.
    Fix coolant leak (I think there is one?) – I honestly don’t remember if there was a coolant leak
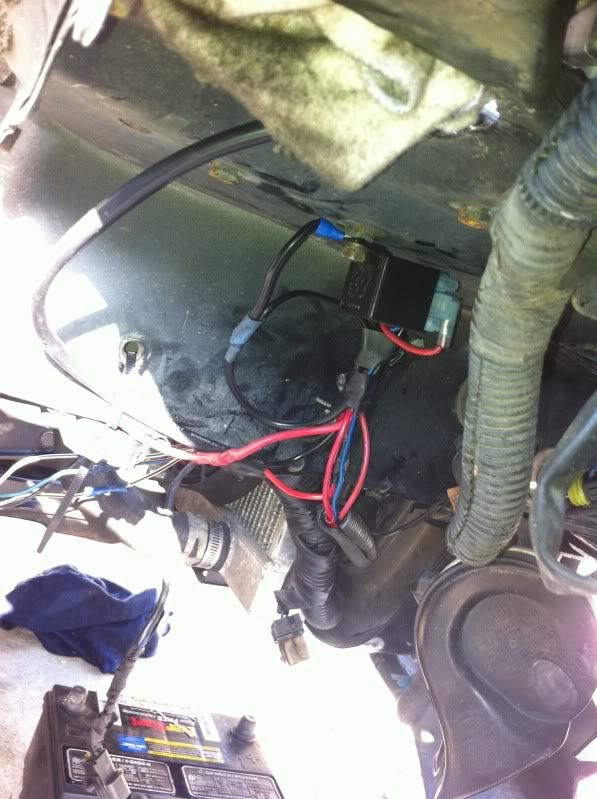
    Clean up under the hood and conceal some wires and sensors – Did do this, along with relocating the battery.
    Replace shifter assembly with the one from my gst – Did it
    Change oil and refill coolant – Did it
    Get IAT bung welded on my VRSF fmic and put it on in place of the greddy fmic – Did it
    Put bumper back on – Of course I did this
    Put on end cap – Finally got this done months after owning the car
    Wash the damn thing – Did it immediately
    Swap over the coilovers from my gst – Did it because the GST had to go
    Put on camber kit and possibly replace upper knuckle bushing – Put camber kit on but still haven’t replaced the upper knuckle bushing
    Swap out radios between the gst and gsx – Done, the one in the GSX was ancient


    Later on: Within a month or two depending on how much my gst sells for and how quickly
    Put on my complete fuel setup that I bought for my GST. (-6 AN line from tank to filter, to rail, to fpr, then stock return line) – Nailed it
    Change all fluids in drivetrain – Couple months later this was done…except for the rear diff
    Fix gas leak (Can't fill above half a tank or it leaks) – Had to fix this, gas leaks are annoying and dangerous
    Fix exhaust leaks (Gaskets are bad) – Took off catback, problem solved
    Get it tuned – Most definitely…car probably wouldn’t even be running right now if I hadn’t

    Reeaallyy later on: Whenever I get around to it/get money/something blows up/decide to go faster
    Build 2.4 bought from previous owner – On hold
    Put on either hx35 or hx40 – Putting on my H1C
    Get new downpipe – Finally done, the old one was crap
    Do a custom catback like on my gst (I loovveedd the sound) – Actually did within a couple weeks. Basically take out the muffler and put two tips on to make it look like stock.


    February 16, 2011 – FMIC and fuel replacements

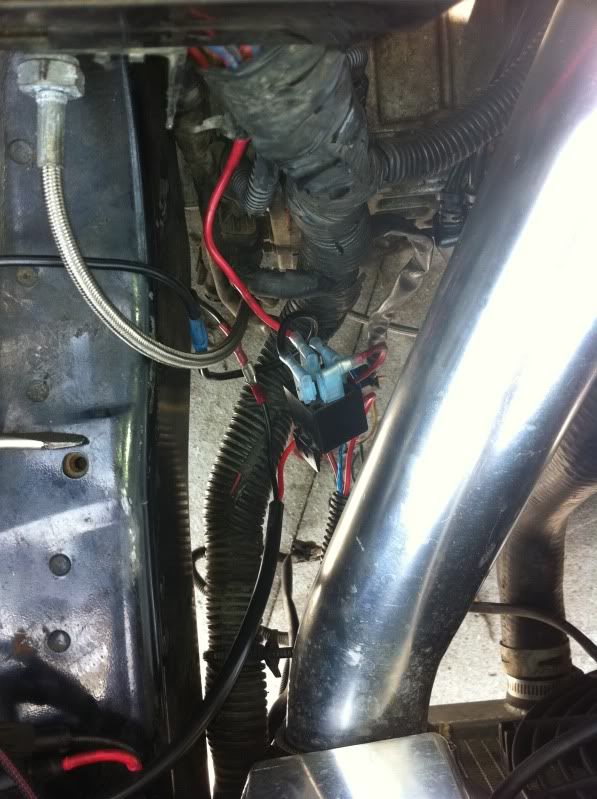
    Since the previous owner said that the E85 was bad in it, one of the first things I did was drain out the old E85 and replace all of the fuel lines. The car would barely run and I couldn’t even think of going WOT without going lean, so I was hoping this would fix it.


    Drained the e85, replaced all fuel lines with -6AN lines and replaced the fuel filter.


    Put new e85 in and it runs much better, although something is still off. It goes waayyy too lean anywhere close to WOT, so either the fuel pump is dying, the fpr is messed up, or the leak directly in front of the wideband sensor is causing it to read lean…highly unlikely but I was hoping that this was the cause

    There is also a leak somewhere that I need to find, I think it is the seal around the fuel sending unit but not sure.

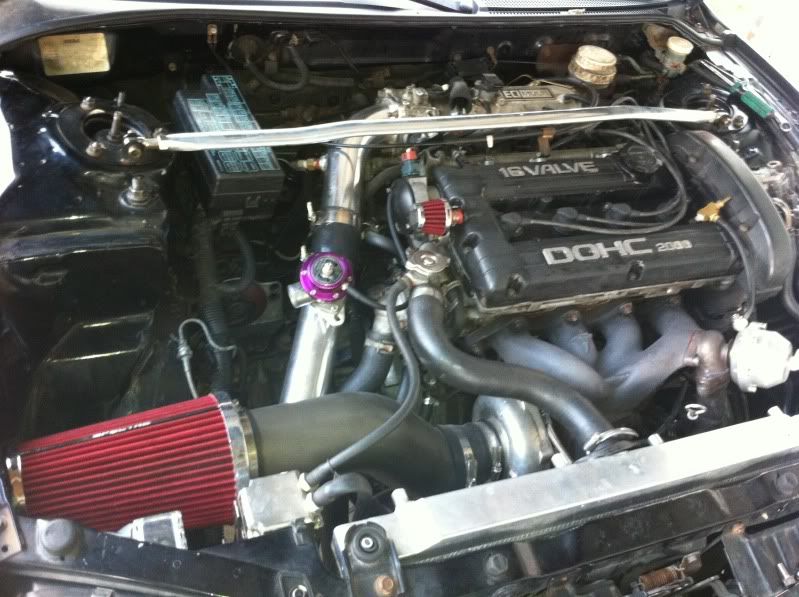
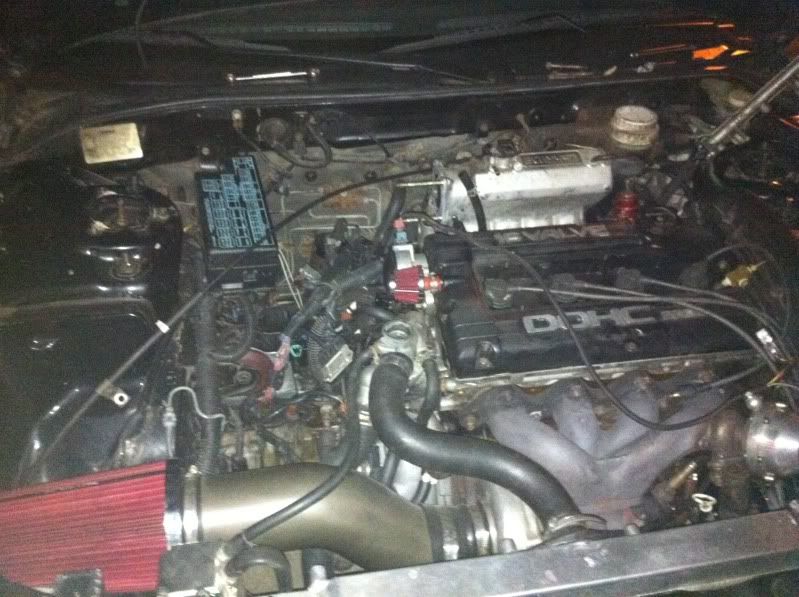
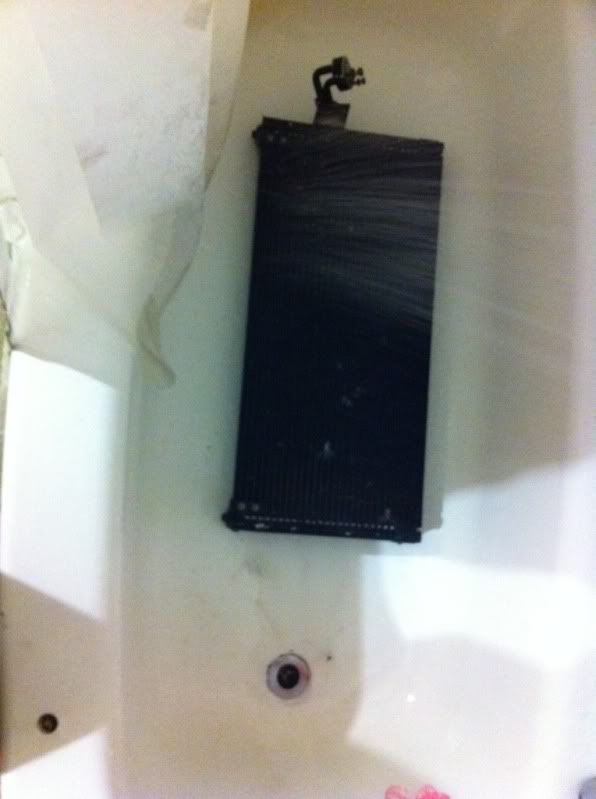
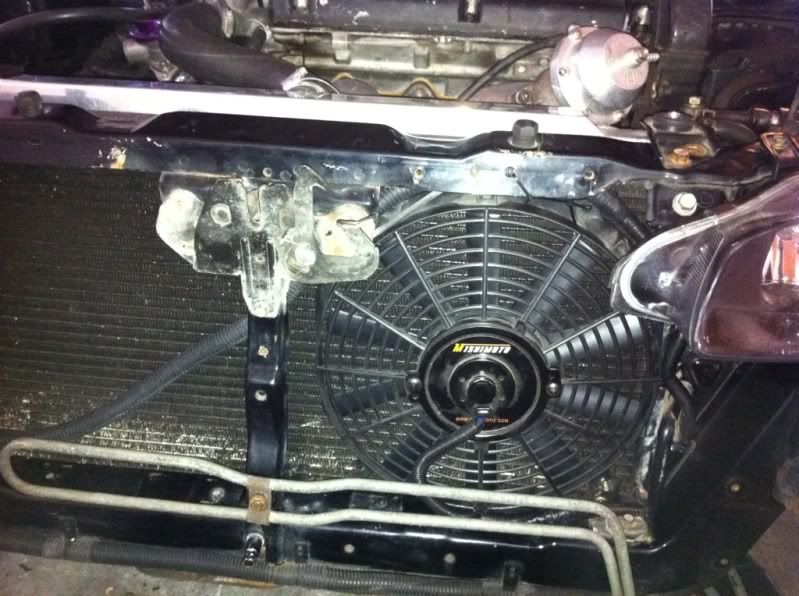
    Today I took off all of the old fmic setup (Greddy with the ghey piping)


    And am replacing it with this (VRSF)


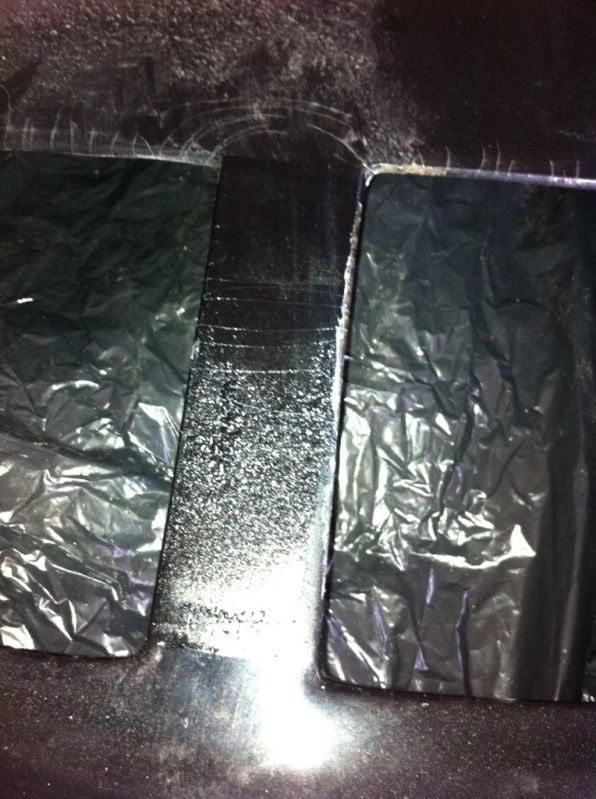
    Got the iat sensor bung welded into the throttle body elbow


    And thats as far as I got today. Only a few more things to do and I can bolt the new fmic on. Plans for tomorrow are to swap suspension, get an alignment and finish putting on the fmic.


    February 17, 2011 – Coilovers on and newly found rebuilt head

    Swapped out my coilovers from the gst


    I use my parking lot very well...and the cement blocks and pieces of wood

    Also finished up the fmic as well, had to do some trimming to the front of the car though


    This is the test fit before the bumper goes on and before I fixed a few fitment issues


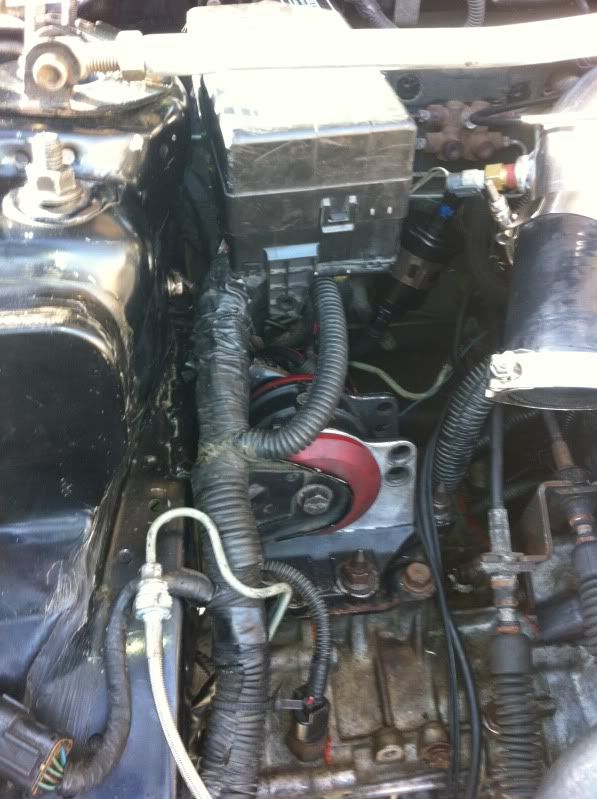
    I changed the valve cover gasket thinking that may have been where the oil leak I spoke of earlier was coming from..but it wasn't...I did find a nice surprise though


    Apparently the head was rebuilt by the previous owner of the previous owner, or in other words it is fairly new and clean as hell! I wondered why there was no lifter tick. But even though I was happy about that I still have a damn leak from somewhere. I will probably drop the oil pan and replace the gasket to see if that could be the problem (I just changed the oil with synthetic…what a waste).

    Got an alignment today but didn't take any pictures since it was kind of cold outside, but I hope to have some tomorrow! Looks amazing to me, even lower than my gst with some nice fat tires on it, can't even fit a finger between the fender and tire
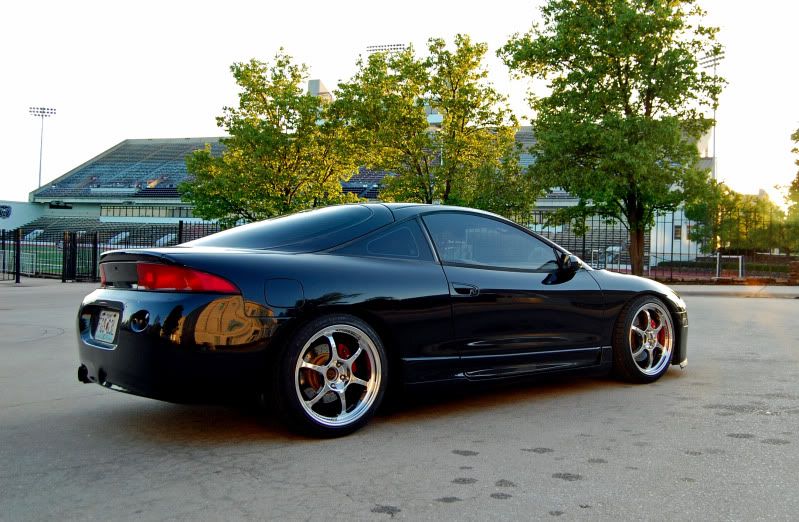

    February 23, 2011 – Current Pictures and Lean Issue Fixed

    Finally got it cleaned up some, but even then it still looked pretty rough. I was happy with it though, it was making progress. It was brought to my attention that the projectors looked like crap and the previous owner didn’t swap them out with 2gb headlights, so the bumper didn’t even fit right. Another thing to add to the list to fix. Also notice the tape from where the bumper was taped on…and the missing end cap :fail


    Way more exciting than the exterior pictures though, I fixed the lean issue!
    GREAT Update, I think I fixed the lean issue I have been having. I noticed the fuel pressure was low earlier today (about 41 when it is supposed to be 43.5) so I decided I would raise it some, which led me to taking out the fpr...which led me to deciding to put in another one I had lying around which had an electric gauge so I could monitor in car. I don't know whether it was the gauge or making sure the fuel pressure was right but I went onto elm to see if it would go lean again and it did NOT! Afr was a little bit lean but not too bad, I was too excited to check anything else.  
    March 2, 2011

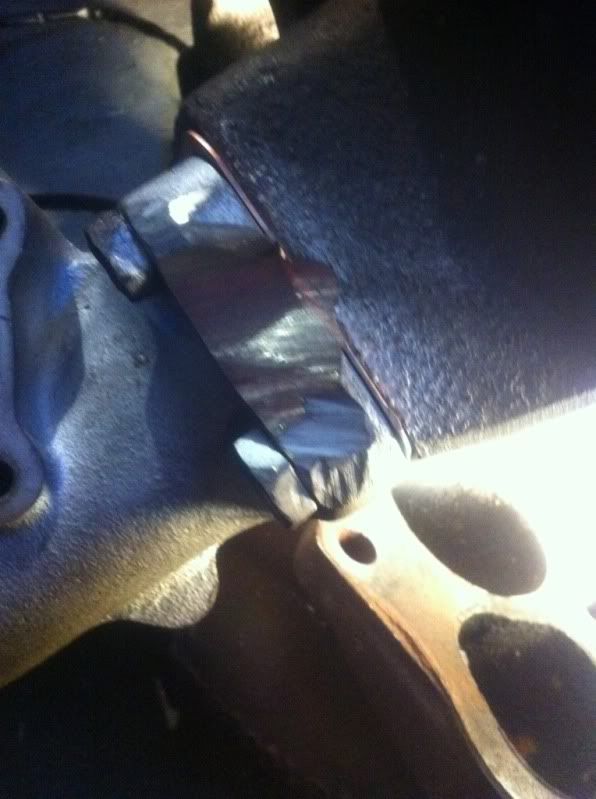
    Put my car on stands to drop the oil pan and try and find/fix the oil leak and figured while I was at it I would fix the broken bolt in the turbo exhaust housing...


    It didn't work out too well as you can tell...THREE more bolts broke off in the housing, making that FOUR bolts that are broken off in there. FML, I planned to drill them out myself and use an extractor to get them out but the extractor broke off too. I ended up taking it to a small shop in a very small town and he got them all out for 30 bucks
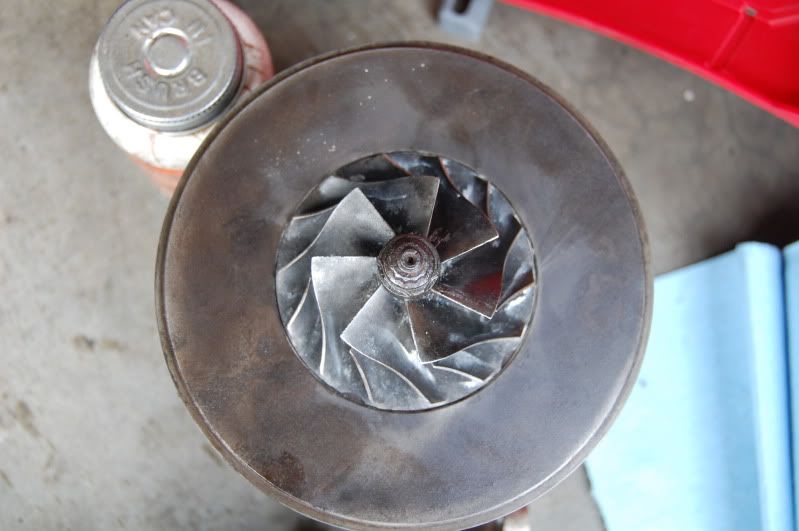

    March 20, 2011

    Finally got the 4g64 2.4 block from the previous owner. Got the block, manley long rods, acl main bearings, and rod bearings for $450. Hell of a deal if you ask me. If I get some money back from school I will begin on putting it together asap. (It still hasn’t been put together…) I think I am going to go with a 9:5:1 compression ratio since it will be on e85. Anyways, here are some pics


    Last edited by Dyesuperman; 09-27-2012, 08:21 AM.

  • #2
    May 3, 2011


    Well I kind of slacked off when I first started doing the build so I don’t have pictures for a few things that I did…Without further ado though, here is where the car was at the time.


    A 50 trim that hits full spool at 4700rpm is messed up. So this led me to hunting down every little thing that could be causing it. First things first, I got a local to tune it for me. Ran much better afterwards but I didn't get a chance to fix some issues before he did it. After the tune and learning about my spool issue, I fixed an exhaust leak that we thought could be the cause. Tore everything out and replaced all of the turbo gaskets and painted the manifold while it was out. Also unhooked my mbc to see if it could be the cause and that wasn't it either. Well it didn't fix the issue but I decided to hit the track anyways after he had tuned it and ran a 13.3@105 with a 1.9 60' as my best run, which can be improved greatly. I learned a lot from the runs as when I popped the hood, a local and I noticed that the coolant overflow was completely full...so I was pushing some coolant. This could explain why I kept losing ALL boost between shifts, which took more time off of my run to build the boost back up. I know now that it is a bad turbo, but at the time it seemed a logical conclusion. The head studs did help it though.

    So I got it home and ordered head studs immediately. I have seen some success with replacing one stock bolt with one head stud at a time so I did it to see if it would work. It helped, but I was still pushing coolant into the overflow. My last resort for the cause of pushing coolant was my radiator cap, which turned out to be bad! Well, that's if the guy who tested it at autozone did it right...he seemed a little confused about how to test it. So anyways, I got a 1.1 bar evo radiator cap and threw it on and I don't believe I have pushed coolant since then, haven't checked or drove much though.

    Next things to do are test the wastegate and check the turbo. I am going to check the turbo later today to see if it is spinning at idle and continues to spin after I shut the car off. If it doesn't spin with either, turbo is likely bad…which would really ruin my day. Hopefully I can test the wastegate this weekend if the turbo checks out. If neither of them are bad I am going to be extremely confused and lost as to what is up with this car.

    Also some random things that have happened since that last update. The wiring for my wideband got caught in the steering column and ripped it in half and shorted out something. Spent a couple hours replacing the AEM with a LC1 thinking the gauge was bad and turns out it was the sensor. So got a new wideband sensor for it as well. Bought rit dye for my carpet and picked up a headliner while I was visiting my dad in Arkansas, so interior should be coming together sometime soon. I am hoping I can get everything fixed before the next Midnight drags but only time will tell.

    Sadly no pictures of any of the above, there may be videos of my runs at the track and if I find them I will add them, but as of now I have nothing. Sorry guys!

    May 6, 2011

    Not too big of an update, but here is how the car looked after almost 3 months of owning it. You will notice that I put my other wheels on and replaced the headlights with oem 2gb ones. I also made the HD lip for it and made a how to seen here.


    May 7, 2011

    Since classes are officially over, except for finals...I probably should have studied instead, but, I worked on my car. Got a lot of things I have wanted to get done finished.

    Started working on it because it seemed like first gear was gone all of a sudden. Just didn't want to go in most of the time which I thought was weird because it showed no signs of wear or anything. I figured the clutch just needed to be adjusted. Well before I adjusted the clutch I wanted to make sure the slave cylinder wasn't leaking and come to find out it was pretty bad. So I bought a new one from Autozone and put it on. Bleeding the clutch seemed like it took forever. I really need to get a speedbleeder for next time as I got tired of getting out from under the car every minute. So when it was finally to my liking I adjusted the clutch, which needed it pretty bad. Haven't driven it yet because I wanted to take care of a few other things but I am anxious to see if I fixed the first gear problem.

    I figured while it was up in the air I would change my front brake pads which were pretty much toast. The rotors and calipers were pretty rusty so I cleaned them up as well. Just accented it in red for now as I have to custom order the color I want. Put in EBC Green Stuff pads which I have heard good reviews about so I am looking forward to testing those out as well.


    I decided that I was tired of my afpr just hanging on the side of my engine so I am going to relocate it...I got distracted by other things before I could finish this so it will be finished tomorrow. I had wanted to look at my return line to see if it could be rerouted to give me some extra slack, but while I was checking this out I noticed my feed line was hanging kind of low to the ground. So I pulled the slack out and realized I might be able to put my fuel filter back in its stock location. (I had to relocate it under the battery because the feed line wasn't long enough.)
    Back in the stock location..sorta. Had to angle it for the hose to clear.


    The wiring for my HIDs has been pretty bad since I bought the car so I decided to finally clean up the mess.
    This is the mess I set out to clean up.

    I noticed I had an excess of wire for my fan when I was cleaning up the headlight wires so I set out to fix that as well.

    Almost finished doing that and realized I wanted to finally relocate my battery since I was doing wiring anyways. Sooo, went and bought 2ga wire and went to town relocating the fuse box to where the battery was.


    And all done, need to get some better pictures tomorrow when I finish up some other things.

    Moved the HID relay under the passenger side fender.

    Ran the battery wire back to the trunk and figured I would stop along the way and finally do the fuel pump rewire to give the pump better voltage. To give you an idea of how much the voltage drops with stock wiring, I can hear the pump slow down and speed up when I have my blinker on. So this should help.


    And that is it for today. Tomorrow I will be painting the rear calipers and putting my gramlights back on for a while. Painting my intake as well..blue-->>gunmetal gray. I will need to finish wiring up the battery and moving the afpr and then it should be good as new! Hopefully I don't lower it back down and drive off only to realize first is still messed up. I would then proceed to kill myself. (First was still messed up…I am still alive.)


    May 23, 2011

    As I said, I put my gram lights back on for a little while and during that time I had a friend take some pictures of it. I think they turned out great and I wish I could have new ones taken like these with how the car looks now


    May 27, 2011

    Seafoamed the car today and changed the oil and spark plugs afterwards. While I was at it I wanted to see if I need to modify my new downpipe, and sadly I do. I think it may bend to where it needs to be by heating it up in a vise then bending it to more of a 90 degree angle but I am not sure.

    Here it is on top of the old downpipe...the old one doesn't fit exactly right but it gives me an idea of how the new one needs to bend to fit


    No way for it to fit without modifying it...


    June 25, 2011

    It seems that I took a break from working on the car or something, or that I just didn’t document anything because I can’t find any posts or pictures from this month span. Oh well, things start happening now

    Finally checked out my wastegate and no leaks to be found. Diaphragm was in good shape and the valve sealed up. Went ahead and put two springs in it in case the small one was worn out. That was a freaking pain but with the help of my roommate I got it done. Even if it doesn't fix my spool issue I can run more boost with the current mbc now


    Also put the carpet that came with the car in. I planned to just dye it black and keep it for a while but decided it wasn't worth wasting the 20 bucks worth of dye. So, I just put it in the car as is for now. Looks much better and much less road noise.
    How it started out

    Seats out

    Carpet in


    Next is the leak down test. Bought the tester today from harbor freight just have to find an air compressor to use. If the leak down test shows bad results I will be ordering a timing belt, headgasket, exhaust gaskets and other misc items and then tearing it apart and hopefully have it together by the 9th.

    (I was trying to get the car ready for midnight drags on the 9th but it didn’t happen…the next few updates will explain why Also, I did do the leak down test but either the tester was bad or I did it wrong, so never got any results from that.)


    July 6, 2011

    Ok so this update is spread out in a week or so but I have no documentation of when it was finished, so I am compounding it all into one large update.


    Alternator was going bad so I decided I might as well do the Saturn alternator swap while I am replacing it anyways. Going from a 65amp alternator to a 105amp that keeps power during a wot pull should be helpful. Also picked up a spare intake from a friend and bored it out to match up with my 1g throttle body...going from 53mm to 60mm(?) there, so another big difference.

    Made some progress tonight and will finish it up over the next few days.
    Had to do some grinding on the alternator for it to fit right. I had to grind more than this but I forgot to take a picture of it when I was done.

    Here is how it looked when I started on the intake tonight

    And when I finished for the night

    Cleaned up and brought my injectors inside to soak in gasoline for the night to get rid of the black goo buildup


    I took out the ac compressor since the lines and condenser are long gone and had to figure out a way to recreate the spacer for my cv axle, so I came up with this


    But, I didn't like that, so I cut up the ac bracket instead. The piece on the bottom is what originally bolts up there, I just didn't need the top piece anymore.


    The alternator tension bolt was too short so I found that one of the bolts that held on the ac bracket was the same thread pitch


    It didn't fit into the tensioner so I got out the grinder and went to work again.


    All finished and tightened up


    Everything off and ready for the new throttle body and intake manifold


    I made a gasket that I figured would work for the thermostat housing...but I was stupid and didn't extend it out to the bolt holes...


    So therefore this happened when I went to do the last nudge to make sure all the bolts were tight..


    Luckily a friend of mine had one so I went to ozark and got the replacement which had a rusted and broke water neck going to the heater core


    So, I hammered out the one from the housing that was on my car and then swapped everything over to the new housing


    Almost finished!


    Annnnnnddddd..Started it up when I was finished and it was running on 2 cylinders and the tach was fluctuating erratically. Bummer. Proceeded to test all of the electronics and make sure they were within specs. Everything checked out, got fuel, spark, everything. I took out the injectors and tested each one individually, put them back in, then took them back out again to switch them around. Swapped out the ptu, coil pack, checked all connections to make sure they were tight. Put the 2g throttle body back on and hooked the fiav back up with no change, then put the 1g throttle body back on. Checked all grounds to make sure they were good...it was a long process and made me angry that I couldn't figure it out. I somehow got it running on 3 cylinders but something still wasn't right. Bought a spare CAS from a local dsmer and put it on and still ran on 3 cylinders. Hooked my laptop back up to take a log and noticed an engine code that hadnt been there before. Downloaded firmware to eliminate it and car started up and ran fine.


    I would like to note here that to this day I do not know what the problem was. The code that came up was a common one with the Saturn alternator swap so it shouldn’t have caused the issues I had. The CAS I bought started leaking so I put the old one on and it is still good, so the CAS never was the issue like I suspected. I’m thinking the thing was possessed or something and magically came back to life. The car was down for a week while I tried figuring this out and it wasn’t a pleasant time for me and my relationship with the car.


    So got it back running and had it tuned again yesterday morning. Set the boost at 26psi and improved spool by 400rpm. Turbo is most likely bad though as it is a 50trim and hits full boost at 4300rpm, so something is wrong with it. (I was denying the inevitable; the major shaft play was likely the cause the whole time.)

    Went to the track last night (I want to say this was July 22nd) and ran a new personal best of 12.61@112 with a 1.89 60'. Never got the launching technique down so it could be improved still but I am happy with that and will settle here for a while until I get a new turbo. I am going to focus on radiator/fmic ducting now. Plan is to buy a new front bumper as the one on it is cut for a greddy fmic and doesn't look too well. Then I will cut and modify the new bumper and use sheet metal to seal the fmic up to the bumper. Then I will use the fog light hole to duct air up to the air filter and seal it off from the engine. Going to install a pusher fan in front of the turbo manifold for a little extra air and then seal the radiator to the fmic. Last on the list will be a hood vent or buy a vented cf hood. All of this is to prevent such hot intake temps in the summer and to prevent overheating on the hot days. Plus it will help for my future goals of autocrossing it and road racing.


    July 24, 2011 – Cam gears, quick release bumper kit, video from track

    Got a few goodies. One in the mail and one from autozone
    Cam gears! :ohyea::


    Annnddd spark plug wires..ones on it were so bad that the metal electrode things inside the spark plug wires all stayed on the spark plugs when I pulled them out


    Also, I bought the quick release bumper kit earlier in the month.

    No pictures of this sadly, and it still hasn’t been installed. It may be put on soon though


    Video of my car from the track a couple days ago…notice my loss of spool and slow shift to second. Trans issues and spool issues really slow ya down


    July 30, 2011-August 4, 2011 – Evo Brakes bought and in

    Have another update!

    I have been considering what I want to buy for my car this fall and have been back and forth on whether or not to buy motor parts or something else that I have been wanting done....these made up my mind. They were a decent price so I jumped on it.

    DBA 4000 XS Rotors..front and rear

    Evo calipers..front and rear

    Hawk pads..front and rear

    I will get some more pics when they come in and are in the car but I am pretty excited about it


    August 4, 2011

    Got home today to see a couple of packages in my room...
    I wonder what this could be?


    Speedbleeders! For all four calipers and my clutch slave cylinder..also a speed bleeder bag to prevent a mess


    Next package looked promising as well...


    This one contained most of the good stuff! What could possibly have been in there...


    Yup, four piston evo front calipers, 2 piston rear calipers, and Hawk pads all the way around. Those front calipers are freaking massive, much bigger than I thought they would be


    Rotors will probably be here tomorrow and hopefully my order from extremepsi comes in as well so I can get these babies on

    Comment


    • #3
      August 9, 2011 – Hit and Run


      WARNING: What you see below may sadden you. If images of shredded metal and torn body parts concern you, please refrain from continuing further.

      I woke up and started to leave my girlfriends house when I saw this. Notice the huge curb mark and that the tire is flat…you would think I would remember parking like that.


      Thought it was odd that I didn't notice jumping the curb when I parked here, but I was pissed either way cause my wheel was curbed...then I walked around the car.


      I can’t even describe the fury and pain that overwhelmed me. I couldn’t even speak. I just sat there thinking what piece of shit lowlife could hit my car this effing hard and not stop? I hope to this day that karma throws him under a bus.

      I took the car by a body shop and got a quick estimate…$3700 in damages. Bumper got torn off on the way there because it was rubbing my tire.


      At this point I had a decision to make. Keep the car or take my insurance money and run. I loved the car but it had its problems cosmetically. It had an aftermarket sunroof with no headliner so it will be nearly impossible to replace. The paint is only in so-so condition in a few areas. The wiring is a mess in some areas. The A/C was torn out of it. Just some small things that are hard to replace. Plus the fact that it is pretty much totaled. I searched for days looking for another car to swap parts over to and I found a spyder that I almost bought. I was oh so close to buying it and swapping it to AWD, but I didn’t.

      Insurance gave me $3900 to fix the car after my deductible. I barely kept the car from being totaled though. First adjuster totaled it. I then sent them a list of all of the aftermarket parts and they decided to not total it. I had a quote to pull the panels out and repaint it for $2000 by a well-known shop. I kept the car. However, I didn’t go to the shop to do the repairs like I should have. I had the panels pulled at one place and then painted at another, which possibly wasn’t as good of a job. I will never know though.


      Panels have been pulled.


      Those of you that know my car, this is likely the stage of my build you have been waiting for as it leads to the newest look of my car most are familiar with.

      I found an amazing deal on a set of red 18x9.5 +35 Advan RG1s.

      I figured it was going to be a massive headache getting these things to fit with 255 wide tires…but nope


      August 17, 2011 – Evo Brake Install

      Since I decided to keep the car I figured I would go ahead and install the evo brakes finally.


      I used brackets based off of kmv's design but made by Shane Steffens. Thought I had everything together but when I went to install the brackets I couldn't find the right size tap. So after driving around town for about 1-2 hours going to all of the parts stores, I randomly stopped by a shop right down the road from my house. I got lucky and they let me borrow the tap I needed! So the install proceeded as planned, but with a slight delay. I opted to grind more and clock them upwards because I think they look better like that and it was well worth it.

      Caliper painted after being machined


      Some pictures of what has to be grinded to clock them upwards


      Old front rotors vs. New rear rotors

      Old front rotors vs. New front rotors


      Fronts installed


      Rears installed


      Also installed SS lines to give it a more firm pedal with the stock MC. Feels pretty good to me as is.


      September 2, 2011 – Photoshoot

      Now is a good time to show how the car has looked over the months I have owned it.

      Its first look

      Then I made the HD lip and put my Drag DR-31s on


      Then the car was fixed after the hit and run and now had new wheels and brakes as well


      Mid October, 2011 – Clutch install and track times

      The last venture I had was a clutch install. I have had clutch problems for a while with dragging and a high engagment point so I figured the clutch was shot and the flywheel stepped improperly. I had bought a used southbend 6 puck and act 2600 pressure plate from a friend nearly a year ago for my old car and finally put it to use. Dropped the transmission and swapped the clutch, replaced the tob with oem, shimmed the pivot ball with another washer, had the flywheel stepped to .610 and put it all back together. I thought my issues were finally over when it didn't drag, but the engagement is still high after adjusting the pedal any such way...so I think my slave is shot again.

      Went to the track after 100 miles of sort of break in (was told it didn't need a break-in period since it was a used disk and pressure plate) and first pass ran a new best of 12.6@115...but with a 2.1 60'...blah. I either spun extremely badly or the clutch was slipping. The next pass the clutch slipped all through 1-2-3 and then I let off and coasted to the line. Let it sit for a bit then went for another run. It slipped again so I was done for the night and not happy to say the least.

      I wanted to see if it would slip on the highway and nothing, except for the shower of sparks behind my car so it was slipping, just not enough to notice apparently. Since then I have just been taking it easy and staying out of WOT to give it a little break-in period at the advice of a vendor on tuners. Not sure went wrong with it but if it still won't hold the trans will be coming back out this winter.

      Oh, almost forgot but I also replaced the rear main seal with a new oem one and replaced my oil pan so I could put my -16AN drain line on for when I finally get my holset on. That thing is massive haha. Also installed my new modified downpipe..i need to get a few pictures of these. And I replaced my passenger axle because the boot was torn. I was doing something with my car a couple days ago and now the driver side one is torn though, so looks like I will have to replace that one soon too.

      Here's a picture of the clutch disk and pp

      And this one shows how much my car hates me..

      Clutch fork position


      October 27, 2011 – Hit and run…again. Wheel test fit

      You have got to be kidding me…around 2-3 weeks after I get the car back from being painted one of my jackass hick neighbors hits it while pulling out of their parallel parking spot. I am pretty sure I know who it was but I have no proof so it will just be scraped up for a while. The best part? It was the last night the car would ever be parked outside overnight as the next day I moved into a new house with a garage.


      In other news, test fitted my other wheels.

      Gram Lights aren’t going to clear without a 17mm spacer…


      Drags fit fine though, my new winter wheels


      November 18, 2011 – Moved. Black interior, vented hood, misc acquired

      Moved into a new house since the last update Car now has a new home and will be garaged every night

      Meanwhile, I worked out some trades with a couple friends

      I traded an aeromotive afpr I had lying around from my previous build for this

      I then traded the NOS parts to a friend that has a GTO and plans to spray it. It pays having good friends


      Hey these are pretty nice

      Oh but what's this?

      Noo...could it be?


      Why yes, yes it could full black interior!!!! Well, almost...it's everything that will work in my car from a spyder. Also, a few more goodies...

      Fog lights, covers, clear turn signals, reverse lights, other random crap


      Also getting a pretty beat up evo style carbon fiber hood I'll be sanding it down back to the carbon fiber and see if I can work with the current hood pin locations (they are uneven, I'm hoping I can even it up with aerocatch latches)


      I have the dash too, just haven't picked it up yet. Literally everything black that was in his car I took. Plus the other random goodies.

      Now for the best part...I paid $15....for all of it!!


      November 29, 2011 – Stripping the vented hood


      As I mentioned and posted earlier, I got a vented hood in the trade so started stripping it down back to the carbon fiber. I started sanding at about 3:30 with a fine grit sponge (not sure what grit, I would guess 300 ish). Well that was taking forever so I switched to 150grit sand paper..that took forever too so I switched to 60grit. That worked a little better but at this rate it will still take me a good week to get this thing stripped down to the carbon fiber. And that isn't even including if its salvageable and I have to strip the gel off too.

      Here is the hood

      After 1.5 hours of sanding...


      I will be cutting out the middle divider in the vent and seeing if an actual evo's mesh will fit in the hole with some trimming… (it doesn’t for those that are curious)

      I scrapped the sanding idea and got some advice about using paint stripper...so I have half the hood stripped and no ill affects yet. I need to smooth out the part I began sanding on with the coarse sandpaper but that's not too involved either. I will finish up with 500 grit sandpaper to take out any deep scratches in the hood and then go from there.

      Here is the progress so far!
      Bought this

      Tested it on the piece I'll be cutting out

      Looks good to me! Except or the cracks and sanding marks from when it was painted..

      So I covered a big portion of the hood..after first coat

      Second coat


      I had to leave for work so I wiped the stripper off and will continue tonight. It seems to eat the paint and make it bubble up, then the second coat makes the primer turn to liquid and easy to scrape off..it's messy though! I’ll be working on this at various times throughout the winter so updates will be sporadic :P 
      December 30, 2011 – Parts hoarding, master/slave cylinder replaced and no cutting required intake ducting


      Well first off, I replaced the slave cylinder and master cylinder the 3rd of this month but it didn’t seem like it was a big enough update to put in a separate post since it is nothing special. I put in full SS line from master to slave and bled it using my speed bleeder. Put in an Autozone master at first then just went ahead and bought an OEM master to be safe so that is what is in it now. Clutch still engages at the top of the pedal and with the rod adjusted all the way out the clutch fork can still be pressed in…beats me what the heck is up with it.


      I picked up a few more parts to go on the car over my winter break from class. I should be putting this on before summer sometime but no idea when.

      Complete low-mile AC setup - $125 shipped
      OEM composite headgasket - 30 shipped
      Picked up the following for 120 shipped
      -OEM water pump with 2k on it
      -OEM timing tensioner with 8k on it
      -OEM tensioner and idle pulley, new

      Parts collection is building up (to be put on the car, you don’t even want to see what’s in the attic)


      Now onto the intake ducting…

      Home Depot is at it again :rocks: My intake temps were extremely high during the summer so I fabbed up some intake ducting to help out for the upcoming summer. I have yet to seal off the filter to the ducting as I am trying to decide the cleanest way to do so, but this should help as is nonetheless.

      First of all, I had to compare prices. Lowes and Home Depot were very close in pricing so I just went to the one that was most convenient at the time, in this case Lowes. The pictures are from Home Depot but they are the same parts.

      I bought:
      6" 90' Adjustable Ducting

      6" to 4" Reducer Ducting

      4" 90' Adjustable Ducting (I know it says 3" but it looks exactly like this)

      And the last piece I didn't get a picture of at the store because I found it last minute but it is just a 4" piece that has slots already cut in one end to folder over in a non-circular hole. I believe it said circle to square adapter or something like that. You will see what it is in the pictures later.

      So began the fabbing up.
      I attached the circle-square adapter piece to the factory smic piping hole. I had to kind of work with it to get the tabs up far enough but it will work with some force and coercing. Once you have it up far enough just grab some pliers or something and start bending the tabs over like such.

      At this point you should have this


      So now you want to take off two of the slidable adjusting pieces on the 6" ducting. No pictures of this but you can just bend the piece in and it will pop out. The pieces aren't held in by anything. You want to take off the pieces on the opposite side of the reduced end so it can slide into your 6"-4" reducer...hard to explain but you will understand once you look at it. These pieces are taken off so the ducting will fit.

      At this point I attached the 6" adjustable piece to the 6"-4" reducer, and the reducer to the 90' 4" adjustable piece like so.


      The 6" piece slides over the side vent on the front bumper perfectly. I slid it over the vent (with everything together) then manuevered the ducting with the adjustable 4" piece to attach it to the circle-square adapter that was put on earlier. I pushed all of the attachments together as hard as I could so they didn't separate and sat back and enjoyed the easiness of the project. Total cost was $21 I believe. I coated it in some cheapo black paint for now so it isn't as obvious.


      January 3, 2012 - Road trip pictures over the holidays

      And it isn't even that dirty! Most of my family lives in Arkansas so I traveled down there for Christmas. The roads were a little wet/dirty going down highway 7 but I figured I would stop and take a few pictures of the scenery anyhow. Enjoy :-D


      January 4, 2012 – Black Interior Install

      As I said earlier, I acquired most of the pieces for a black interior and I finally got around to swapping out the dash. Sorry for the crappy pictures, my iPhone seems to have crapped out that day lol. New updates as of February 21, 2012 will contain nice pictures taken with a dslr

      Center console removed, gray dash still in

      Airbag removed and other such things

      Let's get this thing outta here!

      ....This looks like crap...time for rewiring...

      So much wiring...

      Dash out

      Encountered a small problem...dash harnesses were different :/

      Time to swap them out

      Got the wiring swapped out and realized I didn't like how crappy the roof looked without headliner and the aftermarket sunroof wires running everywhere (NOT my doing)..didn't work anyways


      Manual sunroof conversion done Much cleaner...for what it is anyways


      Ok, so in with the black dash. Had to swap out the VIN plates as well

      Its in!


      January 6, 2012 – Removed wheel spacers, solid carrier bushings, solid motor mount


      I still need to fix the SRS light that came on after the dash swap but I did a few more things to the car.

      First of all, I have a strange grinding/rattling sound from my drivetrain. I jacked the car up to see if the carrier bearings may be torn or sagging or anything and they looked fine. Decided to go ahead and install my solid carrier bearing bushings though.


      I am tired of my tires rubbing on the outer fender so I wanted to double check that the spacer was needed before I tried to roll the fenders some more. Seems that these tires are a little less wide than my other ones because I have plenty of clearance without the spacers! I should have less rubbing problems now :fyeah


      Goodbye spacer


      Went around to take the other spacer off and noticed something odd with the caliper and rotor...the edge of the rotor was a little rusty (the other side is shiny). Can anyone see the problem with the caliper?


      What about now? This is after I fixed it


      If you guessed that the pins were out, you are correct! I don't know how they backed out but I am glad that I caught this now before something worse happened.


      And last but definitely not least, I installed a solid front motor mount.


      I wasn't really expecting it to make too much of a difference, but wow. Shifts feel sooo much better just driving to work and it doesn't seem like there is any slop. And this is only with the front one installed! I don't even know if I will proceed to install the rear one because it may not be needed. I can't even tell a difference in vibrations as I already had the front prothane insert in and prothane side mounts. This is a very good mod though


      January 11, 2012 – More work on the hood


      Got bored last night and decided to work on my hood again. Decided to bring a new weapon to attack the paint with...


      So yet again, put on the stripper and let it sit


      Let it sit for a while and then scraped/wiped off the paint and primer. Did that 2 more times and still didn't get it all off


      Started working on it this morning and decided to use the stripper again so I could just wipe off the primer


      Finally got it to this point after wet sanding and then taking it outside for some more regular sanding. The filler still needs to be sanded off and then inside of the side vents but it's almost there


      I am probably just going to spray it with plasti dip until I save up money for paint. I would rather do something temporary than attempt to paint it myself and have to do this process all over again


      January 12, 2012 – Snow Pictures


      SSNNNOOOOOWWWWWW!!!!!!!
      Nothing too special, just took some pictures out in the snow before it disappeared.

      Good thing it was tucked away all night


      January 20, 2012 – Turbonetics Housing Machined for Holset


      Housing has been machined for the holset exhaust wheel


      Fits perfectly!


      January 23, 2012 – Little bit of hood work and fog light bezels in


      Yet more sanding on the hood...and cutting! I **** that center divider in the vent so I took a grinder and got rid of it. I am going to have those side vents filled in most likely since they serve no purpose.


      And I plastidipped my fog light bezels and put them in. It looks sooo much better


      January 30, 2012 – Holset rebuilt, Downpipe wrapped, AC parts going in, and mud flaps acquired


      Did some work this weekend...rebuilt the turbo, wrapped the downpipe, put in the ac condenser, and put in a pusher fan

      Tools all set out


      What have I got myself into :derp


      Turbo rebuild went sort of smoothly...had some problems with the thrust collar being really tight on the shaft but talked to Justin on tuners and he said as long as it seated then it should be fine. So turbo rebuild is done! Ordered the rest of the parts to do the headgasket/timing/bsek so once I find some time I can have the car down for a couple days the holset will be on

      Again tools set out for what I want to do...I didn't even end up using half of this stuff though. Lol. The tubing was too big to do what I wanted with it and the tape wasn't what I thought it was. Then I didn't have time to use the sheetmetal to do any ducting so that will come at a later time.


      Started tearing it apart for a few changes


      As I have said I want ac back in the car for summer so I decided to give the ac condenser a bath before it went in

      Dirty


      Condenser in and foam around the edges to seal it to the radiator.


      Fan in position and wired up


      Downpipe wrapped and being painted with the DEI coating.

      Drying


      Read a few threads where people said it's a bad idea to wrap the flex section so I cut out that part


      On a sidenote…
      I love coming home to packages


      Mud flaps are in


      One small problem though...I don't even know these will be functional since my wheels are so aggressive, they look puny compared to them lol. I may sell them for a profit if they don’t function for me


      That's all for now!


      February 3, 2012 – Made a fan shroud


      Got bored last night and needed to figure out a new way to mount my main fan. The car ran just a little hot yesterday with the pusher fan being the only one going so the main puller needed to go back on.

      I figured the easiest way to go about doing this would be to make a shroud. So I took some of the sheetmetal I bought for the radiator ducting and cut it in half. Then I measured out how big I needed it to be and marked it.


      Cut it out and bent over the edges to a 90* then put the fan on top to trace it out.


      Cutting out the middle


      Almost done. Holes are drilled and middle is cut out, just need to mount the fan to it and put it on.


      Fan mounted to shroud and rubber vacuum line around the edges of the shroud to seal a little better.


      Installed


      February 8, 2012 – Aerocatch hood latches in

      Aerocatch latches and passwordjdm plates came in today


      Also, thought this was kind of funny seeing as I drive over stuff like this all the time lol


      February 10, 2012 – Oil pressure gauge installed, cigarette lighter relocated


      The Holset install is slowly getting closer so it was time to get ready for the oil pressure gauge install in the feed line. Went ahead and put the gauge in the car...not exactly where I planned though. I wanted it in the other hole in my gauge cluster 2 gauge pod but it is way too long. I got another black center console from a friend a bit ago that already had a gauge hole cut where the cigarette lighter was...so that got relocated and the gauge found a home

      Passenger side, seems to be enough out of the way


      Oil pressure gauge ready to go, just need the sender hooked up


      February 20, 2012 – Holset is on


      So here goes, last weekend I went forward with the h1c install. Got the manifold off and all without too much hassle.


      Then took off the worn out turbonetics 50 trim and bolted on the h1c with the new housing and heat shield


      Well after mocking it up on the car I realized I couldn't clock my turbo the way I need it to be clocked because of my oil feed...so out came the grinder.


      Clearance made.

      So next I needed to tap a hole for my boost source so I started working on that


      Got that finished up and all was good to go. Of course I ran into various problems along the way such as too small of couplers, too messed up of an oil drain hose etc etc but when you are frustrated pictures aren't the top priority lol. Anyhow, here is the first holset on.


      Thought that was over huh? Wrong. Had the h1c on for one week exactly and it felt like it was developing some shaft play (I think I may have been overreacting though...). Either way, I bought a new turbo...a 7 blade hx35. And it was diiirrttttyyy.


      I cleaned it up and then just resprayed it silver until I decide what color to powdercoat it. You can see it in some of my pictures later on.

      Car apart once again


      HX35

      H1C


      A mess


      Back together


      Experimenting with my new camera and exposure settings


      Comment


      • #4
        March 20-27, 2012 – Pulling the motor and transmission

        And so it begins...camera is setup on a tripod so there will be many pictures taken this time...


        More done

        Transfer case and downpipe off...have a little oil leak as you can see


        Motor mount and such off along with intake piping etc etc


        Just throwing in a picture of the holset :P


        Little more work done


        It's coming out...had a friend come over and help


        It's out!


        Something is missing...and yes I am going to try cleaning up the engine bay and getting rid of some wires...yuck


        On the stand ready to be worked on


        And so the tear down of the motor begins...stay tuned for more updates tomorrow


        Originally posted by boostwhipped24
        If you dont mind me asking, why you pulled the motor and transmission
        To do the bsek, replace water pump, timing pulleys, tensioner, etc and replace the clutch...ended up having to use the old clutch though so the trans will have to come out again when I buy a new pressure plate (old one turned out to be warped).


        Valve cover off along with exhaust manifold


        Mmmmm, clean head


        Cam gear bolts loosened and ready to take off for my AEM gears. Intake manifold off


        Random


        Cam gears on


        Filthy! Sooo much buildup on them


        Head looks the same way


        Brake cleaner, a screw driver, and purple power to the rescue!!


        Much better, not perfect but it will work


        Water pump and other misc crap taken off to get ready to pull the pan and do the bsek


        Crank looks pretty decent


        Crank sprocket off


        Another of the crank


        Porting that hole...no after pics because it looked like crap lol. Should do its job though


        Front cover back on and ready to put back together


        Balance shaft stubby


        Ported ofh relief valve hole


        Little motivation for my engine...


        OEM headgasket on and ready to torque down the head. Copper sprayed it just to be safe, shouldn't hurt either way


        Took me ffooorreeevvveerrr to try and get these lined up right...hope this is correct


        Location of the crank sprocket with the gears like above


        Picture of my oil drain for the holset...dent is there so it would clear my h1c and the vband clamp but have since swapped it out with an hx35


        New FIC injector seals


        Engine in, was actually very easy to drop back in


        New power steering cooler setup. Just a $20 kit at autozone that I bought to replace the terrible factory one. Mine was leaking and rubbed against my IC piping so I just did away with it completely and put this on


        Car is back up and running but the old clutch had to go back in due to a warped pressure plate and I have lower than normal oil pressure for unknown reasons. Measuring off the oil feed line to the turbo with -4an line and a .095 restrictor I am not getting above 35ish psi above 3-4k rpm. Cold idle psi is only 30. I am thinking that my relief valve may be stuck open or something so I am going to check it out when I get some time to see what is going on with it. I can definitely feel the vibrations in it as well with the bsek.

        To add on to the above, I changed my oil filter as it was a bit clogged it seems and also took out the restrictor and am getting 11-15psi at idle and 40-45psi at 4500rpm and above

        Comment


        • #5
          April 22, 2012 - Finally dipped into the 11s

          Since I first got into DSMs I knew I wanted to build something that looked good and went fast...something the majority of DSM owners kind of overlook. No offense to those people as having a fast car is nice, but there are some that are different and have both as well.

          The motto of most people that have a heavily lowered car is "low and slow."...my motto is a little different. To be honest, I don't have a motto, but it isn't low and slow. Probably something more along the lines of "it's low, but no, it is not slow." Not very catchy but who gives a s**t. I know being so low doesn't really help with handling but it is a partial DD anyhow so it doesn't hit the curves too much (although when the tubular subframes get finished (ahem 99gstracer :P) I may be correcting the suspension geometry :thumb.

          Enough of the talk, here are the times and for reference, the car.


          Mods are in my profile, boost is set at 26-27psi..it changed a little throughout the day but the 11 second pass was at 26psi

          First pass of the day and first pass with the new turbo...bogged the launch pretty bad


          Second pass I did a little better launch after raising the two step but I had to let out in second due to wheel hop


          Third and final pass I got a decent launch and made it through the gears decently


          All in all it was a good day. I am very pleased with the times and I know for a fact it has more in it because I was running rich the whole day and I haven't done a boost leak test in months...even after tearing the motor out and putting it back together :coy:

          Oh and btw, this is a 125k mile stock 7 bolt block. It is driven damn near every day and is getting A/C put back in so I can drive it more during the summer. Comfortable streetcar FTW

          Comment


          • #6
            I Love me some DSM. I remember reading on EVO caliper conversions if if I remember correctly, You have to swap out 2g knuckles for Galant VR4 knuckles right ? or make a custom adapter ?

            Comment


            • #7
              Originally posted by Arteeste View Post
              I Love me some DSM. I remember reading on EVO caliper conversions if if I remember correctly, You have to swap out 2g knuckles for Galant VR4 knuckles right ? or make a custom adapter ?
              You are correct on both parts. I took the custom bracket route which was much cheaper...$80 compared to about $450

              Comment


              • #8
                always loved diamond stars! this brings back memories of my TSi days..... build done right...

                Comment


                • #9
                  What a buttload of pictarz... BUT, I absolutely love this car and this is by far my favorite 2G DSM after seeing it in the Stanced DSM thread. The HD lip compliments that bumper 100%. I'm gonna say that I like the wheels painted better, but something tells me you got tired of that look. Anyway, good to see you post up a thread! Very good progression over the years' time.

                  Comment


                  • #10
                    Wow, this is seriousely one of the coolest build threads I've ever read! I have a secret love for Eclipses, and you're car is an amazing example! My heart litterally sank when I saw the hit and run pictures, haha! If that happened to my car I think I would cry for about an hour, and then I would go on a Death & Revenge mission. Can't wait to see future progress.
                    Cheers!
                    Brandon

                    IG @straightsixfiend

                    Build Thread: http://www.stanceworks.com/forums/sh...ad.php?t=67173

                    Sig 69 by Vintage Element Photography, on Flickr

                    Comment


                    • #11
                      You are so popular, you exceeded bandwidth D:

                      Nice car though, why no 4g64/3 hybrid?

                      𝔣𝔬𝔩𝔩𝔬𝔴 𝔪𝔢
                      @𝔳𝔦𝔳𝔢_𝔪𝔢𝔪𝔬𝔯_𝔩𝔢𝔱𝔦

                      Comment


                      • #12
                        Originally posted by Bystrov View Post
                        always loved diamond stars! this brings back memories of my TSi days..... build done right...
                        Thanks

                        Originally posted by coconutt View Post
                        What a buttload of pictarz... BUT, I absolutely love this car and this is by far my favorite 2G DSM after seeing it in the Stanced DSM thread. The HD lip compliments that bumper 100%. I'm gonna say that I like the wheels painted better, but something tells me you got tired of that look. Anyway, good to see you post up a thread! Very good progression over the years' time.
                        Haha yes, I take a lot of pictures of the stuff I do for my build threads...I haven't even taken pictures of a few things I have done. I do love the HD lip, I wish I had an actual lip but nothing else would survive driving it all the time. I did like the red wheels but I was kind of ready to try something new and my thinking was also that I can plastidip the wheels red temporarily if I wanted to with them being polished, I can't temporarily polish red painted wheels. I am happy with the decision though, it looks even better in person.


                        Originally posted by Sir Stancelot View Post
                        Wow, this is seriousely one of the coolest build threads I've ever read! I have a secret love for Eclipses, and you're car is an amazing example! My heart litterally sank when I saw the hit and run pictures, haha! If that happened to my car I think I would cry for about an hour, and then I would go on a Death & Revenge mission. Can't wait to see future progress.
                        Thanks man! My heart sank as well, it was such a terrible day for me. I wanted to find the person responsible and tear them apart but they were never found. I know what vehicle it was and everything based off of the part number on a broken turn signal but that is about as far as it went.


                        Originally posted by rice4life View Post
                        You are so popular, you exceeded bandwidth D:

                        Nice car though, why no 4g64/3 hybrid?
                        I really dislike photobucket now, they have become extremely annoying. Problem fixed for now though. Thank you, I just haven't got around to it. The motor I plan to put together will be a long rod 2.4 with 156mm rods and custom 10:1 ish compression pistons so they wont be cheap. I have the rods but pistons are around 550 to have made. The stock block is holding up great and still tons of fun so I will keep it until I can't any longer. If I still don't have the money to build the motor, I will throw a 6bolt in it and never have to mess with the engine again with my power goals (450-500 awhp). Stock 6bolt has held 750awhp, with numerous people at the 600awhp range and lower

                        Comment


                        • #13
                          I will throw a 6bolt in it and never have to mess with the engine again with my power goals (450-500 awhp). Stock 6bolt has held 750awhp, with numerous people at the 600awhp range and lower
                          Yeah, you should find dsport 21 from a few years back, they have a 95 gsx that runs 10's and is street driven on a 4g63. Very similar build to yours, except he has a fully built bottom end and crazy ported head.

                          If you cant find it, I can pm you the specs.

                          Are those cams HKS 272/272?

                          𝔣𝔬𝔩𝔩𝔬𝔴 𝔪𝔢
                          @𝔳𝔦𝔳𝔢_𝔪𝔢𝔪𝔬𝔯_𝔩𝔢𝔱𝔦

                          Comment


                          • #14
                            Hi, You had me at big turbo
                            C280 Build Thread
                            C43 ///AMG Build Thread
                            E320 Wagon Build Thread


                            Follow me on Instagram:@SD_210

                            Comment


                            • #15
                              very nice
                              Preston
                              Stance Wi
                              'More then Fitment'
                              TDMImports
                              Ravage Performance
                              My Photo Album

                              2007 Civic Sedan - Daily whore
                              2004 Sentra Specv - Track Car

                              Comment

                              Working...
                              X