 Tweet
Tweet
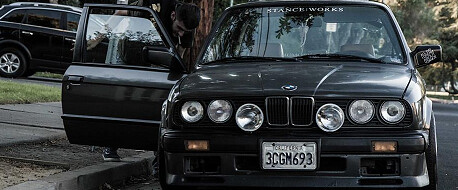
dude this car is awesome!
-
Mazda 3 and Ford Bantam (XR3i Ute) // 2011 Mazda 3 SP25 Sport


-
that's going look so awesome with the grill installed
W I L D M A N 'S R O D S H O P

R.I.P P.WALKER 2013/11/30Comment
-
i actually dont like the headlights, i would have chosen those because they look less modern http://www.typ-17.de/product_info.ph...nd-Bus-T3.html
i like your project though. those 2002 look just awesome.
Comment
-
In a way I agree with you. Mine do look pretty modern with the perfectly clear glass lenses. I like that the ones you posted have the textured looking lens. Oh well, what's done is done, I still like my crosshairs. Thanks thoughOriginally posted by mario69 View PostLast edited by CubbyChowder; 02-19-2013, 01:59 PM.Comment
-
Good work on the lights, they look really nice.Comment
-
Alright so I know I already posted a few pictures of the crosshair retrofit but I figured since I had to do the passenger side today that I would just post a step-by-step process on how I did it. It's pretty pic-heavy so hang in there guys.
First off, here is how the crosshair came out of the box:

And here is the stock sealed beam headlight still attached to the bucket:

I started off by taking the crosshairs apart from the mounting plate and adjuster screws:

Here is the crosshair next to the headlight bucket, you'll notice that the headlight has three mounting tabs:

Next, I cut the three mounting tabs off:


Here is how the crosshair sits in the bucket, it's a bit bigger so it sticks out a bit and doesn't sit flush:

I made these two brackets out of little metal pieces I found at my dad's (pictured under the brackets). These are for the two bottom mounting points:

Here they are installed:


The top mounting point was a bit different since I couldn't use a bracket like the bottom two. From cutting off the mounting tabs on the crosshair, there was still some metal left over, which I bent up and drilled a hole through:

Then I cut a slit in the headlight bucket:

And from there I straightened it out and drilled two holes:

That way the tab from the crosshair would slide right into the slit I cut into the bucket:

Then I shortened the tab a bit so it wouldn't poke out:

And I zip tied it all together. I used a U-shape bolt thing on the last one but felt it was a bit overkill. A zip tie works perfectly fine in this case, and it's much more simple:

And there we have it! Here are some mock up pics:


After that, I decided to prep and primer the door jamb. So I spent a few hours grinding it down to clean bare metal:


And laid down some primer before it got too cold out. Still wet in the pictures:


And that's it for today! I still have sooooo much work ahead of me, I got a little overwhelmed today but I'm just taking it one step at a time. This car will be my pride and joy when it's complete.Comment
-
Great progress man it's going to be a beauty and a beast.Comment
-
like the justin bieber song? ZANE LOVES JUSTIN BIEBER!Originally posted by montgomery View Post

Comment
-
I definitely second this. Dave does amazing work and if you guys don't already, follow him on Instagram @renewedfinishes where you can check out all his work. I currently have a set of RS's with him and he's doing powdercoating, lip repair, full refinishing, and painted barrels for an amazing price (I won't say what). People usually say you get what you pay for, but Dave really does give you the best bang for your buck.Originally posted by deutschman View Post
Progress looks great btw. Not sure if you were considering it, but don't shave much of the car. When people do big body work like you're doing they get tempted to just shave everything off (seen it too many times. It ain't a baby's bottom). The car keeps the retro look with most things where they originally were Last edited by seven-57; 02-22-2013, 02:09 PM.
Comment
-
the new lights are looking good, plus now you can see where your going at night.Comment
-
OMG, dem wheels. Congrats man, looking better and better with every page. Remember, no rush, the patience will be all worth it in the end.@jroc56171' 240z, 03' CL55, 04' CayenneTTComment
-
Huge thanks to Will at BagRiders for hooking up the $100 discount!
 Last edited by CubbyChowder; 02-22-2013, 04:47 PM.
Comment
-
That just happened@jroc56171' 240z, 03' CL55, 04' CayenneTTComment
-
It did, finally!Originally posted by Jroc View Post
Now I just need to start saving for AccuAir management...
Comment
-
damn you are set! WOWIG @RobthaBavarian
Comment


Comment