-
Very clean install! I'm all about the dashcams lately and have been looking at doing it myself.Leave a comment:
-
Hey everyone, hope you all had a great Christmas and New Years!
I got a 70mai 1S dash cam and got it hardwired into the car last night. install was easy, It came with a really long usb cable so I tore apart a 12volt-USB adapter with two ports on it and soldered power and ground wires which I hooked up to an add-a-fuse and tapped a 5amp switch fuse so it turns on & off with the ignition. Then I ran the usb cable from the camera to the fuse box and plugged it into the adapter I wired up. Since the adapter has two ports I can easily add a radar detector or something down the line if I want.
Here are some picsImage quality is pretty good, shoots in 1080p, and I can easily access the footage from my phone. I highly recommend a dash cam, cheap insurance incase someone takes you out and tries to say you're at fault!

View from driver's seat, all the wires are tucked in the headliner and A-pillar


Leave a comment:
-
Nice update! The headlights came out perfect, good job on the refresh of them. That really makes the front end look brand new.Leave a comment:
-
So every time I come on here I complain to myself that this forum is getting a little to quiet. Then I realized I haven't updated my own thread in a while so I figured I ought to chip in and do my part lol Here's what's happened since my last update...
Took care of my accessory belt ~75k miles, not terribly hard and takes about 30minutes no lifting the car up required....unless you drop a socket into the abyss of the engine bay like I did[>_<] only to find out that you were sent the wrong belt and have to wait a day to get the correct one haha Anyways here are some pics
Old tensioner vs new- while the belt appeared to be the only part making noise, might as well replace the tensioner while you're in there, only $40.

As you can see, there's barely any room, but it's just enough to do the job working from the top. my hands did get a bit sliced up though haha

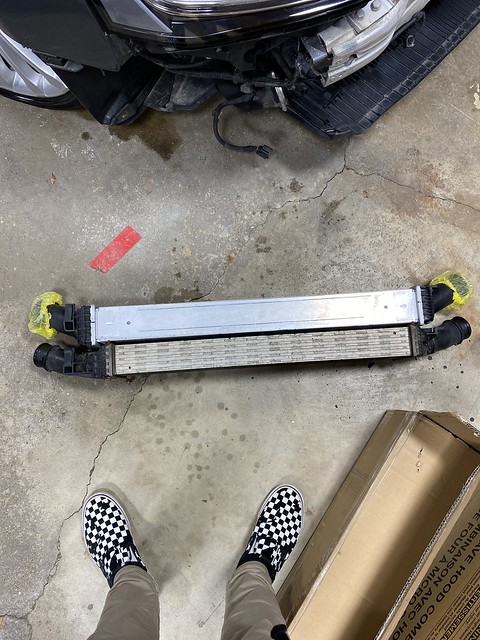
Next up was an FMIC upgrade to find the impending summer heat. I was looking into the 3.0TDI intercoolers as everything I read concluded that they were adequate for Stage 1/2 and typically run ~$150. However some research revealed that Porsche part #8K0145805E is an equivalent part, a unit from the euro spec 2017 and 2018 Macan S Diesel. I searched the part number on eBay and what would ya know, a new OE spec intercooler for just $75! Interestingly the vendor that sold it listed compatibility for A6/7 TDI with no mention of the Macan even though it was listed under a Porsche part #.
Anyways, here's the intercooler.

Compared to stock it's ~1/4" thicker & ~3" longer
Fit's like stock

Judging from all this it seems to be the same as the A6/7 TDI unit. One thing to note is how painful the stock hoses are to squeeze onto the intercooler. They're slightly smaller than what the Macan/C7 use so you have to heat the crap out them and really muscle them on.
I took it out for one drive so far and at the first pull I did, the car didn't boost all that smoothly and didn't get near peak boost. Drove a little further and did another pull, I guess the car adapted and it was back to hitting peak boost. It has slightly more lag, but seemed to be pulling a little harder up top. I did a 30-60run that was slightly up hill and matched my best time with the DA being reasonably higher than when I previously ran that time (also was carrying more fuel) which would support the car being slightly quicker. I still want to run logs to see how the timing compares and do more testing to see how consistent it feels after multiple runs. So far so good though!
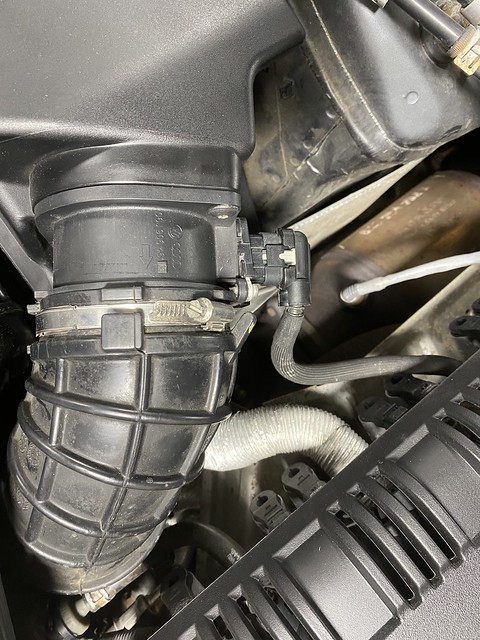
I also got around to replacing the MAF I broke the clips off of a couple weeks prior, Shoutout to Avantagg on Audizine for hooking me up with the replacement!
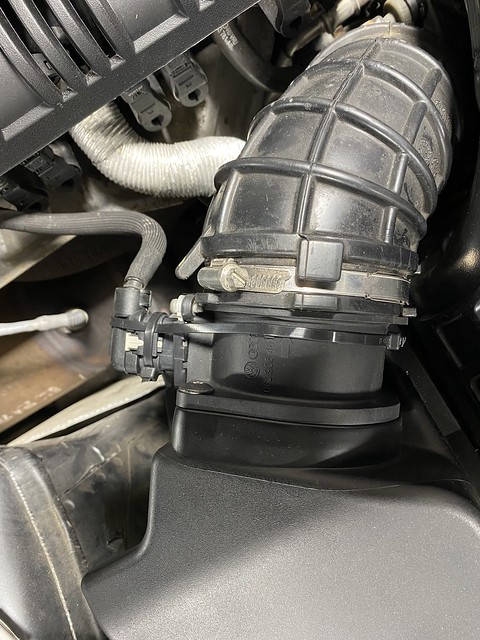
No more zipties!!!
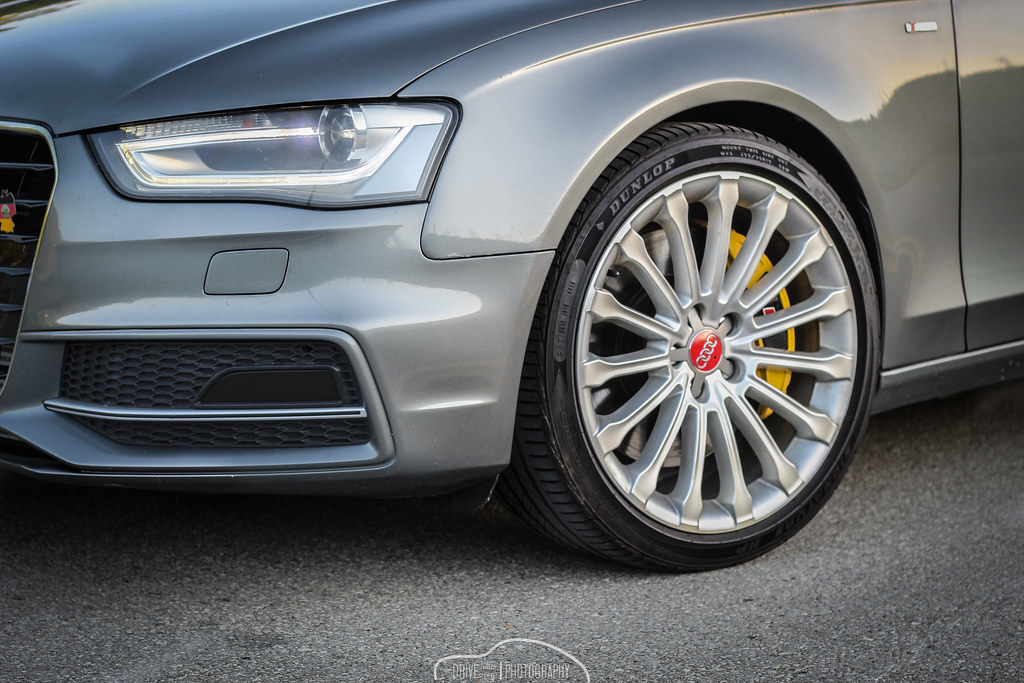
Then I gave the car a thorough exterior detail. clay bar treatment for the paint to remove all the contaminants it collected over winter, hand polished a few parts like the grill and exhaust, then sealed the paint with some 3D Poxy sealant. The ceramic coating was still good, so this would give it the little refresh it needed to look sharp going into summer, of course I had to go out and snap some pics haha

Painted my center caps red


Took the car on a camping trip and did some overlanding
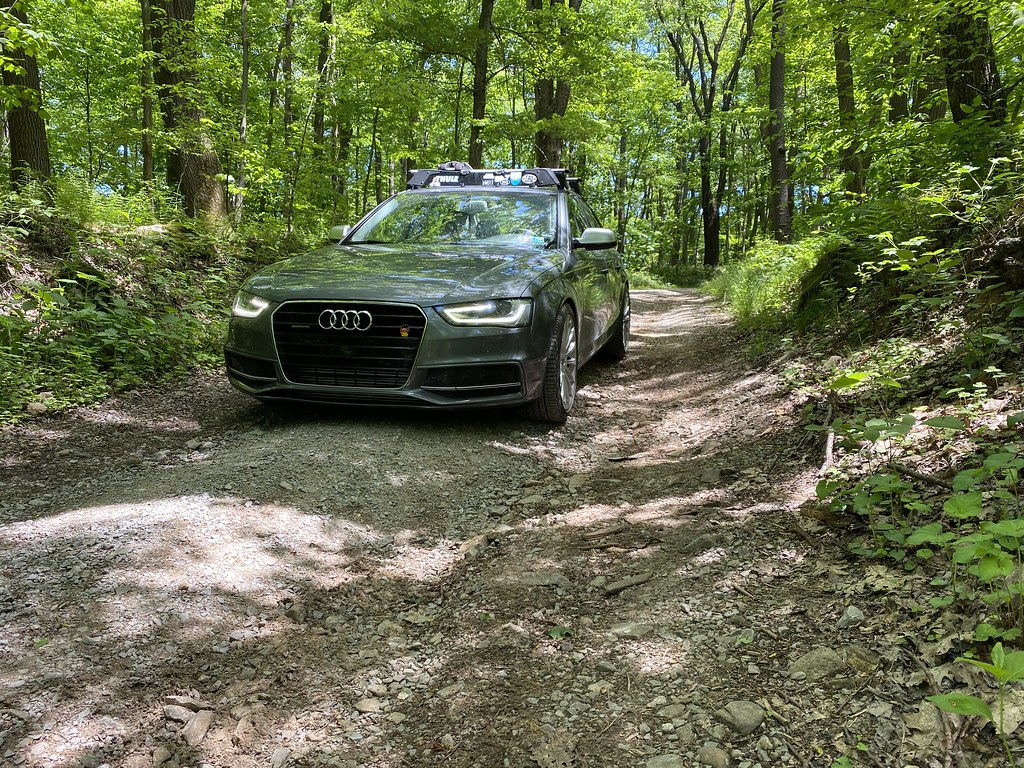


Following week I drove it up to Lake Erie for the day but didn't get any pictures of her up there, both trips she cruised comfortably at 90 like it was nothing, Audis love to eat up highway miles haha
Then I installed a testpipe and predictable the CEL wouldn't go away for the secondary O2 sensor, so I flashed a stage 2 map from Integrated Engineering

To my surprised this flash tune, while very smooth wasn't as quite as potent as the JB4 was, so I did some testing and remapped the JB4 to stack on the flash tune, this made the car feel properly quick once more. Now it'll outrun a lightly modded STI and hold relatively even with a stock 333hp supercharged A6, I'll take it!
Next the front grill was looking rough, I covered some of the spots with a scrap piece of vinyl but when I peeled it of the grill got rekt...good thing I had a fresh roll of 3M gloss black to do it proper!
Before
 Untitled

After

Then for the horizontal bars that were peeling I managed to source an OEM chrome trim kit that I was really excited about. I had been after one of these for months and somehow ECS had a couple in stock. Unfortunately it's designed for cars with front plates so the center sections are short so a plate bracket can fit in the middle [headbang] So I just left the partial pieces uninstalled


Looks decent, but I'm kinda bummed it didn't turn out as I had hoped with the chrome. Overall a big improvement over the previous peeling finish though imo.
Tossed a BMC drop-in panel filter, spool is a little quicker. There's a million and one drop-in filter options out there but Porsche actually uses BMC filters in the GT3 RS so I figured if they're good enough for a $200k+ Porsche, they're good enough for my second-hand luxury commuter car haha


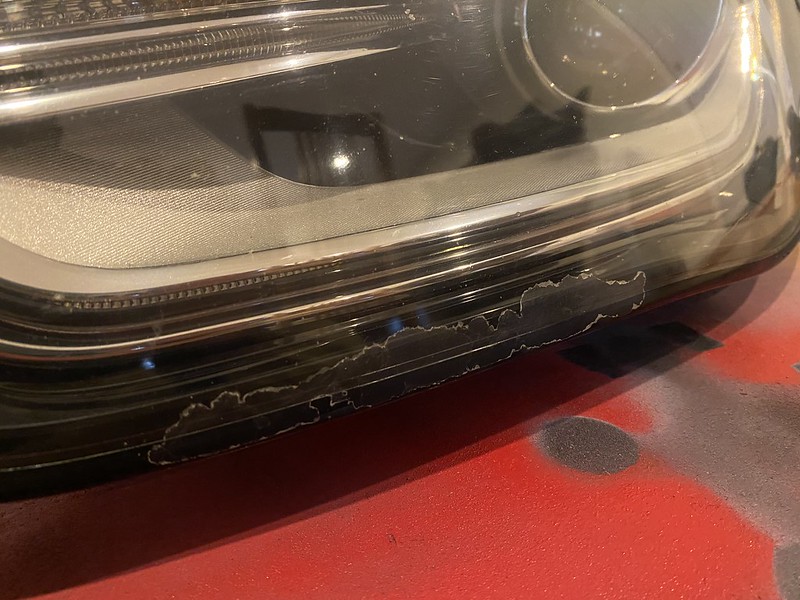
Then the new headlight lenses I ordered finally arrived!

Now both my lenses were slightly scratched and had a little bit of minor pitting, but what put me over the edge was my driver's side headlight having a yellow haze and what I believe to be the ceramic coating starting to chip. It looked horrible and really made the front of the car look tired in my opinion
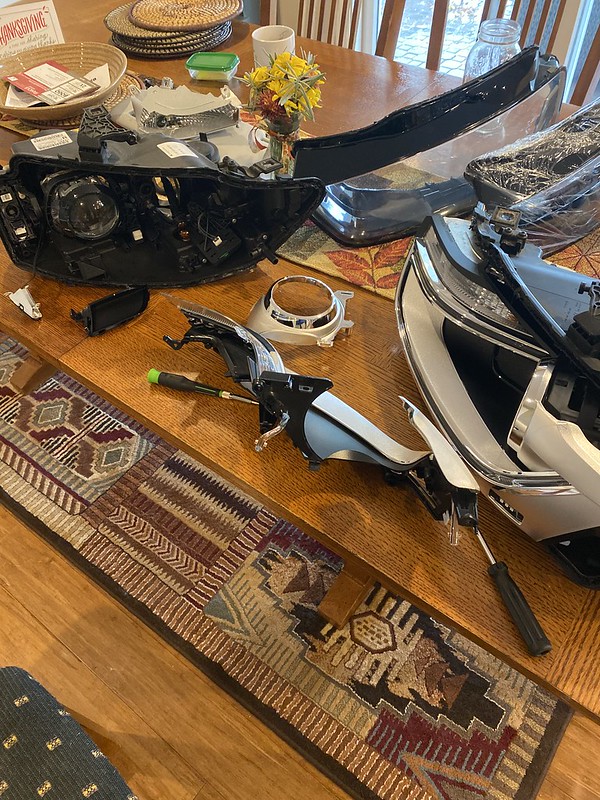
So out came the heat gun and off went the old lenses!

Now this is the second time I've had these lights apart and for a while now I have really wanted to paint some of the internals for a more aggressive look so I figured now was a great chance to do so, so I kept ripping the lights apart. These things are rather delicate so it was a bit nerve wracking, but thankfully nothing broke!
Got everything masked up and started priming and painting! For those who try something like this be sure to sand the lights really well as the surface is very slick


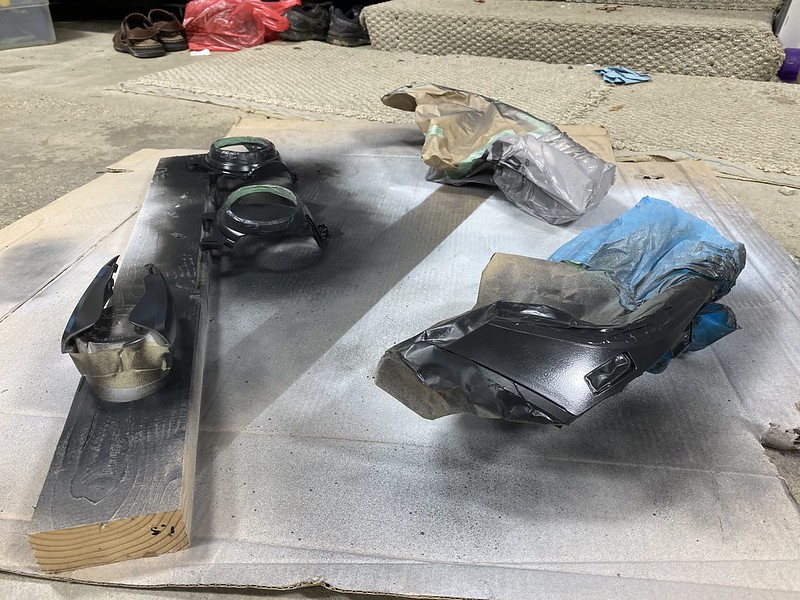

Ready for reassembly!


Painted a couple other bits that I forgot to picture but oh well
Here is the finished result! looks much more aggressive IMO, while still looking OEM. The new lenses just freshen everything up too

Then I applied some Lamin-X to protect the headlights. This stuff isn't terrible to apply, they give you a blade, squeegee, and spray bottle in the kit, having a heat gun helps though. I was initially really bummed though when I finished the headlights and they looked like this
[CENTER]
I quickly found that this is normal though, and a day later after it got to sit in the sun outside at work, most of this had cleared up. They say it can take up to 6 weeks for all the imperfections to come out, a week later most of mine were gone.
Then I did the tail lights because why not?, 50/50 shot

Finished look

Then we got our first snow the other day so naturally I had to go out and snap some shots


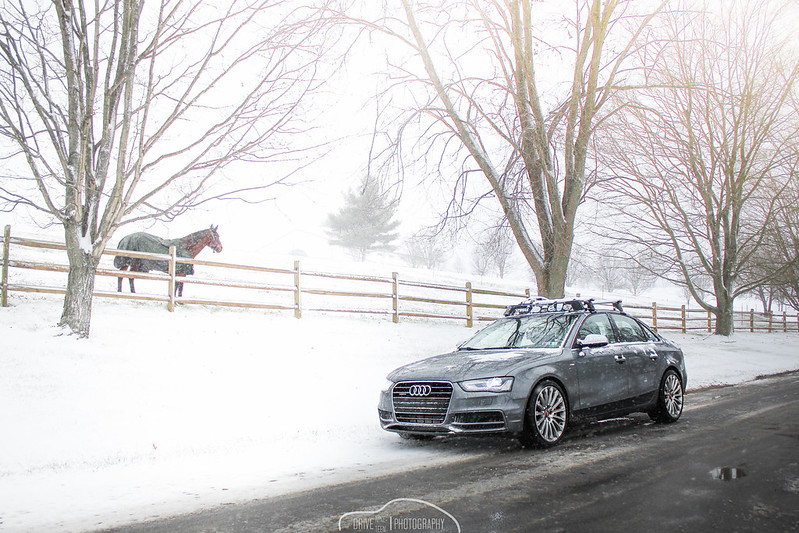
That brings everything up to date, currently at 87k miles and she runs like a top. Still a ton more mods on my mind and some preventative maintenance on the horizon but this thing has been a great daily.Leave a comment:
-
Originally posted by C2_mad View PostThanks! I was thinking that too but I just made a little tweak to the front end and now I think its flows
Before and after I painted the trim silver

With both painted


I think that added the contrast it needed to pull off the no fog look. I might peel the dip on the fogs just to confirm my thoughts tho before ordering tint film.Leave a comment:
-
Audi does interior's really well, and awesome car. I put that same pedal booster on my wife's GTI and it made a surprising difference!Leave a comment:
-
So during this quarantine the itch to work on the car has been strong [wrench] However, due to uncertainty of employment status or when I'll even go back to work, blowing money on the car isn't exactly the most financially responsible choice. That said I have a list of things I can do without spending loads of money so I figured now would be the perfect time to tackle it, and got started this weekend.
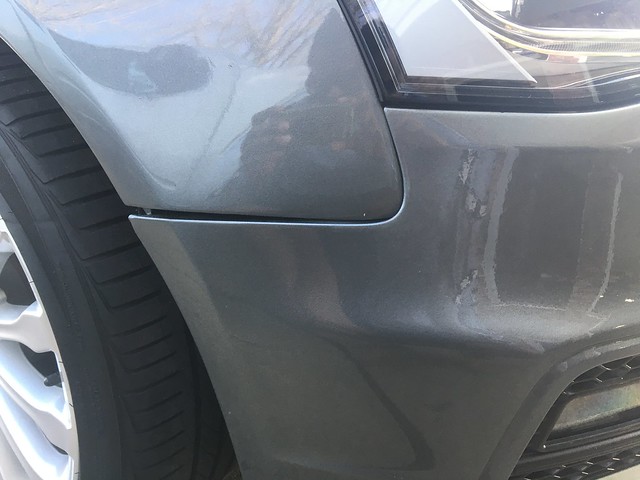
Since I finished the car, there has been an unsightly gap between the fender and bumper on the passenger side. No one has ever commented on it, so I suppose it's more noticeable to me than everyone else, nevertheless I figured it was time to sort it out.
Here's the gap, fender pushing in a little too much at bottom corner

from the side, it also sits a little lower towards the back

After a bunch of twisting and shimming the bracket the goes from the frame rail to the fender I got the top view nice and flush

However, the side profile is still off by about the same amount

I took everything back apart, removed the headlight and kept messing with things trying to perfect the fitment but ultimately discovered that the mangled upper rail that we pulled out during the initial rebuild is still a little lower than that of the driver side. This issue is slight because the fender fits properly, but the part that the core support attaches to must slightly be lower. To fix this, the entire front clip would need to come apart, I'd have to lift the rail, and put everything back together, multiple times over until it was perfect. That would be at least an entire days work assuming no issues, so I'm not going to bother for a defect no-one notices on a 7 year old car. It's 50% better now than before though so I'll take that!
While I was in there I noticed my sound box delete was looking a little rough, the stopper I hose clamped to the charge pipe was cracking after ~15k miles over the course of a year of use.

That cracking didn't go through to the inside so it probably would've lasted quite a while longer, but I had a few fresh ones laying around so I tossed one on. Maybe I'll buy a charge pipe at some point, but these are cheap and easy to replace so it's not a priority as of yet. Maybe next time I'll wrap some foil tape around it to deflect heat

A couple random pics for you guys


So I finally got around to doing the interior detail; spent most of Saturday afternoon getting it dialed in and I'm pretty happy with the results! One thing I like about interior detailing vs exterior detailing, is that you can get the car looking great with minimal supplies.
Here is what I used sans the purple griots bottle (was just purple power)

Here's a 50/50 shot of the seats, always love seeing the matte finish returned to the leather. For this I used the Turtle Wax Fresh Clean apc with the scotchbrite side of the sponge apply light pressure.

Had some dirt spots on the door card that I took care of the same way


Here is the finished door card after applying the Chemical Guys natural shine

For this seat rail I sprayed it with the Turtle Wax cleaner, agitated with a paint brush, wiped down what I could with a microfiber, then used compressed air to spray the rest out. Compressed air really helps flush dirt out of hard to reach areas.


Here's some shots of the finished product. Seats were conditioned with Griots Garage 3in1, and all soft plastics/vinyl treated with the aforementioned Chemical Guys Natural Shine


A good interior detail is underrated IMO and it makes the car feel new again!
Then I had been thinking about how I was going to restore my fog lights when I came across a picture of an audizine member's S5 with the fog lights blacked out. I thought it looked especially clean and reminded me of the black fog light shaped ACC sensors on my mom's A7. I was debating on which route to go when I found a can of plastidip in my basement. I figured I'll try this first since it's a lot quicker and easier to do, and if I don't like it, I can always peel it off and restore as originally planned.
Here's one of the fog lights, as you can see it has lots of pitting and some spiderwebbing.

Here they are after a couple coats of dip

And after about 5 coats total

Installed


With the fog lights on- looks okay in the pic but IRL it's a little spotty because plastidip doesn't spray evenly. I'll probably add some coats this weekend to make it fully opaque

For now I'm undecided on how I feel about the look. It made a bigger difference than I expected and now I feel like I need something to tie it all together at the front...let me know what you guys think!Leave a comment:
-
Thanks! Yeah it really scoots now, the torque especially is intoxicating. Couldn't be more thrilled with the numbers especially with just having the JB4.Originally posted by hinrichs View Post
The pedal controller really surprised me, I didn't expect it to actually make such a big difference. Rev matching is easier now, and acceleration feel more effortless as the inputs no longer feel delayed. Well worth it!Leave a comment:
-
Nice power numbers, that has to be a blast to drive now. Always been curious about those pedal controllers.Leave a comment:
Leave a comment: