 Tweet
Tweet
Nice job in the coils!
-
-
Is that condor shift knob threaded or set with a screw?Comment
-
Really like how you plug welded the coils. A single bead at the bottom was concerning to me but now I will do mine this same way.
Nice progress my dudeComment
-
You should use a bmw e36 m3 eccentric bushings in the place of the centric ones that you just put on. They make the ride more precise and give You better feel of the car especially on the corners, they also fit with no modifications in the stock placeComment
-
I put my lollipop bushings in the freezer for a day. Pulled them out and pushed them into the lollipops and onto the control arms easily by hand. As soon as they hit ambient temperature they don't budge at all. Worked great.Comment
-
Originally posted by Fleetlin49 View PostThanks guys!Originally posted by fackinsteve View Post
It has a set screwOriginally posted by bianchini View Post
Thanks man, I felt a lot better about it with the plug welds myself. I also was a bit concerned about a single bead at the bottom doesn't even go all the way around the tube.Originally posted by delvin View Post
Originally posted by konokrad View PostThese lollipops actually came with the purchase of the car, which is why I just used them. If I had to buy some, I would've bought the offset ones. I can always change them down the road if I feel inclined, but I'm just gonna run them for now. Thanks for the input thoughOriginally posted by oprahhwinfreyy View PostComment
-
It's been a great week for Golden Boy.
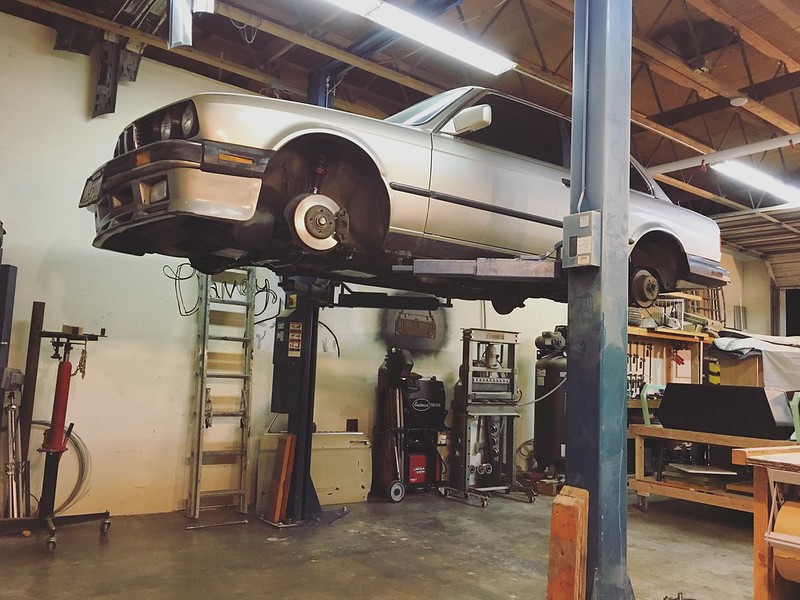
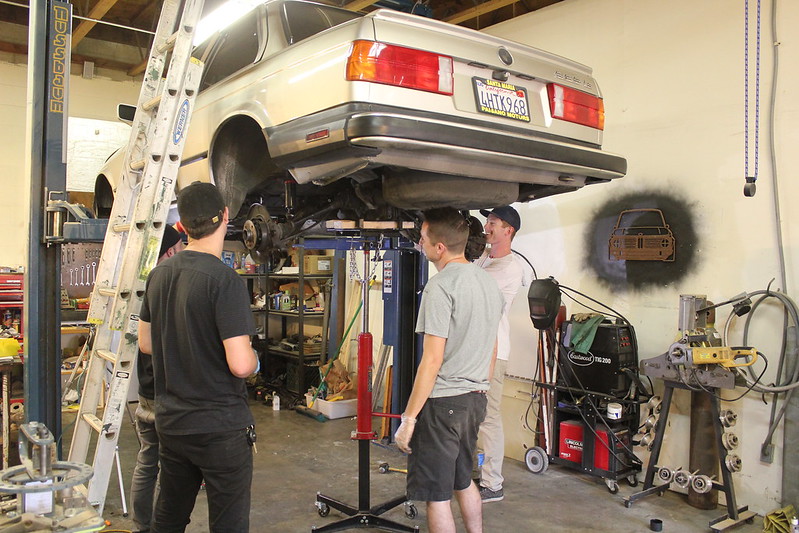
I've really been looking forward to getting all these parts off my shelves and onto the car, and I finally set the time and shop space aside to make it happen. Luckily I had a couple buddies willing to help out for Saturday and Sunday so on Friday evening (April 15th) I rearranged everything and put the car up on the lift and took the wheels off so that we could get straight to the good stuff the next morning.
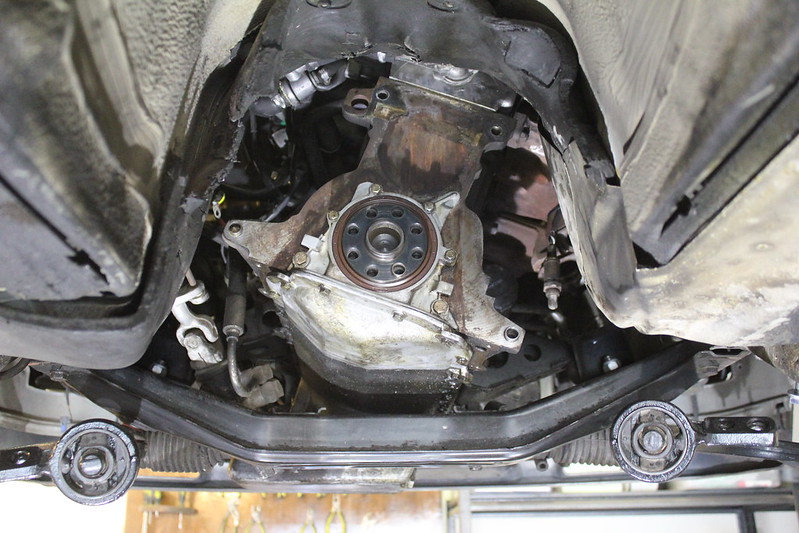
We got to the shop at 9am Saturday morning and started tearing right into it. Of course the starter bolts had us questioning humanity and the other top bell housing bolts taught us a few new words as well. I had at least 8 extensions duct taped together at one point. We laughed it all off and got through it, it was a rewarding moment when we lowered the trans down on the jack and pushed it out from under the car. High fives were slapped, but it was a bit too early for celebratory beers.
This is where I'd like to take a moment and express how truly grateful I am to have a lift and transmission jack in my shop (among many other necessary tools to complete a job like this). I've done work like this crammed under a car on my back on asphalt on a hot ass day trying to make things work and being miserable. This is much better. Still a bitch at times, but much better. I am very fortunate to have my shop, and I make it a point to appreciate it every single day.
Anyways, back on track! By about noon or so we had the perfectly functioning automatic transmission out, ready to hit the R3v classifieds (still need to get to that, not enough time in a day...)
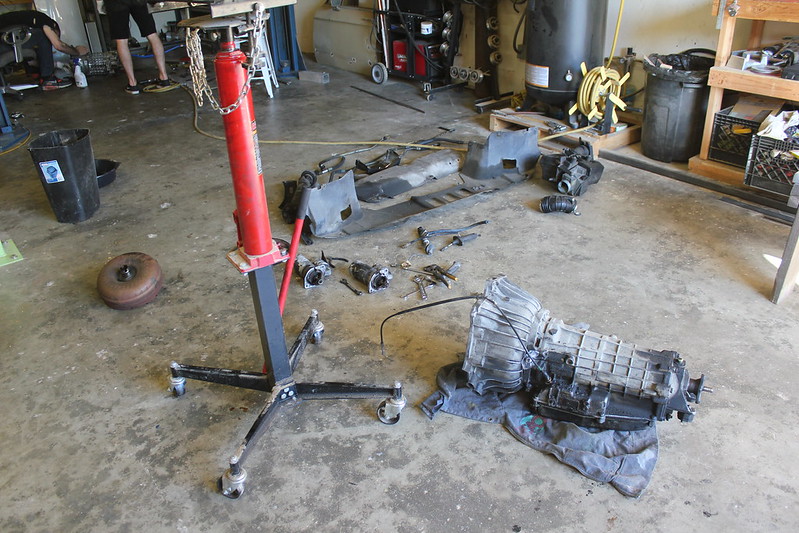
Sprawled out some miscellaneous parts for the swap that I had been gathering:

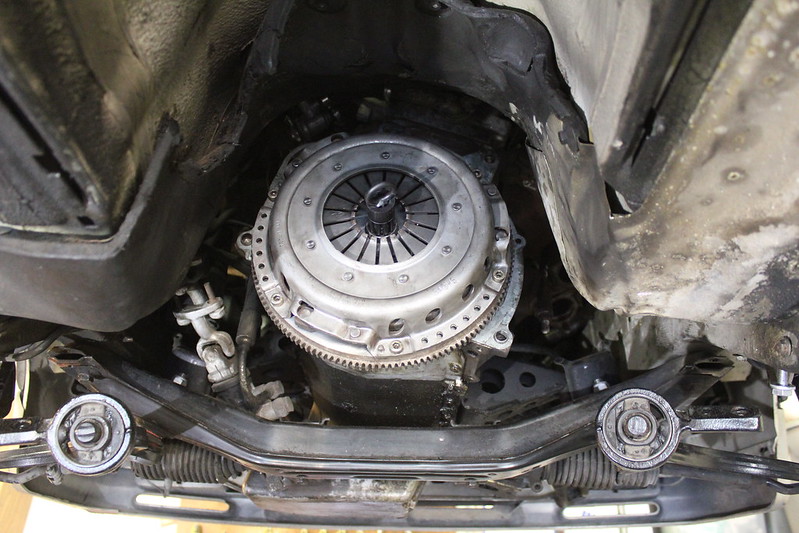
So the sedan parts car that I acquired to help with the manual swap ended up having a clutch kit in very good condition, you could tell it had been replaced very recently. Everything still looked new, so I decided to reuse the kit from the parts car and sell my new clutch kit to provide extra money to get this thing back on the road (still need to post that up for sale. Again, not enough time in a day...)
Got the new pilot bearing in, flywheel torqued down, clutch disc aligned and pressure plate torqued down as well:
This concluded day one and at this point I had 4 or 5 friends over to see progress and lend a hand so instead we drank some beers and patted ourselves on the back
I headed to the shop early Sunday morning to prep the Getrag 260 so we could lift it straight in. I got the shift carrier all set up with new delrin bushings and installed the IE short shift kit and DSSR:

I ended up having to take the short shift kit out again to install the transmission, otherwise it interfered with the trans tunnel, so that made me feel stupid. Learning as I go...haha
But we got it in! We focused hard and made sure everything was lining up perfectly, and within a few minutes we had it butted up flat against the engine block. That was a good feeling, I was a bit nervous about that one. The manual was very refreshing to work with since it's so much smaller than the auto, so the top bell housing bolts were basically a breeze to get through with my patented "8 extension duct taped tool".
**Whenever you work on your car, I highly recommend Sam Cooke radio on Pandora. It's perfect.
My helpers headed home at about 6pm Sunday evening and I proceeded to tackle the pedal box conversion. The manual pedal box was a nightmare to get installed and I even caught myself nodding off at 10pm laying on my back with my head under the steering wheel and my feet up on the back seat, that was my cue to head home for the night.
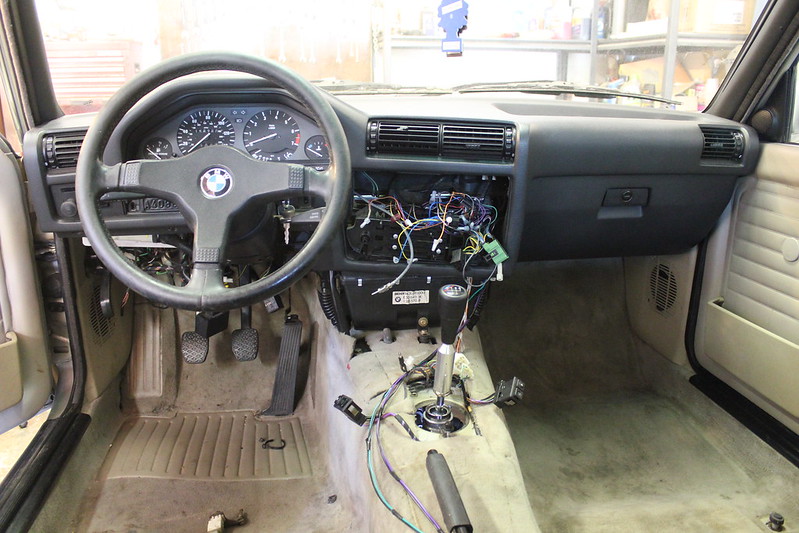
After the pedal box was in, I installed a new clutch master cylinder, slave cylinder and stainless steel clutch line.
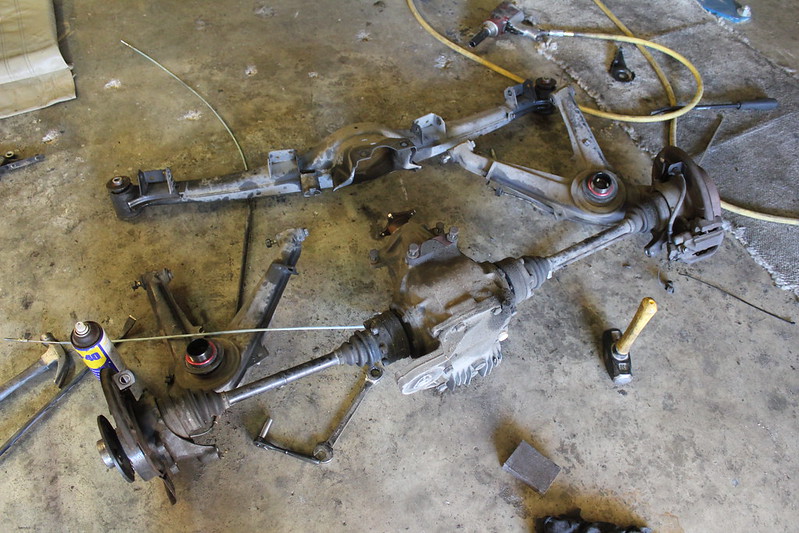
Monday morning came and I started prepping the rear subframe to come down. Disconnected all the brake lines, parking brake cables, etc. By that afternoon I had a shop full of friends again ready to help me pull the sucker down. Of course I fed them beer the whole time, it's important to provide an incentive for them to come.
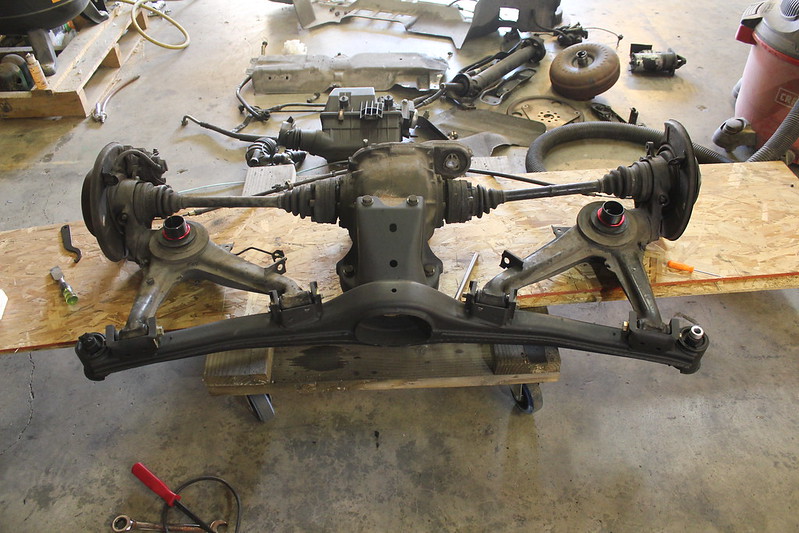
Got it down and snapped a pic after I already disconnected it from the diff and trailing arms:
Got the bushings out:

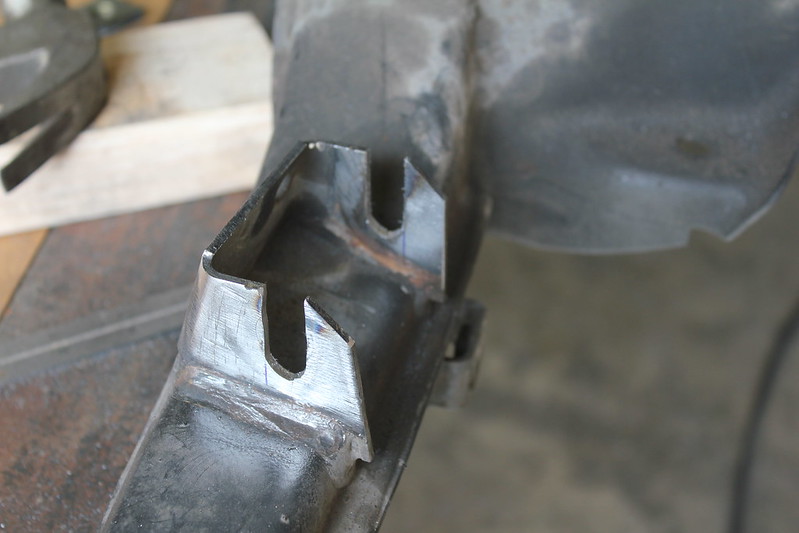
Then came the task of welding in the posi-lock style camber/toe adjustment tabs into the rear subframe. This was a big job actually, it took me the better part of two days to complete. They required quite a bit of extra work.
Figured out how to properly set the toe adjustment tabs and cut the original TA mounts accordingly:

Created a complicated looking jig (not actually that complicated) to make sure the tabs lined up perfectly and were parallel and square to each other:
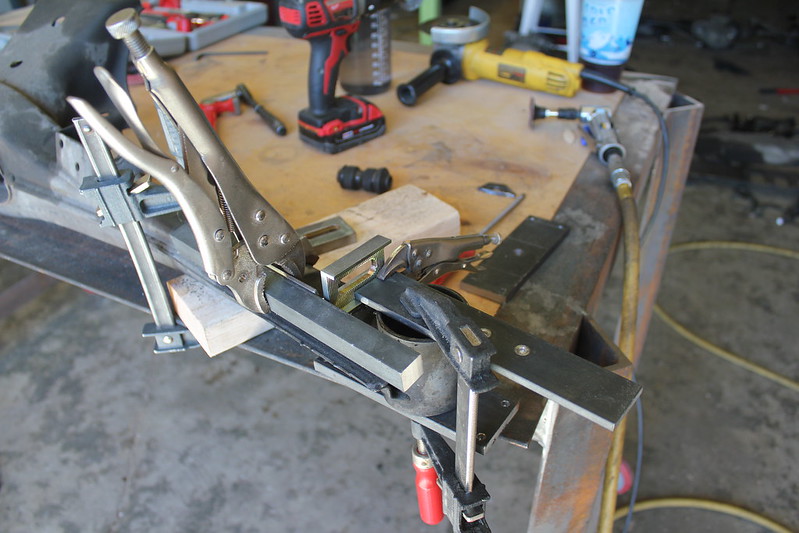
Got the toe tabs tacked in:
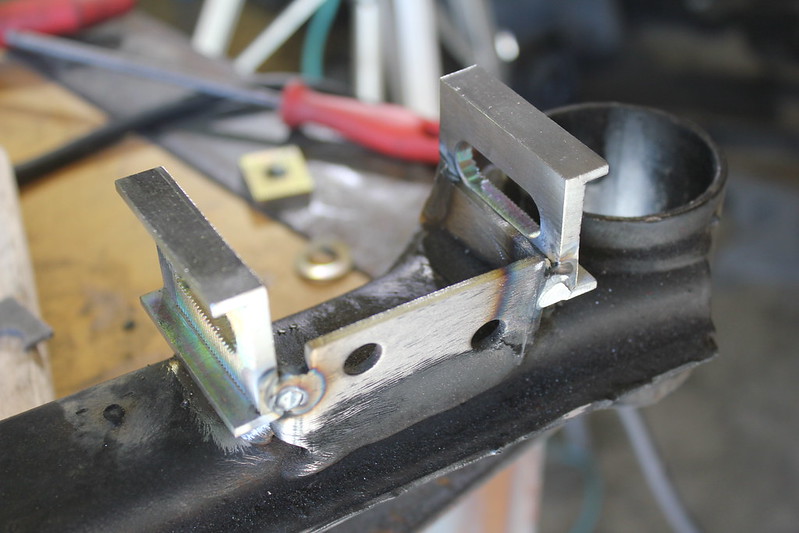
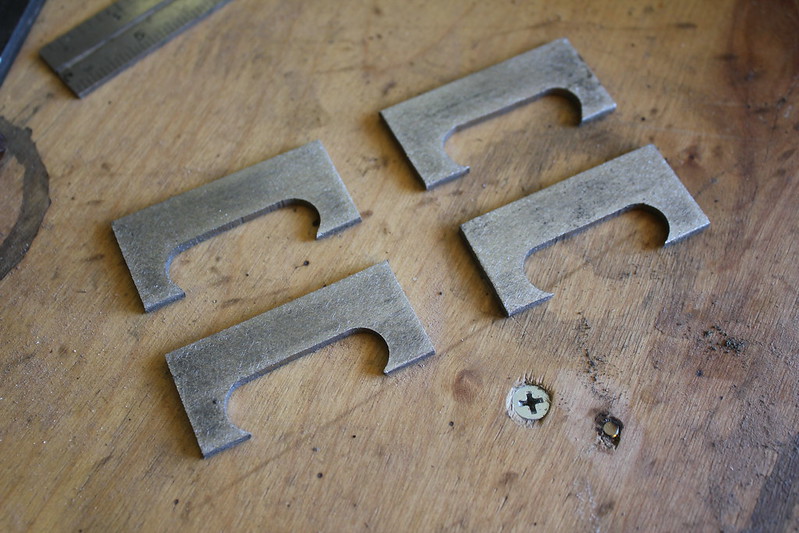
I created some of my own tabs to replace the original TA mount that I previously cut off and later welded these in so that the TA bushing would bolt up firmly when it's torqued down:
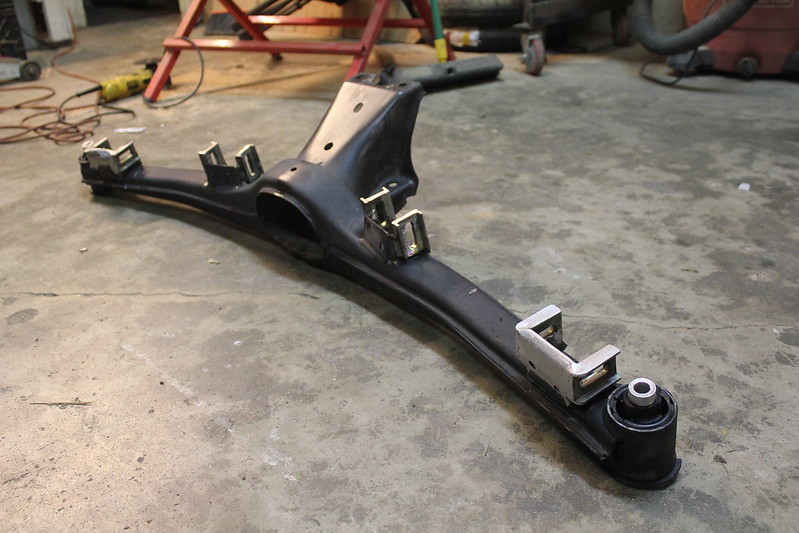
I did a bad job taking photo's of every step. After I finished the toe adjustment tabs I started on the camber tabs which were a lot easier. Notched it out:
Here's a photo after everything was welded up and new subframe bushings pressed in. You can see I boxed the toe adjustment tabs in a bit for support:
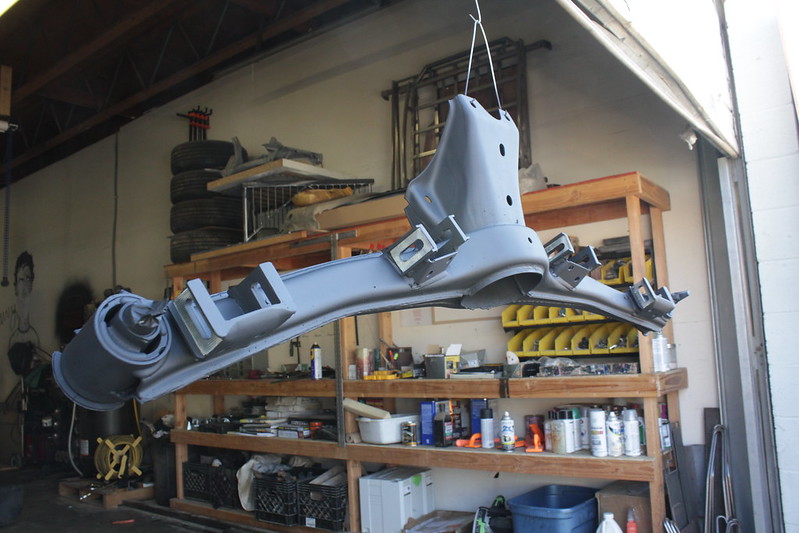
I then prepped and painted the subframe:
I pulled all the original trailing arm bushings out and replaced them with OEM bushings, and then bolted everything back up so it could be reinstalled as one unit:
While I had the subframe out I installed some of my new stainless brake lines:
Reeled in some buddies again to help get this thing back on the car. I get by with a little help from my friends:
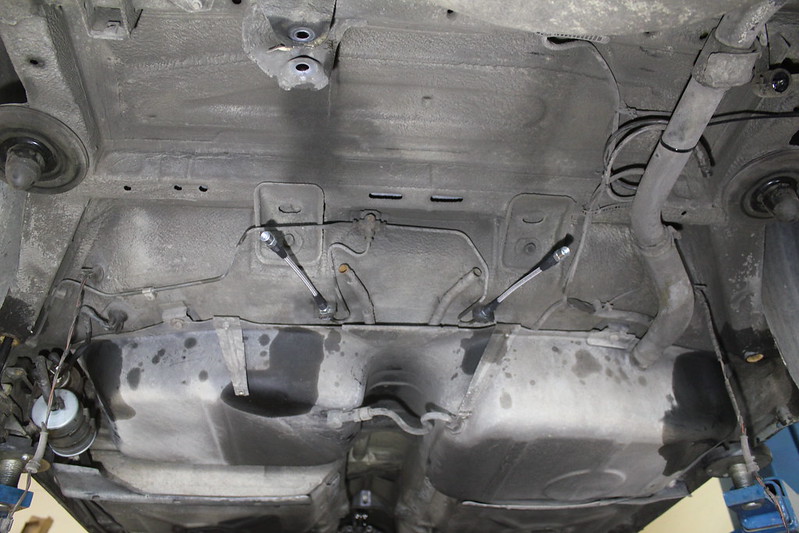
Once the subframe was bolted back up, I started focusing on the Ireland Engineering sway bar mounts. This took a lot of work but I think it will be well worth it. I started off by mocking up the reinforced sway bar brackets and figuring out where they would bolt up. I chiseled away the factory undercoating so I could bolt everything to bare metal:
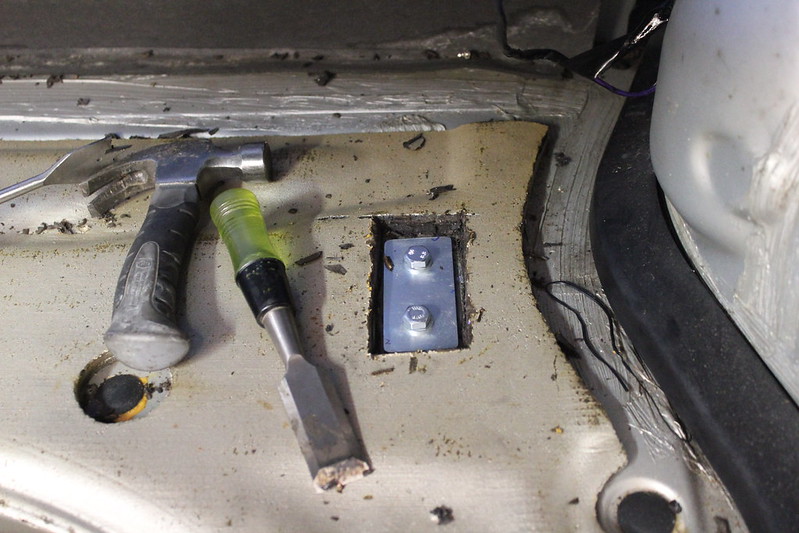
I set the mount up, marked my holes and drilled them. From the top side (inside the trunk compartment) I chiseled away the factory sound deadening to get to the bare metal to ensure everything bolted up properly. That was a doozy, I was sweatin bullets after that one:
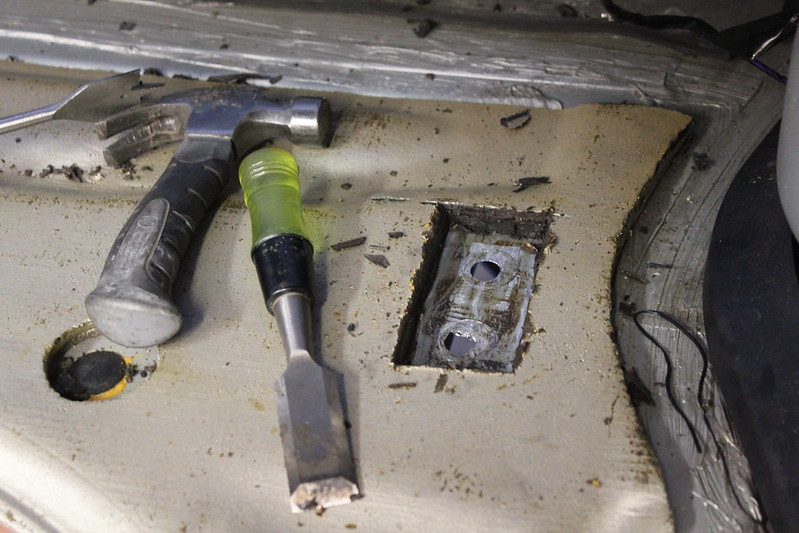
Got it chiseled out on both sides:

Once that was done, everything bolted up beautifully with the help of my lovely girlfriend and shop mate Janine:
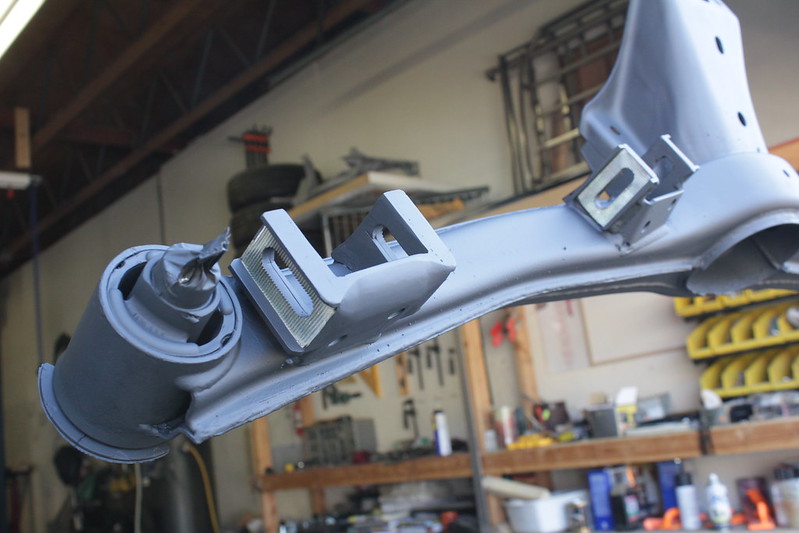
The top portion of the mount installed:
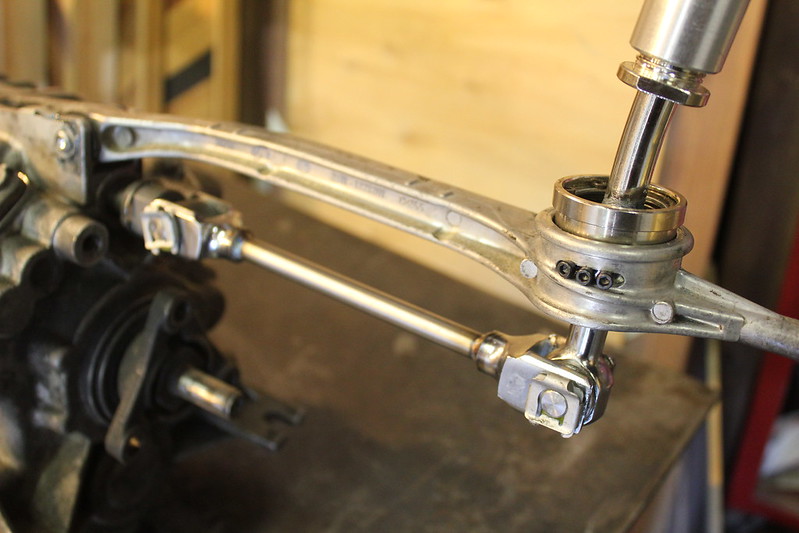
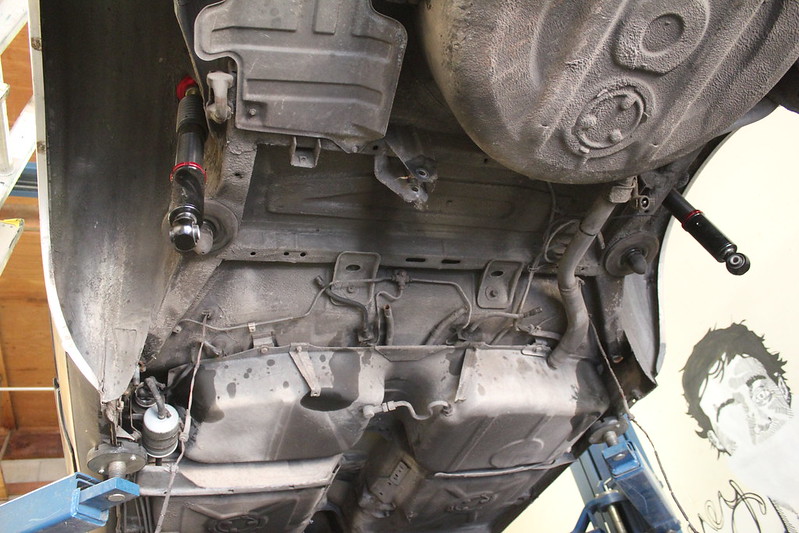
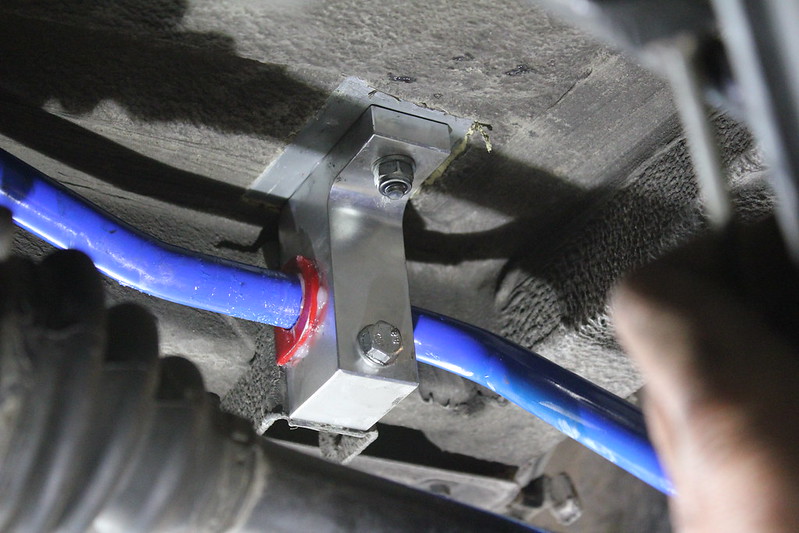
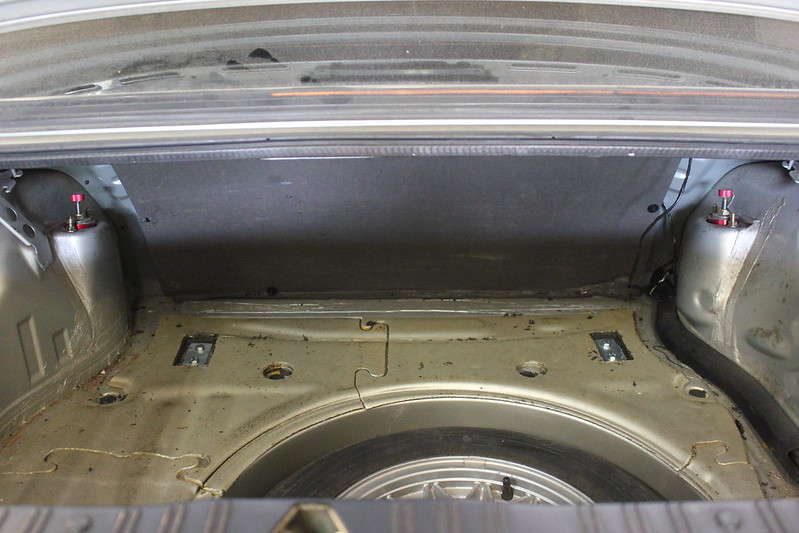
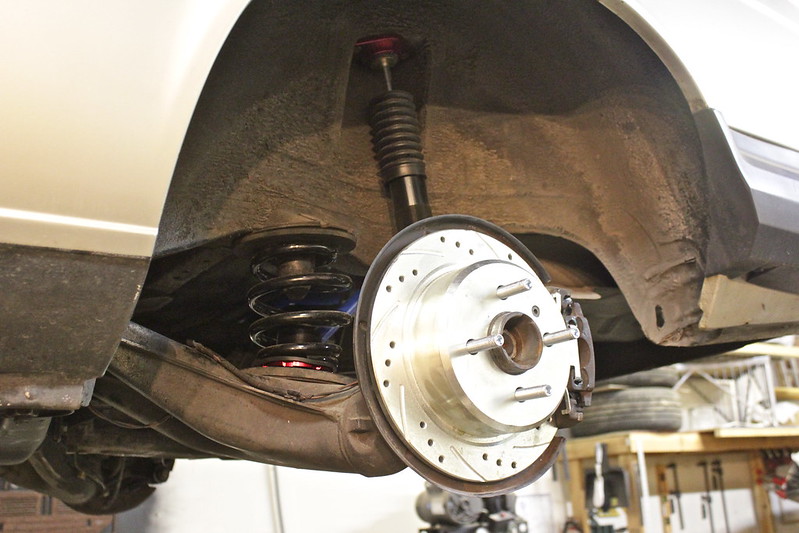
Here you can see my new CAtuned rear shock mounts with damping adjustment as well as both Ireland Engineering rear sway bar tabs bolted up :
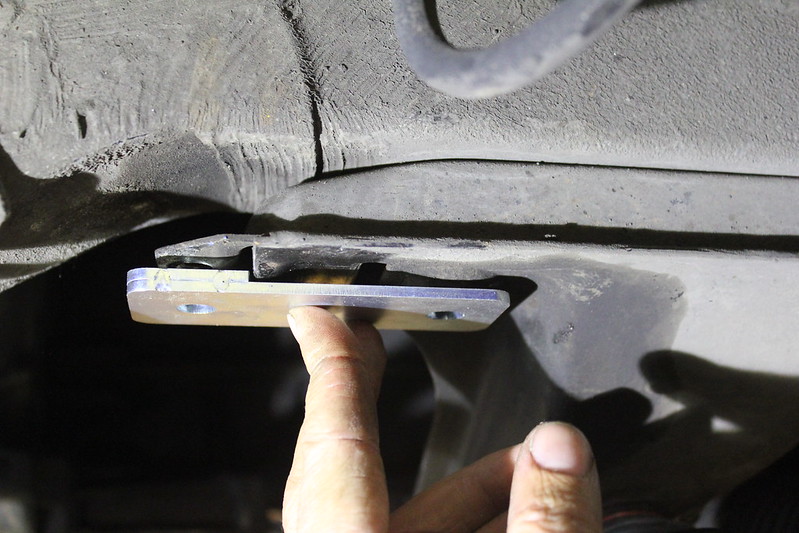
Now that the rears were taken care of, I had a small issue with the front sway bar that I wanted to correct. The mounting tab didn't really sit properly against the original sway bar mount, you can see gaps :
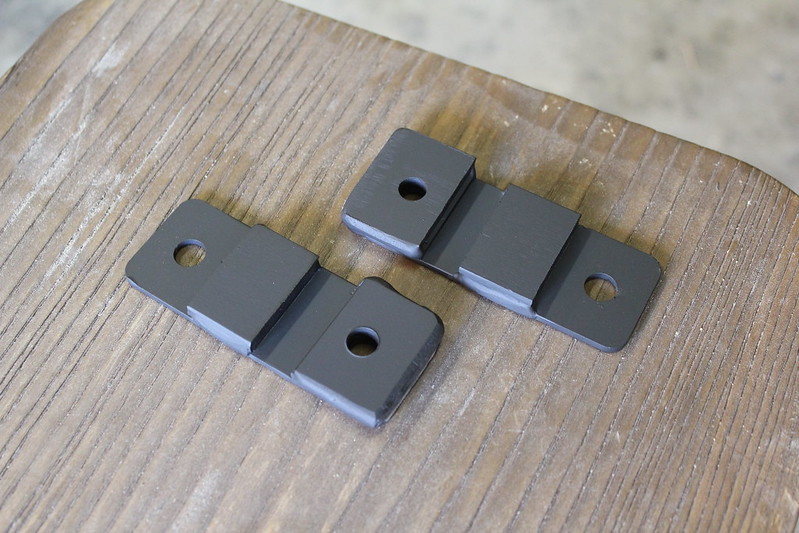
So basically what I did was figure out the empty space and filled it with more metal so that everything would bolt up tight with no gaps. I added a 1/4" thick section and a 3/16" section to the supplied IE tab and came up with these. They're nothing pretty but they'll do the job. I painted them black:
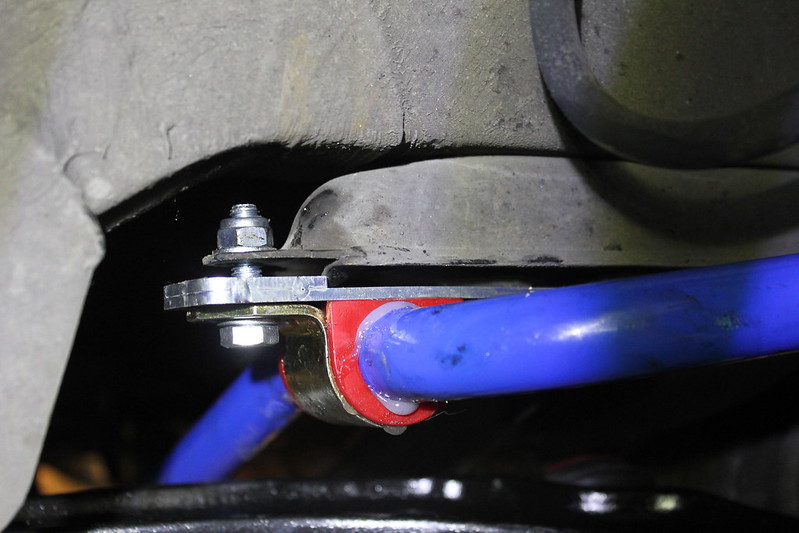
And here's how it sits now. Everything bolted up firmly, I'm much happier with these:

With the sway bars finally installed, it was time to focus on other things.
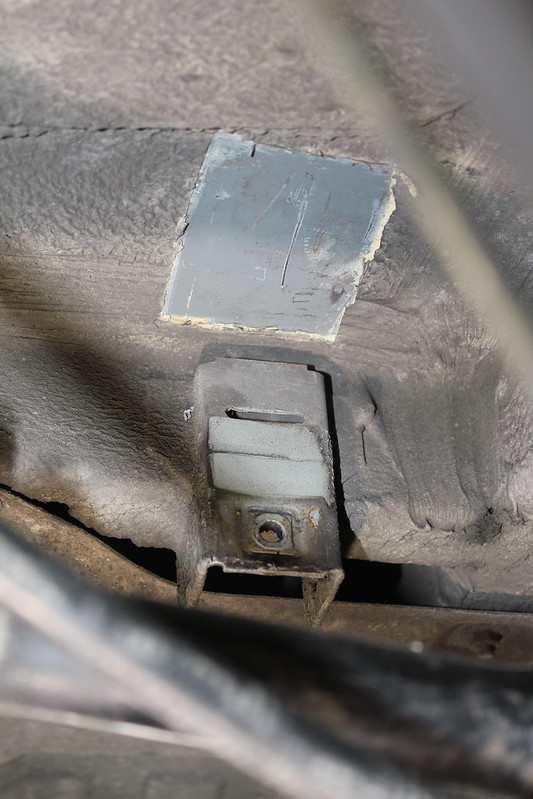
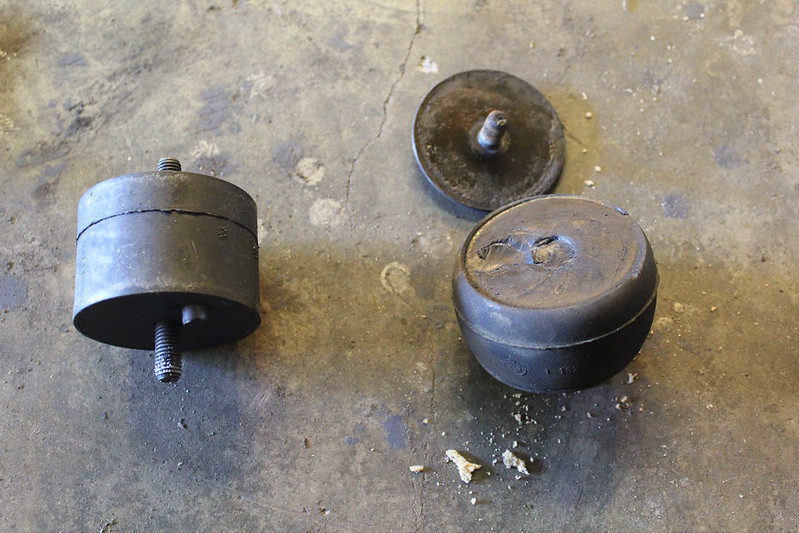
I accidentally broke a motor mount when we were doing the auto to manual swap, which is ok with me because they looked like they needed replacing anyways. I made an order through BluntTech for an array of odds and ends that accumulated throughout all this work and they showed up yesterday. Here's a new motor mount compared to the one that broke:
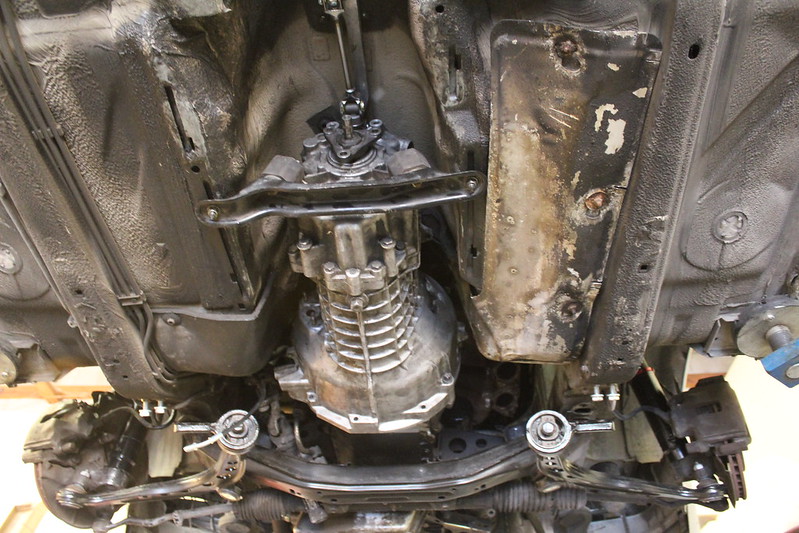
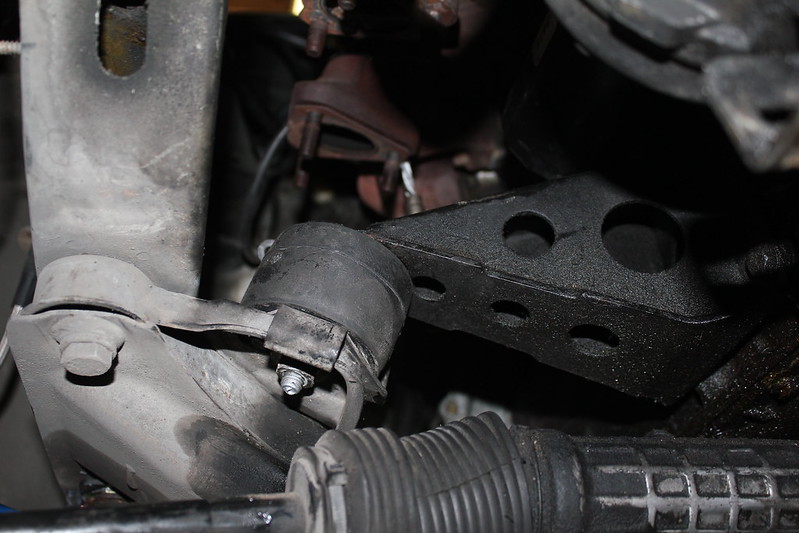
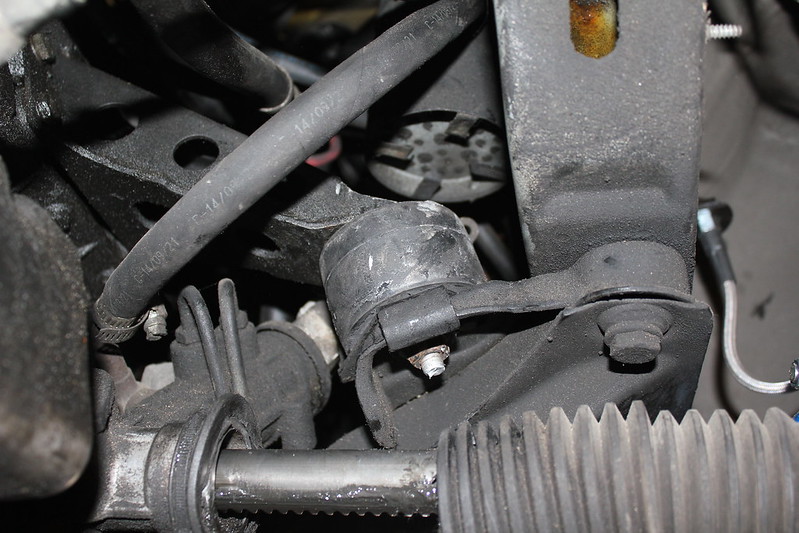
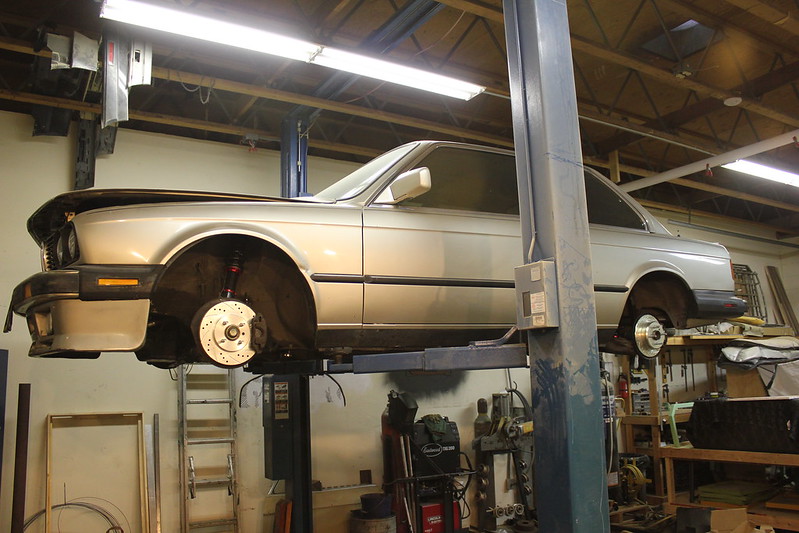
Got the mounts in (I'm planning on giving the whole engine bay and under carriage a heavy pressure wash up at my dad's house soon). You'll notice my steering rack boots are smoked, I'm planning on upgrading to an E46 rack in the very near future :
:
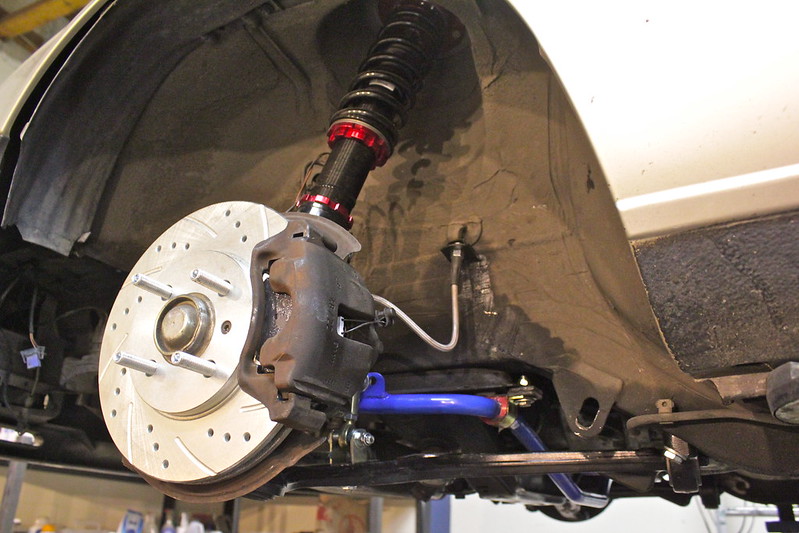
Once those were in, it was time to focus on brakes. I serviced the calipers and got the new rotors and pads in. I installed stainless steel brake lines all around and also installed a lug stud conversion so that I can easily run spacers with my new Fifteen52 wheels:
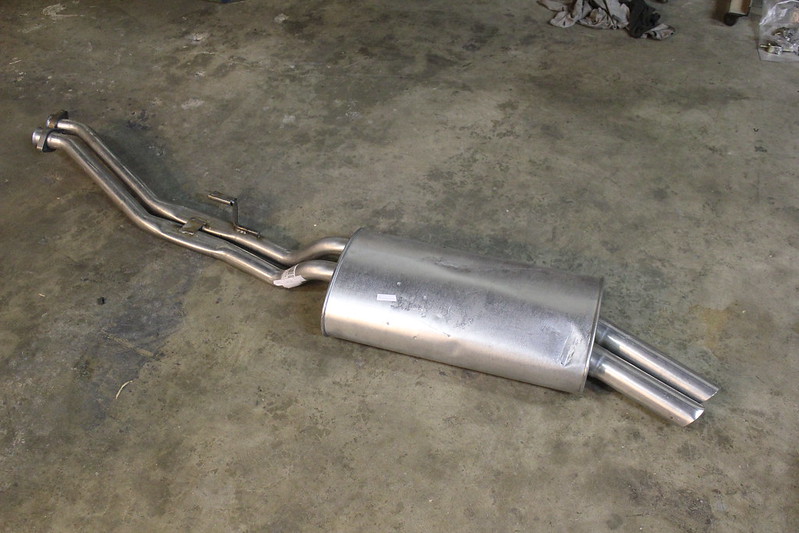
Part of my BluntTech order was a new catback exhaust since my original one was toast. It's just a standard Bosal unit, didn't have money to splurge on a nice one unfortunately. UPS had it's way with it and put some shitty dents in the muffler and one of the exhaust tips, that was a bummer to see but I'm not going to make a big deal out of it. I'll try to straighten out the tip and probably paint the whole thing black since it's raw welds and would be a big silver eye sore to anyone looking at my car:
So that's where I'm at with Golden Boy as of Friday, April 22nd. I can't thank my friends Oliver (r3vlimited member BobaFlesh) and Eric enough for helping me through those first days enough! It was a lot of fun getting greasy with my buddies and spending a lot of time wrenching on my E30. I'm very close to taking this thing on it's first test ride with all of the new goodies installed! I still need to button up a few things like installing the driveshaft, bleeding the clutch/brakes and buying a new battery. I really hope everything goes smoothly, I'll guess we'll have to wait and see. I've gone into every aspect of this build expecting setbacks so I'm sure things will pop up but I'm on the final stretch!
Thanks for taking the time to follow my build and read through everything, I'm so excited to enjoy this thing!Last edited by CubbyChowder; 04-22-2016, 09:17 PM.Comment
-
-
Great attention to detail, looks great!sigpic
Pronounced Eve-odd Rich-E
Comment
-
I love your updates! Keep 'em coming!Comment
-
-
Great to see some big progress being made on thisComment
-
Thanks everyone, really happy to finally get some work done on this thingComment
-
Not a whole lot to report, waiting on a few things to come in the mail so I can finish this job up.
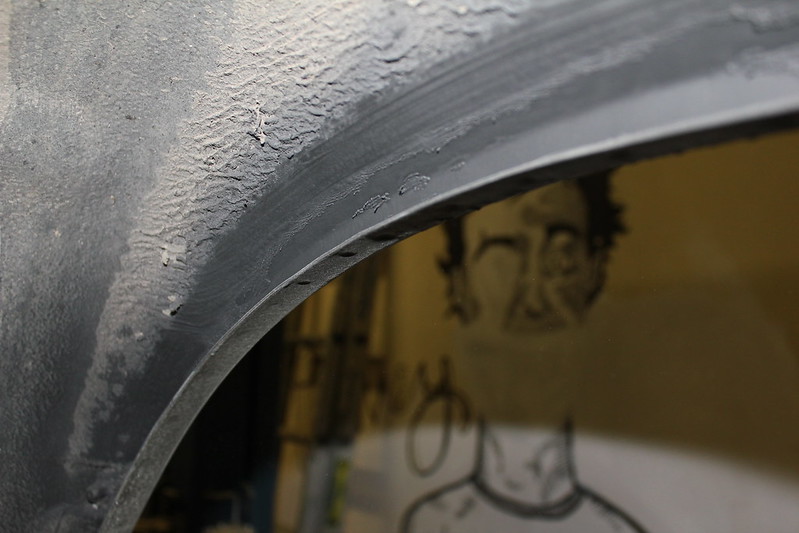
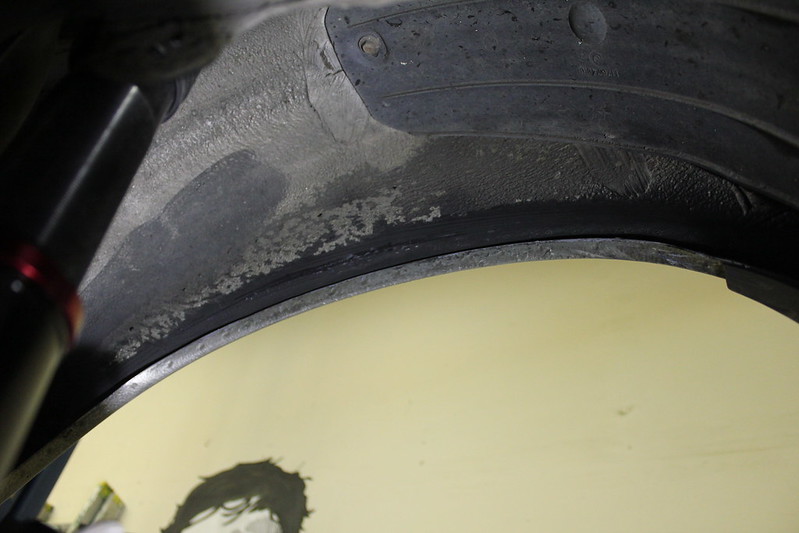
I was able to get back on it for a few hours today though and got a few things done. Last week I removed all the undercoating from the fender lips so they would roll flat. My last E30 had terribly rolled fenders from the previous owner and he didn't remove that undercoating, so it wouldn't roll flat at all. Anyways I got all that off and hit it with some black spray paint just to make sure any raw metal was sealed from the elements. I don't have a before picture but here's what it looked like after:
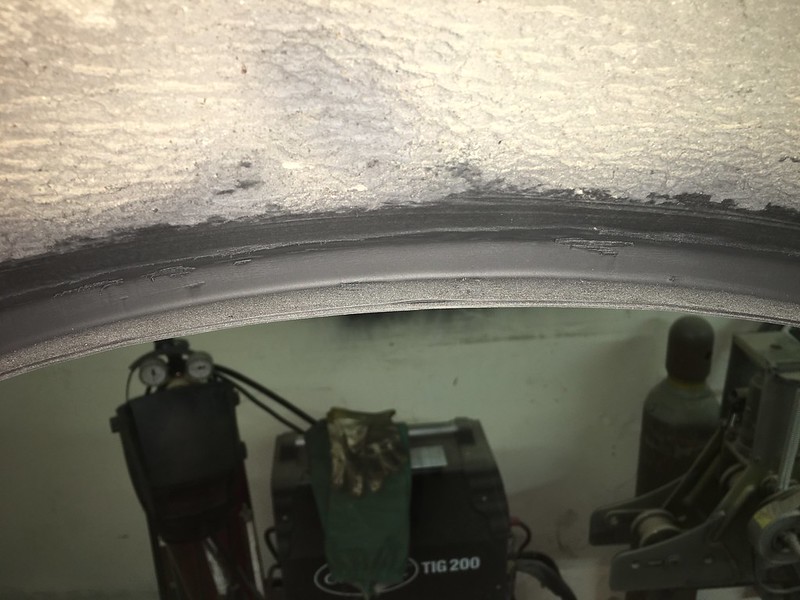
I was using a really shitty fender roller to do this, it was broken in like 3 places and had a badly stripped main bolt so I had to spend a few hours yesterday fixing it just so I could use it today. Got it done though and am happy that they rolled flat:
Today I also took care of a few little odds and ends:
- Replaced some grommets in the pedal assembly and got everything hooked up
- Changed the oil and filter
- Emptied the trans and diff fluid in prep for new fluid on Friday
- Got all the sway bar linkages hooked up
On Friday I should be receiving a new CSB for the driveshaft and some Redline MTL for the trans. Here's my to-do list for Friday:
- Fill trans and diff with new fluid
- Bleed brakes
- Bleed clutch
- Install heat shields
- Change CSB and install driveshaft
- Install exhaust
- Buy and install new battery
- Install air box
- Cross my fingers and hope I can take it for a test drive!Comment
-
Nice work, I love doing a ton of stuff all at once like that, it's a good feeling. It's gonna feel like a brand new car.Comment


Comment