 Tweet
Tweet
So it's time for an update that I've been working on for the past month or so, it's a long one so be prepared! I recently wrapped up this big project and wanted to share it with everyone.
Last year I designed and built a few custom metal/wood roof racks that were compatible on the BMW E10 (1600/2002) and E30 chassis. In total I built three rack systems but eventually decided to pursue other ventures.
I was recently approached by Andrew Adams at Ireland Engineering who was interested in having a custom rack built for his 2002 project (which is an awesome build by the way, check it out here: http://www.r3vlimited.com/board/showthread.php?t=211891). After a few messages back and forth I was happy to take the project on and decided it would be a good opportunity to thoroughly document every step of the way to shed some light on how I build things the way I do.
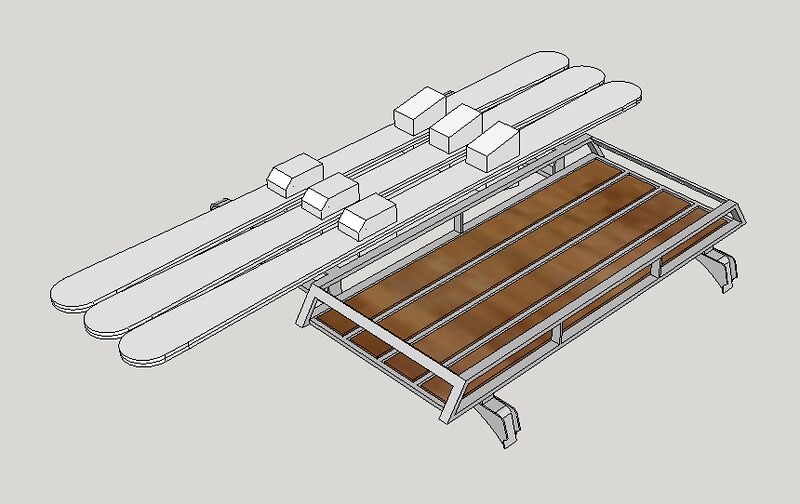
Andrew was very lenient and gave me full creative freedom on the design with one request being that it could mount three sets of snow ski's in some way. With this in mind I went to the drawing board, came up with a few renderings and got to work. I used the same mounting solution that I designed last year for this build, but everything else is custom and one of a kind. This project was a lot of fun and VERY time consuming. I'm really looking forward to seeing this rack on the completed 2002 project in person in August! A big Thank You to Andrew for being so easy going and open to my ideas.
A quick note I'd like to add: while I was happy to take this project on, I am currently not taking on any other custom roof rack projects at this time.
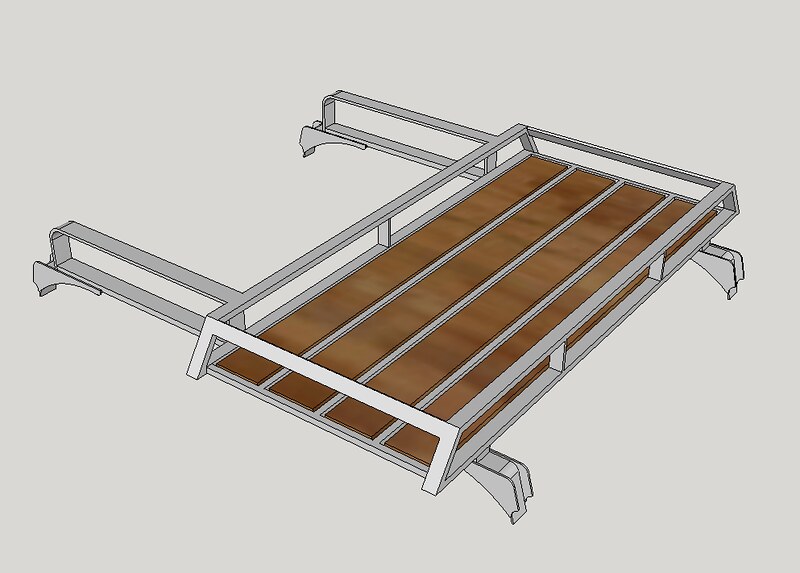
To show where this build is headed, here are a few renderings I came up with which gave me the general design that I wanted (feel free to make fun of my ski's I drew haha):
So now, let's get started!
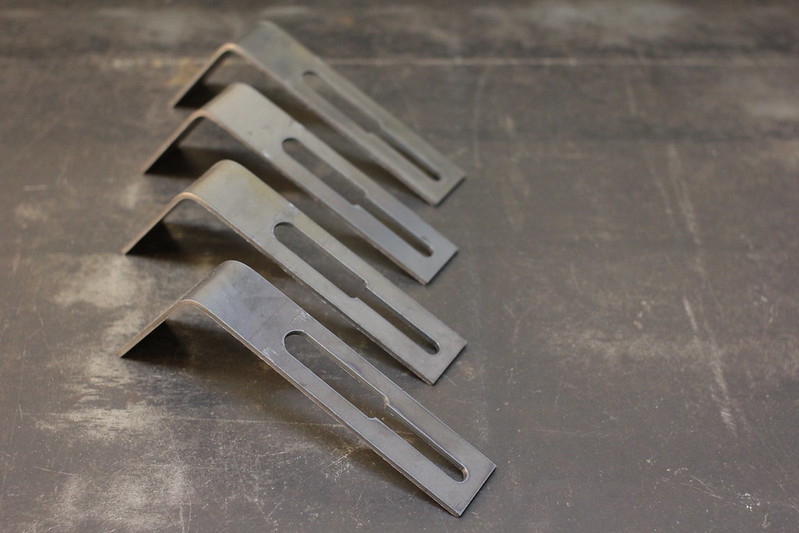
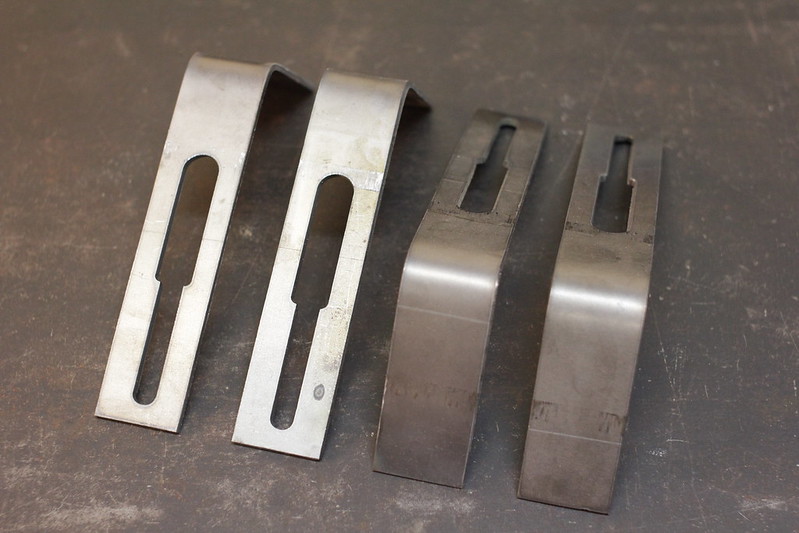
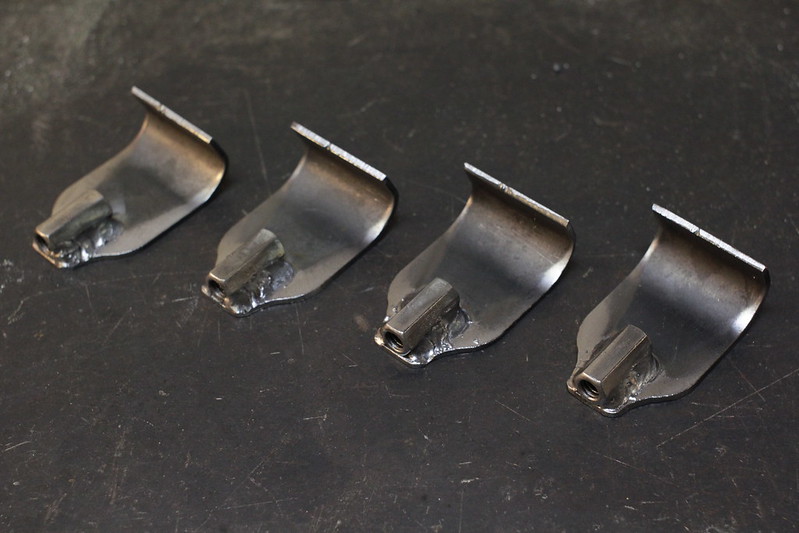
The very first step is to bend these tabs into the shape pictured below. They start off as flat CNC plasma cut pieces that get bent in my press brake, I carefully measure them out so they are all the same:
This random little tool I made serves two purposes and it helps me make sure every mount and bracket are exactly the same:
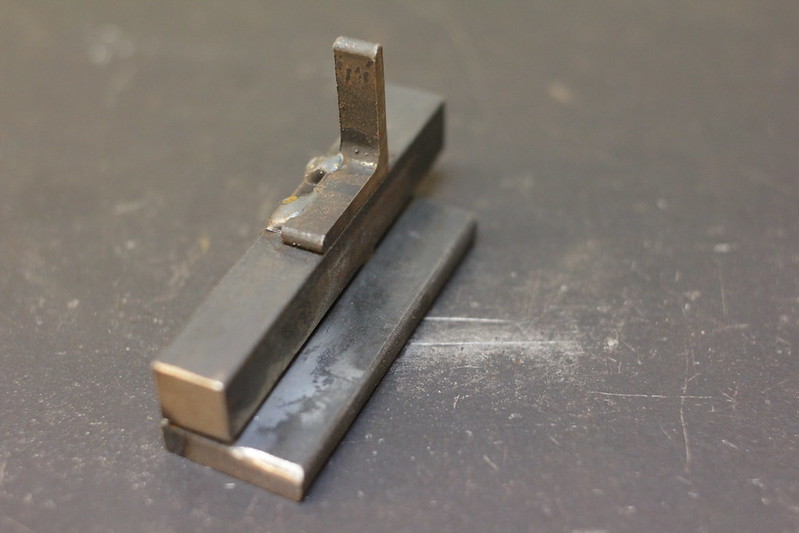
For one, it helps me set the "sleeve" coupler on the main mount. I line the bottoms up, clamp it onto the mount body and then set a 5/16 coupling nut in the right place:
From there I clamp the 5/16 coupling nut to the mount body, it is now ready to weld into place:
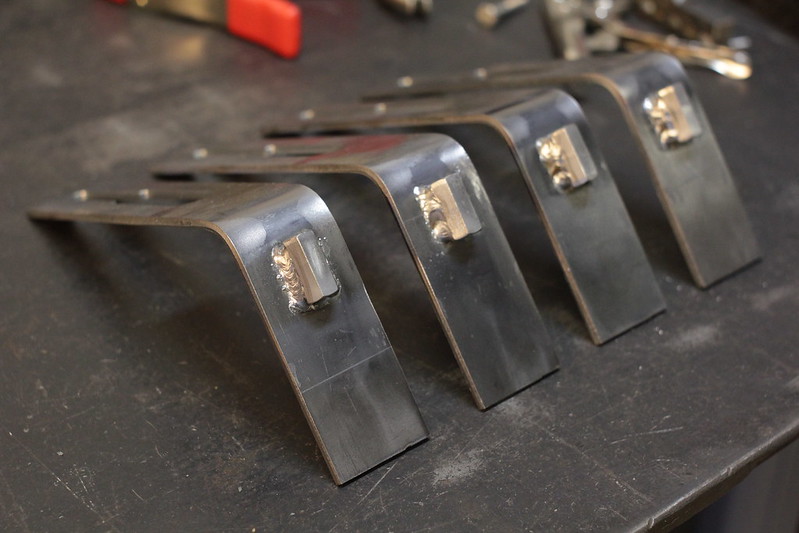
Welded up on all four mount bodies:
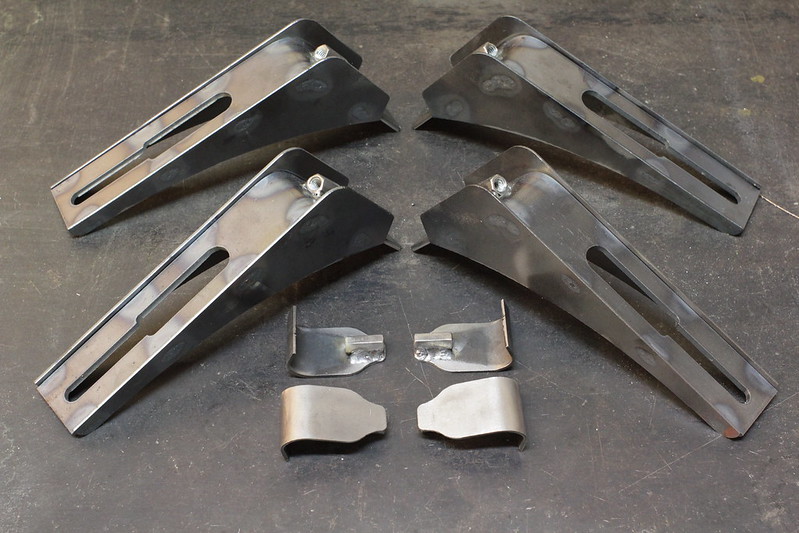
Then come the CNC plasma cut pieces that make up the sides of the mounts:
I create a very simple jig that helps me set them in the correct spot for welding:

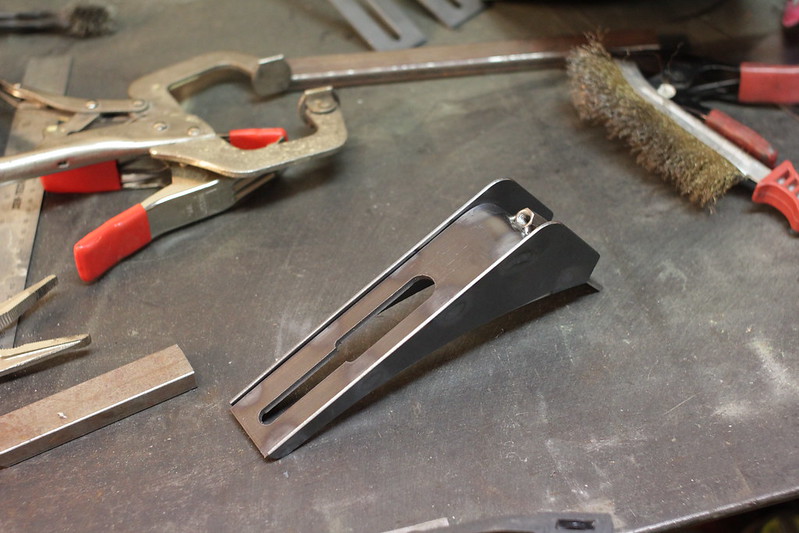
Once both sides are welded on, the mounts look like this:
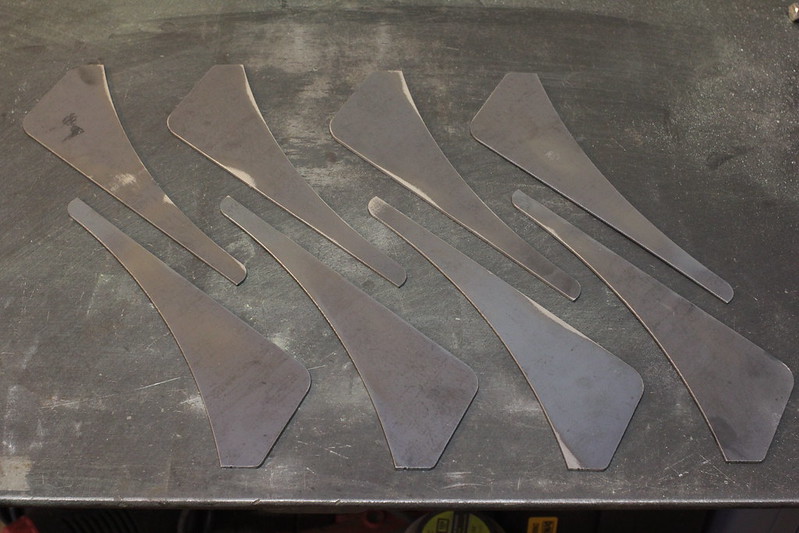
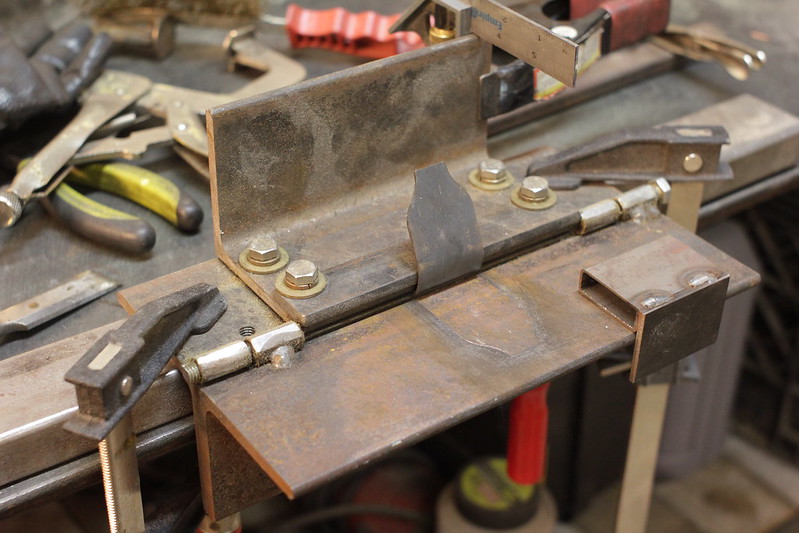
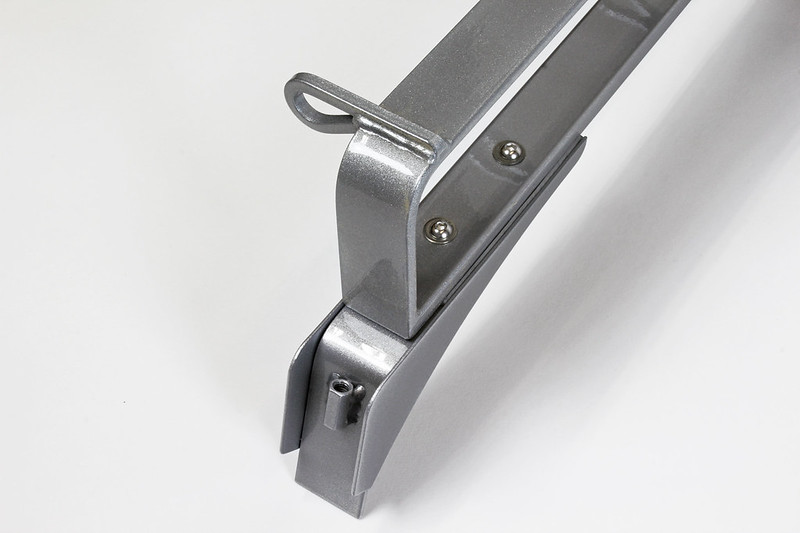
Now that the mounting feet are done, it's time to move onto the mounting tabs. They actually secure the mount to the roof of the BMW by clamping around the rain gutter. They start off as flat CNC plasma cut pieces:
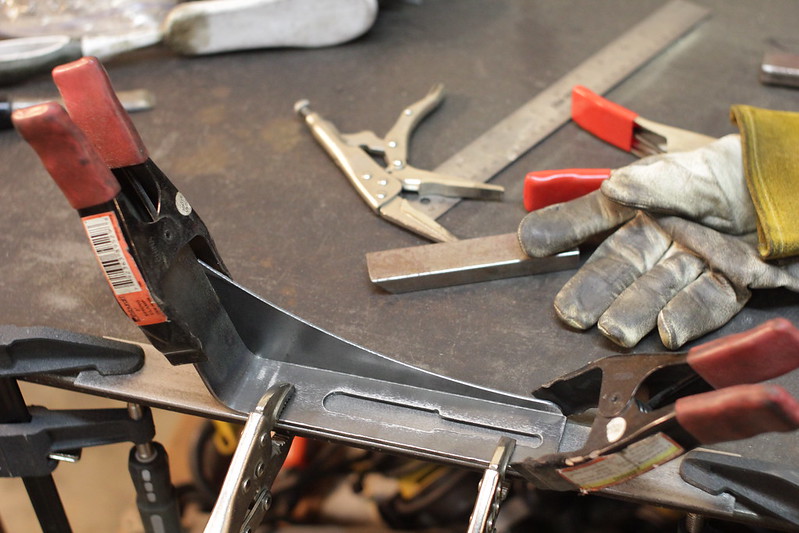
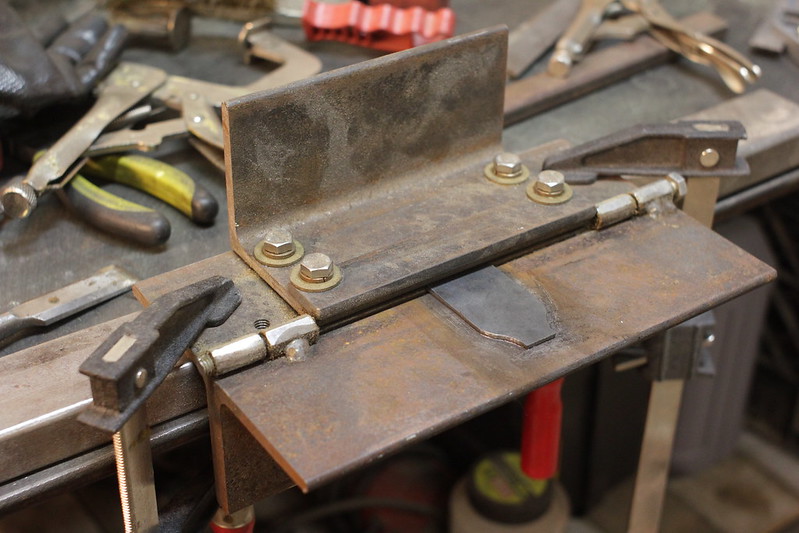
I custom built a simple brake out of some scrap 3" angle iron to create the profile of these mounting tabs. Here's how it sits before and after the bend:
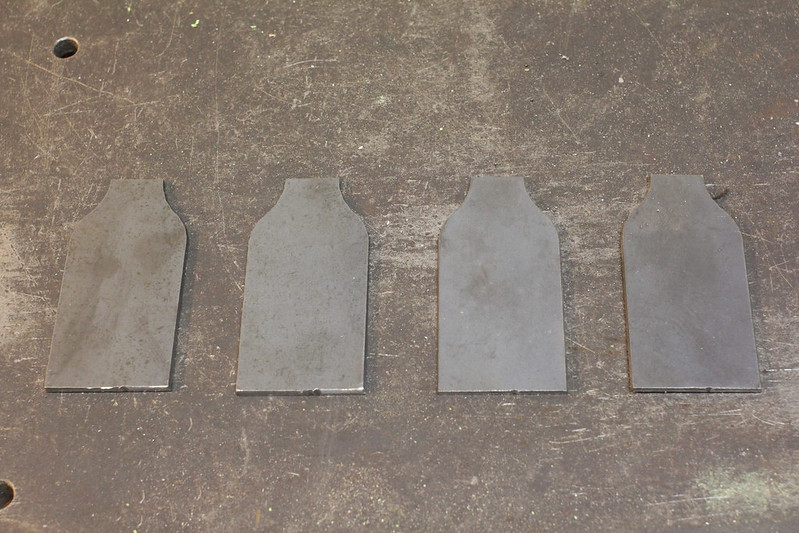
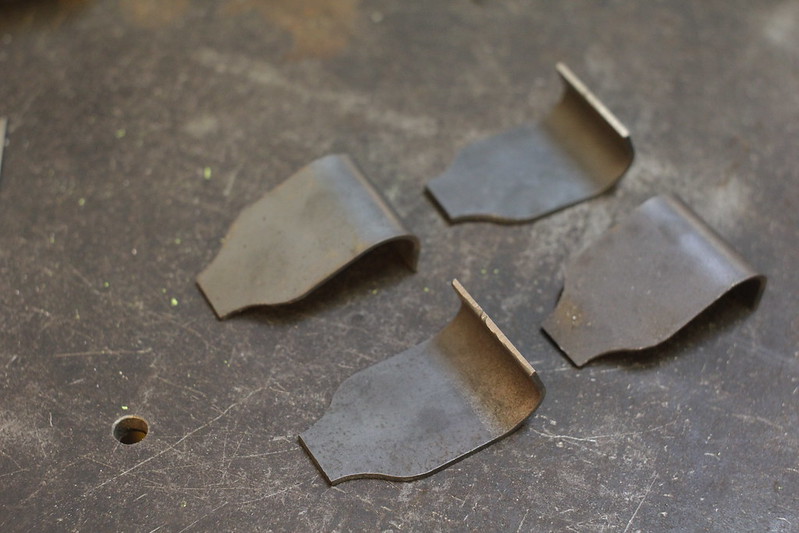
4 mounting tabs bent up:
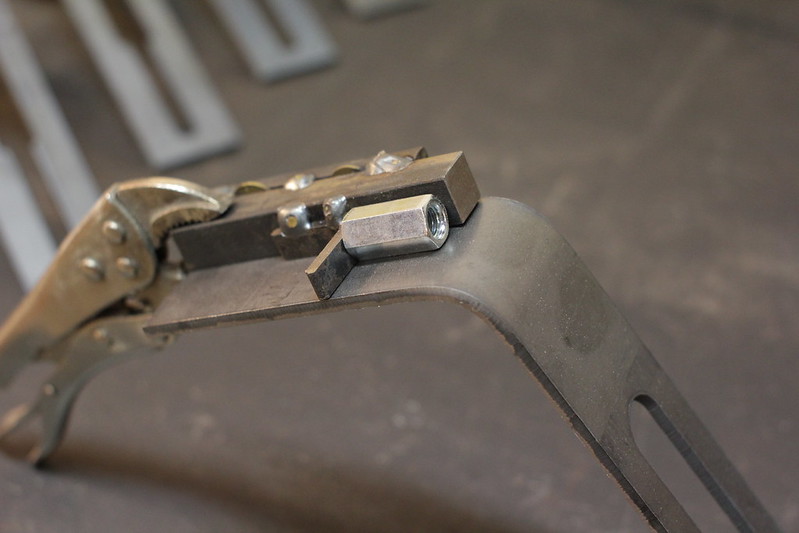
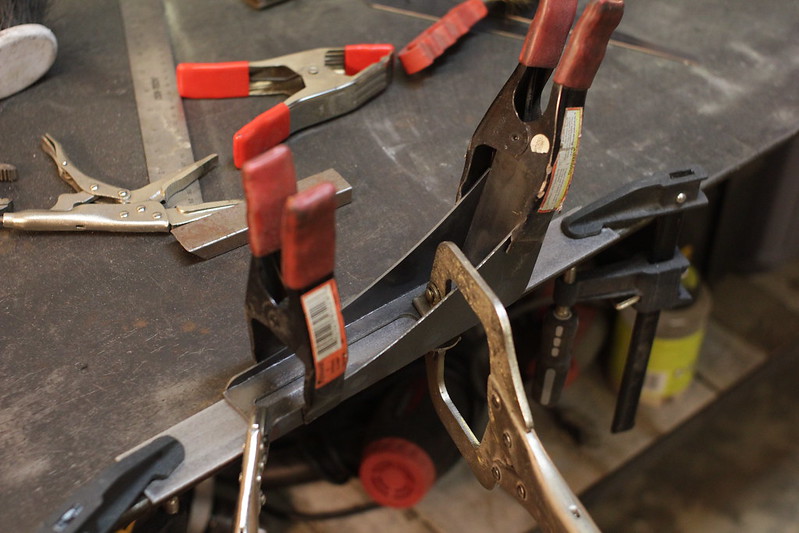
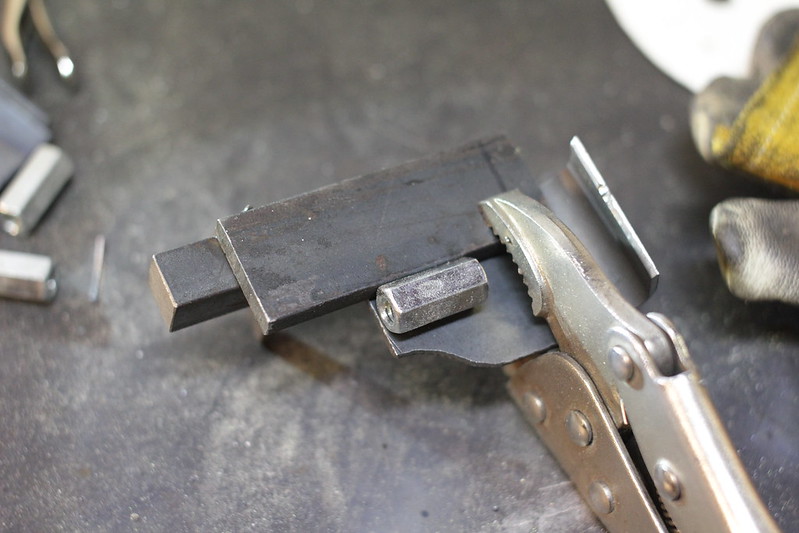
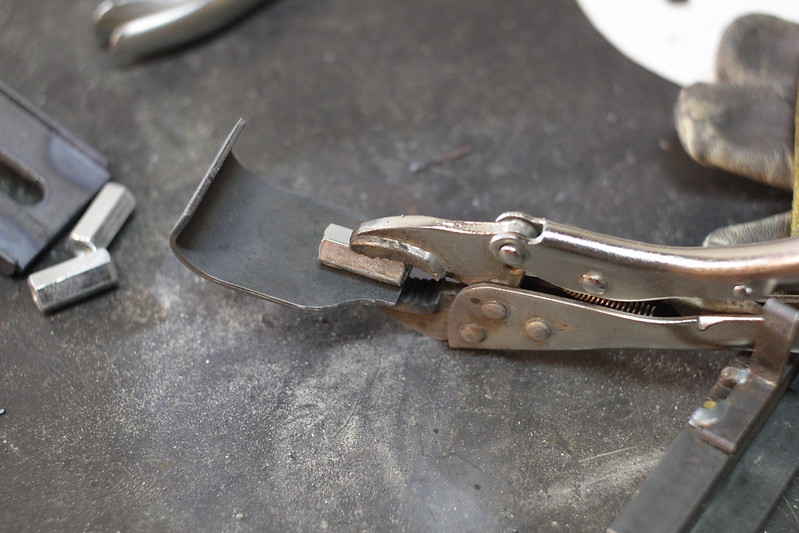
Here's where that random little tool from earlier comes back into play, it helps me set the mounting tab coupling nut. I clamp it in a specific spot so it acts as a guide for the coupling nut to sit perfectly centered on the tab, which then gets welded up:
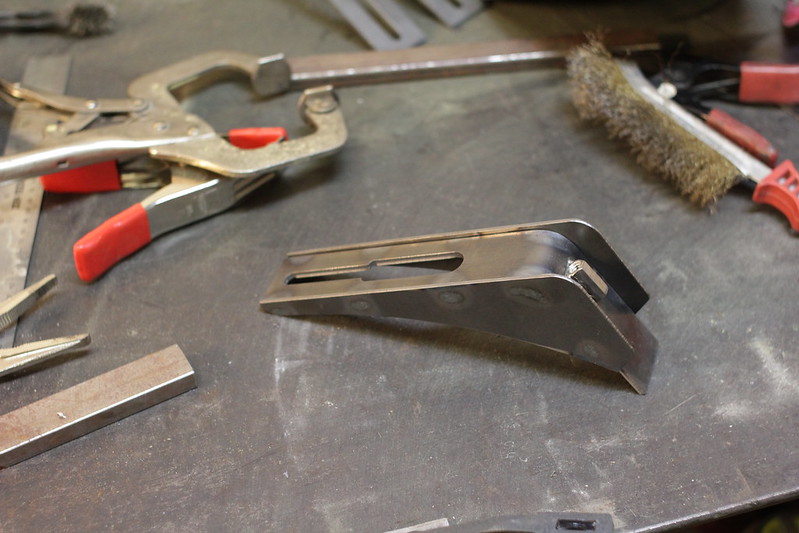
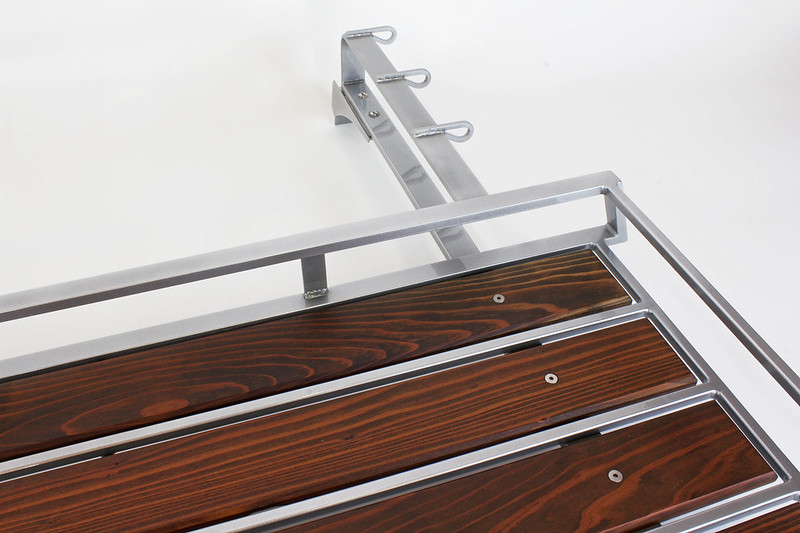
After some clean up the mounts and tabs are complete and ready for powder coat. I'll show how they actually work at a later time when they are mounted on a car:
Now that the mounts are finished up it's time to actually build the rack itself, so I started off by cutting up these pieces. This is 1"x0.5" rectangle tubing and these will act as the main basket "runner bars".
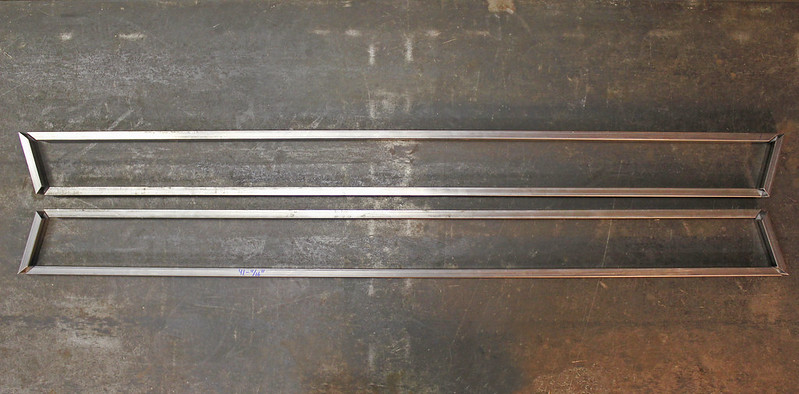

I then welded everything up and ground all the welds smooth to achieve a seamless look:

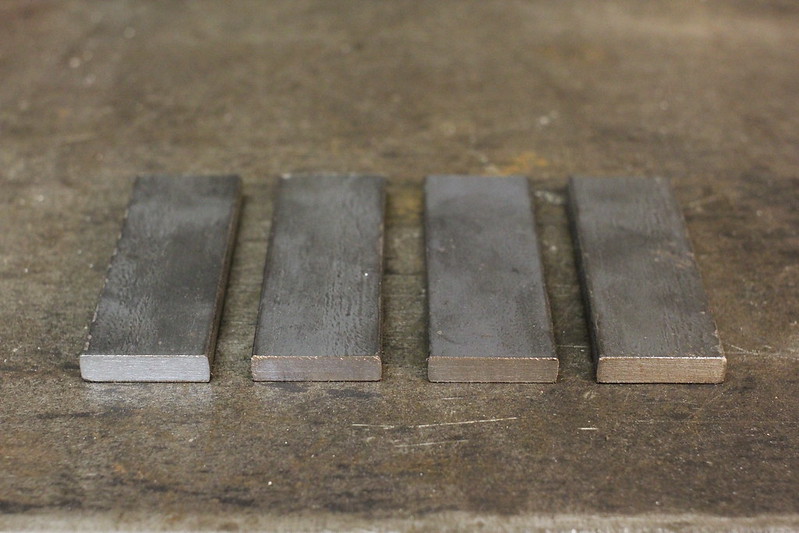
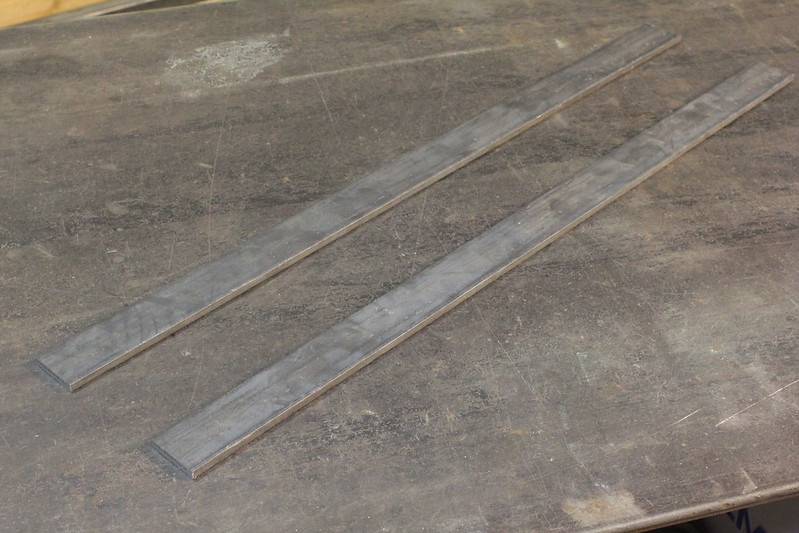
Cut a few pieces of 1"x0.25" flat strap:
These will act as supports for the runner bars. Welded them in and ground everything smooth:
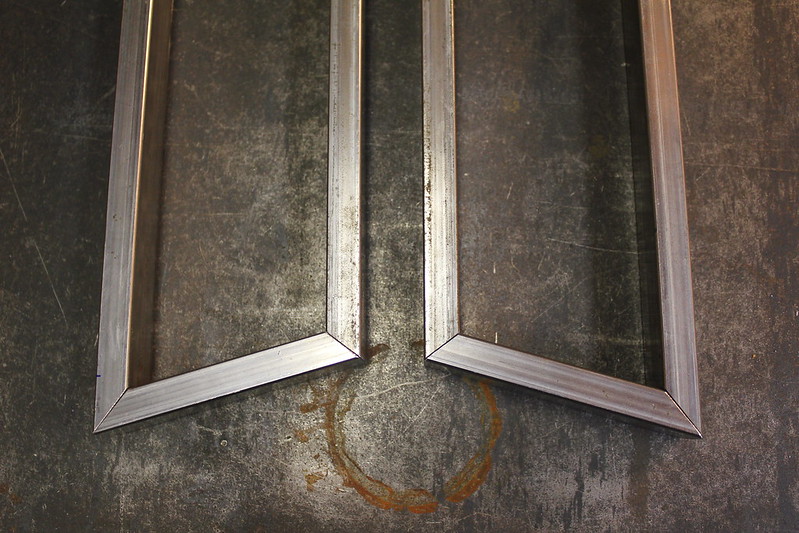
Next up, I built this frame out of 0.5" square tubing:
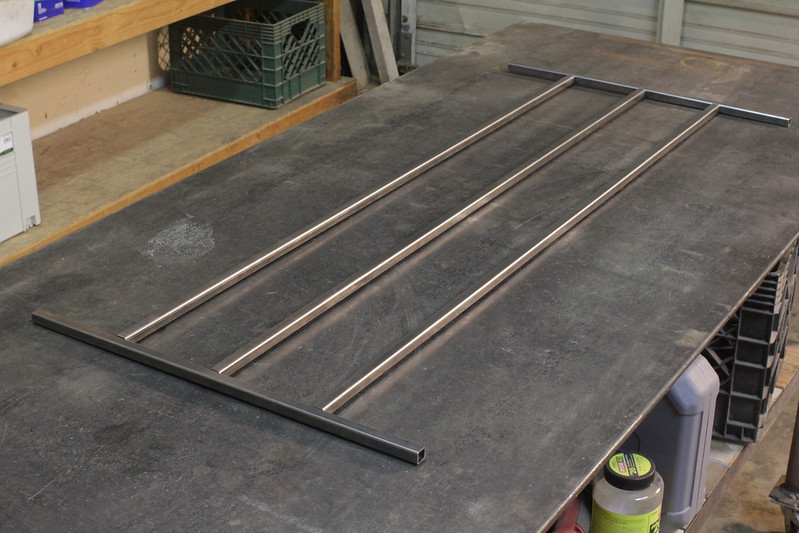
This connects the runner bars and creates a basket:
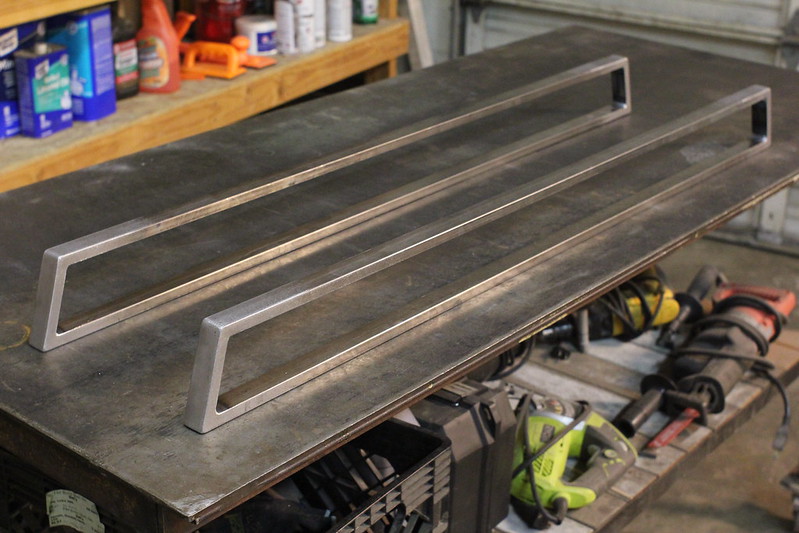
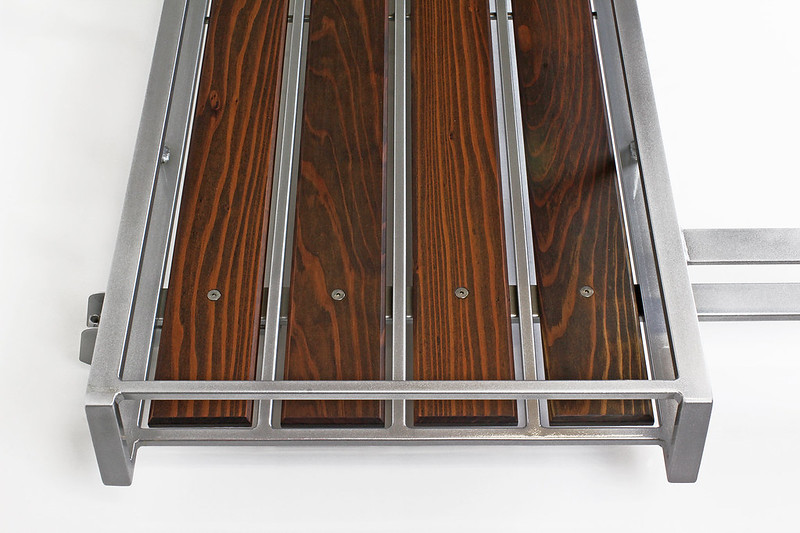
Added top bars and ground all the welds smooth. The basket is now complete:

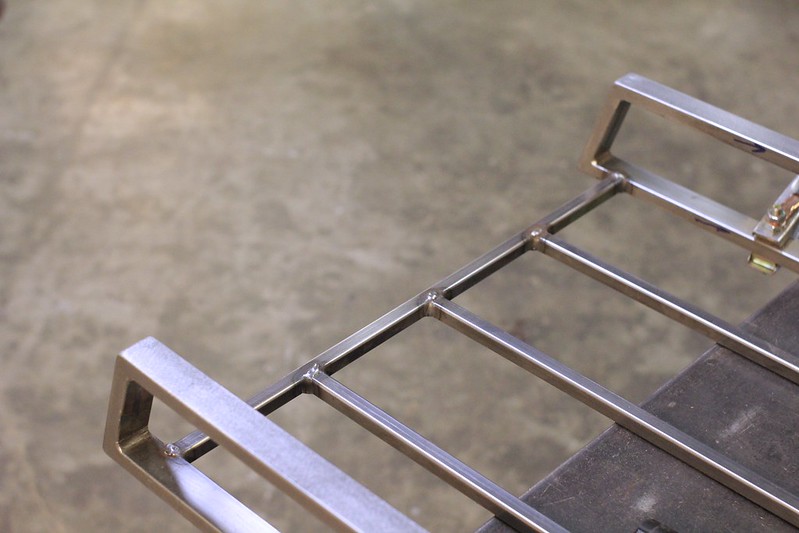
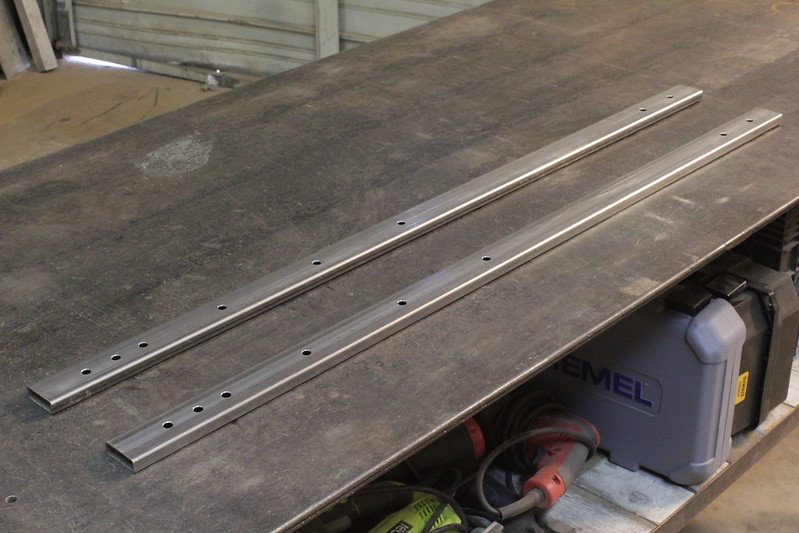
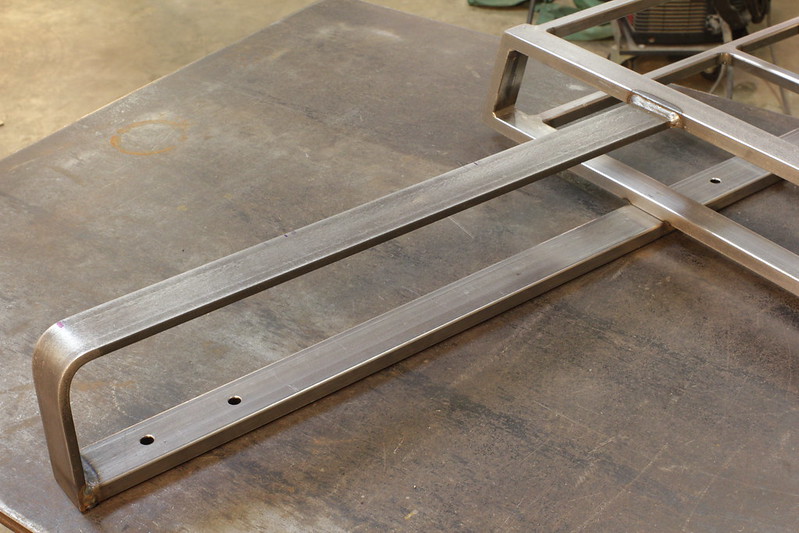
Now it's time to create the cross bars which consist of two pieces of 1"x1.5" rectangle tubing, each having 8 precisely measured and drilled holes in them:
I welded these bars to the bottom of the basket:
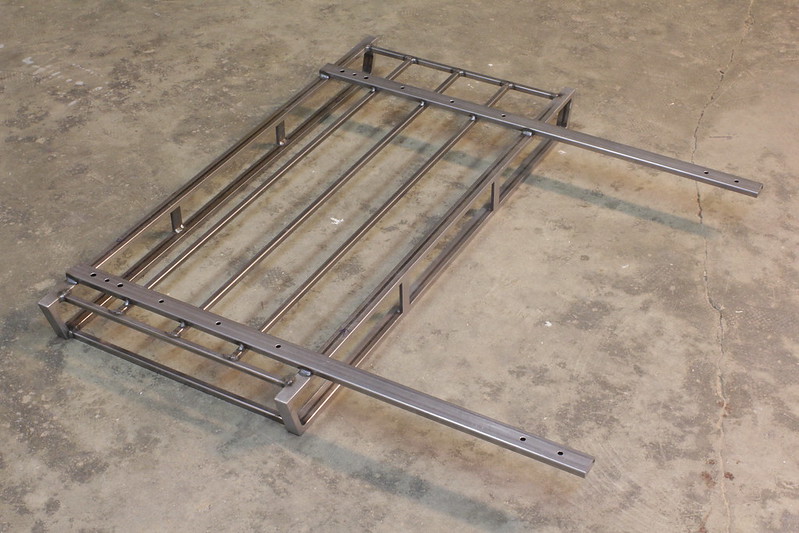
Flipped right side up. Here you can start to see why the holes are drilled the way they are:
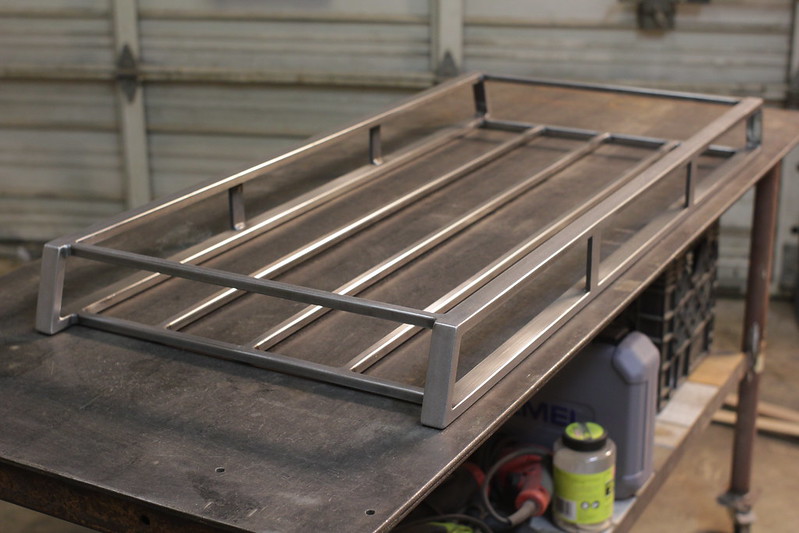
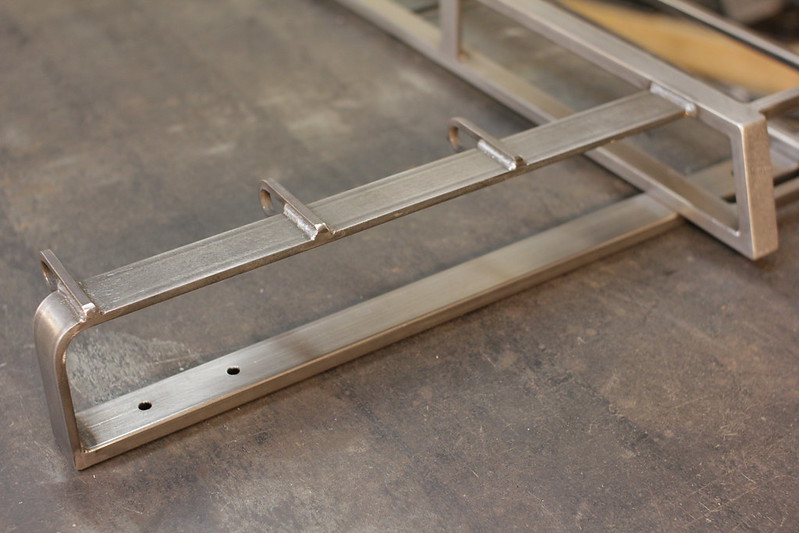
It's time to build the ski mounts. I cut up two pieces of 1.5"x.025" flat strap:
I put a rounded 90 degree bend in them with my compact bender:
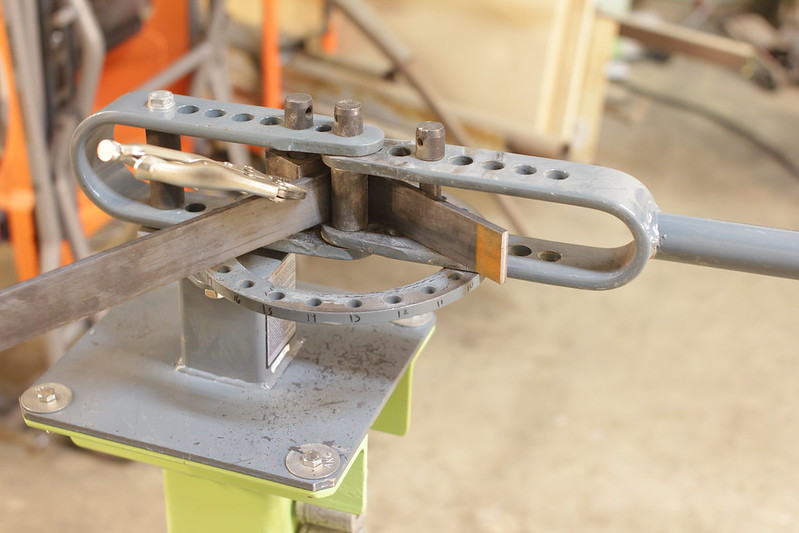
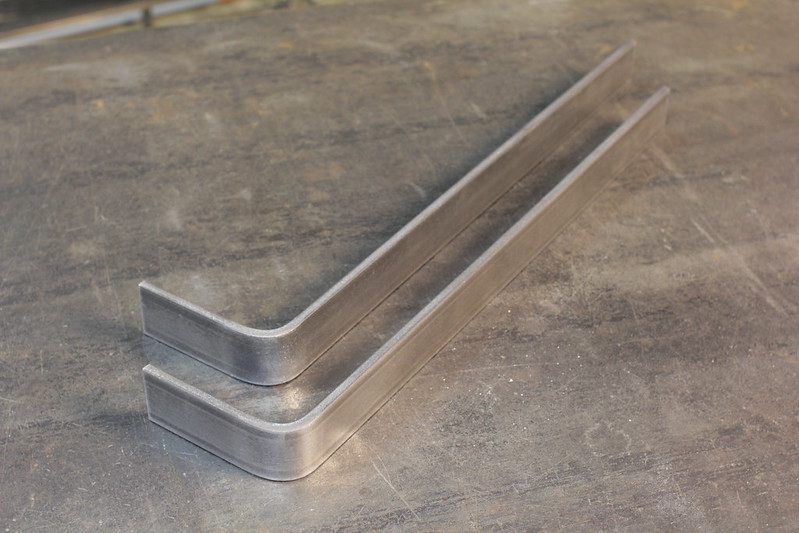
The ski mounts will be integrated into this part of the roof rack:
Clamped them into place, ready to weld:
Welded up:
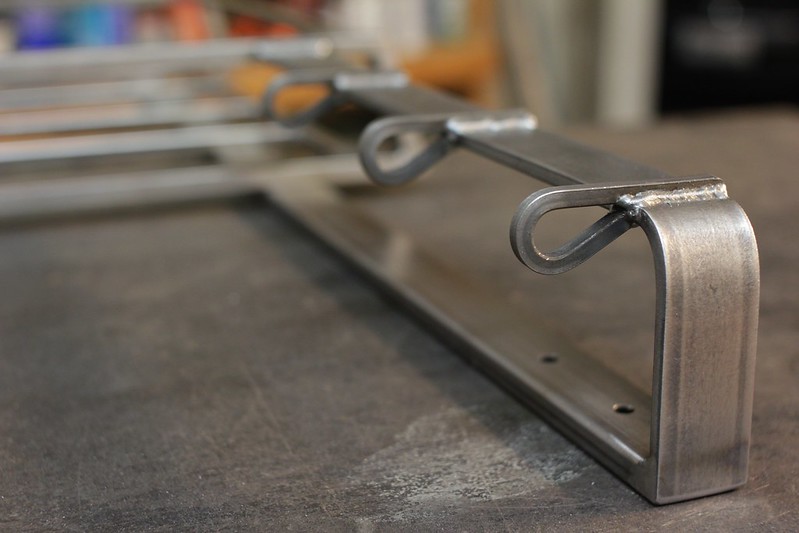
I needed to figure out a way to strap the ski's down to the bars, so I tossed some ideas around and eventually came up with these little hoops that I bent on the compact bender:

Which eventually led to this:
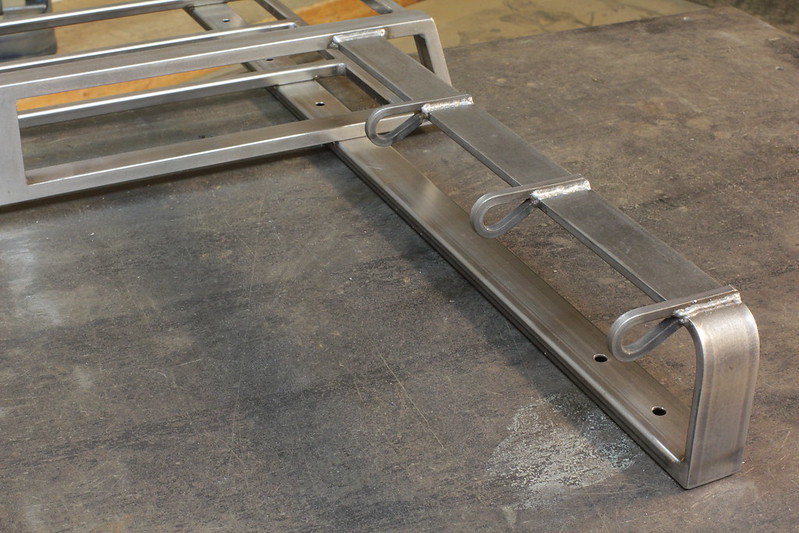
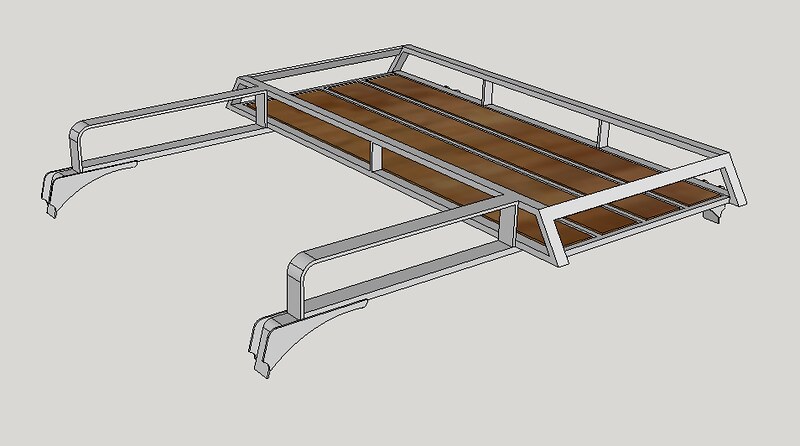
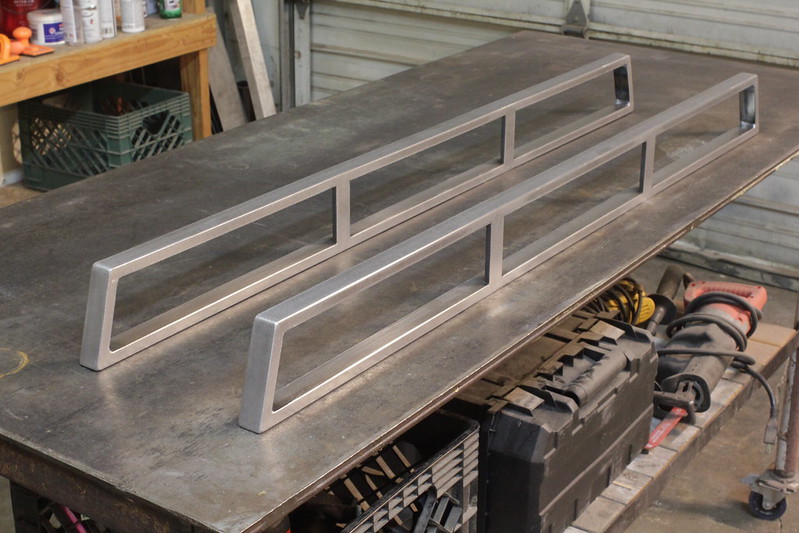
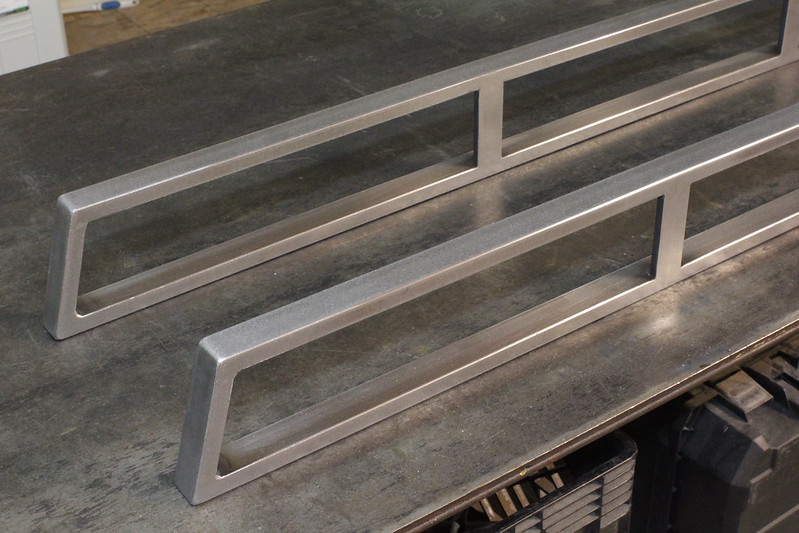
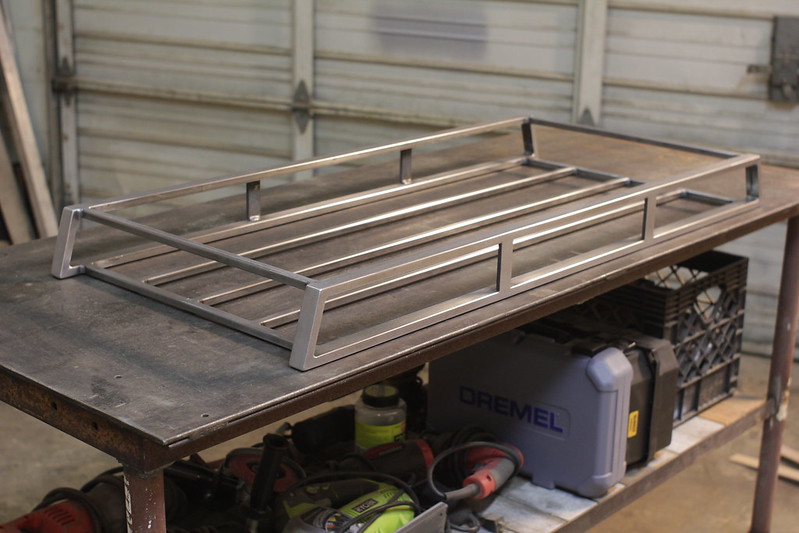
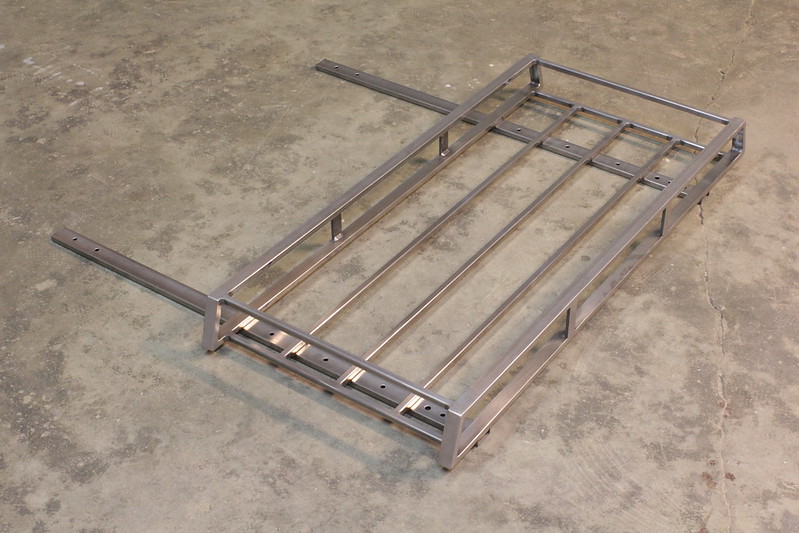
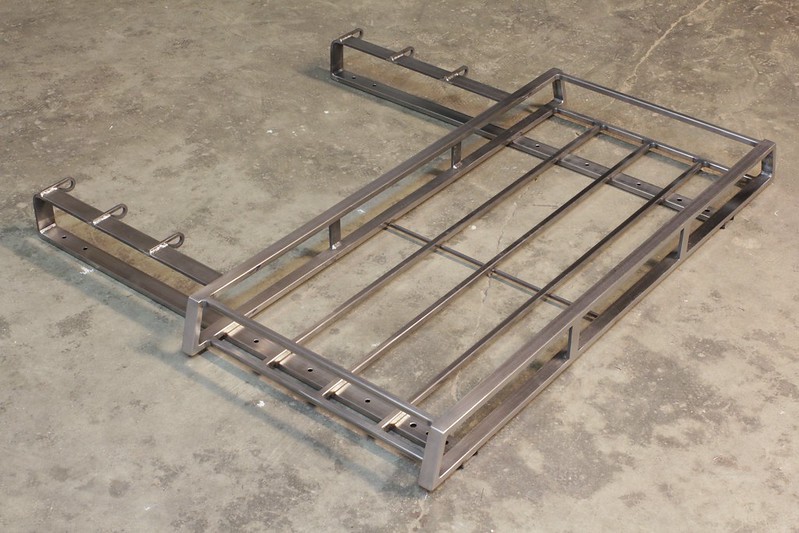
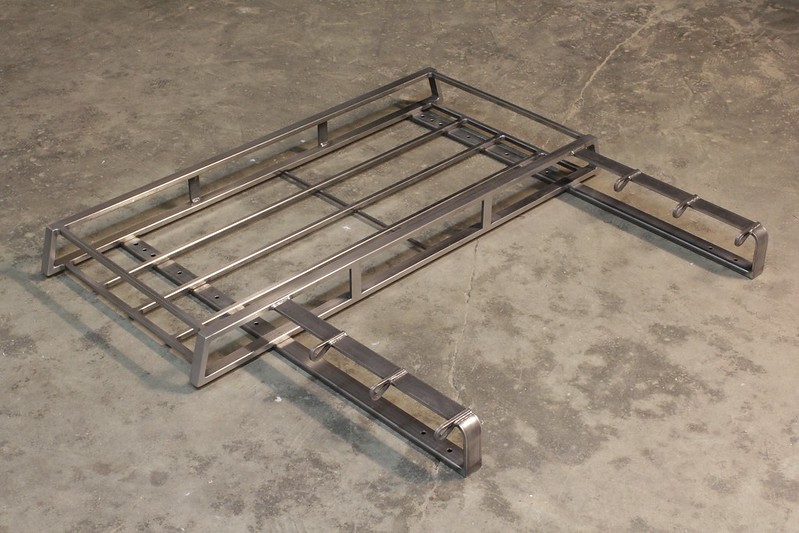
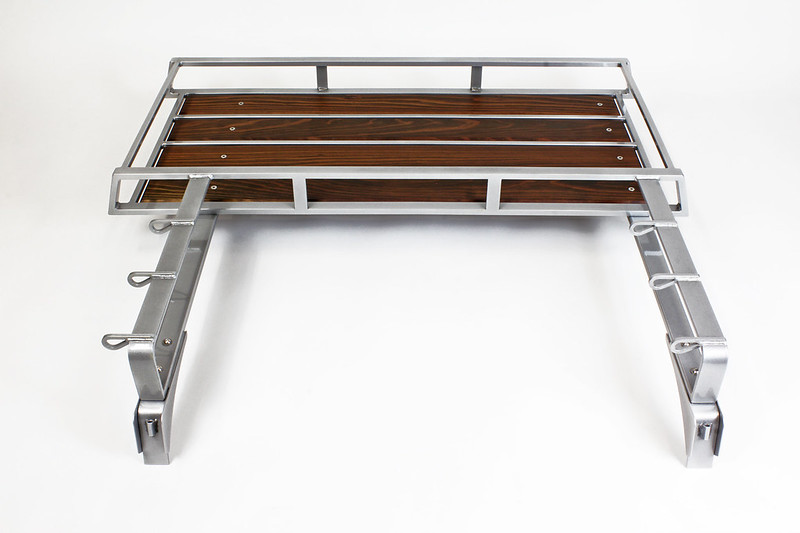
At this point, the roof rack is finally complete and ready for powder coat!
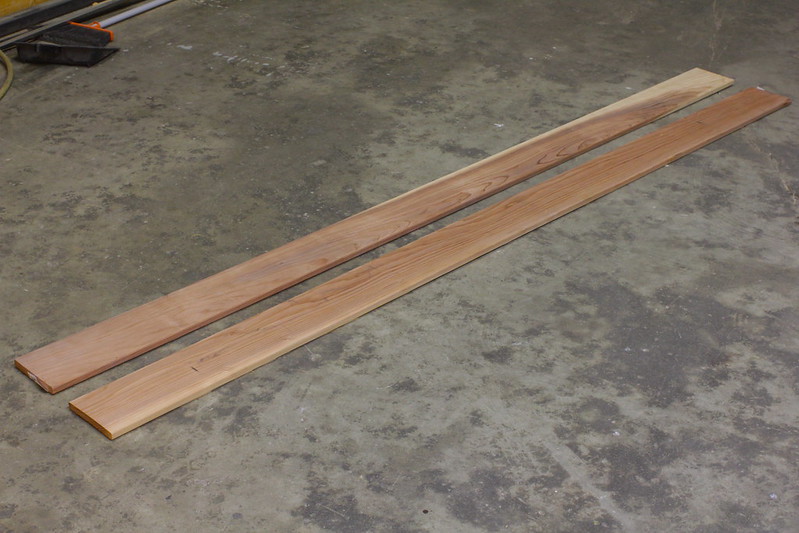
With the metal working portion of this build done, it was time to send everything off to the powder coater for a shiny metallic silver finish and set my focus on the wood working segment, which requires a whole different set of tools and consumables. I chose redwood because it is lightweight and handles the elements pretty well. After figuring out what I needed, I went out and bought two long boards of it:
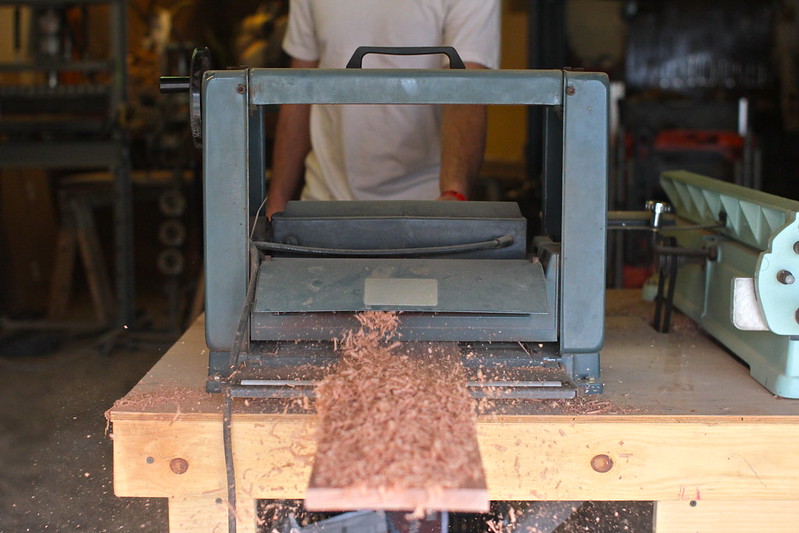
I needed 4 wooden slats at a specific length, width and thickness, so I started to mill them down. The first step was to cut each board in half so I had 4 separate pieces, and then I ran them through the planer so that everything would be 0.5" thick:
Once the thickness was spot on, I ran each board through the jointer to create a perfectly straight edge:
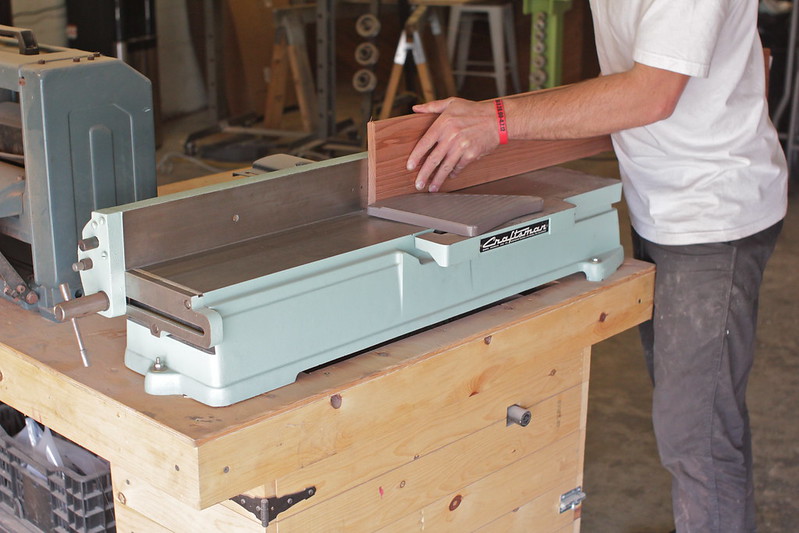
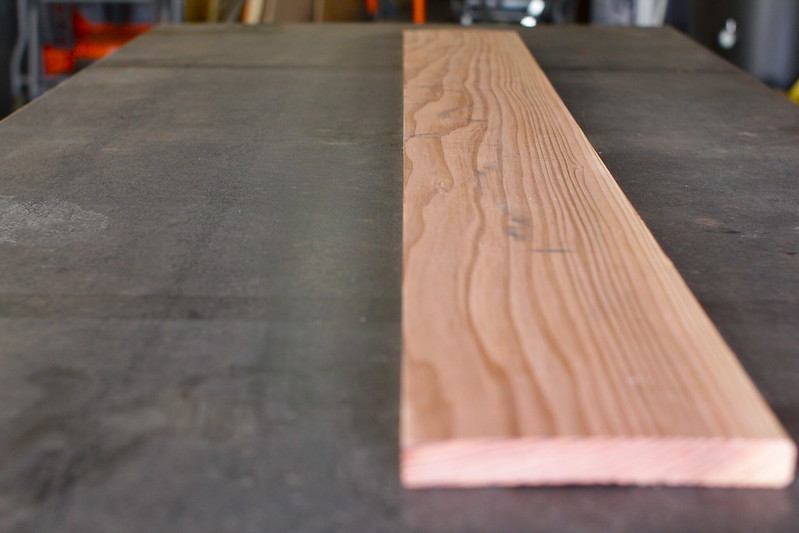
The straight edge allowed me to achieve an accurate cut on the table saw, bringing every board to the desired width:

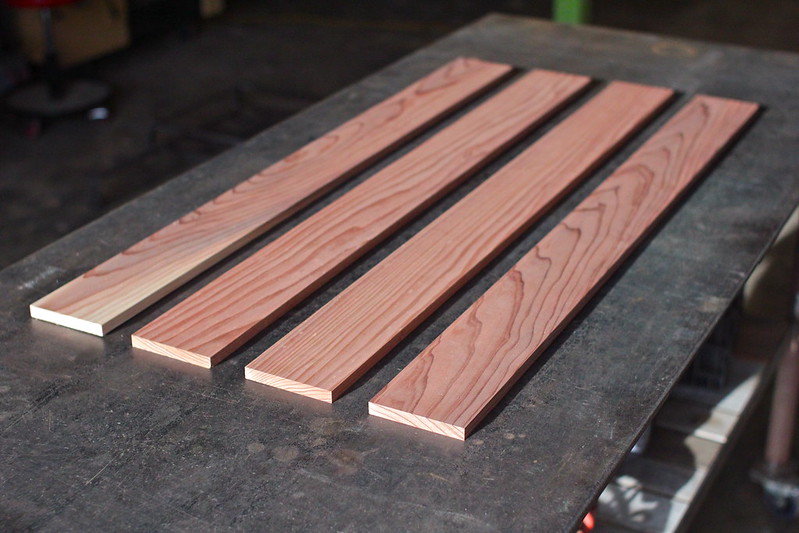
Alas, I have 4 properly sized boards:
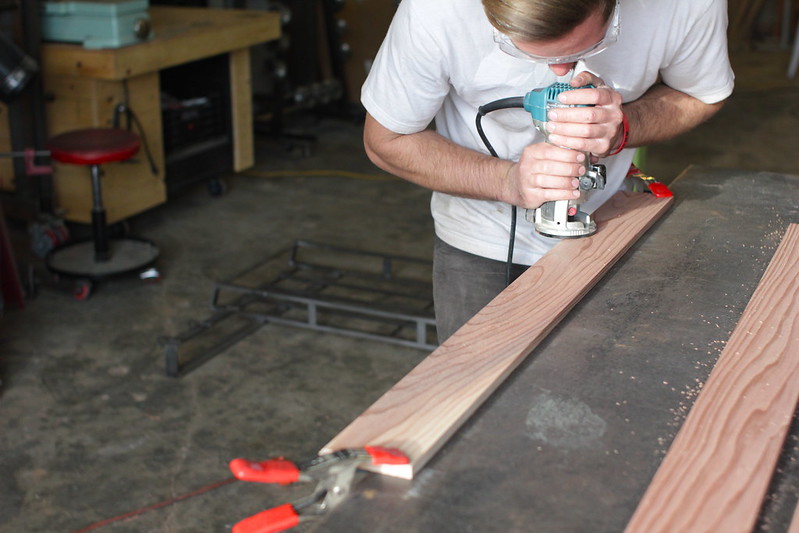
I wanted to put my new router to use, so I busted it out:
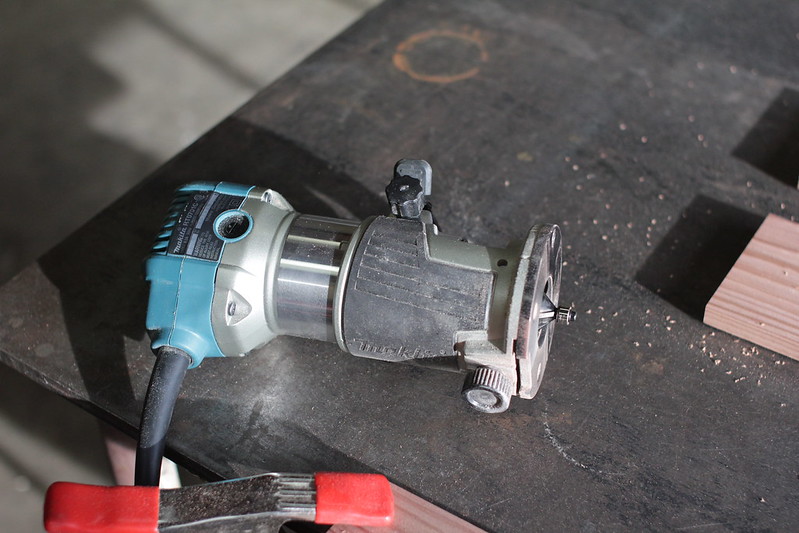
I then proceeded to give all the top edges of the wooden slats a 45 degree bevel to add some detail:
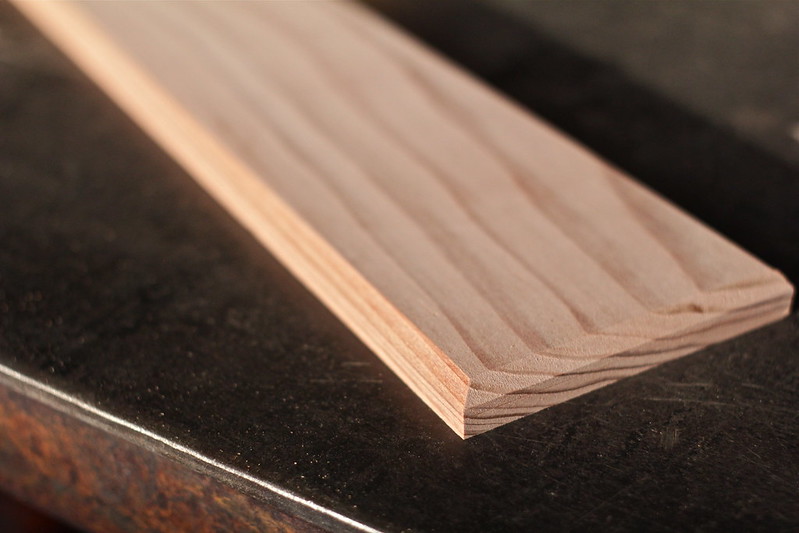
Carefully measured, drilled and countersunk the holes to mount the wood slats to the roof rack:

Gave everything a final sand and applied a coat of stain to the redwood to get the color I was after:
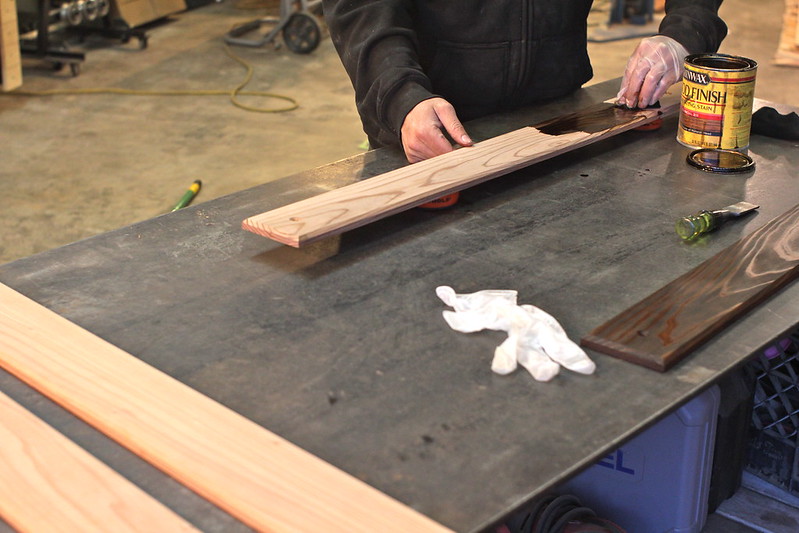
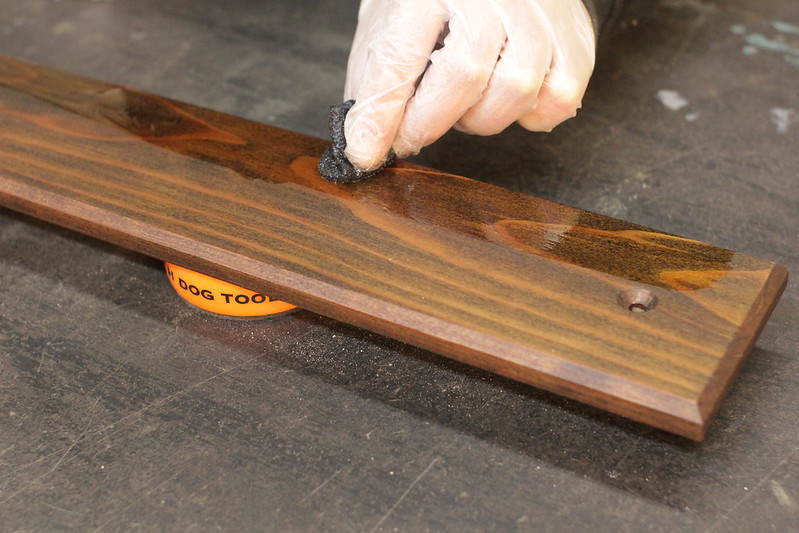
Protection. Now that I had the color I wanted, I needed to protect it while not compromising it's appearance. I purchased an oil-based exterior grade polyurethane and created a "wipe-on" application by diluting it 50/50 with mineral spirits:
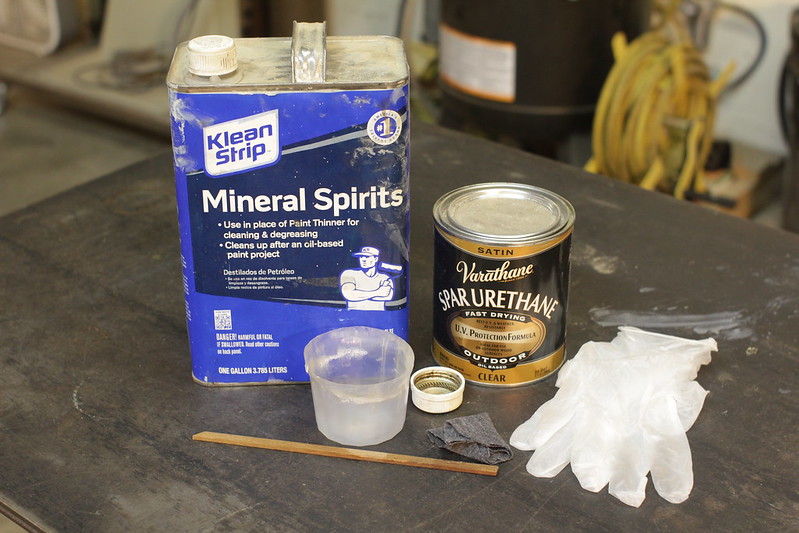

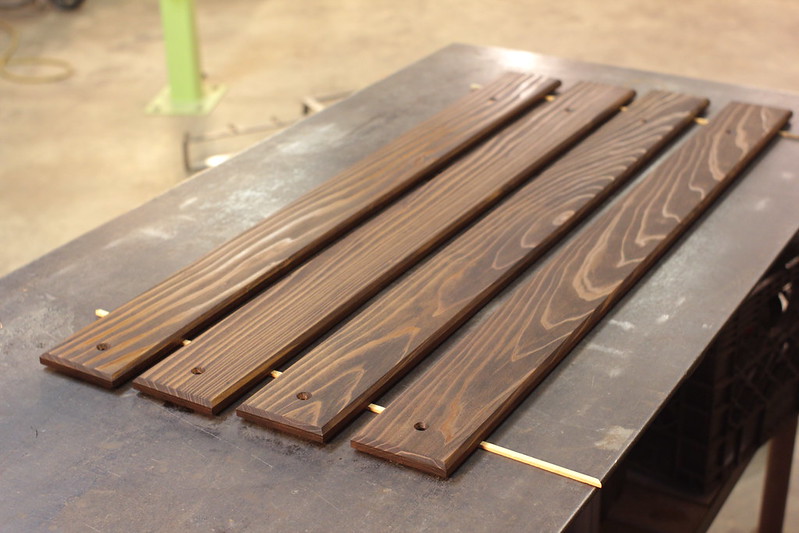
Applying this is a VERY tedious process. Since it's goes on thin, you have to put on extra coats. In total I laid on about 10 coats over the coarse of the next 2 weeks. This is definitely not the most efficient way to do this, but I wanted a hand rubbed finish. If I were to produce these on a more consistent basis I would figure out a better solution to this step:
This concludes the wood working portion of this build!
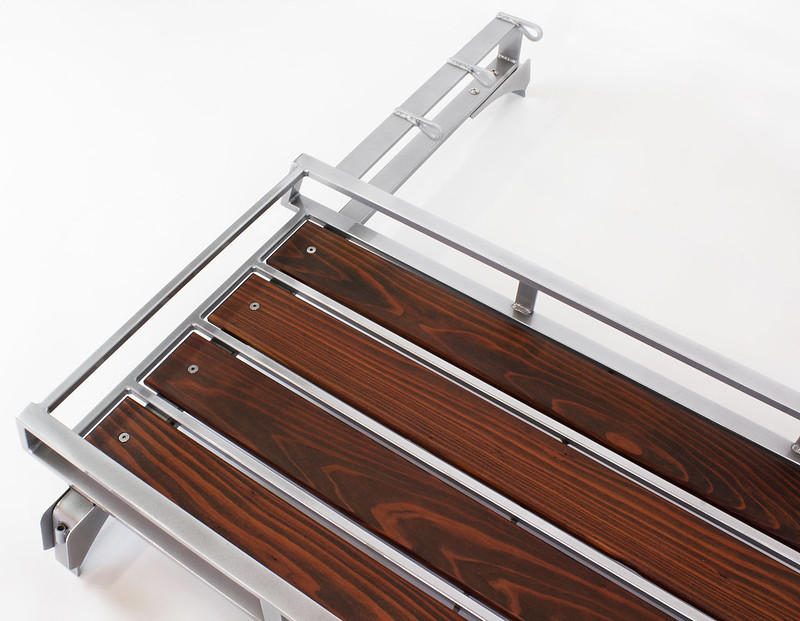
The rack came back from powder coat and looked great, I personally love this metallic silver finish.
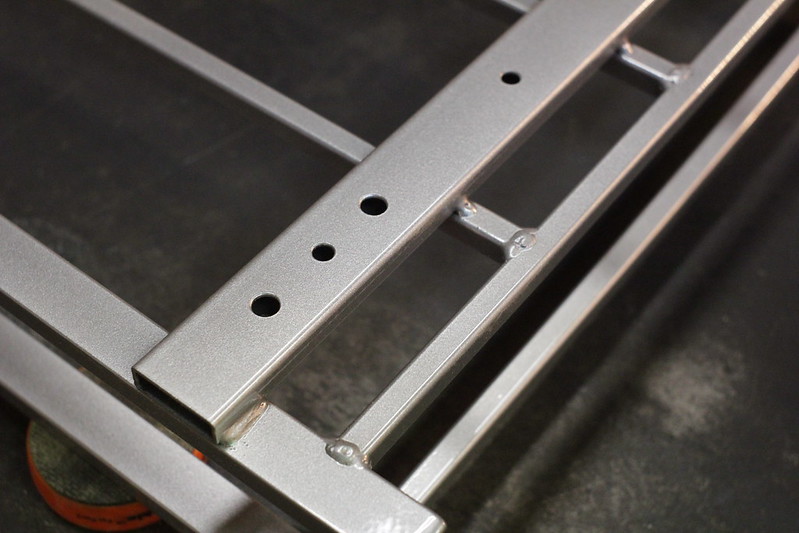
Since a wood slat sits over the driver's side mounting feet, I have to mount them from the underside of the rack so that all of the wood looks cohesive on top. This is why I have these two larger holes drilled in the cross bars pictured below:
These are rivet nuts, and they are the solution to my problem:
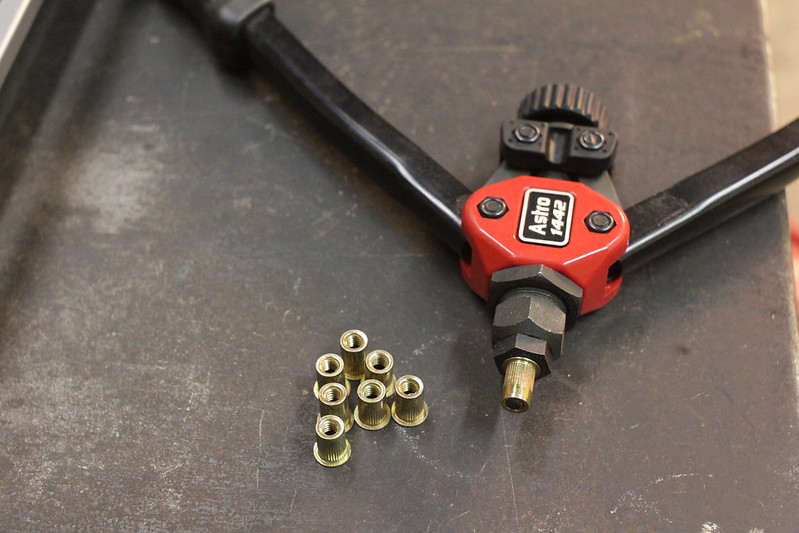
To install a rivet nut, I thread it onto the tool and place it into the hole as shown:
I then pull the handles together, which crushes the rivet and forces it to clamp itself to the wall of the steel tubing very tightly, leaving a threaded insert:
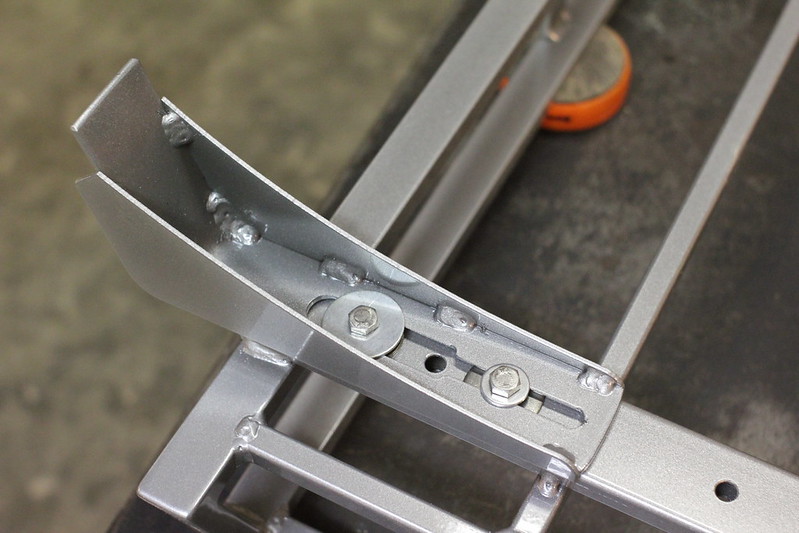
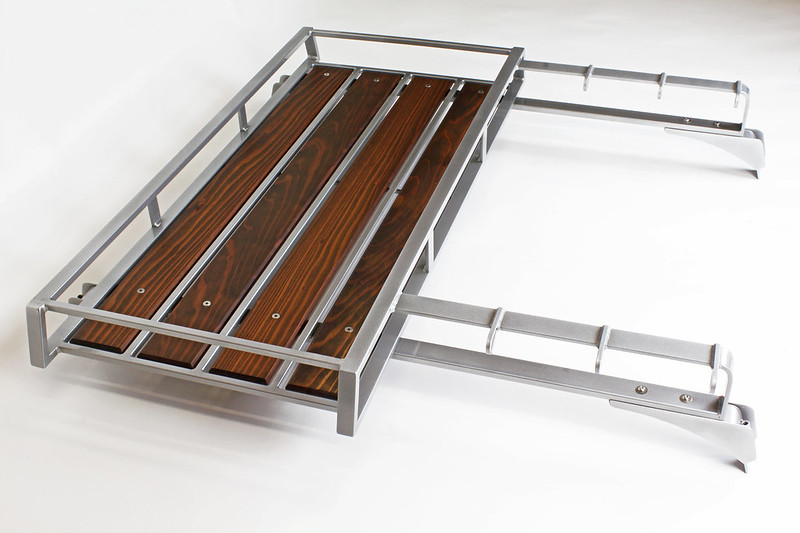
This allows me to bolt the mount in from the underside only, so there are no signs of a bolt on top. You can also see here how the mount is designed with a slot to adjust the width of the rack for different sized roofs:
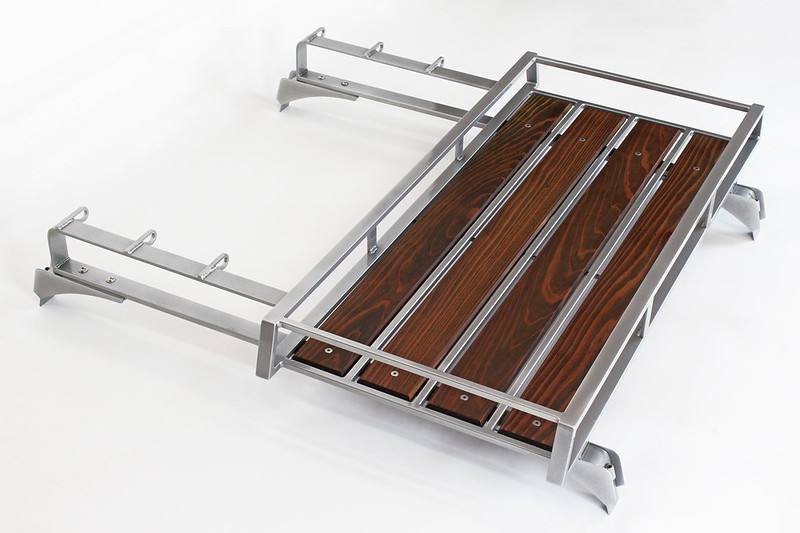
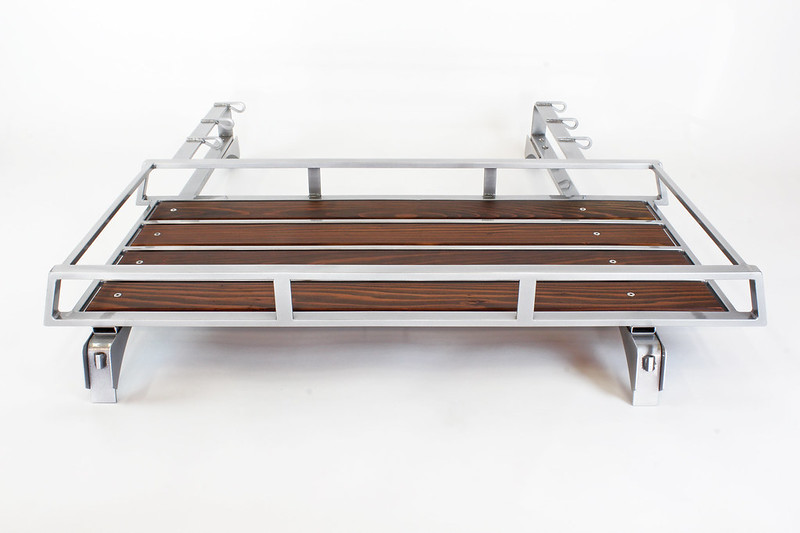
At last, the time has come to install everything and see it all together for the first time! Very happy with how it turned out and I cannot wait to see it on Andrew's awesome 2002!

Thanks for looking and please let me know what you think!
Last year I designed and built a few custom metal/wood roof racks that were compatible on the BMW E10 (1600/2002) and E30 chassis. In total I built three rack systems but eventually decided to pursue other ventures.
I was recently approached by Andrew Adams at Ireland Engineering who was interested in having a custom rack built for his 2002 project (which is an awesome build by the way, check it out here: http://www.r3vlimited.com/board/showthread.php?t=211891). After a few messages back and forth I was happy to take the project on and decided it would be a good opportunity to thoroughly document every step of the way to shed some light on how I build things the way I do.
Andrew was very lenient and gave me full creative freedom on the design with one request being that it could mount three sets of snow ski's in some way. With this in mind I went to the drawing board, came up with a few renderings and got to work. I used the same mounting solution that I designed last year for this build, but everything else is custom and one of a kind. This project was a lot of fun and VERY time consuming. I'm really looking forward to seeing this rack on the completed 2002 project in person in August! A big Thank You to Andrew for being so easy going and open to my ideas.
A quick note I'd like to add: while I was happy to take this project on, I am currently not taking on any other custom roof rack projects at this time.
To show where this build is headed, here are a few renderings I came up with which gave me the general design that I wanted (feel free to make fun of my ski's I drew haha):
So now, let's get started!
The very first step is to bend these tabs into the shape pictured below. They start off as flat CNC plasma cut pieces that get bent in my press brake, I carefully measure them out so they are all the same:
This random little tool I made serves two purposes and it helps me make sure every mount and bracket are exactly the same:
For one, it helps me set the "sleeve" coupler on the main mount. I line the bottoms up, clamp it onto the mount body and then set a 5/16 coupling nut in the right place:
From there I clamp the 5/16 coupling nut to the mount body, it is now ready to weld into place:
Welded up on all four mount bodies:
Then come the CNC plasma cut pieces that make up the sides of the mounts:
I create a very simple jig that helps me set them in the correct spot for welding:
Once both sides are welded on, the mounts look like this:
Now that the mounting feet are done, it's time to move onto the mounting tabs. They actually secure the mount to the roof of the BMW by clamping around the rain gutter. They start off as flat CNC plasma cut pieces:
I custom built a simple brake out of some scrap 3" angle iron to create the profile of these mounting tabs. Here's how it sits before and after the bend:
4 mounting tabs bent up:
Here's where that random little tool from earlier comes back into play, it helps me set the mounting tab coupling nut. I clamp it in a specific spot so it acts as a guide for the coupling nut to sit perfectly centered on the tab, which then gets welded up:
After some clean up the mounts and tabs are complete and ready for powder coat. I'll show how they actually work at a later time when they are mounted on a car:
Now that the mounts are finished up it's time to actually build the rack itself, so I started off by cutting up these pieces. This is 1"x0.5" rectangle tubing and these will act as the main basket "runner bars".
I then welded everything up and ground all the welds smooth to achieve a seamless look:
Cut a few pieces of 1"x0.25" flat strap:
These will act as supports for the runner bars. Welded them in and ground everything smooth:
Next up, I built this frame out of 0.5" square tubing:
This connects the runner bars and creates a basket:
Added top bars and ground all the welds smooth. The basket is now complete:
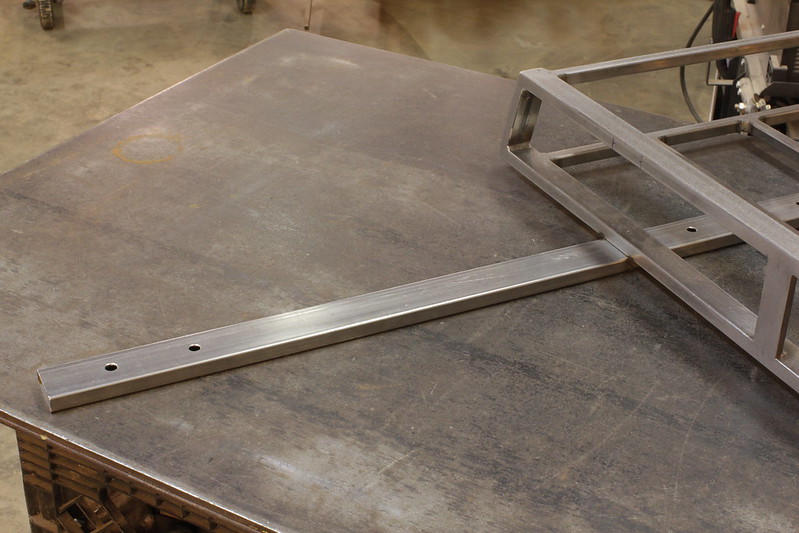
Now it's time to create the cross bars which consist of two pieces of 1"x1.5" rectangle tubing, each having 8 precisely measured and drilled holes in them:
I welded these bars to the bottom of the basket:
Flipped right side up. Here you can start to see why the holes are drilled the way they are:
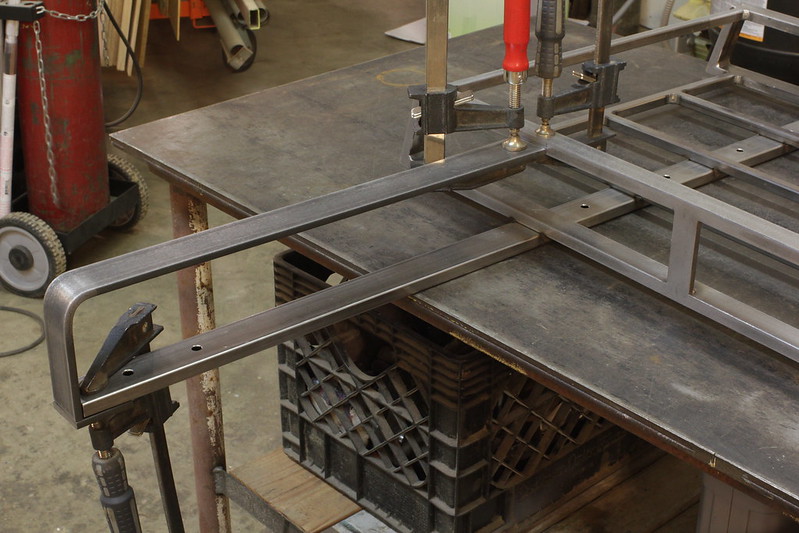
It's time to build the ski mounts. I cut up two pieces of 1.5"x.025" flat strap:
I put a rounded 90 degree bend in them with my compact bender:
The ski mounts will be integrated into this part of the roof rack:
Clamped them into place, ready to weld:
Welded up:
I needed to figure out a way to strap the ski's down to the bars, so I tossed some ideas around and eventually came up with these little hoops that I bent on the compact bender:
Which eventually led to this:
At this point, the roof rack is finally complete and ready for powder coat!
With the metal working portion of this build done, it was time to send everything off to the powder coater for a shiny metallic silver finish and set my focus on the wood working segment, which requires a whole different set of tools and consumables. I chose redwood because it is lightweight and handles the elements pretty well. After figuring out what I needed, I went out and bought two long boards of it:
I needed 4 wooden slats at a specific length, width and thickness, so I started to mill them down. The first step was to cut each board in half so I had 4 separate pieces, and then I ran them through the planer so that everything would be 0.5" thick:
Once the thickness was spot on, I ran each board through the jointer to create a perfectly straight edge:
The straight edge allowed me to achieve an accurate cut on the table saw, bringing every board to the desired width:
Alas, I have 4 properly sized boards:
I wanted to put my new router to use, so I busted it out:
I then proceeded to give all the top edges of the wooden slats a 45 degree bevel to add some detail:
Carefully measured, drilled and countersunk the holes to mount the wood slats to the roof rack:
Gave everything a final sand and applied a coat of stain to the redwood to get the color I was after:
Protection. Now that I had the color I wanted, I needed to protect it while not compromising it's appearance. I purchased an oil-based exterior grade polyurethane and created a "wipe-on" application by diluting it 50/50 with mineral spirits:
Applying this is a VERY tedious process. Since it's goes on thin, you have to put on extra coats. In total I laid on about 10 coats over the coarse of the next 2 weeks. This is definitely not the most efficient way to do this, but I wanted a hand rubbed finish. If I were to produce these on a more consistent basis I would figure out a better solution to this step:
This concludes the wood working portion of this build!
The rack came back from powder coat and looked great, I personally love this metallic silver finish.
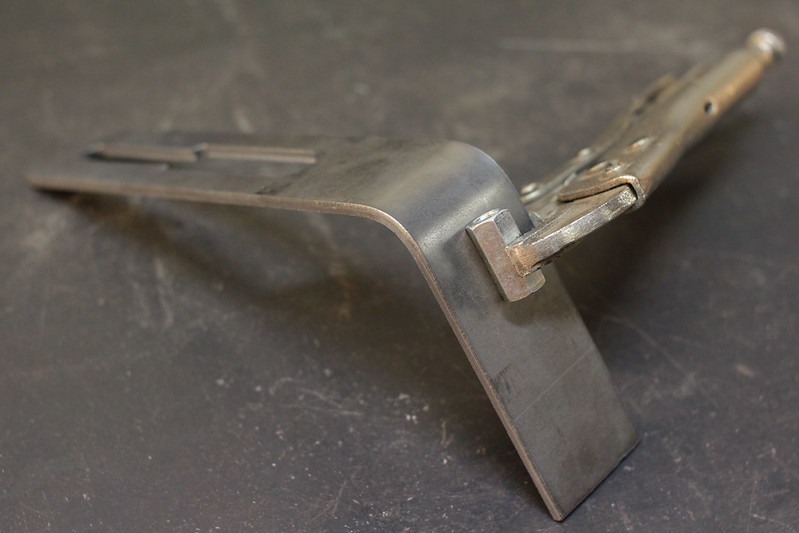
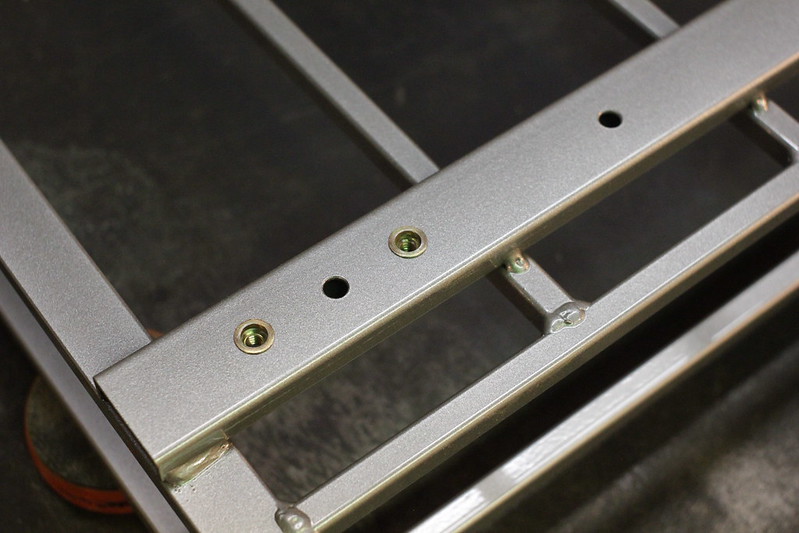
Since a wood slat sits over the driver's side mounting feet, I have to mount them from the underside of the rack so that all of the wood looks cohesive on top. This is why I have these two larger holes drilled in the cross bars pictured below:
These are rivet nuts, and they are the solution to my problem:
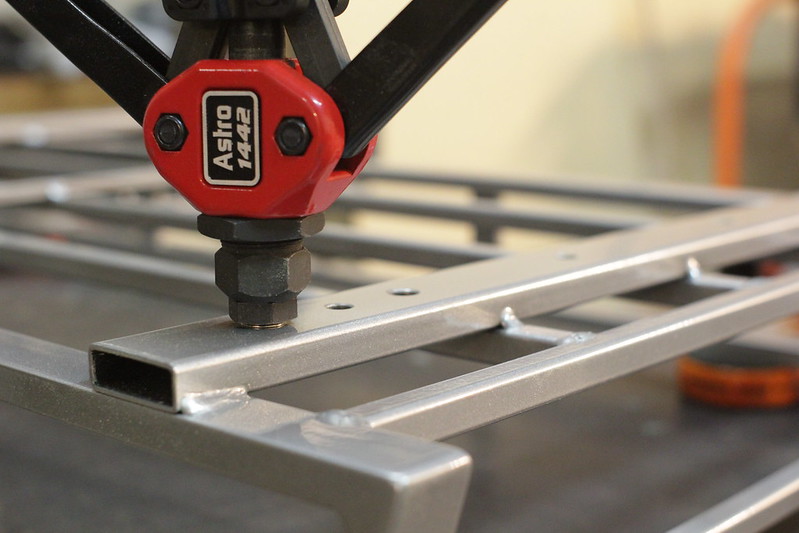
To install a rivet nut, I thread it onto the tool and place it into the hole as shown:
I then pull the handles together, which crushes the rivet and forces it to clamp itself to the wall of the steel tubing very tightly, leaving a threaded insert:
This allows me to bolt the mount in from the underside only, so there are no signs of a bolt on top. You can also see here how the mount is designed with a slot to adjust the width of the rack for different sized roofs:
At last, the time has come to install everything and see it all together for the first time! Very happy with how it turned out and I cannot wait to see it on Andrew's awesome 2002!
Thanks for looking and please let me know what you think!


 "Effy" E60 BMW 530xi 6MT [N52]

 :
:
Comment