 Tweet
Tweet
I'm just going to copy and paste some of this in here so if the first coupe of posts seem out of context then don't get all fired up, it's just a shitty old e34.
Start paste-
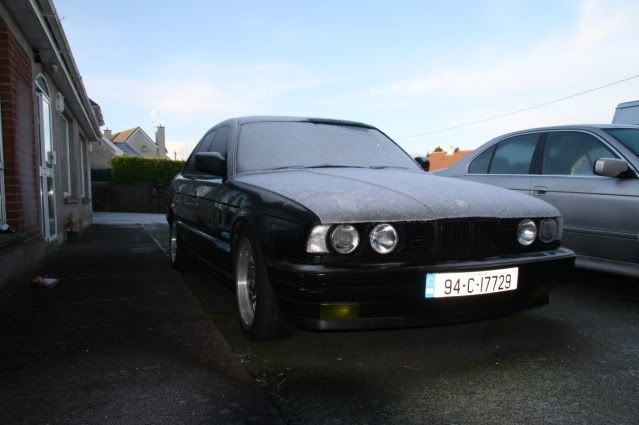
My 520i was the car I learned to drive in when I was 17, one of those cars I'll never sell.How it looked just before it was put on the boat to me nearly four years ago.


About 2 years the headgasket went in it so it was off the road for the while, then it went fine for another few months and started overheating again last summer. All it was good for at that stage was making tea, I was sick of driving a kettle so I said fuck it I'll park it for a while because I wanted to go back to college and turboing it or putting a bigger engine in it wasn't going to happen at the time.
Fast forward to last friday evening, one of the lads in college told me he is breaking an e39 523i auto but his mam wanted it gone from the house. Of course I hadn't a notion of starting at the car till next christmas bcause I just wouldn't have time or money. I went for a look at the car anyway it had been crashed from the front and an engine mount had snapped dropping the sump down onto the rack. Nice crack in the sump there was too. We agree'd a price and I trailered it away that evening not good for the oul studying at all.
Saturday I lifted the engine with the hoist and put a load of chemical metal on the sump bt hopped a load of waste oil into it and it started first pick of the key to my surprise!
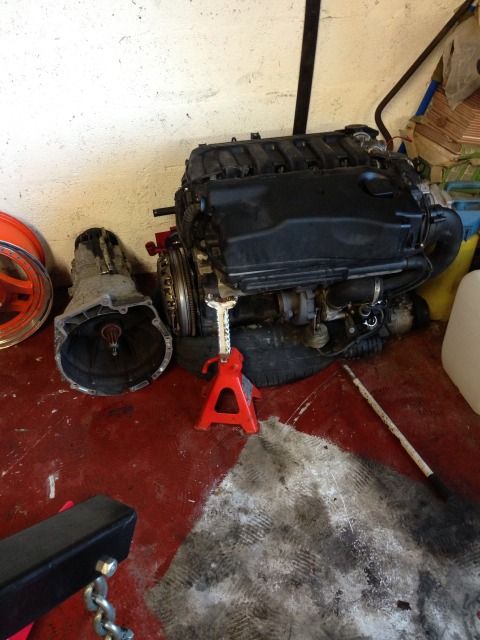
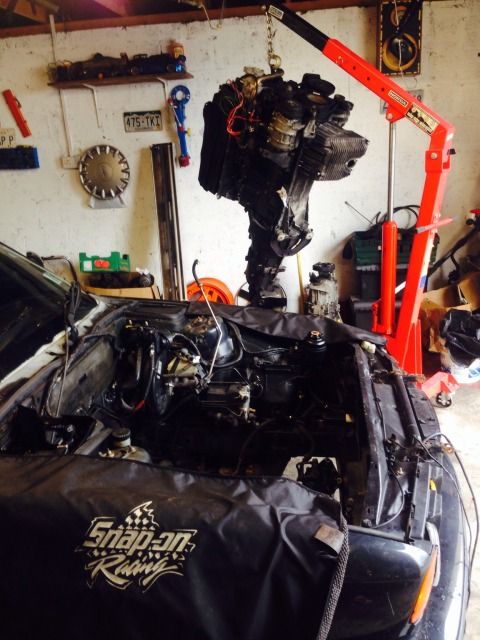
Sunday again I was out at it in the lovely weather and I got the engine and box out before I went to work. :happy)
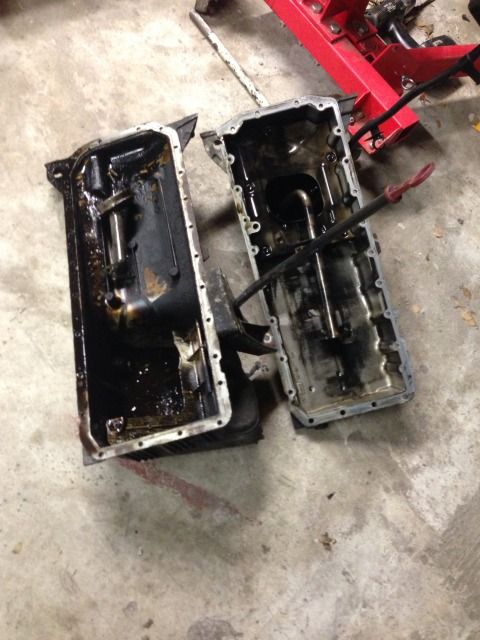
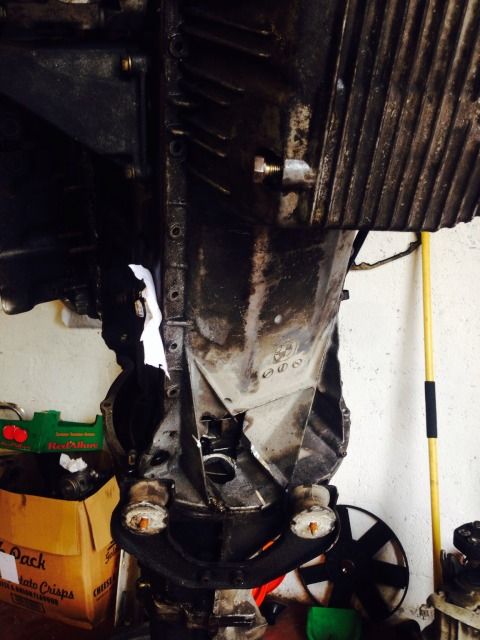
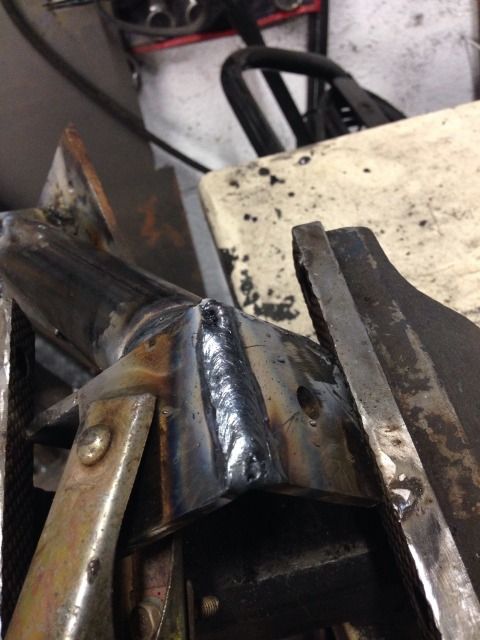
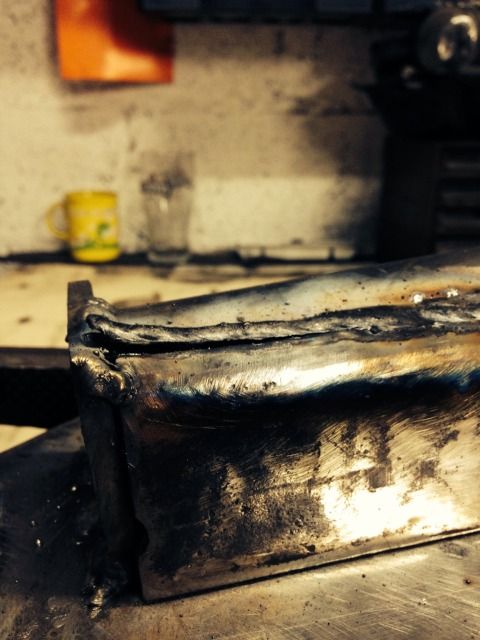
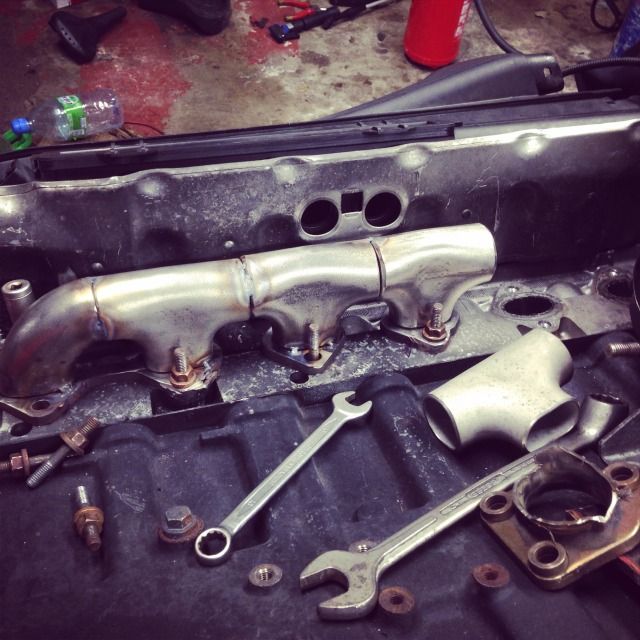
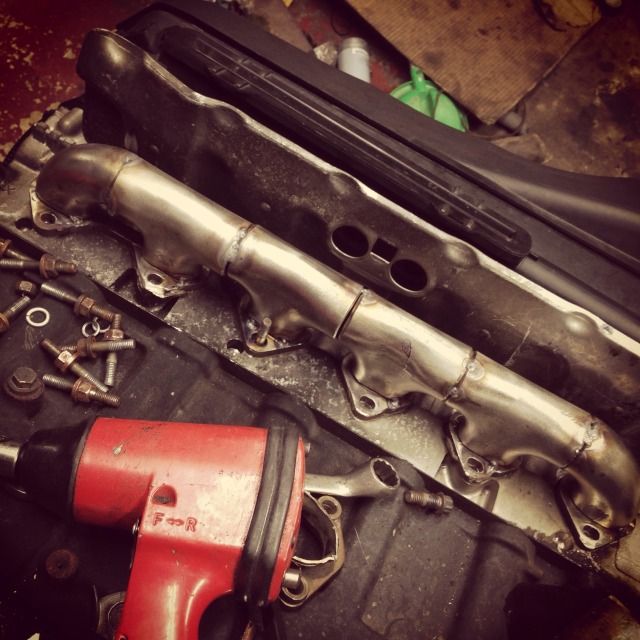
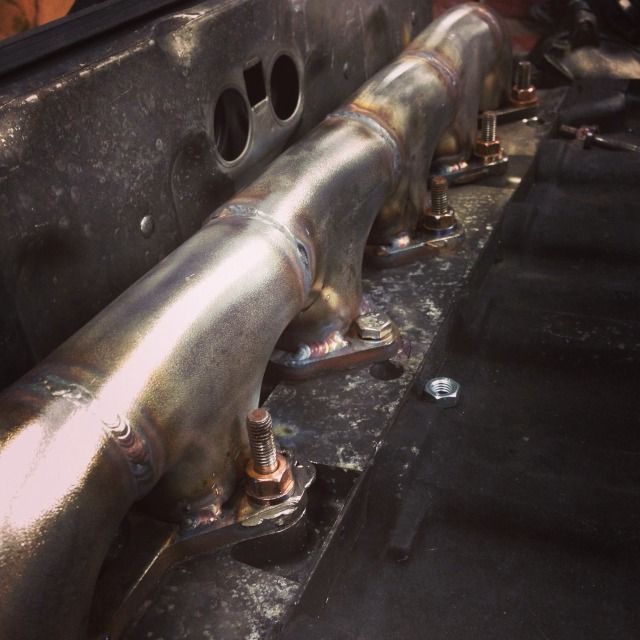
Monday (today) I had the engine up on the engine stand after taking off the box off it. Took one of the manifolds off it and I'll bring that into college in the morning to have a crack welded in it. I also took the sump off the ending only to discover its got the deep end on the worng way so it will catch the subframe in my e34. I took a trip up into the rafters in the garage and came up trumps with an e34 sump and oil pickup off a car I scrapped last year. One of the lads was kind enough to take them off into work with him to the parts washer so I should have those back by the end of the week.
Unfortunatley I dont have any pictures of the work yet but I should have some during the week.
To do to the engine before fitting:
New gasket for oil pickup
new sump gasket
bit of a clean maybe bt
Heres the few bits that are done to the car as it stands as well:
Koni yellow shocks with lowering springs
BBS RC090 (style 5's)
Tinted windows
4300k HID's
yellow fogs
shadowline trim
satin black kidney grilles
prefacelift mirrors (e30 style)
smoked rear indicators
clear side and front indicators
2xJL audio w3's firing through the armrest
JL audio e1400d monoblock amp
JL audio 300/2
Focal polyglass front components
0 guage wiring kit
Also have a number plate surround to go on at the back and an autodim rearview mirror.
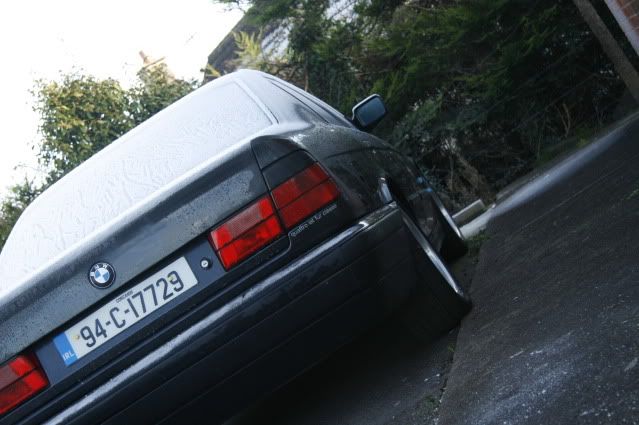
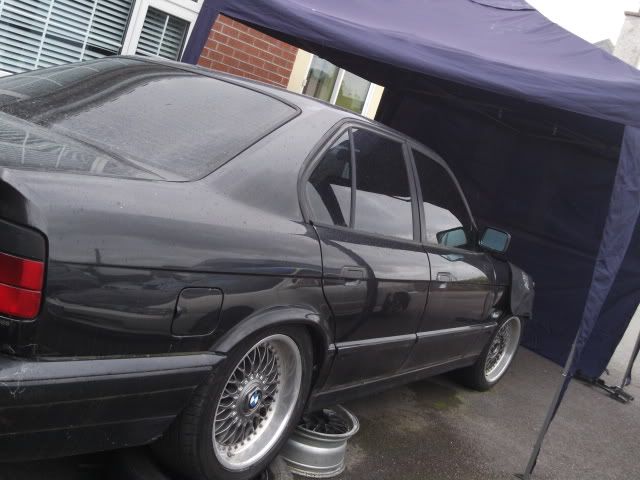
How it sat before I put it up in the air.
Just have the engine out here
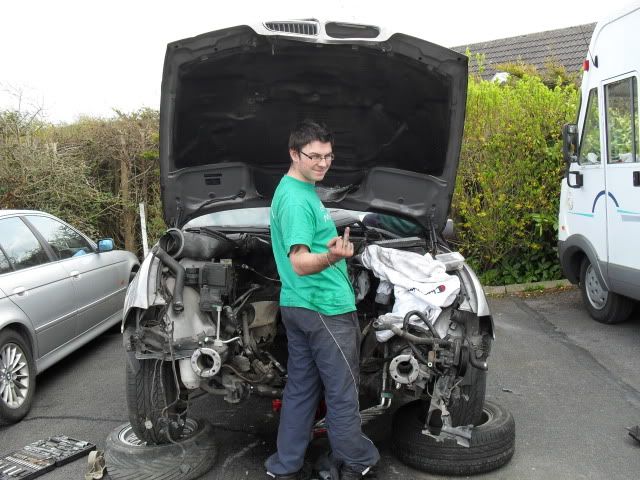
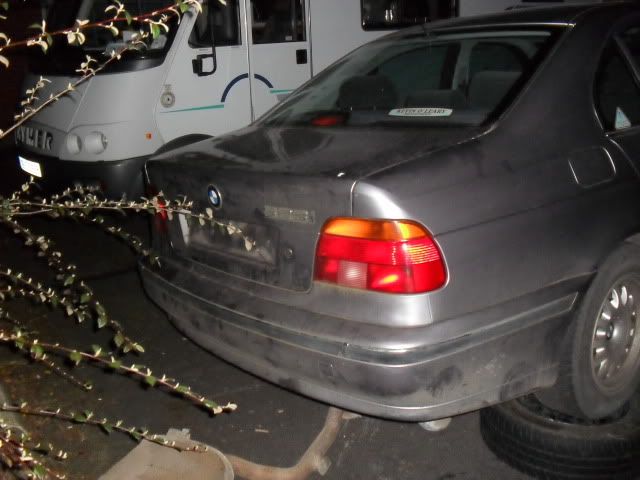
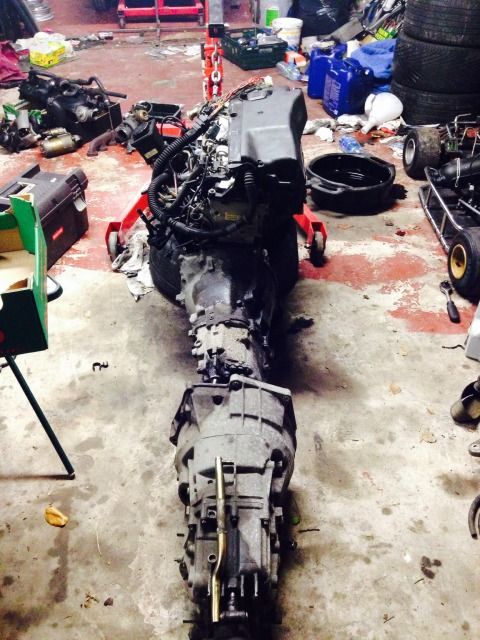
Couple of the doner car which I'm breaking for parts (shameless plug!)
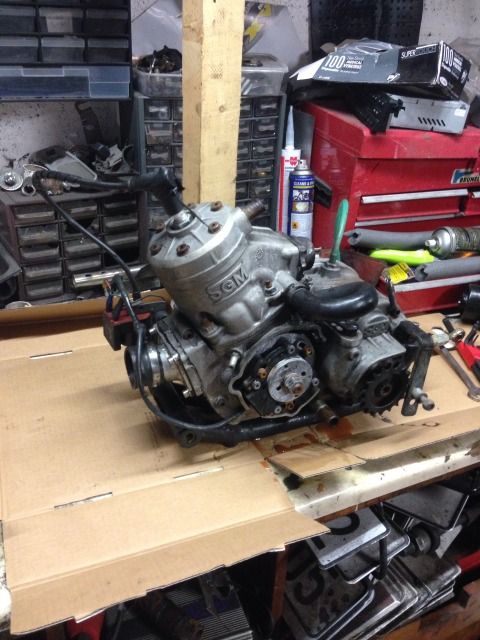
Heres the engine, none of the different oil pick as the photographer left early :ban:
Had to empty out the dirty oul torque converter :nuts)
This flywheels got to go aswell, I'll be putting on the one form my current engine then hoping my gearbox fits
Now down to buisness
Its on r888's for the swap (rrfl:
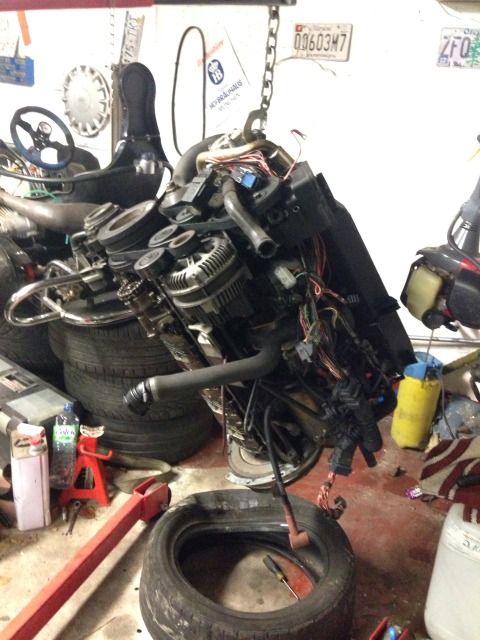
Heres the loom that I had to take out of the doner car, I was surprised how easy it came out to be honest, I hope it goes back in in the same 20 minutes it took to get out.
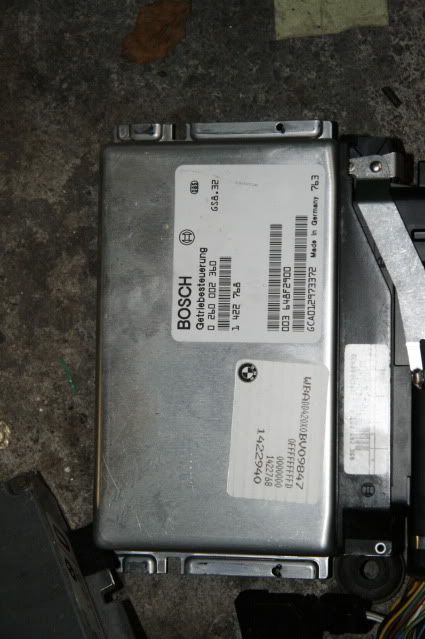
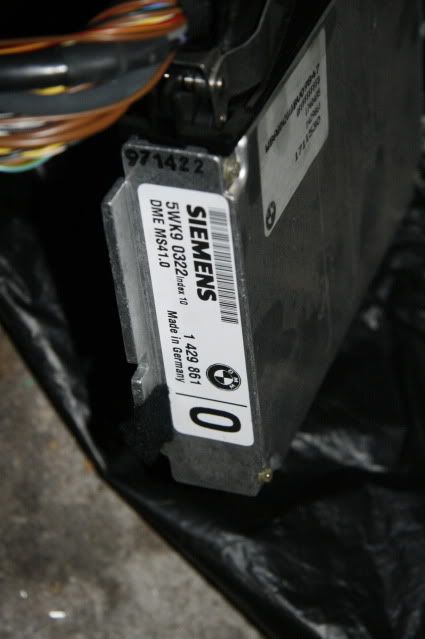
Anyone know why theres 2 control units one is for the engine definatley, not too sure are they both though?
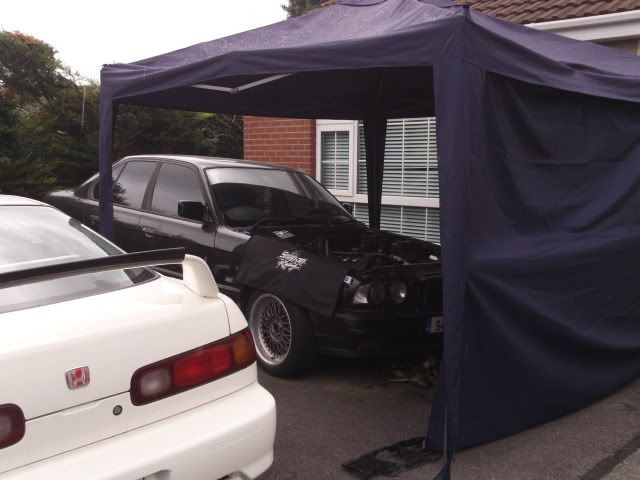
It was lashing rain yesterday so I decided to throw up the service tent and get a few bits done to the car.
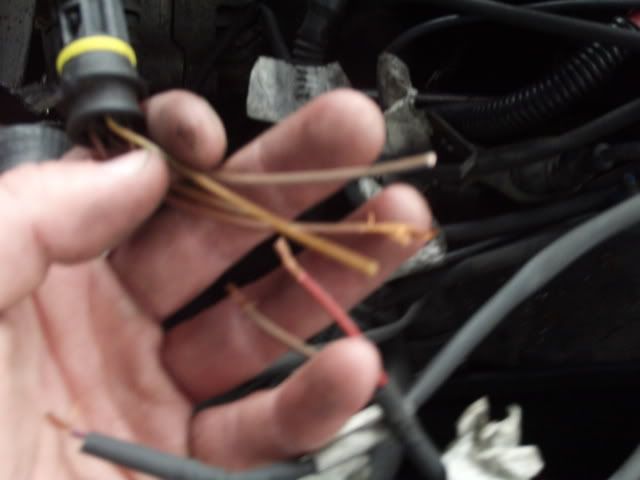
The coolant temperature sensor on the e39 was a single sensor and there was two in the e34 so I had to join the wires from the e34 OBD1 loom to the wires on the back of the sensor from the e39's OBD2 loom. Im not sure will it actually work yet as there are only three wires on the e34 loom and four on the e39. I did come across the link in my previous post though and connected the wires up according to that and jeft the last wire unconnected on the e39 plug.
Block connectors cut off e34 loom
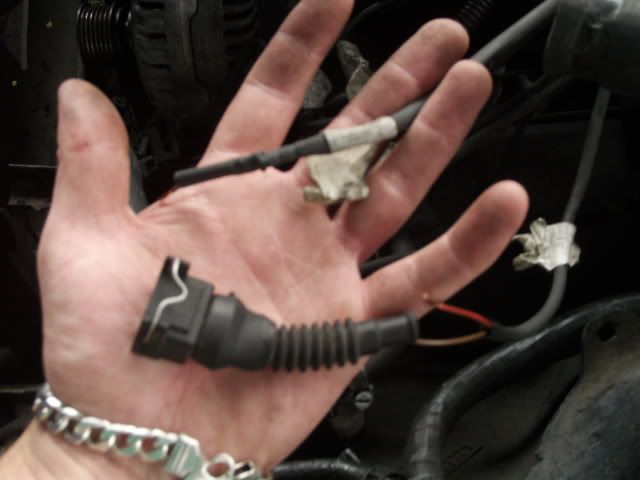
e39 coolant temp sensor
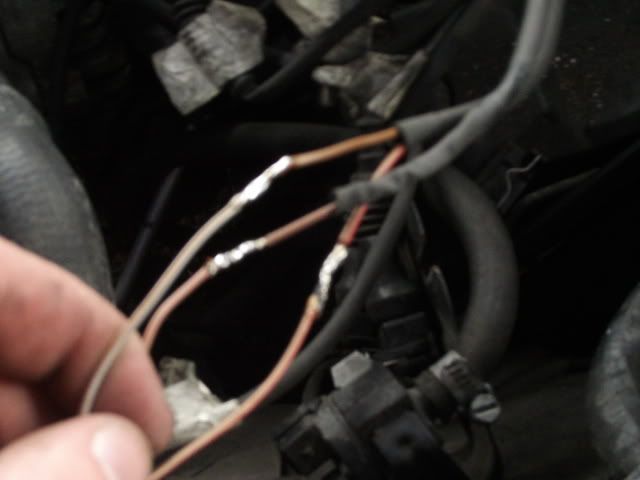
wires connected and soldered
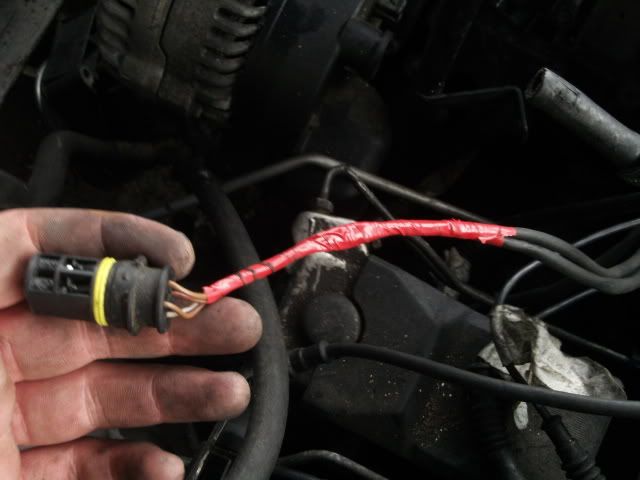
Im not so sure will it worked so here is the finished connector just wrapped in tape, if it works I can go back and use heat shrink later, the fact I've used red tape will annoy me so I'll have to get it done :lol:
I thought I was on the pigs back at this stage with a clear run of just connecting shit up and putting back on the inlet manifold unfortunatley ran into problems again at the alternator which I hadn't read about anywhere. At the back of the OBD1 alternator is just + and - red and black wires onto terminals, when I was about to connect the OBD1 wiring to the OBD2 alternator I found that there was just one terminal on the back of the alternator and a space for a block connector.
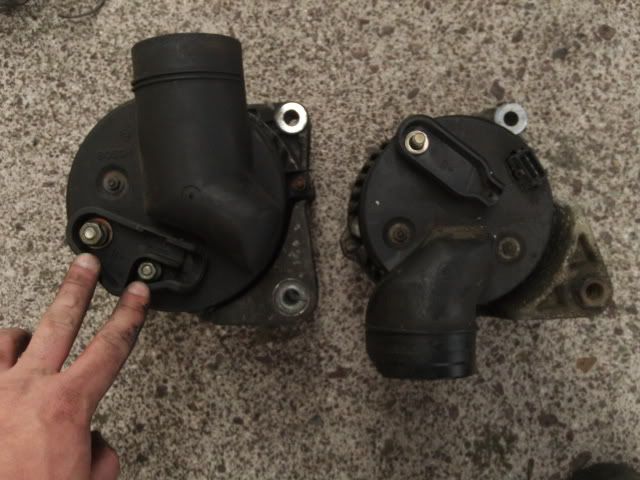
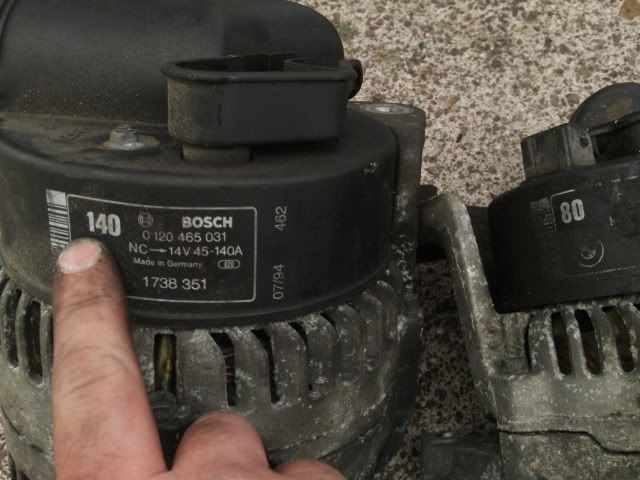
I also noticed that my e34 alternator was a 140amp and the e39 was a much smaller 80amp so I was glad at this stage because I have two amplifiers in the car which cause the lights to dim at high volumes.
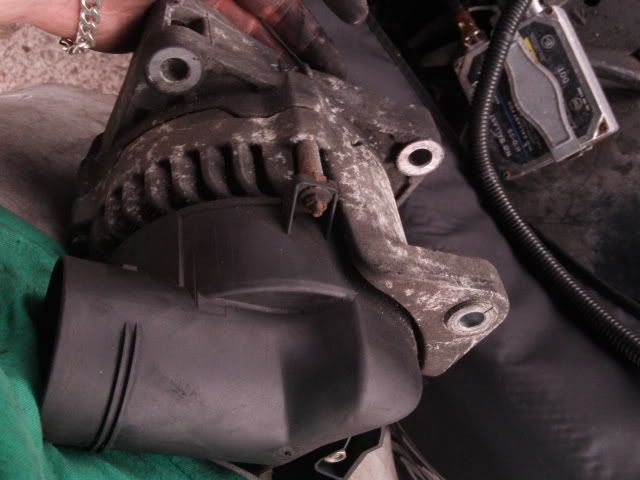
Upon trying to install the e34 alternator to the m52 engine I discovered that it wouldn't fit but I noticed that there was an insert pressed into one of the holes so I decied I'd try press it back in my bench vice which worked perfectly and its now mounted solidly on the engine
You can see the insert in this picture
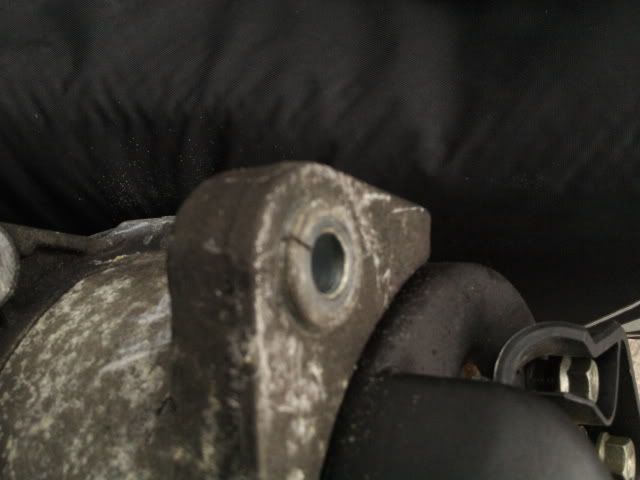
And the section that at first didnt seem to be wide enough by a fraction.
I am also going to have to make some changes with my power steering pump and I have changed the tensioner over from my old engine also so as to keep everything the same from the m50, I will take some more pictures next time I'm working on the car and write about what I'm having to do. Might be of some help to someone in the future!
A small update, lost interest for a while, the e36 diff won't fit my casing so I have to go and find another LSD to fit now.
I got the engine running, had tried to start it and it swung over but no joy. Chhecked for fuel and spark, did some breathing by the car to make sure there wasn't a vacuum. Plugged it into diagnostics and the diagnostics wouldn't comunicate. Sat down drank some tea scratched my head then one of the lads says "Hoi is the ecu plugged in right". Checked the ecu it seemed to be in juist fine so I took it out and saw that I had put in the gearbox ecu from the doner car by mistake  . Looked for the 520i ecu, plugged it in and it fired up first go happy days!
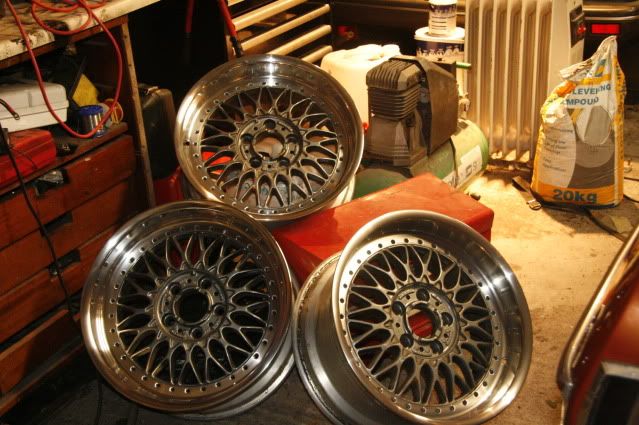
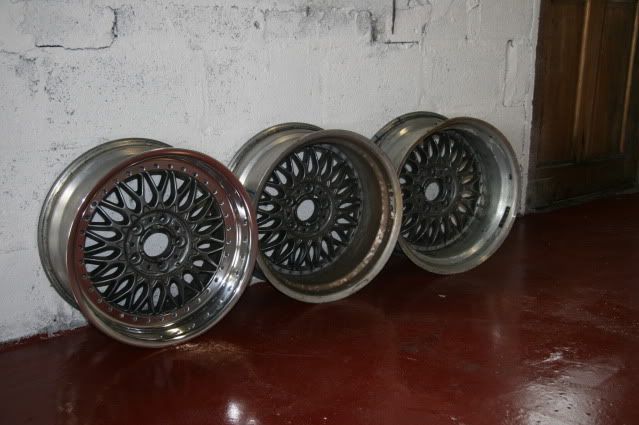
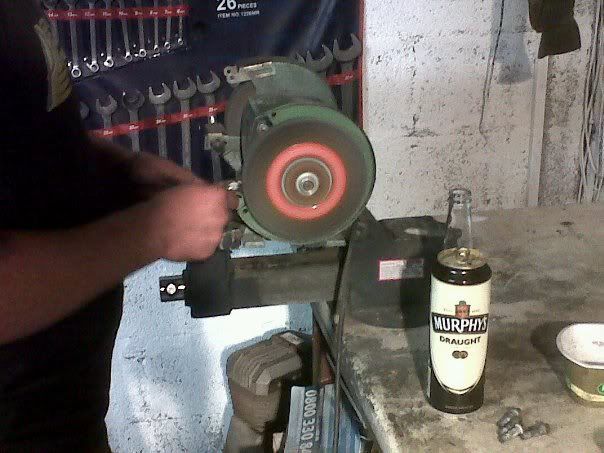
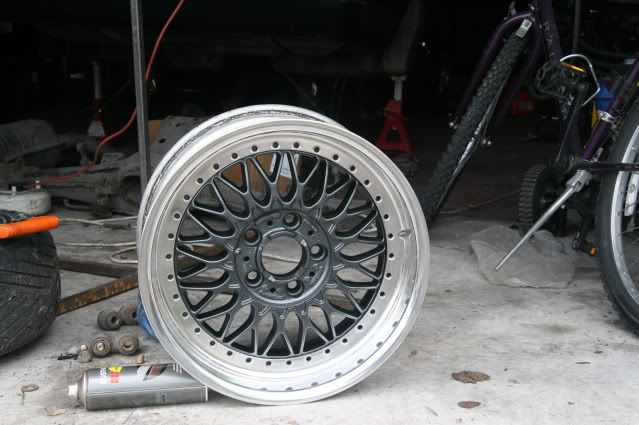
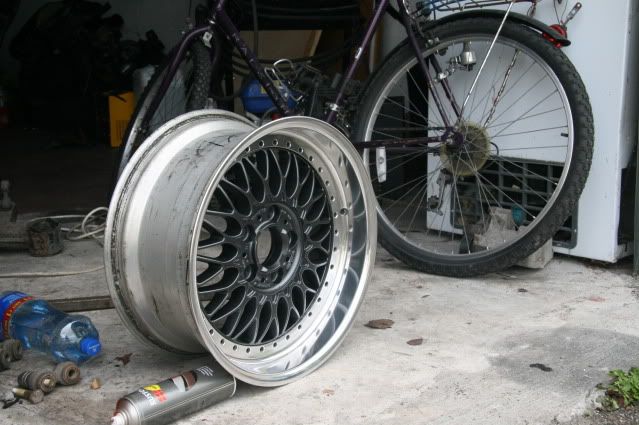
Decided yesterday that it was nice weather to be polishing wheels so I took off the style 5's and had the tyres removed. I then removed the bolts holding the face into the barrel and mounted them on an e36 I have and got to work sanding them with the car jacked up and running in gear (makes light work of sanding wheels) I started at 320 grit working up to 2000 grit with wet sand paper. I then hand polished the lips off the car. It was a much better finish than polishing them the same way as I was sanding them surprisingly enough!
Heres a pic of three of the wheels nearly finished, Im not going to repaint the centres until after the summer I think. I must repaint the bits of the bolts that protrude from the lip though they are still removed in this picture.
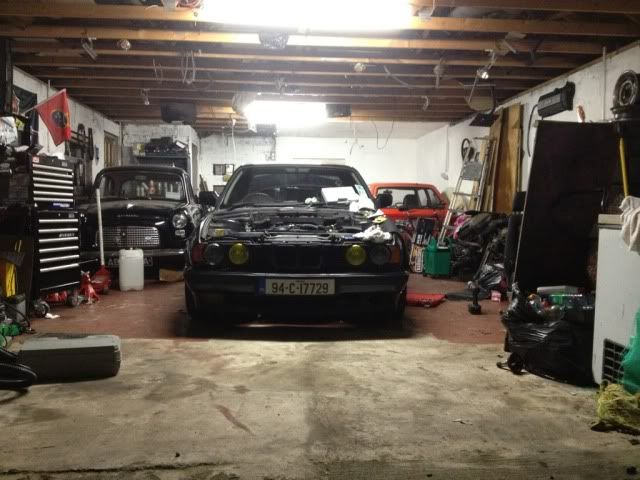
Its been a while again since I updated this, hoping to be driving it soon I tidyed my garage so now I have a place to work just have to move the car in.
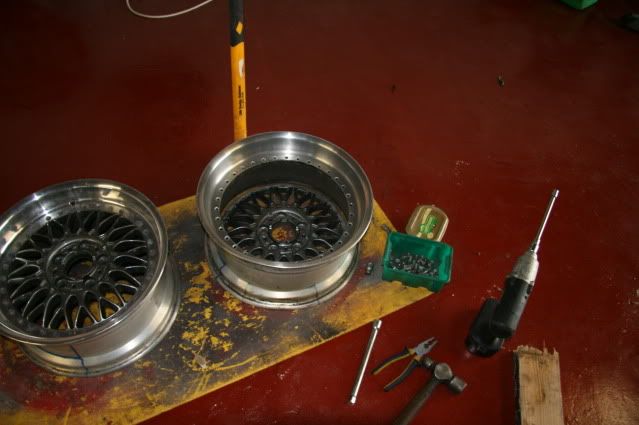
I started to refurb the style 5's properly today. The shine was good but the centres were pissing me off. Im hoping to have them blasted during the week and paint them properly over the coming weeks.
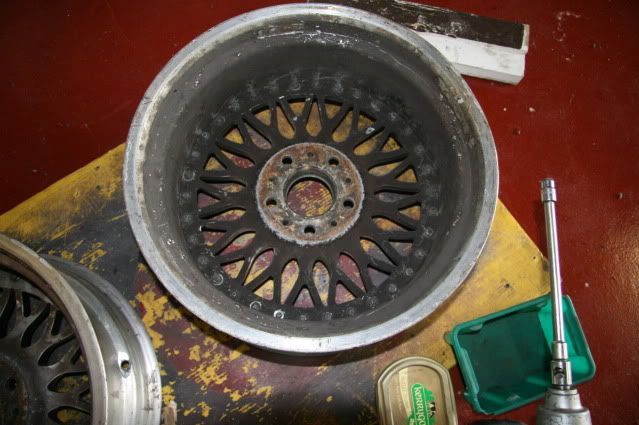
Taking the bolts out again as I had to get some buckles taken out.
Used a hammer and extension to take the splined studs out
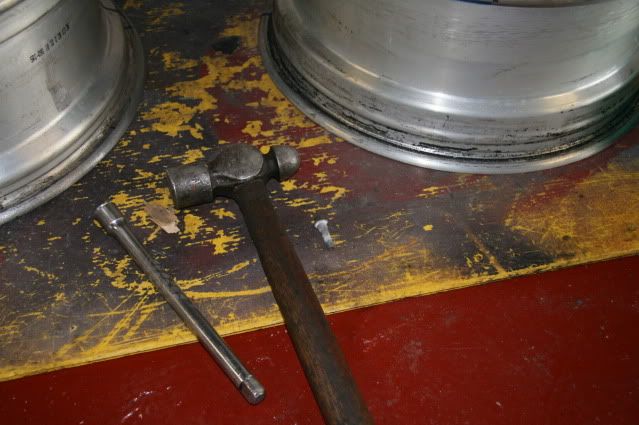
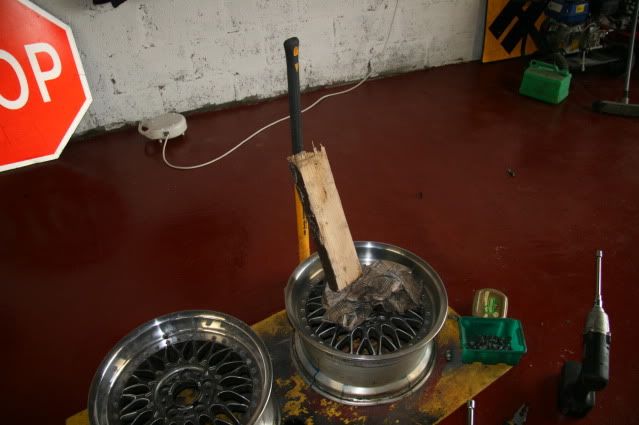
Studs out and about to use a block of wood and the sledge to tap the centres out, used a cloth to make sure I didn't mark the centres
Centre is out
Used some wheel cleaner to clean the inside of the barrels, be careful if your doing this the wheel cleaner will dull the shit out of bare metal
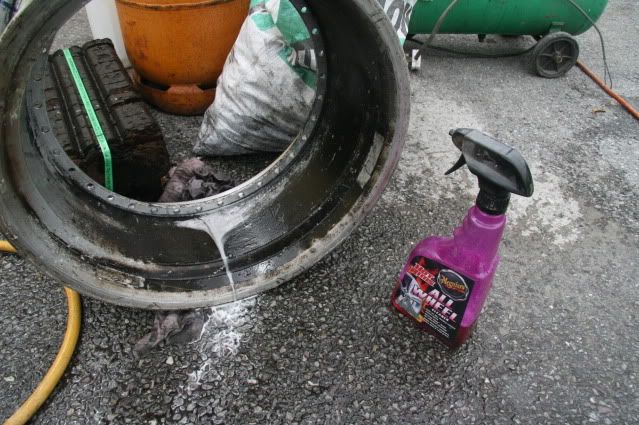
Put the centres in backwards to see what it would look like
Two more barrels to polish

Hope that was a help to anybody doing it themselves.
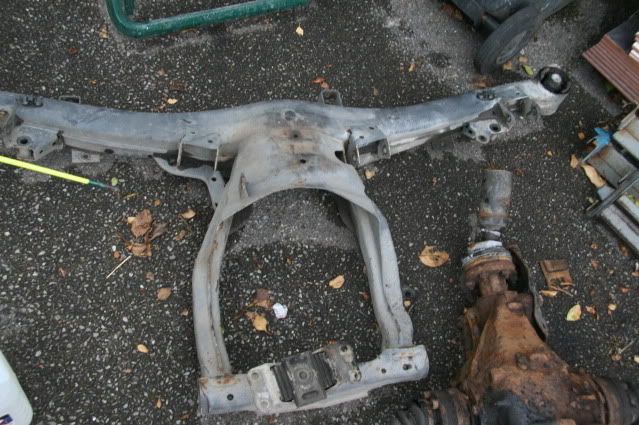
The diff I got didn't work out so Ben O Brien gave me a 525i sport LSD 3.15 ratio. The casing is different to the 520i so I got the subframe to suit from Dave-Msport. Ordered new bushes for the frame from OTTO. Hoping to give them a clean soon.
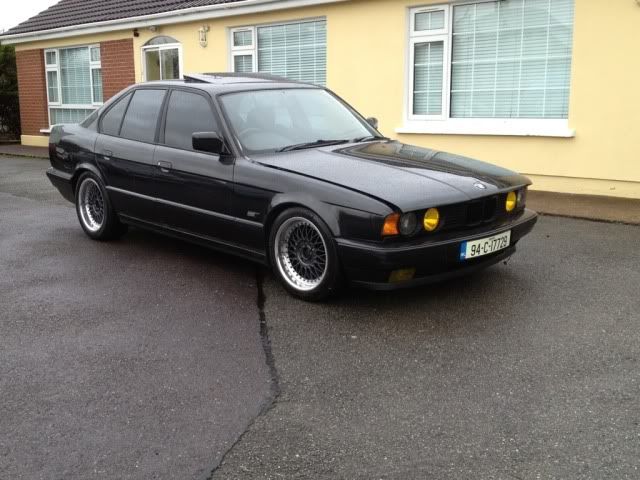
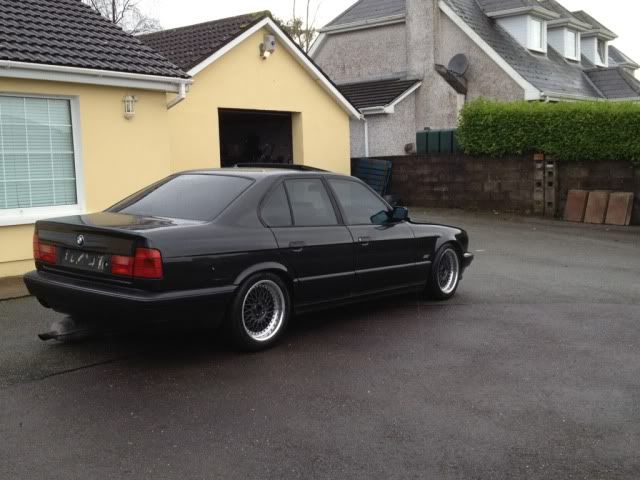
Put back in the orange indicators, has smoked dips and yellow mains. Probably not to everybodys taste but I like.

@ben thanks! Its like working in a hospital now its so clean! No but I should be able to use my own cups and they'll bolt to my shafts. Drop me a text next time your out this way.
Had some more free time over the past few days and a bit of motivation to go with it!
Spent some time cleaning up the 'bay a bit and put the engine covers back on. I used fenwicks black streak caravan cleaner to clean off the dirt and grease (stuff used to remove black streaks that occur during the winter on caravans and motorhomes) it worked really well actually couldn't believe how well it shifted all the gunk on the chassis legs and turrets. Followed that up with mer polish, I just thought I'd use it up rather than let it sit there.
Got the style 5 centres back from blasting also, got them done by sodablast.ie and I'm really happy with how they came out, clean sheet for painting now. Im undecided whether to send them to the painters or have a go at spraying them myself and if I do them myself get paint made up for the gun or made up in a can.
Picked up the new subframe bushes from OTTO yesterday and put them in today. I'm a happy man that the frame was out of the car, it was just a case of drilling the rubber centre out, cutting the metal shell with a hacksaw and then using a chisel hammer out the old shell. Pushed in the new bushes in the vice, used a bit of grease to help them along.

After a small bit of hard work it was time to open a few cans to help my patience. Spend an hour or two doing this.
Before left after right.
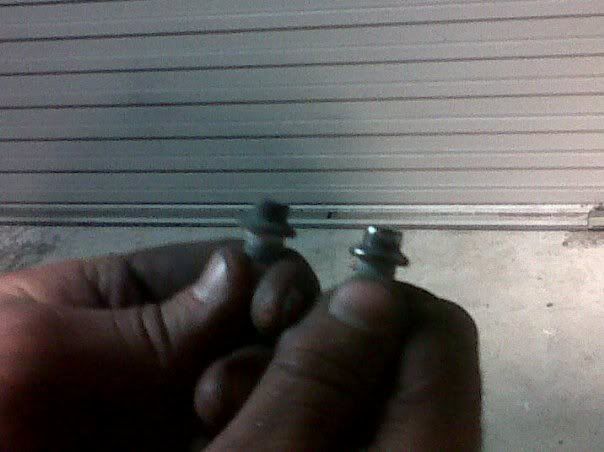
The product of my saturday night") :
:

So thats all the bolts prepped for paint. I also polished up the heat shield for the steering box when I was bored but I don't have any pictures of that, only had the buddies blackberry at my disposal and its not too fond of taking pictures in low light.
Just bought a dimmer control unit that looks like this when fitted
hopfully it works well, its got good reviews so fingers crossed.
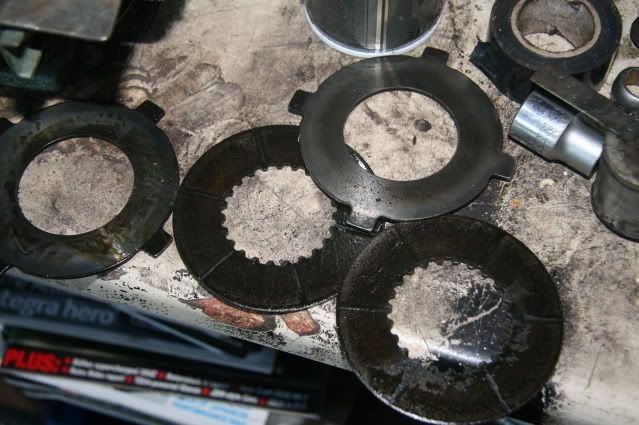
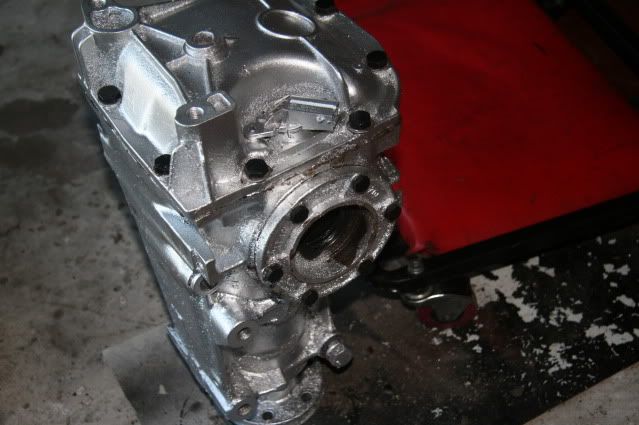
The other day I stripped down the LSD and changed the clutch plates for the new ones I got from Barrys Motorsport. The casing got a clean down and a lick of paint. I have no pictures of the strip down of the diff but I followed this link http://www.r3vlimited.com/board/showthread.php?t=92714 just in case anyone was wondering but its straight forward enough anyway once you put everything back where it came from.
The old plates...
An unpainted casing
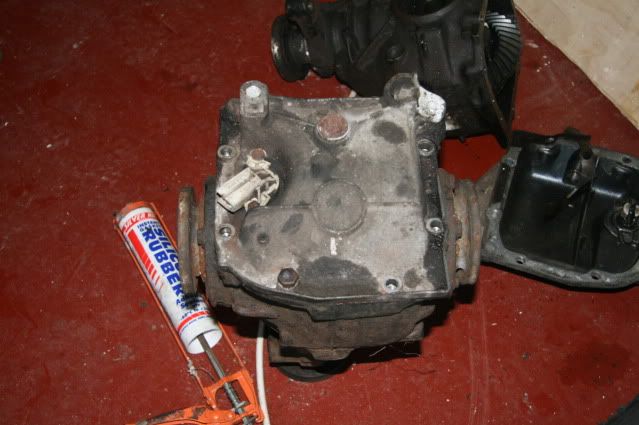
And my dodgy cowboy painted casing
When I was putting the back cover back on I put some silicone sealer in because I didn't have a new gasket.
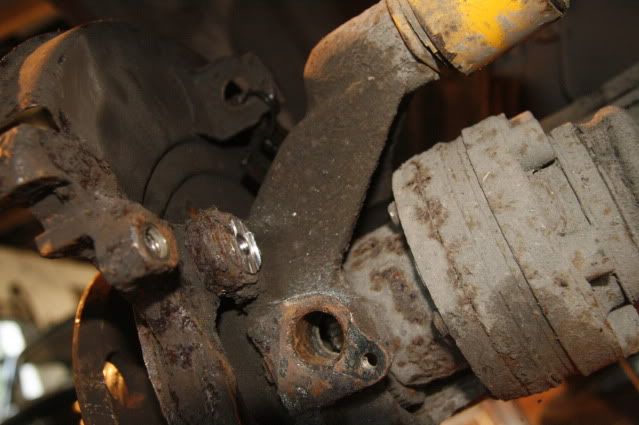
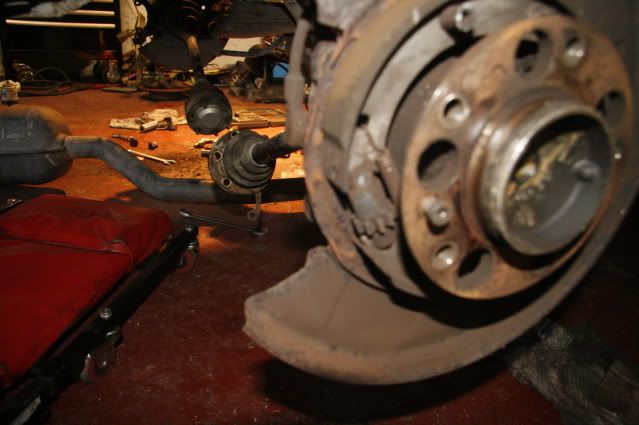
I made a proper start at removing the rear subframe too, never buying an english car again....I used the visegrips and the grinder as much as the sockets and spanners:
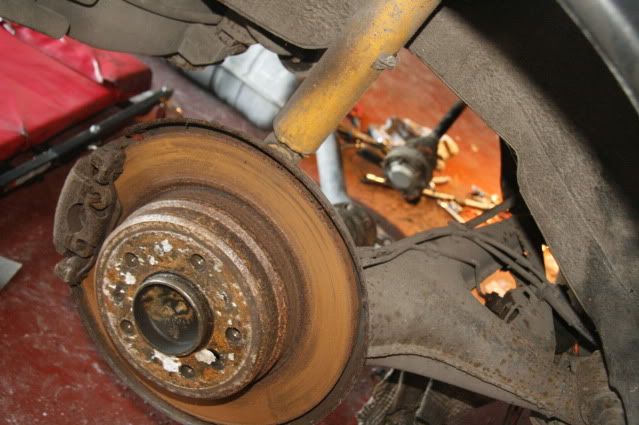
I had to remove the handbrake cable to get the frame and trailing arms down. Taking the discs off and one carrier bolt rounded, halfway through cutting it I realised that it was threaded through the carrier so the only way out to get the disc off .
Not something I enjoy doing but...
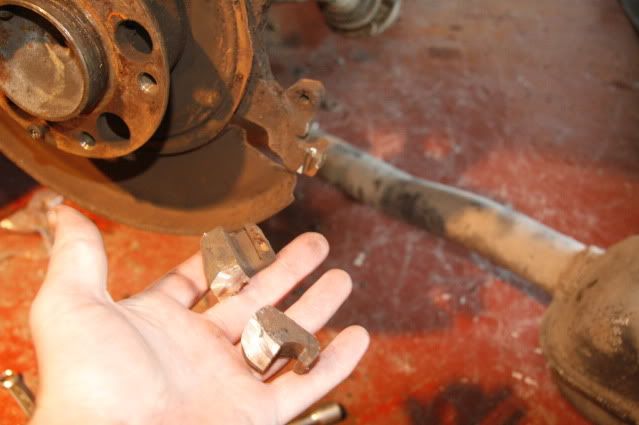
All stripped down
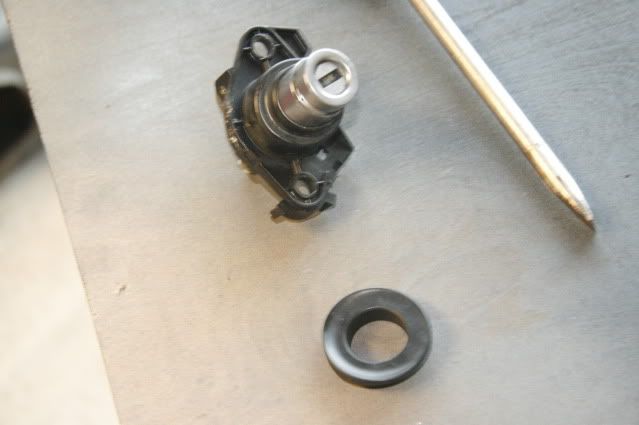
So M5 boot llocks are different to the non m car locks so that the grommet for the number plate filler will fit on around the lock it has been shaved down slightly
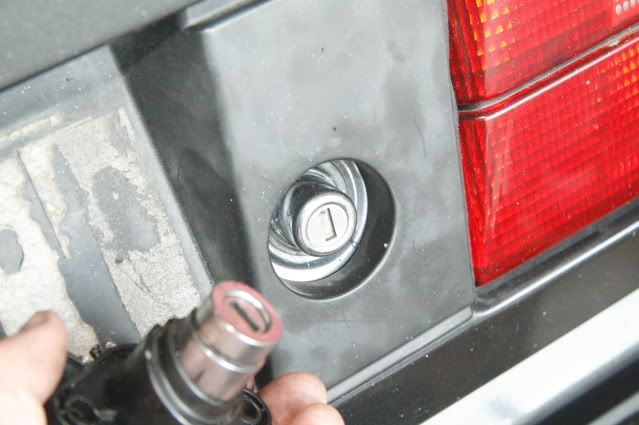
Another job on the list is to see if I can use the outer part of the m5 barrell with the guts of my own barrel so that my key works and I can have the grommet for the filler plate. You might think why dont I force it on the other on.....Well I tried that and it does go on but when I press in the lock to open the boot it pushes the grommet off when it comes into contact with the door.
For ages and ages the front panel around the kidney grilles has been matte black so I got some Diamond Schwartz mixed up when I was getting the paint for the wheels and gave the panel a lick of paint. I painted the front vents matte black and the kidneys satin black so I'm a bit happier with how it looks now.

Thats all for now. The frame is currently on the floor in the garage so I'm going to prep it for paint tomorrow. Im still waiting on Barrys Motorsport to get me the m5 eccentric trailing arm bushes as they are on back order but as soon as I get those the back end will all be going back together!
First wheel done minus the centre cap and bolts. Not sure on the colour yet its a lot darker than I expected but happy with the overall result.
I'll get pics up of my "spray booth" and the other ones being painted soon.
Start paste-
My 520i was the car I learned to drive in when I was 17, one of those cars I'll never sell.How it looked just before it was put on the boat to me nearly four years ago.

About 2 years the headgasket went in it so it was off the road for the while, then it went fine for another few months and started overheating again last summer. All it was good for at that stage was making tea, I was sick of driving a kettle so I said fuck it I'll park it for a while because I wanted to go back to college and turboing it or putting a bigger engine in it wasn't going to happen at the time.
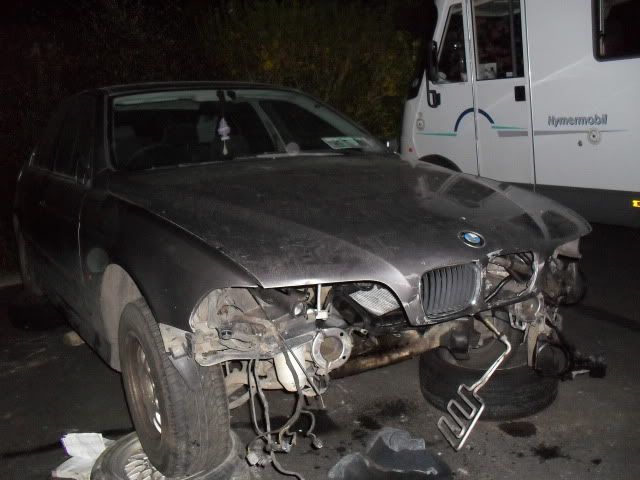
Fast forward to last friday evening, one of the lads in college told me he is breaking an e39 523i auto but his mam wanted it gone from the house. Of course I hadn't a notion of starting at the car till next christmas bcause I just wouldn't have time or money. I went for a look at the car anyway it had been crashed from the front and an engine mount had snapped dropping the sump down onto the rack. Nice crack in the sump there was too. We agree'd a price and I trailered it away that evening
not good for the oul studying at all. Saturday I lifted the engine with the hoist and put a load of chemical metal on the sump bt
hopped a load of waste oil into it and it started first pick of the key to my surprise! Sunday again I was out at it in the lovely weather and I got the engine and box out before I went to work. :happy)
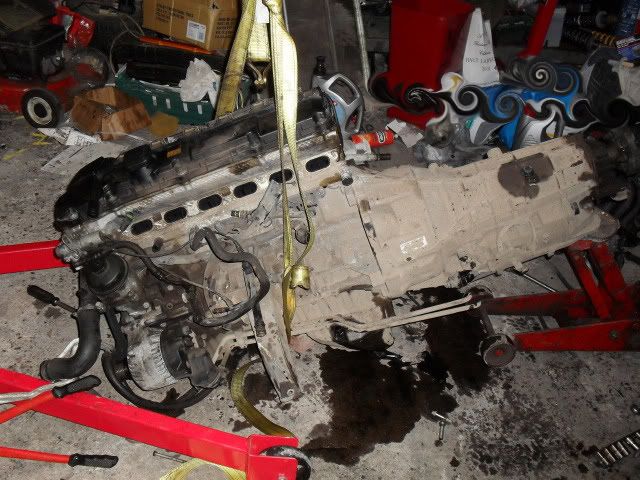
Monday (today) I had the engine up on the engine stand after taking off the box off it. Took one of the manifolds off it and I'll bring that into college in the morning to have a crack welded in it. I also took the sump off the ending only to discover its got the deep end on the worng way so it will catch the subframe in my e34. I took a trip up into the rafters in the garage and came up trumps with an e34 sump and oil pickup off a car I scrapped last year. One of the lads was kind enough to take them off into work with him to the parts washer so I should have those back by the end of the week.
Unfortunatley I dont have any pictures of the work yet but I should have some during the week.
To do to the engine before fitting:
New gasket for oil pickup
new sump gasket
bit of a clean maybe bt
Heres the few bits that are done to the car as it stands as well:
Koni yellow shocks with lowering springs
BBS RC090 (style 5's)
Tinted windows
4300k HID's
yellow fogs
shadowline trim
satin black kidney grilles
prefacelift mirrors (e30 style)
smoked rear indicators
clear side and front indicators
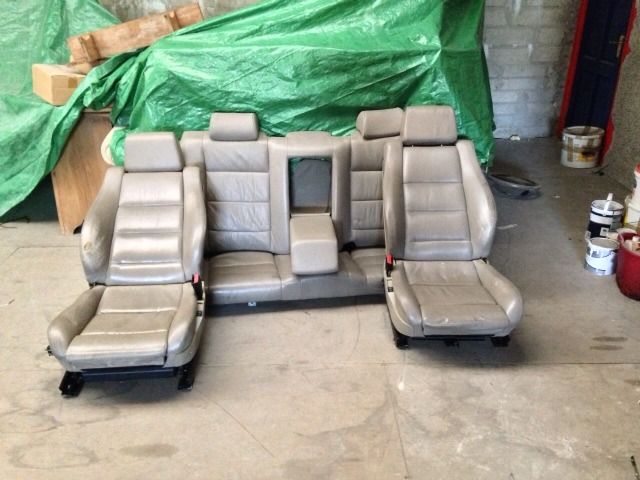
2xJL audio w3's firing through the armrest
JL audio e1400d monoblock amp
JL audio 300/2
Focal polyglass front components
0 guage wiring kit
Also have a number plate surround to go on at the back and an autodim rearview mirror.
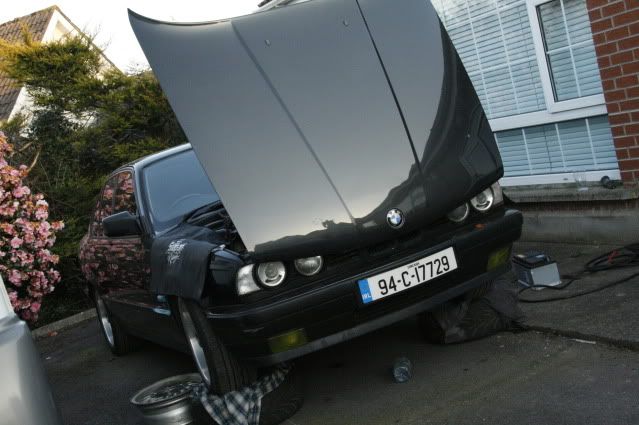
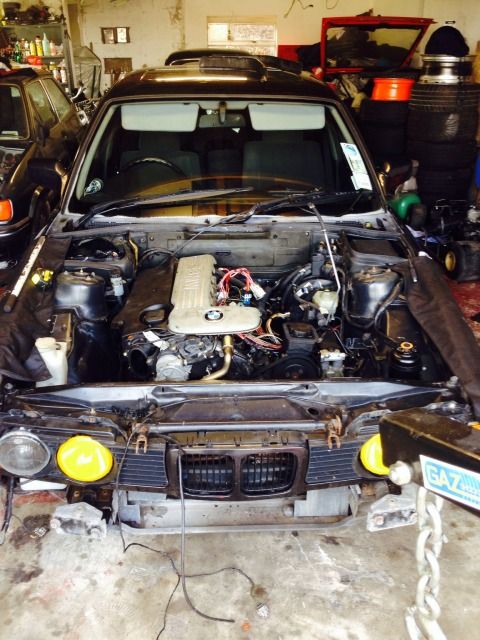
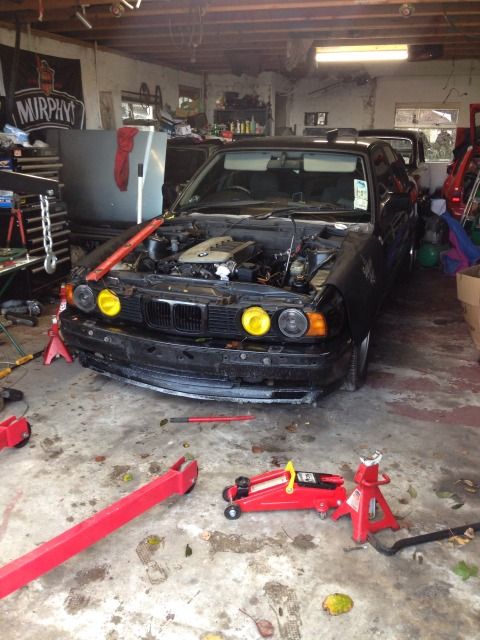
How it sat before I put it up in the air.
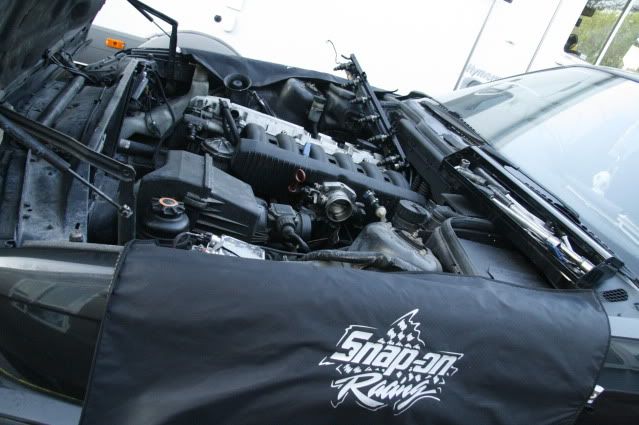
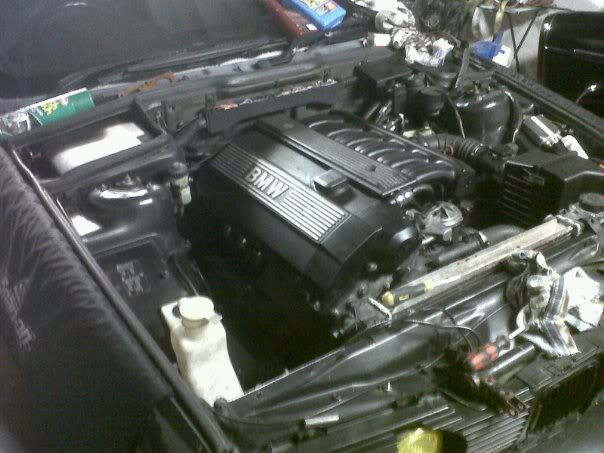
Just have the engine out here
Couple of the doner car which I'm breaking for parts (shameless plug!)
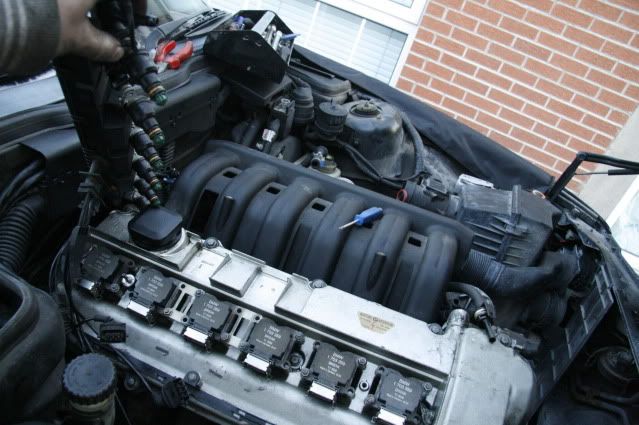
Heres the engine, none of the different oil pick as the photographer left early :ban:
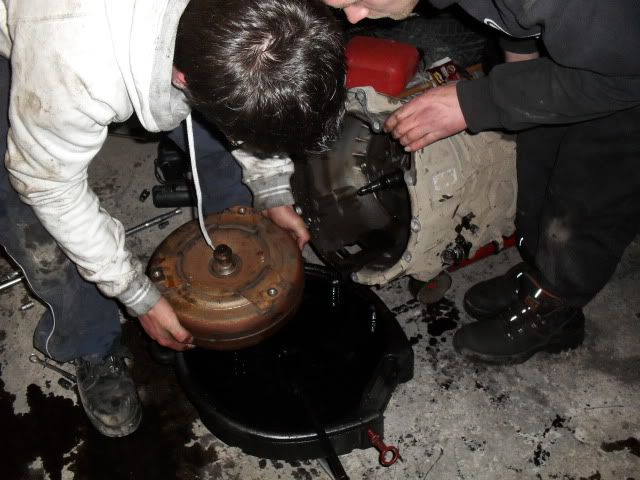
Had to empty out the dirty oul torque converter :nuts)
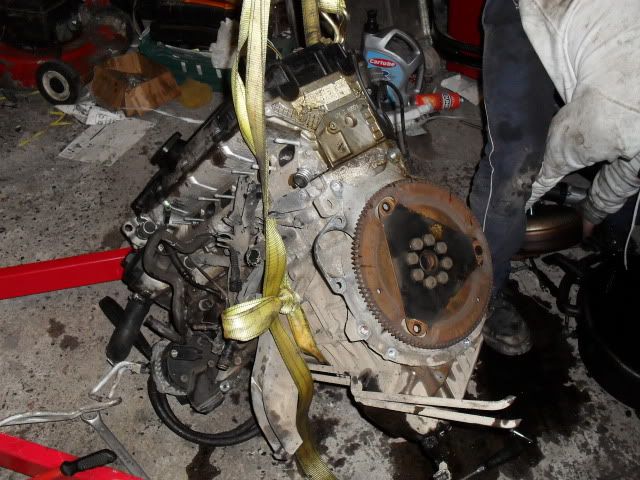
This flywheels got to go aswell, I'll be putting on the one form my current engine then hoping my gearbox fits
Now down to buisness
Its on r888's for the swap (rrfl:
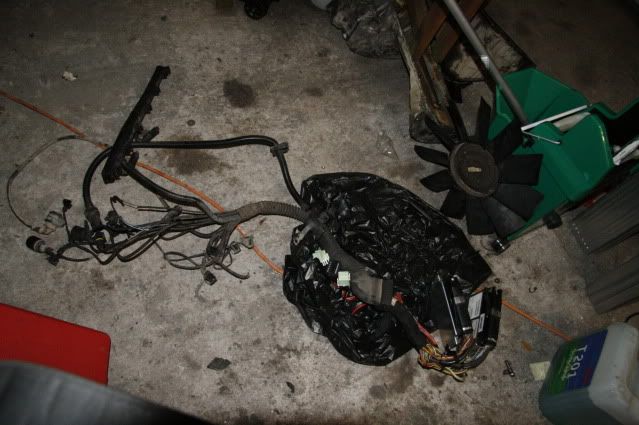
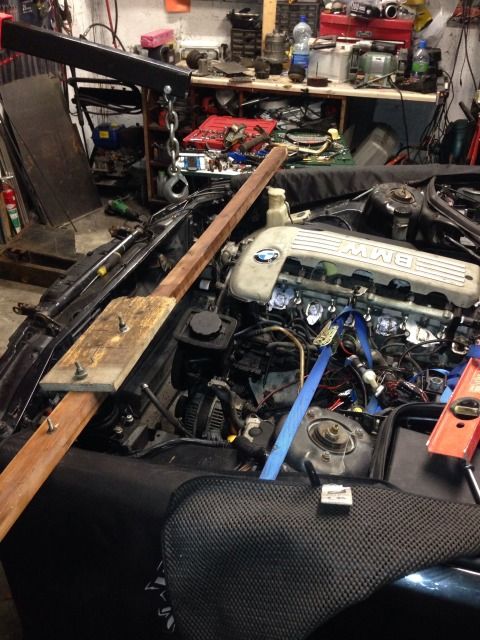
Heres the loom that I had to take out of the doner car, I was surprised how easy it came out to be honest, I hope it goes back in in the same 20 minutes it took to get out.
Anyone know why theres 2 control units one is for the engine definatley, not too sure are they both though?
It was lashing rain yesterday so I decided to throw up the service tent and get a few bits done to the car.
The coolant temperature sensor on the e39 was a single sensor and there was two in the e34 so I had to join the wires from the e34 OBD1 loom to the wires on the back of the sensor from the e39's OBD2 loom. Im not sure will it actually work yet as there are only three wires on the e34 loom and four on the e39. I did come across the link in my previous post though and connected the wires up according to that and jeft the last wire unconnected on the e39 plug.
Block connectors cut off e34 loom
e39 coolant temp sensor
wires connected and soldered
Im not so sure will it worked so here is the finished connector just wrapped in tape, if it works I can go back and use heat shrink later, the fact I've used red tape will annoy me so I'll have to get it done :lol:
I thought I was on the pigs back at this stage with a clear run of just connecting shit up and putting back on the inlet manifold unfortunatley ran into problems again at the alternator which I hadn't read about anywhere. At the back of the OBD1 alternator is just + and - red and black wires onto terminals, when I was about to connect the OBD1 wiring to the OBD2 alternator I found that there was just one terminal on the back of the alternator and a space for a block connector.
I also noticed that my e34 alternator was a 140amp and the e39 was a much smaller 80amp so I was glad at this stage because I have two amplifiers in the car which cause the lights to dim at high volumes.
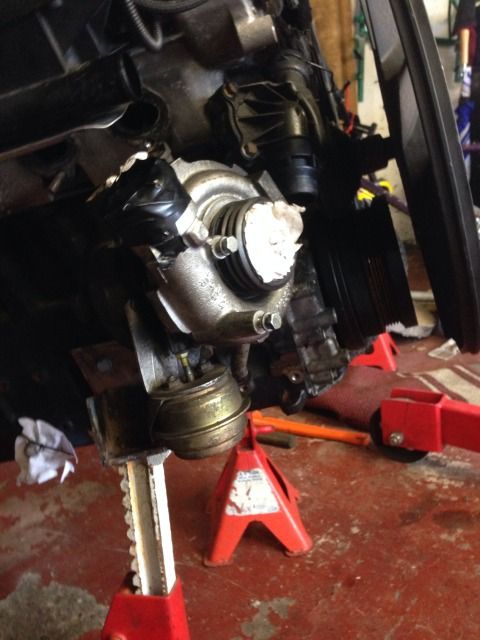
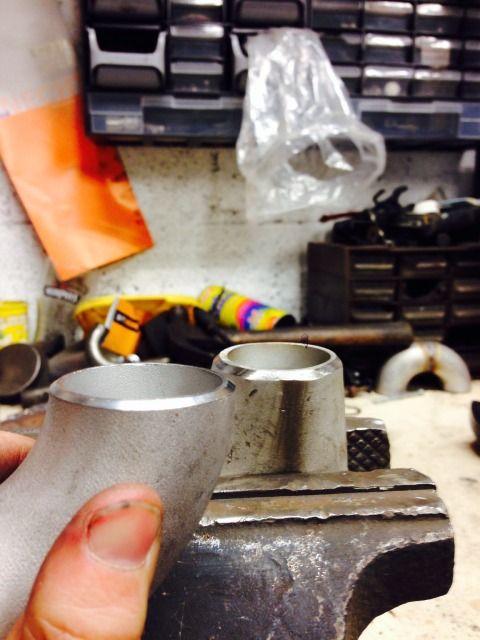
Upon trying to install the e34 alternator to the m52 engine I discovered that it wouldn't fit but I noticed that there was an insert pressed into one of the holes so I decied I'd try press it back in my bench vice which worked perfectly and its now mounted solidly on the engine
You can see the insert in this picture
And the section that at first didnt seem to be wide enough by a fraction.
I am also going to have to make some changes with my power steering pump and I have changed the tensioner over from my old engine also so as to keep everything the same from the m50, I will take some more pictures next time I'm working on the car and write about what I'm having to do. Might be of some help to someone in the future!
A small update, lost interest for a while, the e36 diff won't fit my casing so I have to go and find another LSD to fit now.
I got the engine running, had tried to start it and it swung over but no joy. Chhecked for fuel and spark, did some breathing by the car to make sure there wasn't a vacuum
. Plugged it into diagnostics and the diagnostics wouldn't comunicate. Sat down drank some tea scratched my head then one of the lads says "Hoi is the ecu plugged in right". Checked the ecu it seemed to be in juist fine so I took it out and saw that I had put in the gearbox ecu from the doner car by mistake . Looked for the 520i ecu, plugged it in and it fired up first go happy days!Decided yesterday that it was nice weather to be polishing wheels so I took off the style 5's and had the tyres removed. I then removed the bolts holding the face into the barrel and mounted them on an e36 I have and got to work sanding them with the car jacked up and running in gear (makes light work of sanding wheels) I started at 320 grit working up to 2000 grit with wet sand paper. I then hand polished the lips off the car. It was a much better finish than polishing them the same way as I was sanding them surprisingly enough!
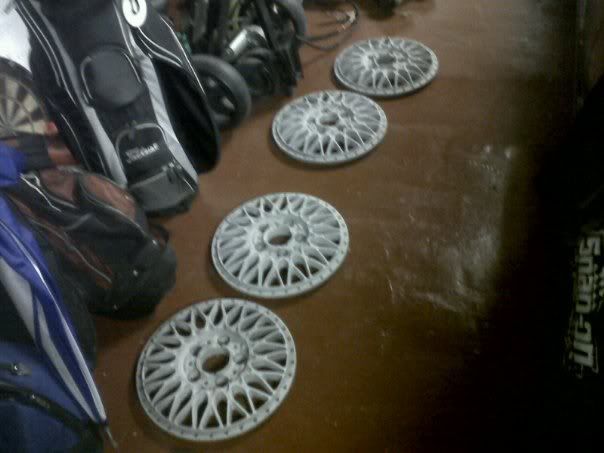
Heres a pic of three of the wheels nearly finished, Im not going to repaint the centres until after the summer I think. I must repaint the bits of the bolts that protrude from the lip though they are still removed in this picture.
Its been a while again since I updated this, hoping to be driving it soon I tidyed my garage so now I have a place to work just have to move the car in.
I started to refurb the style 5's properly today. The shine was good but the centres were pissing me off. Im hoping to have them blasted during the week and paint them properly over the coming weeks.
Taking the bolts out again as I had to get some buckles taken out.
Used a hammer and extension to take the splined studs out
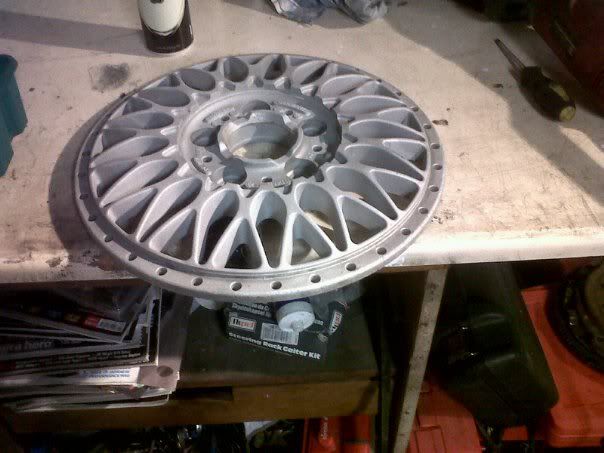
Studs out and about to use a block of wood and the sledge to tap the centres out, used a cloth to make sure I didn't mark the centres
Centre is out
Used some wheel cleaner to clean the inside of the barrels, be careful if your doing this the wheel cleaner will dull the shit out of bare metal
Put the centres in backwards to see what it would look like
Two more barrels to polish
Hope that was a help to anybody doing it themselves.
The diff I got didn't work out so Ben O Brien gave me a 525i sport LSD 3.15 ratio. The casing is different to the 520i so I got the subframe to suit from Dave-Msport. Ordered new bushes for the frame from OTTO. Hoping to give them a clean soon.
Put back in the orange indicators, has smoked dips and yellow mains. Probably not to everybodys taste but I like.
@ben thanks! Its like working in a hospital now its so clean!
No but I should be able to use my own cups and they'll bolt to my shafts. Drop me a text next time your out this way.Had some more free time over the past few days and a bit of motivation to go with it!
Spent some time cleaning up the 'bay a bit and put the engine covers back on. I used fenwicks black streak caravan cleaner to clean off the dirt and grease (stuff used to remove black streaks that occur during the winter on caravans and motorhomes) it worked really well actually couldn't believe how well it shifted all the gunk on the chassis legs and turrets. Followed that up with mer polish, I just thought I'd use it up rather than let it sit there.
Got the style 5 centres back from blasting also, got them done by sodablast.ie and I'm really happy with how they came out, clean sheet for painting now. Im undecided whether to send them to the painters or have a go at spraying them myself and if I do them myself get paint made up for the gun or made up in a can.
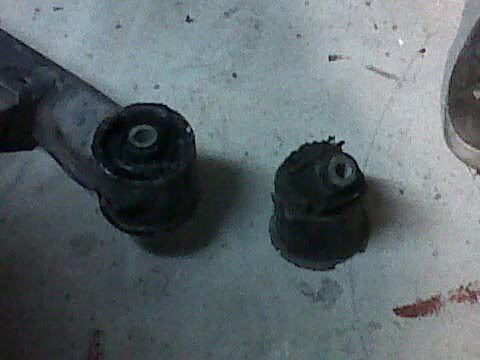
Picked up the new subframe bushes from OTTO yesterday and put them in today. I'm a happy man that the frame was out of the car, it was just a case of drilling the rubber centre out, cutting the metal shell with a hacksaw and then using a chisel hammer out the old shell. Pushed in the new bushes in the vice, used a bit of grease to help them along.
After a small bit of hard work it was time to open a few cans to help my patience. Spend an hour or two doing this.
Before left after right.
The product of my saturday night
:So thats all the bolts prepped for paint. I also polished up the heat shield for the steering box when I was bored but I don't have any pictures of that, only had the buddies blackberry at my disposal and its not too fond of taking pictures in low light.
Just bought a dimmer control unit that looks like this when fitted

hopfully it works well, its got good reviews so fingers crossed.
The other day I stripped down the LSD and changed the clutch plates for the new ones I got from Barrys Motorsport. The casing got a clean down and a lick of paint. I have no pictures of the strip down of the diff but I followed this link http://www.r3vlimited.com/board/showthread.php?t=92714 just in case anyone was wondering but its straight forward enough anyway once you put everything back where it came from.
The old plates...
An unpainted casing
And my dodgy cowboy painted casing
When I was putting the back cover back on I put some silicone sealer in because I didn't have a new gasket.
I made a proper start at removing the rear subframe too, never buying an english car again....I used the visegrips and the grinder as much as the sockets and spanners
:I had to remove the handbrake cable to get the frame and trailing arms down. Taking the discs off and one carrier bolt rounded, halfway through cutting it I realised that it was threaded through the carrier so the only way out to get the disc off .
Not something I enjoy doing but...
All stripped down
So M5 boot llocks are different to the non m car locks so that the grommet for the number plate filler will fit on around the lock it has been shaved down slightly
Another job on the list is to see if I can use the outer part of the m5 barrell with the guts of my own barrel so that my key works and I can have the grommet for the filler plate. You might think why dont I force it on the other on.....Well I tried that and it does go on but when I press in the lock to open the boot it pushes the grommet off when it comes into contact with the door.
For ages and ages the front panel around the kidney grilles has been matte black so I got some Diamond Schwartz mixed up when I was getting the paint for the wheels and gave the panel a lick of paint. I painted the front vents matte black and the kidneys satin black so I'm a bit happier with how it looks now.
Thats all for now. The frame is currently on the floor in the garage so I'm going to prep it for paint tomorrow. Im still waiting on Barrys Motorsport to get me the m5 eccentric trailing arm bushes as they are on back order but as soon as I get those the back end will all be going back together!
First wheel done minus the centre cap and bolts. Not sure on the colour yet its a lot darker than I expected but happy with the overall result.
I'll get pics up of my "spray booth" and the other ones being painted soon.

Comment