 Tweet
Tweet
Updated- 2/13/2015.

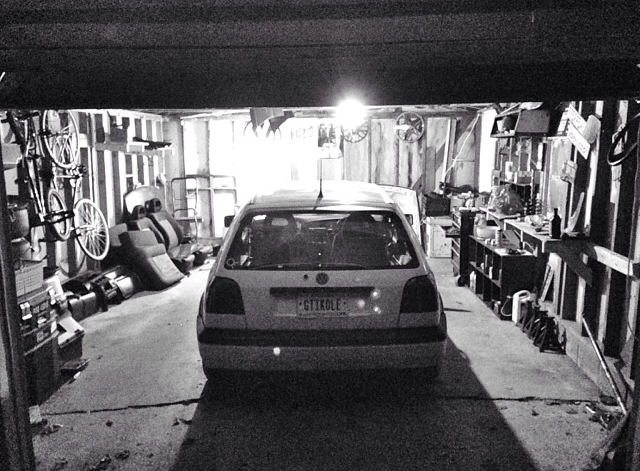
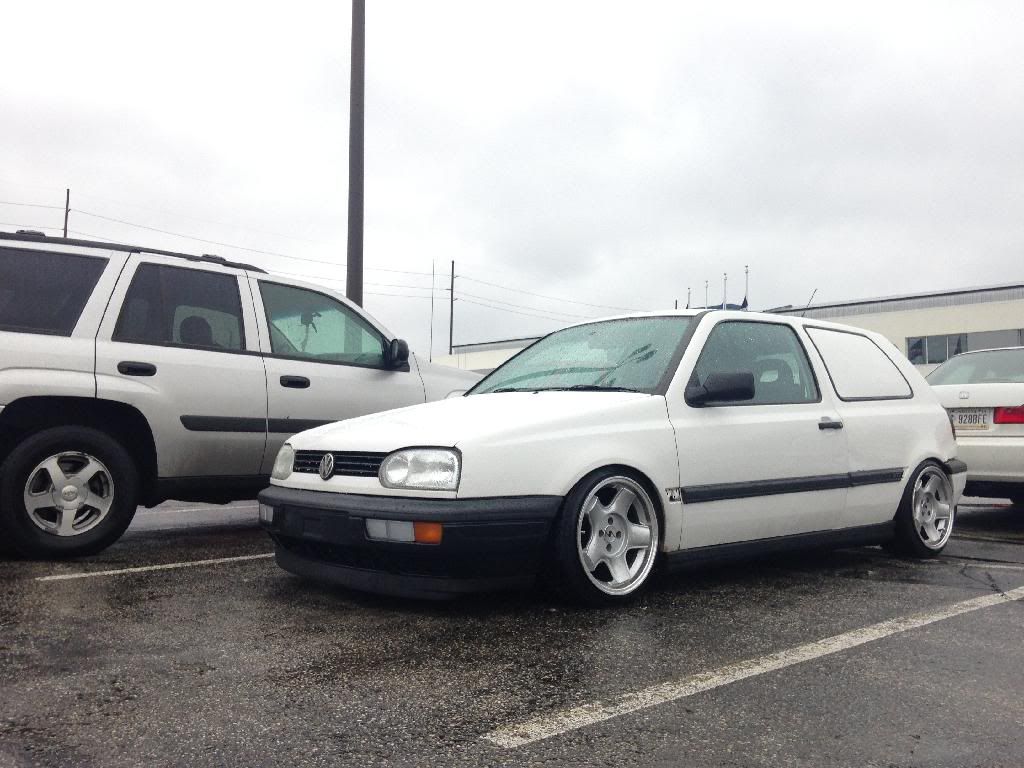
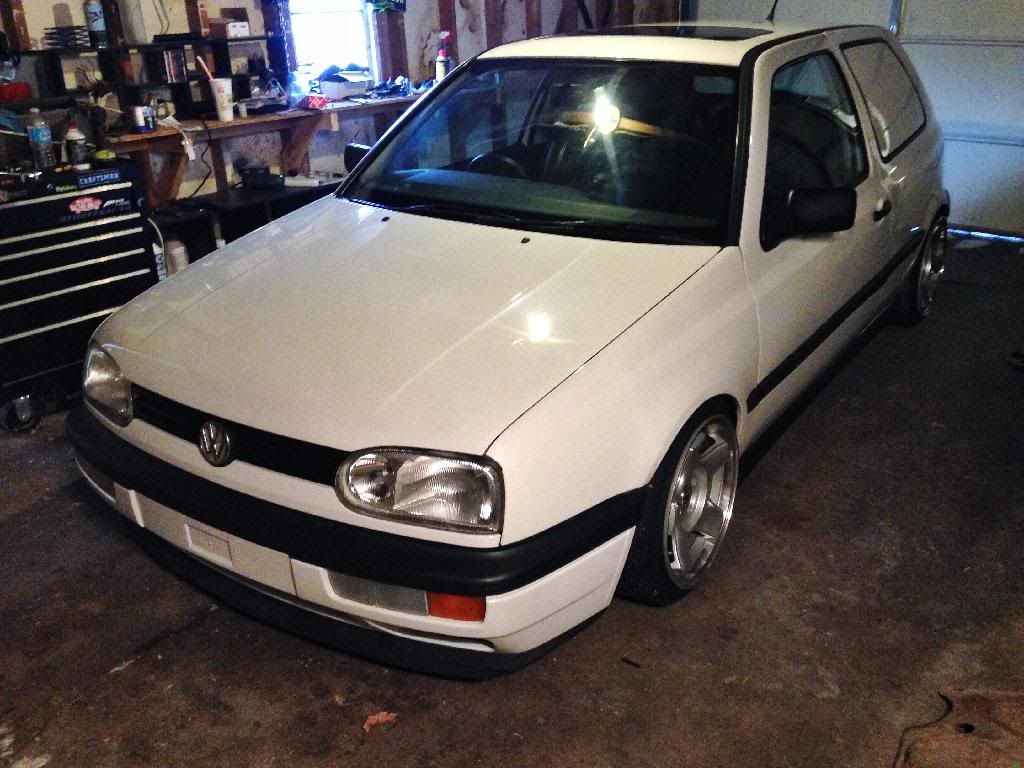
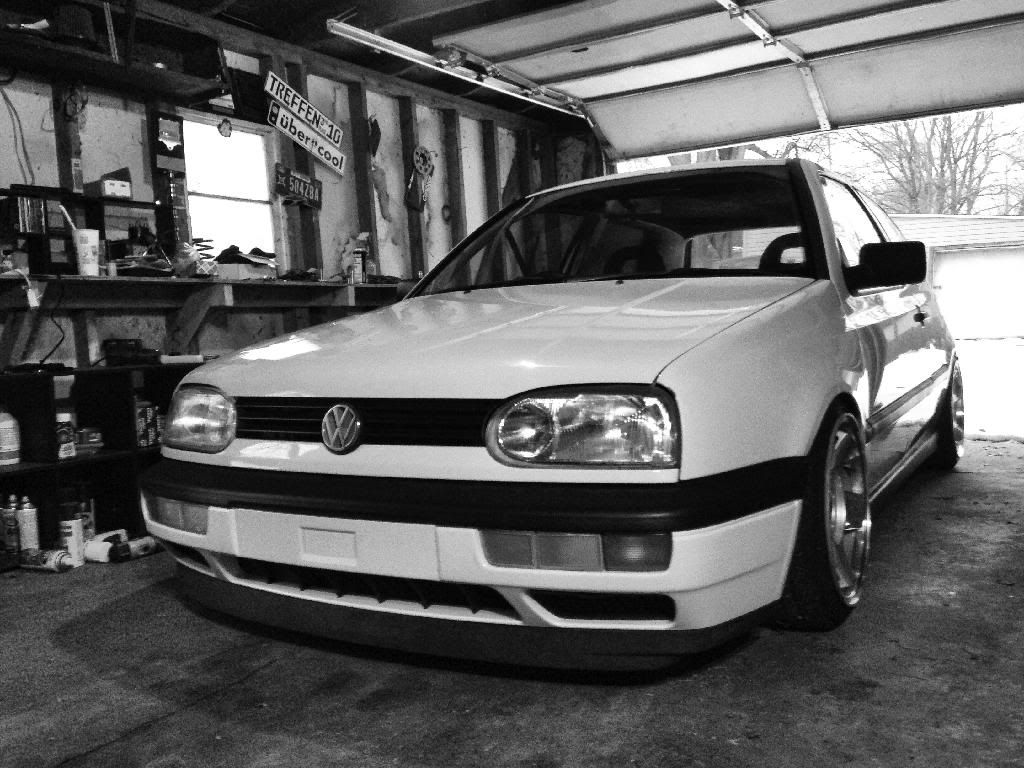
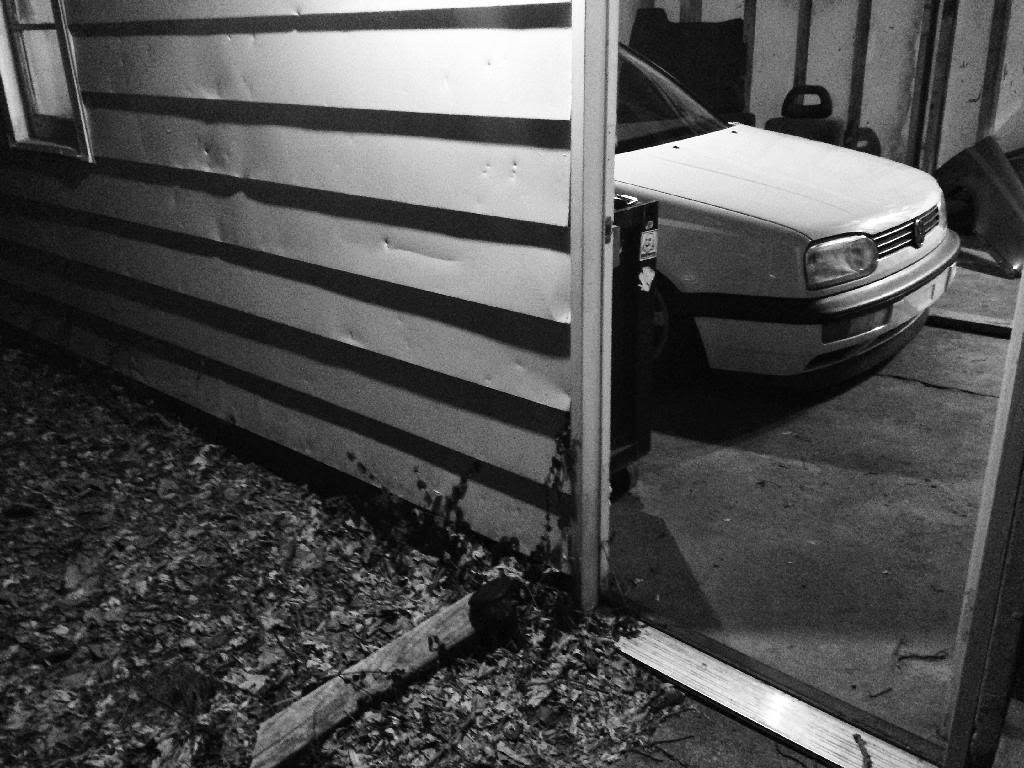
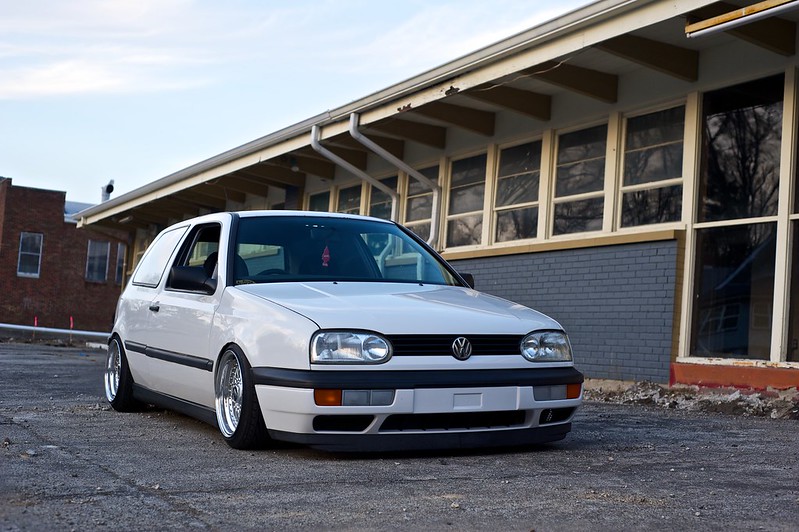
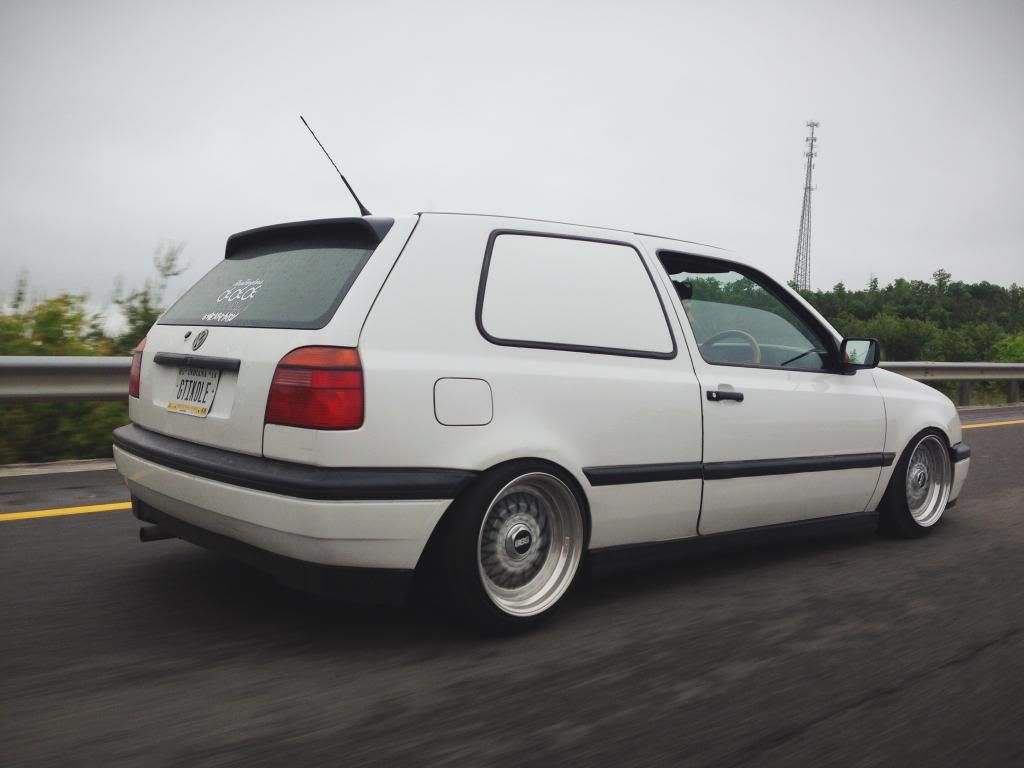
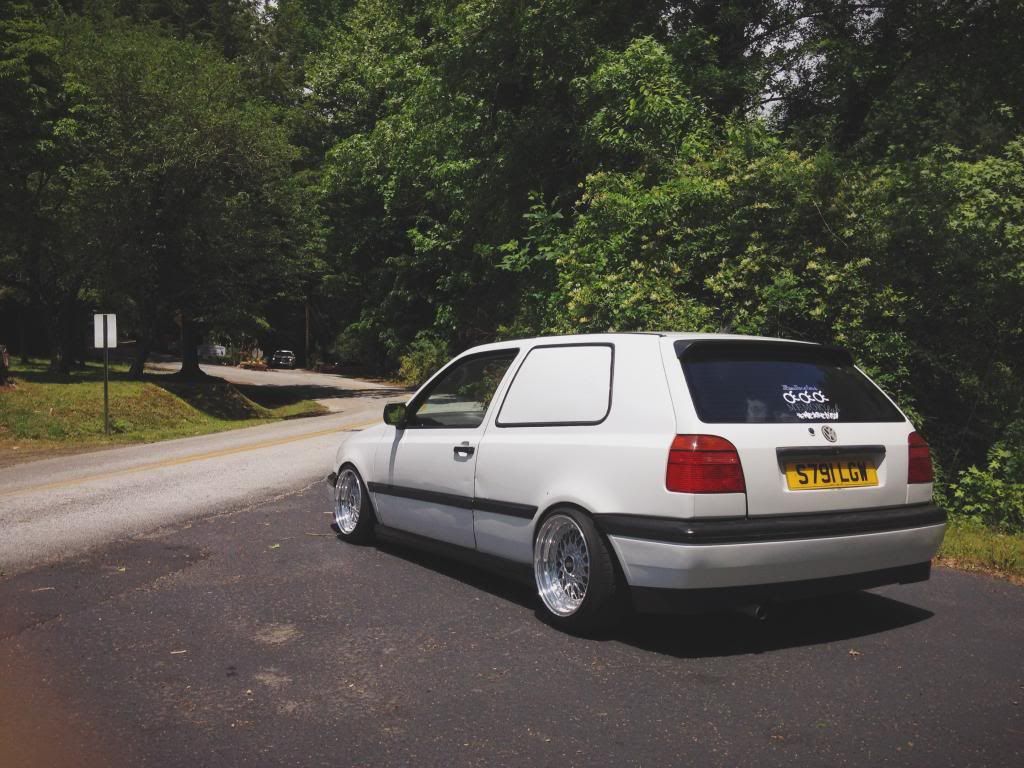
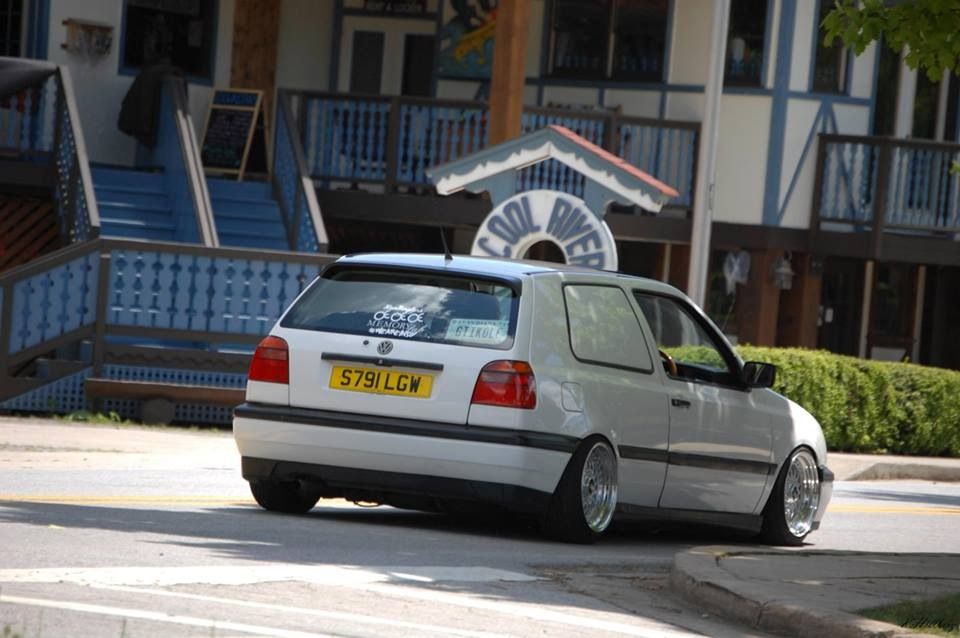
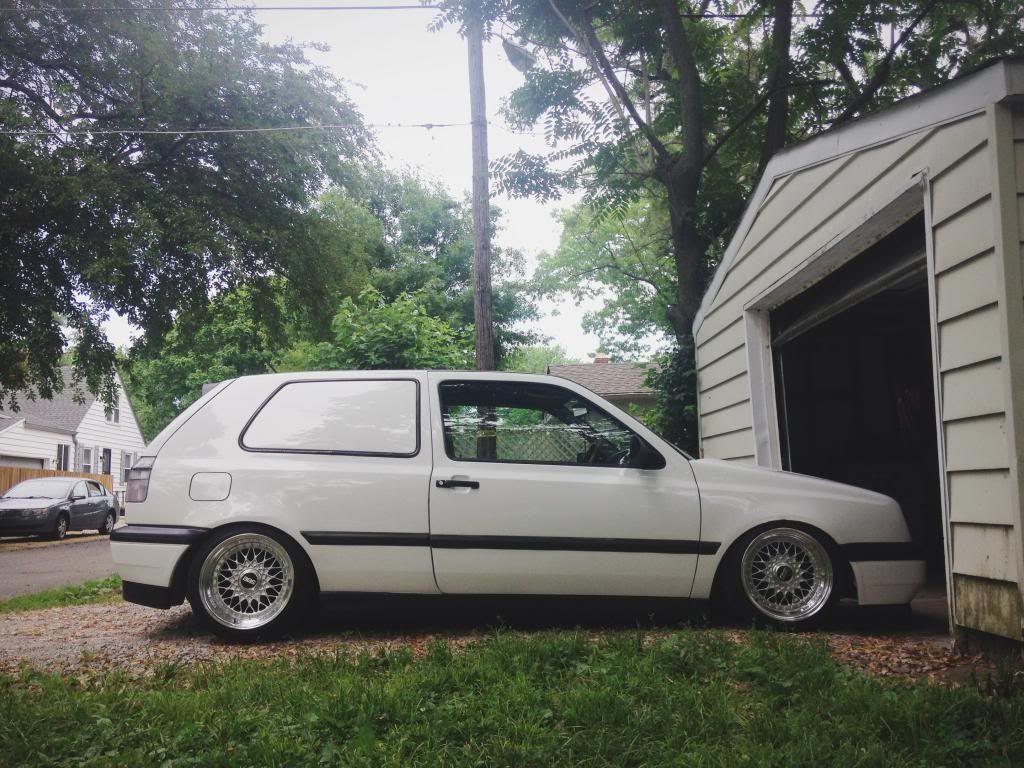
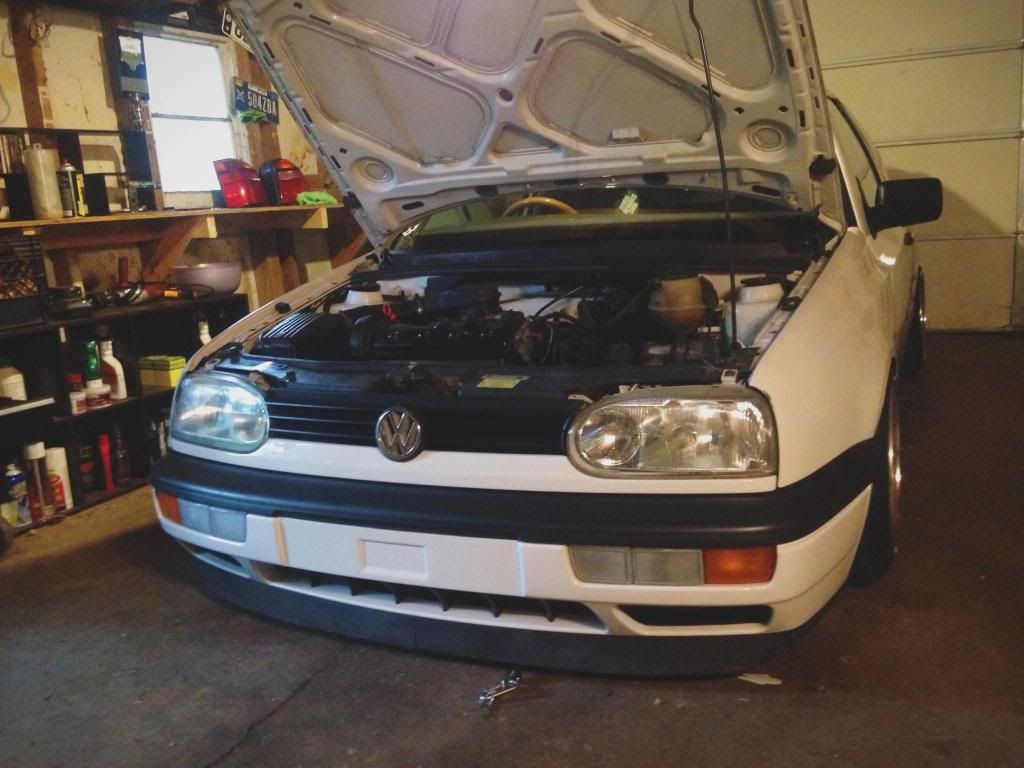
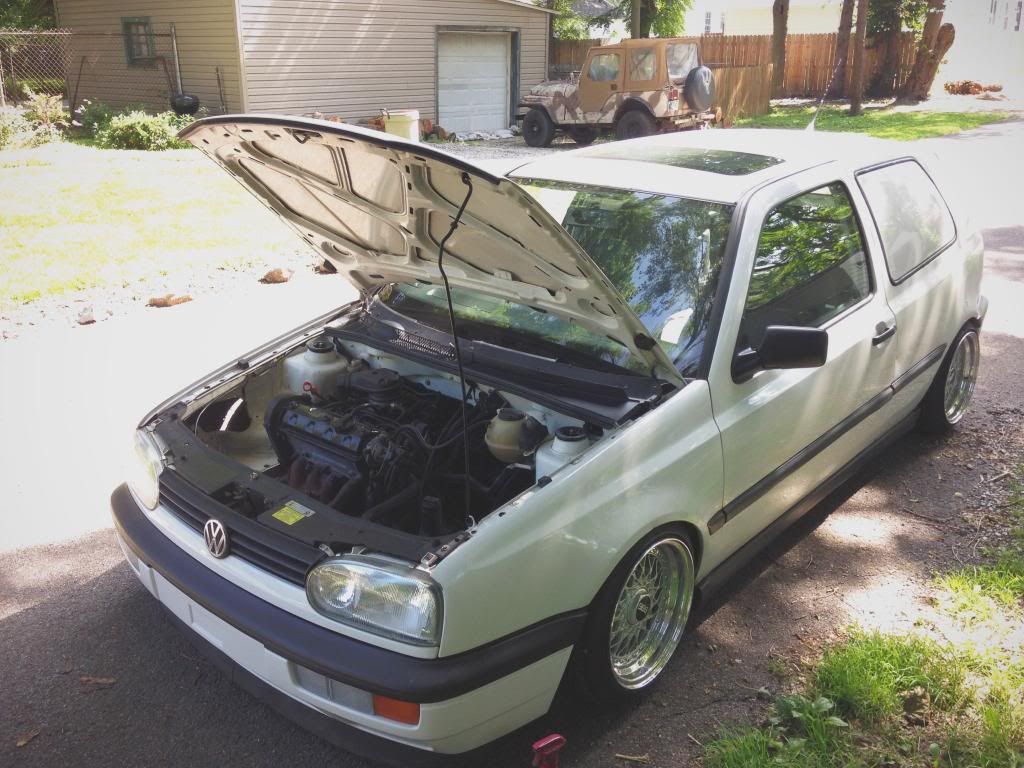
1997 VW GTI Sport.
Candy white.
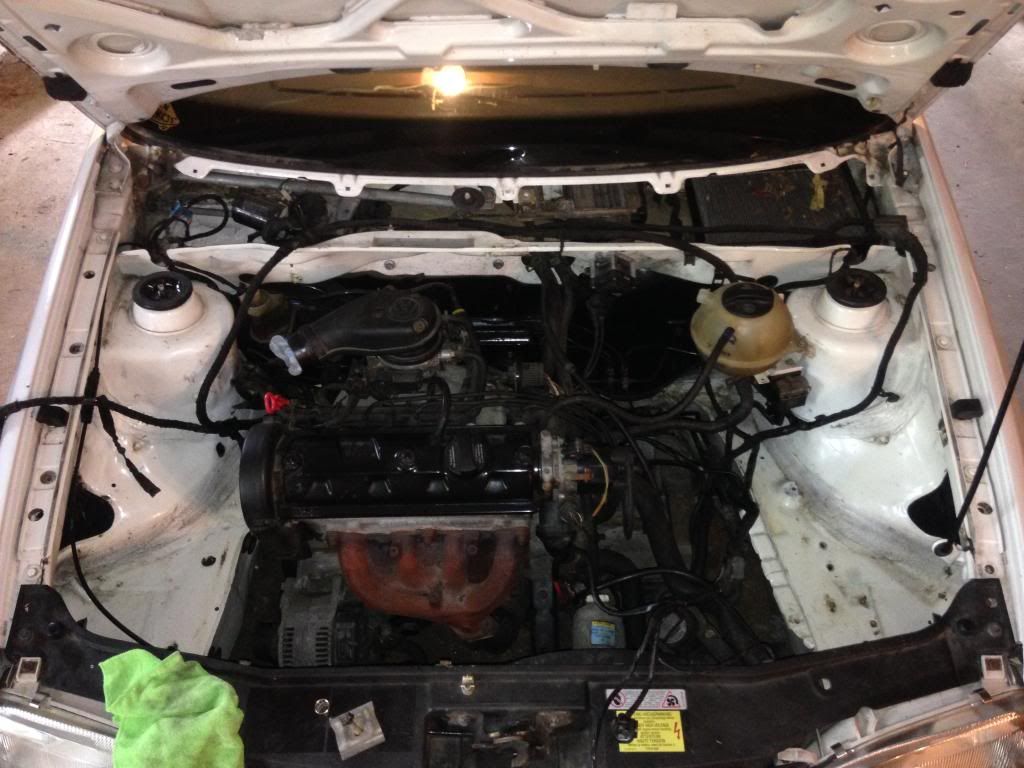
1.6L petrol mk3 8v engine swap with matching 5speed transmission, clutch cable setup etc. full matching specific brackets and all other pieces.
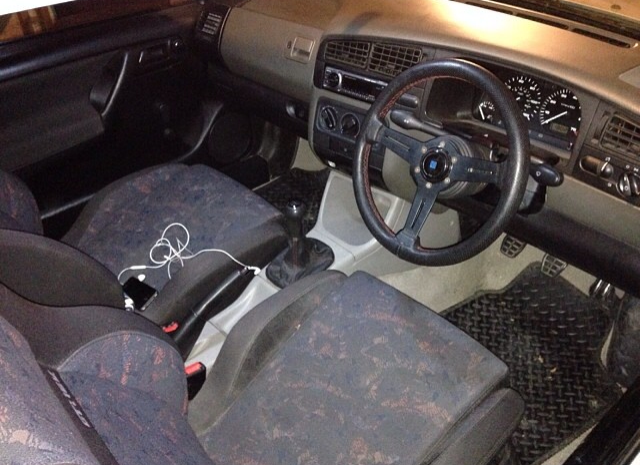
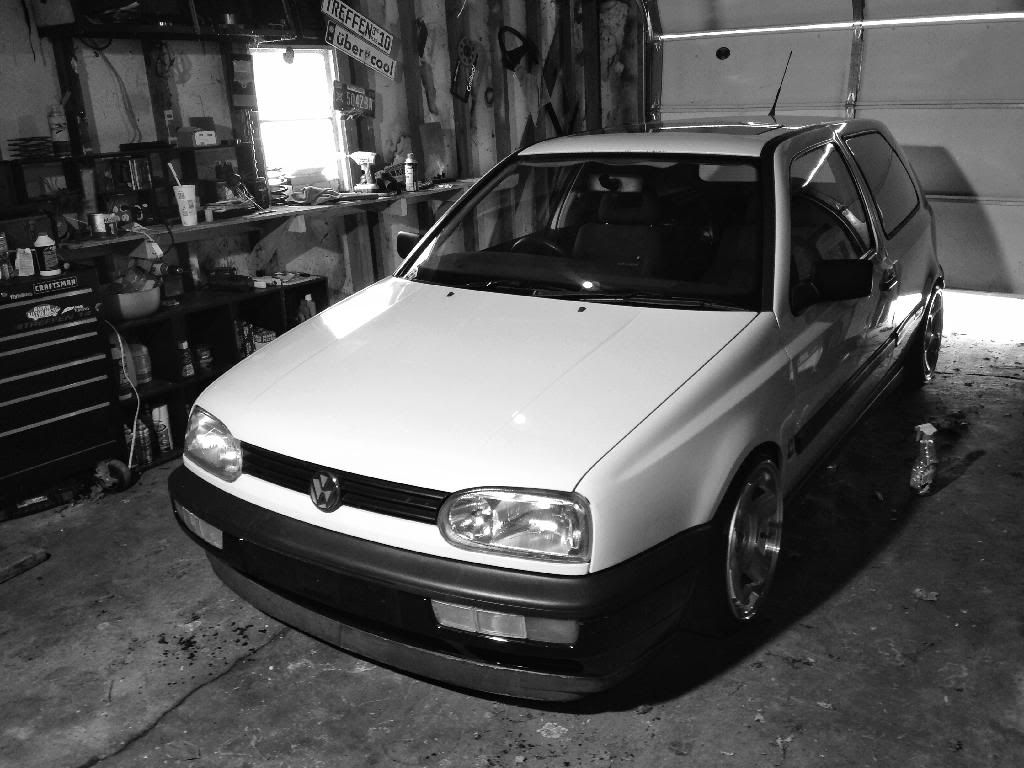
Inside.
-SEAT Ibiza GTI 16v front seats with original factory donut headrests
-Chrome button ebrake handle
-Old wood /leather steering wheel
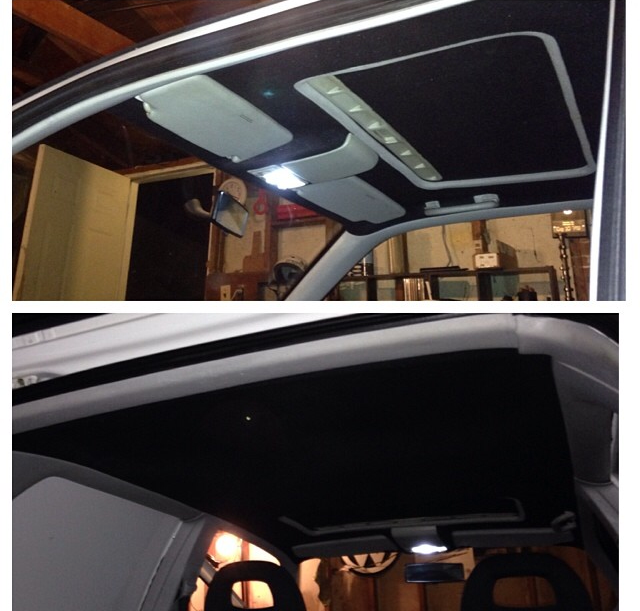
-3.5 black sun visors.
-Redone black headliner.
-OEM Rolling stones edition shift knob/boot.
-V2 control hidden in coin holder.
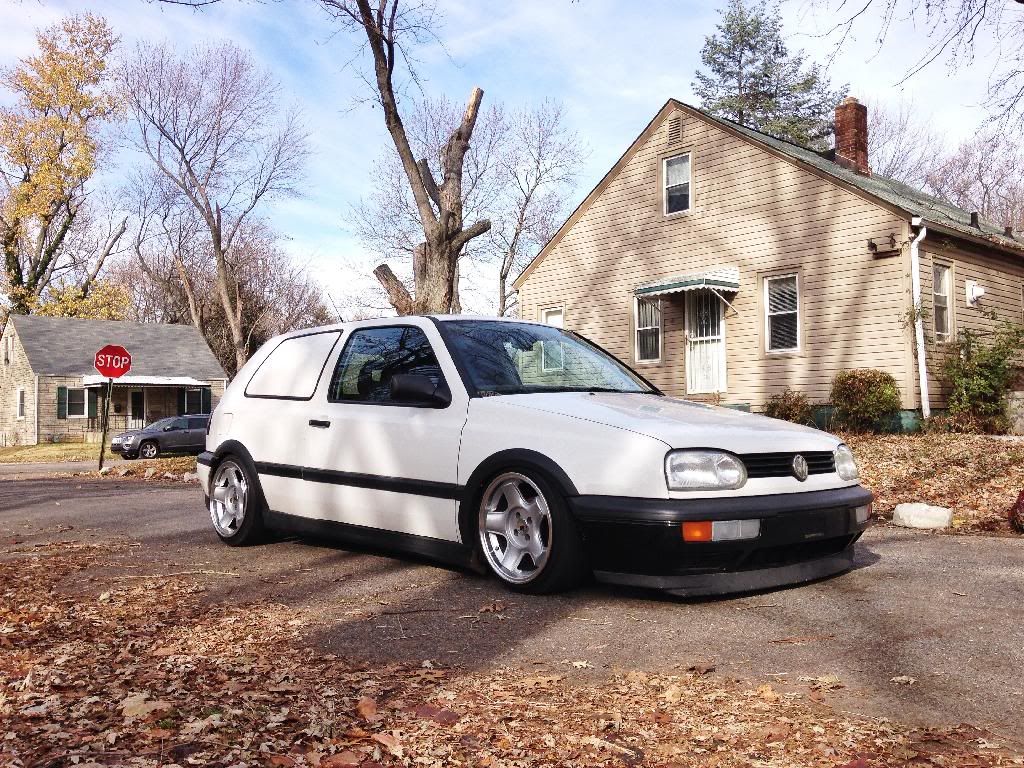
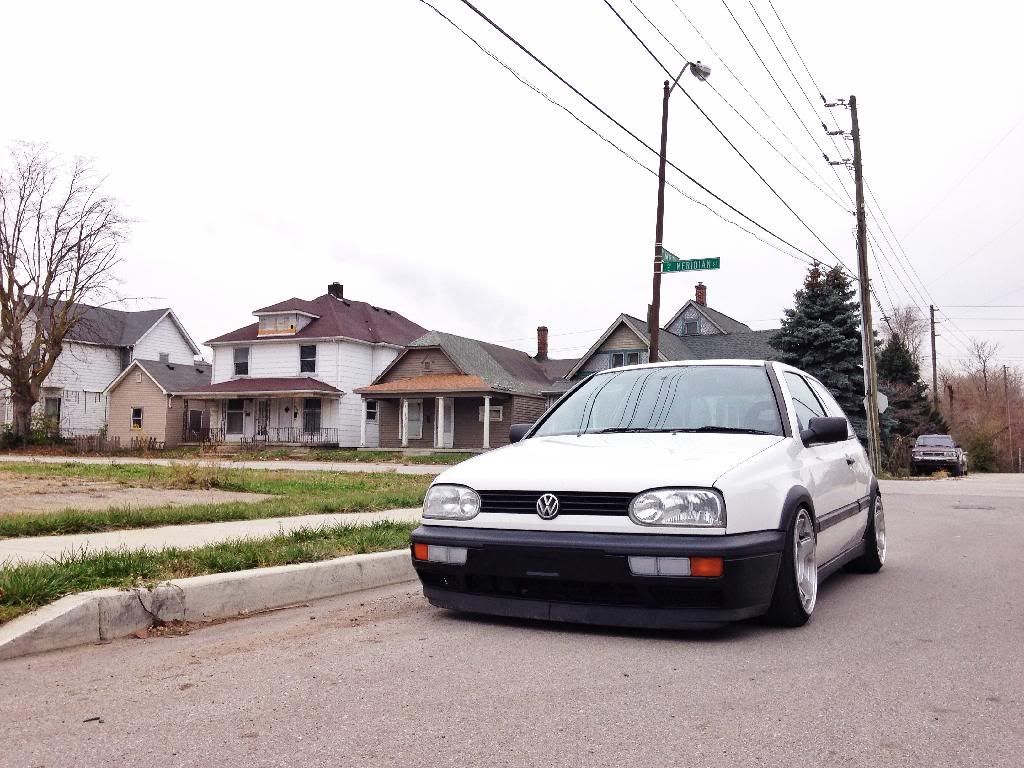
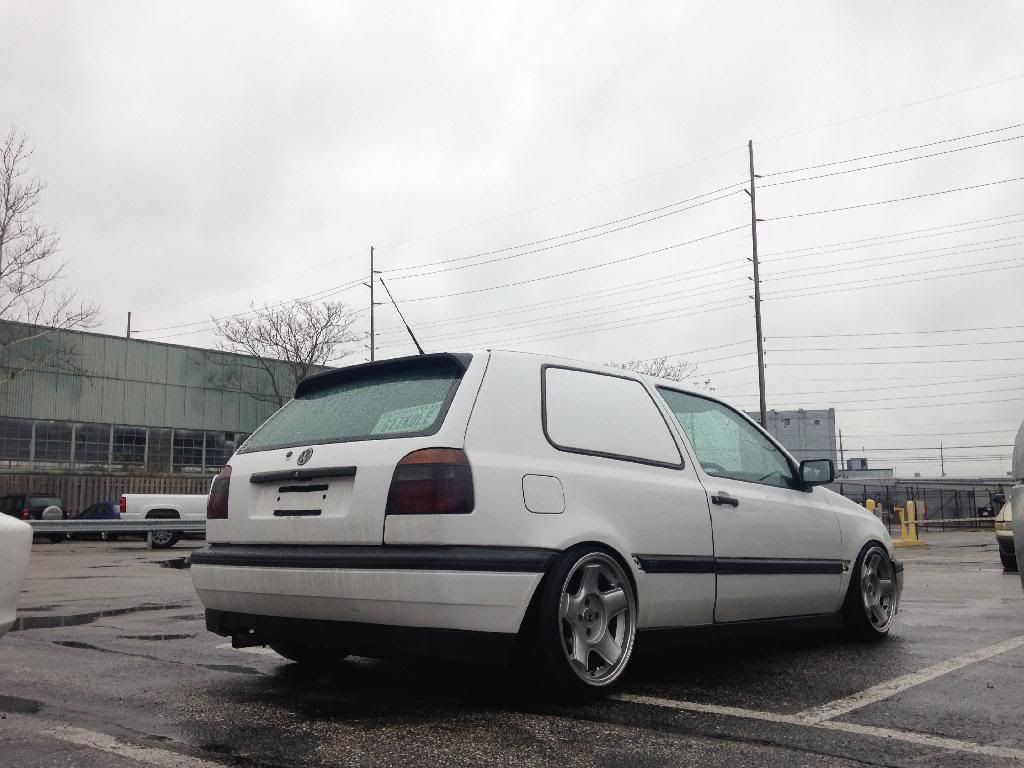
Outside.
-Euro OEM CL Side moldings.
-Euro OEM hatch
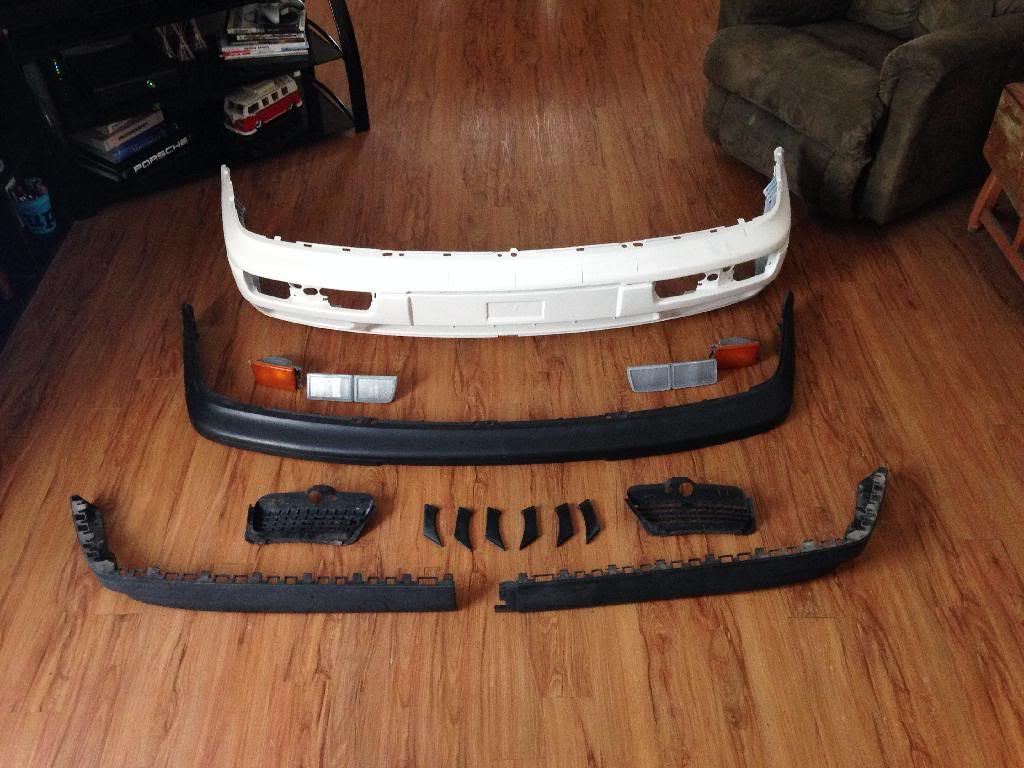
-Euro OEM front rebar
-Euro OEM rear bumper
-Euro OEM rear rebar
-Euro OEM amber turn signals
-USDM GL tail lights
-Euro OEM ecode headlights
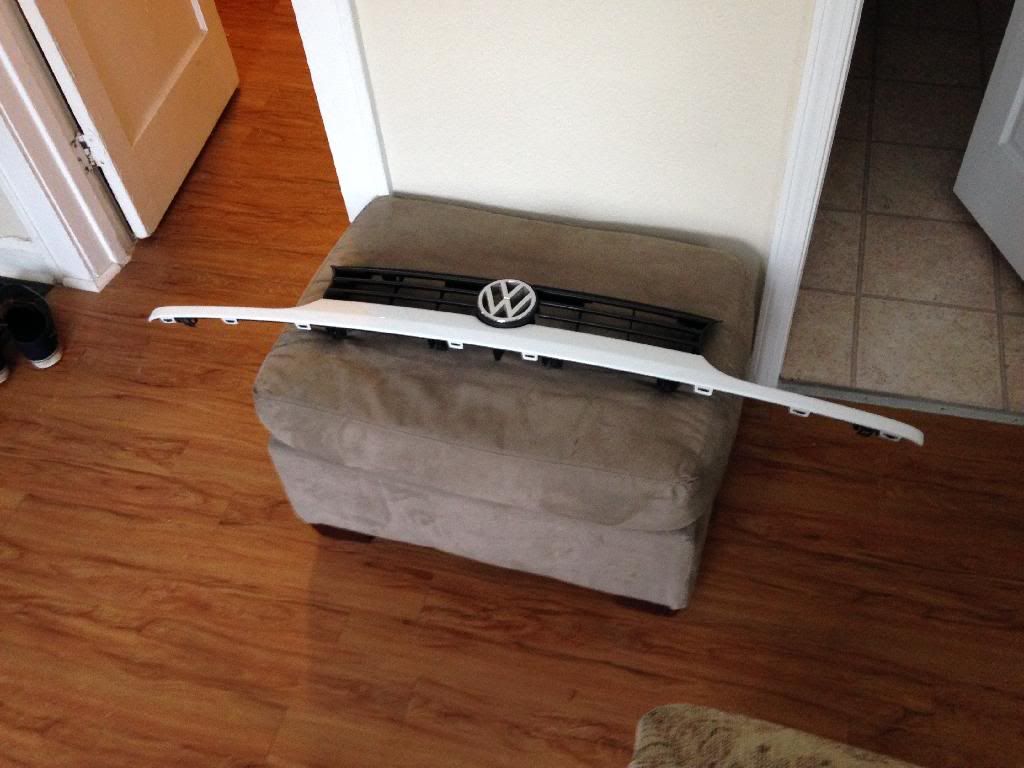
-OEM Euro 3 slat grille
-Euro OEM 1/2 length radiator
-Euro OEM 1/2 length rad support
-Euro OEM Golf front bumper
-Euro OEM CL lip
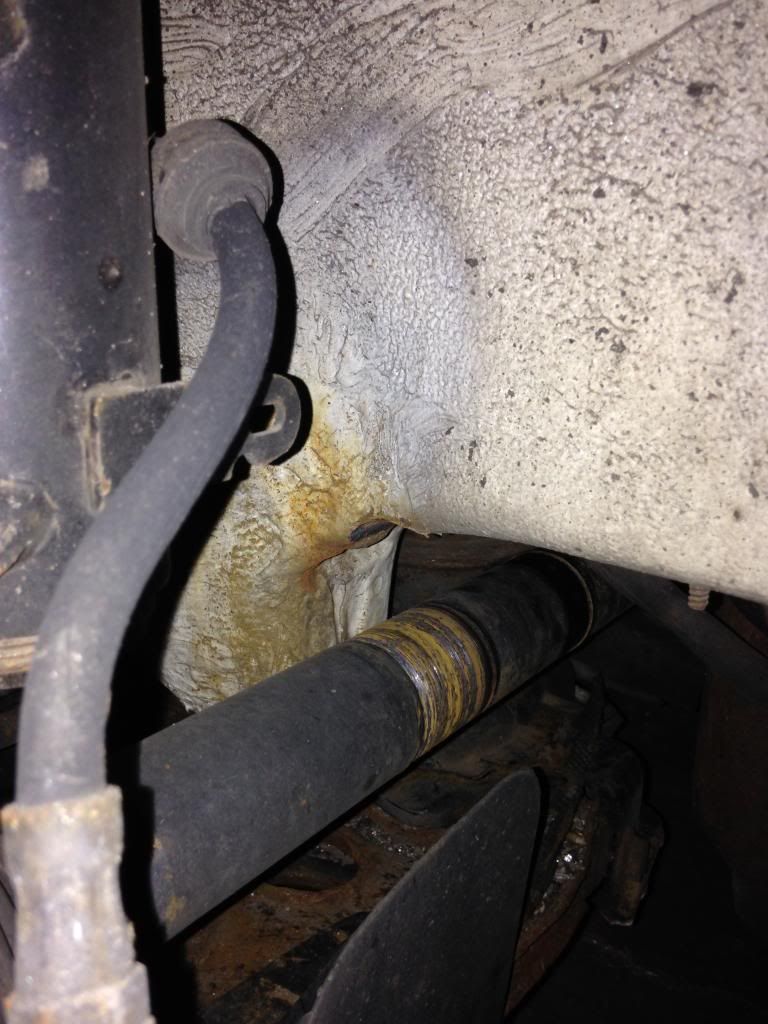
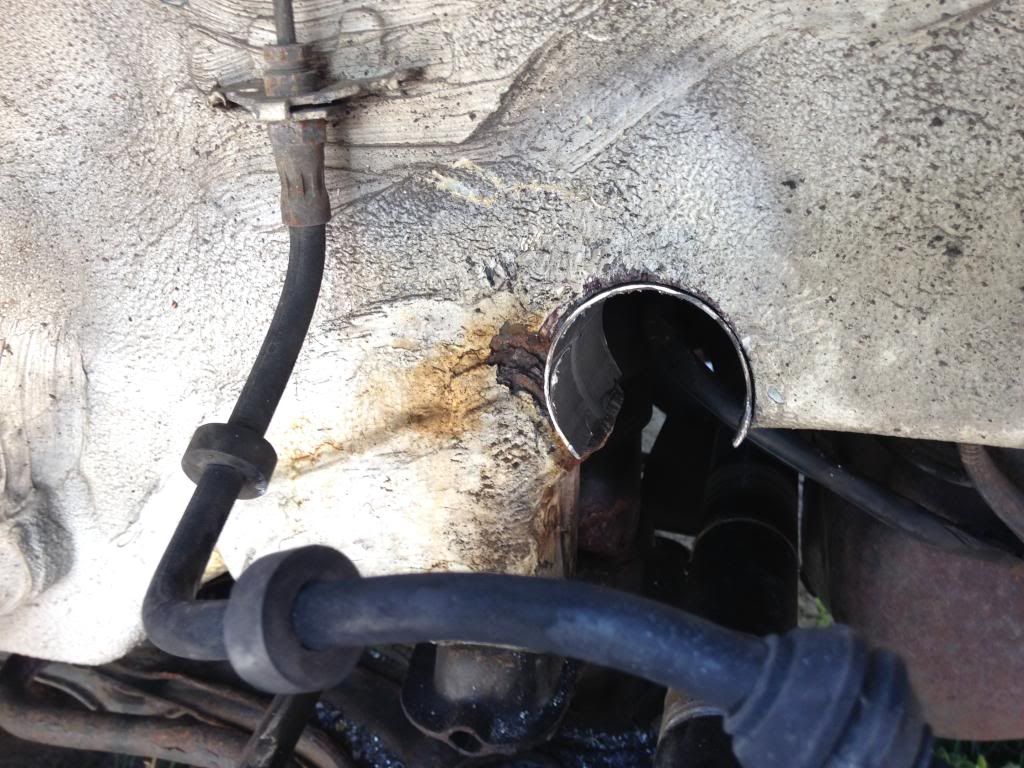
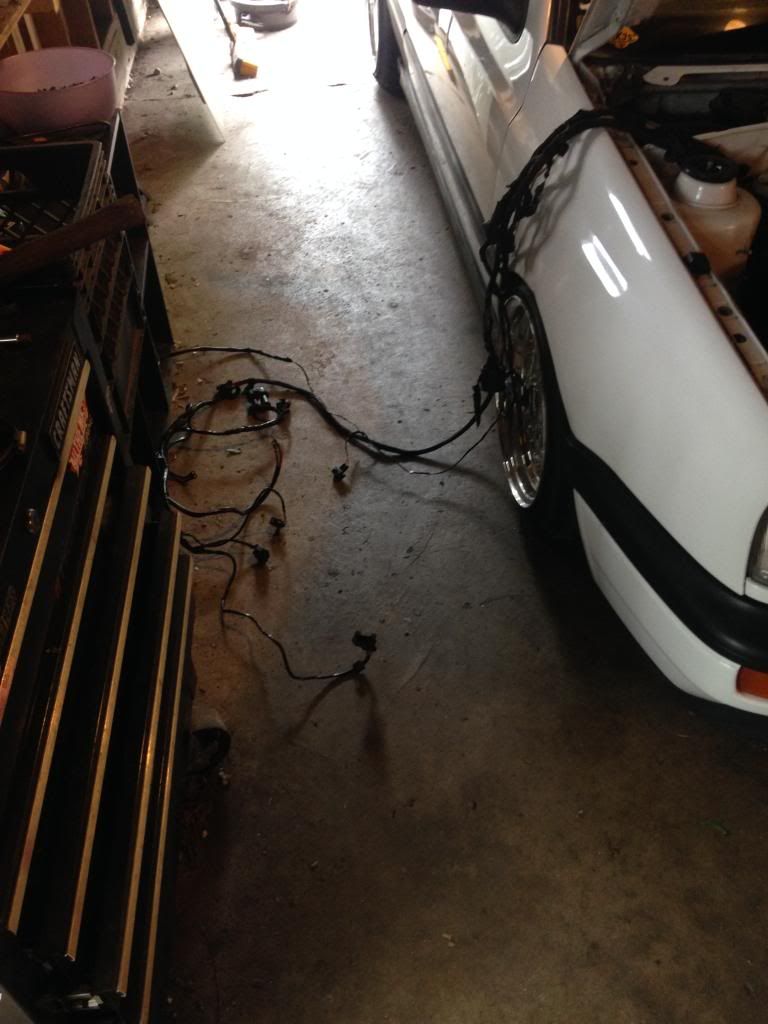
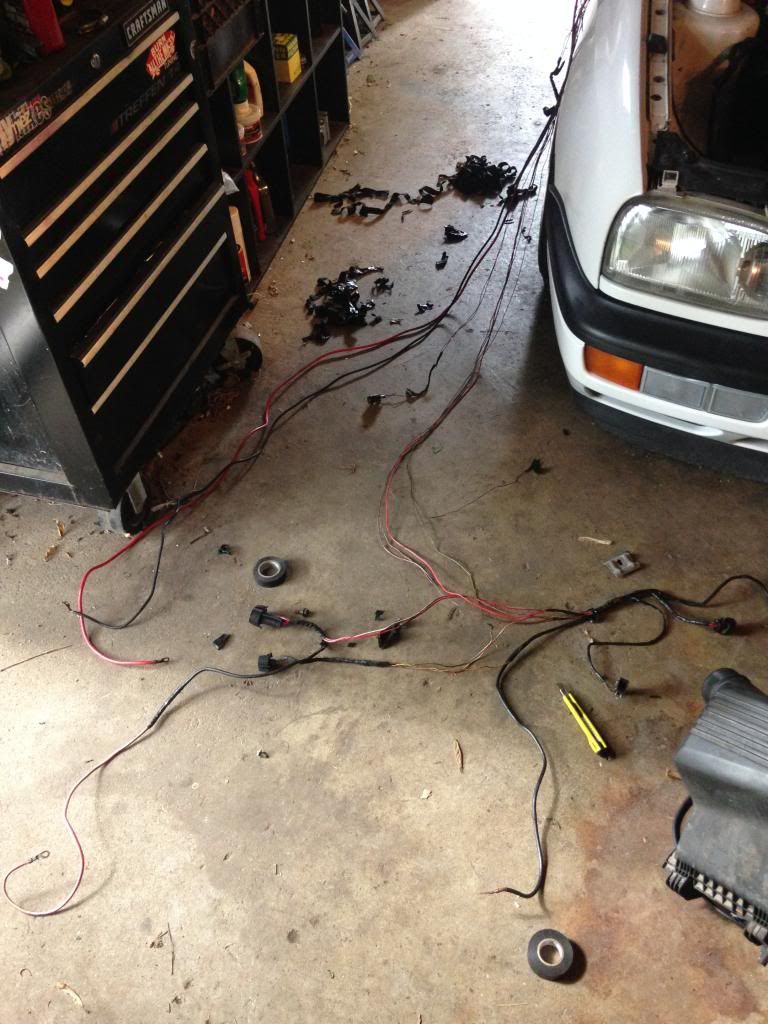
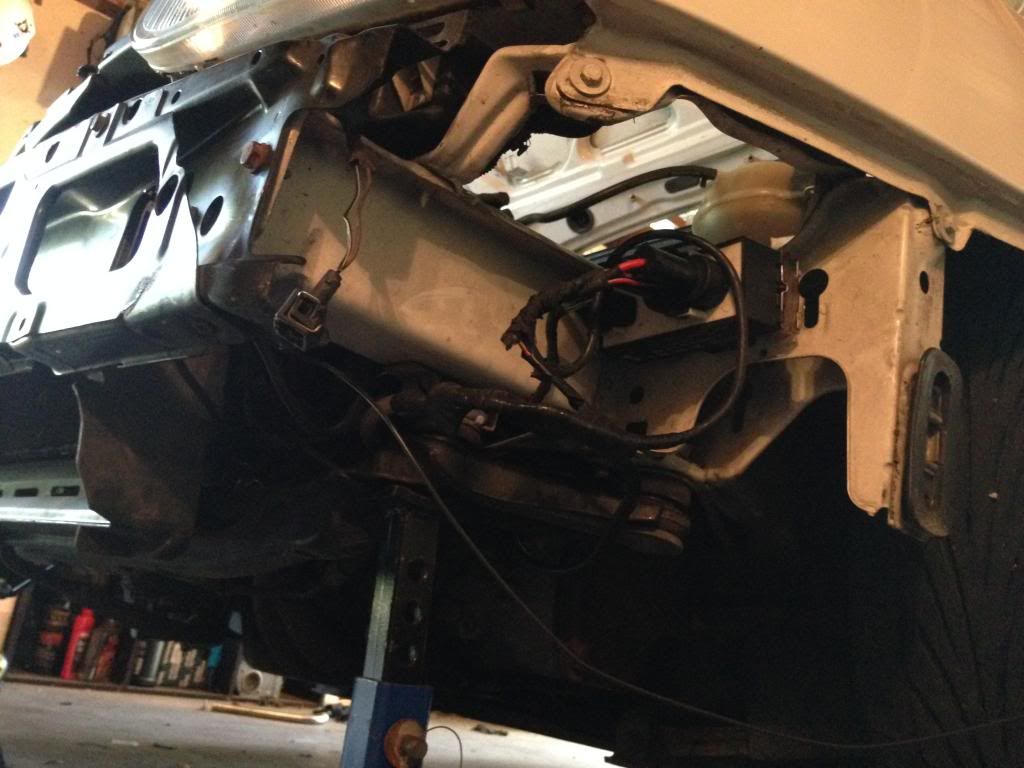
-Engine, fan and light harness tucked in engine bay.
-Battery relocated to trunk.
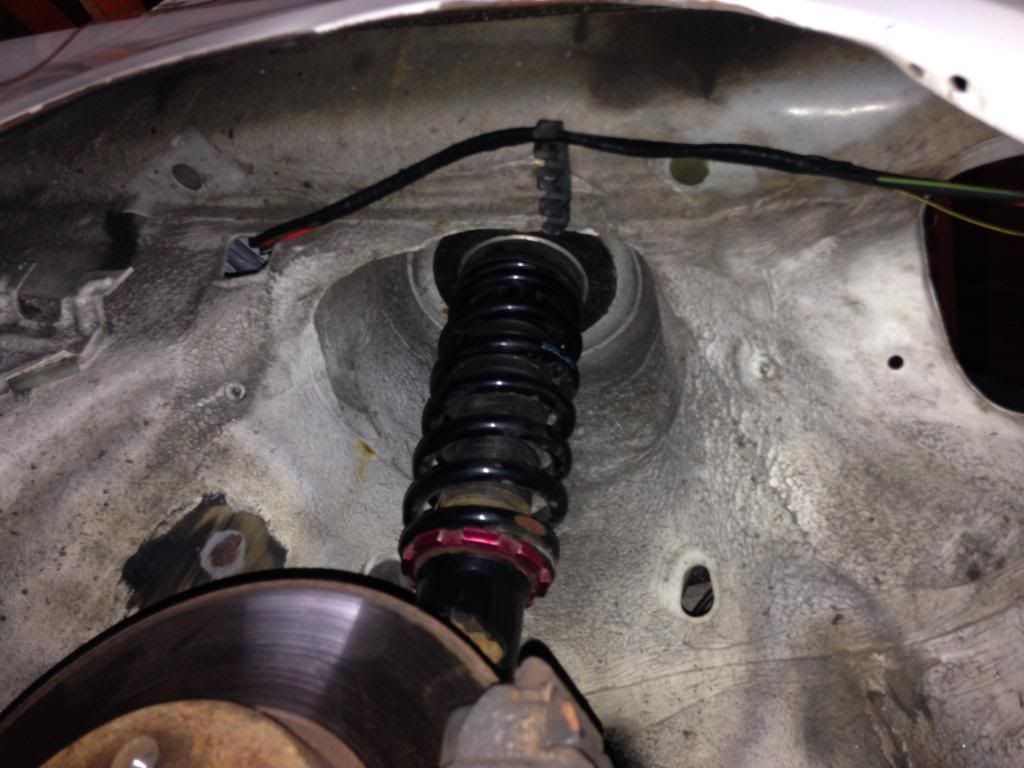
Suspension.
-Airlift v2 Airride kit,
-MK2/3 struts
-Aitlift skinny 5 gallon tank.
-400c Viair compressor
-Early strut mounts, Modified.
-Frame notch.
-Tie-rod notches
-Adjustable rear camber shims. (-3 degrees)
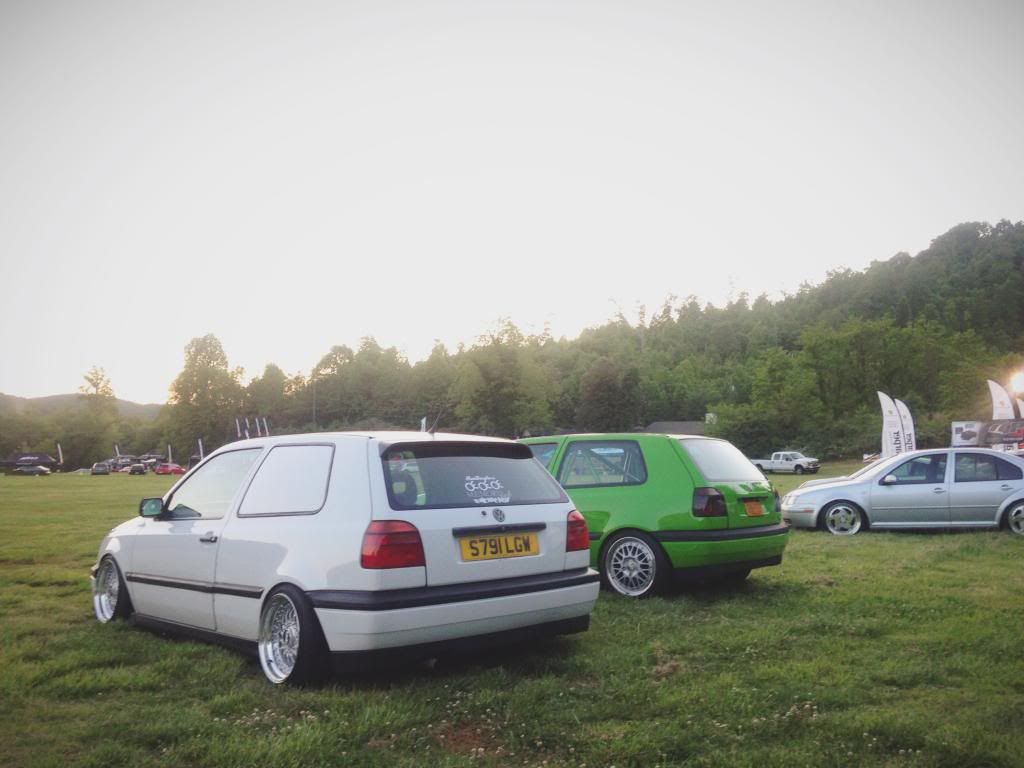
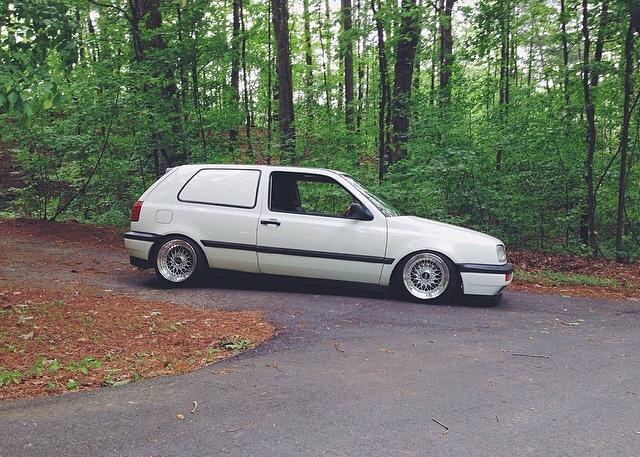
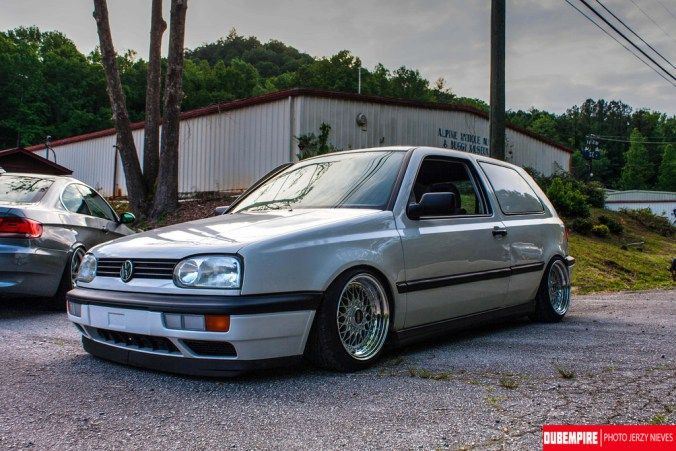
Wheels.
Schmidt TH-Lines.
-4x100
-16x8.5 et24 (2.5 lips)
-16x9.5 et12
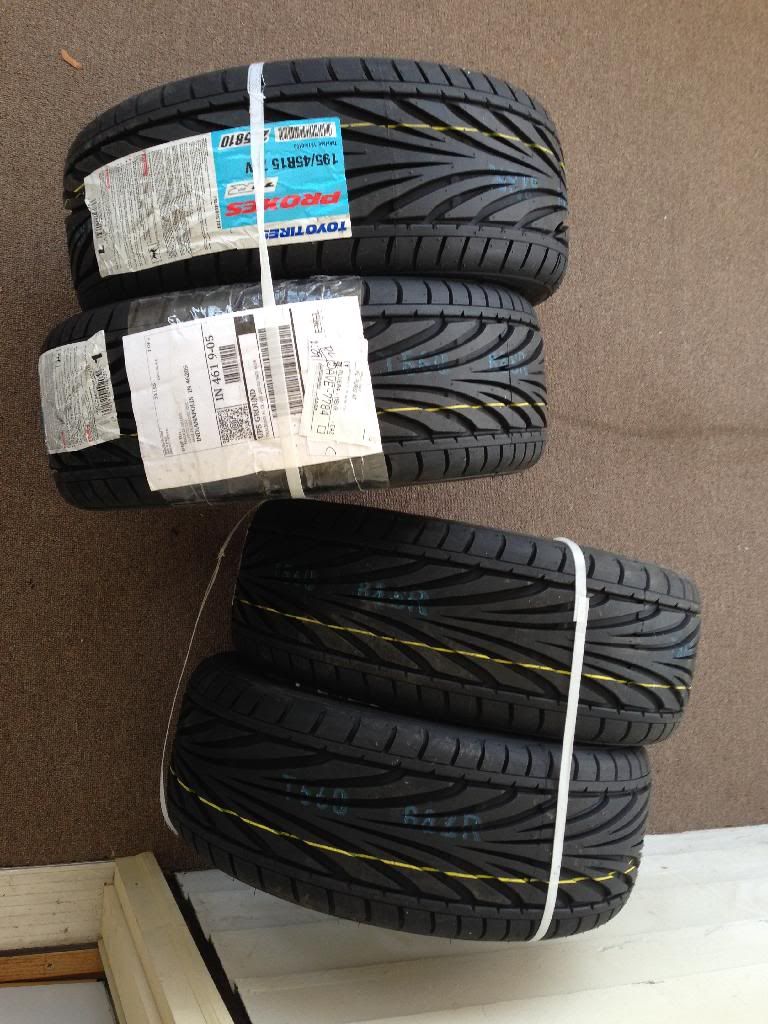
-195/45/16 all around
Full OEM European market van conversion:
Rear OEM seat delete sub panels
Rear OEM cover full length
Rear OEM metal window delete panels - bonded not welded so can be removed if desired.
Rear OEM seat belt delete panels
Rear OEM door card deletes - no speakers, all vinyl covering.
Rear OEM full size spare tire with tool kit tray
OEM Euro Golf trunk opening protector panel
OEM Euro Golf trunk organiser - rare and in great condition which is super rare.
Right hand drive conversion:
Full RHD dash, wiring, wiper, carpet trim etc. Beaver upper and black lowers. Black door cards.
OEM RHD steering rack etc.
Painted and uninsulated RHD firewall
Non-ABS RHD brake setup etc.
Rhd non-AC setup
New RHD heater core
Rhd hood release
Euro headlight switch
Euro cluster - fully functioning
Upper and lower glove boxes
Euro center console front - no cup holders
Euro center console rear
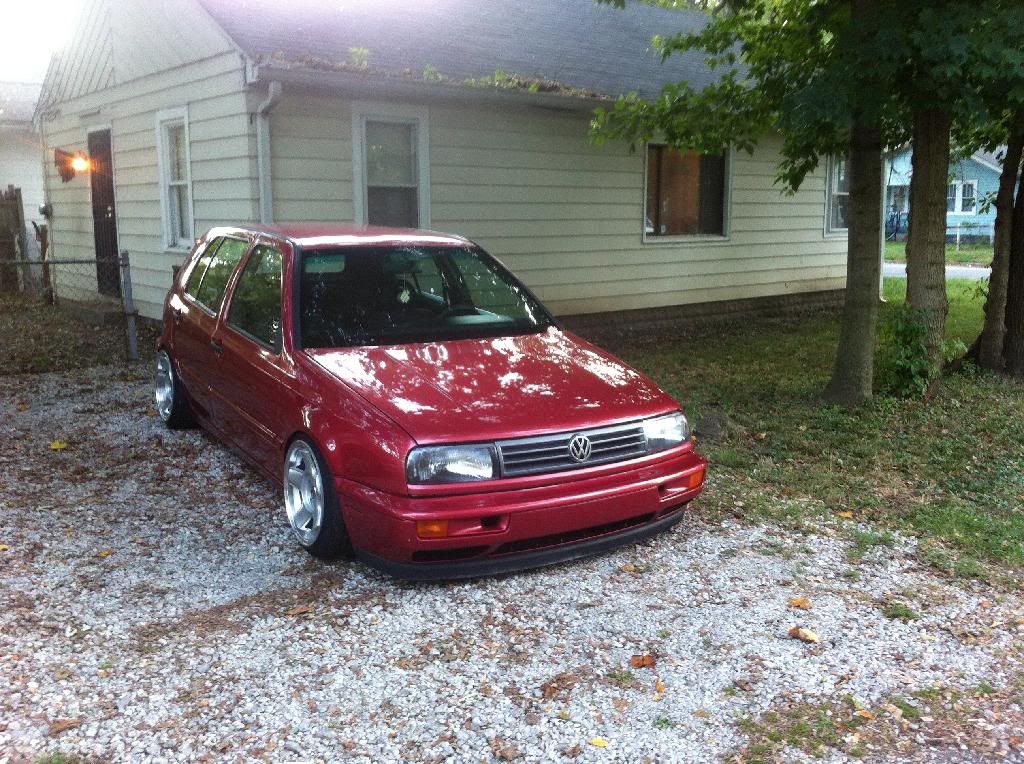
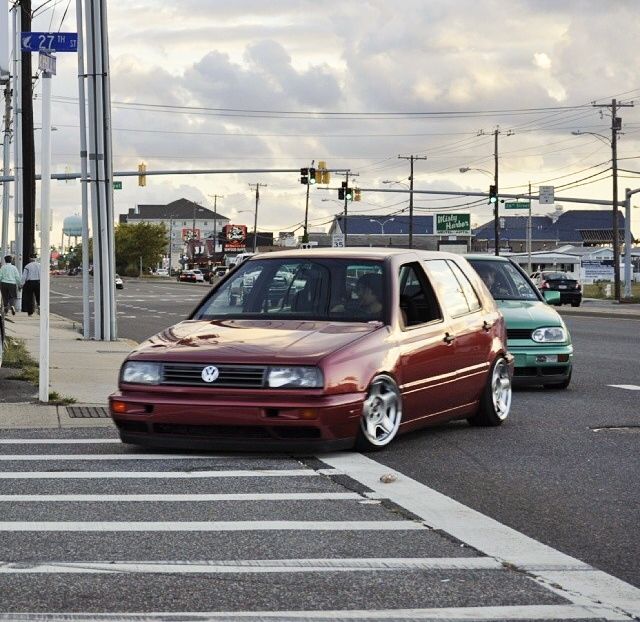
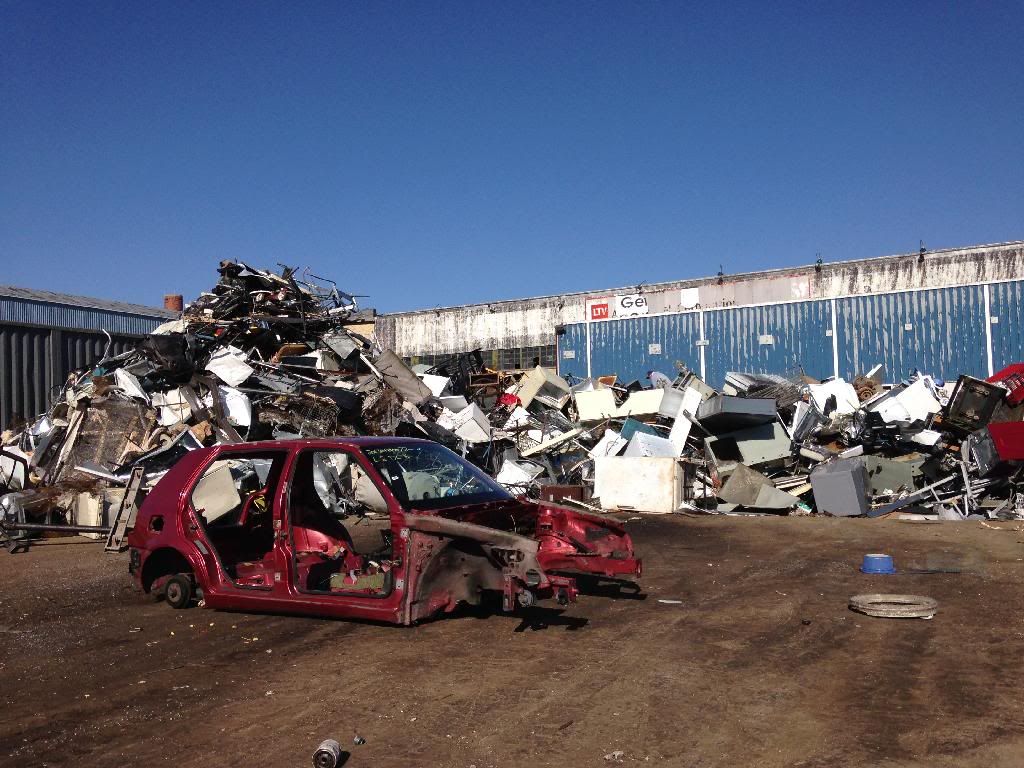
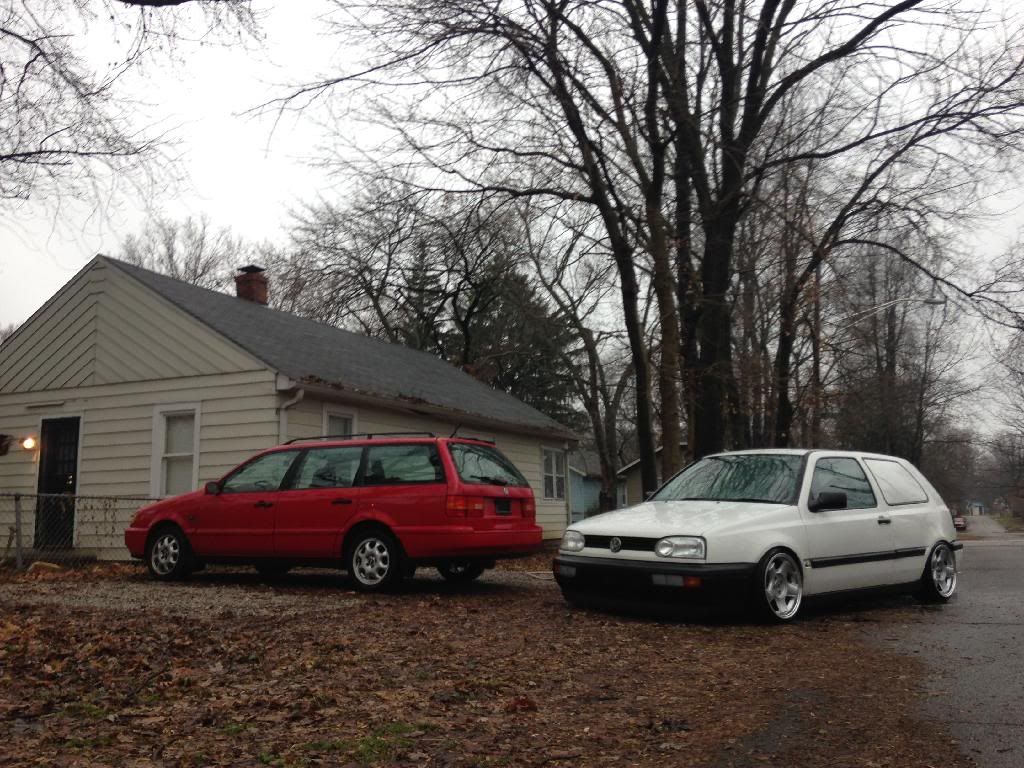
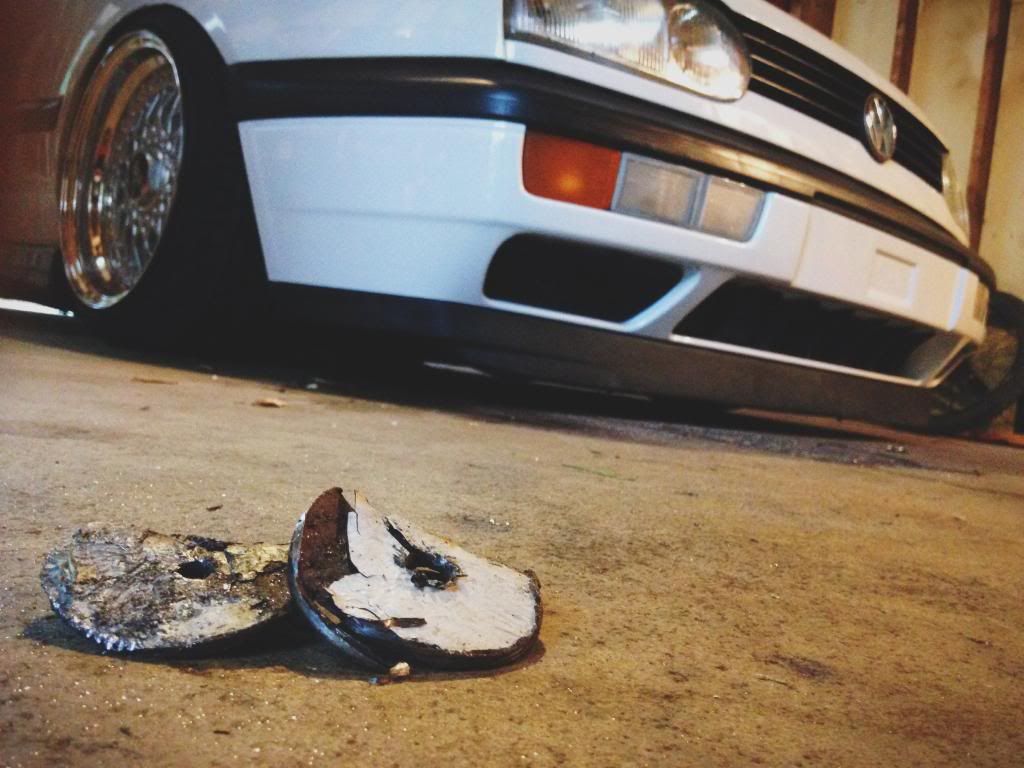
In October 2013 my last MK3 "RED" was stolen. It was recovered 3 days later. Car was in all together minus the radio, speakers & the NA front lip but the underside of the car was destroyed from him driving it carelessly. Subframe, both control arms & driver side tie-rod were all bent & the driver side floor was caved in. After some thinking and looking at the damage and the rust on the floors I figured it was time to let it go. I parted the car out and kept some of the bits for my next car.
Pictures of RED.
RED at her grave.
I looked at a lot of other MK3's since I had a good amount of money to spend. I just wanted a clean and solid Mk3 which is getting harder and harder to find with rust killing more and more off.
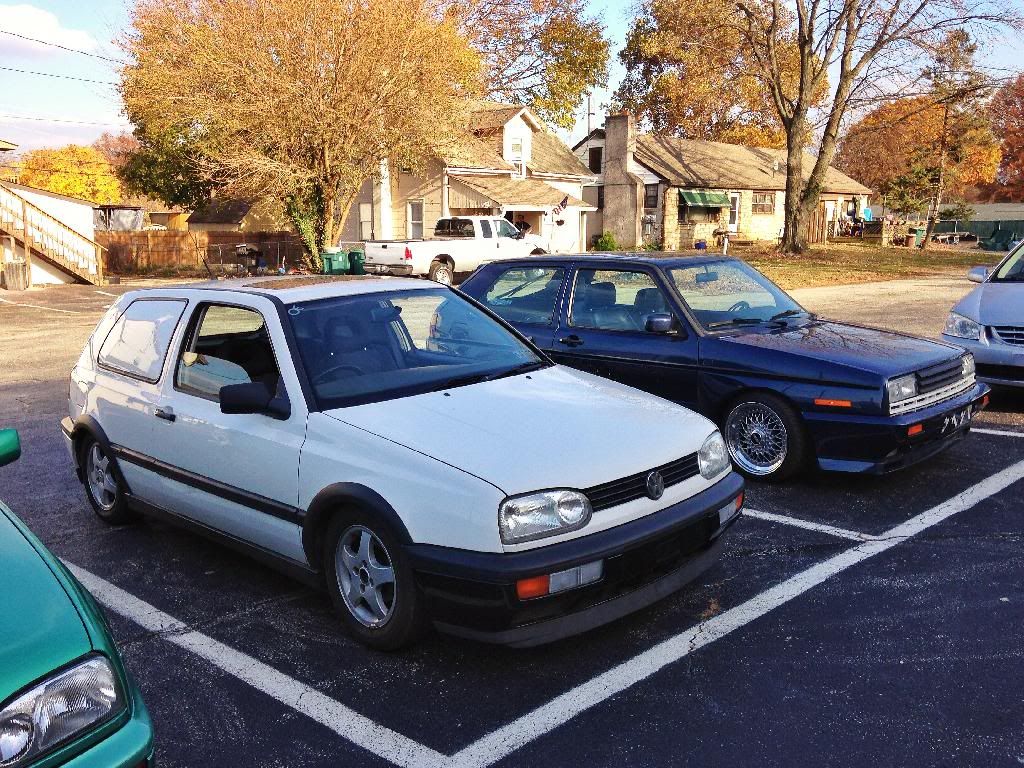
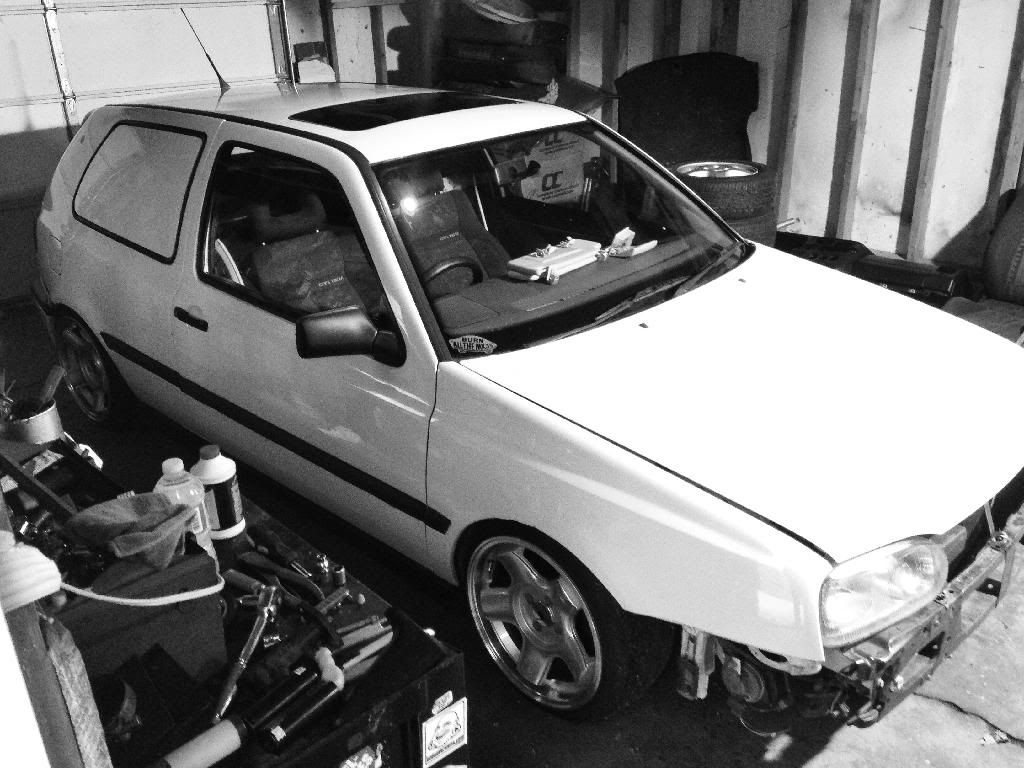
I then landed eye's on this white two door GTI that my good friend Jamie Orr had started building up. A few things made it different from your normal MK3 best being it was RHD, it had metal panels where the rear windows went and it had a UK spec 1.6 ABU motor. So for a mk3 nerd like myself it was nuts to see something like this in the US.
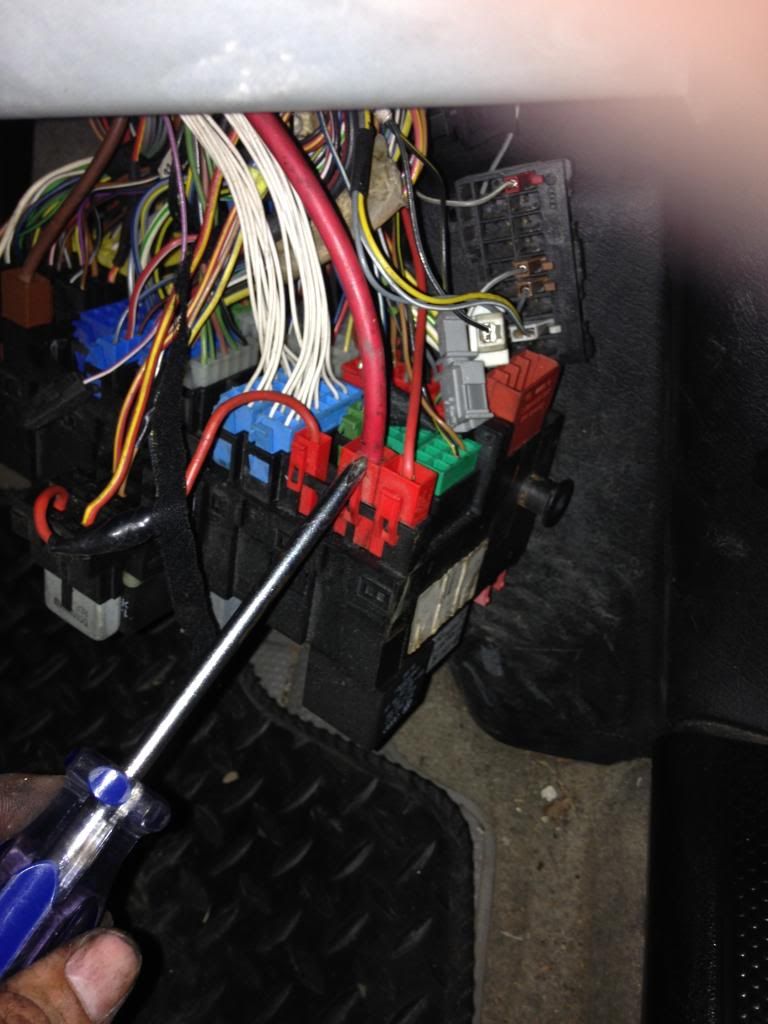
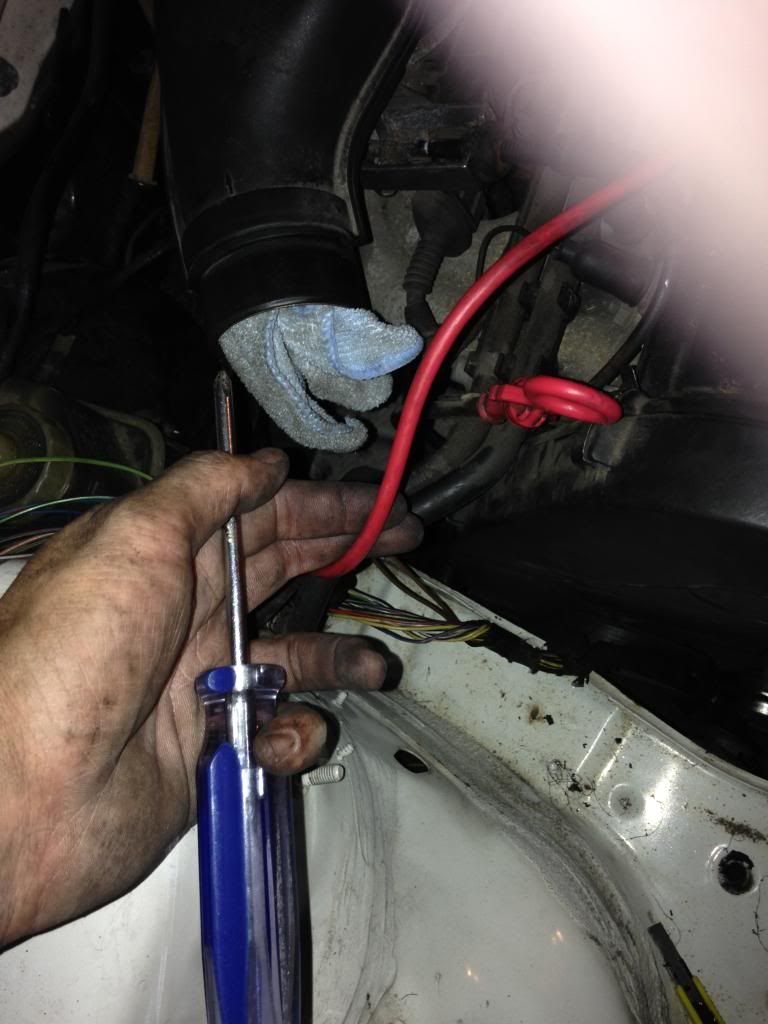
Jamie, who runs Orchid Euro in PA, imported a rhd clip, the 1.6 swap and the all the panel vans bits.
He then did the rhd drive swap and the 1.6 swap in about a week.
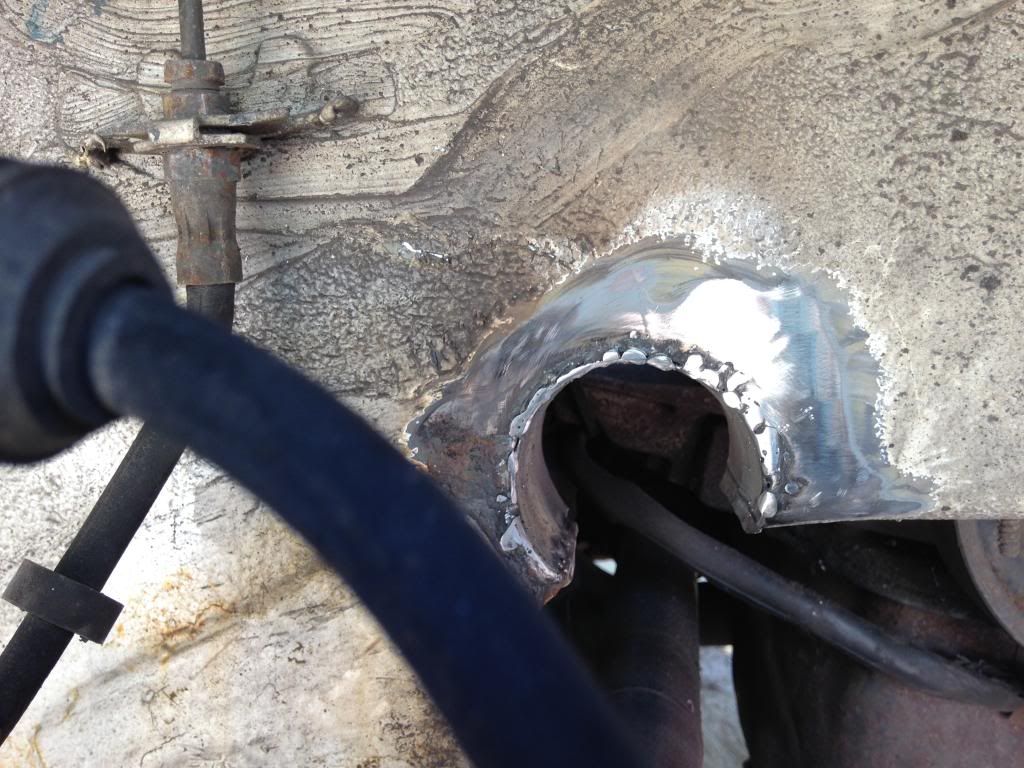
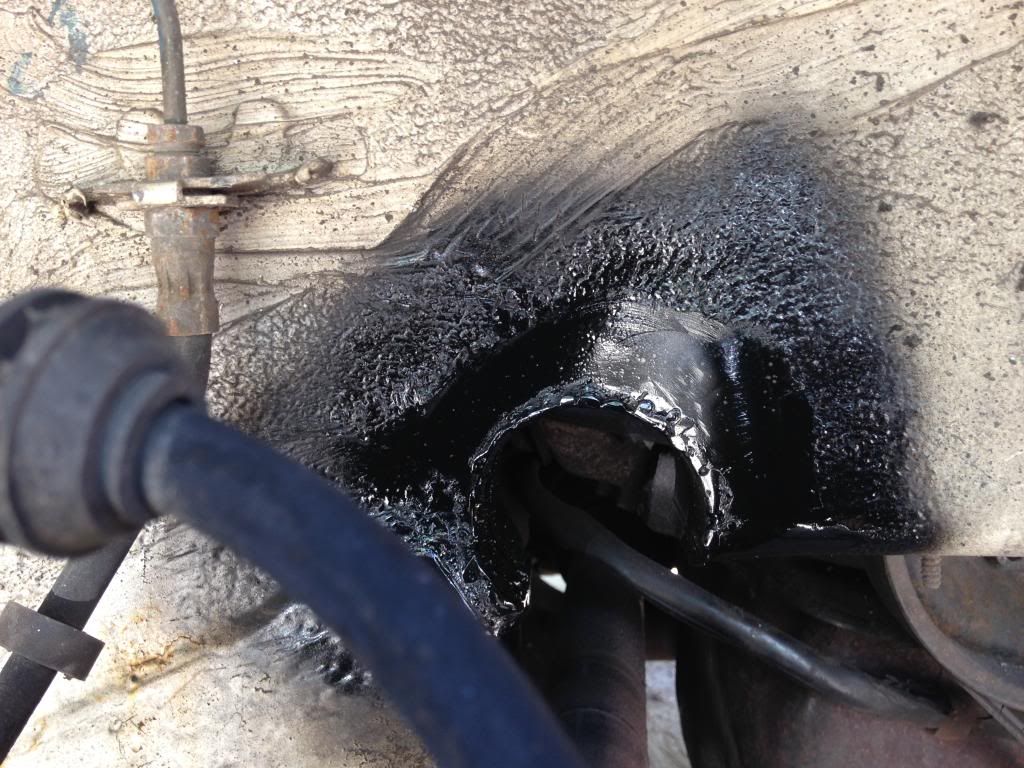
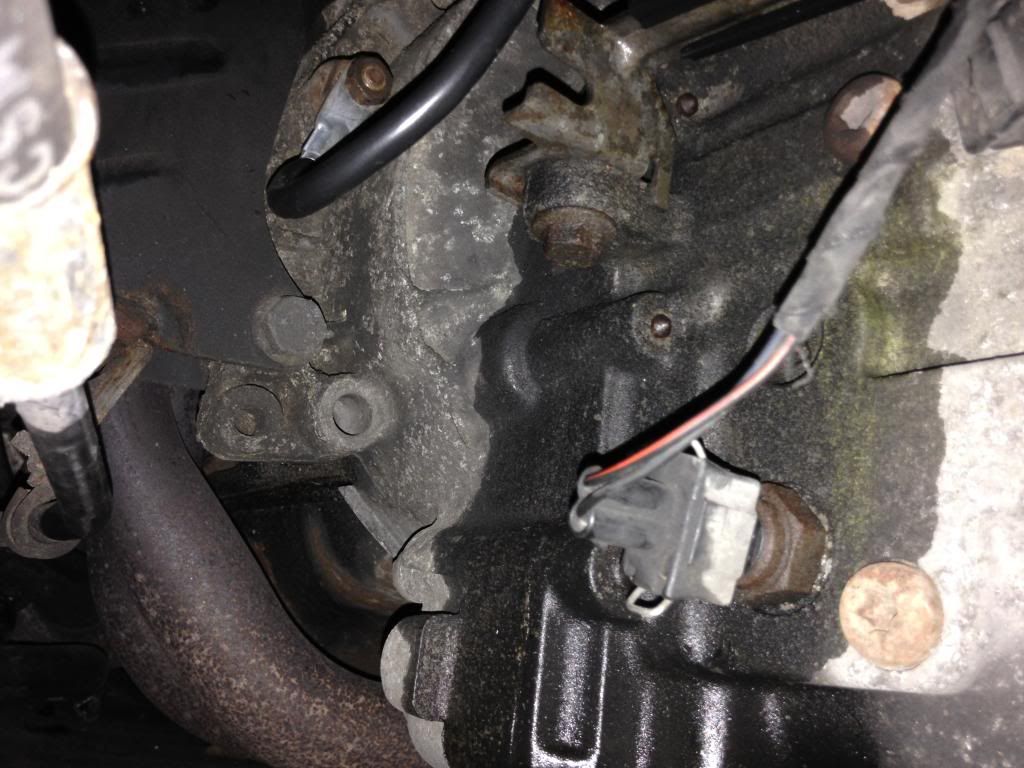
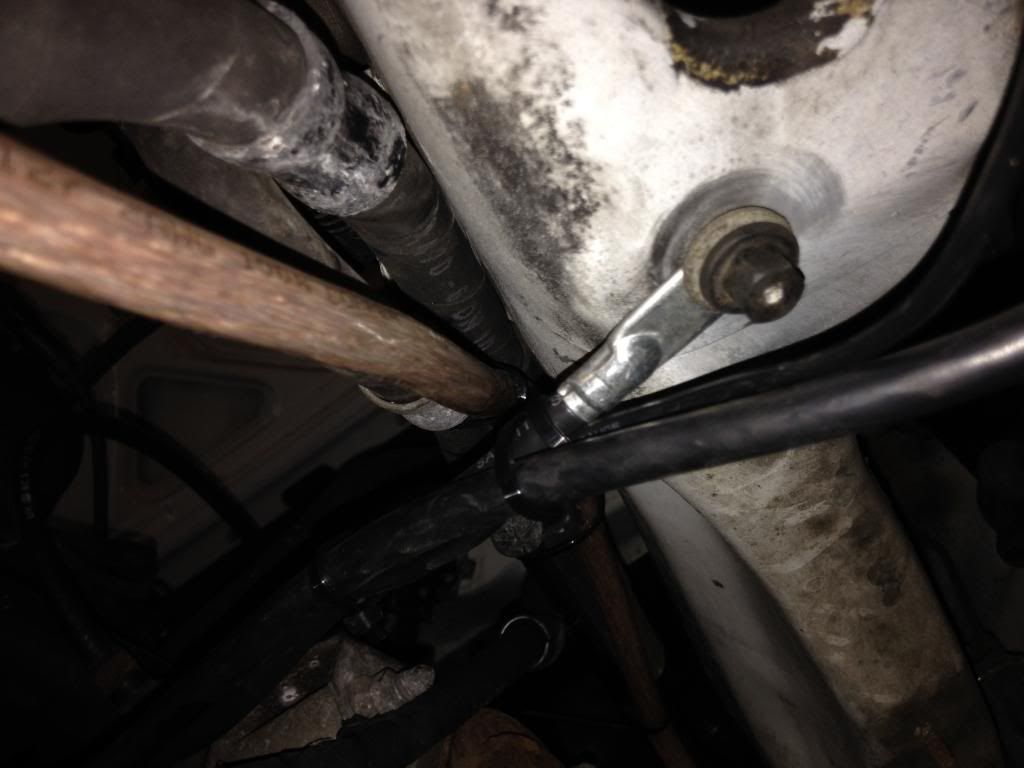
Here are some pictures of the build from Jamie as the swaps where being done..


A few months after Jamie finished the MK3 he put it on sale but no one seemed to want to take the car on. So after looking and debating I figured I would give the Panel Van a good home. Jamie just had one thing he asked of me and that was to contuine to build it and really "finish" it
1997 VW GTI Sport.
Candy white.
1.6L petrol mk3 8v engine swap with matching 5speed transmission, clutch cable setup etc. full matching specific brackets and all other pieces.
Inside.
-SEAT Ibiza GTI 16v front seats with original factory donut headrests
-Chrome button ebrake handle
-Old wood /leather steering wheel
-3.5 black sun visors.
-Redone black headliner.
-OEM Rolling stones edition shift knob/boot.
-V2 control hidden in coin holder.
Outside.
-Euro OEM CL Side moldings.
-Euro OEM hatch
-Euro OEM front rebar
-Euro OEM rear bumper
-Euro OEM rear rebar
-Euro OEM amber turn signals
-USDM GL tail lights
-Euro OEM ecode headlights
-OEM Euro 3 slat grille
-Euro OEM 1/2 length radiator
-Euro OEM 1/2 length rad support
-Euro OEM Golf front bumper
-Euro OEM CL lip
-Engine, fan and light harness tucked in engine bay.
-Battery relocated to trunk.
Suspension.
-Airlift v2 Airride kit,
-MK2/3 struts
-Aitlift skinny 5 gallon tank.
-400c Viair compressor
-Early strut mounts, Modified.
-Frame notch.
-Tie-rod notches
-Adjustable rear camber shims. (-3 degrees)
Wheels.
Schmidt TH-Lines.
-4x100
-16x8.5 et24 (2.5 lips)
-16x9.5 et12
-195/45/16 all around
Full OEM European market van conversion:
Rear OEM seat delete sub panels
Rear OEM cover full length
Rear OEM metal window delete panels - bonded not welded so can be removed if desired.
Rear OEM seat belt delete panels
Rear OEM door card deletes - no speakers, all vinyl covering.
Rear OEM full size spare tire with tool kit tray
OEM Euro Golf trunk opening protector panel
OEM Euro Golf trunk organiser - rare and in great condition which is super rare.
Right hand drive conversion:
Full RHD dash, wiring, wiper, carpet trim etc. Beaver upper and black lowers. Black door cards.
OEM RHD steering rack etc.
Painted and uninsulated RHD firewall
Non-ABS RHD brake setup etc.
Rhd non-AC setup
New RHD heater core
Rhd hood release
Euro headlight switch
Euro cluster - fully functioning
Upper and lower glove boxes
Euro center console front - no cup holders
Euro center console rear
In October 2013 my last MK3 "RED" was stolen. It was recovered 3 days later. Car was in all together minus the radio, speakers & the NA front lip but the underside of the car was destroyed from him driving it carelessly. Subframe, both control arms & driver side tie-rod were all bent & the driver side floor was caved in. After some thinking and looking at the damage and the rust on the floors I figured it was time to let it go. I parted the car out and kept some of the bits for my next car.
Pictures of RED.
RED at her grave.
I looked at a lot of other MK3's since I had a good amount of money to spend. I just wanted a clean and solid Mk3 which is getting harder and harder to find with rust killing more and more off.
I then landed eye's on this white two door GTI that my good friend Jamie Orr had started building up. A few things made it different from your normal MK3 best being it was RHD, it had metal panels where the rear windows went and it had a UK spec 1.6 ABU motor. So for a mk3 nerd like myself it was nuts to see something like this in the US.
Jamie, who runs Orchid Euro in PA, imported a rhd clip, the 1.6 swap and the all the panel vans bits.
He then did the rhd drive swap and the 1.6 swap in about a week.
Here are some pictures of the build from Jamie as the swaps where being done..
A few months after Jamie finished the MK3 he put it on sale but no one seemed to want to take the car on. So after looking and debating I figured I would give the Panel Van a good home. Jamie just had one thing he asked of me and that was to contuine to build it and really "finish" it


 \
\


Comment