 Tweet
Tweet
Engine Build Part 2
After getting the long block built we began to install our tin. For those of you not familiar the engine tin is the back bone of the air cooled system. Most aftermarket tin fits like shit, due to this most modded type 1 engines run hot. Our goal was to not run hot
We began to put on our tin from cb with the cylinder head tin.
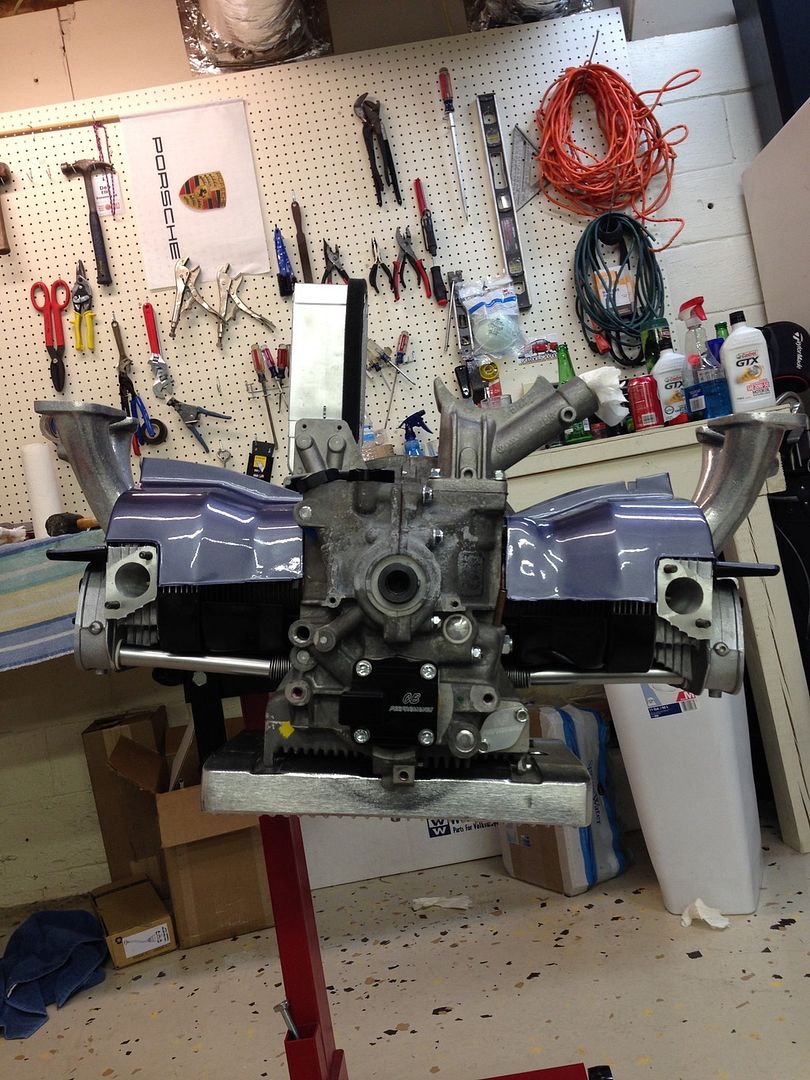
after this we fitted the fan shroud and threw on the oil filler neck.
The tin looked super cool and fit okay after considerable cutting and bending. I was satisfied for the most part other than a couple problems with paint. But after a lot of consideration from my dad, who has actually built a 2 liter VW motor before, the tin would not work. Due to the pretty expensive engine we've put together neither of us wanted it to burn up so we had to give up a little bit of form for function.
The cb tin had some problems that would really prevent us from getting the cooling we wanted. the first problem was that the tin didn't have thermostat flaps, which are almost never used in aftermarket applications. Even though the flaps are unpopular and cause 4 screws to need to be in the fan shroud, (ugly), they are necessary in letting the engine cool properly. The way the flaps work is that a thermostat located under the cylinder head for the 3rd and 4th cylinder expands and contracts with the temperature of the air. When the engine is warming up from a cold start the thermostat will close the flaps so no air is blown over the engine. This allows the engine to warm up quickly and properly and prolongs the life of the engine.
The next problem with the tin is that it doesn't fit very well mostly due to the fact that the engine is significantly stroked. The big ass crank makes the engine anywhere from 1/8 inch to about a full inch wider, making the already shitty aftermarket tin fit even worse.
The final problem with the tin is that we decided to use the 36 horsepower early style fan shroud rather than the late model shroud. The late model doghouse shroud cools the engine the best out of any shroud other than Jake Raby's DTM fan shroud. The problem with this shroud is that it cost 750$ and doesn't allow the use of heater boxes.
After deciding our tin was not sufficent and doing some research we decided to have a tin set specially made from clark at awesomepowdercoat.com . While his wedsites name is a little cheesy imo he knows his shit about engine tin modification. We had him make us a set of his modded tin from original german tin. His mods first of all include widening the various tin pieces specifically for the width of our motor, which we gave him specs on. One important part of the tin that he usually installs is an important air vein in the cylinder head tin. Because we had him get us original german tin this was already installed. we also had him install a venturi ring on the back of the shroud on the inlet for the air to the fan. The venturi ring was added from the factory when they switched beetle to fuel injection and began having heating problems. we also had him fill various holes and gaps for things we wouldn't be using, like the fan shroud mounted coil. We also bought a restored thermostat kit from him. Then we had him buy some custom powder for for powder coating our tin that color matches the L75 beige that all the interior metal is painted. Then he powder coated the tin and sent it over to us and the fun began.
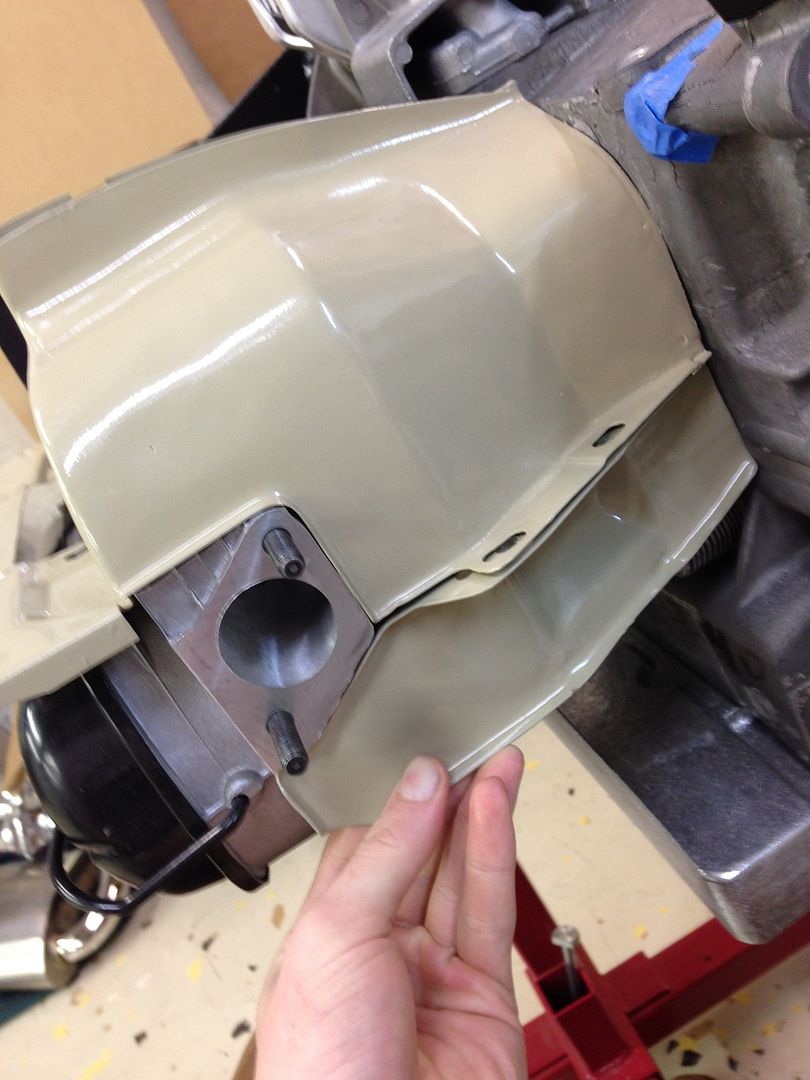
Before installing the new cylinder head tin we noticed that part of the casting of the head's cooling fins went too far into where the tin was to be installed. I grinded this clean using a dremel type tool so the tin could fit flush
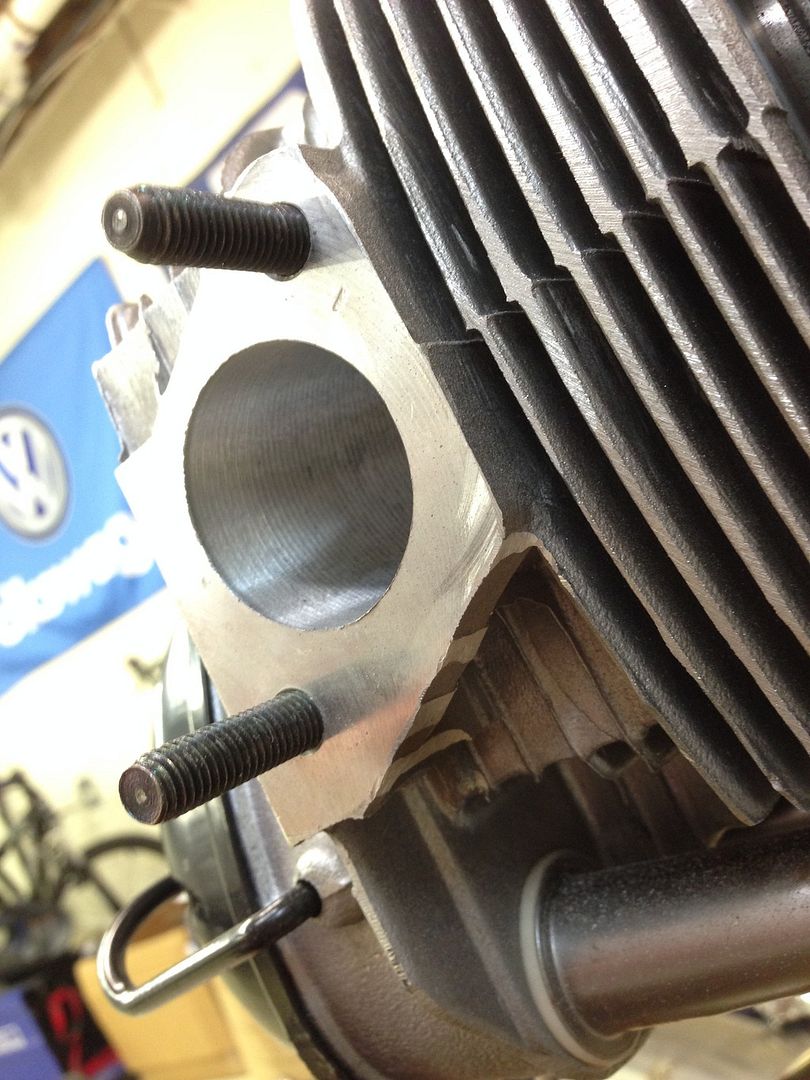
After grinding this flush i put on the tin with the lower piece that's not usually used at all.
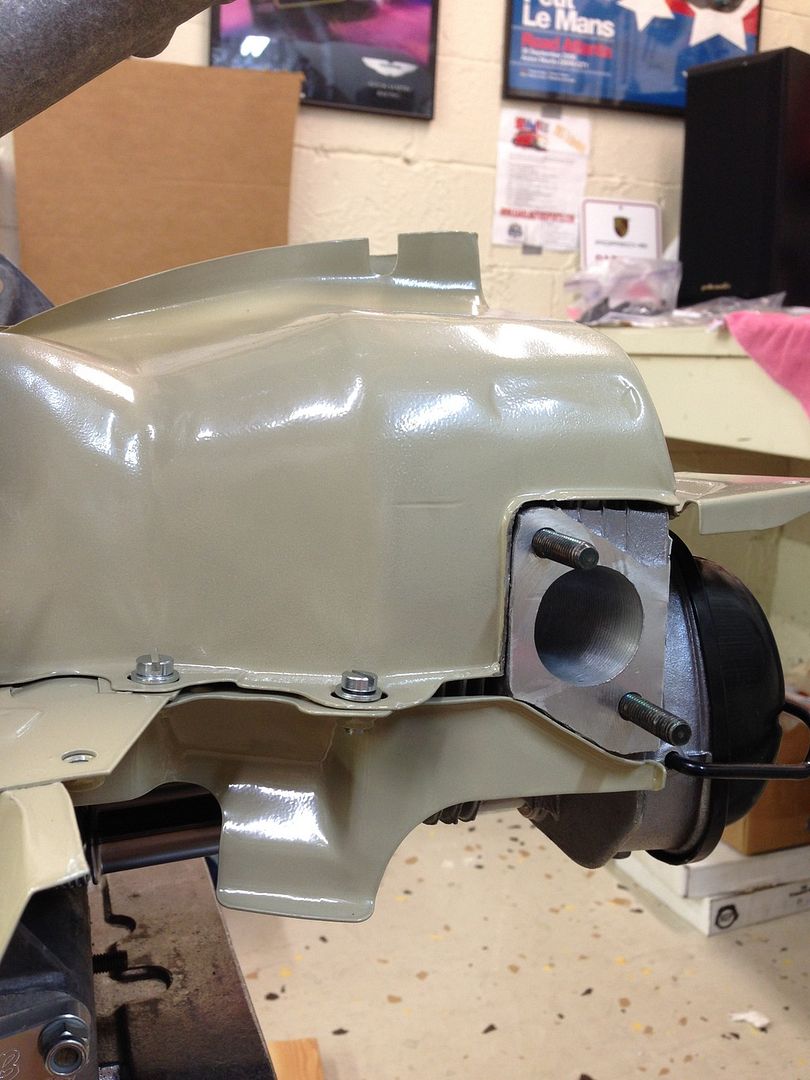
and on the other side as well
After trimming and some slight grinding it all fits very tightly and I'm really satisfied with it. It fits really tight around the case as well as the heads. So then we put the flaps in the shroud and put it on. we also put on the sled tin, necessary for heater boxes and usually not used on aftermarket engines, and we also put on the front pulley tin.

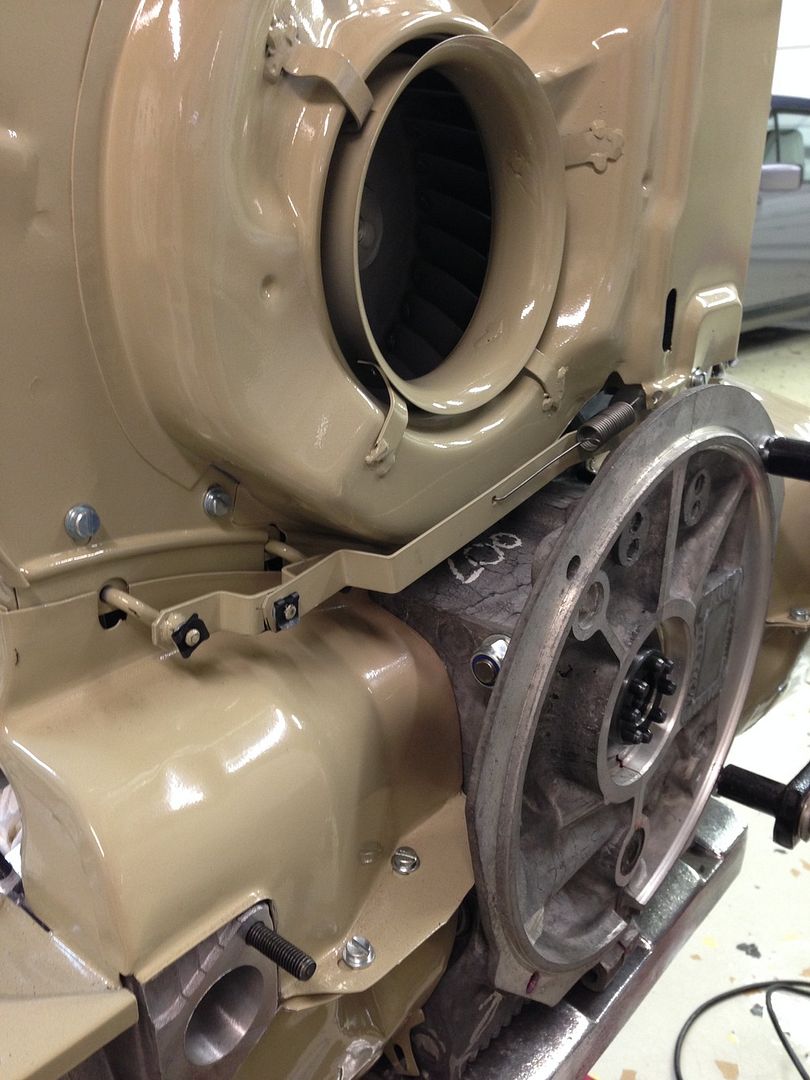
It all fits very well, clark did a very good job extending it. Next we had to put on the linkage for the flaps of the thermostat. That ring in front of the inlet for air for the fan is the venturi ring that we had welded in.
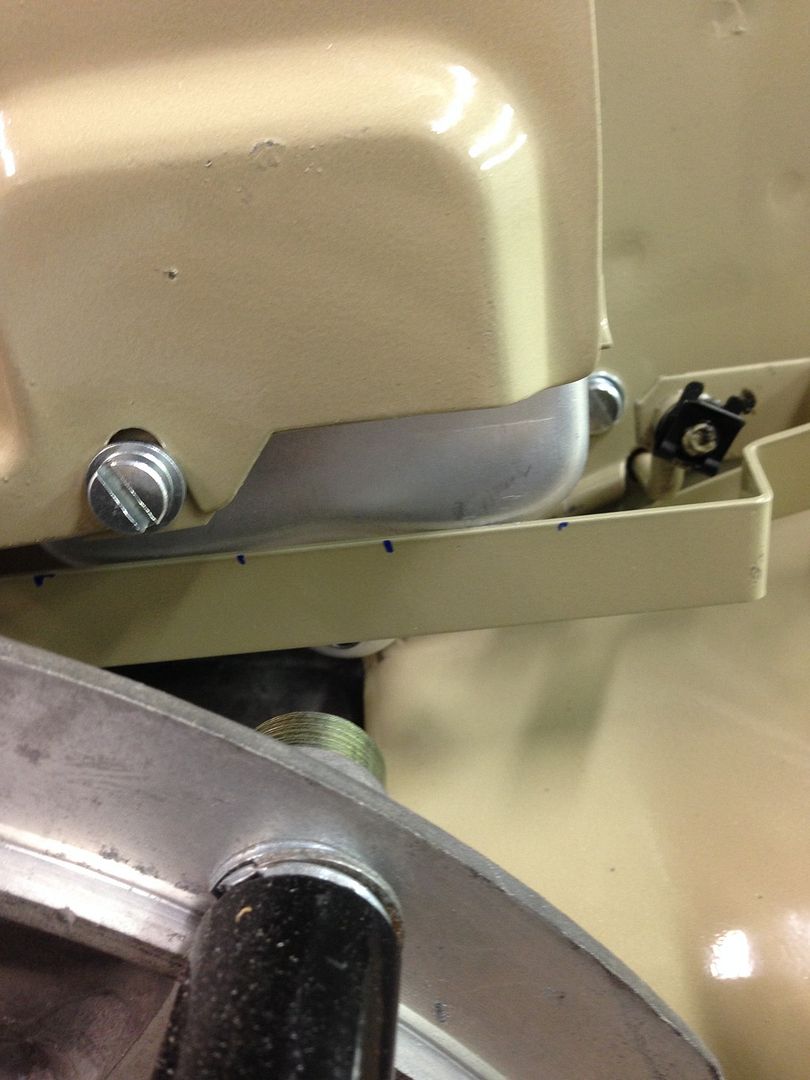
The clearance on the oil cooler was pretty bad so we had to cut some notches into it so it could move without scraping
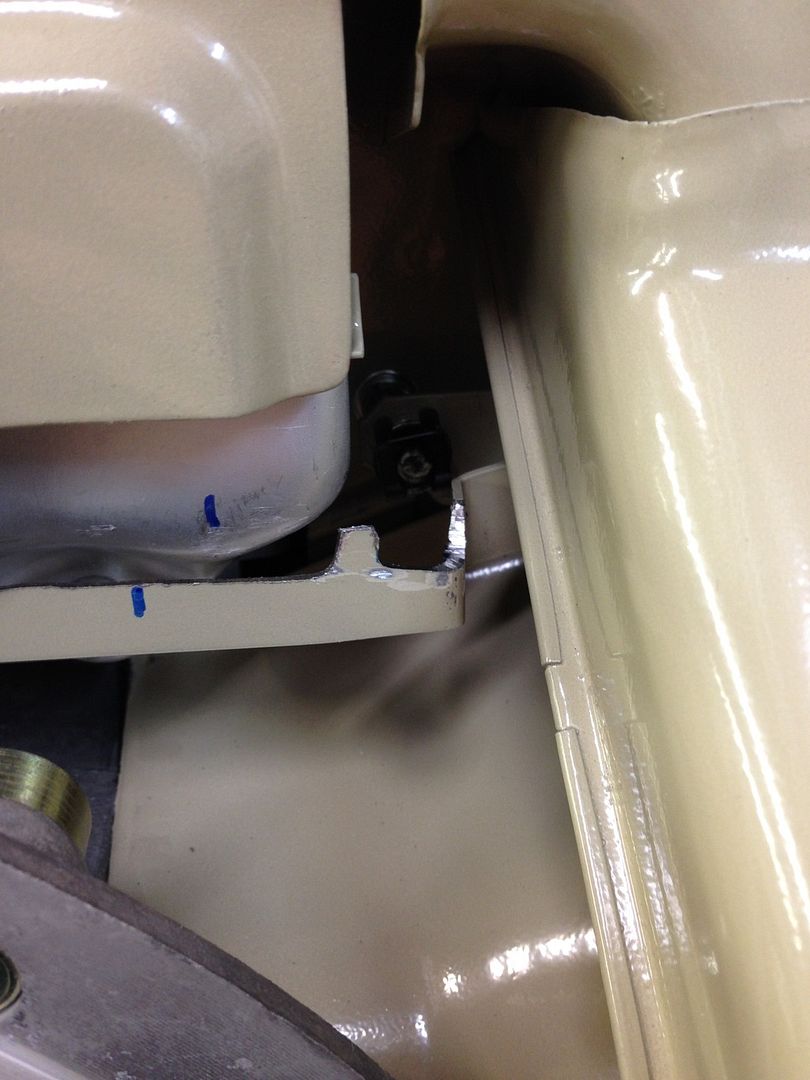
The blue lines would line up if the thermostat was heated, we put them on so we could move the linkage from opened to closed and keep accurate linkage movement without having to actually heat the thermostat. We grinded away an linkage piece that scraped.
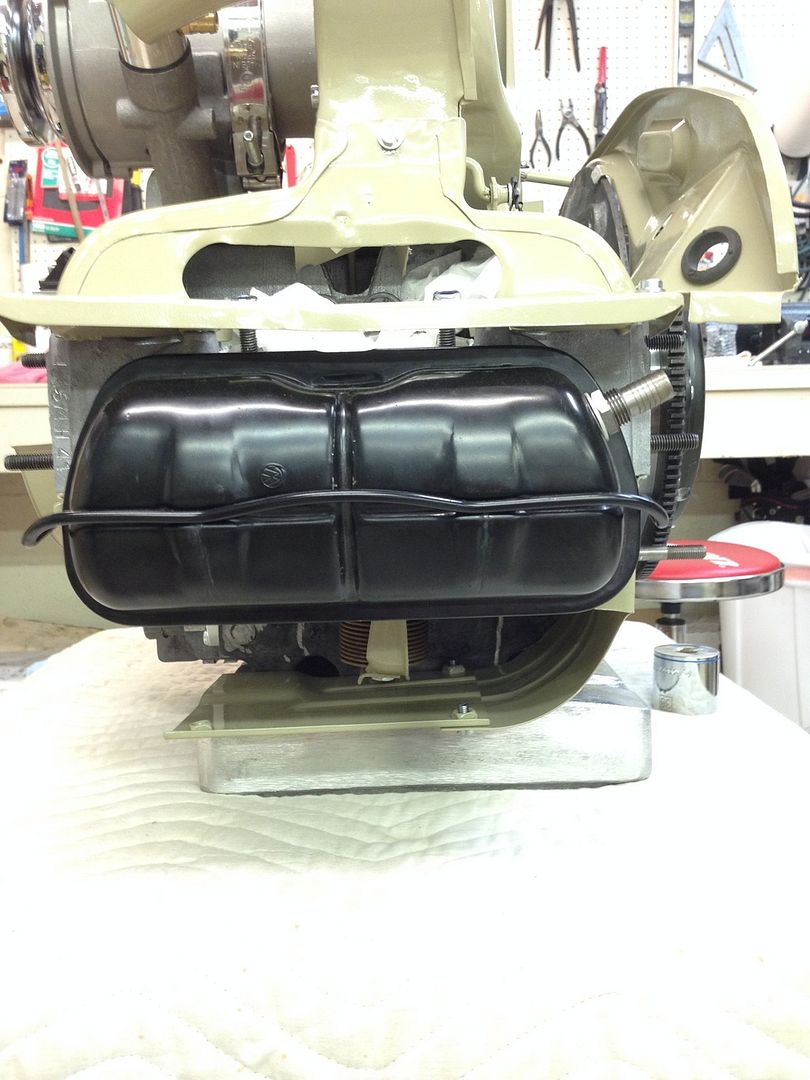
The thermostat was put on with the sled tin and other lower tin pieces. Here it is.
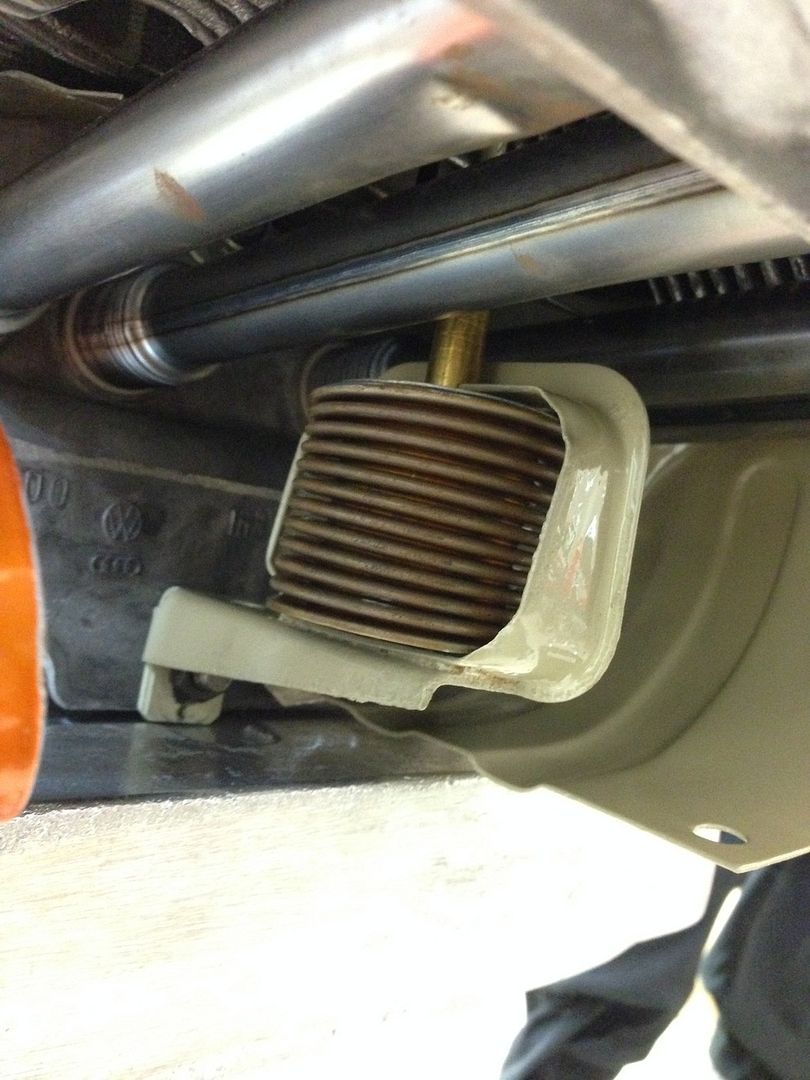
It is in the heated position. When cold the coil binds and only takes up half of the space it does in the picture.
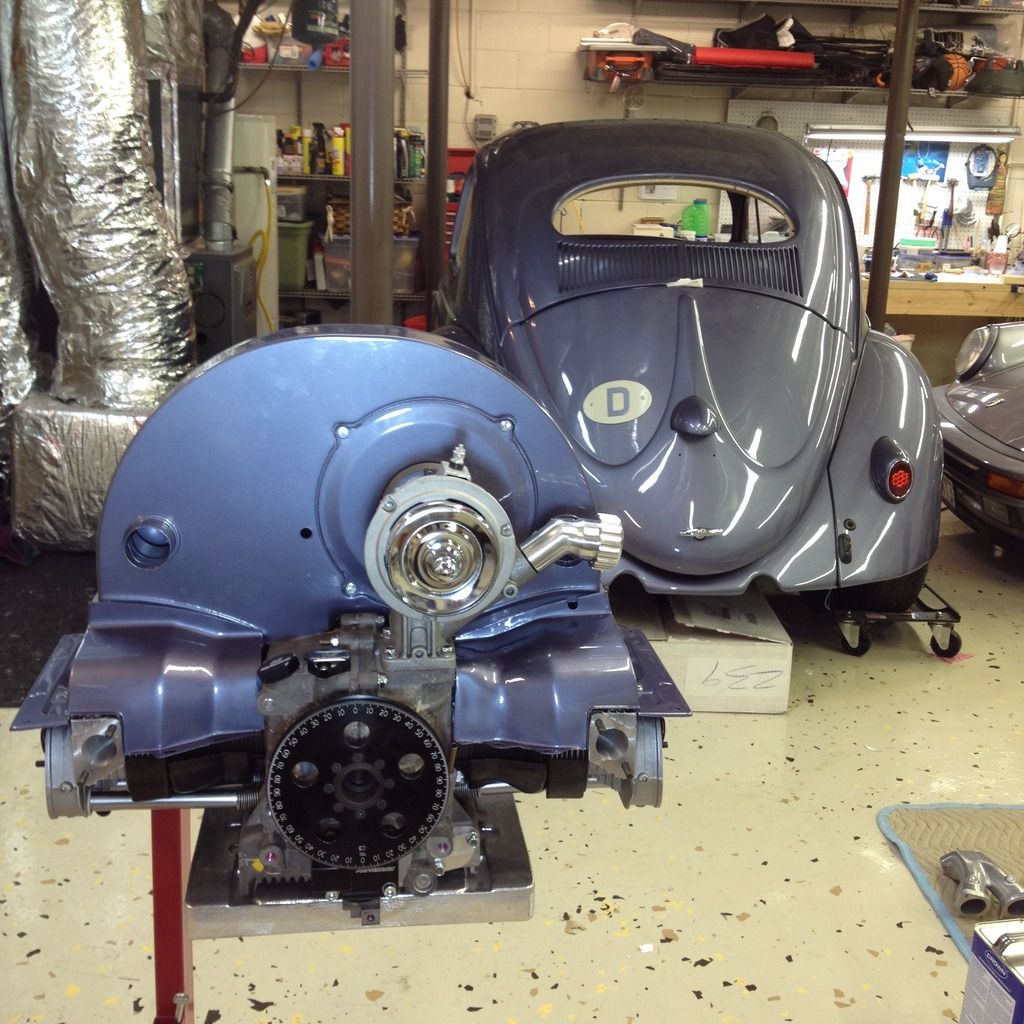
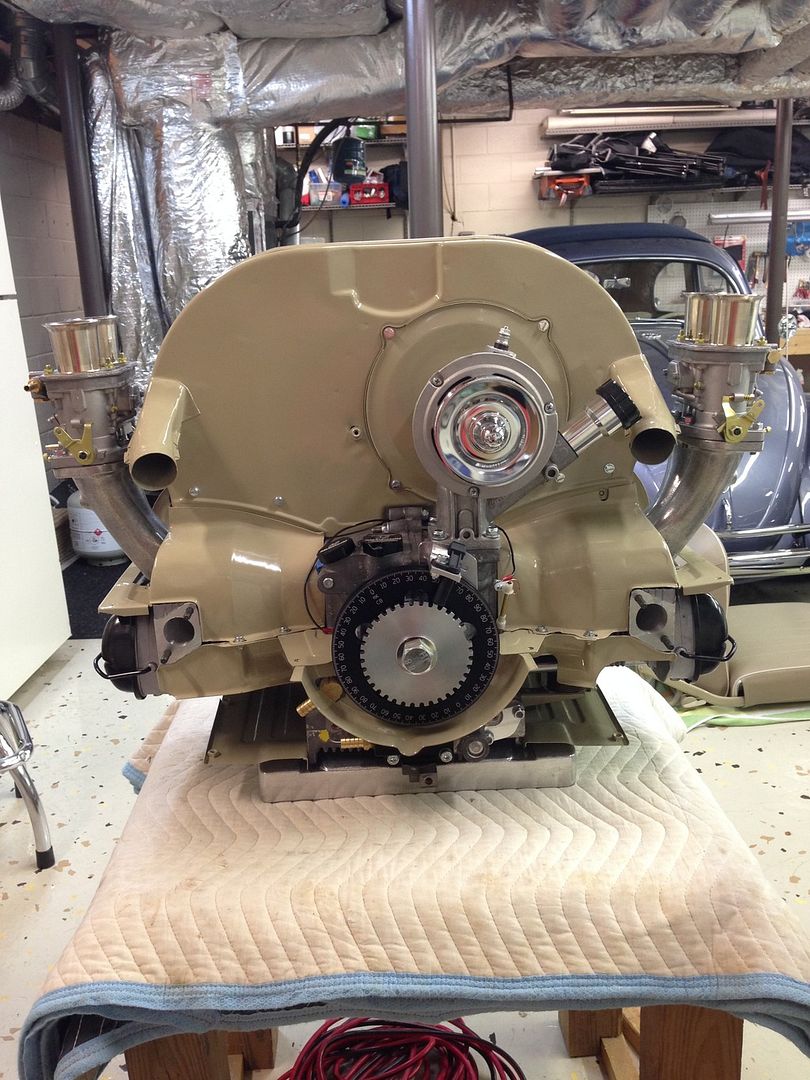
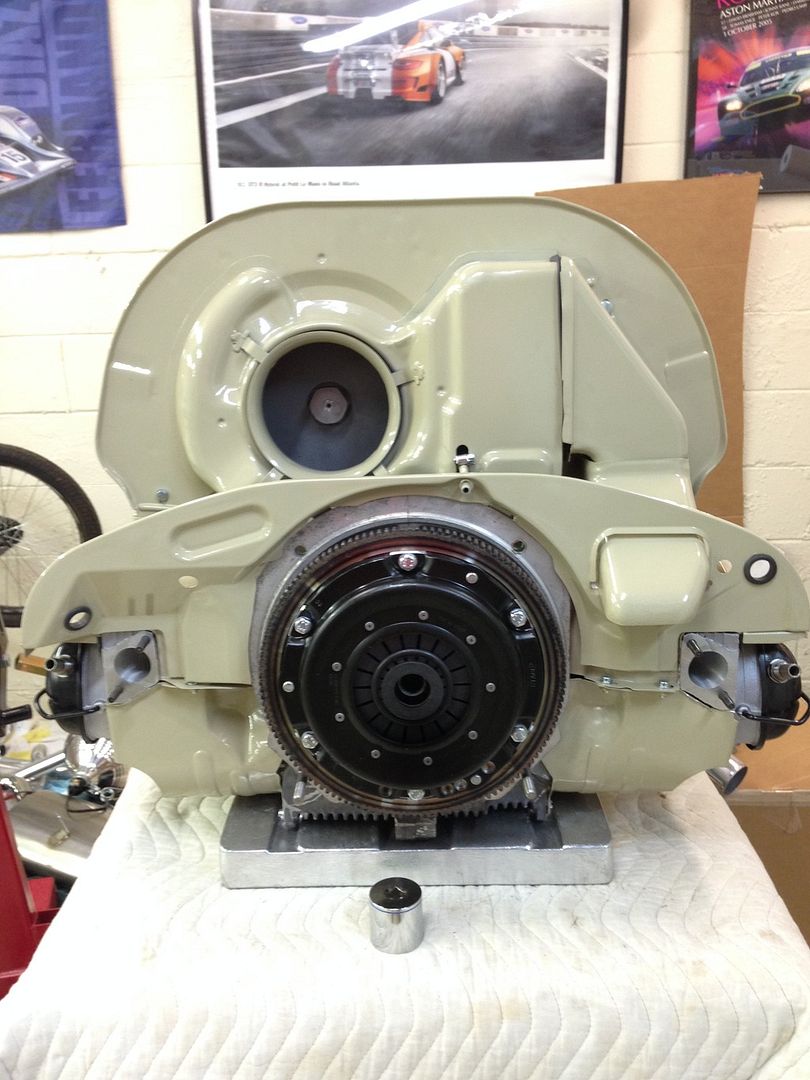
Here is the engine with all the tin installed.

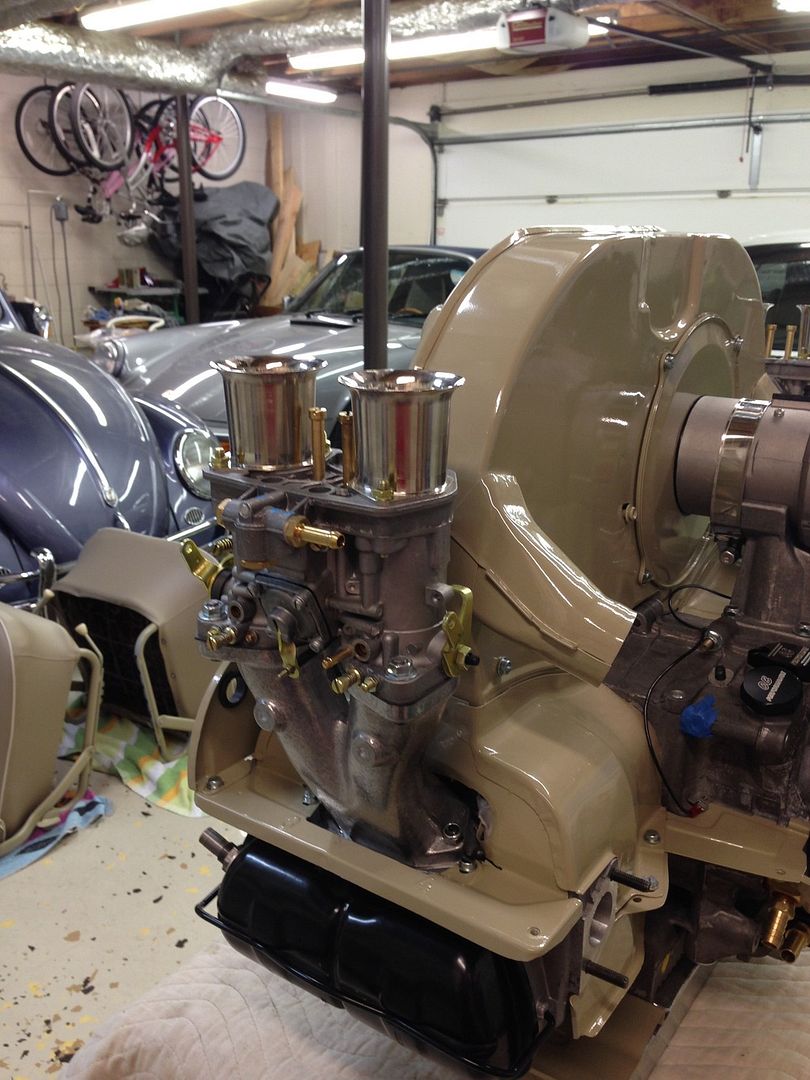
and a teaser with the carbs and manifolds mocked up .
damn I love velocity stacks.
next we secured the flywheel by torquing our gland nut to 500ft lbs with the torque meister tool thats popular on vw's.
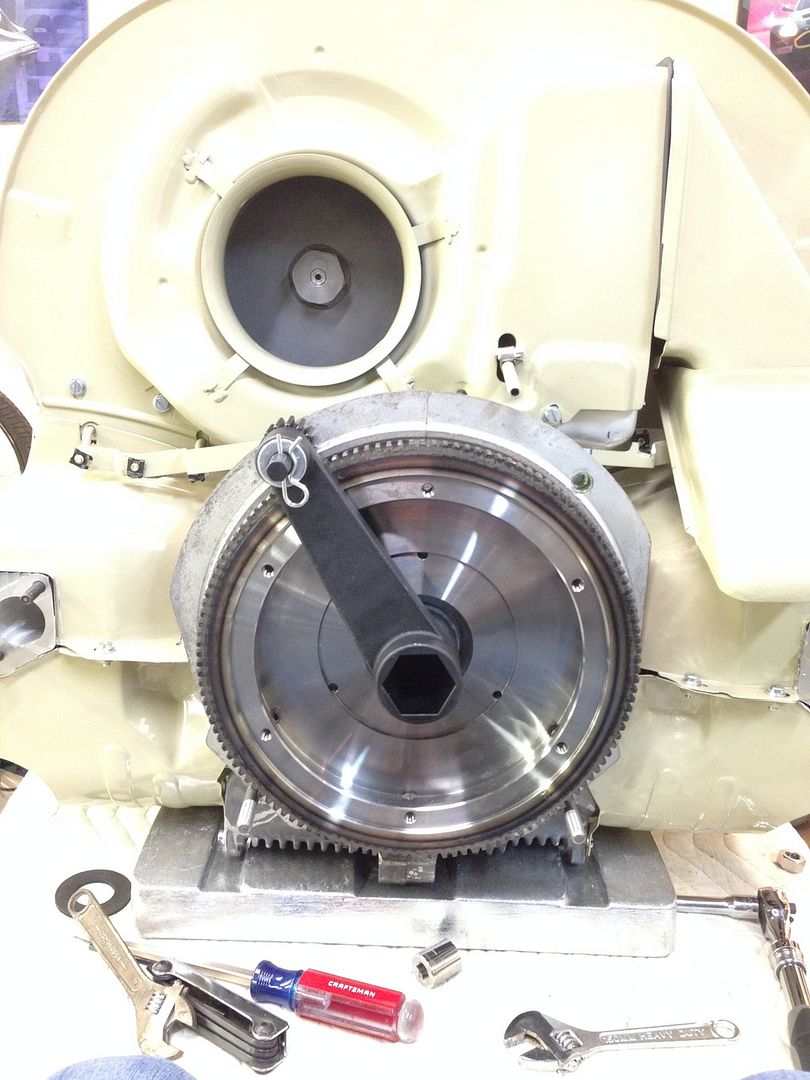
and then we put on our kennedy stage 2 pressure plate. 2300 lbs if I remember correctly.
Next we vented our valve cover to run for our breather box later on
and that concludes the engine build part 2. Part 3 it will go into the car.
After getting the long block built we began to install our tin. For those of you not familiar the engine tin is the back bone of the air cooled system. Most aftermarket tin fits like shit, due to this most modded type 1 engines run hot. Our goal was to not run hot
We began to put on our tin from cb with the cylinder head tin.
after this we fitted the fan shroud and threw on the oil filler neck.
The tin looked super cool and fit okay after considerable cutting and bending. I was satisfied for the most part other than a couple problems with paint. But after a lot of consideration from my dad, who has actually built a 2 liter VW motor before, the tin would not work. Due to the pretty expensive engine we've put together neither of us wanted it to burn up so we had to give up a little bit of form for function.
The cb tin had some problems that would really prevent us from getting the cooling we wanted. the first problem was that the tin didn't have thermostat flaps, which are almost never used in aftermarket applications. Even though the flaps are unpopular and cause 4 screws to need to be in the fan shroud, (ugly), they are necessary in letting the engine cool properly. The way the flaps work is that a thermostat located under the cylinder head for the 3rd and 4th cylinder expands and contracts with the temperature of the air. When the engine is warming up from a cold start the thermostat will close the flaps so no air is blown over the engine. This allows the engine to warm up quickly and properly and prolongs the life of the engine.
The next problem with the tin is that it doesn't fit very well mostly due to the fact that the engine is significantly stroked. The big ass crank makes the engine anywhere from 1/8 inch to about a full inch wider, making the already shitty aftermarket tin fit even worse.
The final problem with the tin is that we decided to use the 36 horsepower early style fan shroud rather than the late model shroud. The late model doghouse shroud cools the engine the best out of any shroud other than Jake Raby's DTM fan shroud. The problem with this shroud is that it cost 750$ and doesn't allow the use of heater boxes.
After deciding our tin was not sufficent and doing some research we decided to have a tin set specially made from clark at awesomepowdercoat.com . While his wedsites name is a little cheesy imo he knows his shit about engine tin modification. We had him make us a set of his modded tin from original german tin. His mods first of all include widening the various tin pieces specifically for the width of our motor, which we gave him specs on. One important part of the tin that he usually installs is an important air vein in the cylinder head tin. Because we had him get us original german tin this was already installed. we also had him install a venturi ring on the back of the shroud on the inlet for the air to the fan. The venturi ring was added from the factory when they switched beetle to fuel injection and began having heating problems. we also had him fill various holes and gaps for things we wouldn't be using, like the fan shroud mounted coil. We also bought a restored thermostat kit from him. Then we had him buy some custom powder for for powder coating our tin that color matches the L75 beige that all the interior metal is painted. Then he powder coated the tin and sent it over to us and the fun began.
Before installing the new cylinder head tin we noticed that part of the casting of the head's cooling fins went too far into where the tin was to be installed. I grinded this clean using a dremel type tool so the tin could fit flush
After grinding this flush i put on the tin with the lower piece that's not usually used at all.
and on the other side as well
After trimming and some slight grinding it all fits very tightly and I'm really satisfied with it. It fits really tight around the case as well as the heads. So then we put the flaps in the shroud and put it on. we also put on the sled tin, necessary for heater boxes and usually not used on aftermarket engines, and we also put on the front pulley tin.
It all fits very well, clark did a very good job extending it. Next we had to put on the linkage for the flaps of the thermostat. That ring in front of the inlet for air for the fan is the venturi ring that we had welded in.
The clearance on the oil cooler was pretty bad so we had to cut some notches into it so it could move without scraping
The blue lines would line up if the thermostat was heated, we put them on so we could move the linkage from opened to closed and keep accurate linkage movement without having to actually heat the thermostat. We grinded away an linkage piece that scraped.
The thermostat was put on with the sled tin and other lower tin pieces. Here it is.
It is in the heated position. When cold the coil binds and only takes up half of the space it does in the picture.
Here is the engine with all the tin installed.
and a teaser with the carbs and manifolds mocked up .
damn I love velocity stacks.
next we secured the flywheel by torquing our gland nut to 500ft lbs with the torque meister tool thats popular on vw's.
and then we put on our kennedy stage 2 pressure plate. 2300 lbs if I remember correctly.
Next we vented our valve cover to run for our breather box later on
and that concludes the engine build part 2. Part 3 it will go into the car.


Comment