 Tweet
Tweet
Looking good!
-
IG: ashtonlafleur
-
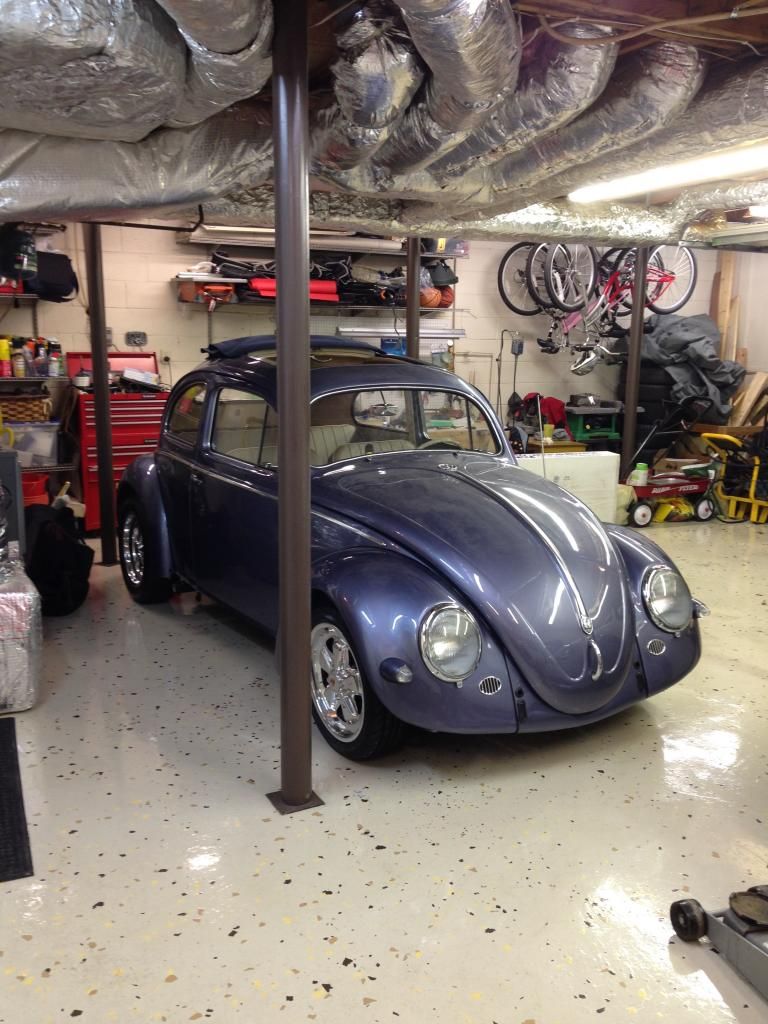
So I'll give a short update real quick, I've been working on the interior and the seats are in and looking good. I really like to just let the pictures do the talking so here they are

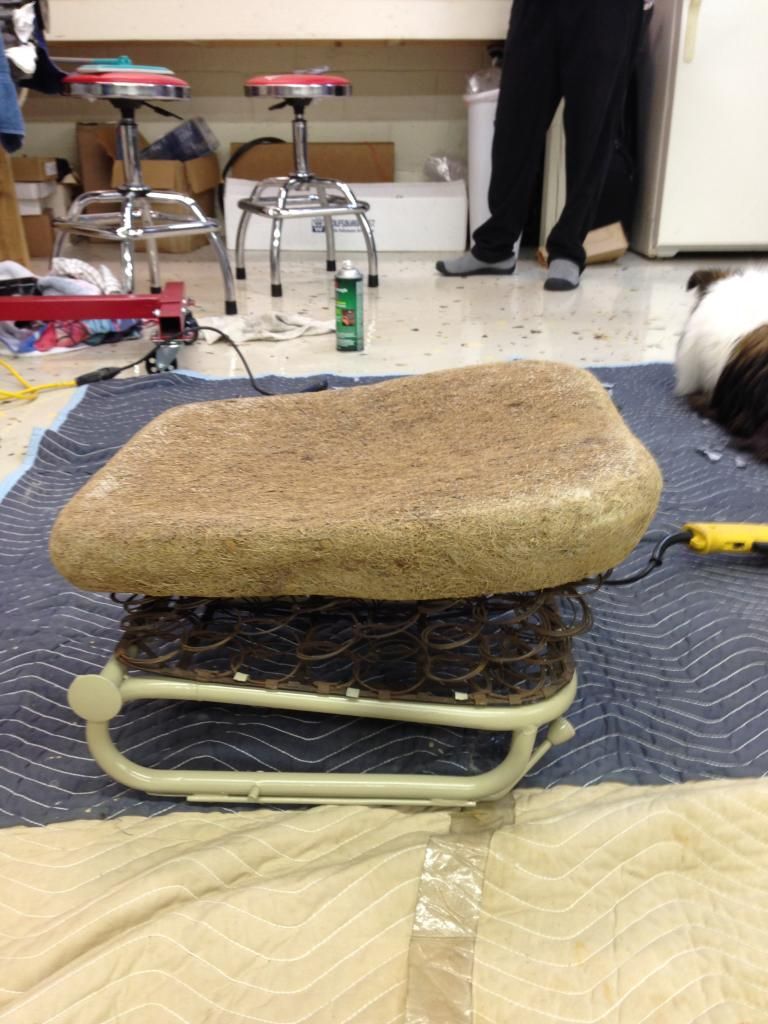
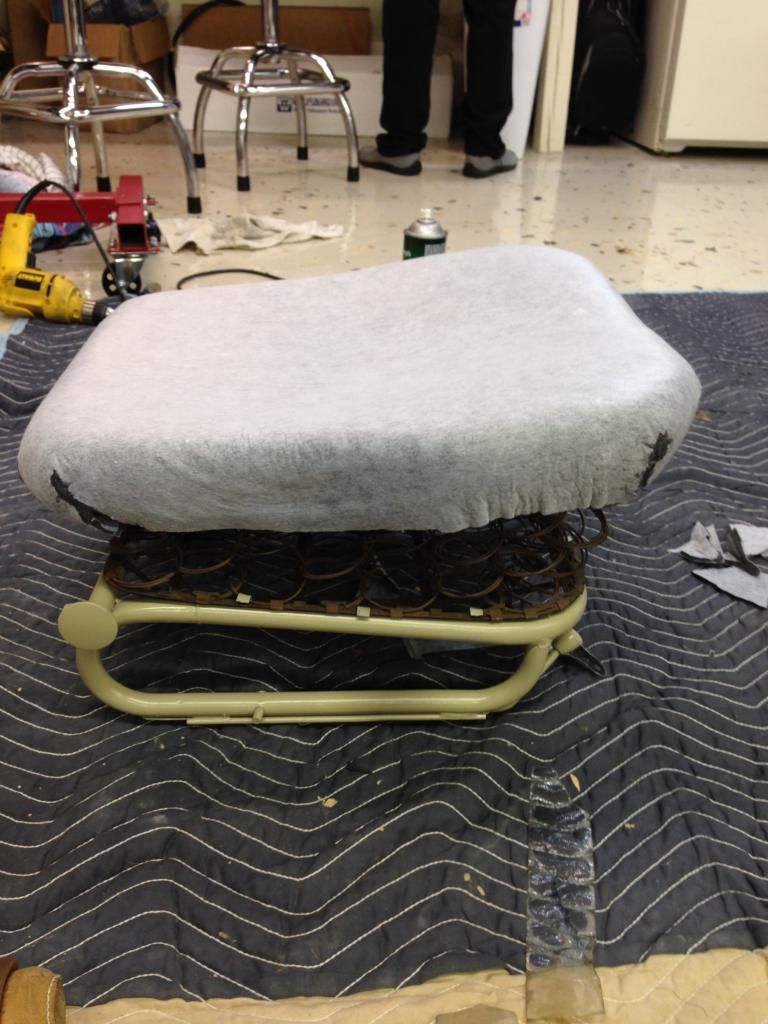
I put on that extra padding and it really added some plushness to the seat, i would definetly recommend it to anyone recovering vw seats.
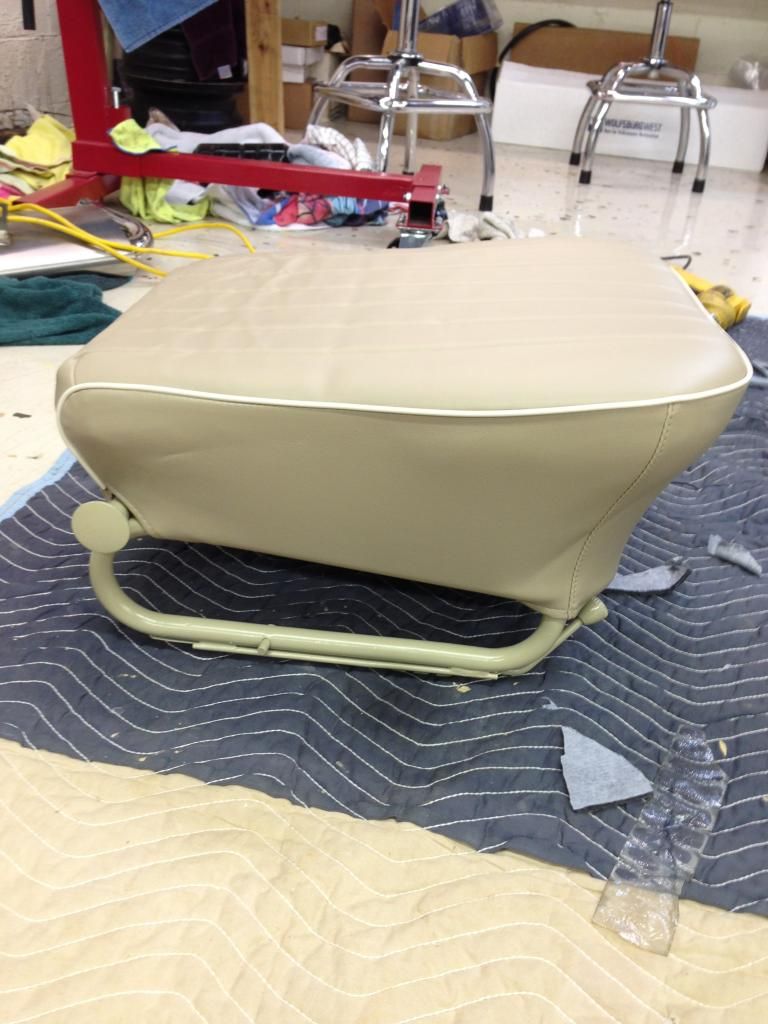
These were way easier to do than i expected and they came out awesome. There are a few wrinkles on the lower part of the seat but the have come out by now.
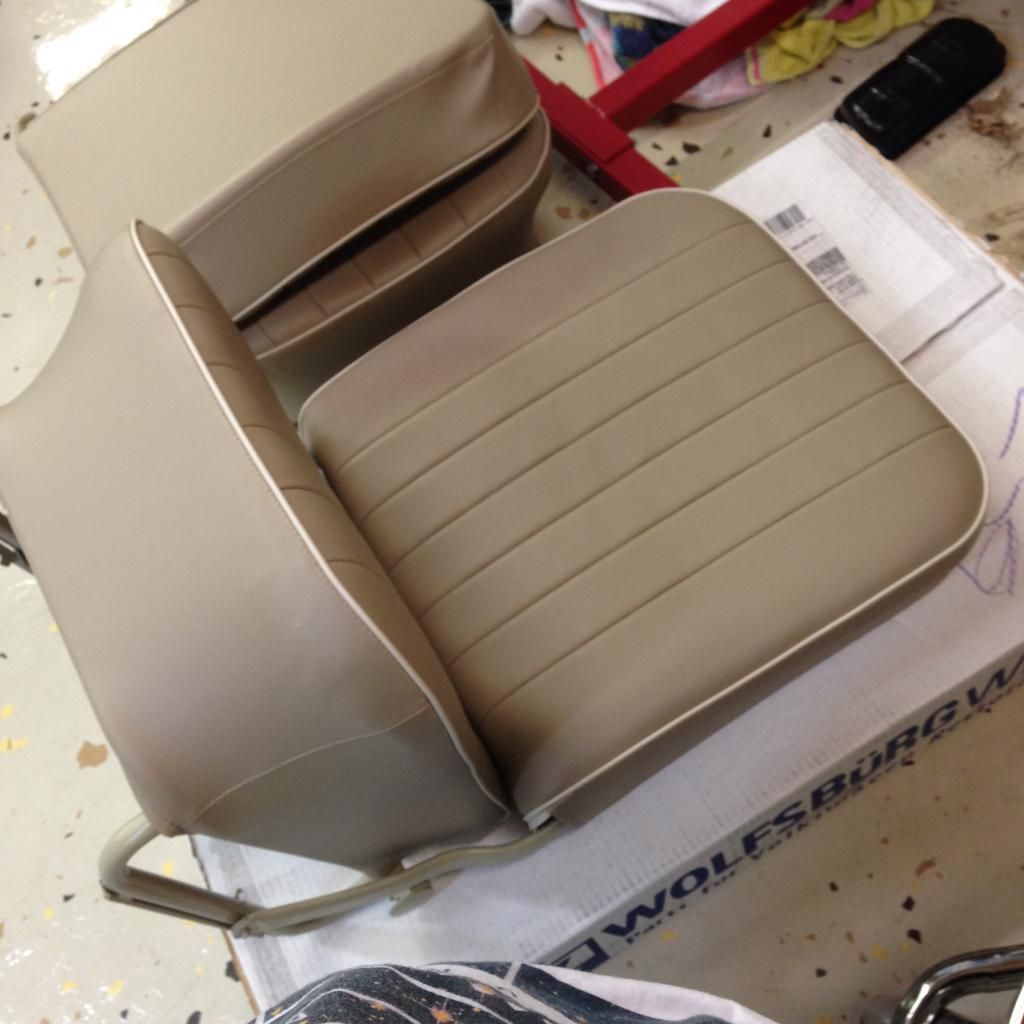

The overall finish was awesome and they turned out better than I expected considering ive never done upholstery work before.
Ill admit it I am the laziest thread updater ever and I have a'lot of things done that aren't in this thread. I'm going to do at least one more small update this weekend and I could do Part 1 of the engine build if people are interested.( The engine build will actually be in depth). Or i could just get all my other miscellaneous updates out of the way. Anyway, till next time more updates to come.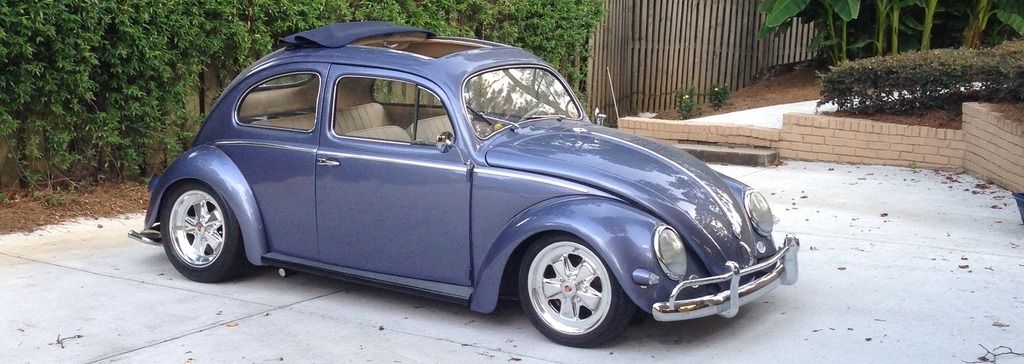
Comment
-
-
This thing is killer. Please tell me it's still going to be a pan scraper.IG: ashtonlafleur
Comment
-
Absolutely gorgeous build, man!Comment
-
I have to be honest and say that making this car quick is much more important to me then slamming the shit out of it... The front beam will probably be a healthy 1.5 inches off the ground but chances are I'll at least put it on the ground the week before sowo. And one thing that I never really said is that this car will be daily driven because its my only car. (other cars in this shiny garage are my parents). oh yeah and I'm a high school sophomore.
And tonight will be a picture heavy update and should be a pretty cool one.Comment
-
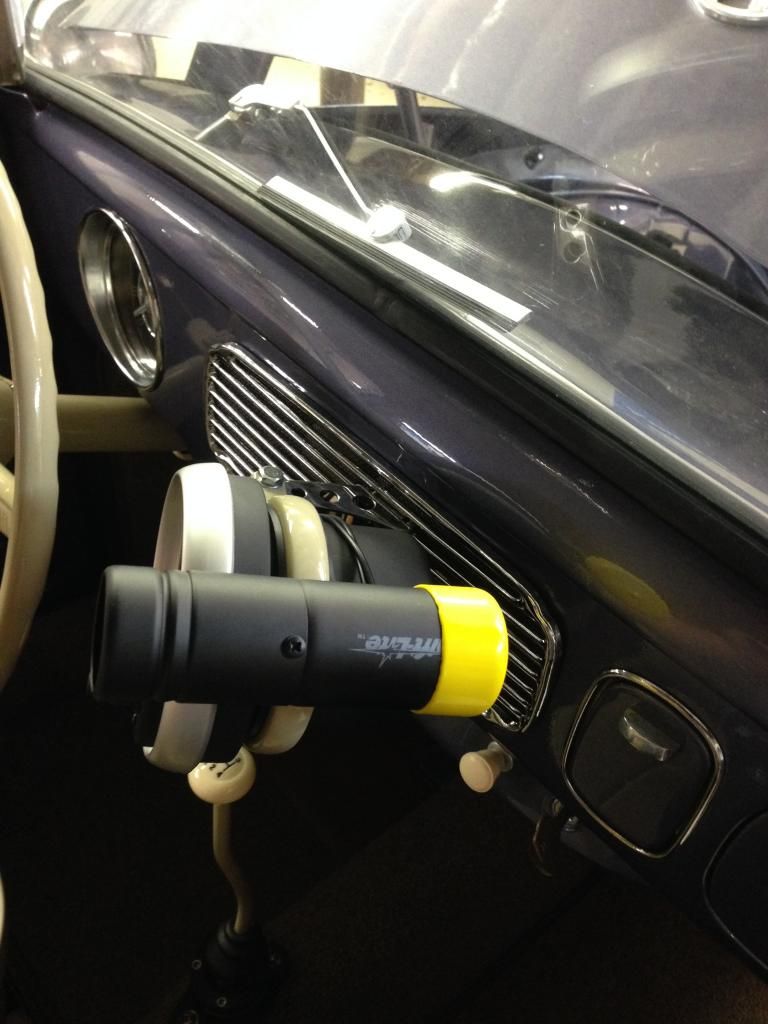
So one thing I did was add my ricemaster autometer monster tach. (I like it and it popular in cal look bug style).
I bought a nice fancy tach mount from vintage speed. Great company for all you aircooled vw people. Shipping is roughly 3 weeks from Taiwan but their parts are worth it.
I started out by painting the tach attachment ring thing that autometer sells to math the rest of my beige interior stuff.
Then I threw it up on the dash and I personally think it looks awesome. Its very in your face but I think it works. The little brown wire hanging from it eventually got and tucked but I just hadn't done it in this picture.
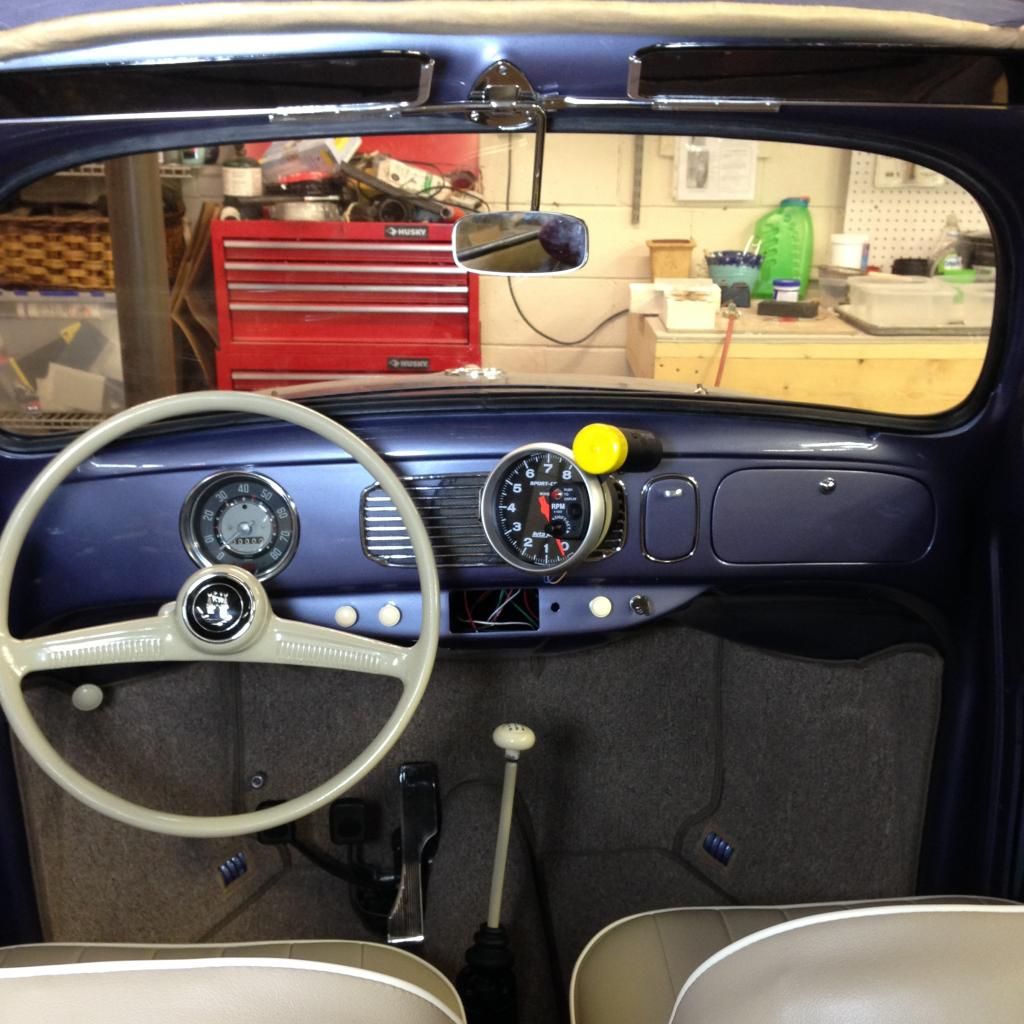
I struggled for about an hour trying to push the shift light wires through the little hole in the tach mount. I drilled out the tach mount and eventually more or less got them through but I wasn't really satisfied with the overall look. I cut the wires and spliced them where the tach meets the mount. It turned out pretty lean and you cant see the splices anywhere in or out of the car. Here's how the paint turned out, I think it added alot over the plain silver that was on there before.
After leisurely hunting around online for an authentic 56 for about a year I was about to give up considering i could never find any for sale that weren't for commercial trucks. I finally found this on ebay and won the bid for much less than I thought I would have to spend.
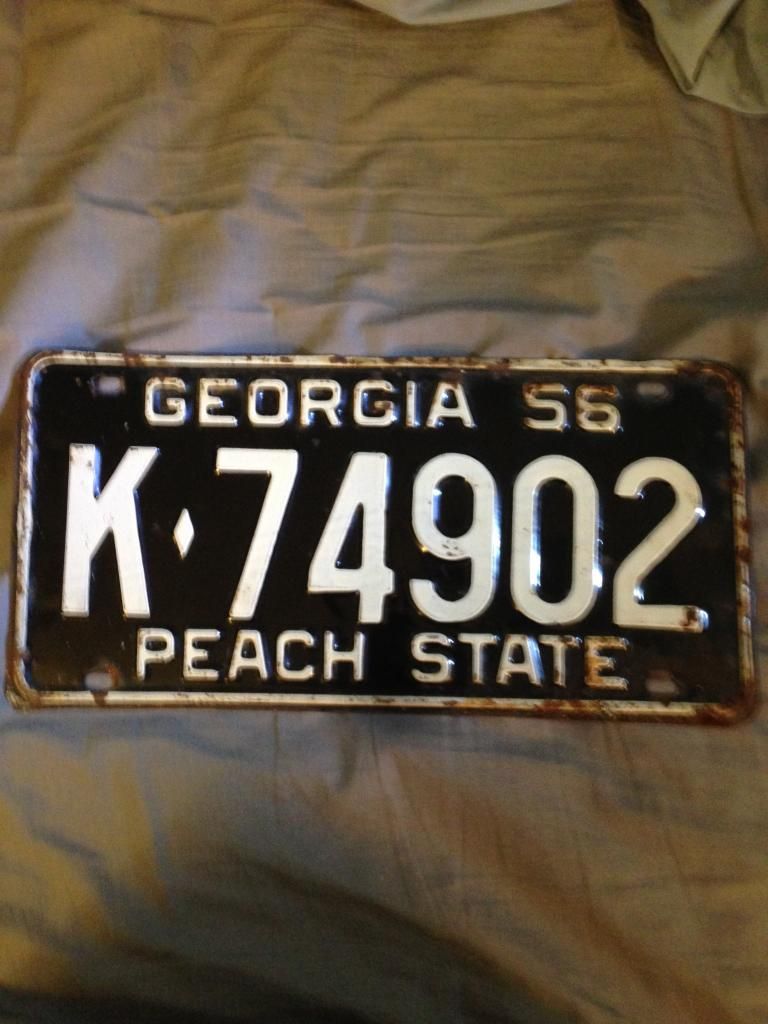
Im in love with the patina on it and the up close look of the old paint so I wont dare to try to refurbish it. Luckily Georgia lets pre 1971~ cars run period correct plates so I'll get to roll around with this on all the time. Kind of reminds me how old this shiny bright new looking bug is.
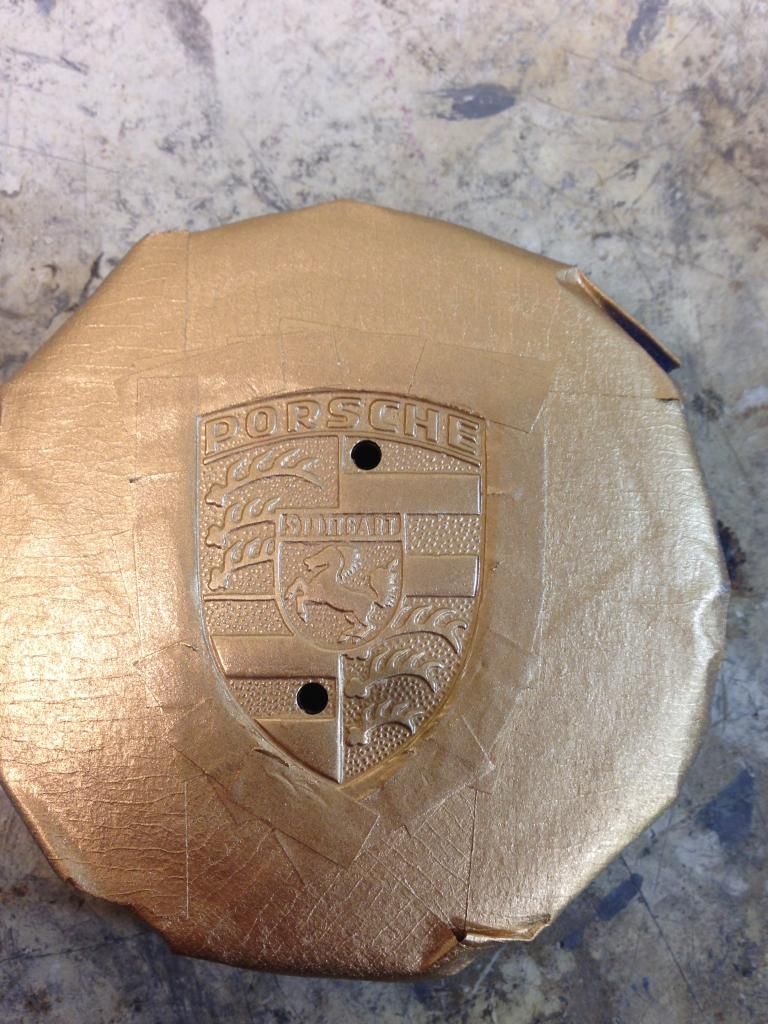
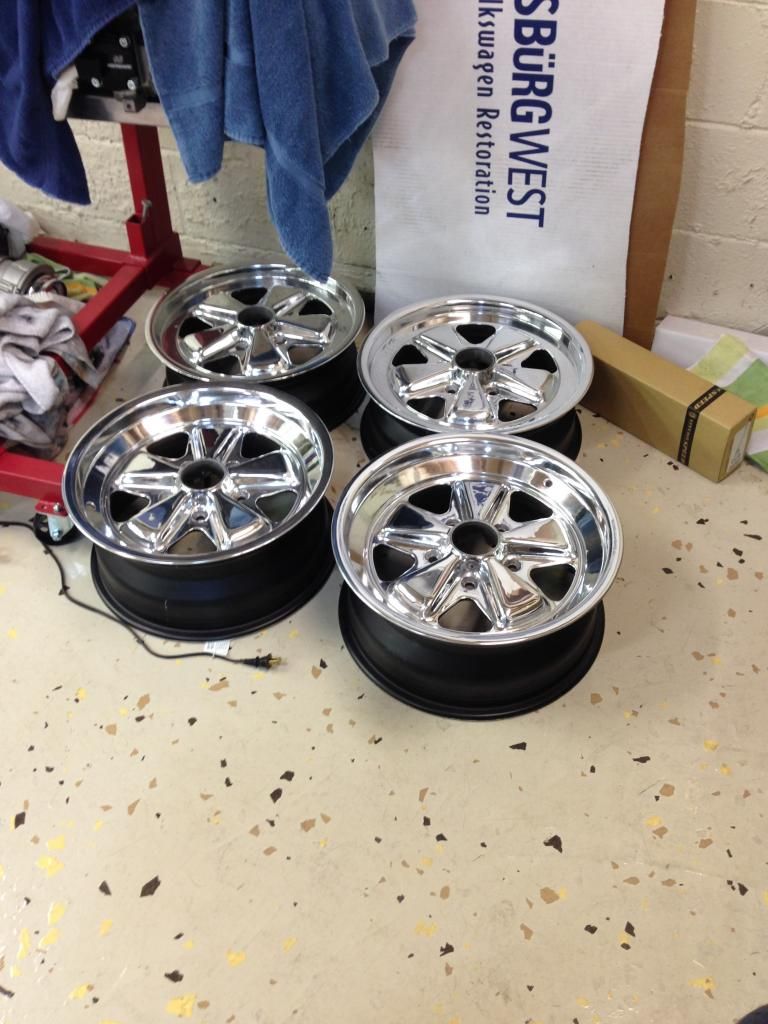
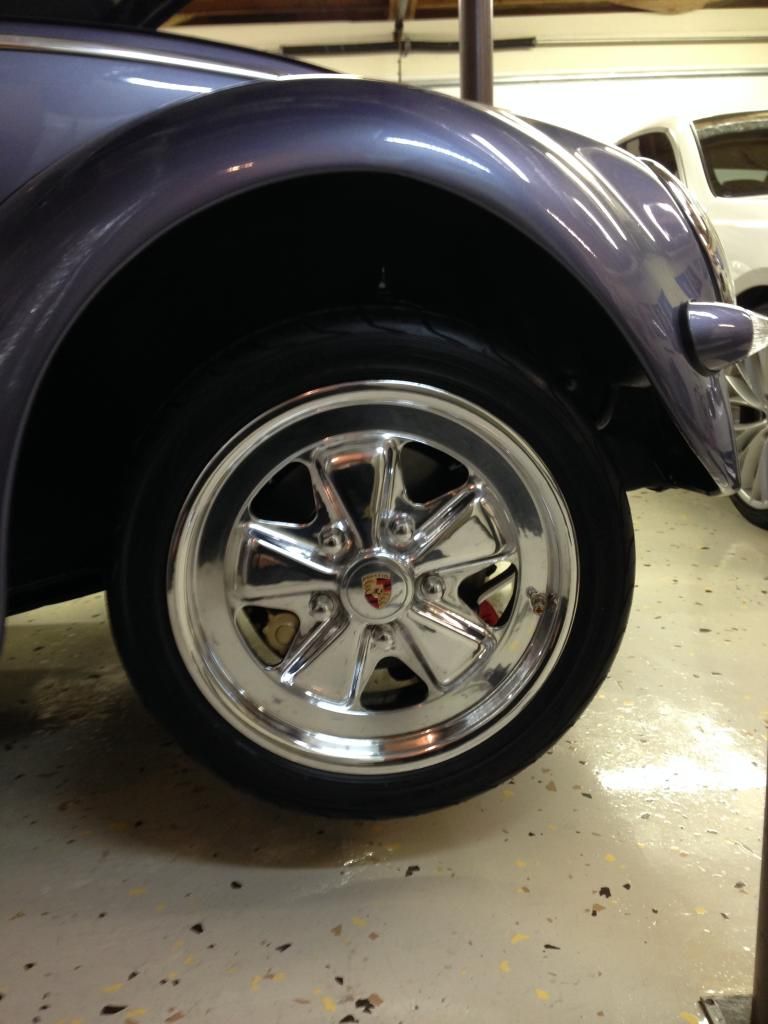
So the real big update tonite is my wheels. Ive been polishing these fuckers for over a year and its about time they're "done"(still not quite shiny enough for me ill just call this stage 1).
Ive posted a finished wheel on here before i think so I'll start with the center caps. I started by taking off the paint and anodization with a 3M light rust wheel and polishing them to this level with simple harbor freight metal polish equipment. Then i sanded them down with 1500 then 2000 grit paper. I began to polish them with Mother's polish and they came out ok (7/10).
Sanded with some Mother's polish on em.
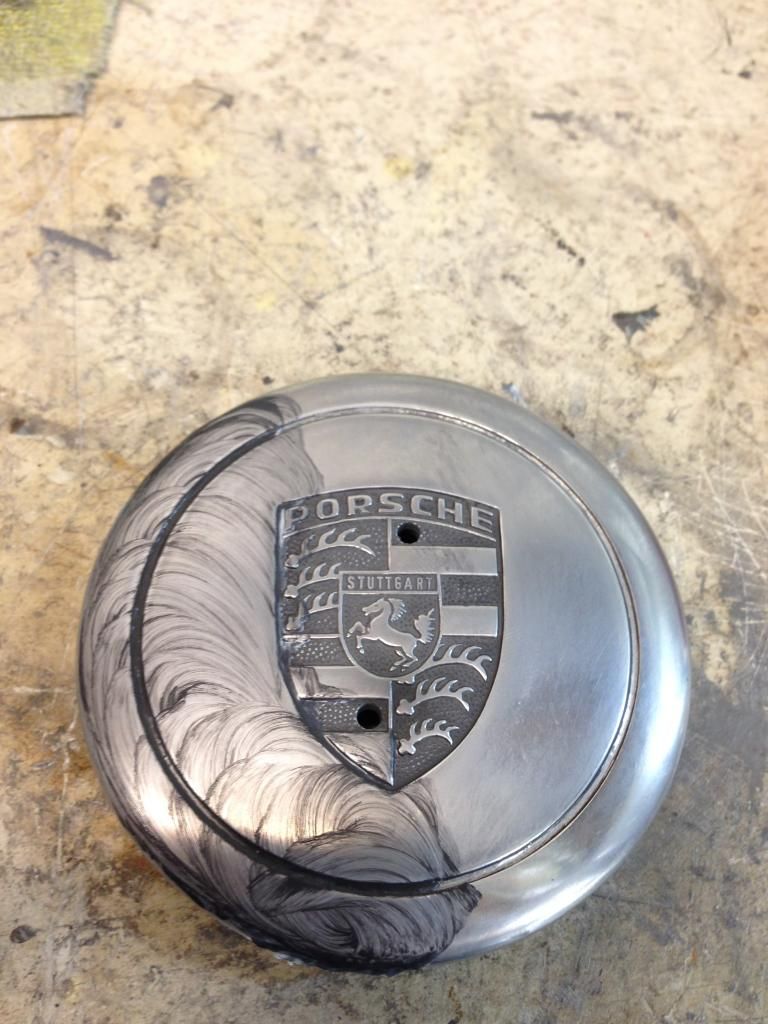
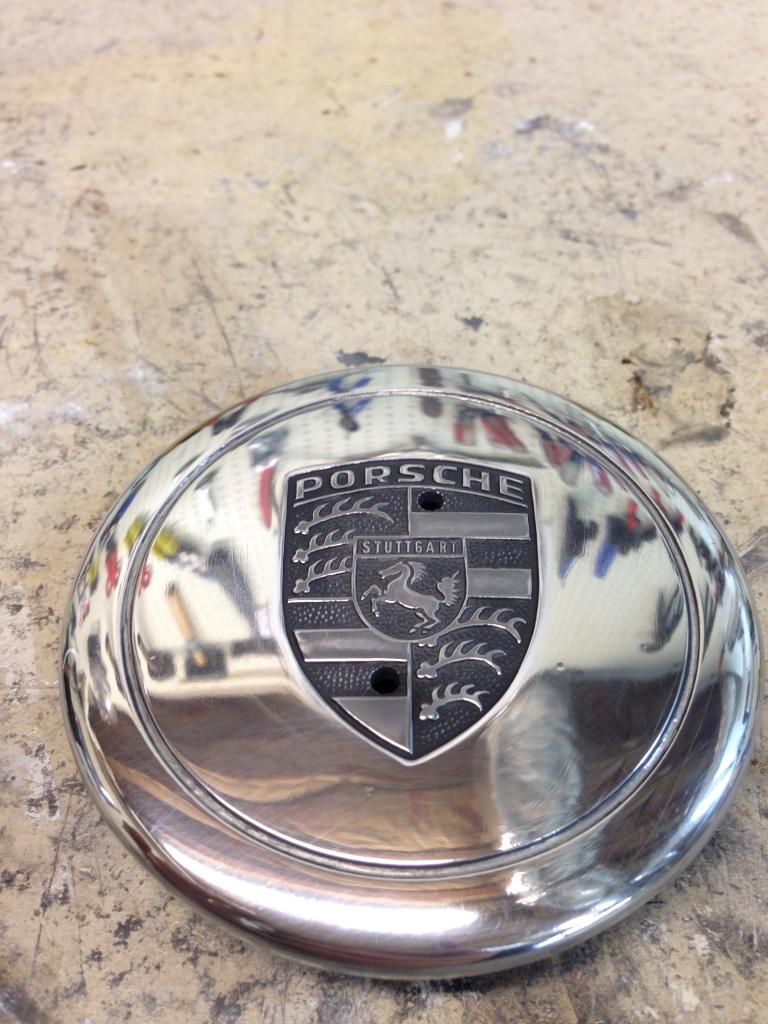
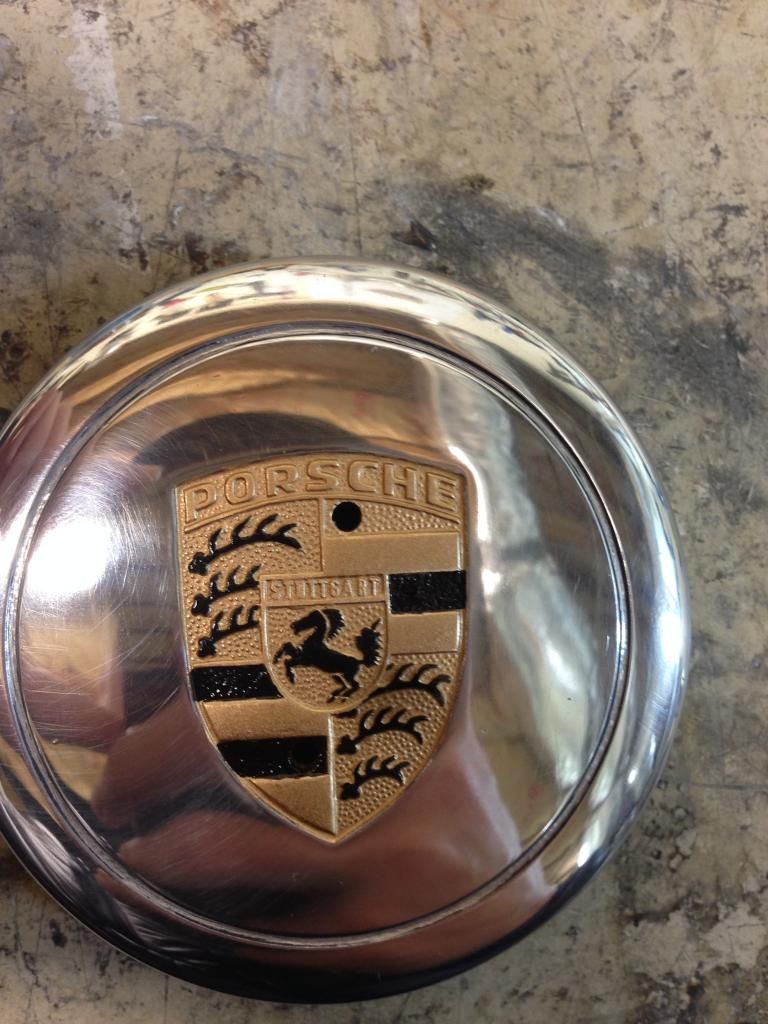
Heres them fully polished. Theres still a few small marks that i cant get over but they look perfect from a distance.
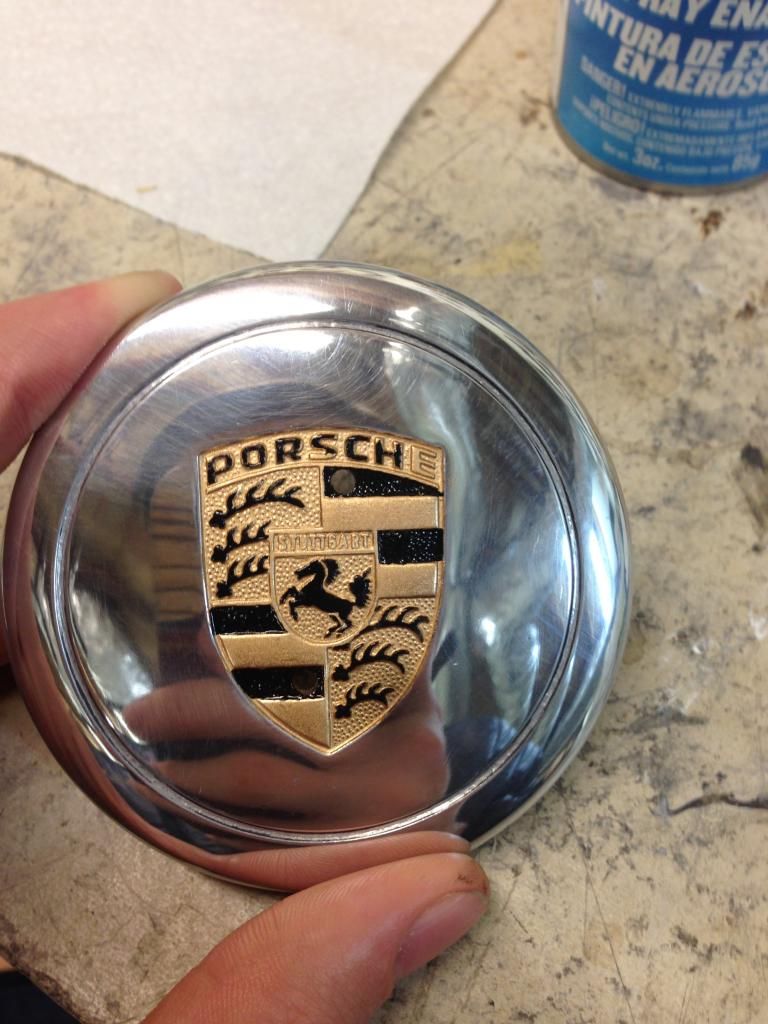
Now I've been dead set on having colored caps on these fuchs from the beginning. My dad couldn't care less and told me if I painted them by hand it would look like a failing middle school art project. I wanted to buy some of these http://www.eagleday.com/bialcecach.html but I would rather put that large chunk of change elsewhere. (hint bags). I lied I'm getting stereo stuff maybe bags this summer. Anyways I decided to go to the hobby store and buy some testors and masking tape and give these a shot for the low price of 20~$

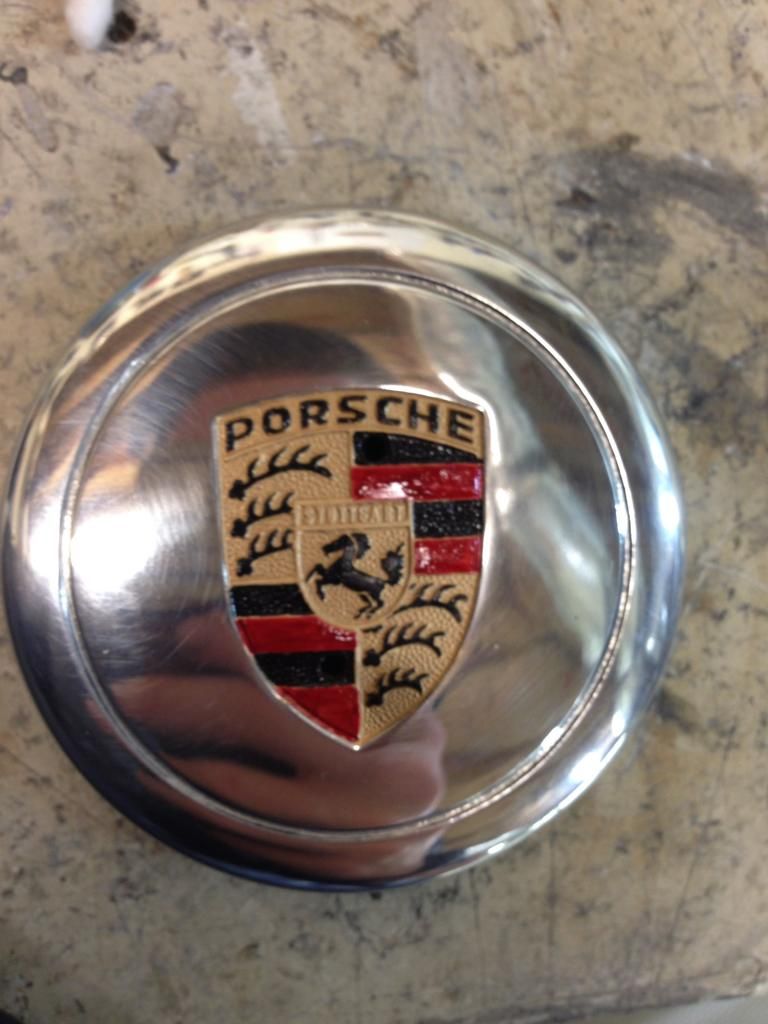
And there is how they look, for my first painting of something like this I'm pretty satisfied. The picture makes the red look very blotchy and uneven but they don't really have that effect in person.
wheels
wheels with caps
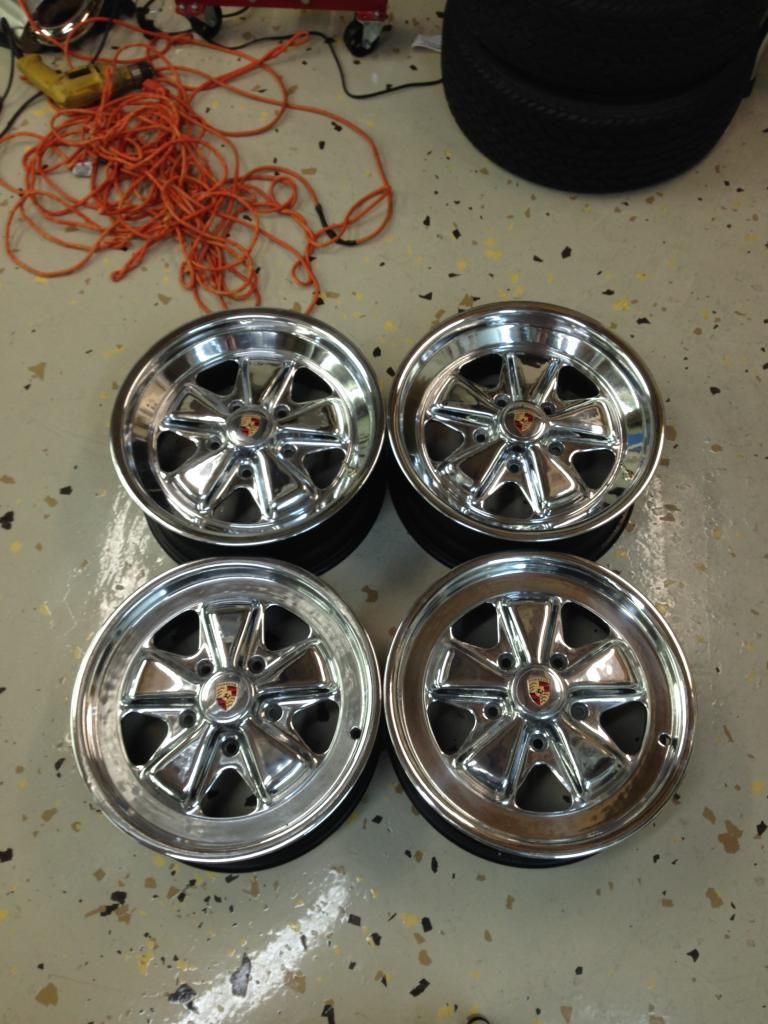
Up close they are pretty stunning. (atleast to me but everyone loves the wheels they slaved over).


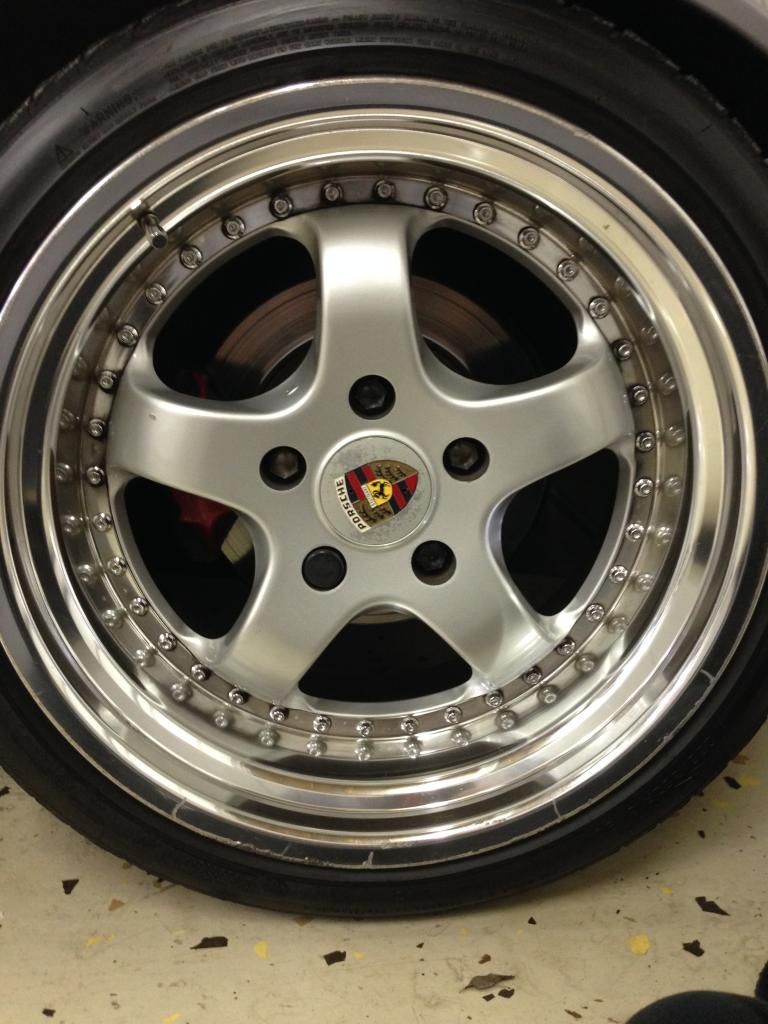
So after finishing the wheels I threw on the tires. Out back I have whatever was on the front wheels when they were taken off my dads 911 many years ago for whatever wheels he has now, (he still doesn't know what they are if someone wants to ID them That'd be great). Up front i have 175 50 series yokohoma S drives.
911 wheels
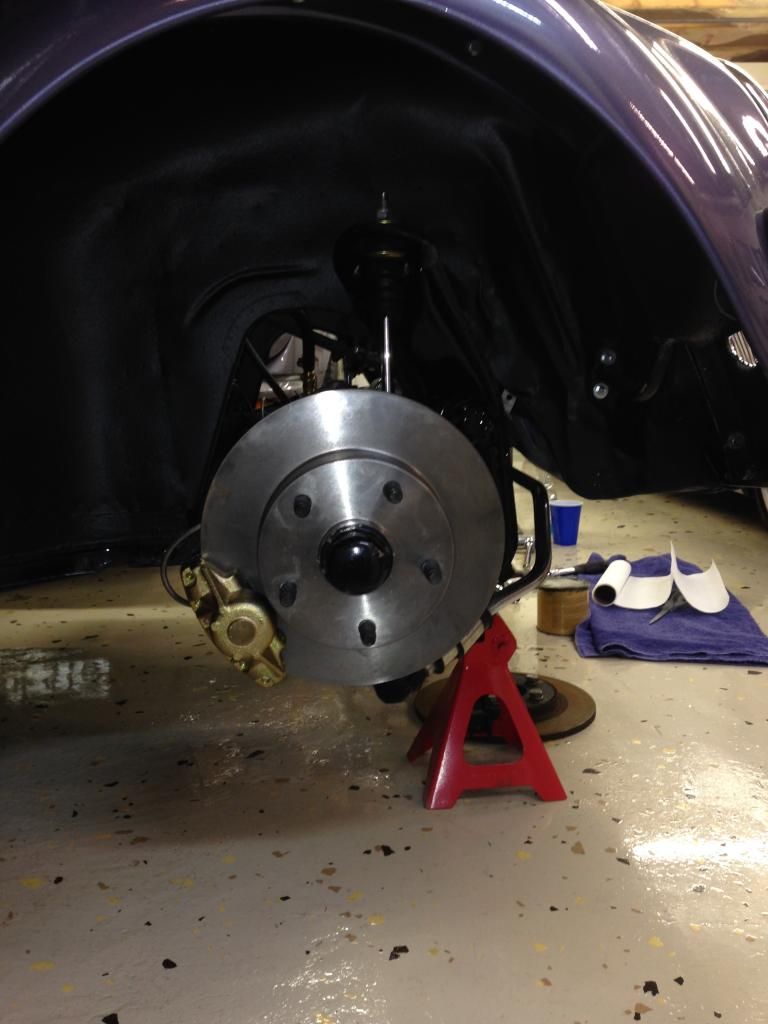
Before I could put these on I had to redo the whole front brakes + spindles. When we bought this pan (me and my dad, father son project. Dad had a slammed 2178cc 68 bug in the 80's) it already had front and rear disc brake conversion but the rears were 5x130, which was what we wanted, and the fronts were wide 5 (5xalot) pattern. We thoguht we would only have to buy new rotors from cb performance (shop who makes the kit) but when we did that and it didnt work I got on the phone with Marianne at the front desk. shes pretty awesome by the way, really knows her shit when it comes to their shop. She said that none of our parts were compatible and we had to buy essentially the whole kit,(didnt need brake lines or wheel bearings). So i got the Parts in, Switched the bearings and put it all together.
On the plus side I have a cb performance Wide five front disc brake kit for a ball joint beam that has about 2000 miles on it. If any bug guys want it just say so. I can bring it to sowo or whatever if people don't want to travel (does not have wheel bearings or the steel braided brake lines).
Anyways heres the front end brake overhaul.
parts. DS marked drivers side i wanted to put the bearings back on their original sides.
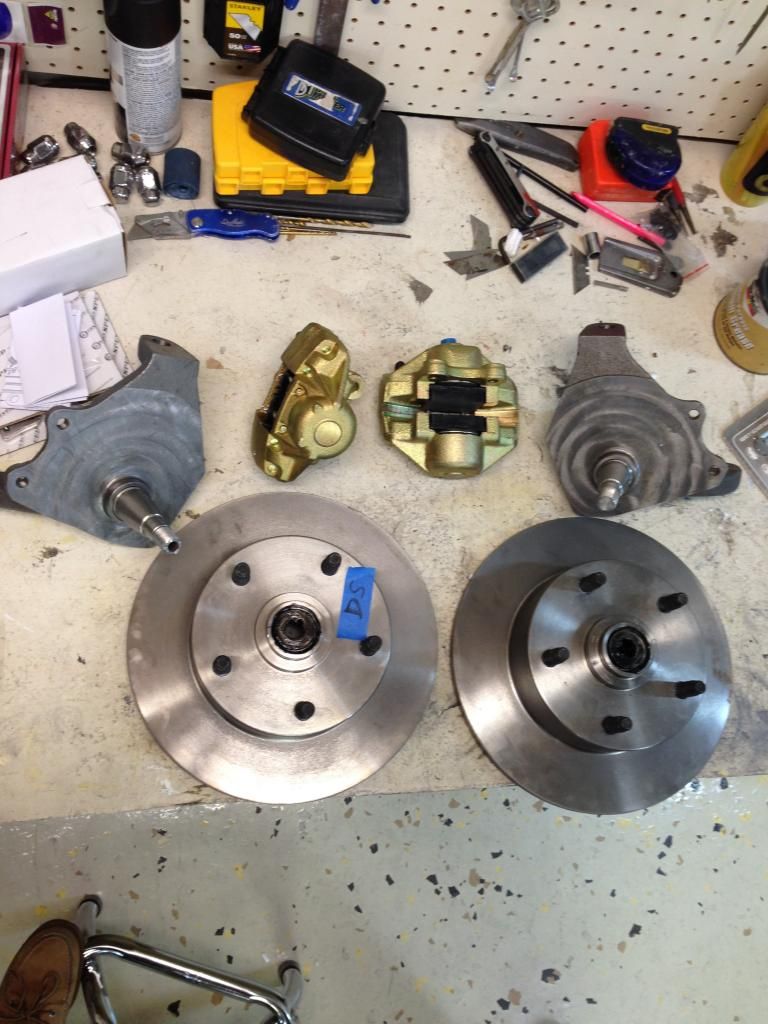
spindles
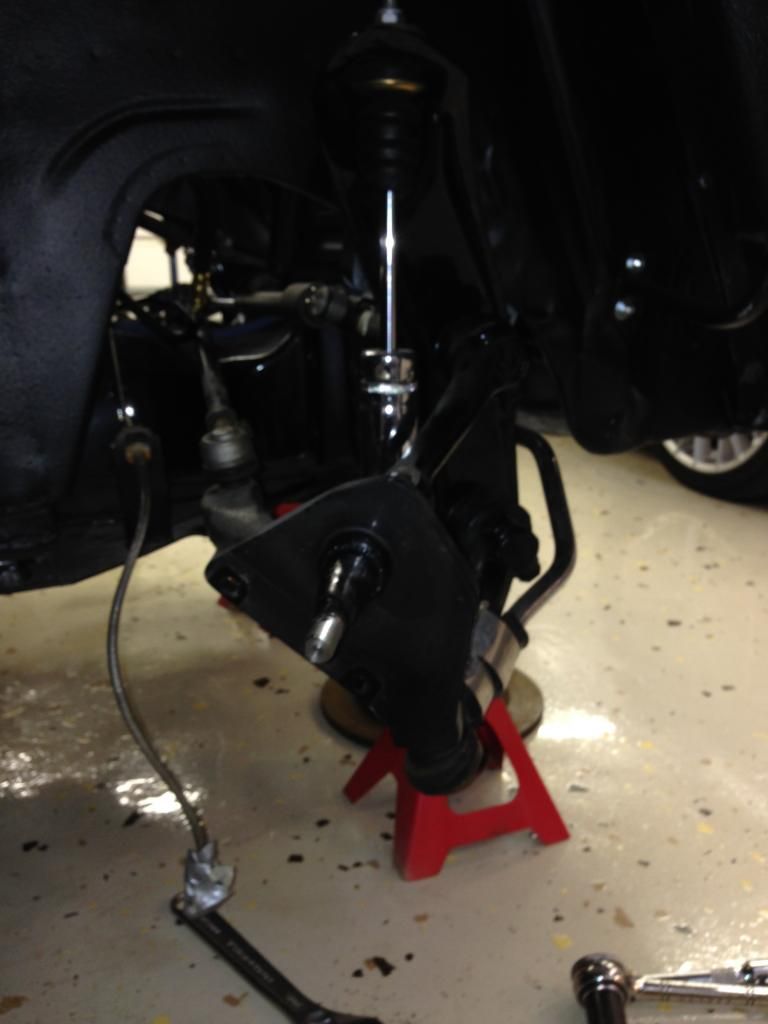
rotors
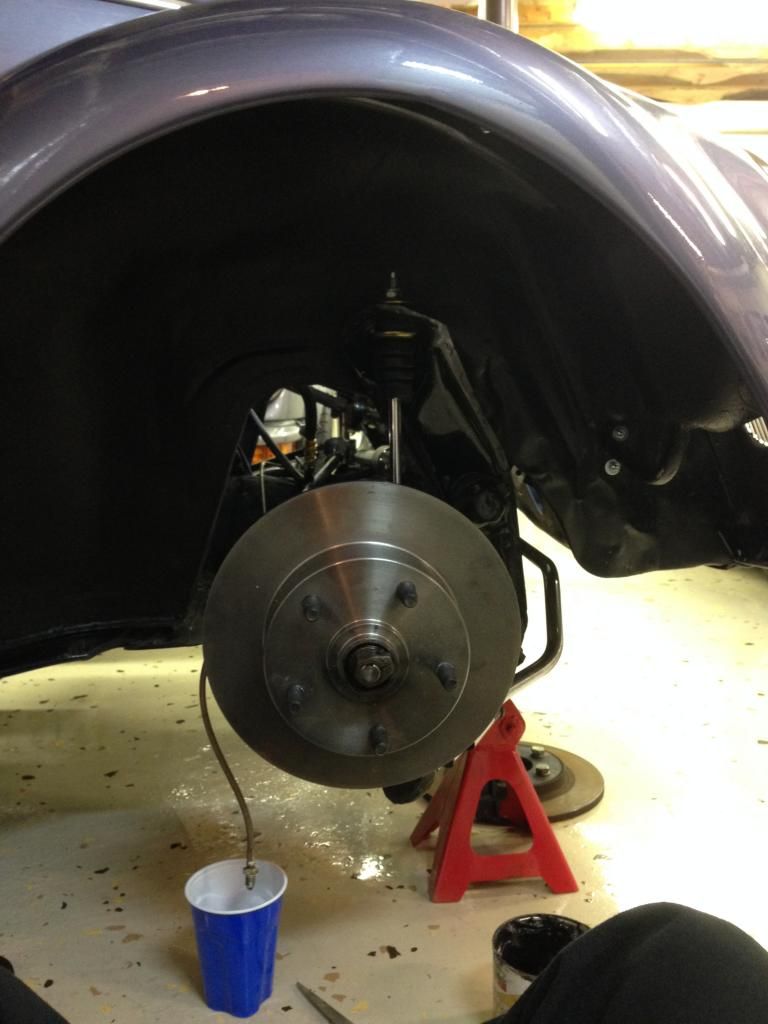
calipers
wheels
so much wheel gap.. i could probably fit my head in there.
on the ground, what we all wanted from the first picture.

That first picture is whats really pushing me to finish this damn thing. wheels look good but it needs to drop several inches. I'll drop it on its ass when I have the engine and most of the rest of the weight in the car so I can actually know what to expect in where it'll normally sit. Goal is to be done by sowo but we all know how that goes. I'll update again when my hose unfreezes and I can pressure wash my gas tank.Last edited by thatbeetleguy; 02-21-2015, 10:35 PM.Comment
-
Wow, I'm a fan of what you have done. Everything works really well together.
For some reason though, I'd love to see some white walls wrapping those rims.
Comment
-
Very nice job overall, it looks like you really know your stuff. It would be an impressive build for anyone but it's even more amazing that you're just in high school.Comment
-
I'm sorry to inform you all of this but I am selling the beetle. I know I've been lazy with updates and i doubt anyone was really intrigued with my build but I'm still sad to say its over. Considering this is my only car I need something more practical so I've began browsing craigslist.
In slightly more happy news i was able to get the engine running. I'll leave you all with an exhaust clip for some closure. https://www.youtube.com/watch?v=dQw4w9WgXcQComment
-
-
-
Was expecting that shit when I read Sophomore in the thread.lol Badass bug though, can't wait for the engine build posts.Comment
-
I have plenty of stuff to update the engine build included, I'll probably start to put it up sunday.Comment
-
Nice build! I love the rag top. Any updates on the engine build?Comment

Comment