Announcement

Collapse
No announcement yet.

Easy Slider z32 missile

Collapse
X
 
  • Filter
  • Time
  • Show
Clear All
new posts

  • Today's post is full of spinning metal at a high rate of speed!. Also this will be part 1 of 2, took way more pictures than I realized

     photo DSC03072.jpg

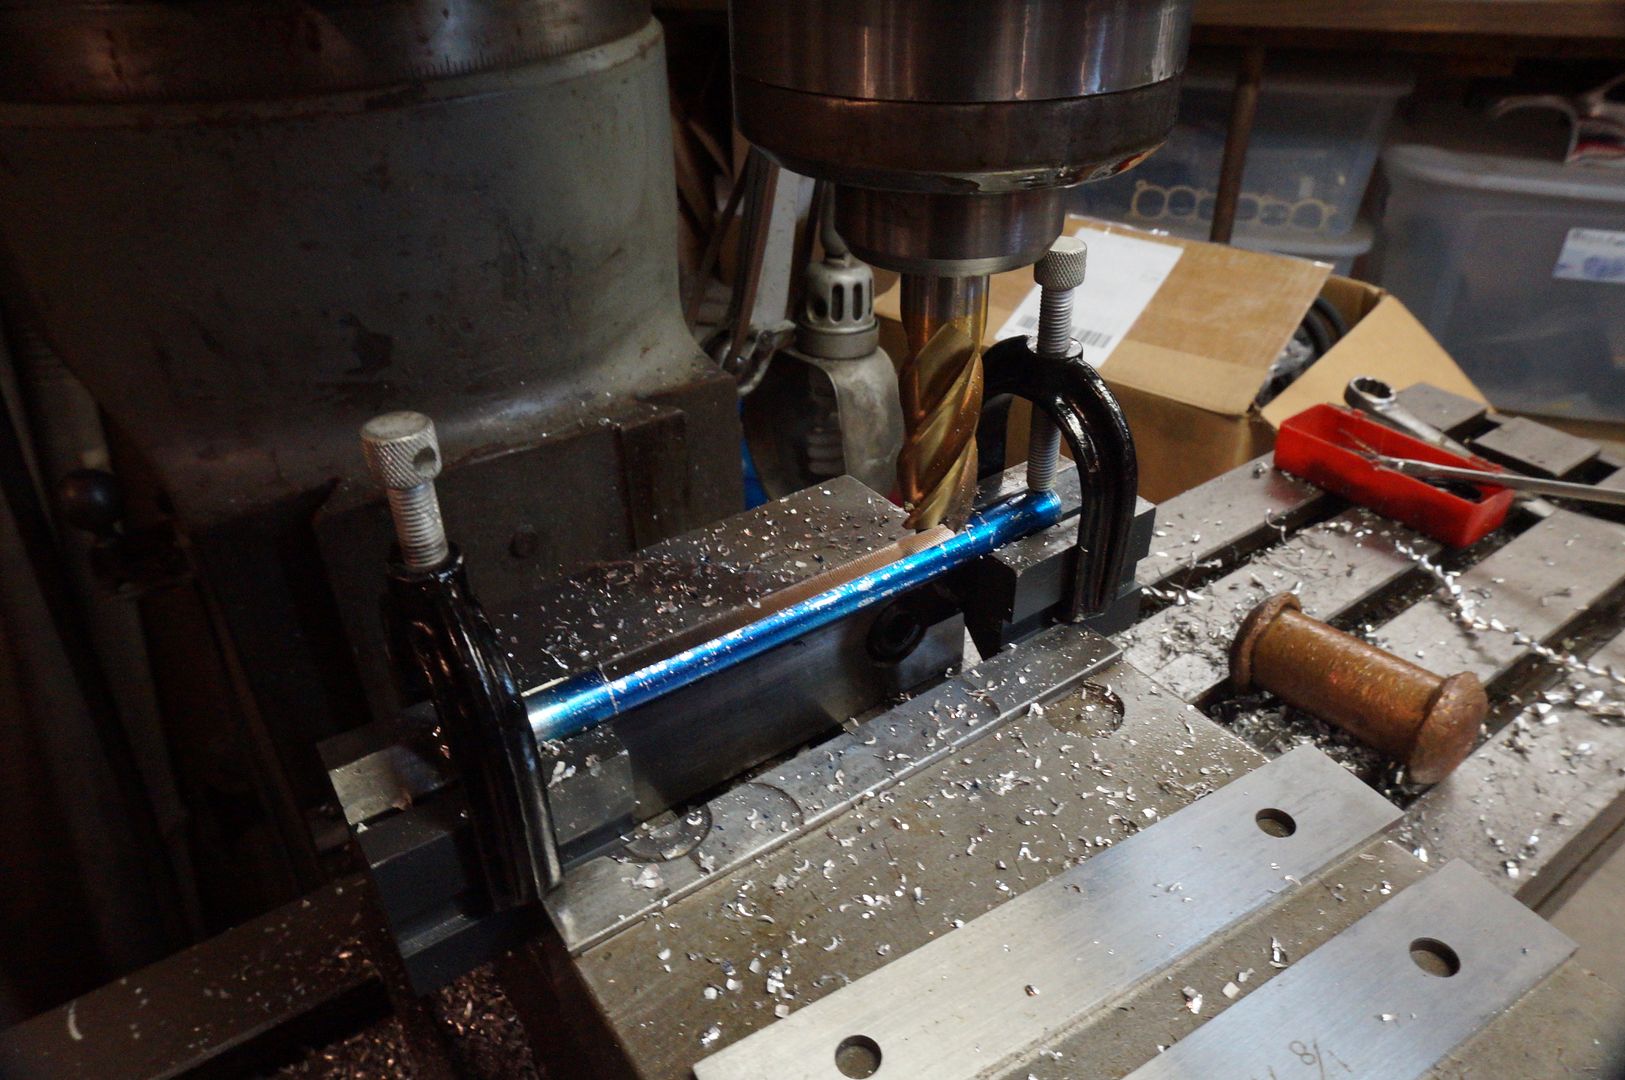
    Using v blocks to machine a face on the aluminum bar

     photo DSC03073.jpg

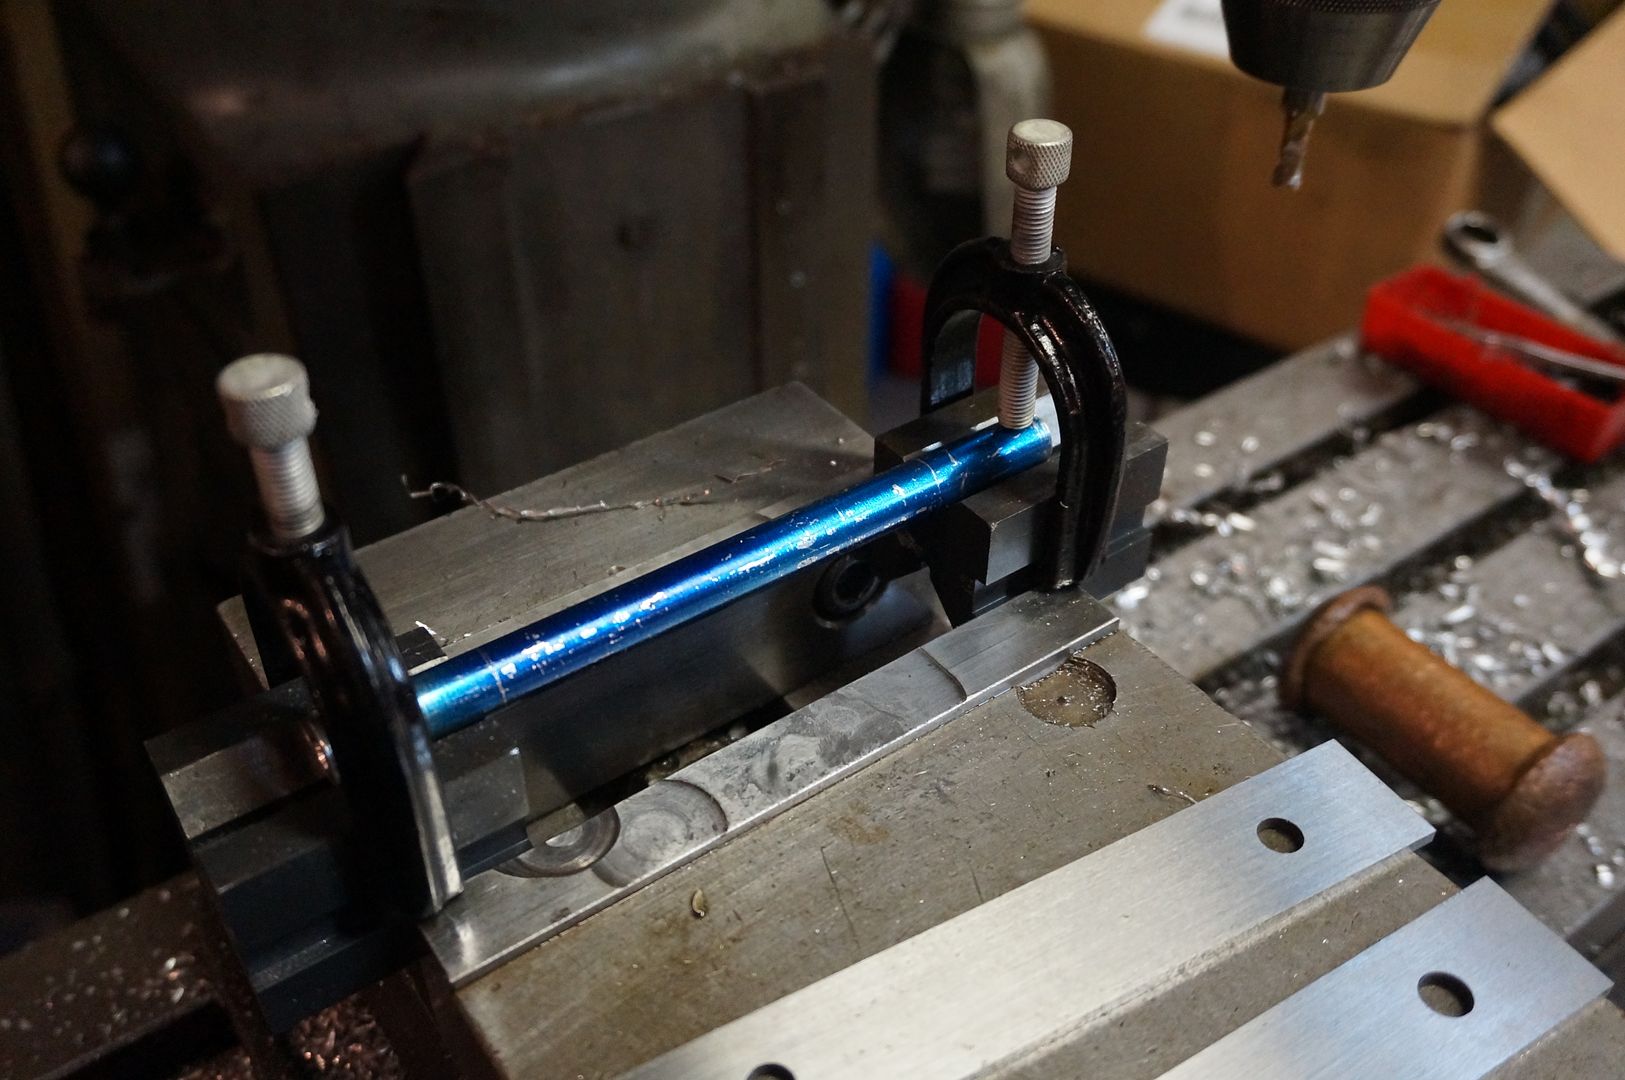
    V blocks are almost a necessity when milling round materials

     photo DSC03091.jpg

    I made 2 of these, this one will be welded to the underside of the plenum eventually

     photo DSC03094.jpg

     photo DSC03098.jpg

    This is the second one

     photo DSC03101.jpg

     photo DSC03105.jpg

    Made a plug anchor

     photo DSC03106.jpg

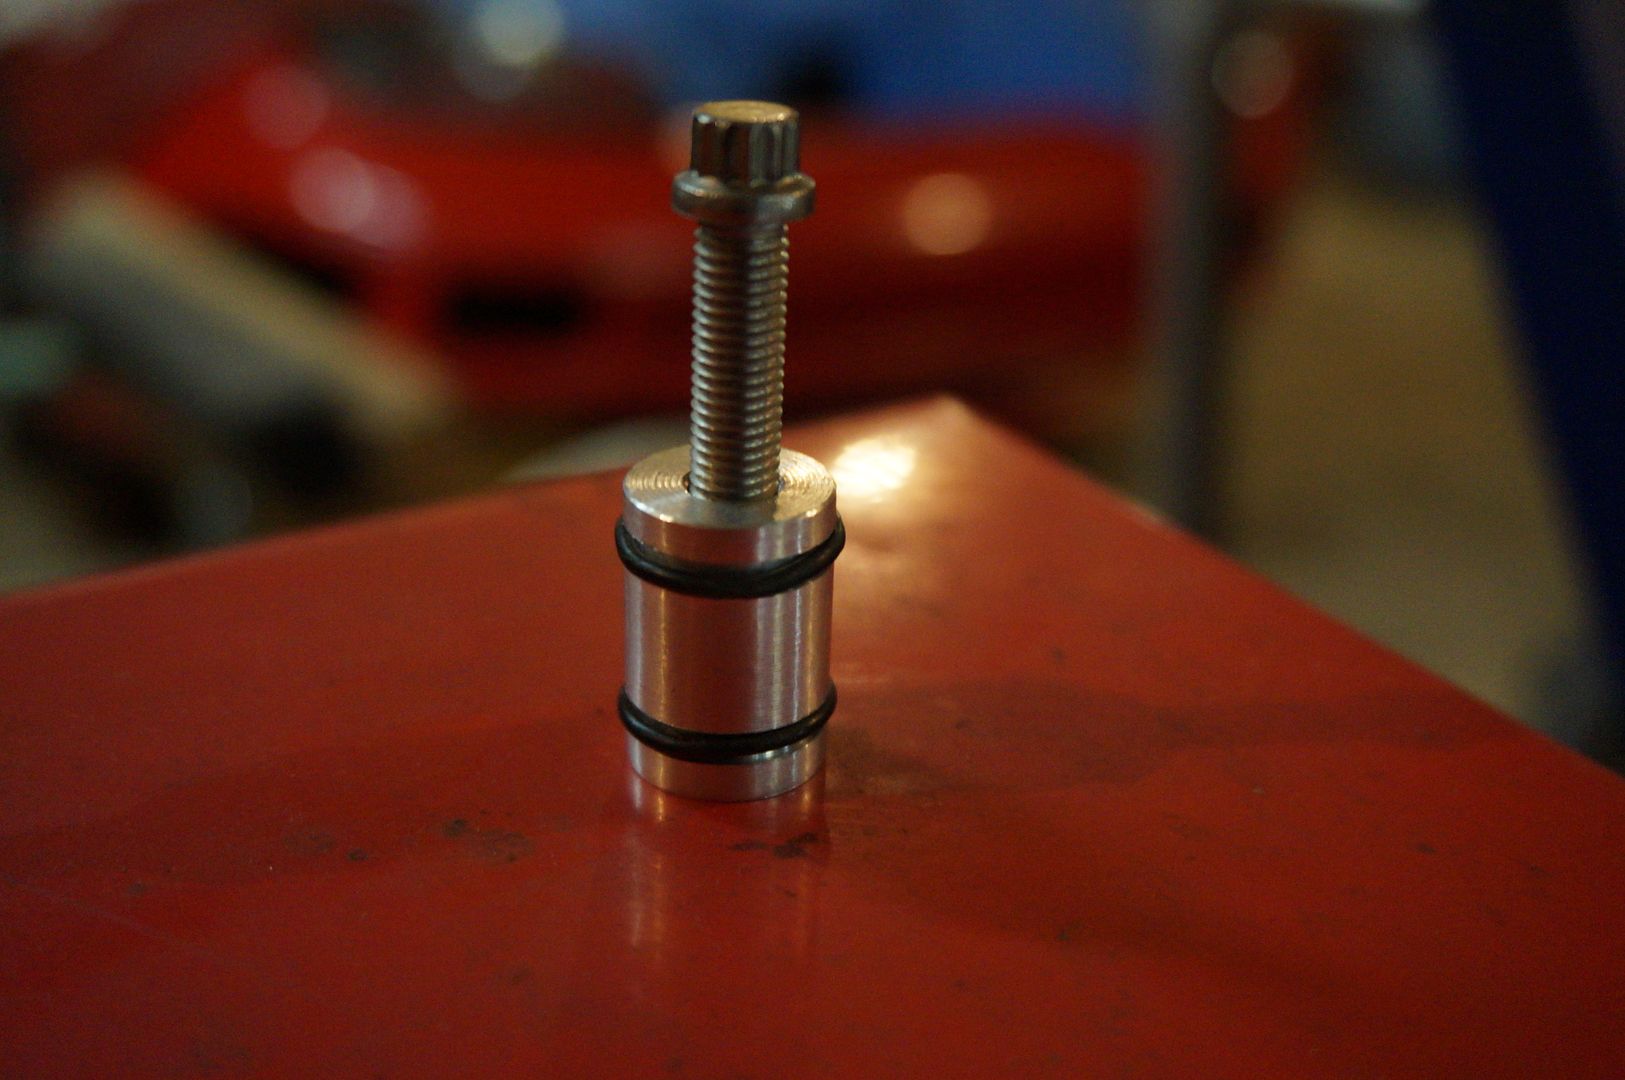
    Plug anchor is inserted into plenum bolt holes

     photo DSC03110.jpg

    Machining a hole and facing the hole for the plug anchor

     photo DSC03111.jpg

     photo DSC03132.jpg

     photo DSC03134.jpg

     photo DSC03149.jpg


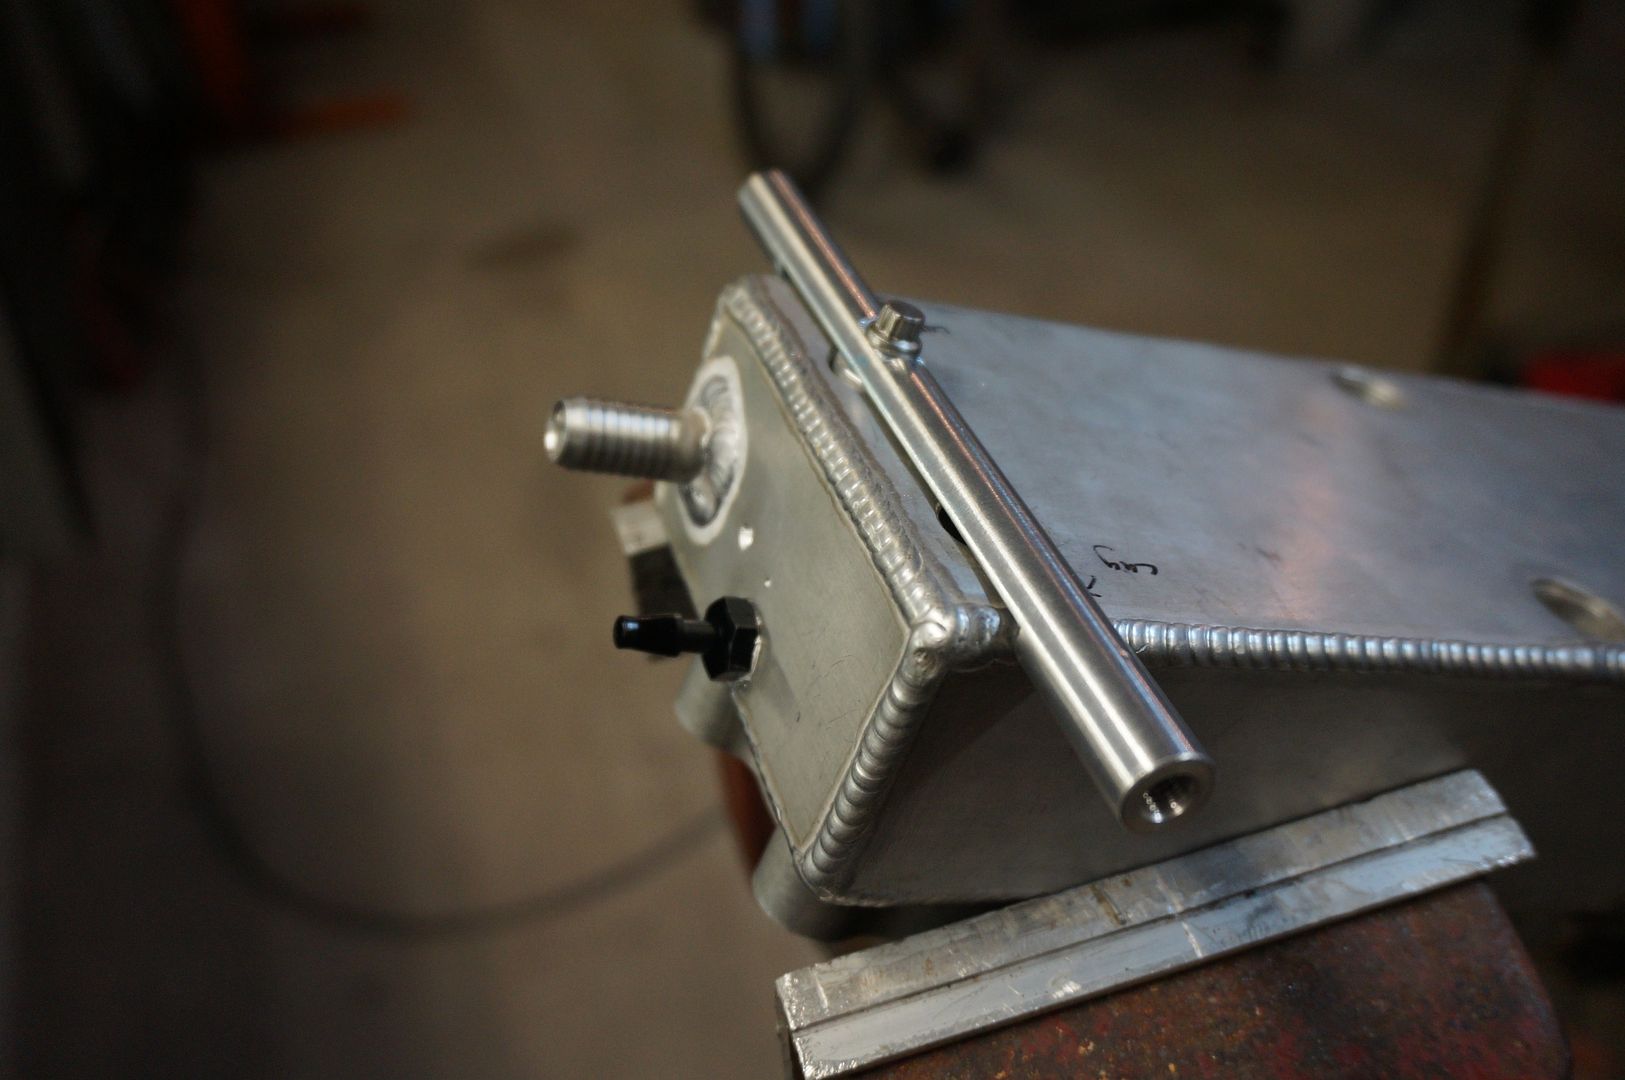
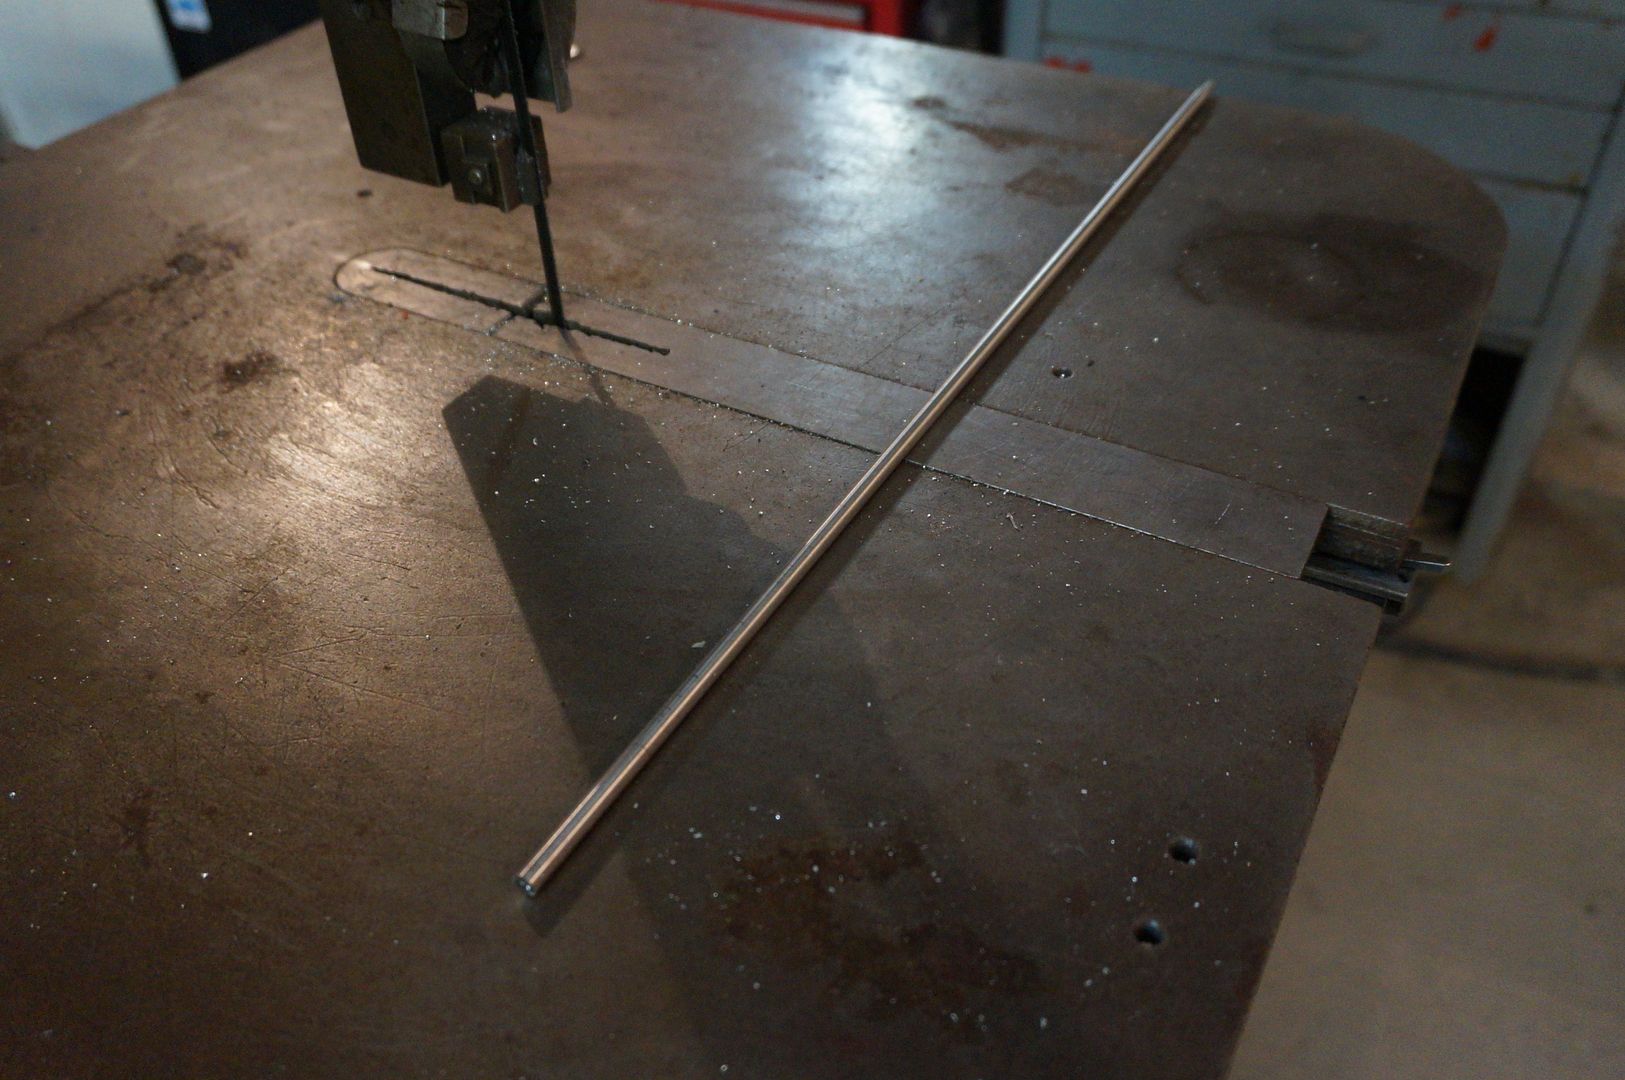
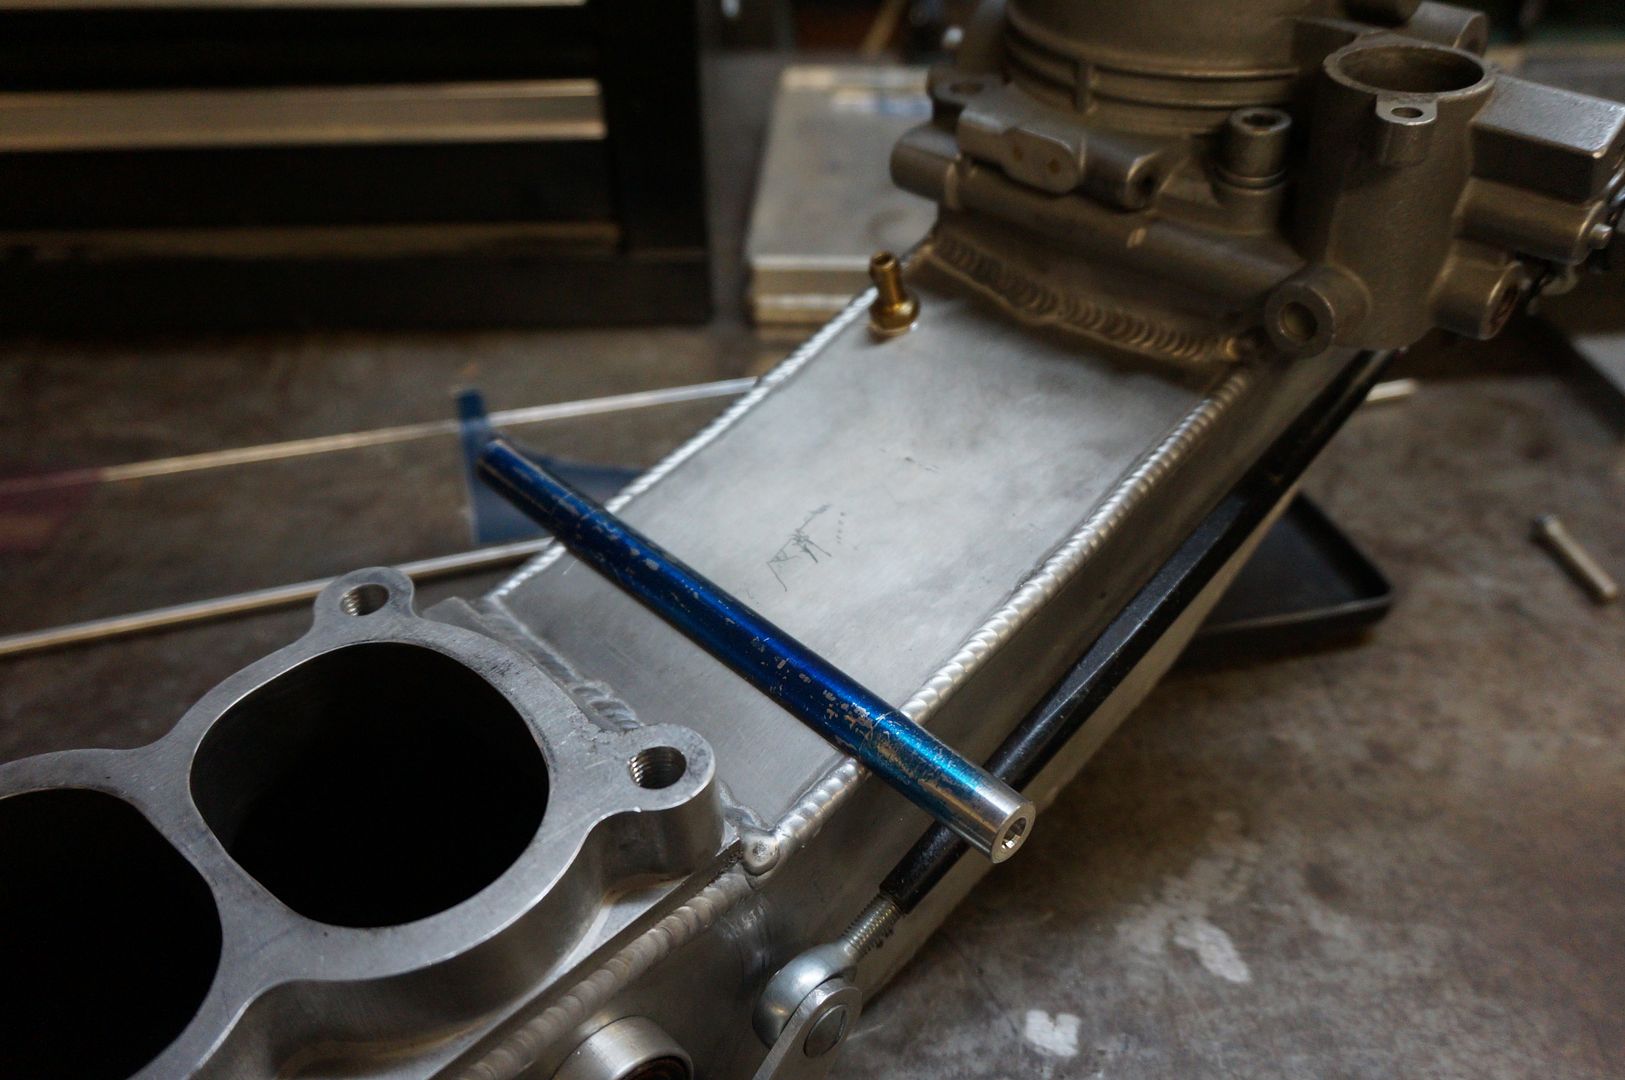
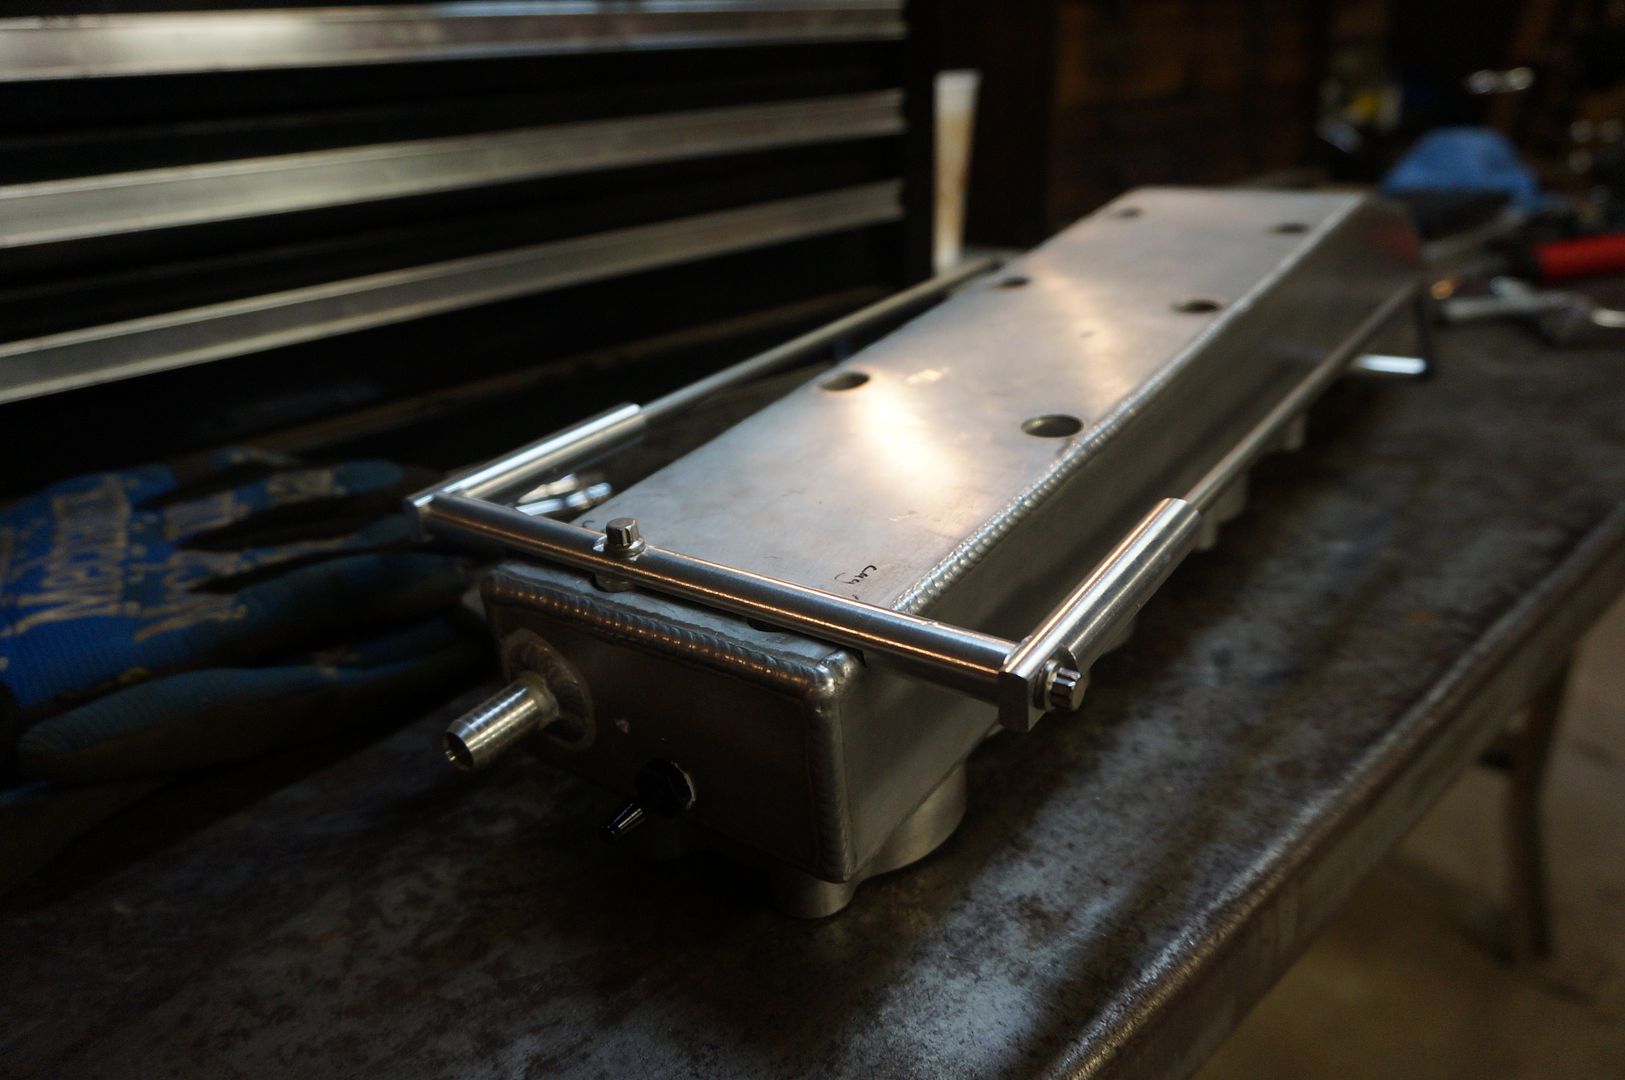
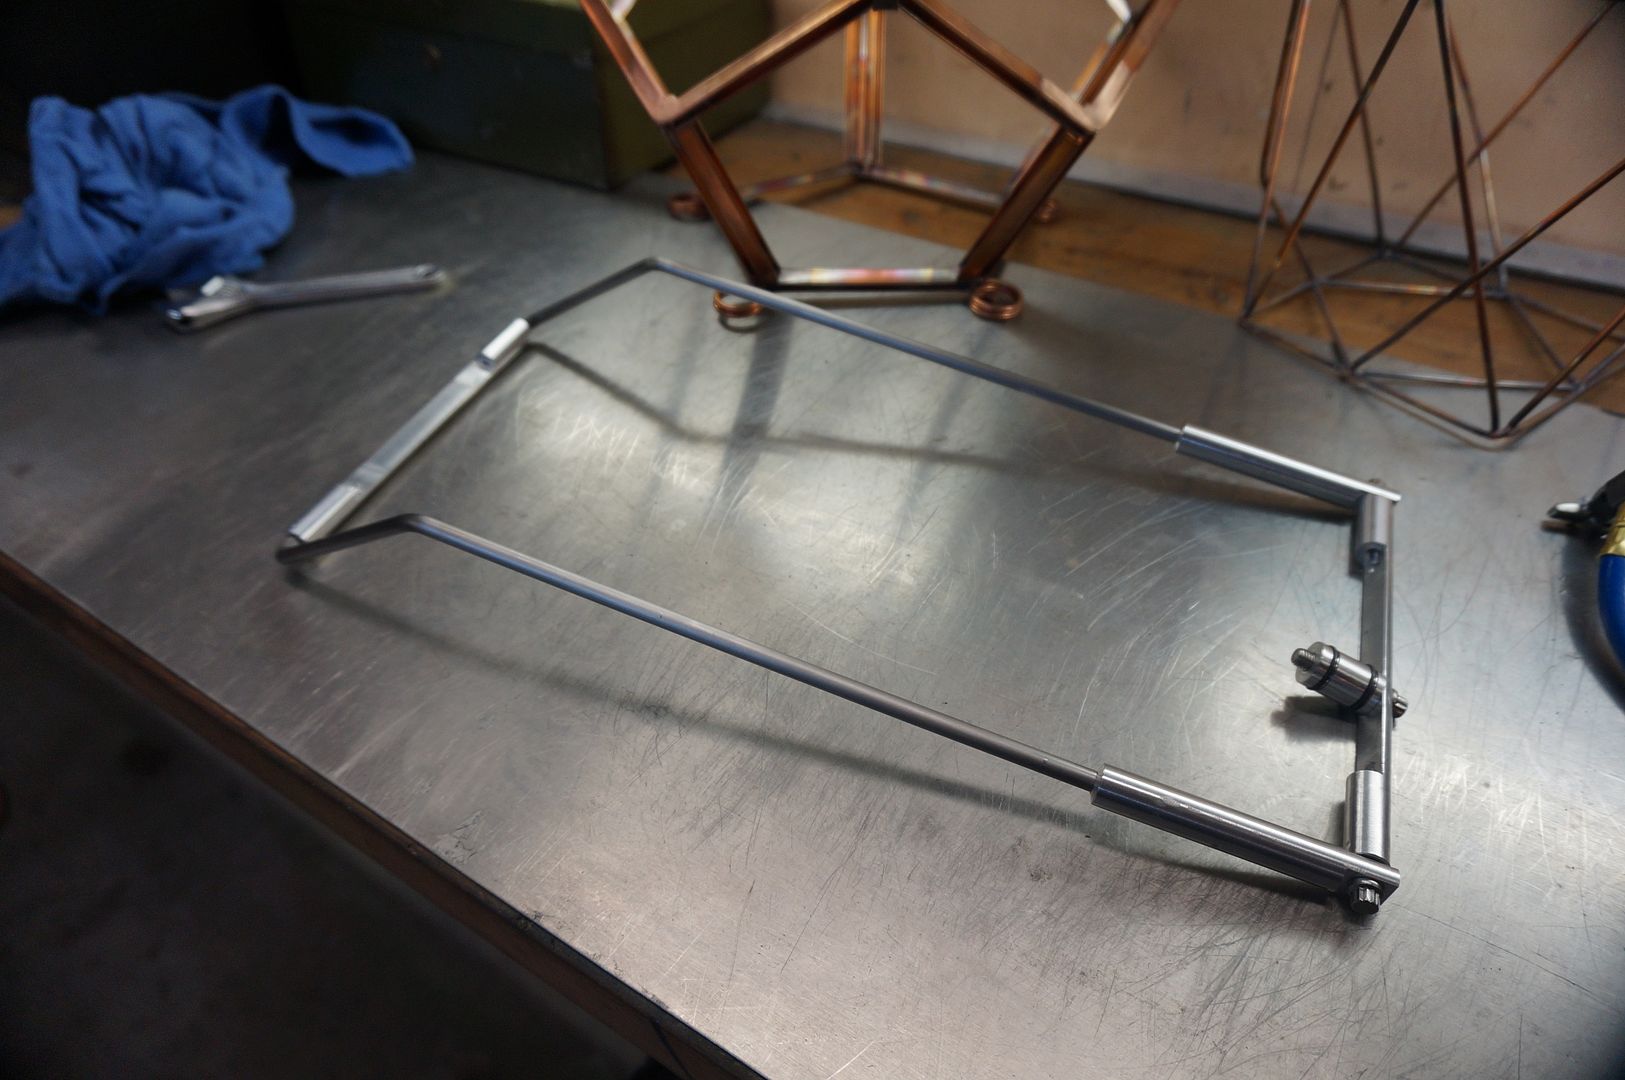
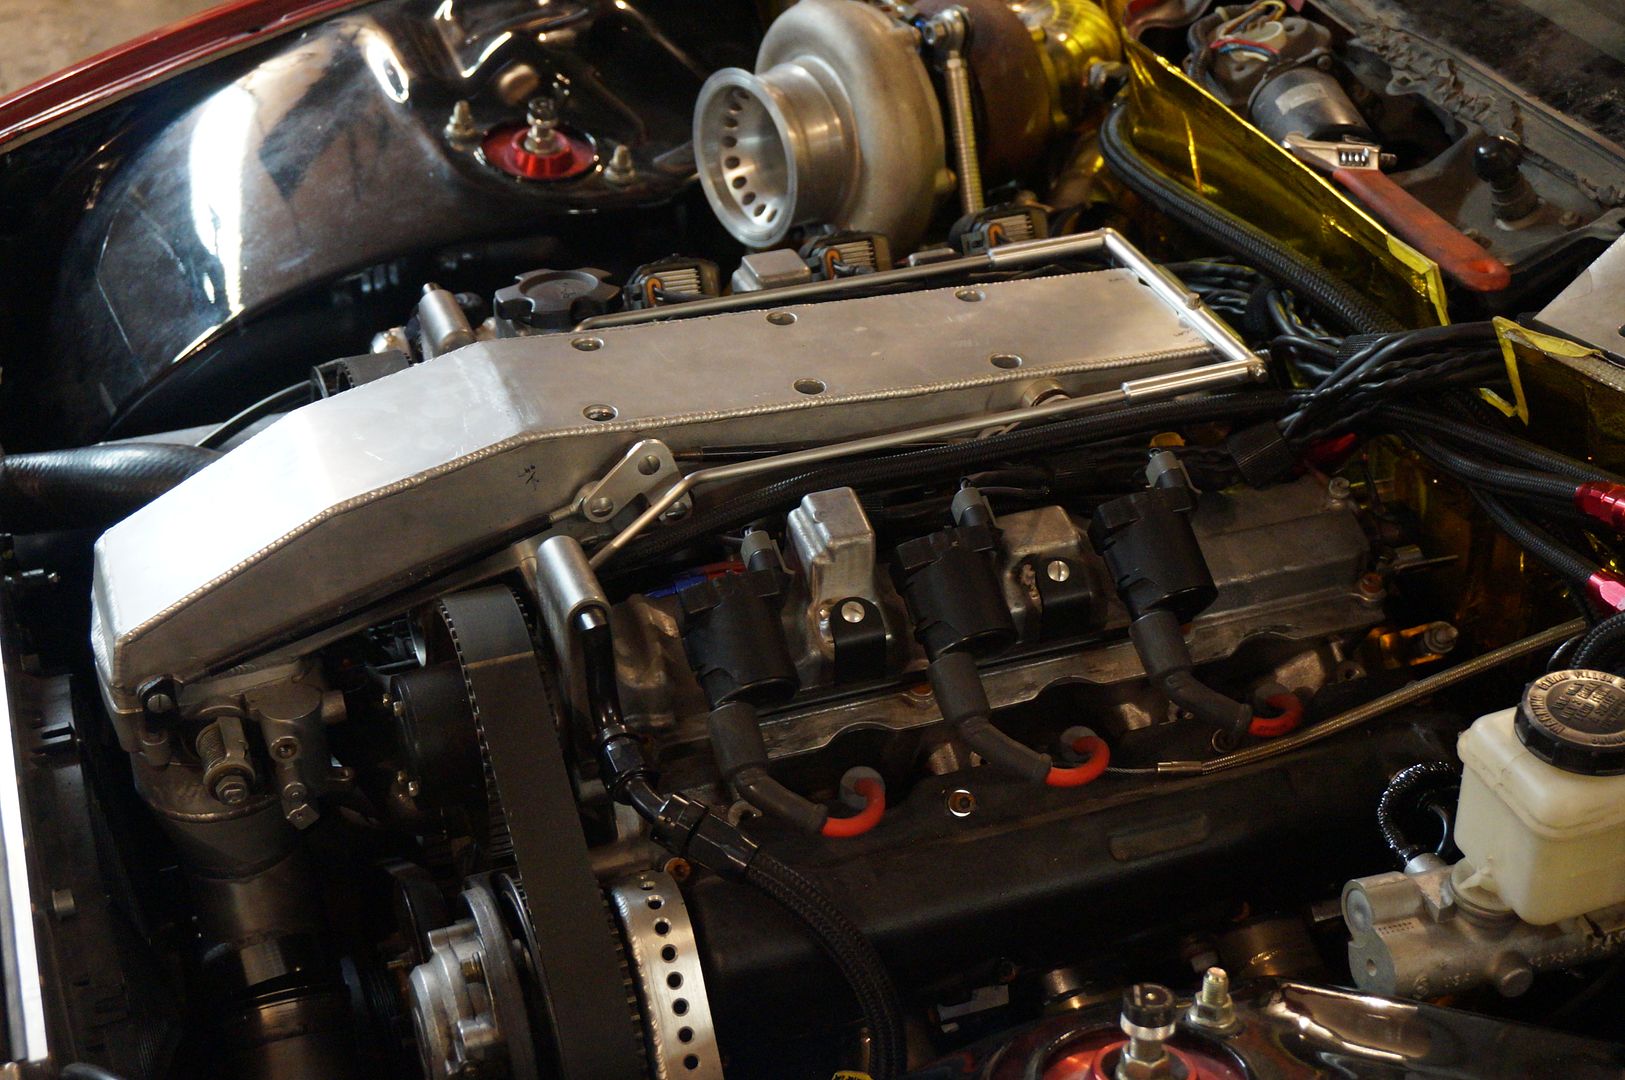
    Bent 2 of these 1/4" stainless bars for the fuel line/engine harness to mount to

     photo DSC03145.jpg

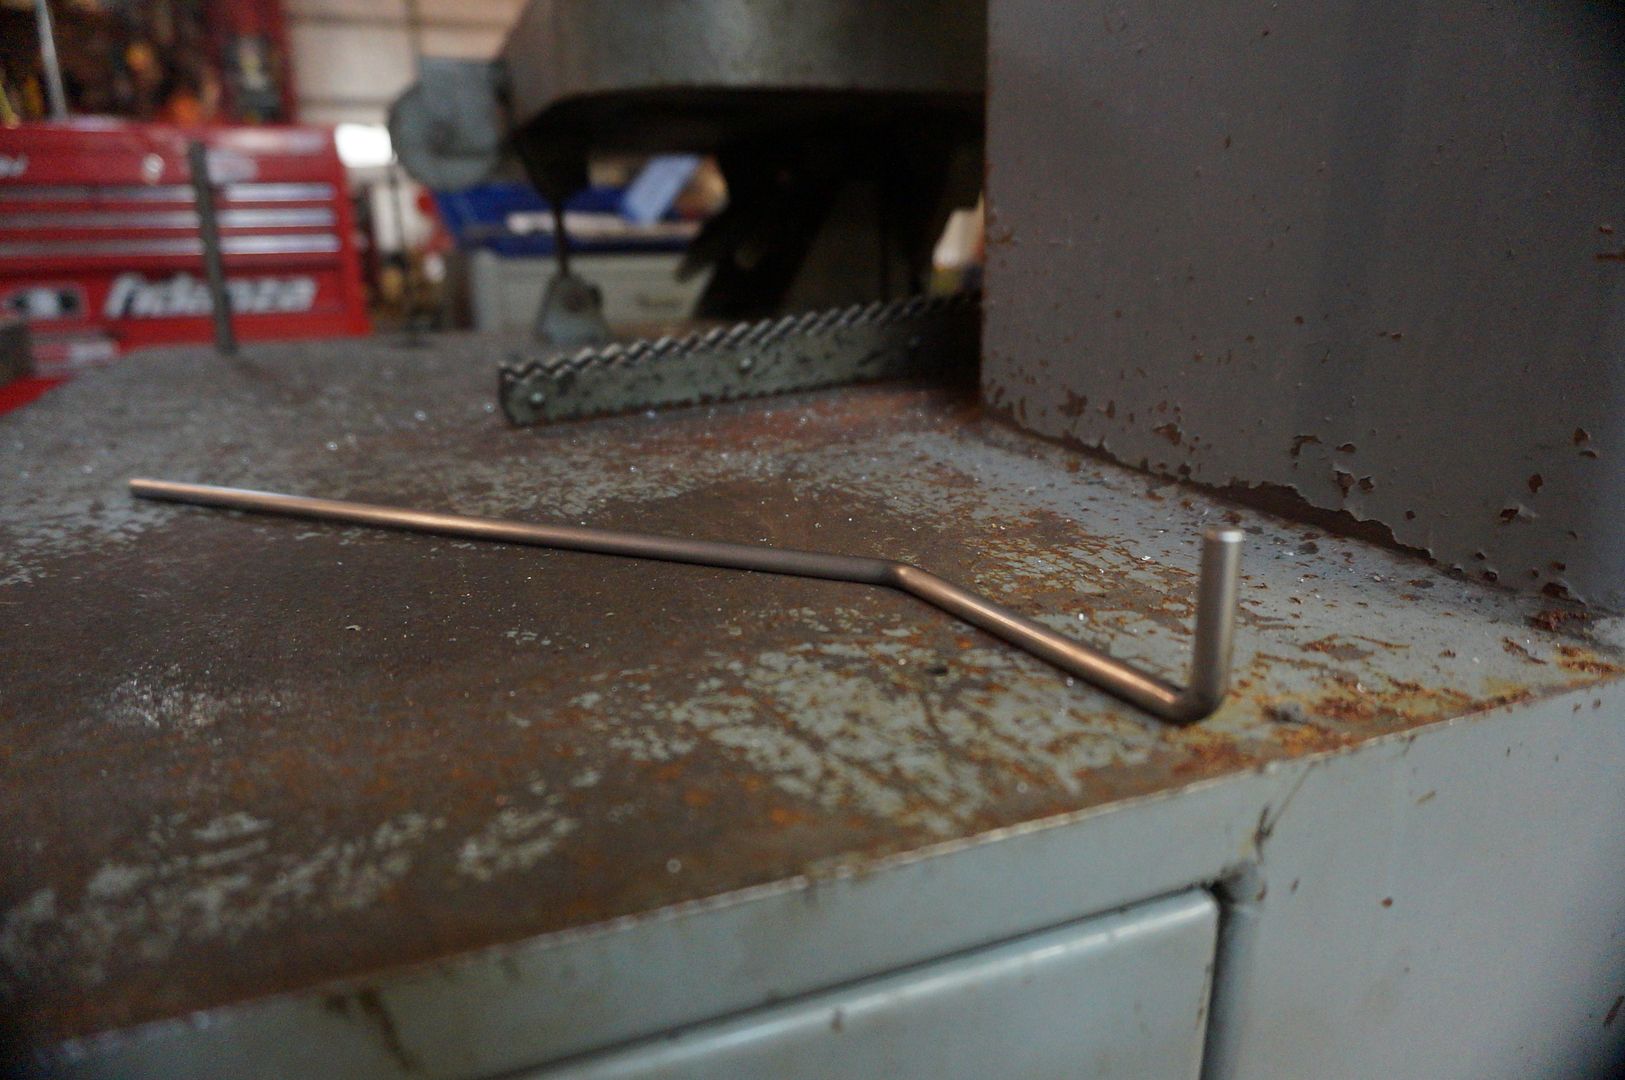
    They run the length of the plenum

     photo DSC03151.jpg

     photo DSC03157.jpg

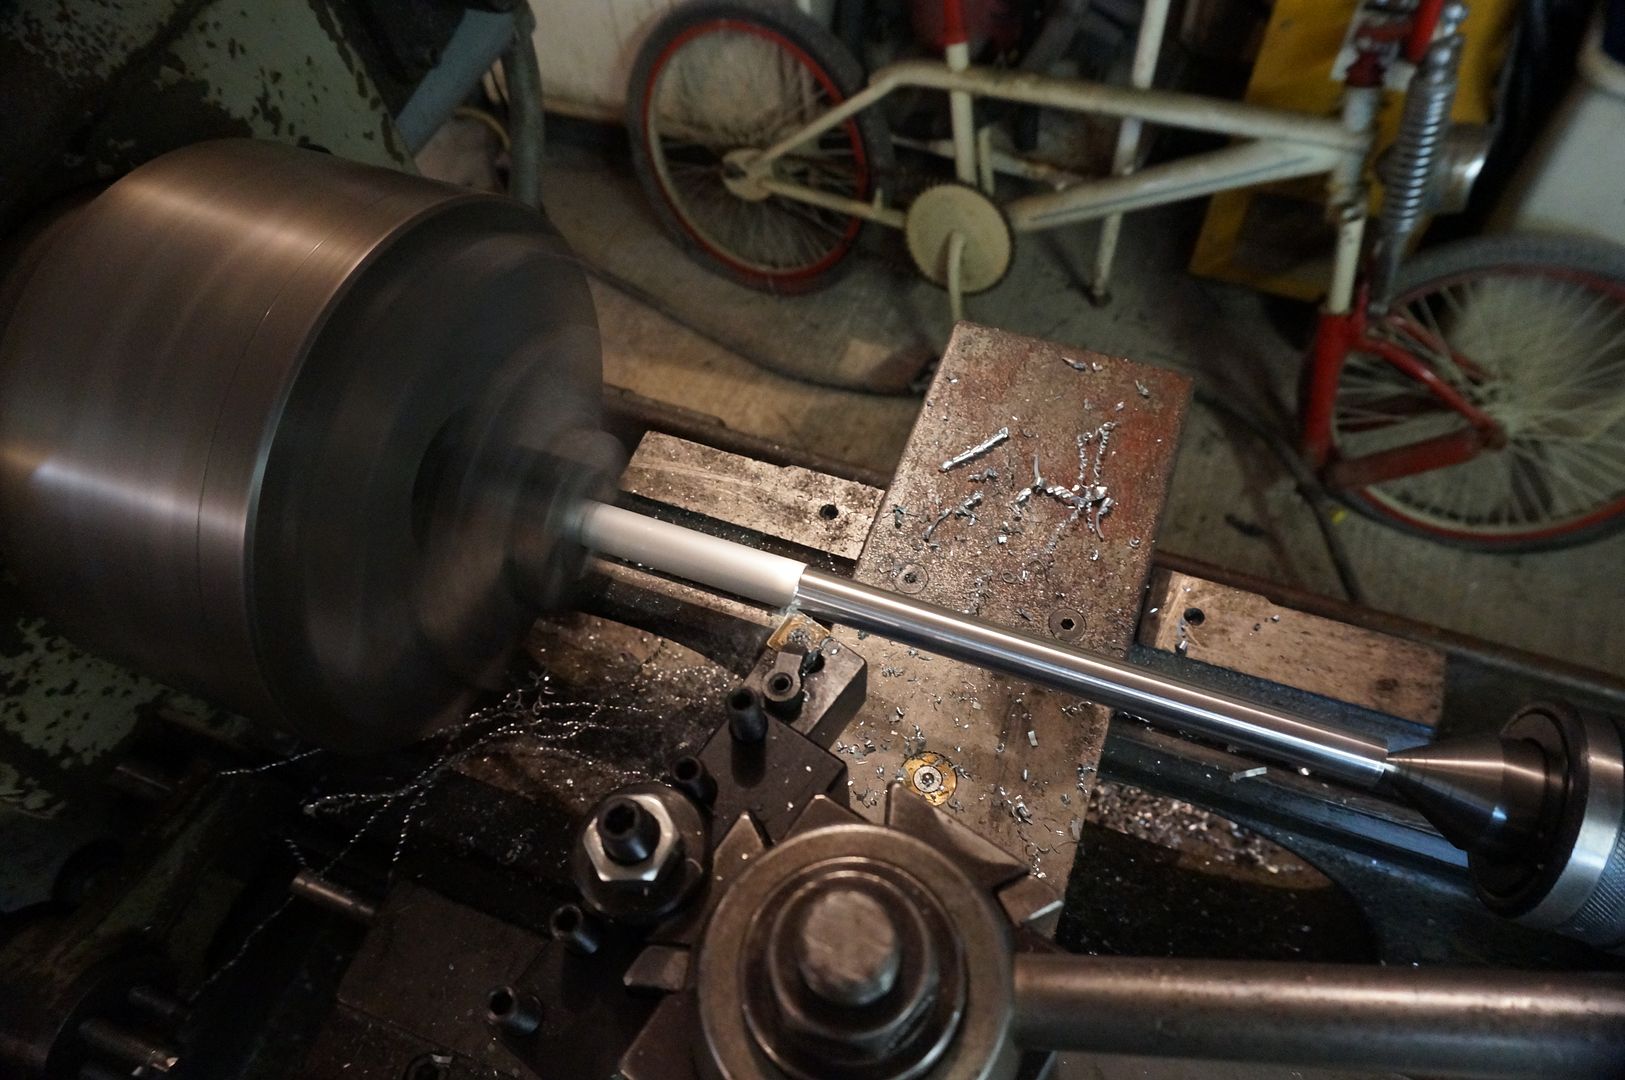
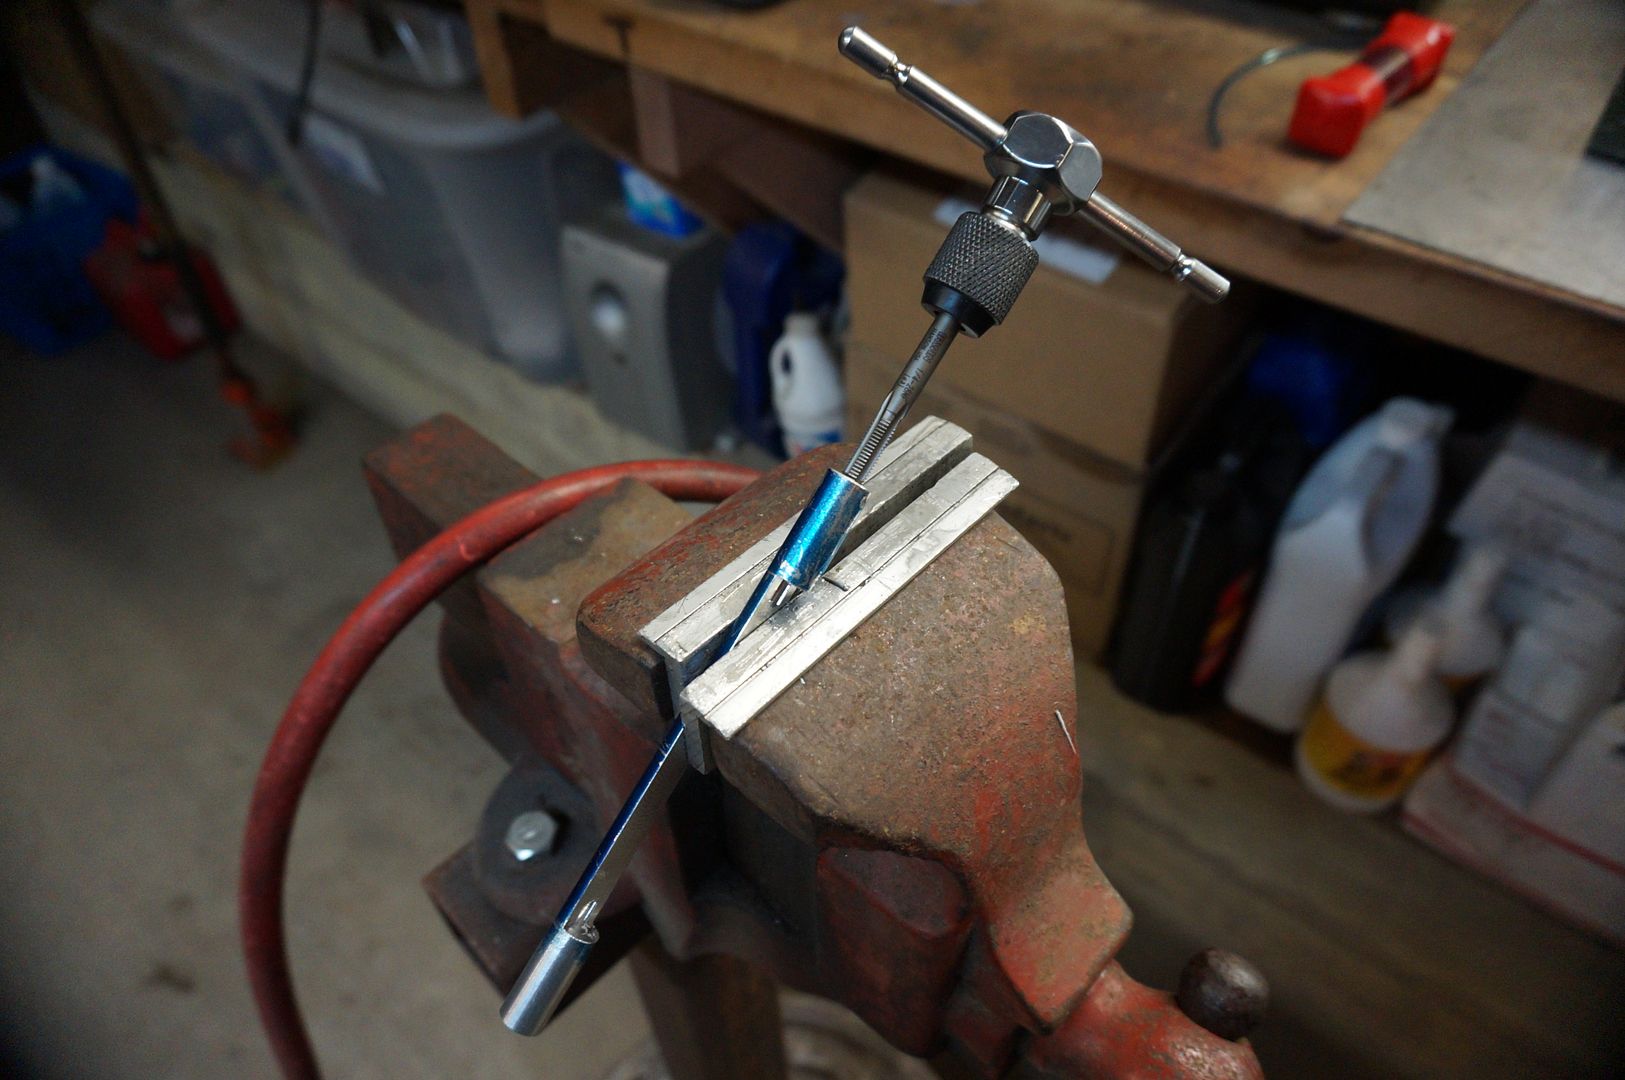
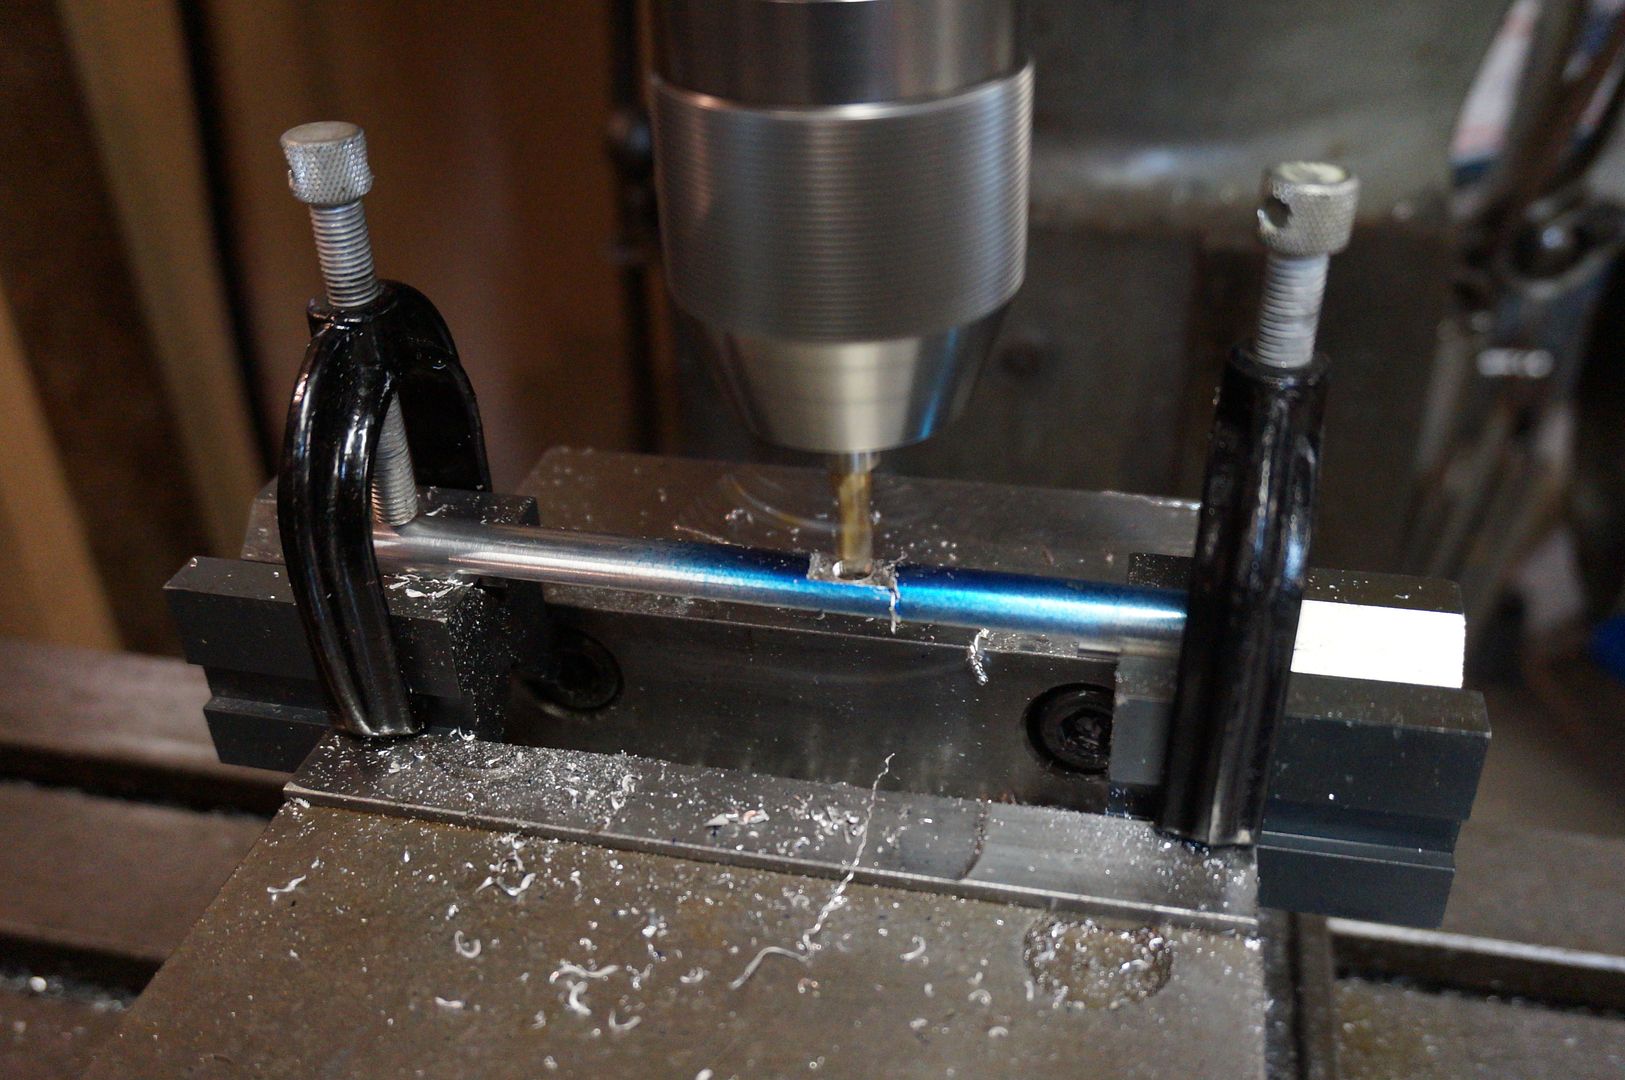
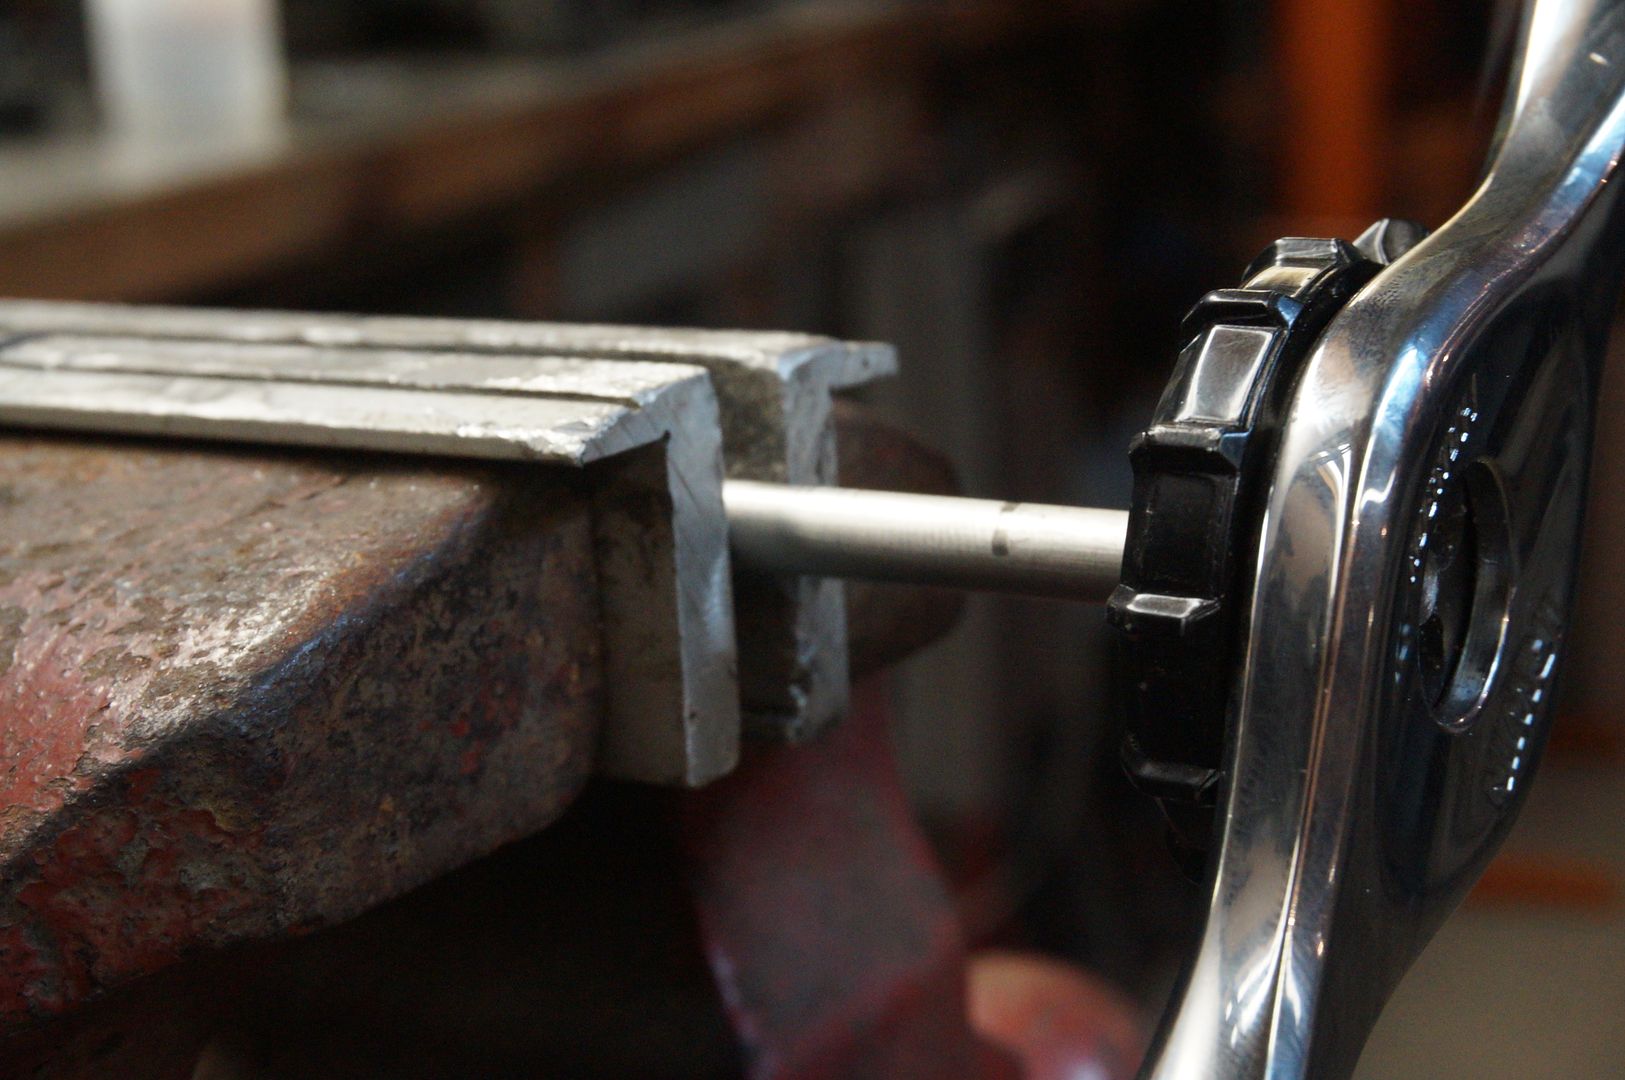
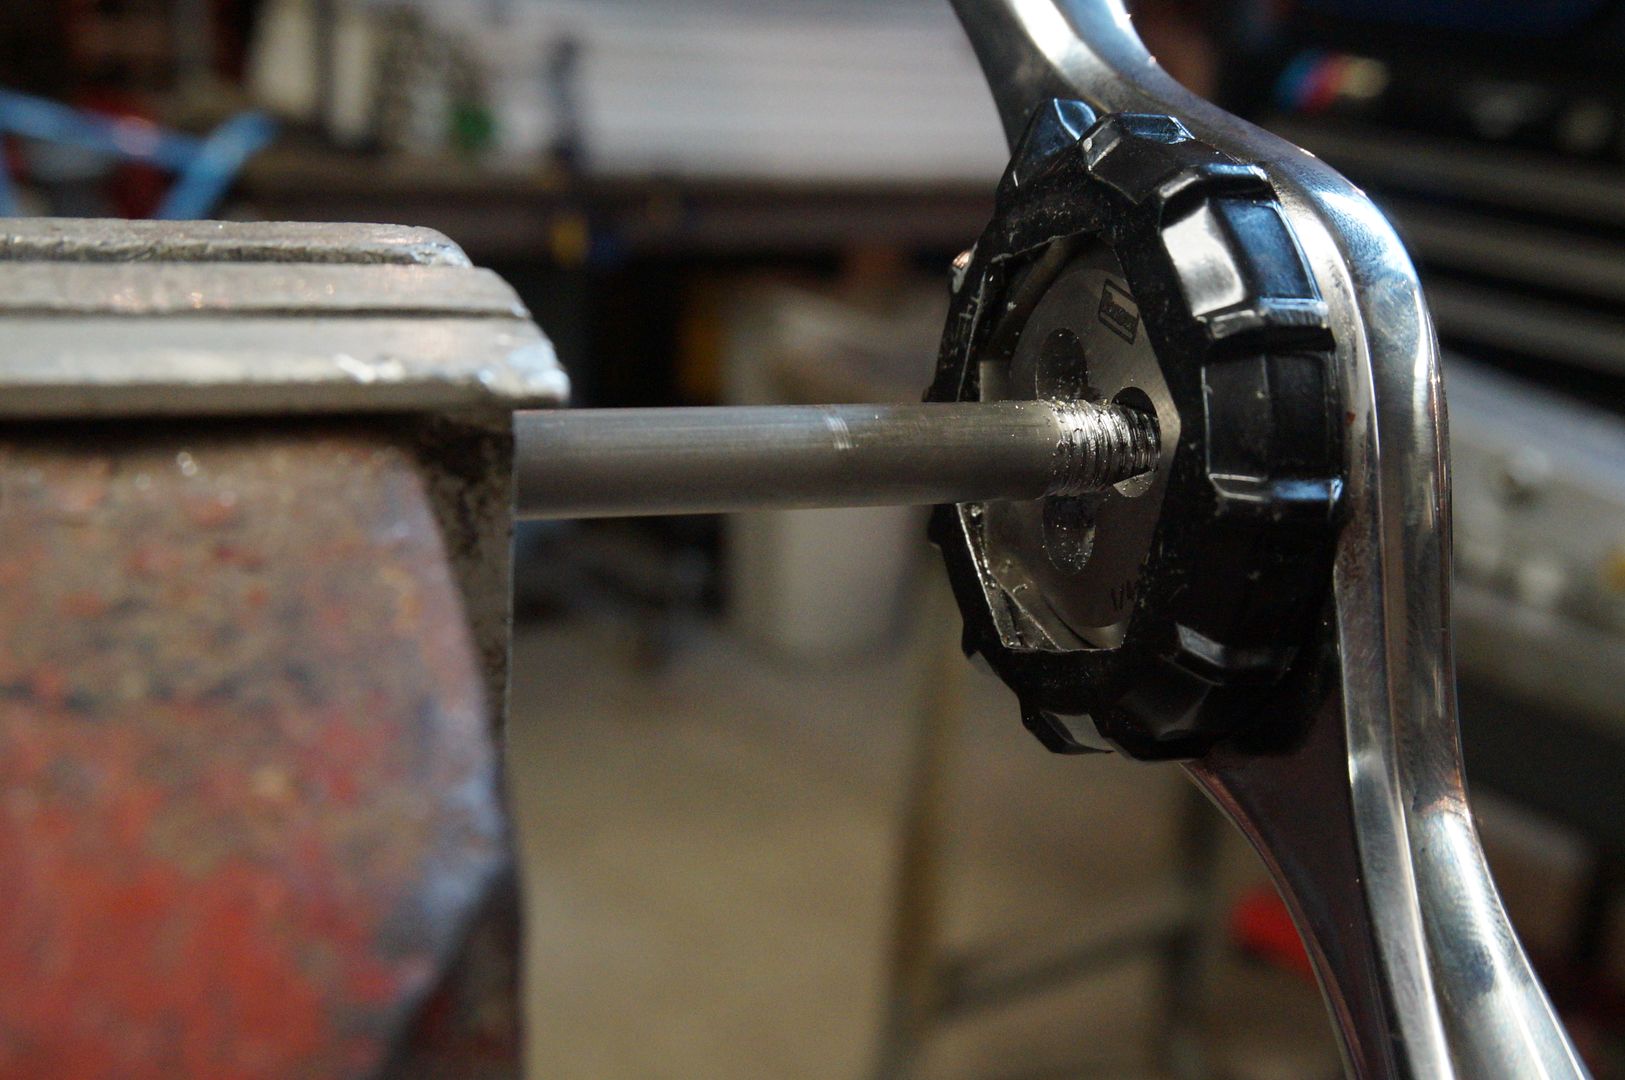
    Threading the ends of both stainless rods

     photo DSC03169.jpg

     photo DSC03174.jpg

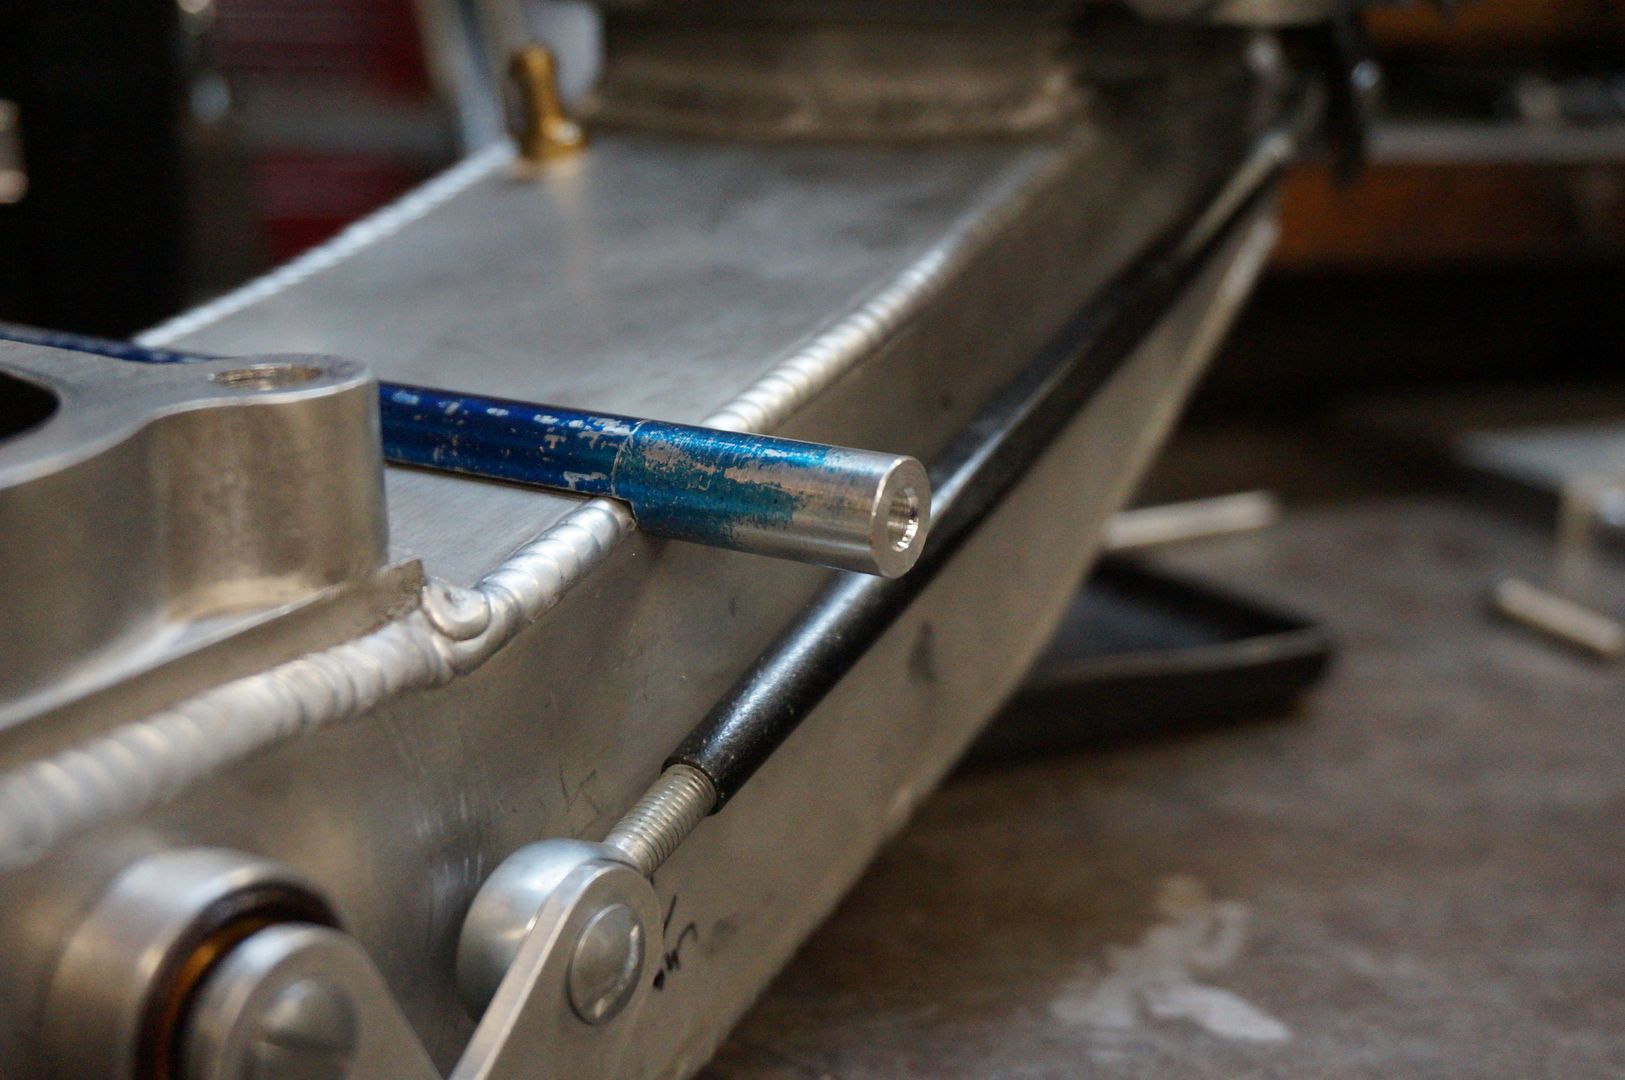
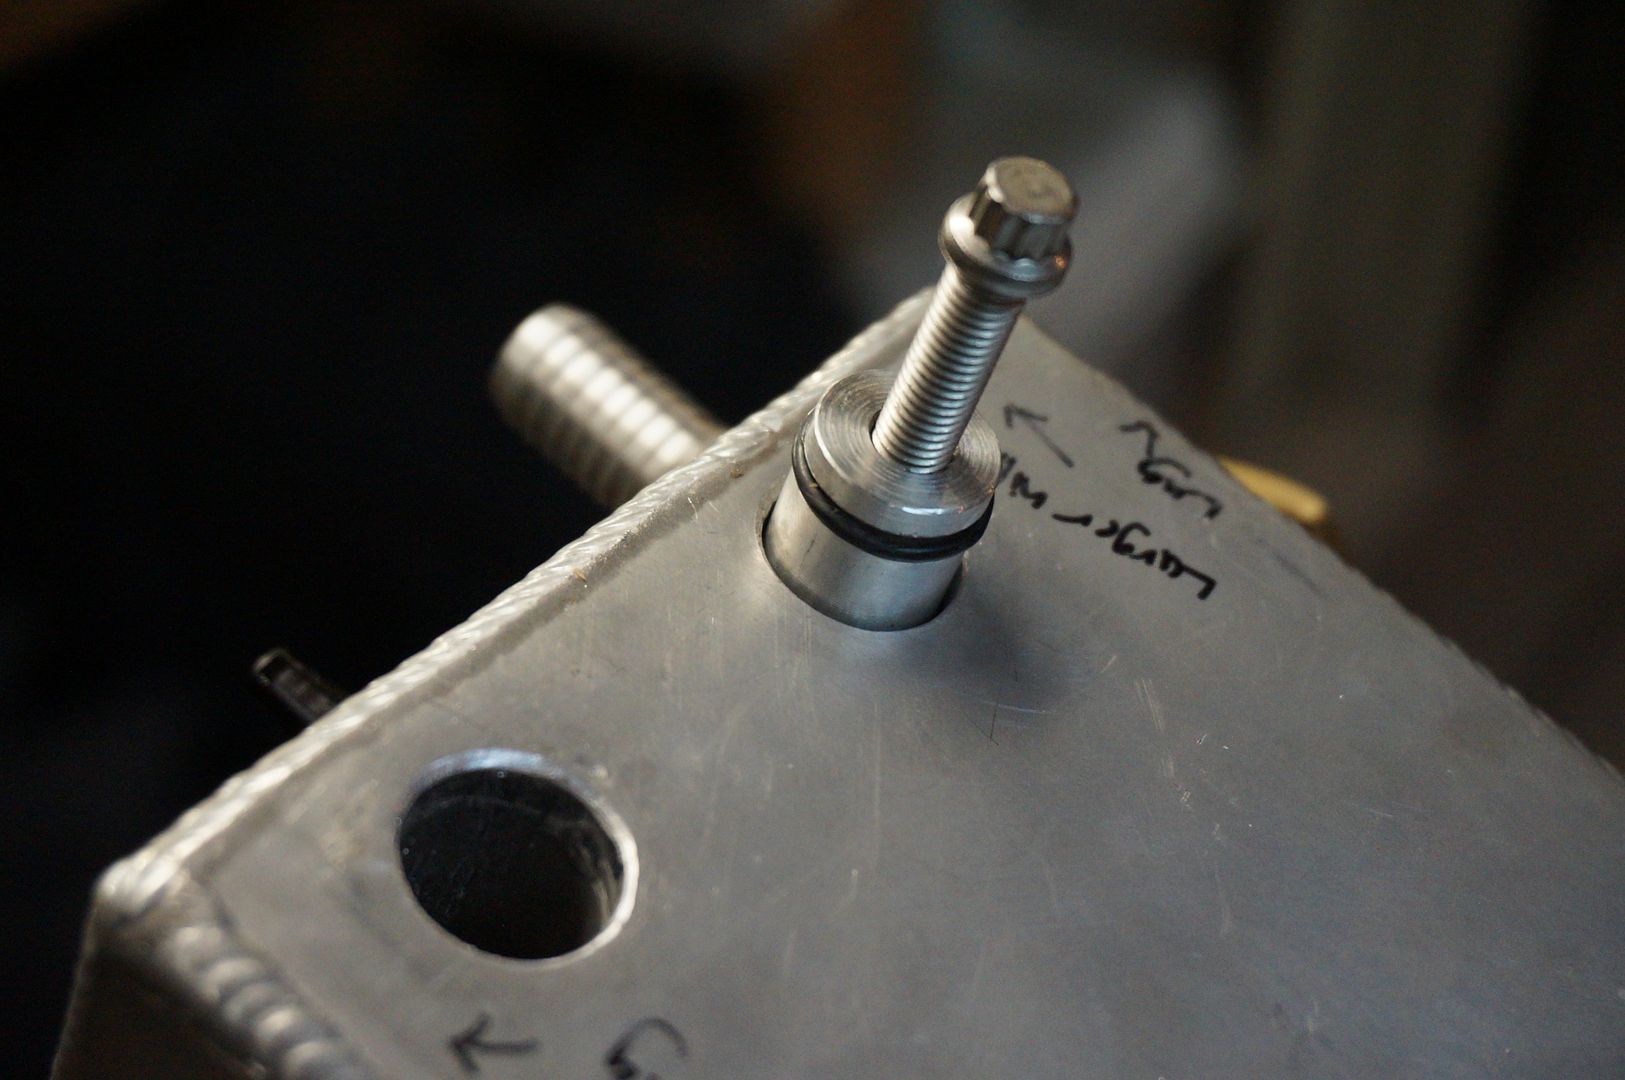
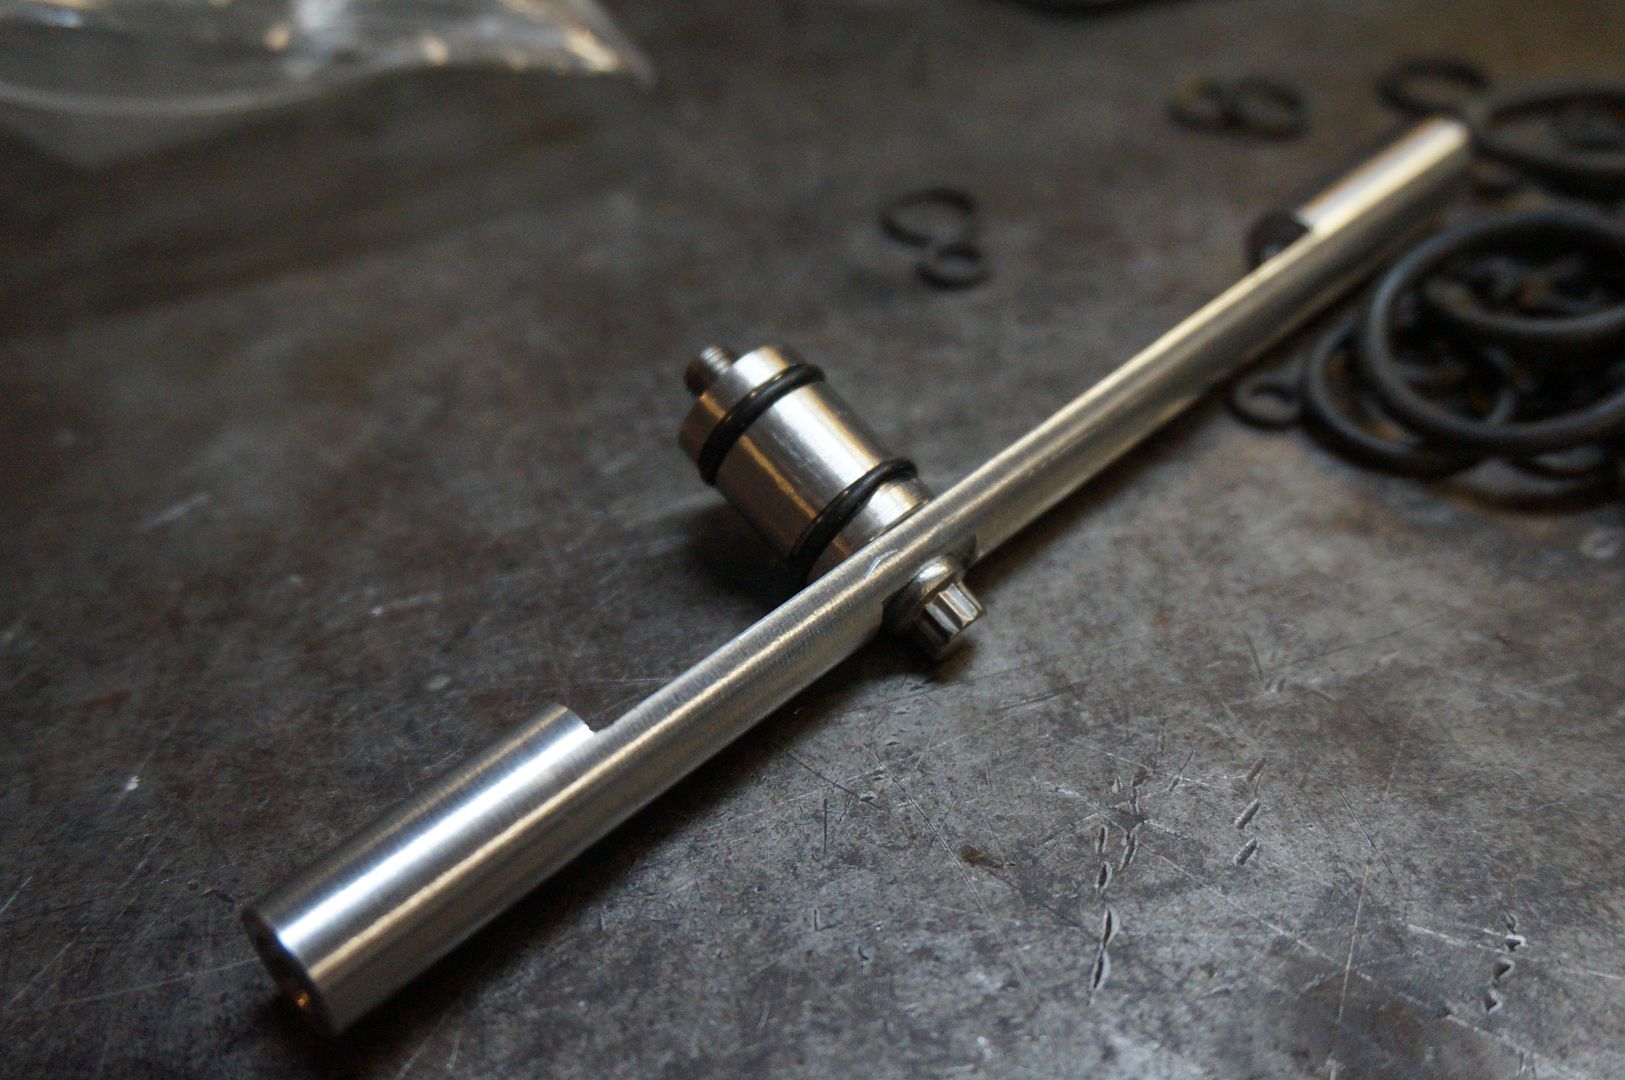
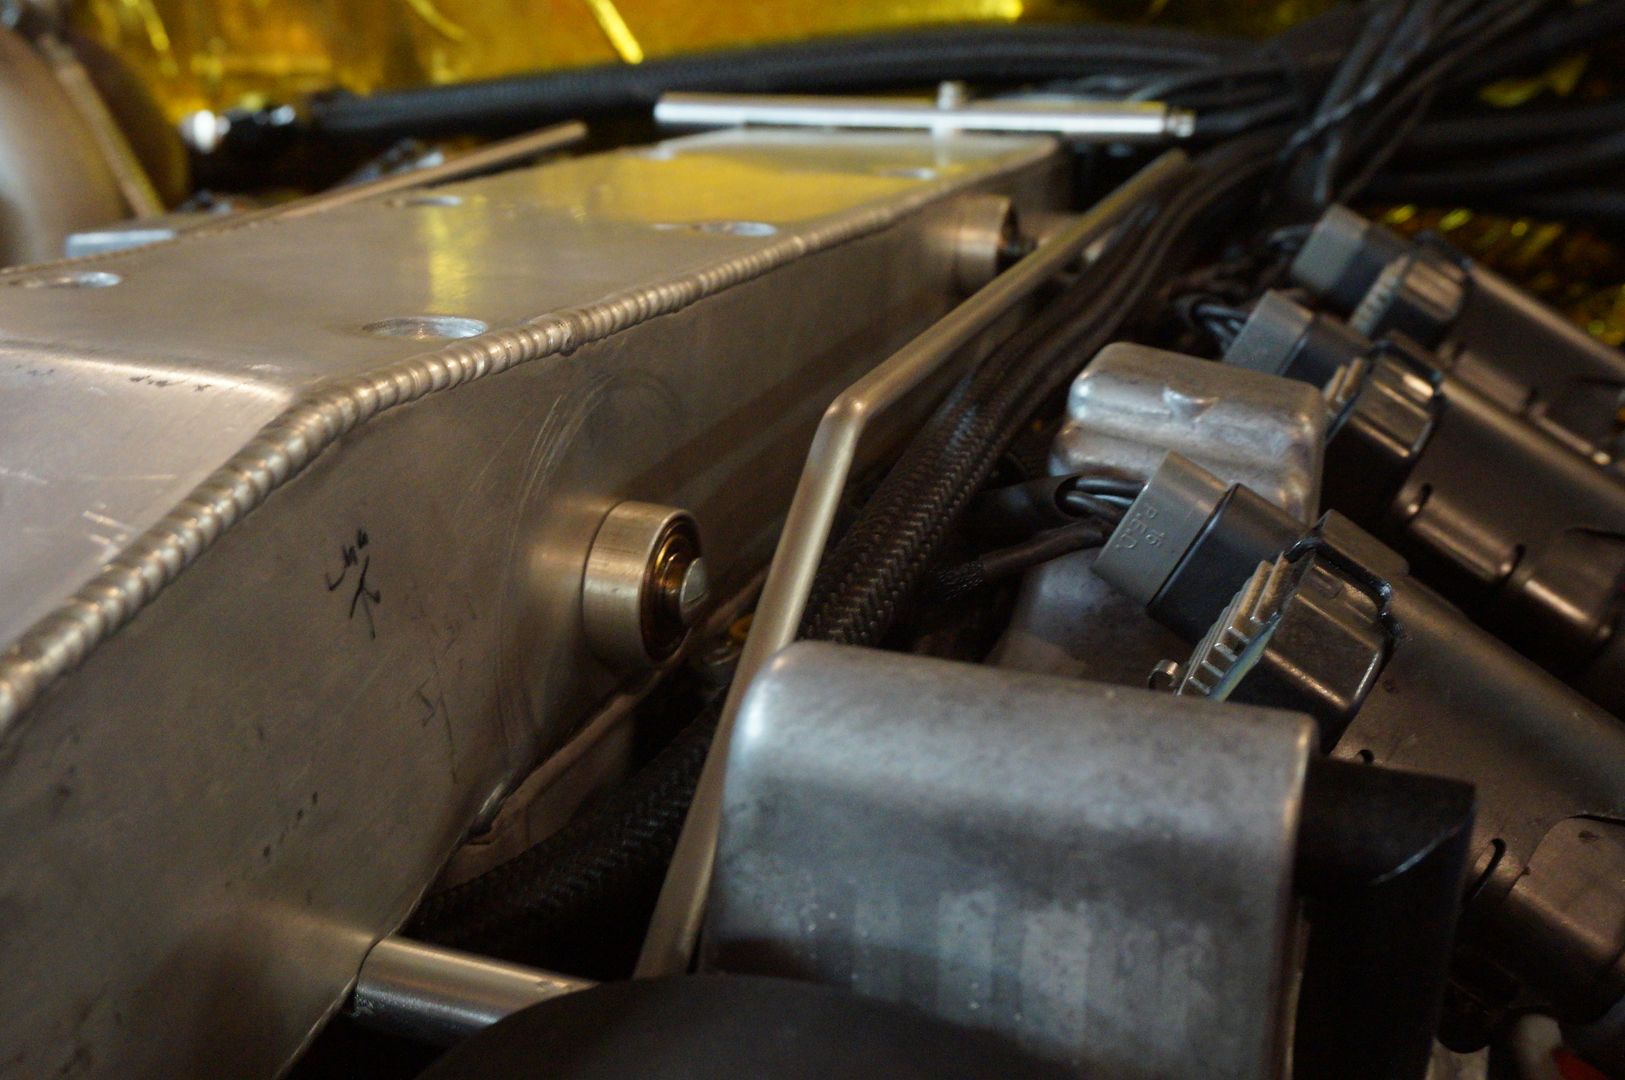
    Aluminum sleeve threads onto the rod end

     photo DSC03188.jpg

     photo DSC03189.jpg

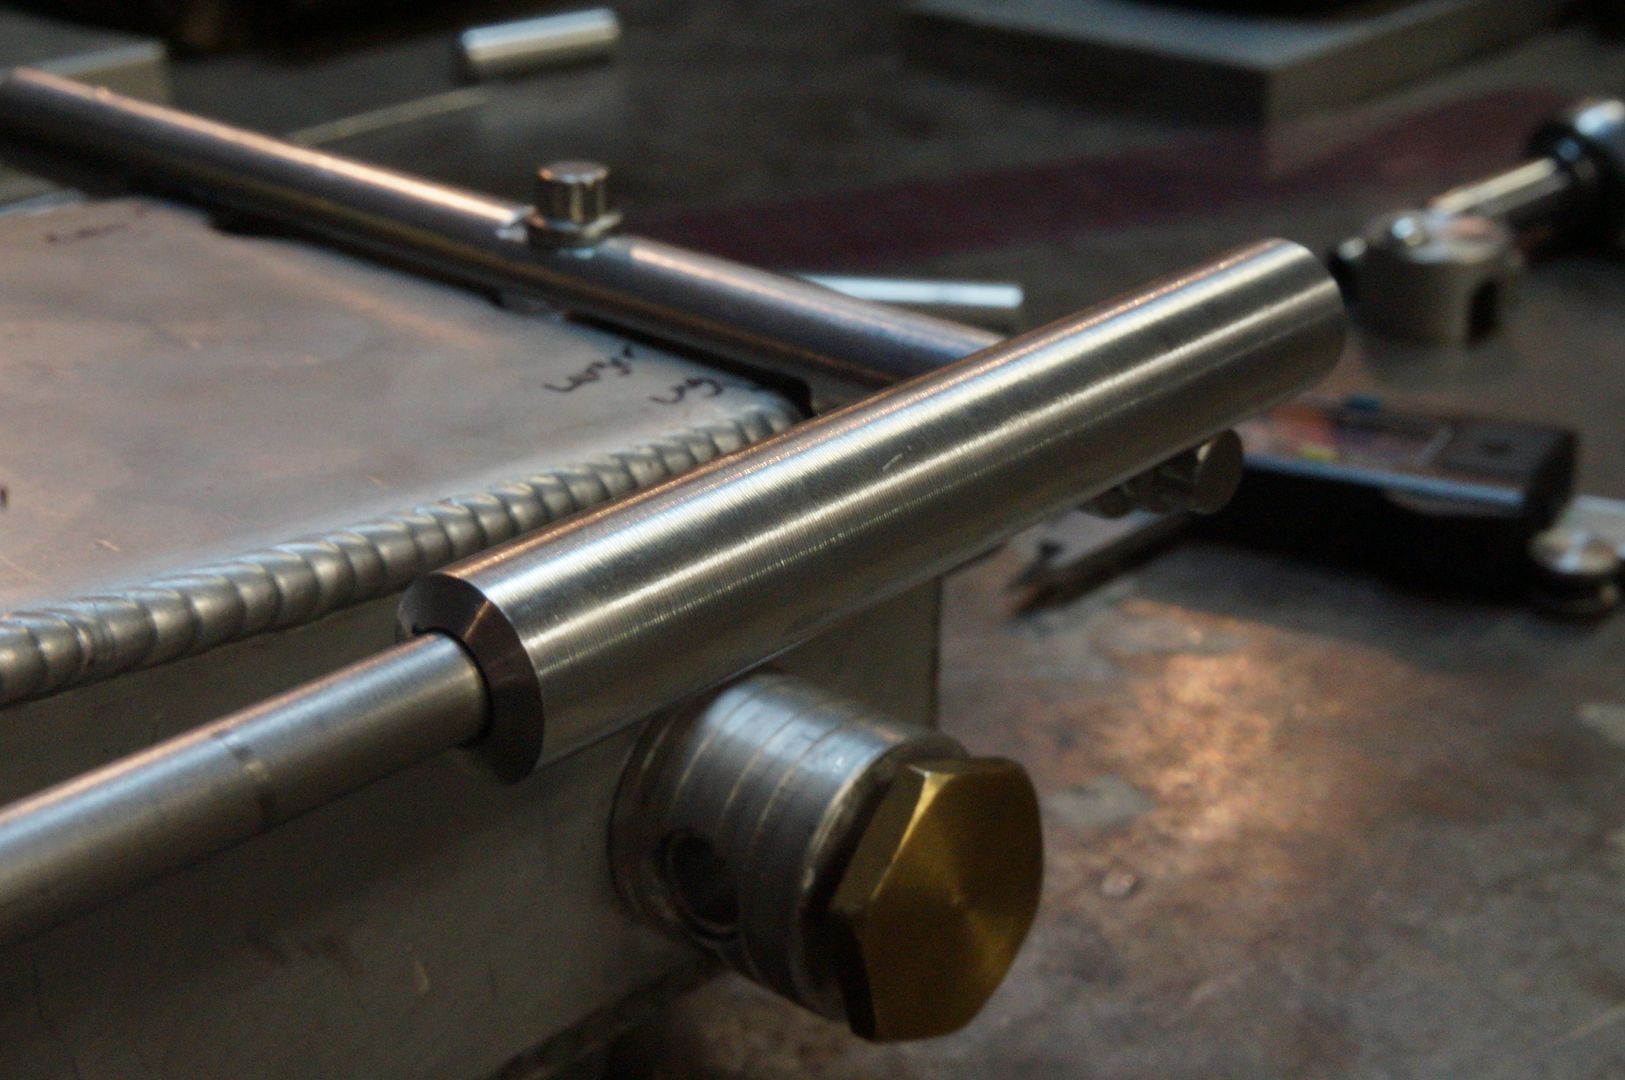
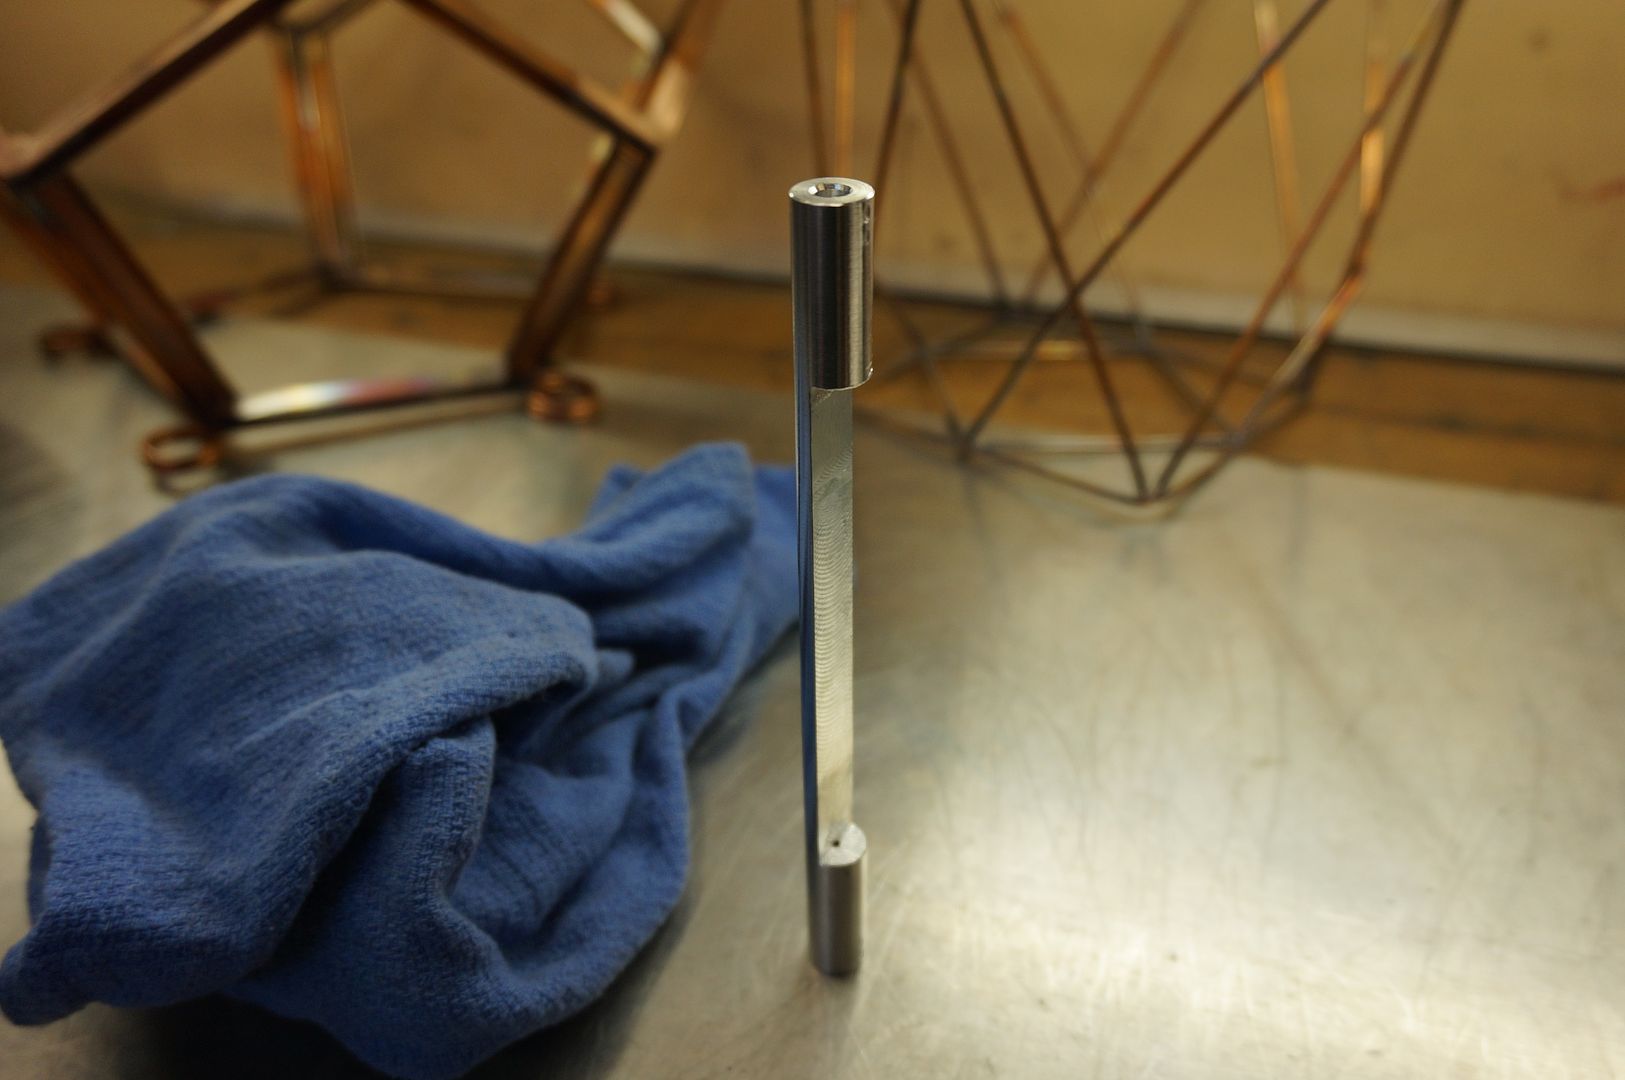
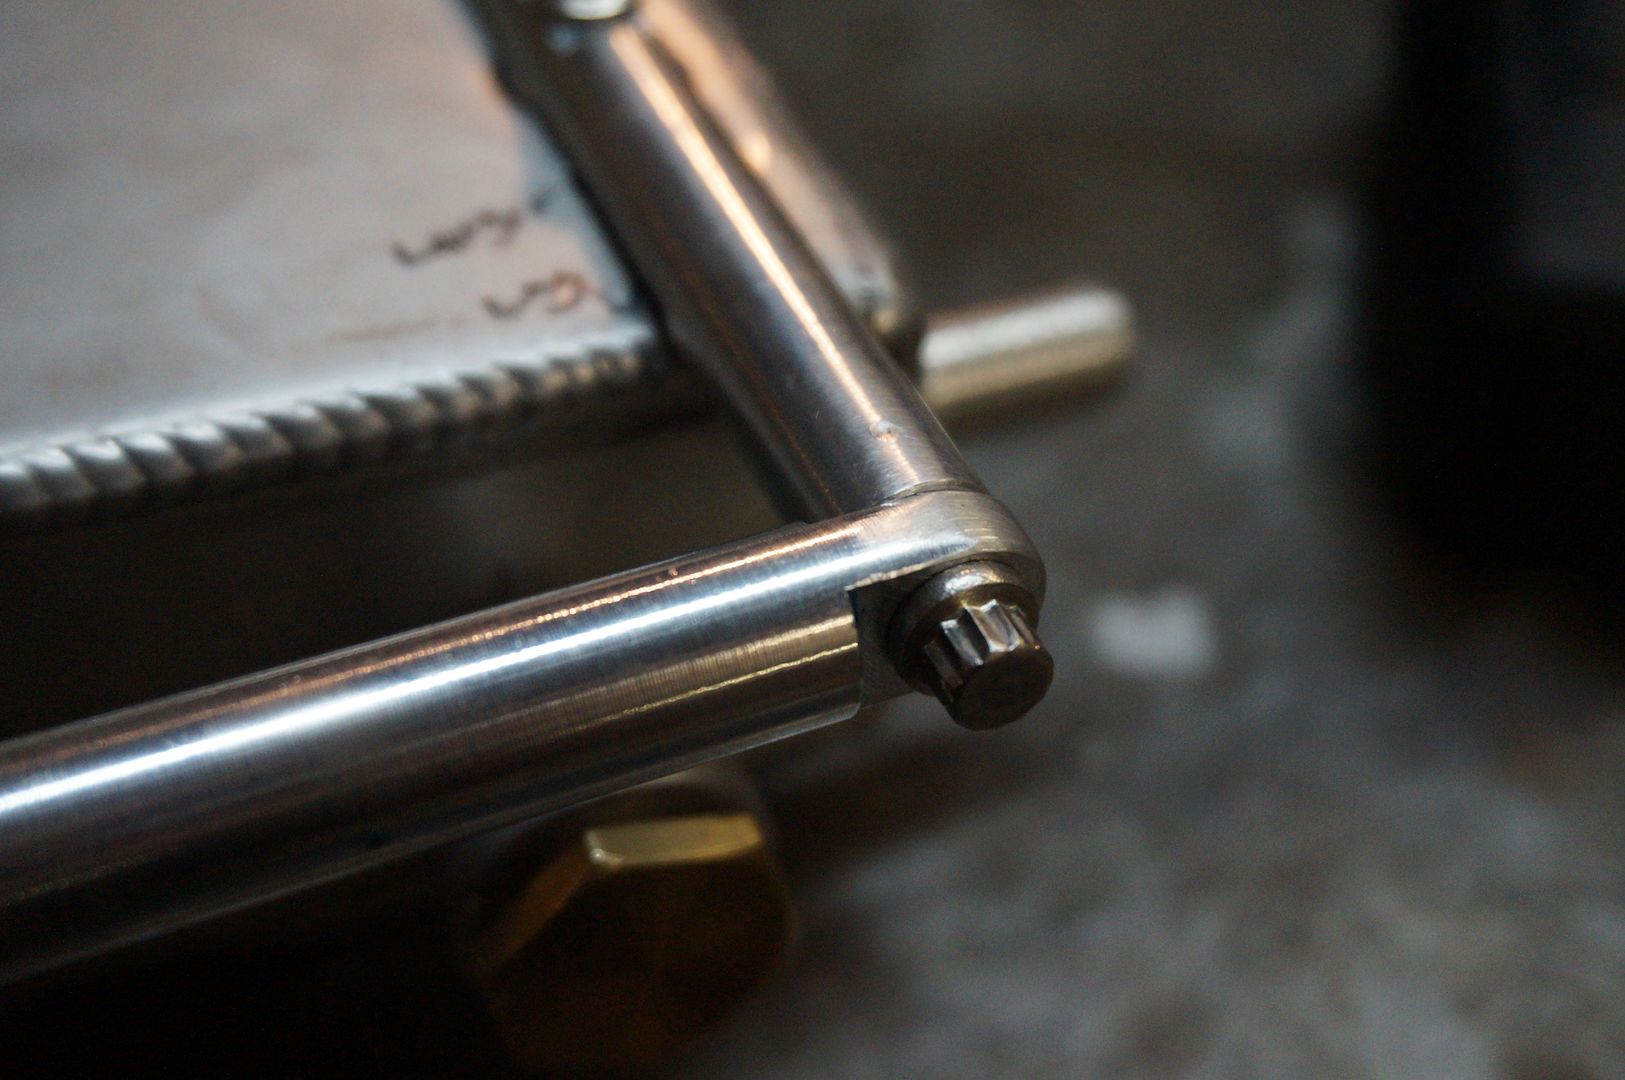
    Faced sleeve and drilled hole for 12 point fastener

     photo DSC03190.jpg

     photo DSC03203.jpg

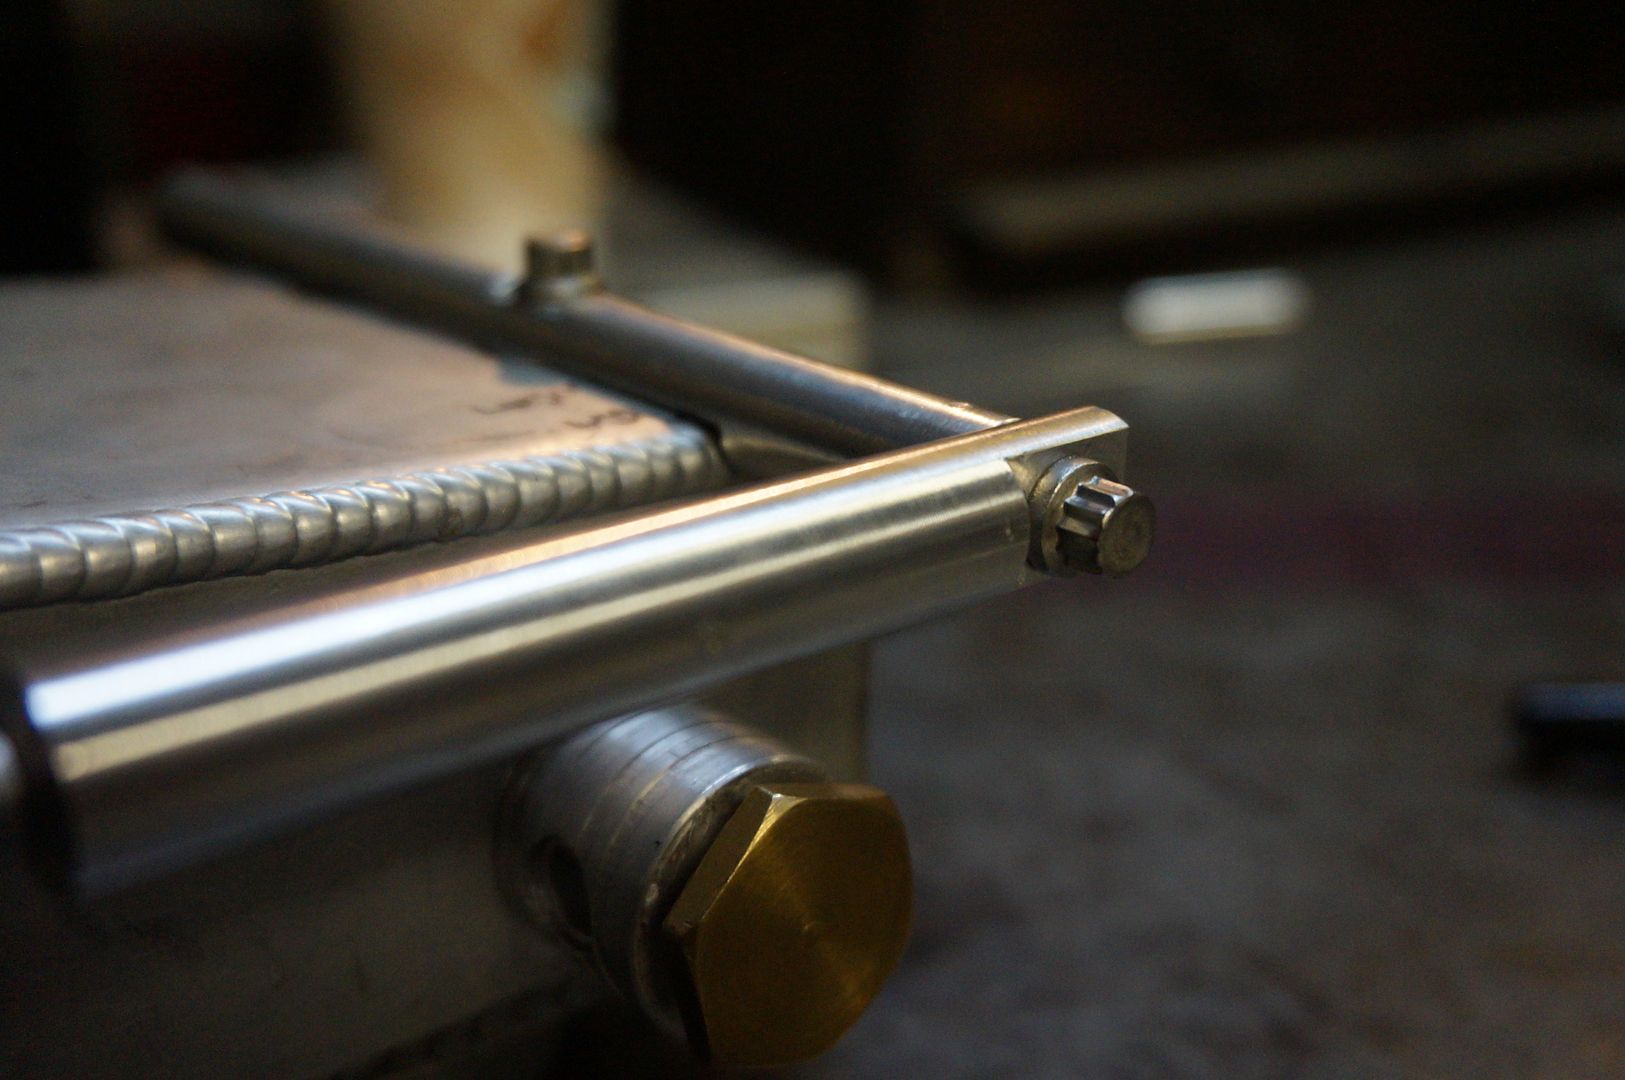
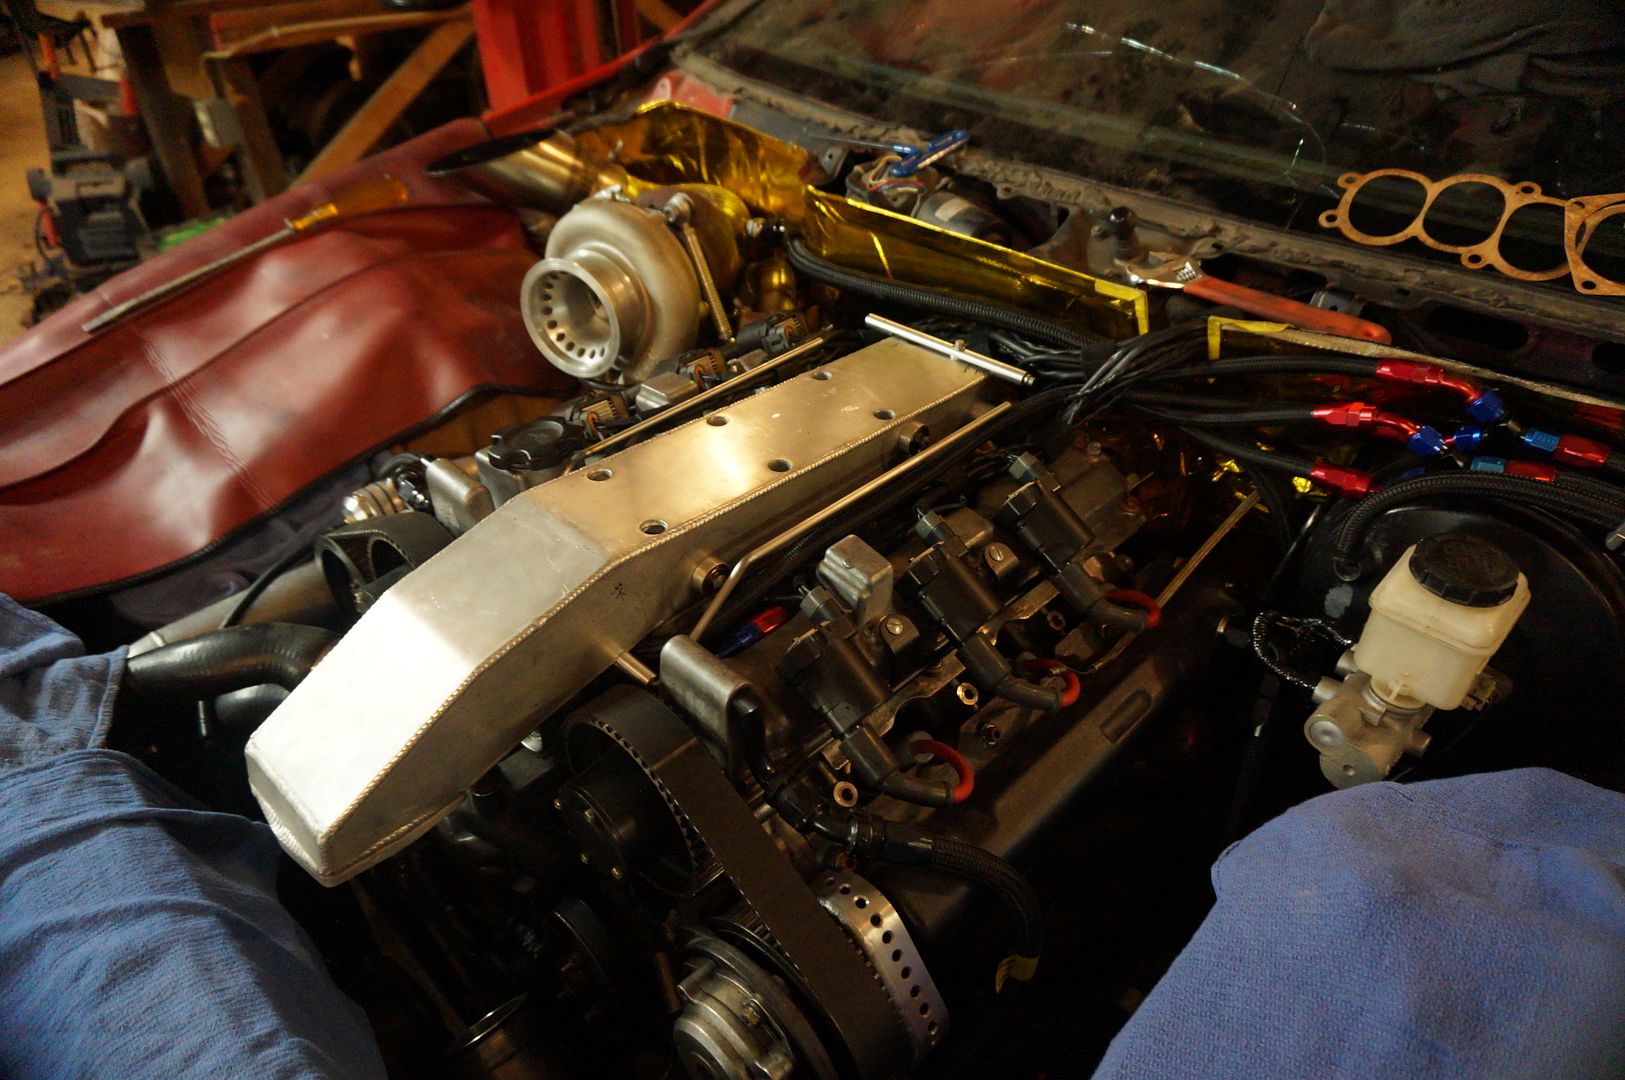
    Its like a little exoskeleton

     photo DSC03207.jpg

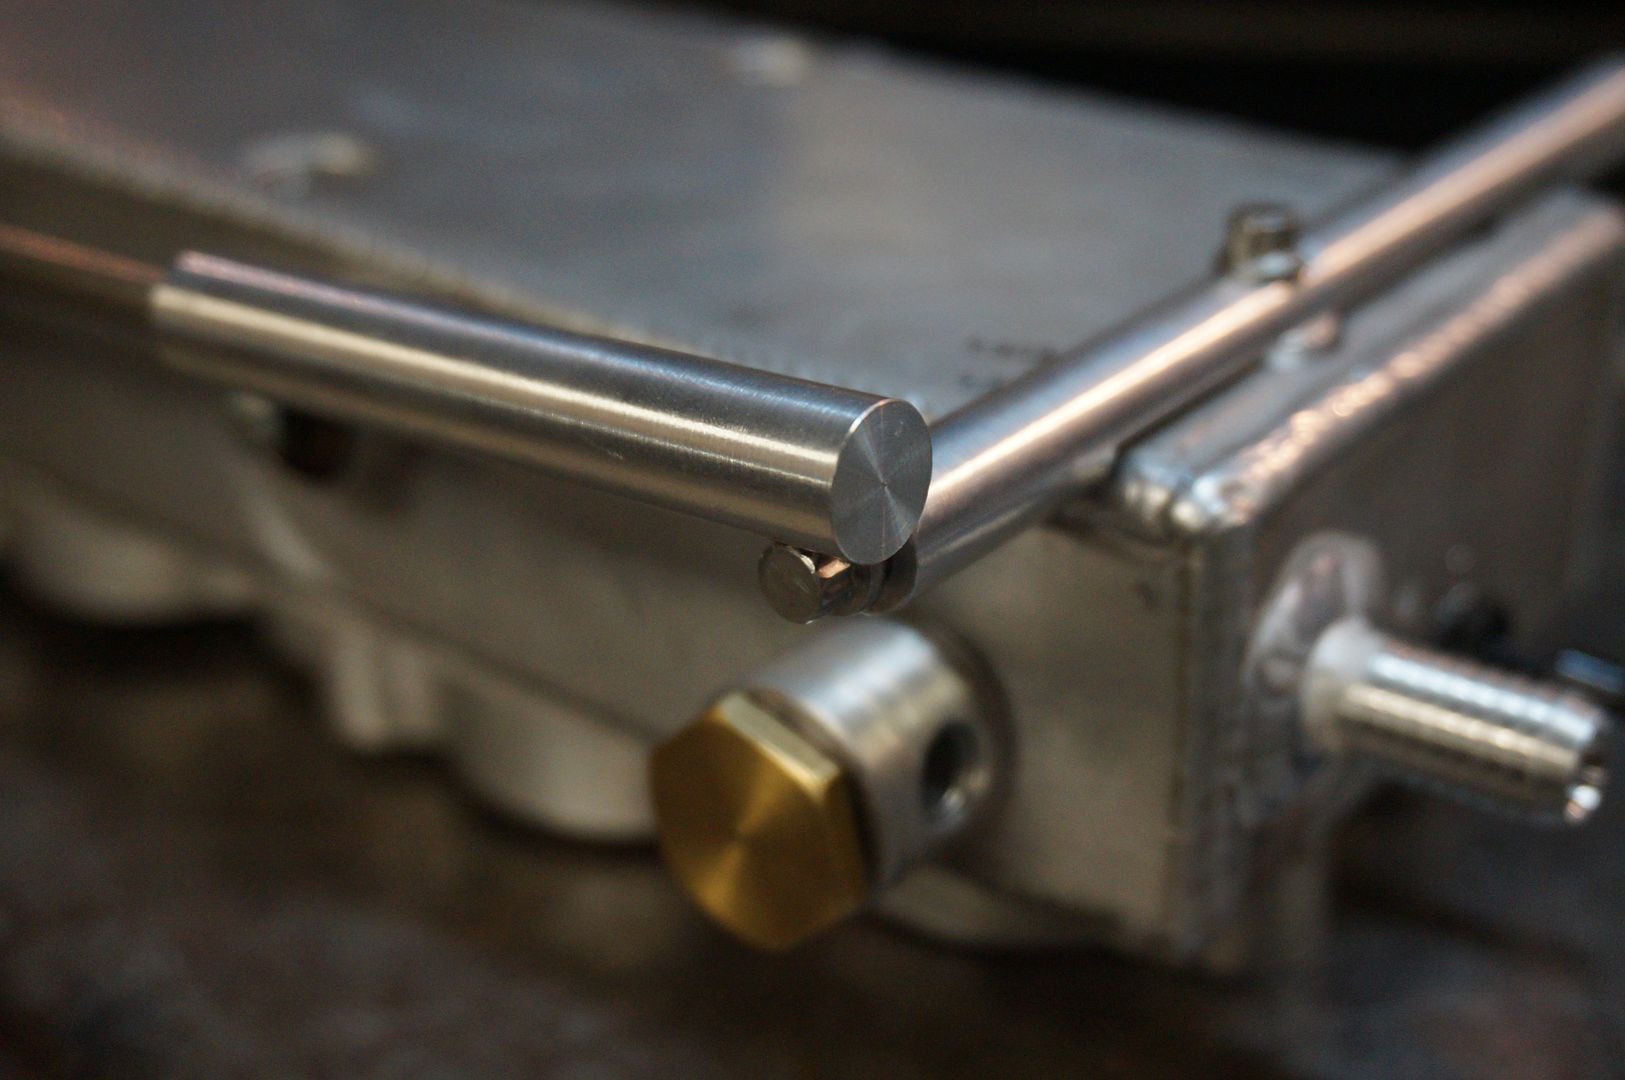
    Contoured end for maximum ocd effect

     photo DSC03212.jpg

     photo DSC03218.jpg

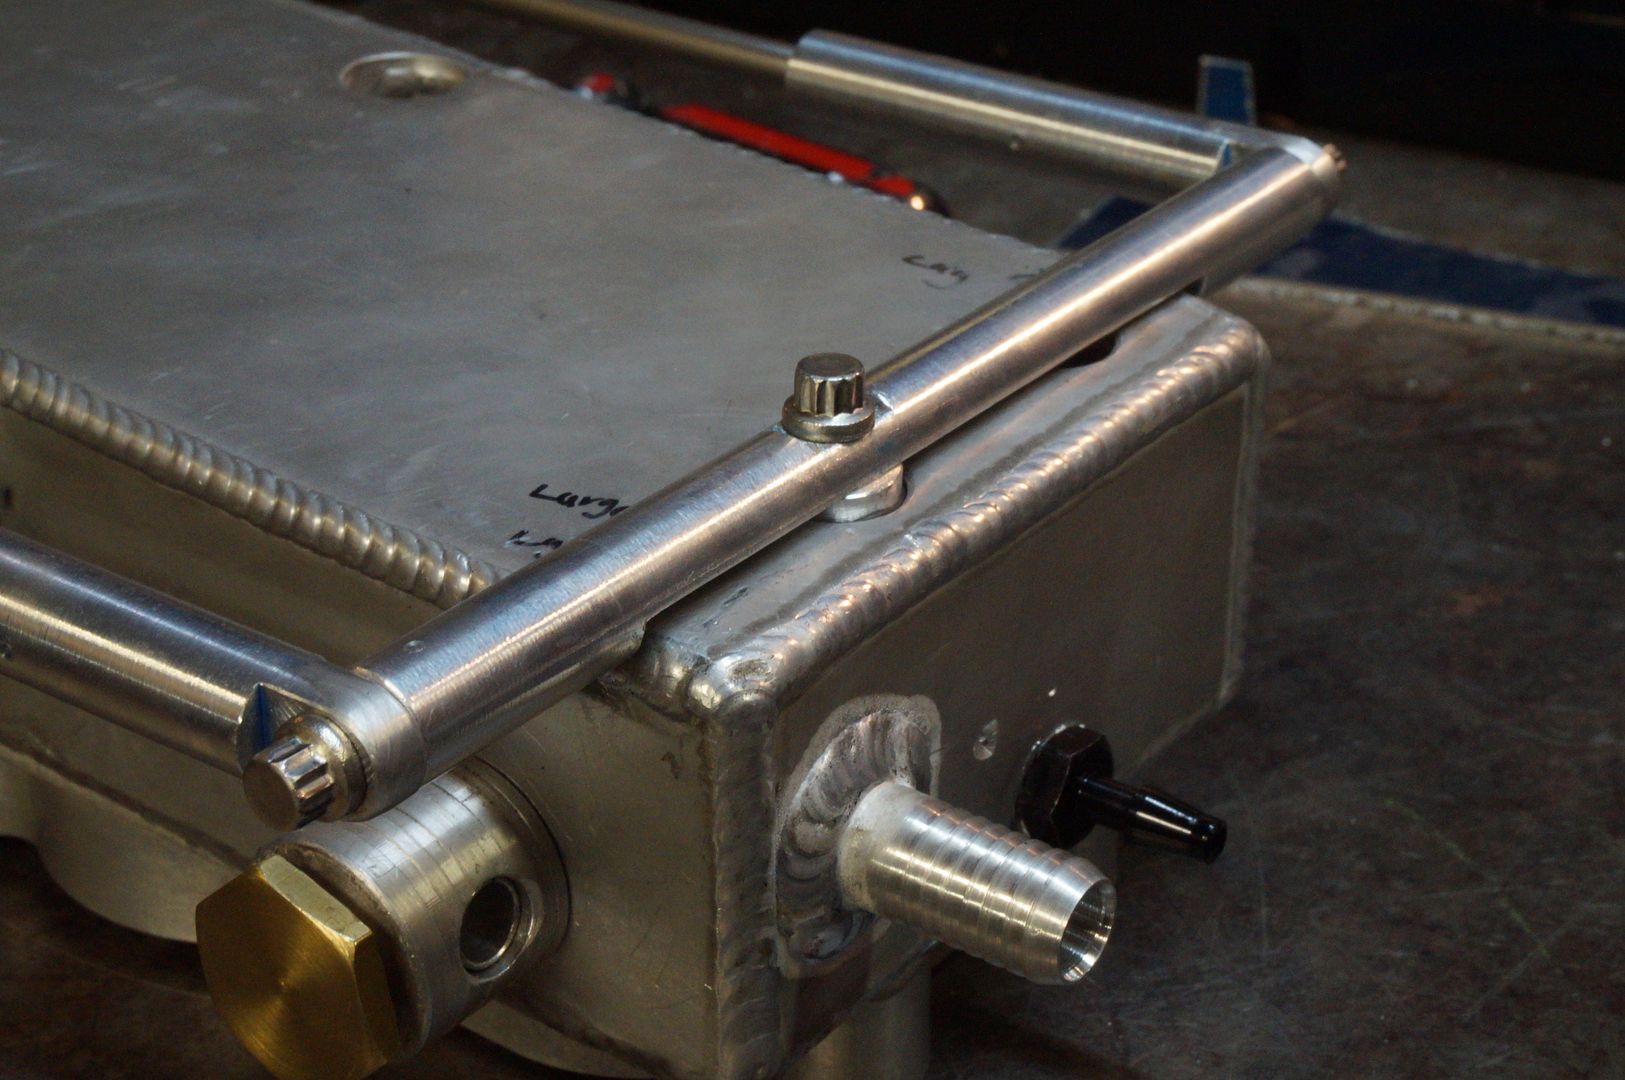
    I have incorporated a service mode that will allow ample room and doesn't require any fasteners to be removed just loosened

     photo DSC03225.jpg

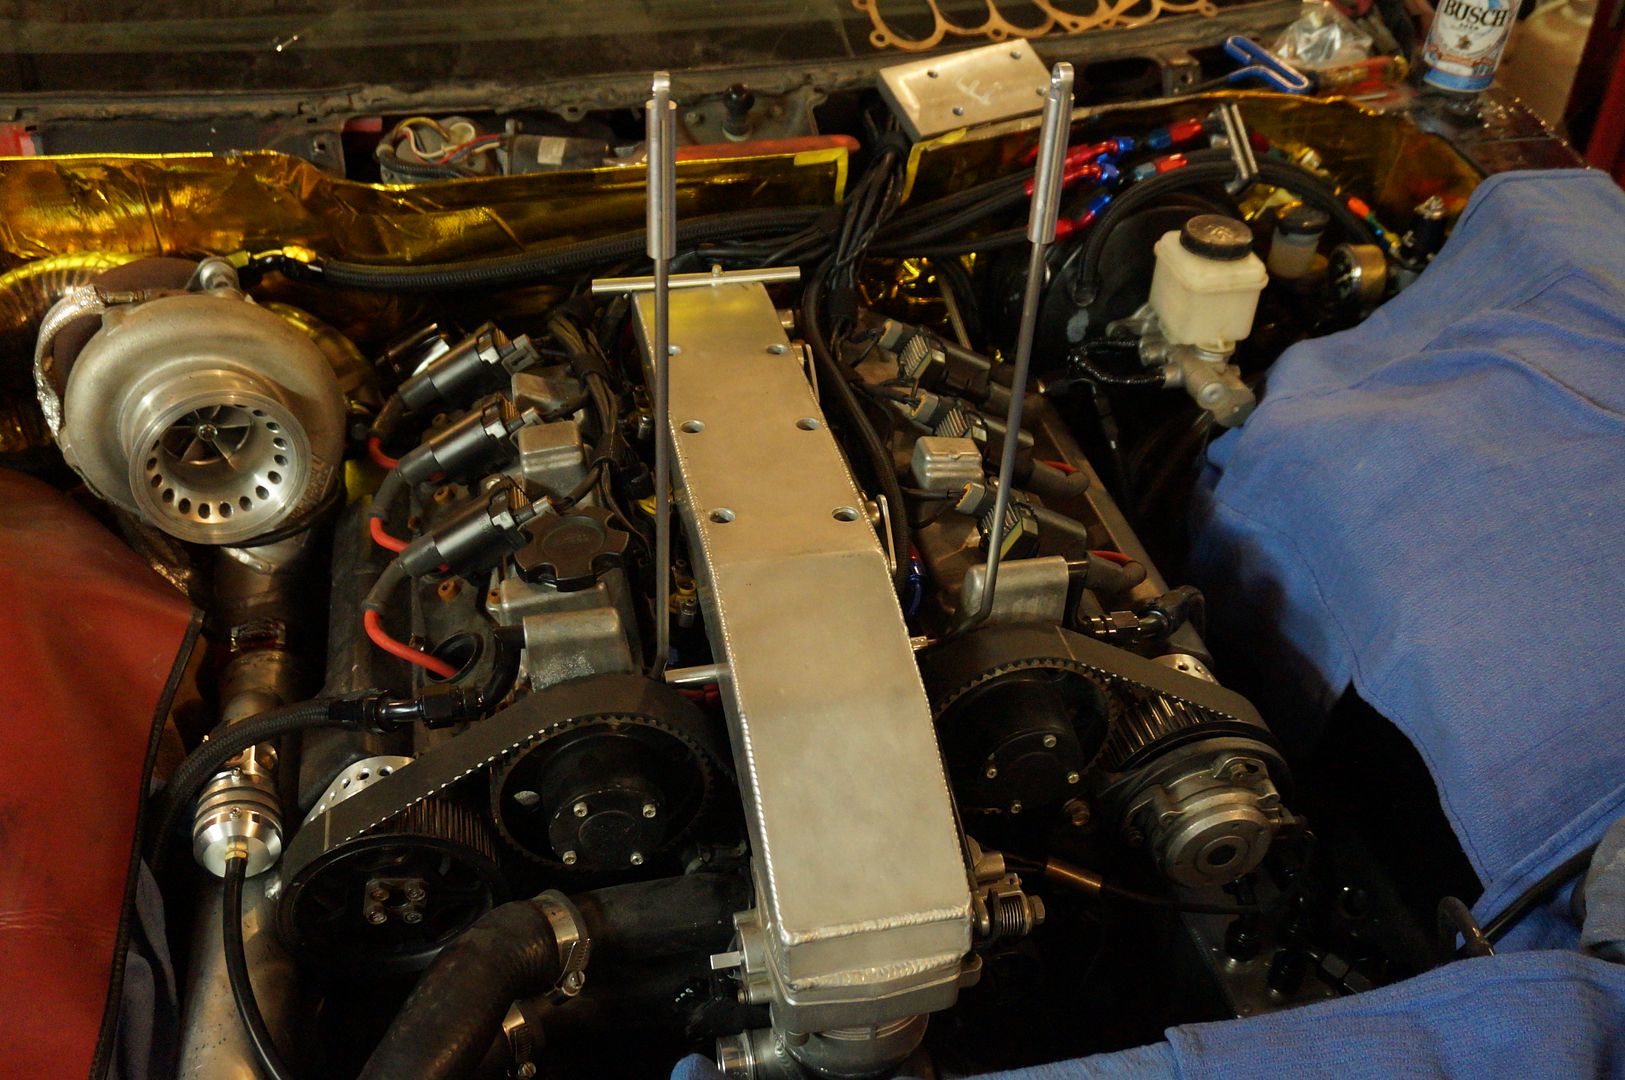
    But ya this is just the build of the main frame that will hold my fuel lines and engine harness, I will continue the actual mounting system in an upcoming update

     photo DSC03228.jpg

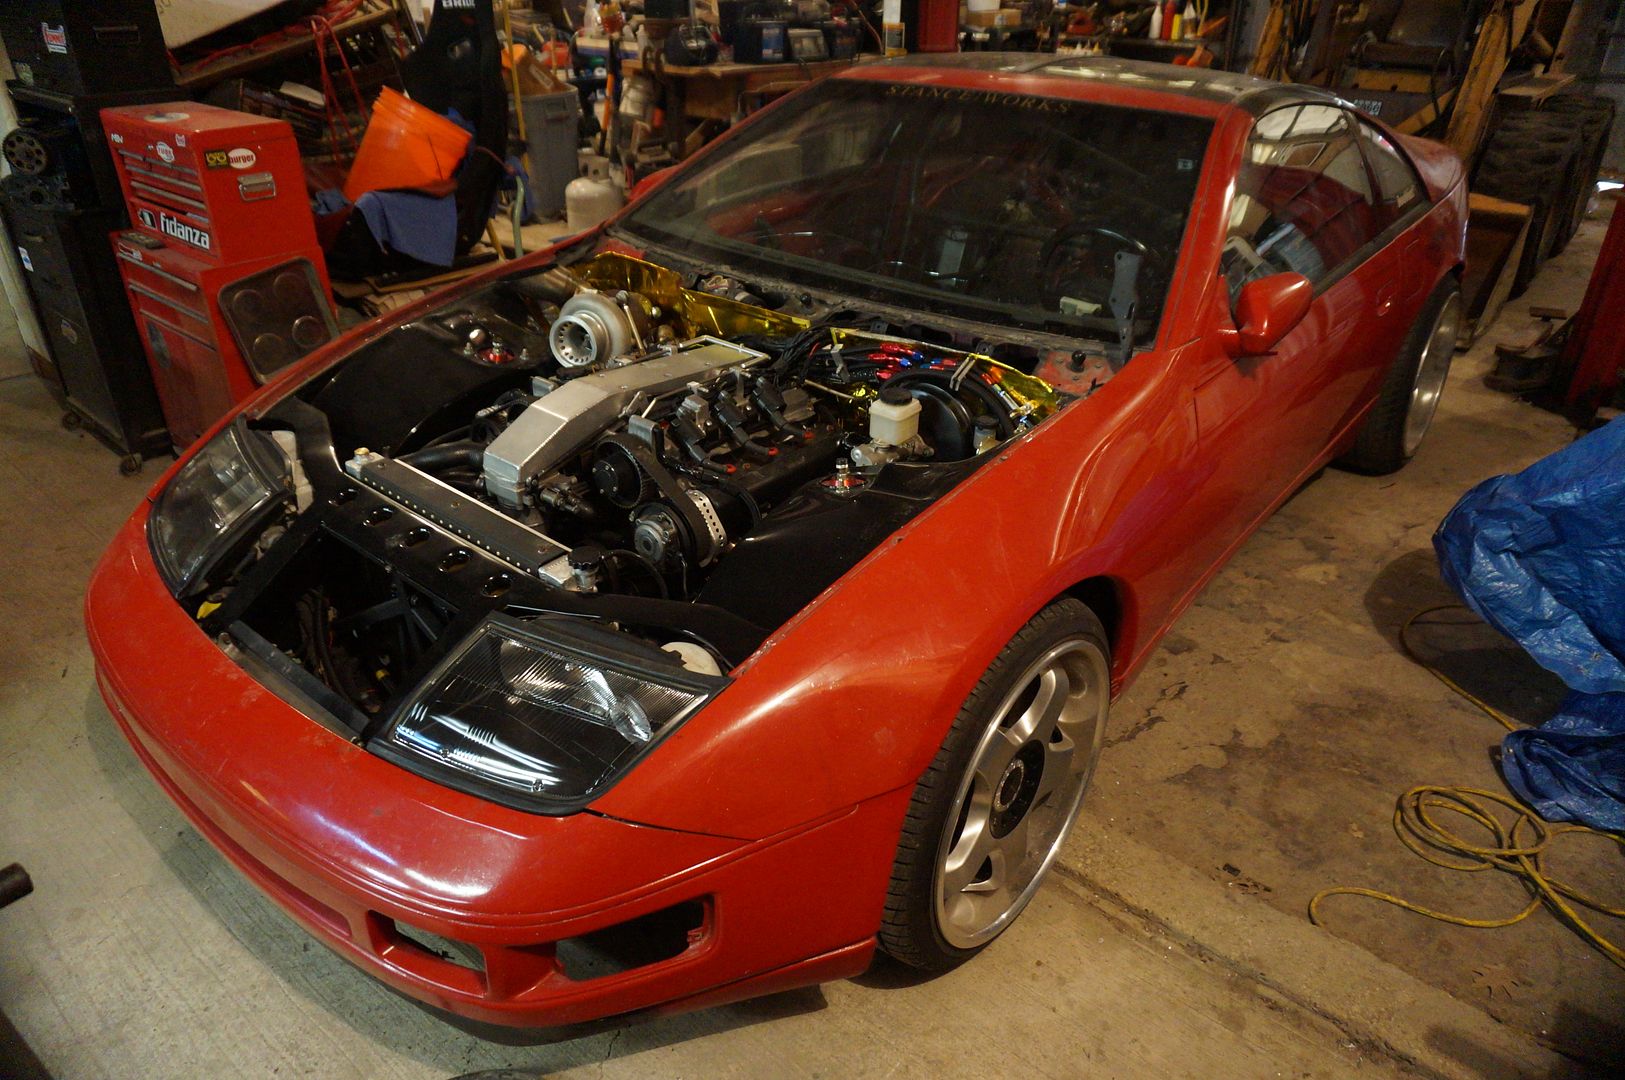
    Finally painted the headlight housings Black!!


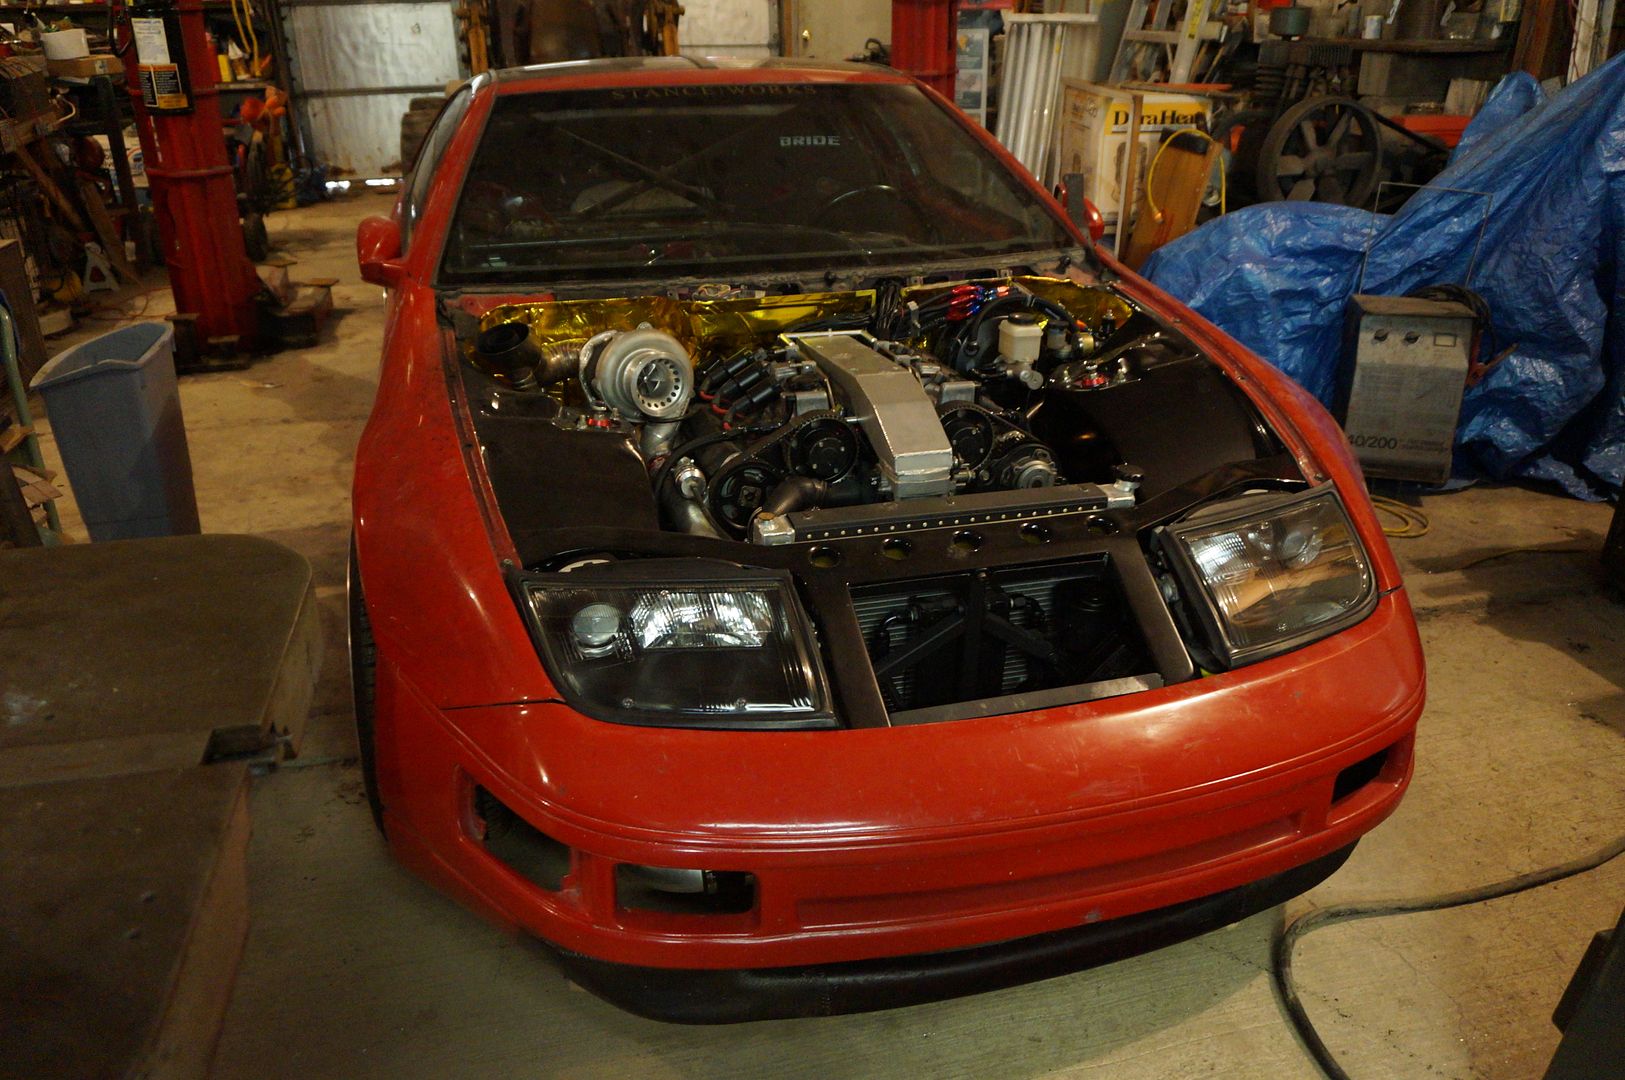
    Had a few completely valid comments on the headlights looking better black, I can assure you I didn't like them as well so I buckled down and went through the joy of separating the headlight assembly and repainting them, came out nice

     photo DSC04844.jpg
    sigpic

    Comment


    • So much work to hold a harness that can be run next to the injector bungs

      Comment


      • Originally posted by anti.engineered View Post
        So much work to hold a harness that can be run next to the injector bungs
        Yes everything is a lot of work, but this is not just for the harness, I have both fuel feed and return lines running along the plenum as well. Also my throttle linkage is quite close to both the harness and fuel lines, not something I care to chance getting stuck in the throttle linkage or worse yet rubbing on something and causing all sorts of intermittent issues. Next update will make this more clear once its all complete.
        sigpic

        Comment


        • love your work! I'm glad someone who knows what there doing is putting attention into a 300zx, I love the cars but for the most part, nice builds using this platform are few and far between.

          Comment


          • I love this build. im glad i came across it. keep it up.

            I really need to pick up a lathe, but i dont even know where to begin looking on top of i have zero experience and yet again wouldnt even now where to begin how to learn.
            IG @gt3_brz

            My Mustang Build
            http://www.stanceworks.com/forums/sh...=1#post1552949

            My BRZ Build
            http://www.stanceworks.com/forums/sh...ad.php?t=86482

            My F100 Build
            http://www.stanceworks.com/forums/sh...ad.php?t=97329

            Comment


            • Originally posted by laextreme5 View Post
              I love this build. im glad i came across it. keep it up.

              I really need to pick up a lathe, but i dont even know where to begin looking on top of i have zero experience and yet again wouldnt even now where to begin how to learn.
              Youtube is your friend, specifically the youtube channel Mrpete222. Awesome channel highly recomend watching all of his how to videos very informative.(also watch the "how to buy a lathe" videos)

              It took some time to find one but I actually bought my Clausing 5914 lathe because thats what he used in most of his videos.
              sigpic

              Comment


              • Good to know. thanks man. how long have you owned the lathe and been using one?
                IG @gt3_brz

                My Mustang Build
                http://www.stanceworks.com/forums/sh...=1#post1552949

                My BRZ Build
                http://www.stanceworks.com/forums/sh...ad.php?t=86482

                My F100 Build
                http://www.stanceworks.com/forums/sh...ad.php?t=97329

                Comment


                • Originally posted by laextreme5 View Post
                  Good to know. thanks man. how long have you owned the lathe and been using one?
                  I have personally owned this one for about 4 years now, and have been using lathes for around 9.
                  sigpic

                  Comment


                  • you are my hero!
                    so much skill and years of patience,looking forward to the next update.
                    i'd wish you luck but this much skill isn't about luck anymore,keep doing what you do!
                    Originally posted by Chris05ppwz
                    Guys I have a problem I went lower...

                    Comment


                    • The work in this thread is insane. Regardless of if I understand the purpose of every little thing you do it is still so cool to watch


                      Originally posted by Stupid Kid
                      I need the weed in advance i can't ride my bmx across the ocean unless im high

                      Comment


                      • Part 2 of fuel and harness mount

                         photo DSC03229.jpg

                        Both fuel feed lines run along the plenum on the driver side, due to the throttle linkage being within rubbing distance I wanted to ensure no contact could ever occur. Also the main engine harness runs along with the fuel lines, its a tight fit when all assembled

                         photo DSC03247.jpg

                        It starts with a solid chunk of aluminum

                         photo DSC03256.jpg

                        Then add some scribe lines

                         photo DSC03257.jpg

                         photo DSC03259.jpg

                        The Bridgeport is such a joy to use

                         photo DSC03261.jpg

                        Blast some holes

                         photo DSC03314.jpg

                        1 of 6 clamps that hold the fuel lines and engine harness

                         photo DSC03272.jpg

                        Spring loaded fastener

                         photo DSC03309.jpg

                        The idea here is to hold the fuel line snugly. I know they will expand/contract due to pressure, heat and engine movement relative to the chassis, this will hopefully provide a constant pressure but still allow a little movement

                         photo DSC03298.jpg

                        Side note, for cutting aluminum on a band saw I cut pieces of wood to clean the blade after each cut, also wax works great as a lubricant for cutting soft materials such as aluminum

                         photo DSC03313.jpg

                         photo DSC03284.jpg

                        Lines kept separated and held firmly

                         photo DSC03320.jpg

                        View of how close everything is

                         photo DSC03325.jpg

                        Clamp for the firewall to secure both return and feed fuel lines

                         photo DSC03406.jpg

                         photo DSC03421.jpg

                         photo DSC03429.jpg

                         photo DSC03434.jpg

                        Mounts are finished, now to assemble

                         photo DSC03438.jpg

                         photo DSC05566.jpg

                         photo DSC05573.jpg

                         photo DSC05581.jpg

                         photo DSC05555.jpg

                        All she wrote for this update
                        sigpic

                        Comment


                        • lovely

                          Comment


                          • Lovely indeed. The top of your plenum needs some kind of decoration/ dress up.

                            2001 BMW 560i 6.0 LSx/T56 SOLD


                            2000 Corvette Hardtop FRC

                            Comment


                            • every time I check back up on this thread, I'm stunned. The amount of detail that goes into this build is astonishing! keep up the good work, man!
                              Some people will never understand it, why we do what we do.
                              The busted knuckles and the late nights in the garage;
                              it's more than a hobby or pastime, it's a lifestyle. We live it."


                              Instagram: @Stance_God
                              My 93' EG Sedan Build ( Daily )
                              My FC3S RX-7 Build

                              Comment


                              • How are the bottoms of those clamps secured on the plenum? Do they just kinda rock back and forth on that frame?

                                Silk Blue MK6 Jetta build
                                Instagram: @justmarshallgiles

                                Comment

                                Working...
                                X