Announcement

Collapse
No announcement yet.

E46 Brilliant White M3 build

Collapse
X
 
  • Filter
  • Time
  • Show
Clear All
new posts

  • E46 Brilliant White M3 build

    Hi guys thought I would share my build thread with you please excuse all the quotes I'm trying to move it all over at once
    Originally posted by LoadedM3 View Post
    Hi guys this thread is long over due, iv wanted to create a build thread for ages (2years now)but never got round to it unit now. So lets start at the beginning.
    Out with the old e36 323i in with the e46 M3.
    As you can see I'm driving a lefty because my current residence is Spain. After 6 months of searching i found the M for me, its a 2002 smg finished in carbon black with imola red fully loaded with satnav, heated seat etc. Buying this car was quit the experience after getting the :thumbsup: from BMW Madrid. I flew from Mallorca (island off Spain) to collect the car in Madrid (mainland Spain) and what a trip get to know my new M3. After collection i had a 6hour drive from Madrid to Valencia to catch my ferry back to Mallorca, as i arrived in Valencia i had timed the road trip perfectly to watch the end of the F1.
    After the race was finished you could take your car around the track which was the first time id really opened the M3 up as the motorway was full of speed traps. As Valencia is a small city with big built up buildings around the track the induction and exhaust sounds bounced of every building this made my hairs stand up on my neck and that was it i was hooked.
    So here she is


    Originally posted by LoadedM3 View Post
    This M is completely stock apart from a custom exhaust system which i still don't no what it is to this day lol

    My first mods were just a few little things that bugged me from the start like changing the door pins. Dont no if its just me but the stock 1's would just rattle all the time even after tightening them so swopped them some M-tech pins which look sweet (ebay). I also added some aluminum smg shifts which later on look great with all the storm kit :thumbsup::thumbsup:


    Originally posted by LoadedM3 View Post
    Ok im trying to cast my mind back to what i did and when mao:
    I add a K&N direct replacement pretty much straight away although thinking about it iv just had an inspection 2 were they replaced the air fitter so need to pop that back in soon. Should have told them i didn't need a air filter really : never mind.

    At this point iv had my M3 about 3-4 months and i'm not sure which direction i want to go with the styling aspect. I bought an acs rear diffuser and csl front splitters but after alining them up on the car i decided not to go down this root.
    what do you think ?
    Originally posted by LoadedM3 View Post
    It took me over 6 months to find the right set of wheel iv been back an forth on so many different sets. I really wanted something different, i had my heart set on a set of Kinesis F100(photo below) but the company that made them went bust. So in the end i went for Iconzs 880 ZR 2 19" 9.5 FRONT 10 REAR with a polished fat lip. enjoy. time to slam this fat whore mao:mao:


    Originally posted by LoadedM3 View Post
    I'm speeding up the modding as their is no way i could leave the car ridding this high and the mod bug has got me. So went for a simple but affective set up.
    Vogtland 25mm springs, no arch work or rolling.


    Originally posted by LoadedM3 View Post
    The M's starting to take shape now and iv just got a shipment from Adam's detailing products so its time for a full intensive detail with a 3 stage machine polish. Here are the products and here are the results


    Originally posted by LoadedM3 View Post
    Time for a refresh inside and what better way than loading up with 1 of our site sponsors storm http://www.storm-motorwerks.com/
    I went balls deep and got the smg stick,smg ring, handbrake and satnav buttons. They are amazing best mod ever. I also to a punt on a ebay alcantara hand brake gaiter and smg gaiter. When i opened the package i was not happy with what i saw, the sticking was not the best but after cooling down i installed them and i have to say for the money you cannot grumble. Here is the tread below


    Originally posted by LoadedM3 View Post
    LED's from ebay. Sidelights and rear number plate LED's fitted and the difference is outstanding.


    Originally posted by LoadedM3 View Post
    So glad i didn't go down the ACS route in the end because i no exactly what and how im going to finish the project off. More info to follow but here is a big clue.
    U21


    This is what im going for
    Originally posted by LoadedM3 View Post
    Ok so the paint.... if your unsure about it or have never seen this individual colour before watch the video below. CF works very very well with this paint so try and picture the paint colour but with all these cf goodies on the next page fitted. Oh and with the video make sure you watch it when it drives out the show room into the sun!!!! amzinggggggggg


    Originally posted by LoadedM3 View Post
    Ok guys this is the look im going for so first of all image the Brilliant white paint all over the vert with my current wheels. Now image all the items below installed
    The paint


    The front CF splitter

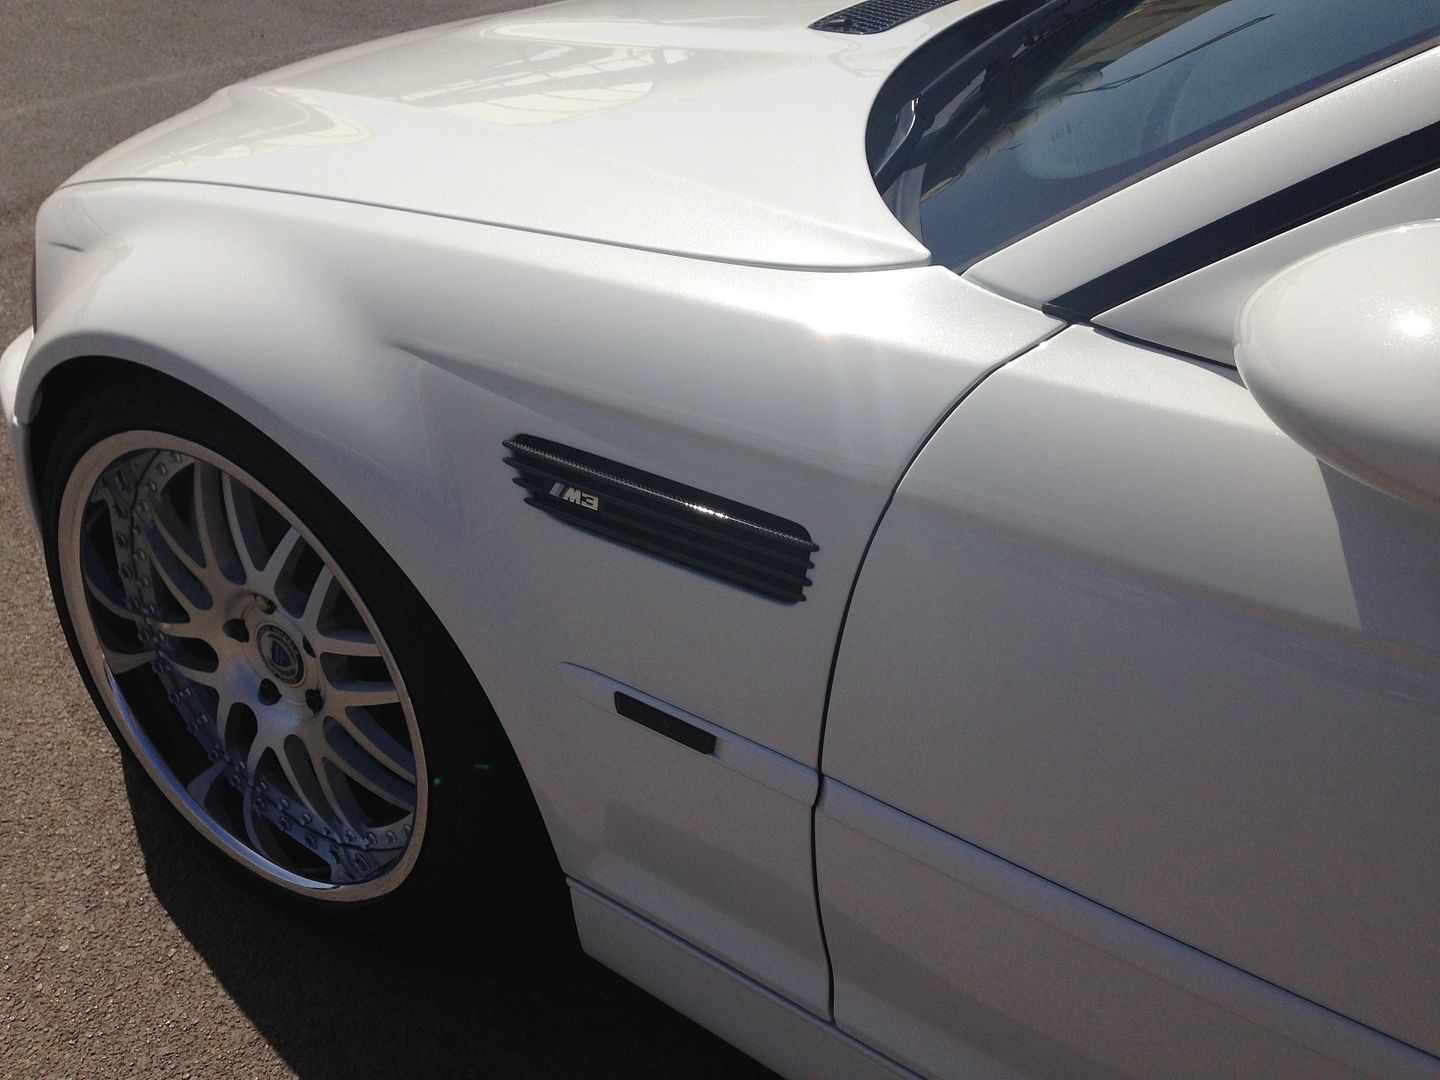
    The CF side grills


    The CF front kidneys


    The ASC CF rear spoiler


    The Lamin Sidelighs and spots


    So what are your thoughs ????

  • #2
    i like it! go on

    Comment


    • #3
      .
      Originally posted by LoadedM3 View Post
      Pretty cool shot of the m3 plus my dd below which is a V8
      Originally posted by LoadedM3 View Post
      Got some small treats this week. Most importantly my headlight paint arrived and lamx fog covers.


      Originally posted by LoadedM3 View Post
      It just had to go in the end its useless


      replaced by the old cup holder

      Originally posted by LoadedM3 View Post
      from the old lanky one


      smaller stumpy one mao:

      Originally posted by LoadedM3 View Post
      Fogs done. iv got the paint for the sidelights as well that's weekends job.


      Originally posted by LoadedM3 View Post
      ok so the spray glass paint which Paul used on his feature e46 was not available so I had to get a small paint brush out and some glass paint from
      hobby craft.


      will get better pics up soon but starting to
      come together. my angel eyes from euro division have been a flop so waiting for replacements
      Originally posted by LoadedM3 View Post


      Originally posted by LoadedM3 View Post
      It was time to pull my finger out today and get my brakes painted i also clean up the undercarriage. Here are the results.


      Originally posted by LoadedM3 View Post
      just found these on my phone over looking Palma. Great driving roads, clocked up a €1,000 speeding fine here good and bad times


      Originally posted by LoadedM3 View Post
      With all the subframe threads reappearing it does give you the willies, so after researching all the tell tails signs and the areas to spot I got The car booked in to be inspected. What did concern me was that I'm out the 10year good will. So after cleaning all mount areas of a years worth of crud and grime. We found nothing at all and I mean nothing.. this 2002 vert subframe is in incredible condition soooooo happy

      this is drives side rear mount
      before and after


      Now the show must go on :thumbsup:
      Originally posted by LoadedM3 View Post
      My csl front CF splitter arrived today. Very happy with it but not the import tax I got landed with. After setting up a GB you would think they would have got my order stop on but their you go. Also my LED inside lights arrived today thanks to nev for the info. Finally my rear bushes, universal joint and 3rd rear LED brake light arrived. Got a busy weekend ahead


      Originally posted by LoadedM3 View Post
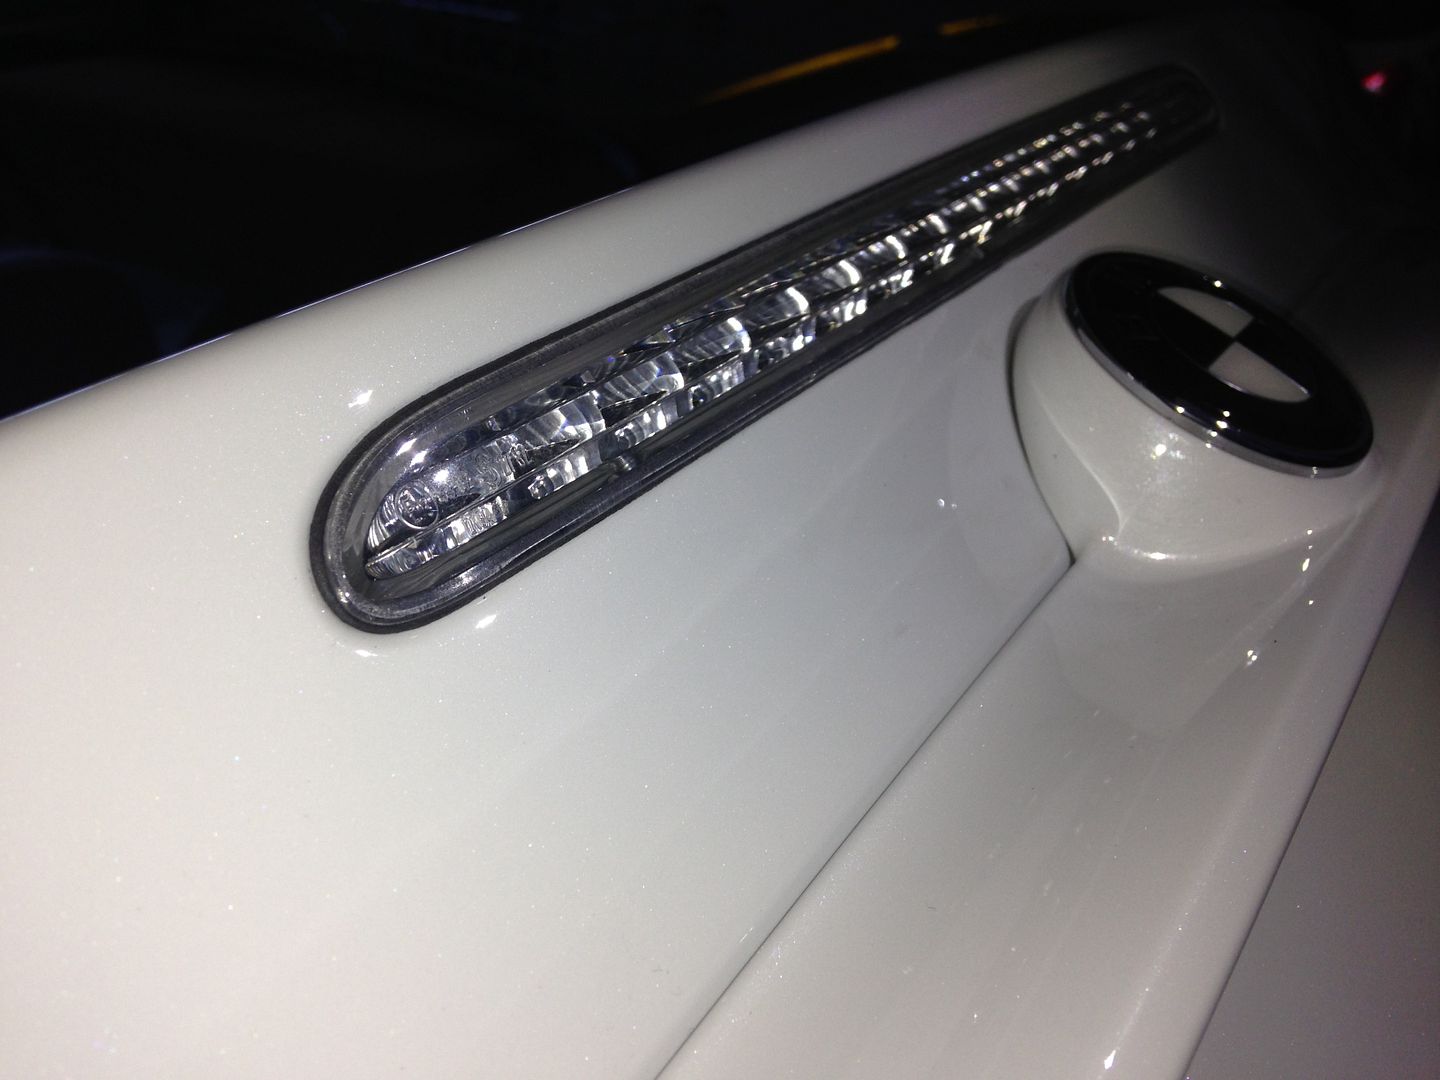
      No idea how my old mankie 3rd brake light lasted so long the new LED clear unit looks 100% sharper and modem.


      Comment


      • #4
        1


        Originally posted by LoadedM3 View Post
        Been a busy day today got all my CF parts out and test fitted everything to make sure all was good before the car gets paints. The fronts CSL splitter is soooooo low. This is just me in the car come down the bat cave (see video) question for you guys. With more weight in the back of the car will it bring b the front down even more ???

        CLICK ON THIS IMAGE BELOW FOR VIDEO


        Originally posted by LoadedM3 View Post
        I think i manage to get one of the last units currently. Another busy weekend/have nothing else to do because iv spent all my money on mods :muttley:

        Originally posted by LoadedM3 View Post
        Quick update
        I installed my intravee unit today, great bit of kit I must say. iv install it in the boot for the time being as I'm waiting on the delivery of an idock for the front. Going to be giving the front end a refresh with a new ashtray unit and centre console base, as both currently have 10years of scratches.


        Also today I install an LED light kit inside thanks NEVETS for the details. Great way to sharpen up for £35


        Originally posted by LoadedM3 View Post
        One of my rear covers in the boot was looking scratch and messy so I wet and dry it, primed, painted and gave it a coat of clear coat. This paint is meant to be U21 brilliant white. It's far far far from brilliant. it's like Matt.


        just going to order a new one

        Originally posted by LoadedM3 View Post
        what do you guys think ? going to do the battery cover also

        Originally posted by LoadedM3 View Post
        Got the car booked into the indie garage to change rear bushes, going to take this opportunity to give it a once over making sure all the shocks, dampers, springs and wish bones are all in good condition.

        Next on the list is to install angel eye when they arrive (thanks m3ricky) then install spec dock and rout wires to the front glove box, Iv also ordered a new ash tray unit to vamp up the cockpit area. Ordered a storm blank for the lighter as well to neaten this area up because its going to be on show all the time with the ipod plugged in.

        Oh iv got myself a hardtop :thumbsup::thumbsup::thumbsup::thumbsup: very lucky to find one on such a small island. This is painted black currently so will be repainted with the car in march


        March is a big month. All going well the car will be fully painted installed with
        • CSL rear diffuser
        • CSL CF from lip
        • ACS rear CF spoiler
        • Smooth out number plate
        • Smoked side indicators
        • ACS pedals
        • Refurbished leather :thumbsup::thumbsup::thumbsup:
        • Refurbished oem 19's
        • Spacers install
        • Tracking and balance (hunter alinement)
        • Refurbish steering wheel
        • Install new CF front grills and side vents
        • Add all new goodie from Nevets
        • Claim to the wife that im now bankrupted mao:


        Hit list

        Spacers (waiting for more info before buying)
        Koni adjustables (after respray)
        BBK (2014)
        Transplant or supercharger
        Subframe reinforcement
        Originally posted by LoadedM3 View Post
        After reading m3marks thread the other day I noticed he had got a fire extinguisher under the passenger side seat which pretty handy incase somthing where to happen. I have got a first aid kit so rather than tempt fate and refit a fire extinguisher instead, I have install one in the boot. Painted the battery cover the other day so decided its a good place to mount it. I think it looks pretty sweet.


        Originally posted by LoadedM3 View Post
        think I'm going to try the amber look at some point, can't see it been hard to find a set
        I really like this look


        Originally posted by LoadedM3 View Post
        loving the whole red led rear lights


        Originally posted by LoadedM3 View Post
        More CF arrived today :-)

        Originally posted by LoadedM3 View Post
        just a little update my plate holder from US arrived this morning. I was going to make my own like Steven but I just don't have the time at the moment with so many other jobs on the list so in the end I just ordered one.

        This weekend i will be picking up my hardtop which I'm excited about and I'm going to be tackling my leather arm rest with some dye treatments as it looking old and tired. Tips and tricks coming up :thumbsup:

        Originally posted by LoadedM3
        Add some M// stripes to the right hand side CF kidneys grills they will go on once the cars painted but i think it will look sweet against the white paint. What are your feelings chaps. Just to note im not doing both just the one below

        Originally posted by LoadedM3 View Post
        Started the arm rest salvation tonight. Mine is over 10years old and has had a hard life by the looks of it,so i picked up a mini leather treatment kit from the leather clinic (you can also use this on your steering wheel which is my next job but this is a tester for it) all seems to be going ok so far. This i what i did below.

        First of all i did not attempt this in the car (Black leather dye next to Imola red not a good idea for me mao so this link will explain how to take it out without breaking anything.


        This is the kit


        This is the before shot of my arm rest


        The first part of the process is to use the leather prep which is a strong solvent which strips the leather dye and dirt away. Use one of your wifes brand new white ikea cloths just for the purpose showing the dirt :thumbsup::thumbsup::thumbsup::thumbsup:


        Leave this to dry for about 30 minutes of so. Now the next step for me was to apply my first layer of black leather dye. Apply this in very light layers


        This is the second layer above, i then used a hair dryer to dry the layers


        So iv got two layers on now, going to add a final 3rd layer tomorrow and then seal with the leather finish (tbc)
        Originally posted by LoadedM3 View Post
        Just collected the hardtop the colour match is amazing :muttley:

        Please excuse my discussing dirty M not cleared her for ages


        Originally posted by LoadedM3 View Post
        I finished of the central arm rest today with 3 coats of leather finish. Left it for an hour between coats and it's all done. Happy with the results. Going to do the steering wheel next weekends


        All finished

        Originally posted by LoadedM3 View Post
        Today i test fitted my number plate tow mount as i wanted to make sure everything fitted and looked ok before i smooth out the drill holes from the front bumper.

        The problem is unlike the UK number plates, over here plates are only issued by one company and they are ALL the same size with no exceptions.

        I think it looks too big ???????????


        This is another option .... not sold on any yet...

        Originally posted by LoadedM3 View Post
        Got a boxes of treats arrive with me today


        First of all a big thanks to Nevets for the badges and wheel caps amazing work and i fully recommend Steven to all forum members cracking chap to deal with and i will be using Steven a lot in the near future.

        Also thanks to Chris for sending over the MINT ash tray center unit. The bad news is that i'm a massive bellend and it doesnt fit a LHD M3 so will be up for sale very soon


        On the plus side Lamin x, more storm gear, side depos, pedal kit, leather treatment, stubby areal and many more items have arrived safe & sound.
        Originally posted by LoadedM3 View Post
        Just thought id keep a little log of the Spec dock install linked up to the intravee and 420i unit.

        The first stage was to install the dock and feed the wire to the glove box.

        The first thing you need to do is feed the wire through the bottom of the ash tray and out to the right hand side (this will be the other way round for you guys in the uk) Use a set of trim removing tools to prize open a gap to feed your spec dock wire through so then you can feed it to the back of the glove box.

        Once you lift out the ash tray make sure to clean the bottom of the unit because the 3M tape will stick better as you place in the Spec dock. I then stuck the spec dock down in place. This take a while to get it into place but once you have push down hard on it to set it in place. The longer you do this the better.

        The next step is to rout the 420i cable from the boot to the glove box which il be doing this weekend. :thumbsup::thumbsup:


        Sorry about the photos the bat cave is pretty dark
        Originally posted by LoadedM3 View Post
        Once i had installed my spec dock into the ash tray the next step is to rout the long wire ( Long AiNET Cable) you ca buy this from http://www.toysinyourcar.com/acatalog/intravee.html

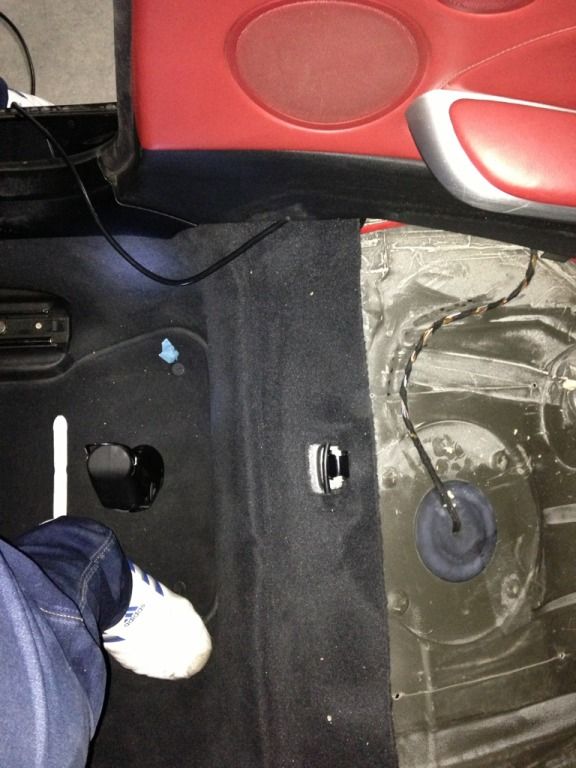
        The first thing you need to do is pull back all the carpet in the rear of your car and locate a large gromit where all the wires are feed from the front to rear. Will look something like this below. This is in a very faffy area. The best chance you have of getting this wire through is to tape the wire to something long which you can push without over stretching. I used a couple of carpet trim tools.


        Once you have pushed this wire about a foot through the hole you need to get into the back and removed your rear seats. This is very easy just lift up the seating panel. Then unscrew the 2 10mm nuts holding the back rest in place, one on each side. This will then lift straight out.

        You now need to located the hole you feed your wire into. In a vert its located below.


        Pull the plastic trim towards you and you will see your cable. Pull it all the way though as you will need all the slack to hide it all nicely away. Remember to leave enough in the boot to link it to your intravee tho.

        Next is a simple process of hide and taking the wire all the way to the glove box. Everything hides under your trims nicely just follow the photos below.


        You should now have all the cables you need at the front of the car next to the glove box. The next process is to remove the glove box completely as you need to sit your 420i unit behind it.

        Removing the glove box is very easy. You have about 6 screws to unscrew and the whole unit will drop down.

        Once you have taken out the glove box you will see there are lots of different cubby holes. None of them will fit the 420i perfectly but i squeezed mine in the following area below. Make sure to feed the rest of your wires up round the back so they are out of site. Connect everything you and your good to go.


        Check that everything works and that the glove box will go back on without your unit blocking it. I pushed my 420i right into the slots and nothing will get it out now haha.


        So now just re install everything like the glove box, rear sears and tidy up your rear boot. If you have removed your cd changer (vert) you can buy a storage box that slots into replace it. I kept my update cable plugged into the intravee ready to feed into the bottom of the storage box. Handy as you dont have to pull your carpet back every time you need to update the firmware. I no this isn't the most detailed of guides but it just covers the basics the rest is self explanatory. Hope this helps somebody.
        Originally posted by MMTM3 View Post
        Nice one Jeff and it is a good write up. Anybody else wanting to do this will find it really useful.
        The iPod and dock all looks really neat there amongst the Storm Motorworks Gear Knob, SMG ring and Cig Lighter Blank. :thumbsup:


        I've got the Storm bits to fit to my car and that's just given me a bit of a nudge to get my finger from up my 4rse and get them fitted.
        Originally posted by LoadedM3 View Post
        so got rid of my new one for a newer. 100% Better
        Originally posted by LoadedM3 View Post
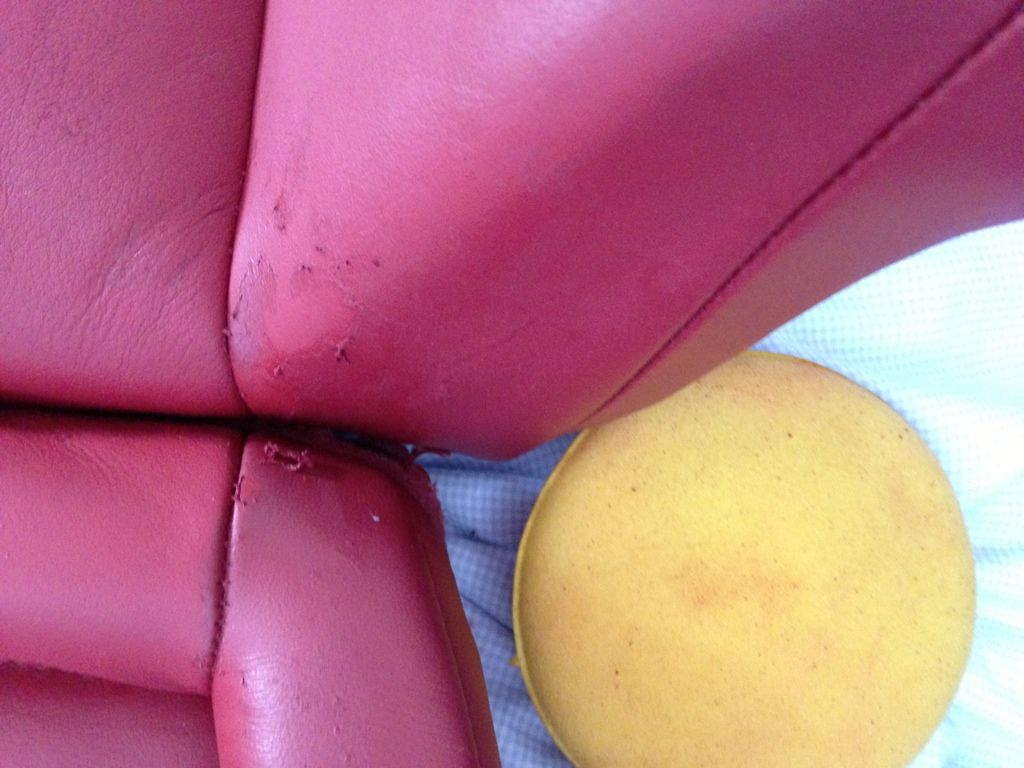
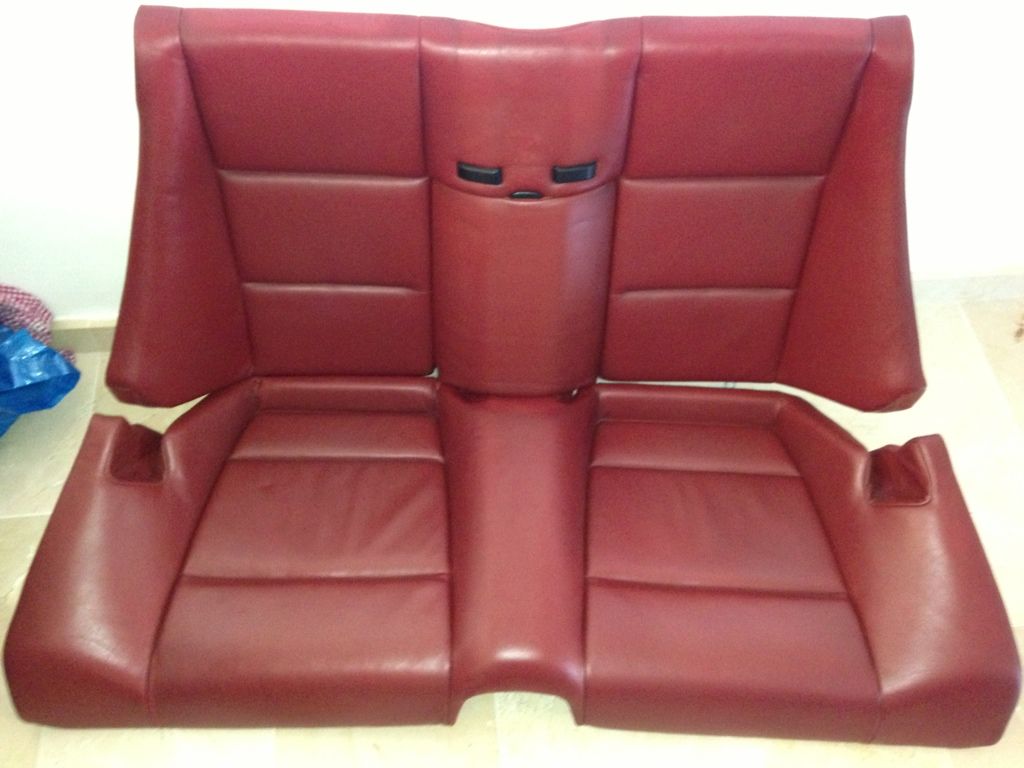
        Bit of a brake through this weekend just gone. My leather is fooked big time... its pealing and discolored. sooooo i thought

        The previous owner has had the seats not re trimmed but re "painted" with a leather trim kit or something like that the results are bad. But after i tried to clean and condition them bits started pealing off to my horror ::::: so at this stage i just thought il get them re trimmed professionally. But when i pulled the seat out to run cables to the front. I decided to give them a moster clean to see what difference it made. Have a look for yourself


        As you can see this is the leather pealing but its just damage leather with the **** refurb kit. Under this boch job is perfectly good imola red leather

        Before


        After 3 hours of hard scrubbing


        Now the front seats are a millions time worse so im looking forward to sorting them out this weekend before the car goes in for its new coat of paint.

        Cheers for viewing
        Last edited by loadedM3; 09-17-2013, 05:08 PM.

        Comment


        • #5
          damn, alot going on, so by your signature im guessing you painted it? or wrapped it? love the progress man!

          Instagram: @half_lung

          Comment


          • #6
            Originally posted by scweet14 View Post
            damn, alot going on, so by your signature im guessing you painted it? or wrapped it? love the progress man!
            I won't spoil it for you buddy more coming now

            Comment


            • #7
              .
              Originally posted by LoadedM3 View Post
              Had a rear clunking noise over the past few month and the handling has been dreadful. After lots of input from from many legends on this forum, I ordered new RTABs and a universal joint.

              The car is now completely transformed handles like its on rails and no clunking sounds from the rear.

              So here's what they looked like after being replaced :thumbsup:

              As you can see they are fooooooooked


              Originally posted by LoadedM3 View Post
              installed the Cree LED lights

              very bright

              Originally posted by LoadedM3 View Post
              more Nevets treats

              Just like to point out for the people reading this Steven (Nevets) offers some fantastic goodies from badges to door sills and custom items also. Pm him for prices and a list of the bits and bobs he has on offer. You will be in very safe hands chaps

              Originally posted by LoadedM3 View Post
              The BBK is a far out my reach price wise for the next year or so. But the time has come to replace my disc and pads all round

              After researching pads and a quick chat with Craig (crapbags)

              Ordered up some front and rear performance friction z rated pads
              Price wise i was very happy £140 delivered

              http://www.ppcgb.com/BMW/M3-E46-01-0...ma578-cmo1226/


              Also just about to order some new oem disks. All will be fitted after the paint job including all the monochrom badges from Steven.:thumbsup::thumbsup:
              Originally posted by LoadedM3 View Post
              Well busy busy weekend i have a video to upload of the M3 progress
              Smoked depos side and front plus silver bulbs arrived today.
              Cars on track an looking like a pile of metal atm

              Just got my summer wheels out from storage. Spent a full day cleaning and polishing them. Cannot wait to get them on the car.

              Originally posted by LoadedM3 View Post
              Here are some shots of the M being stripped down and prepped for the next stage. Enjoy. Looks so strange like this. I also didn't know that the front impact bar (if thats what its called) is carbon fiber ???


              Originally posted by LoadedM3 View Post


              Originally posted by LoadedM3 View Post
              [YOUTUBE]s0MyGi2m870[/YOUTUBE]
              Originally posted by LoadedM3 View Post
              ITS FINISHED


              :muttley:

              I NEED TO GET THIS
              Originally posted by LoadedM3 View Post
              Hi chaps

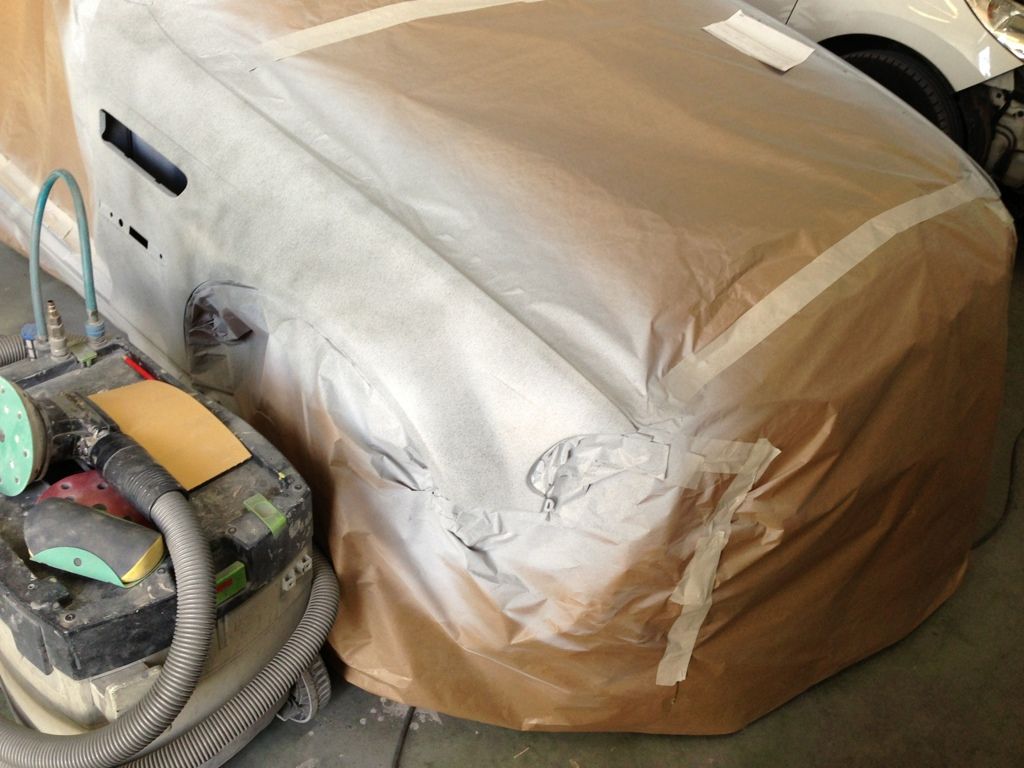
              Its about time i gave you all an update on the M3. The car is now fully prepped and ready for painting. This week we have had the standox paint mixer representative mixing the paint to get a 99-100% match. We painted the wing mirrors as a test for the colour match. The first sample of paint was very close but the sparkes grain is to small so it not right at the moment but this is just a small adjustment needed and we are good to go. Full painting will start tomorrow after i see the adjusted mix in the morning. The company that im dealing with are great to work with as they don't move forward to the next stage without my say so. Everything has to be perfect otherwise we dont start on the next detail. Its taking a lot longer this way but on the same token i know that i has been done to the highest standard possible. They say good things come to those who wait :peace::peace:

              In other news i now am now the proud own for some much need HR front and rear spacers. long time coming. I have also got my iconz out of storage and ready for me to detail this weekend with some detailing treats. I have also decided on the glaze/wax combo i will put on the new paint. I have gone for the Adam's premium Americana wax and glaze. This will give the new paint a classic dripping wet finish. There is no need to full seal the paint work as its not my DD and stored underground out of the way from UAV rays. :thumbsup::thumbsup:

              Also iv got some exciting news as my new drying towel samples have arrived. They are without a shadow of a doubt the best microfiber drying towels i have ever used and im not just saying that because its my product. I will send some sample out for you guys to put them to the test :thumbsup::thumbsup:
              Enjoy


              Originally posted by LoadedM3 View Post
              The summer wheels are out and iv spent most of the day detailing them. Look at that finish


              Originally posted by LoadedM3 View Post
              getting ready
              [YOUTUBE]iacFKL_DSYQ[/YOUTUBE]
              Originally posted by LoadedM3
              teaser

              Originally posted by LoadedM3 View Post
              now we have the paint mix perfect

              Originally posted by LoadedM3 View Post
              Hello chaps this project is starting to drag on i know... should have been finished weeks ago, my fault I'm too fussy. I what to make sure everything is perfect. It will be like having a new car when i get it back so want to make sure iv got it right.


              Got a nice package arrive today from the UK. Big thanks to Chris for sorting me out with new extended bolts and locks for the spacers. £500 nicker gone on new disc's all round but my word they are pretty new.:thumbsup::thumbsup::thumbsup:

              Not long now guys thanks for staying tuned


              Originally posted by LoadedM3 View Post
              Long overdue update

              Hi guys
              First of all I'm sorry for the lack of updates, works been busy and it's been very hard for me to move forward with the painting as iv been offshore. anyhow. The good news is the paint is now a perfect match and it's fully painted :-)))))) . It will be fully assembled by Wednesday. However I will need to change the wheels and install some other goodie before I show you the finished article. Here is a short videos of the paint. Sorry the video is poor but you can make out the sparkles just about. This videos does not do justice to the paint what so ever so again sorry about that. Here are also some shots of the car in the paint cabins. Enjoy.next update will be the big one. Thanks for staying tuned guys and thanks for all the support with my build.

              [YOUTUBE]7EgBeQUK0yo[/YOUTUBE]


              Originally posted by LoadedM3 View Post
              For all you guys that have been with from the begin it's been a very long wait so far but we are now just days away from finishing. I wasn't going to post unit it was all finished but I though what's the point in that we have been on this journey together so I'm happy to share.(it's eating at me to show you away) that's the point of a build thread in the first place. I think at this stage you all have a vision of the final product of my imagination so I hope this make an even clear picture for you all. Again sorry for the iphone pic not the best but i would rather save the best till last. enjoy guys and thanks for viewing/

              Without the light the paint look just like alpine white but as soon as you show it some light.... well see for yourself


              Originally posted by LoadedM3 View Post
              More progress today

              The M's starting to take shape now but still waiting for the window seals to arrive so everything can be finished off. Should fingers crossed be ready Friday morning. Here are some more shots. Really am Loving it it like a completely different car. Hope you like


              Originally posted by LoadedM3 View Post
              99% completed now just need the rear bumper and diffuser installing. Next the good clean inside out. Then I turn over the cash haha so here we are still inside sorry guys but Monday I will 100% be collecting the car on Monday. Thanks for the comments guys.


              Last edited by loadedM3; 09-17-2013, 05:14 PM.

              Comment


              • #8
                .

                Originally posted by LoadedM3 View Post
                it's ready but it's been raining all day. Law of the sod

                Originally posted by LoadedM3 View Post
                Pushing my lucky big time with these bad boys and 12s front and 10s rear. Bought them for my oem set up but slapped them on tonight to see if I could get away with it... I didn't haha rubber everywhere haha sorry about the photos I will get some better ones tomorrow for you all. thanks for viewing.


                Originally posted by LoadedM3 View Post
                before


                after

                Originally posted by LoadedM3 View Post
                still no sun but here it is outside in the day


                Originally posted by LoadedM3 View Post
                So finally the sun came out to play
                don't no why this is not playing in HD

                [YOUTUBE]UIOY4TtU6t4[/YOUTUBE]


                Originally posted by LoadedM3 View Post
                The sun was beating down so got a few better shots of the paint next to the CF


                Originally posted by LoadedM3 View Post
                Hi chaps
                I spent a good few hours today detailing the M and sealing the new paint here are some shots on a camera rather than my iphone just to worn you there are a lot of photos :muttley::muttley::muttley:

                Enjoy and thanks for looking


                Originally posted by LoadedM3 View Post
                Thanks to Nevets i am continuing the monochrome theme inside the car and today i started with the door sills which i think look the nuts


                Originally posted by LoadedM3
                Just smashing through the list of bits this weekend. Here is my Red rear Lamin x installed. It has some small air bubbles which need time to settle but apart from that its all good. Really like this look.


                Originally posted by LoadedM3 View Post
                Update time

                Hello all my avid M modders. Today i finally got around to fitting my angel eyes and i have to say im very very impressed with them. Very quick to install about 15minute each side. These are CCFL's from oz i finally got a set that was not broken. Got a few more mods for the Vert in store including front splitter and front Lamin x. If the lamin x looks good and tones down the yellow bowls im going for ambers also.

                Currenlty trying to get my head around the stance i want. The car looks great but a bit to square for me atm. Camber is a must so im looking for the right products to buy without spending over £800 on coilovers. Iv always wanted them but iv spent a lot on the car this year so for now im looking at camber front mount plates and rear adjustable control arms. Will i need anything else?

                The interior is getting a complete over hall next week, a full freshen up got loads to install. From steering wheel trim to consoles, ash trays, carpets, peddles very long list should look brand spanking new when finished.

                Also iv taken the hardtop off for the summer so another full detail and wax tomorrow with loads of photos coming up.
                If anybody can give me some tips on camber sets up please post them here


                Thanks for looking :thumbsup:
                Originally posted by LoadedM3 View Post
                Made a quick video today to capture the paint as it was 34 degrees :-)))))

                Just a wash and deep glaze followed by 3 coats of wax.

                enjoy

                [YOUTUBE]U5uwbfvo4Ws[/YOUTUBE]


                Originally posted by LoadedM3 View Post
                UPDATE Time

                Well lads it's time for an update with some real content as over the past few months iv just been WHORING the m3 out left right and centre which i hope you have enjoyed. I'v been in a few different minds over the past few months with regards to getting another M as i want a coupe and i really want some more power. Iv been looking at e92's and also e46's all coupe of course but reality has set in and i cannot justify having two M's, plus my wife and i are expecting our second baby . People carrier time (kill me now hahha) so my head has ruled my heart and its no more cars now the forceable future.

                So it's time to pull my finger out and make this M into the car i want it to be, halfway their now as the paint is done, as well as body work its now immaculate not a scratch or dent which is a great situation to be in. I dread the day i find the first imperfection

                So what's on the cards for the white devil now is the following.

                1. Stance = Coilovers- Not happy with the stance as it's looking to square. Was chatting with Craig @crapbags about buying camber plates and adjustable rear arms but im not going to get the whole package for that so first thing on the list is coilovers D2's of Koni adjustables. Not made my mind up yet. Currently looking for a company to roll my arches so i can have some serious stance

                2. BBK - NEEDED TO STOP THE THING. Loving @ART BBK they are on my list to as long as they fit around my aftermarket wheels.

                3. Leather - need to find two front imola red leather seats as my front two are discussing a real thorn in my side as they are just letting the whole are down. Or full retirm depending on funds

                4. Supercharge or Turbocharger - Vf are in the crosshairs atm most likely stage 2 or 3. This is what's missing for me atm some power not that the e46 is slow but i want it up there.


                So it's an expensive list hope i get it all finished for the start of next summer when i drive back to the UK

                In other news iv got lots to get on with as you can see below so il get cracking on.

                Originally posted by LoadedM3 View Post
                Steering wheel transformation

                Hello chaps a while ago i got a steering wheel trim from Lovatt wrapped in brushed ali to match the rest of the trims. I also got some new Monochrome badges of Steven to finish it all of and pull the whole badge colour situation to a close. As i was at it, i gave my whole steering wheel a full detail. This included a steam cleaner and very fine horse hair leather brush. I used a number of products from grip stone to adams to get the best results. I did have Airbag issues which im not going to go into as there is another thread kicking around somewhere. As it stands the airbag is still not flush but its getting better and better every time install it again. So anyway here are the results and to finished of the monochrome i added a engine M badge as well.

                Before


                After


                Originally posted by LoadedM3 View Post
                So the polishing process has started and this is not a ride in the park

                Originally posted by LoadedM3 View Post
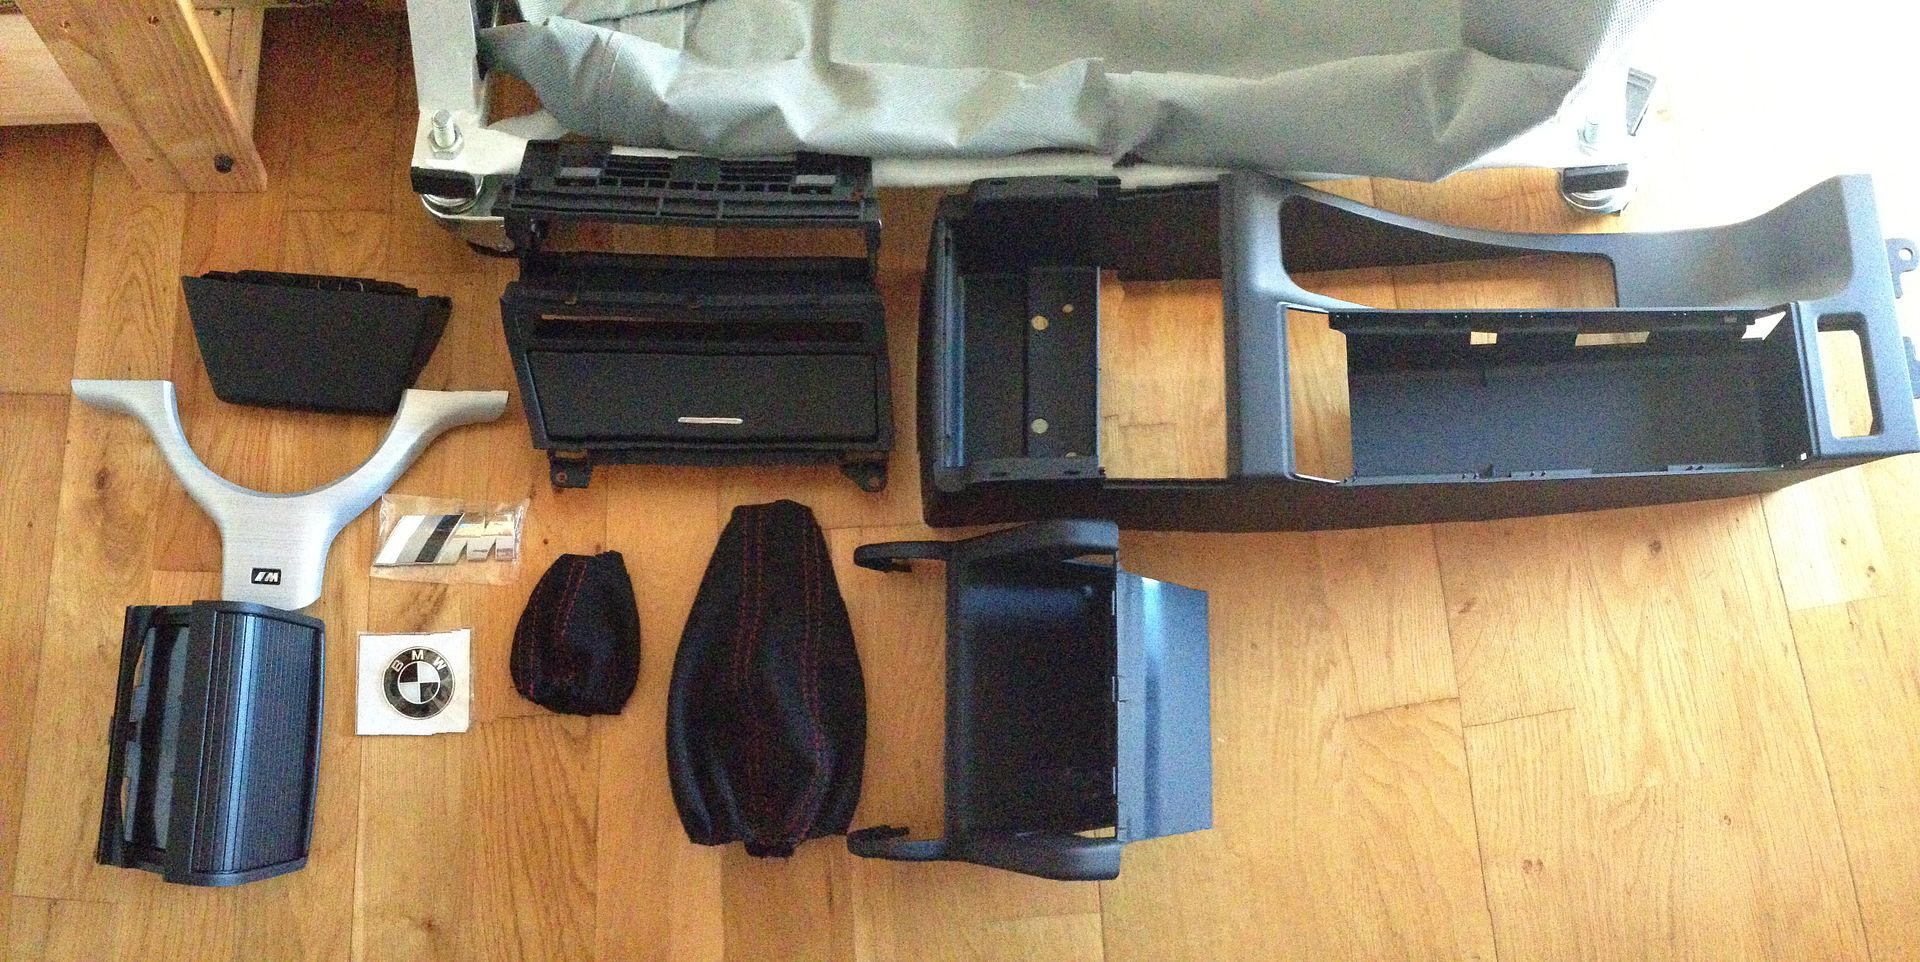
                Time for a refresh inside this month as the bodywork and paint is now pretty much perfect. So ordered all the consoles, trims and parts needed to completely replace the middle section of the car. I also switched out all the gaiters and arm rest covers for black alcantara with red stitching. (OLD ONES FOR SALE SOON)
                So here are the results. Leather needs sorting next.


                very happy, all feels like new :thumbsup::thumbsup:
                Originally posted by LoadedM3 View Post
                the squares have arrived many thanks to ART got a great deal and fantastic service from FedEx.
                More polishing for me then haha


                Slowly slowly now needs product and this one is finished


                Originally posted by LoadedM3 View Post
                Well guys and gals I have now finished polishing my wheels. Although I do have another two rears to go so I am not out the water yet. I'm very happy with the results. It's been a long road. I will write up a DIY as I used a slightly different method to hassles cutters guide. This DIY will show you were i went wrong, my first wheel was a complete nightmare so I want you all to learn from my mistakes so you don't have to. I will also recommend the best methods to use depending on your wheels as it seems to be two different oem finishes. They must have change the manufacturing methods at some point. I will also add in some finishing products for you to keep them looking like a mirror for as alone as possible. . Tomorrow I will be layering up seal and product. Then will get them on the old girl .


                Originally posted by LoadedM3 View Post
                Progress today manage to clean all four wheels and add products.
                Here are my weapons or choice below.


                I started by a deep clean all four of the wheels.

                1. APC over all tires and over all the wheels, brushed into every crack with a horse hair brush as not to scratch the hard work. Rinse down
                2. Wheel cleaner, same process as above.
                3. Shampoo, rinse and dry
                4. Iron x then rinse
                5. Spray down with AF iscoclene cleaning fluid and dry with a micro-fiber so that the wheel is not contaminate free.

                At this stage all 4 wheels are now ready for having product applied. For the long term and also for the DIY i have tried 4 different products to see what results they bring over the next few weeks. My gut instinct is most of it will be hit and miss. I personally feel that no seal or polish will last longer than 3-4 week max. Therefore grabbing the porter cable and a polishing pad will be easier than adding loads of different products layer on layer.

                First wheel

                So on the first wheel i went for a simple approach to see how long a good quality carnauba wax would last. I selected an Adams combo of Premuim car paste and buttery wax. This is the combo i use on my polished iconz lip and the results are great. I applied 4 layers. Wipe on wipe off.


                Second wheel
                This wheel again was simple. I went for a seal. The finish from the final machine mop is great so didn't want to enhance the finish just maintain it. The product i went for was CarPro c.quartz hydrophobic long lasting gloss. This is the product i was going to use on all the wheel after applying a few different products however this need 24hour to cure so i just wanted to see what it can do. High hope for this product.


                Third wheel

                The 3rd wheel was a simple metal polish applied via a micro fiber ball applicator you can put on your drill. I went for ALU belgom. This went straight on no dramas easy as pie. However did not effect the finish in anyway shape or form, but these wheels have just had the hell polished out of them so didn't expect much.


                The fourth wheel

                The 4th wheel was again a simple product to add and buff. I went for the Adams metal polish. This is not a polish you machine into the metal this is an enhancing product. Wipe on and wipe off. Add 4-5 layers of this.


                In summary its far to early to tell which will last the longest and help maintain the finish. I will keep you guys posted and add the best one to the DIY.

                Here is the finished article


                Originally posted by LoadedM3
                Installed brand new disc and performance friction z pads today. Just went out to bed them in. The bite is already noticeable in comparison to oem pads. The disc and pads i took of the car have around 40-50% left if anybody wants to buy them for a track day of something like that.

                Love them loving all new


                20 minutes After bedding ----- new is gone haha

                Originally posted by LoadedM3 View Post
                I manage to get the wheels on today and im blown away, these polished wheel suit our M3s to the ground. If your oem wheel are looking damage and worn. You have to do this the transformation is second to none. I will have a full DIY up for you guys soon to help. Its fully worth the hard work. The wax/wax combo is holding up the best so far. This is my go to lip finish as i bath my car every sunday. So for this sort of routine i recommend good quality carnauba wax layered up. Time will tell about the others. So here we are have a look for yourselves.


                Last edited by loadedM3; 09-17-2013, 05:25 PM.

                Comment


                • #9
                  that the build update guys thanks for reading I hope you enjoyed the transformation. Coilovers and camber next that's what lead me here :-)

                  Comment


                  • #10
                    Well, damn.

                    Comment


                    • #11
                      What a transformation and I like the polished oem wheels.

                      Comment


                      • #12
                        Originally posted by KFC ONE View Post
                        Well, damn.
                        Originally posted by Slycas28 View Post
                        What a transformation and I like the polished oem wheels.
                        thanks guys hope you enjoyed the journey so far

                        Comment


                        • #13
                          Quite the transformation. Love the fact that you switched to that metallic/pearl white, and the hard top looks great on there.
                          BB6 Prelude . . E36 ///M3 . . VA WRX Limited . . 1969 Nova
                          Originally posted by Ollie
                          We all love to turn heads. Sub-consciously we're all materialistic attention-craving dickheads.

                          Comment


                          • #14
                            Originally posted by MommysLittleMonster View Post
                            Quite the transformation. Love the fact that you switched to that metallic/pearl white, and the hard top looks great on there.
                            Thanks man, i saw an e92 finished in brilliant white and from that point i had to have it

                            Comment

                            Working...
                            X