If this is your first visit, be sure to
check out the FAQ by clicking the
link above. You may have to register
before you can post: click the register link above to proceed. To start viewing messages,
select the forum that you want to visit from the selection below.
thanx! love to see pics/info! i'd imagine the kenne belle sticks through the hood, which would look pretty awesome. or you mean he has a 5.0 mustang with a KB?
thanx man! Stanceworks is what inspires me to get back in the garage, glad to contribute to the flame
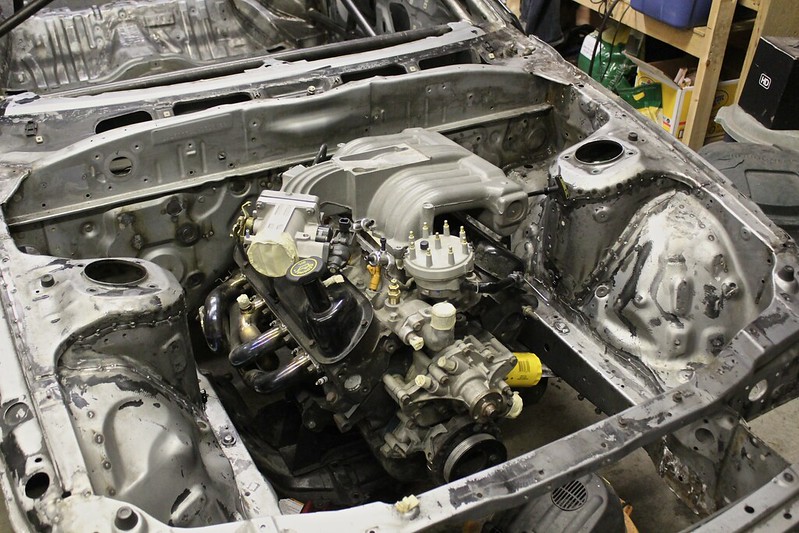
My other problem with the car is how the engine sticks through my hood, i **** the cowl hood that I have and really want a stock T2 hood on the car. I did just notice that Grannys says their new kit allows the 5.0 to sit under the hood with no problems. I might look into that.
My other problem with the car is how the engine sticks through my hood, i **** the cowl hood that I have and really want a stock T2 hood on the car. I did just notice that Grannys says their new kit allows the 5.0 to sit under the hood with no problems. I might look into that.
even with the granny's kit you still need to trim the webbing of the hood and use a SN95 intake manifold.
if I were to have to cut my hood, i would do it like Jeff over here (trick flow track heat)
if I haven't mentioned, this car was my inspiration for going this route
he later put a cowl on it, but I like the cut hood better
Yupp i have mine cut right now. But the new mounts are supposed to clear the hood. I put a thread up over on Norotors to see what people say about it
Ya I don't mind answering questions, thats what the internet and forums are for right?
The basic kit is totally worth the cost, the rad kit I feel is definitely overpriced. We'll have to see how I fare with the stock rad and a huge fan and lots of ducting.
The slave adapter kit they sell also doesn't appear to be useful, its basically all the parts you need with none of the work done (the hard part) so no point in buying it through them
If you can handle fab work I've seen this swap done with out a kit, kit just makes it way easier.
The from sway may fit with SN95 stuff, I really hope it does. Been doing a lot of reading on suspension lately and if I move the sway bar forward it will alter the spring force it provides.
Are you putting the alt down low? I thought about putting it where the air pump was, but that makes the reverse rotation water pump impossible to use. The newer style timing chain covers (explorer, SN95) all use reverse rotation (relative to the crankshaft) water pumps.
This is how I was going to do until I get a good electric water pump:
I'm keeping the alternator in stock location. I'm only running the alternator and water pump (I'll go electric if I have to, but not planning on it). I've kept the SN95 powersteering bracket in place though, to hold the coil in the stock location and keep the tensioner pulley there. I should be able to route it in a way that keeps the proper rotation of the water pump, I can't find the diagram now that I'd stumbled upon a while back that showed it.
And I wouldn't say I'm great with fab work. I can make stuff work (usually), but its not super pretty haha. I thought about building the engine brackets, but I don't want to deal with getting everything properly lined up to be honest.
Not yet, I really do need to make one soon! It's not really fair of me to leech off of what you're doing and not return the favor I'll try to get one started in the next week or two, probably just do one on here
Ah I look forward to seeing what you come up with! I find fab work is really problem solving, there's always multiple ways to do something, coming up with the easiest/prettiest is the hard part.
And ya as far as I know your only options for electric water pumps are Meziere or CSR. The CSR is cheaper, but you need to buy different arms/backing plate. Buy that point buying the Meziere is like the same price, and it's a better pump.
Also, this is almost exactly how I cut my alternator bracket and I plan to run my belt like this. I also cut off a bunch of the powersteering bracket since I've got a manual rack, I'll get pics in my thread sometime
Purity Ring. Weird lyrics, electronic music, really good, kinda hipster. They put on a really cool live show too using a midi controller and lights. Good chill vibes to work to.
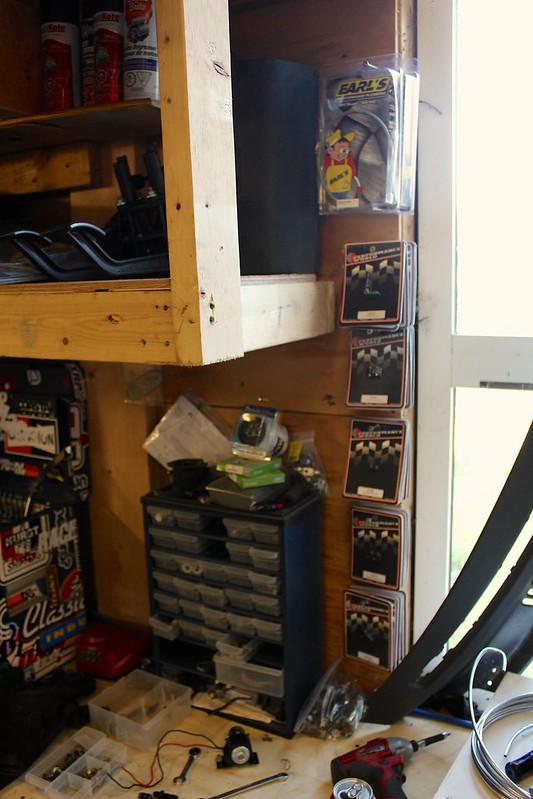
so I made that mess on the floor..
into like my own personal store
Then I borrowed some tools
busted out the welder (again yes) and got to work.
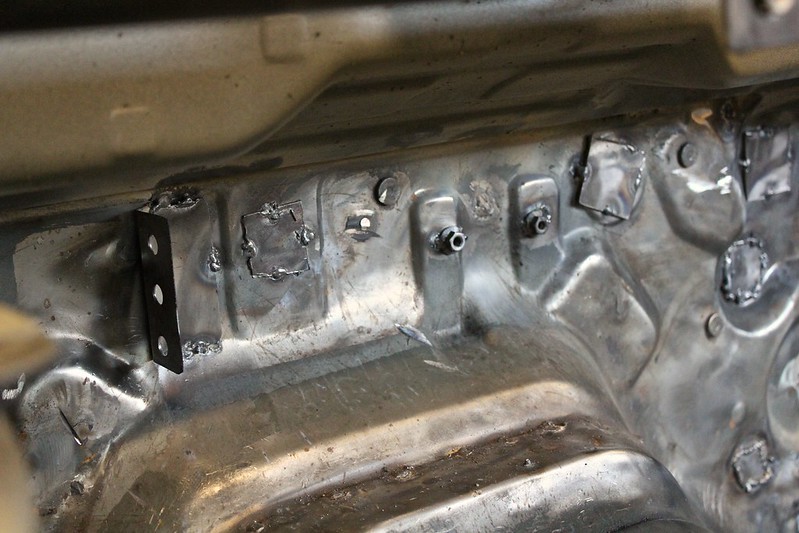
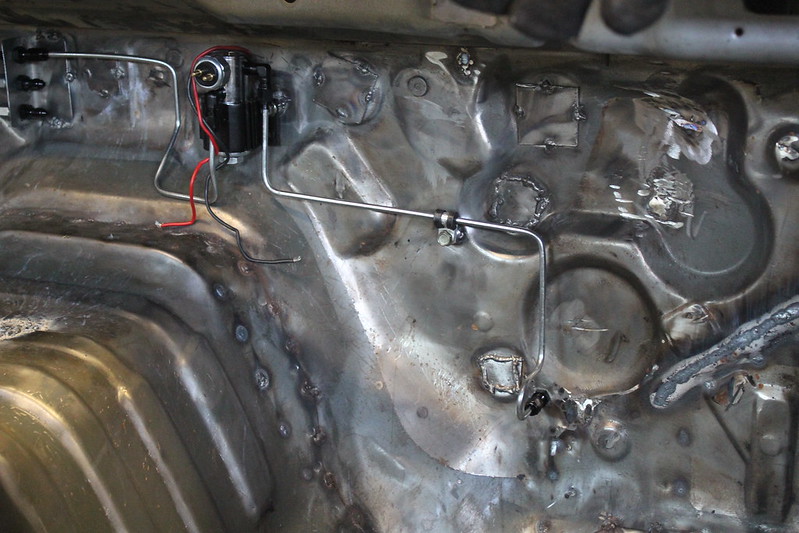
I didn't want to make anything penetrate the firewall, so that meant no self tappers or anything. So welded some nuts and made a bracket..
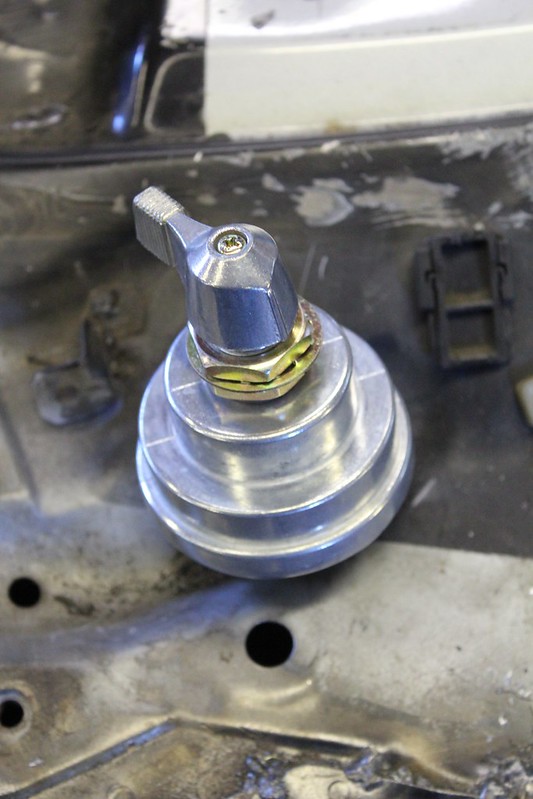
which gave me a place to put Line lock.
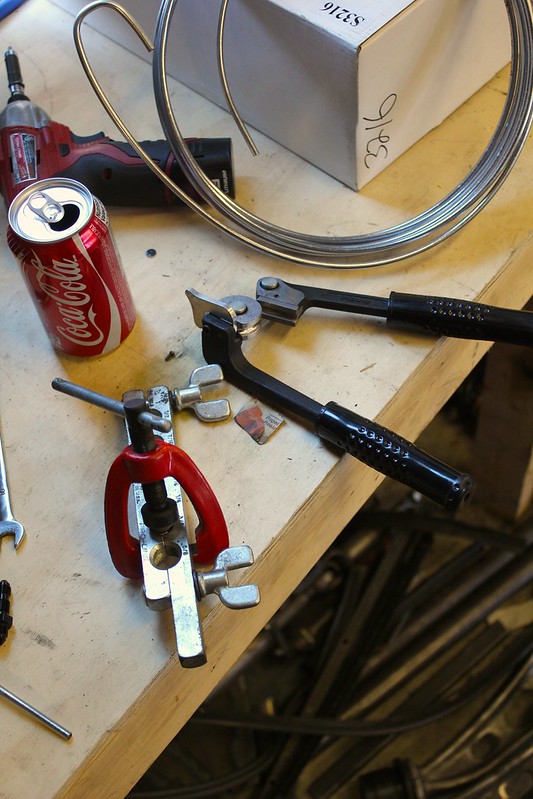
used bulkhead -3 connectors to link the hard lines to the flex lines
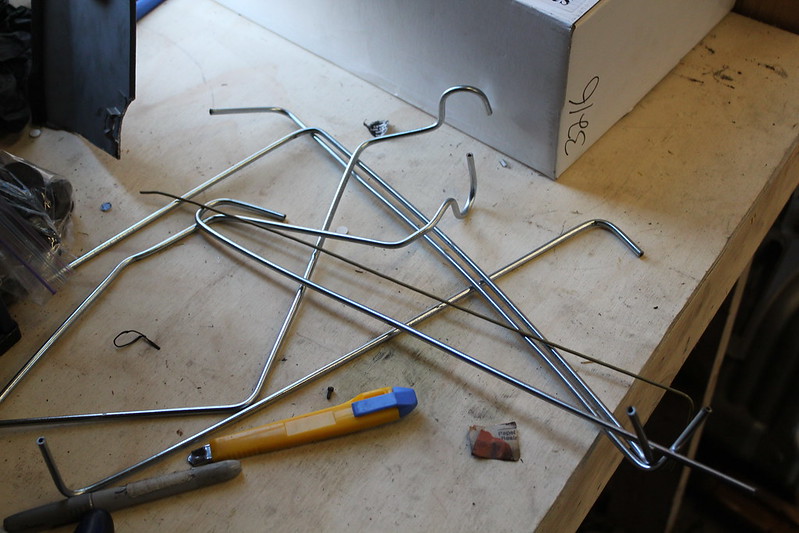
Then bent and flared a bunch lines, really like AN fittings. Way easier than double or bubble flare stuff.
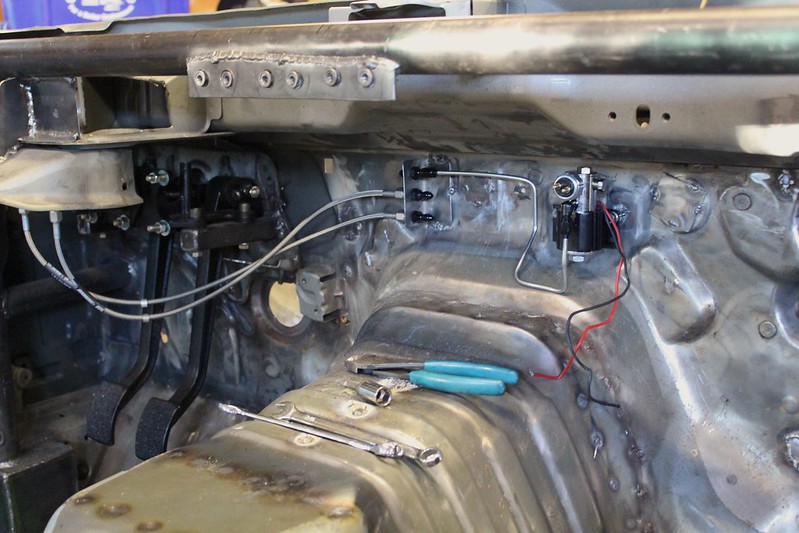
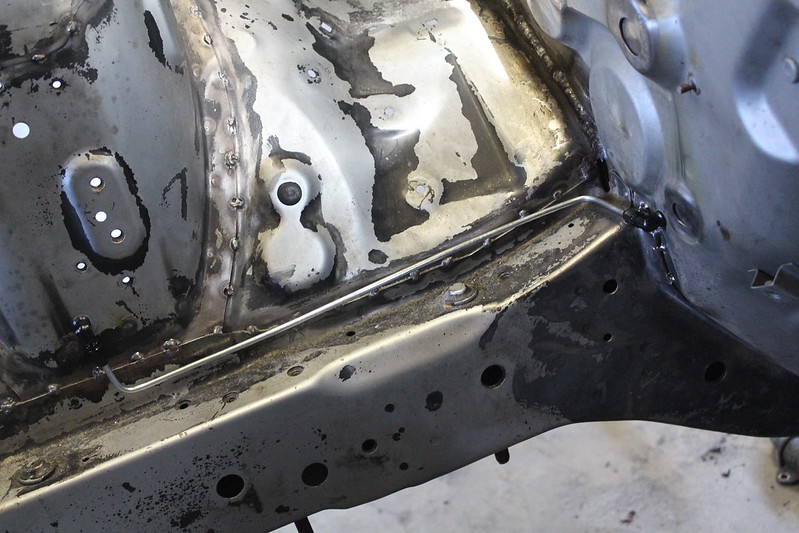
Passenger side
and passenger side in the engine bay
I would've liked to completely tuck them somewhere, but they would basically have to run under the front frame of the car (no, risk of damage) or in the frame rail (no hard to get at if need be) so that leaves us with a tuck against the engine bay. they will probably need heat protection from the exhaust how ever. But you can barely see them when everything else is in.
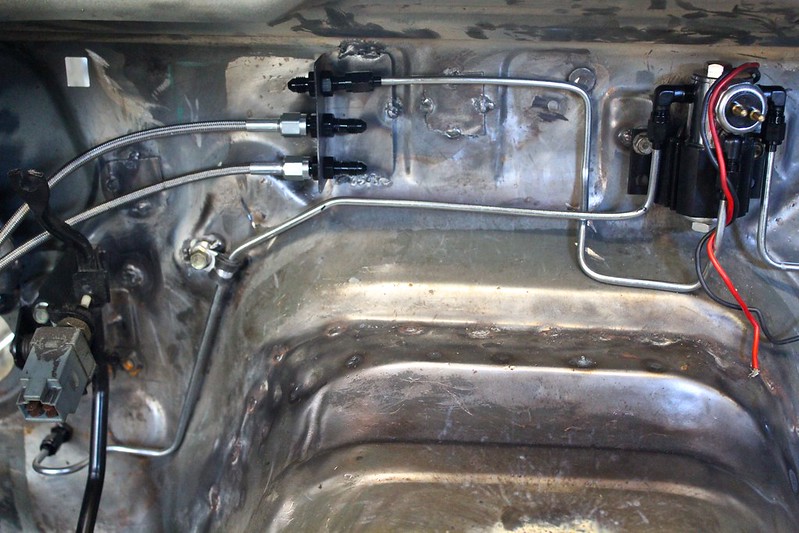
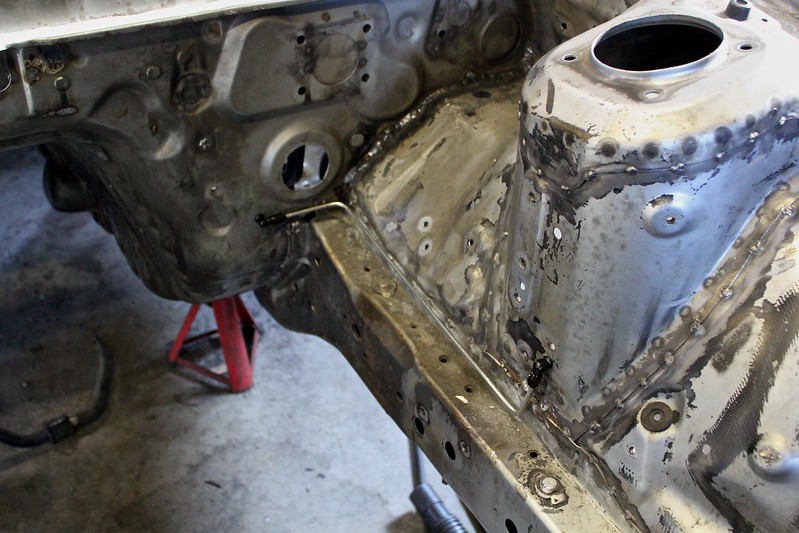
drivers side
the line comes close to the gas pedal, but the pedal doesn't/can't touch it
lol line is hard to get right, good thing its cheap
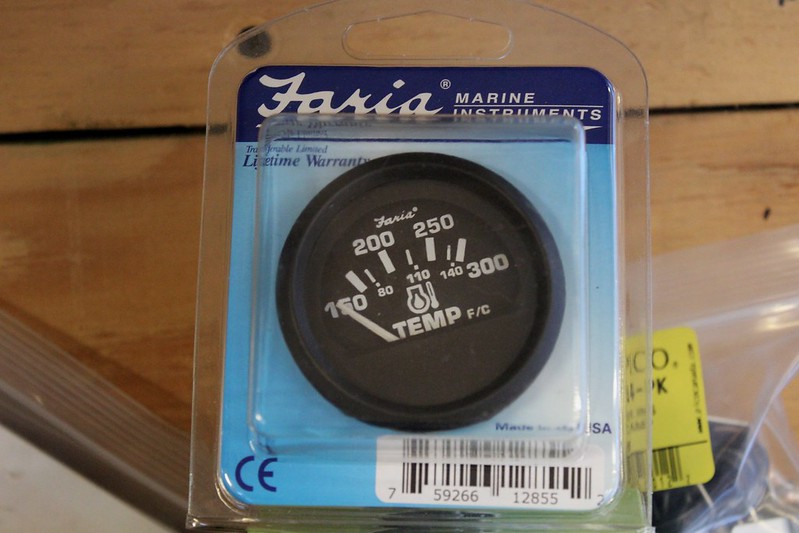
got this in (finally) after being back ordered, stopped due to holidays etc I have the last gauge
and this
I'm gonna need two. In order to race the friday night street legals at the local drag strip the car has to be NHRA compliant. NHRA is annoying and wants a switch on the back, where as every other sanctioning body wants one on the cowl. Cowl makes more sense to me, if the car gets in an accident the rear is more likely to be damaged than the firewall area which is one of the strongest parts of the car. /rant
and deeeennn
and to bring some light to the sway bar thing, my other engine didn't have a oil pan on it when I had it mocked in there. The pan is what it hits, so it's going to have to be relocated anyway.
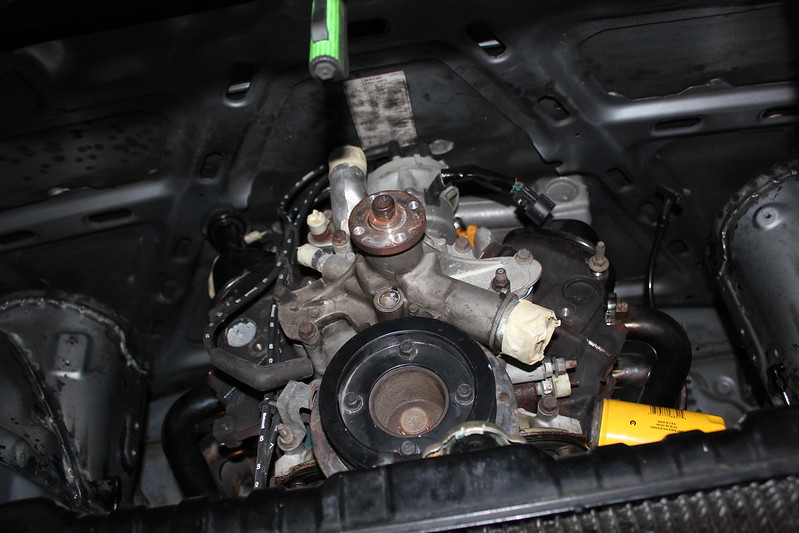
Disty is looking reeeeaaallly close. makes me think it ain't gonna fit close. time will tell when I get the hood mounted.
But for now I can weld in the new rad support, fuel lines, on and on. much to still do, but it feels like progress.
so this evening was a little short, had a buddy come by and check out the build and we compared notes. He's building a very similar 302 Rx7, same colour even.
been listening to this, not in love with all of it. used to **** matt good, but after a while its grown on me. still unsure if its considered rock or alternative or what lol.
so to add more light to this sway bar business, it hits the pan. or more accurately the drain plug. It will probably clear when the suspension is under full droop. in this pic i can get the bolt out.
this is with it relocated forward btw
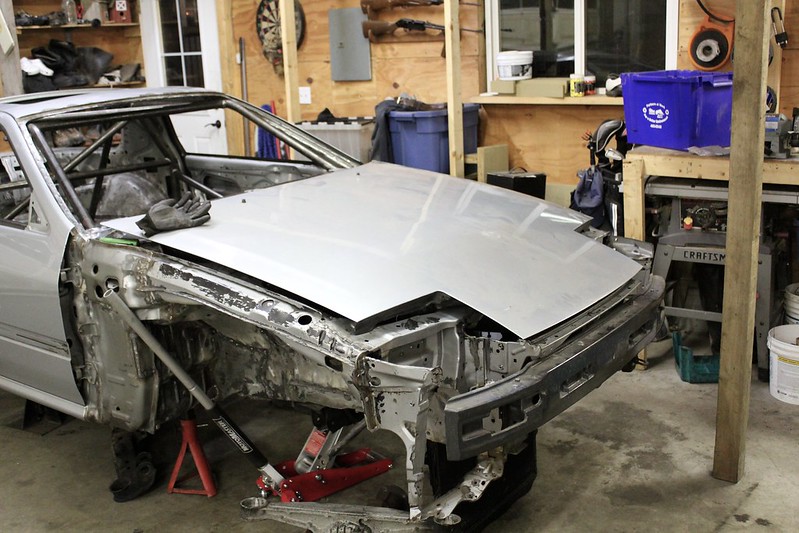
then while in an experimenting mood we put the hood on to see how it fit. Thankfully my buddy drives an FC so we went outside to eyeball how the hood sat, then put it on. I forgot to lift the back of the engine to simulate the trans being it, so it just didn't clear on the distributor.
then i clued in and lifted the back and put the hood back on.
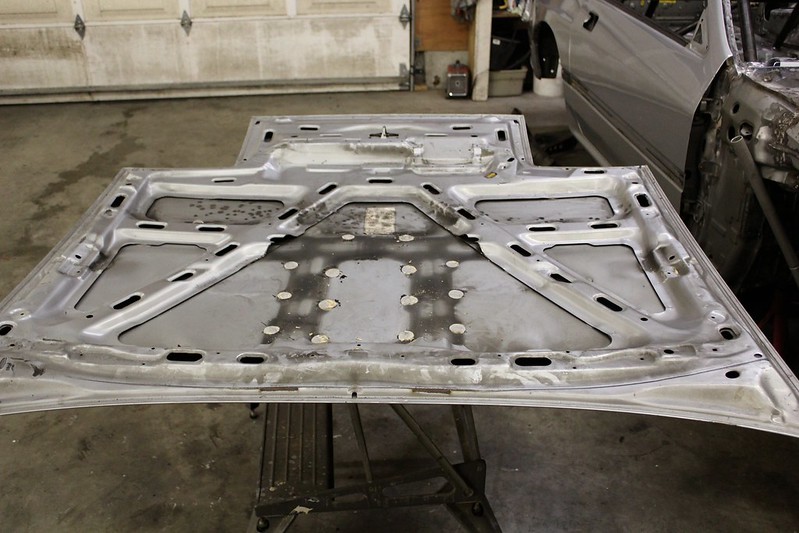
fits! but is seriously close, so I took out a grinder...
before
and after
fits perfect with some trimming. going to pull the hood hinges out tomorrow and be 100% sure but i think i have to trim it just a bit wider in the middle to clear the intake manifold.
here is a bad photo from under neath
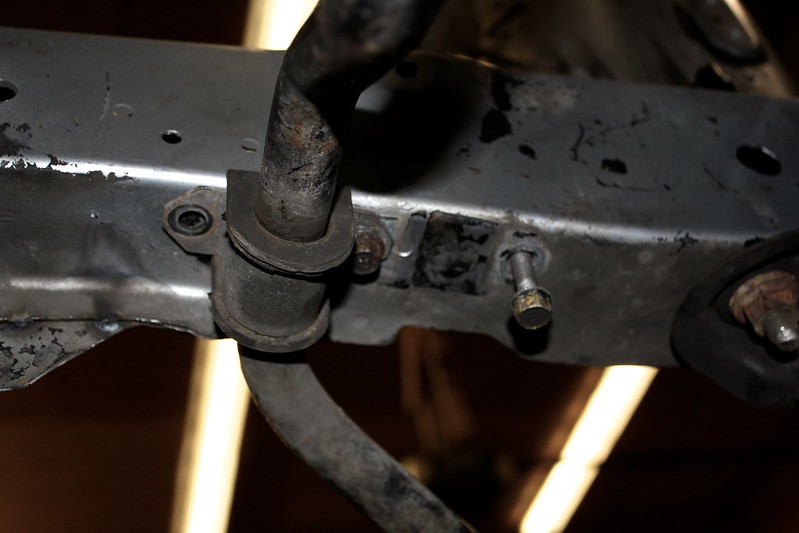
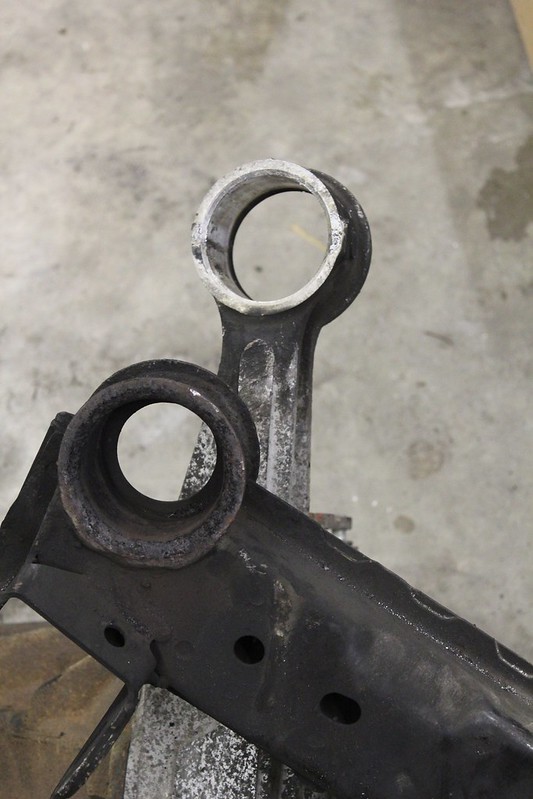
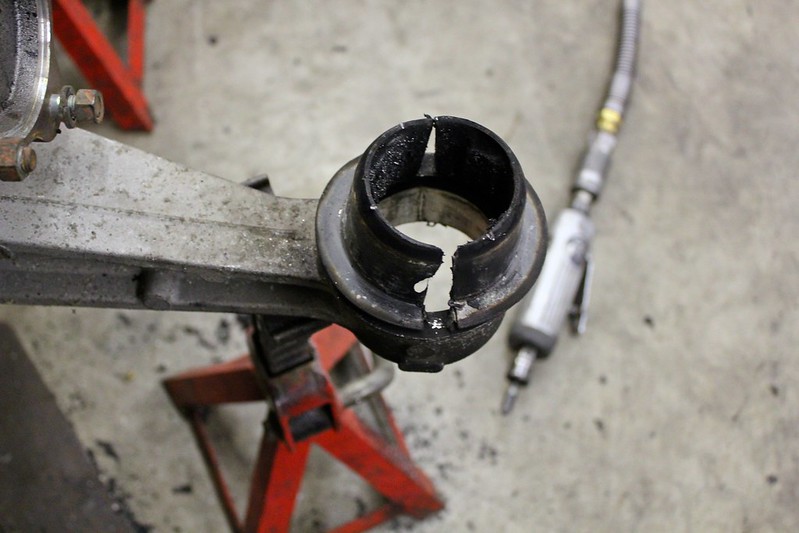
I also got these suckas out
I learned a tip, they are a 2 part metal sleeve. get one out the other is easy, so grind along the seam and hammer away. Helps that the rubber was burnt out. I honestly don't see another way to do the subframe bushings, but one could press the diff bushings out.
Thanks for the compliments you gave me MONTHS ago. I forgot to check back. Oops.
Anyway, this is looking amazing and I'll be subscribing this time because I completely intend to keep up with this build! I wish more people did things like this.
Don't get bogged down by the amount of fab work... just push through, take your time, and do it right. It will be well worth the the wait!
You're doing super awesome with this. Keep it up.
edit: I remember what I wanted to say! The 1975 is definitely one of my favorite bands. My favorite song is "Woman", hands down. I'm so mad that I missed them when they came to town. You like good music and I like that.
 Tweet
Tweet


 I'll try to get one started in the next week or two, probably just do one on here


Comment