 Tweet
Tweet
Originally posted by Miroteknik
View Post
-
I like that style seat, but it is honestly over done and easy. The VOX car and other builds have used that style, and they just appear to massive and bulky in the car, so I am really trying to rack my brain for something different. I dont plan on running those exact seats that I pictured, and I think what I am looking for is some of what you were describing just above. -
What about aircraft seats? Maybe something like an aerobatic plane.Comment
-
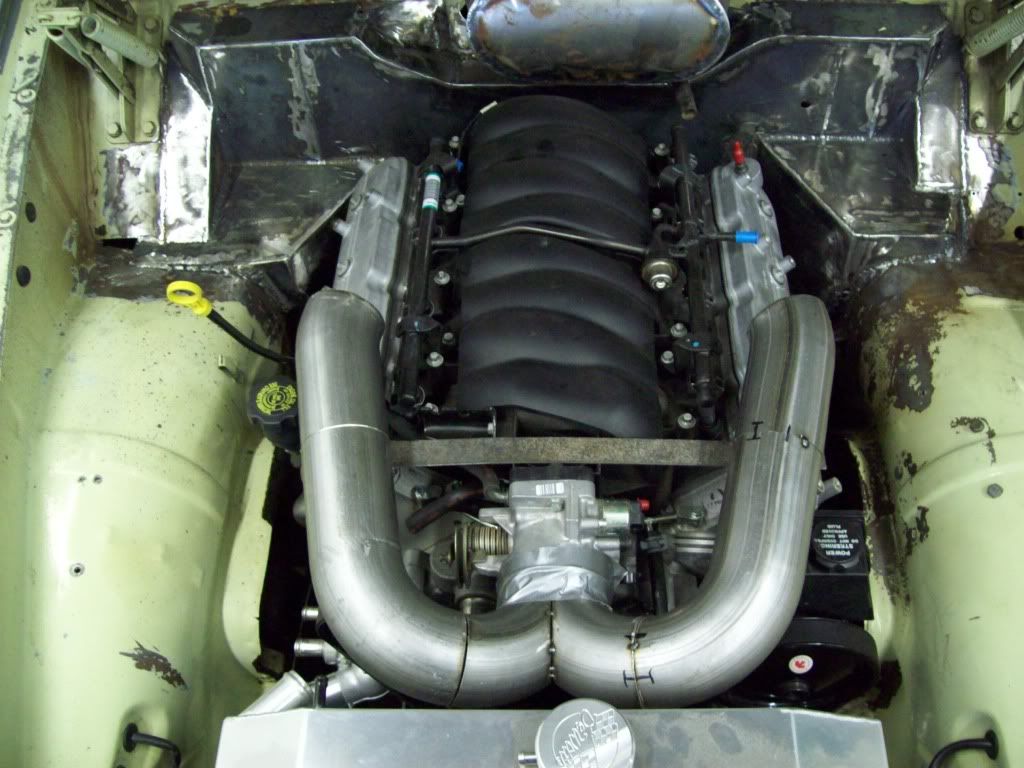
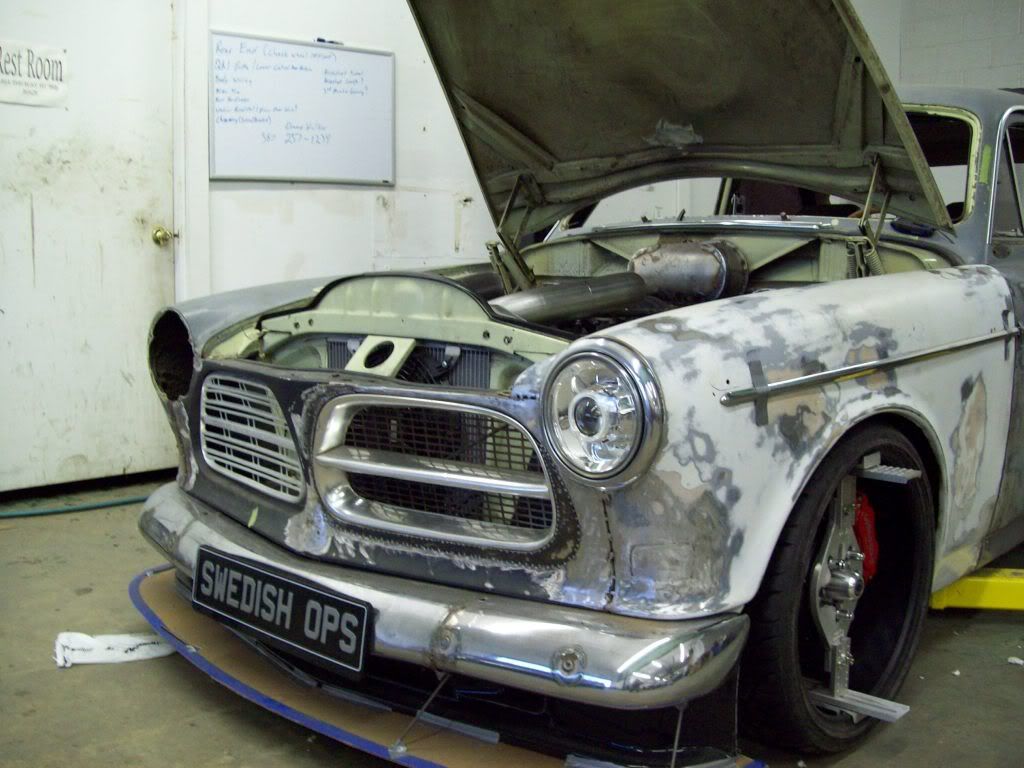
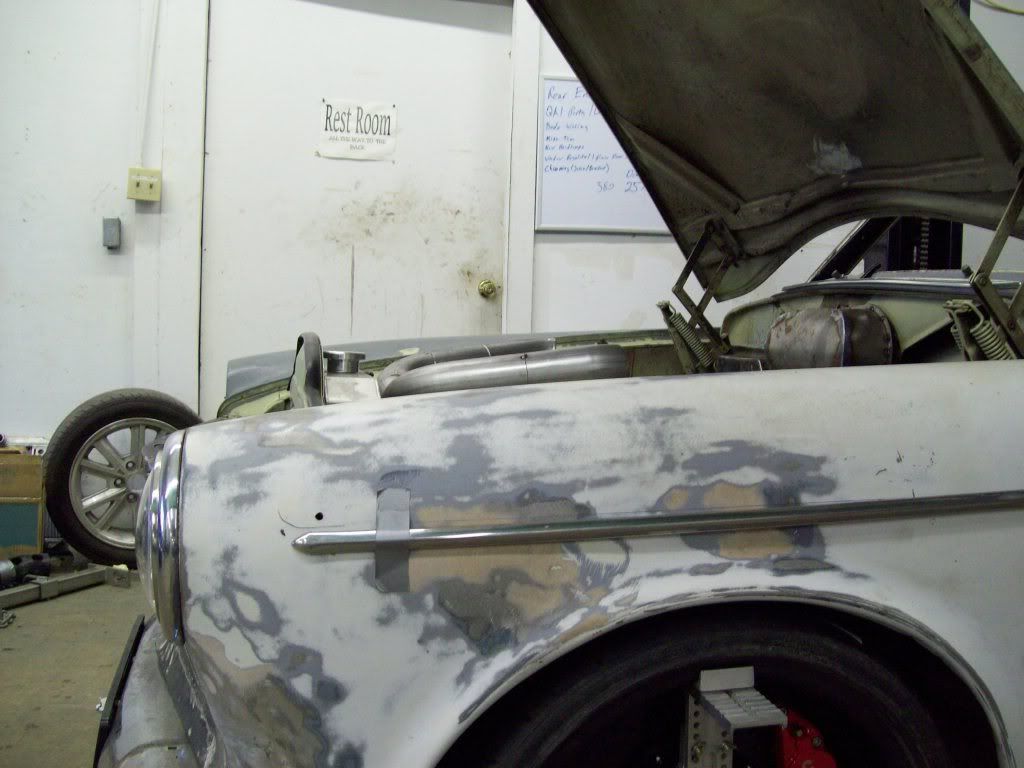
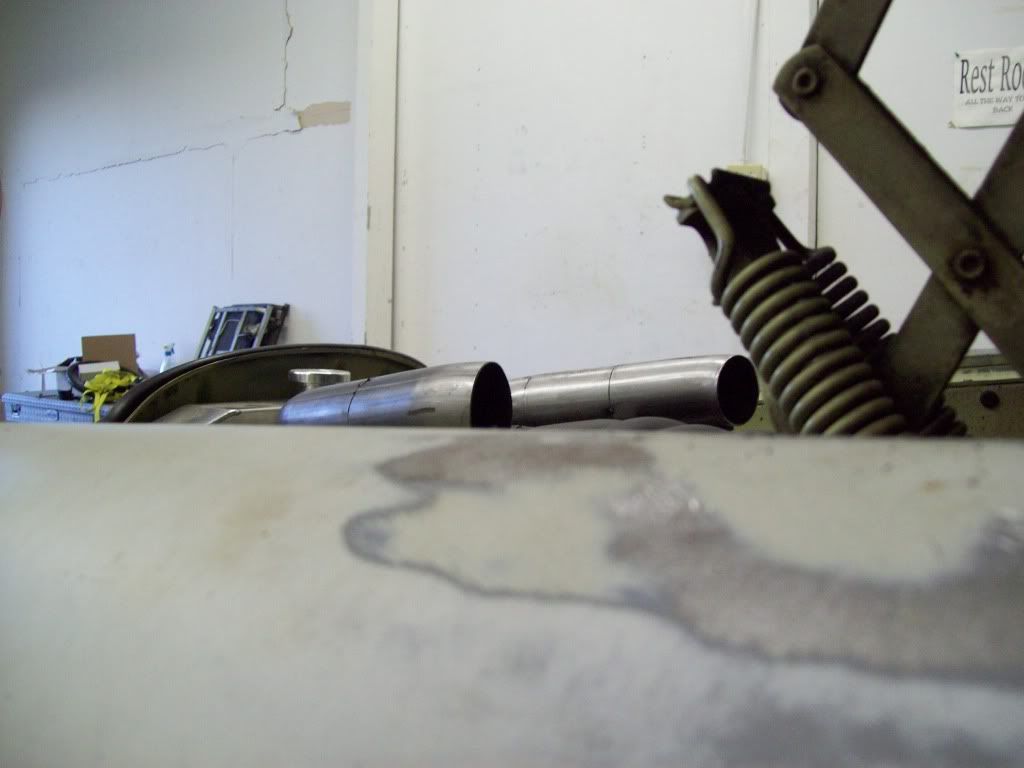
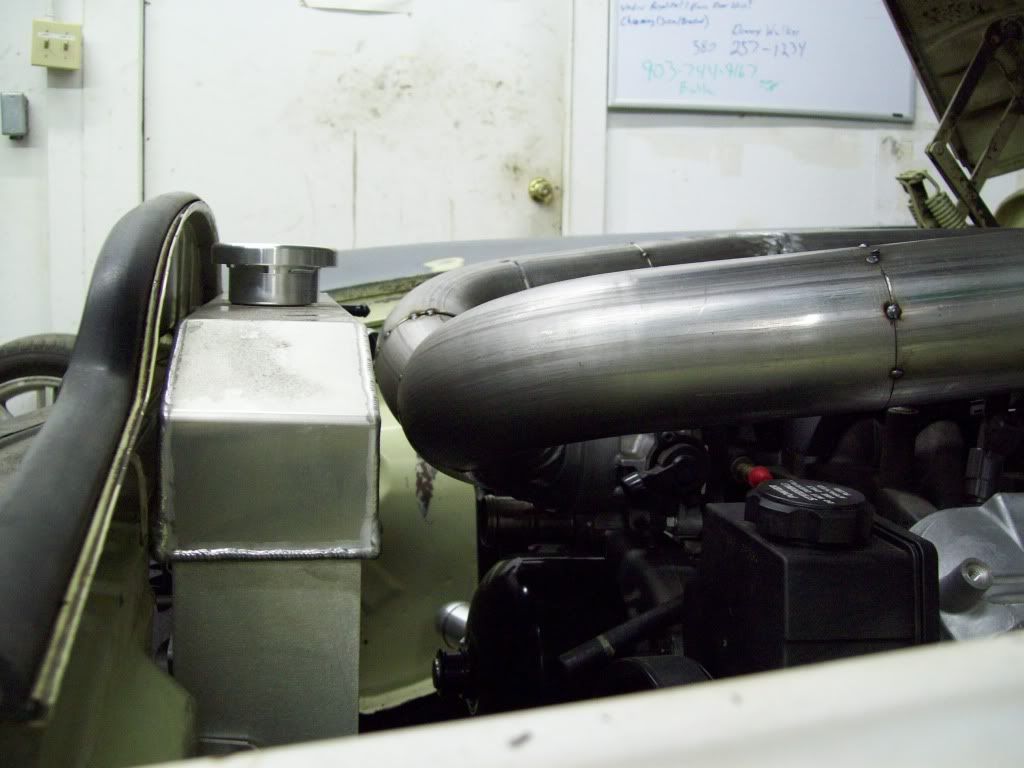
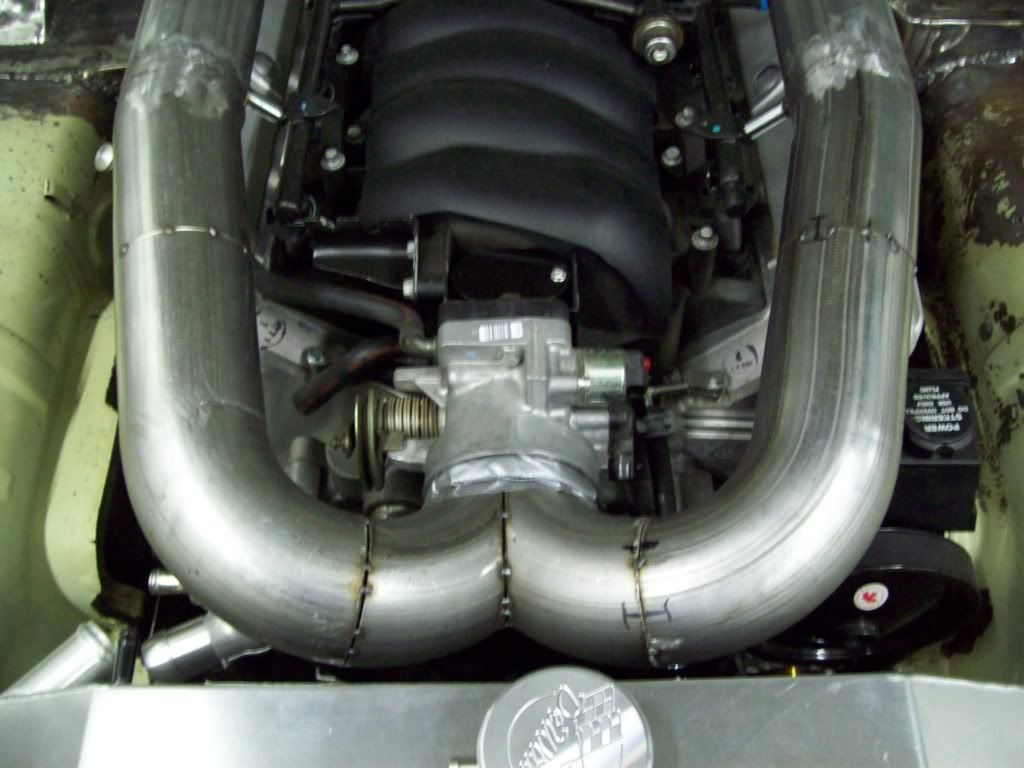
Here is my idea for the Intake Setup.. I think that once I get the remaining pieces, so I can run it back to the filter box, it will all tie in nicely. I am need two 30 degree bends so I can cut back to the box in the proper place, but of course I didnt order those. I am trying to make this where it all looks like it isnt out of place, so I have some of the basic runs mimicking the fender angles, so when the hood is open, the Intake Tubes and the Fenders compliment each other. I think that it takes little feature like that, so you have the capability to have something as an uncommon option, but it appears that it was made for it.. It is these little features that go un-noticed in the day to day, but makes it apparent when someone is using cookie cutter items that are one size fits all.
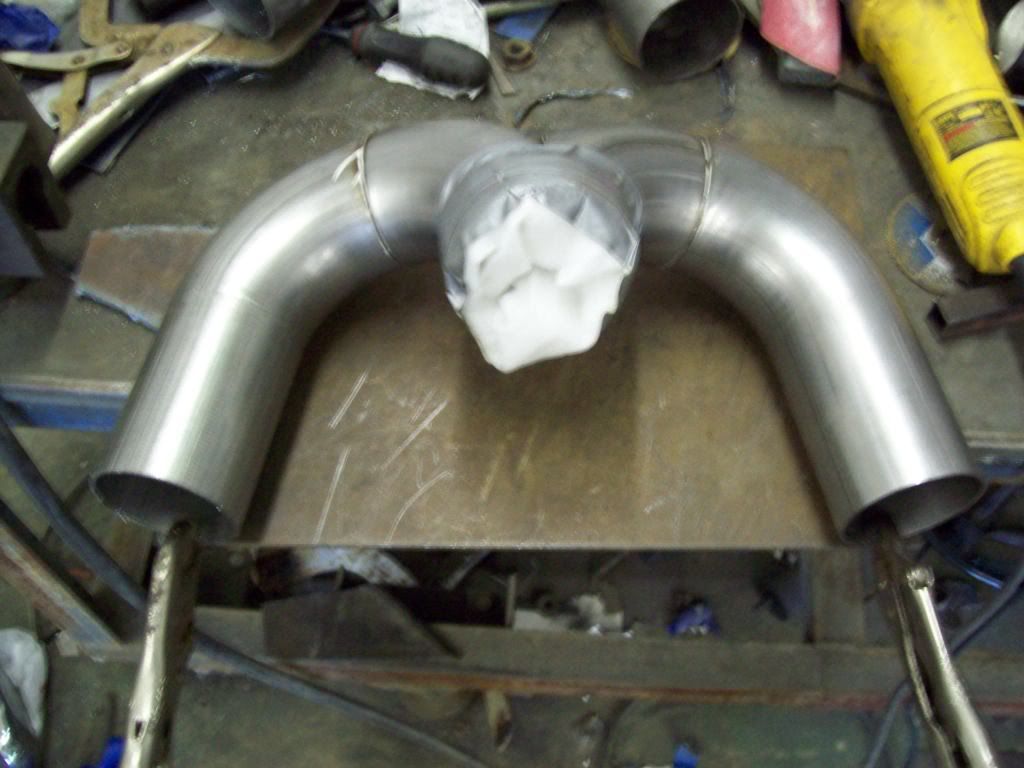
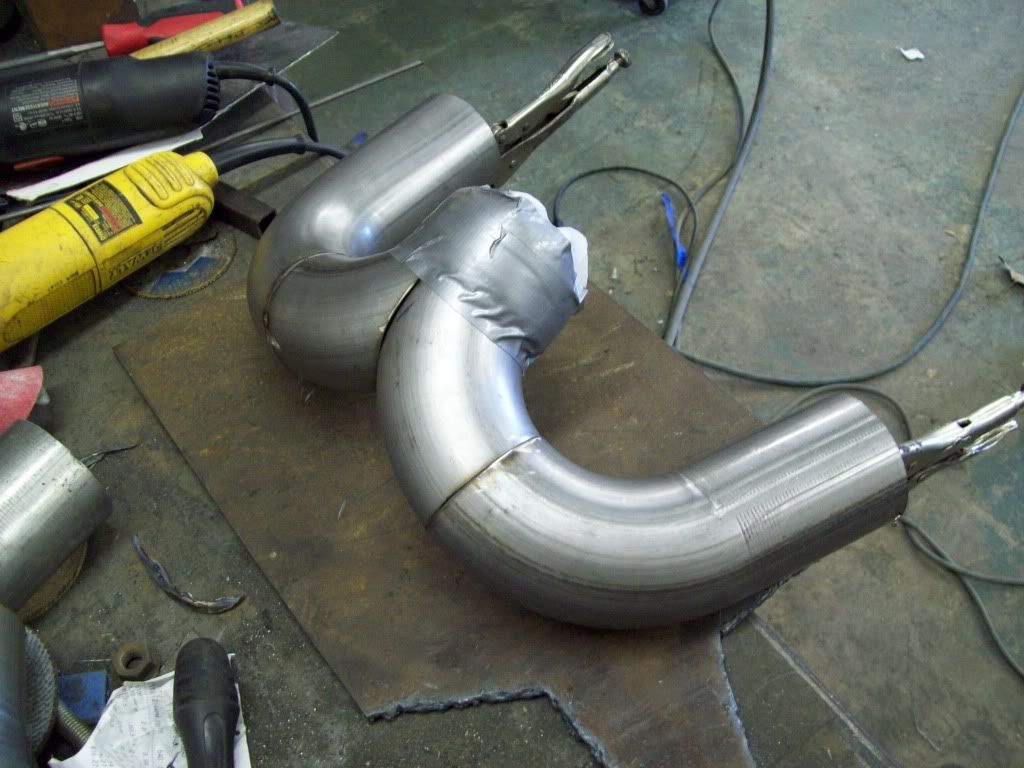
I had to split two 90 degree pieces to make my Y section (I guess it would actually be a T), and that turned out to be a bit more complicated than I had thought, because I had to factor in the angle of the outlets from the Y section before they were cut. I did my best with the tools that I had, but I think it came out pretty damn good.
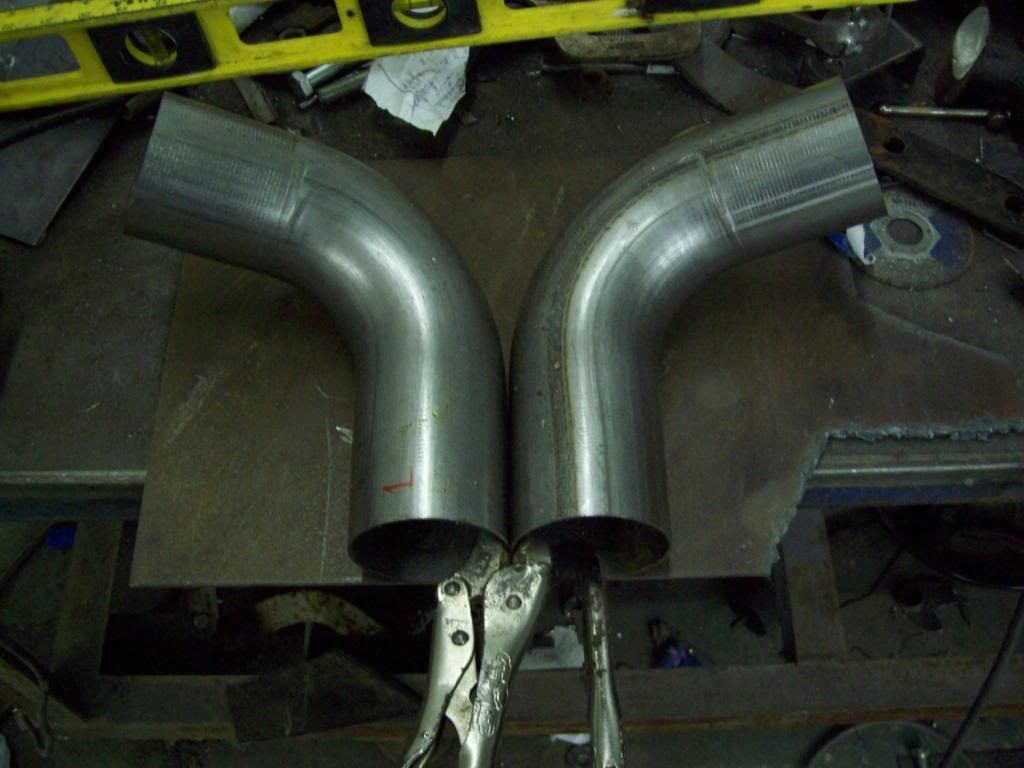
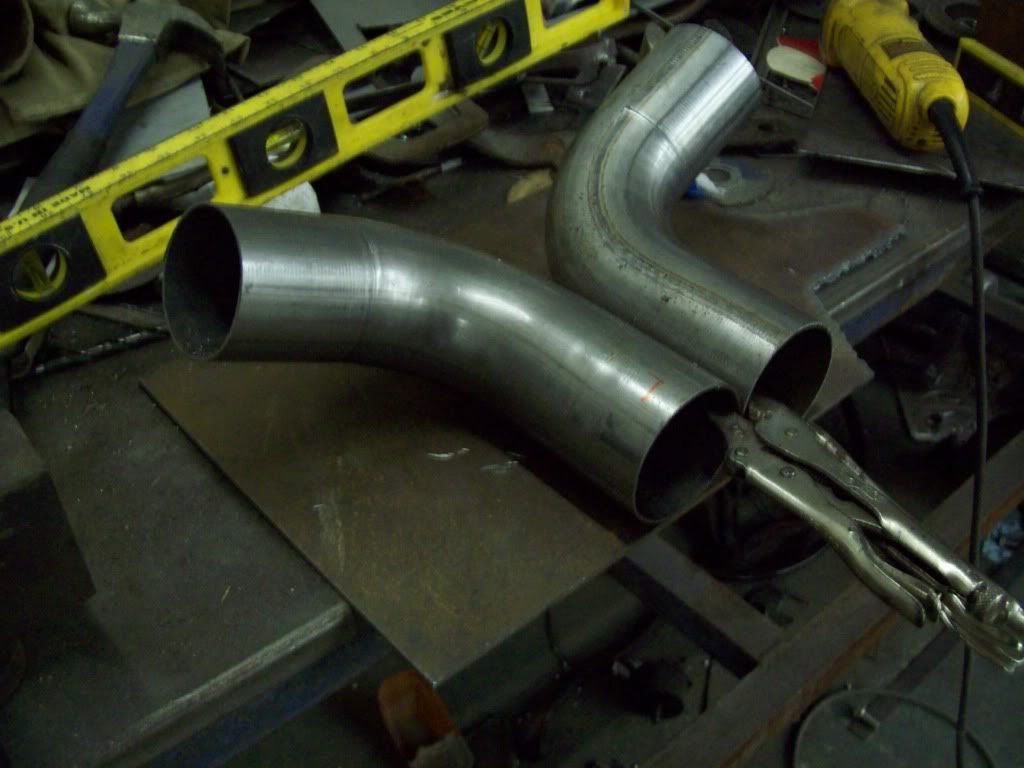

Now that the Y (or T) is done, I was able to lay out the rest of the angles, and cut the material I needed off the ends of the bends, to get the overall curves to fall where I needed them. It took a bit of trial and error, but as long as you cut off a little at a time, you are pretty safe.

Comment
-
why this thread still doesnt have a 5*?
awesome work man!Comment
-
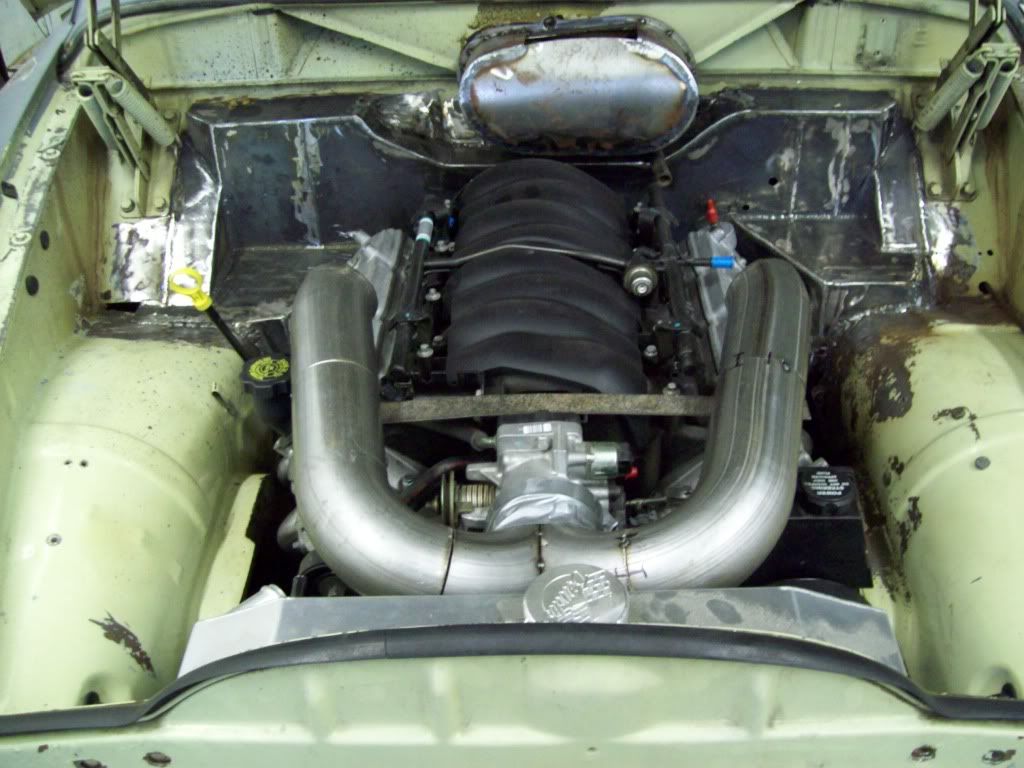
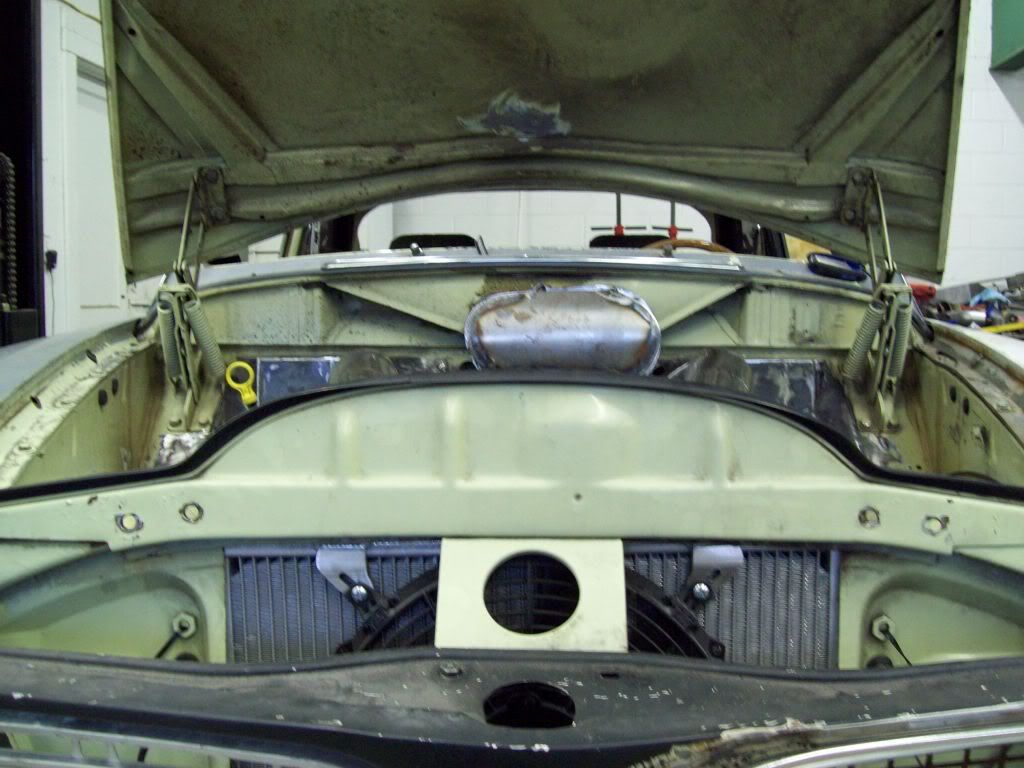
Well it is just my luck.. It looks like I am going to have to re-configure the Air Filter Box, because isnt right in appearance/shape for the intake tubes I have made up. When I did this air filter box, I used the OEM heater flange that connects to the cowl vent because I thought I wanted a factory configuration, but the factory offset is way to far off for what I need to look right.. I will still use the flange, but I will have to build some sort of new box that will center it all out, and will allow my new intake tubes to attach efficiently.. It is much easier to build a new box, than try to configure a secondary intake runner setup, especially when I am just using a Chop Saw and a 4.5in angle grinder to get all this set up right. I am beginning to think that I need to get a bit of new equipment, and learn how to use it, but I dont have the time right now.
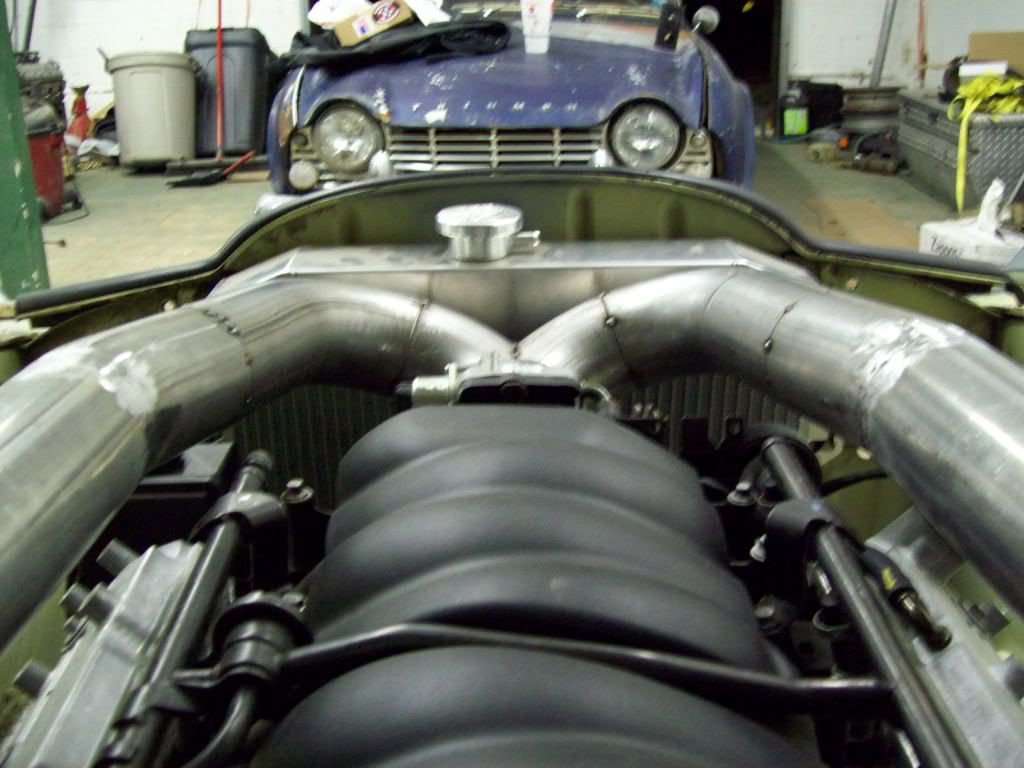
I have done my best to make the Intake Runners flow with the body contours of the fenders, that way everything looks complimentary when the hood is open.. I think this is about a close as I am going to be able to get it, and I wish the need for correct proportions and contours didnt bother me so much, because it would have made this task alot easier. This whole intake unit will be mounted directly to the top of the motor with some nice and hidden mounts, so it should all be very stable and flow well.


 Last edited by Iamtheonlyreal1; 11-30-2012, 07:48 PM.
Comment
-
I appreciate that, and I guess no body if voting for it... LOL I am on a few different forums, and I think people drift past the thread, because it is an Amazon build and they dont expect much from it.Originally posted by tha View PostComment
-
Holy Crap... This is a Jesus approved build, that will go far in the Bible Belt area I live in... LOLOriginally posted by Jesus Christ View PostComment
-
Well I think I got the Air Filter Box set up the way I want it, and it seems to fit the body great.. It will have either one air filter, or individual filters per tube, but I am not sure yet.. Now that I have the body of the air box done, I can take it to my local parts store to see that filters will work, so I can make the baffles and resting points.
I did my best to make this thing fit the body of the Amazon, so much so, that I actually used curves and contours from the parts off the car.. I normally like to use already existing contours, because you would be surprised how out of place things can appear if you are just slapping foriegn features to the body. I made air box mimic the cowl left to right curve, and also added a compound duplicate curve to the side, so I think it really completes the firewall nicely.. Infact, you can see that the air box rest in the heater box relief of the Amazon pretty nicely.
The next thing I have to do after I locate air filters, is to figure out a good looking mounting feature for it.. I plan on hard mounting the full assebly to the motor, and then have a boot/gasket that makes the sealed connection to the firewall, sort of like the Trans Am shaker hood mount gaskets. I am not sure if I want to make some sort of closed/solid sides for the inside of the unit, run some straight machined leg style mounts, or build some sort of erector bridge sort of mounting on the side.. I am guessing that I am going to have to stare at this thing a bit, and then deal with that aspect just a bit later.
Also, I have not trimmed the bottom of the box yet, so it might appear to sit a bit low.. I was waiting until I find out what filters I can run, so I can then determine the depth of the box. I plan on making the filters load from the bottom of the box, so any seams and hardware will be hidden. I dont think I will have any problems making the bottom look satisfactory and functional, after all , it is on on the bottom.
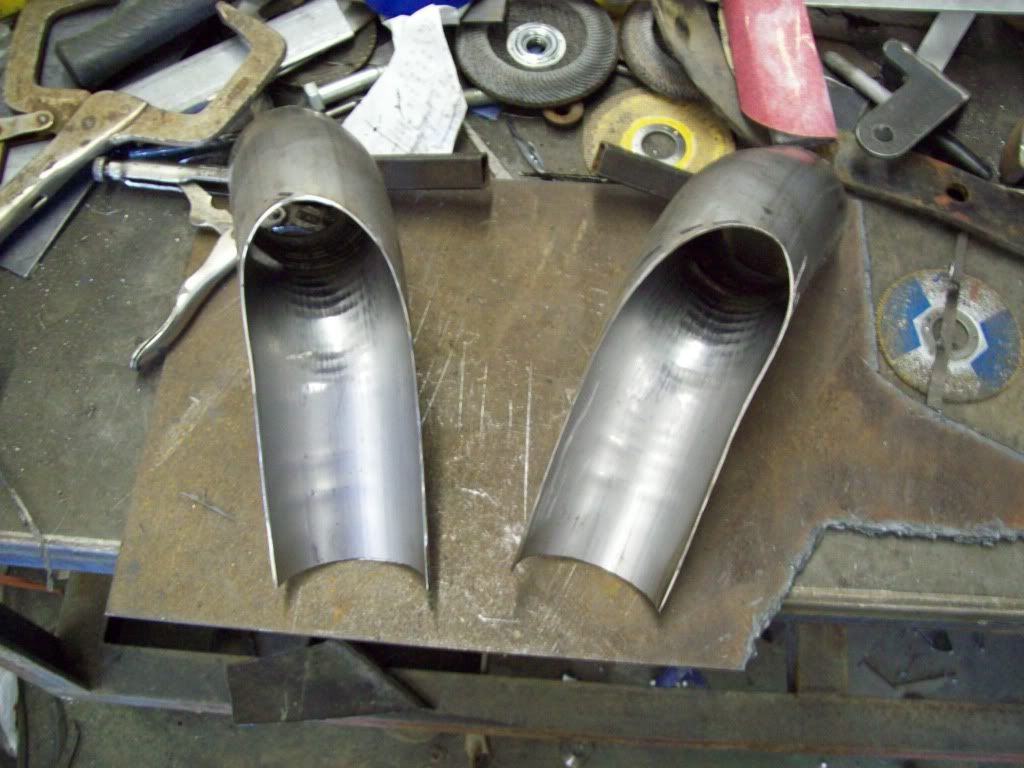
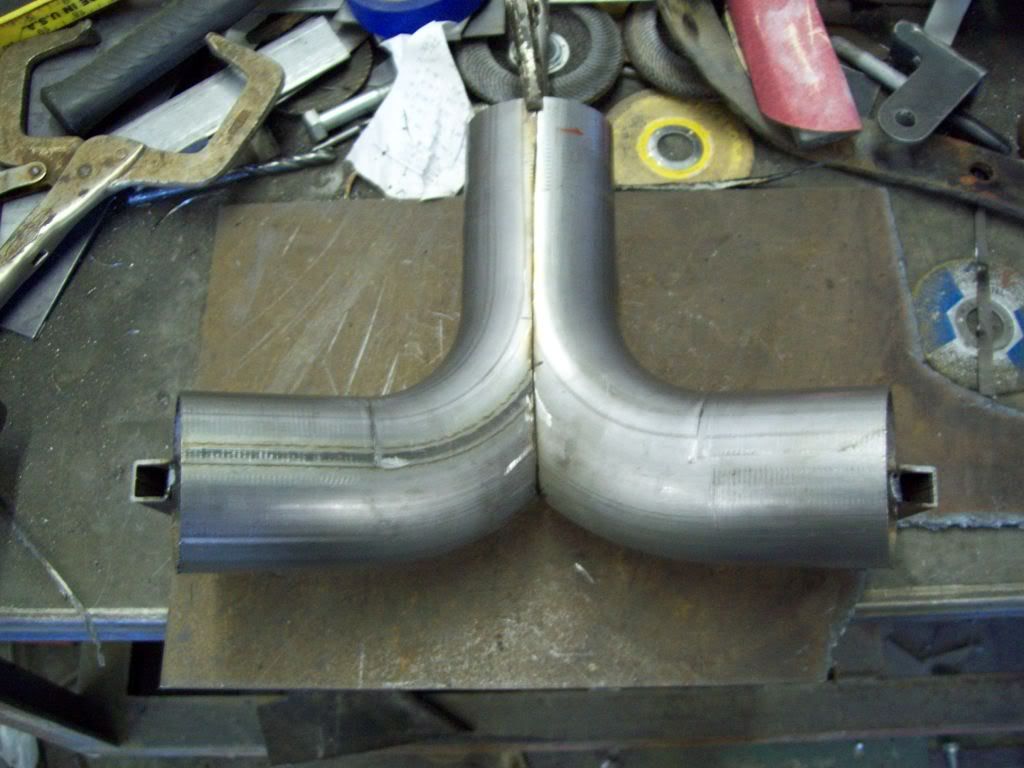
Here is a bit of the work it took to get this, and I am sure it wont do alot of you any good, because this is a one off piece for this car, but there still might be something to share.. This was all made with the 4in angle grinder, and some basic tools..


 Last edited by Iamtheonlyreal1; 12-01-2012, 09:13 PM.
Comment
-
this thred is on fire!!! awesome, keep it upp
Comment
-
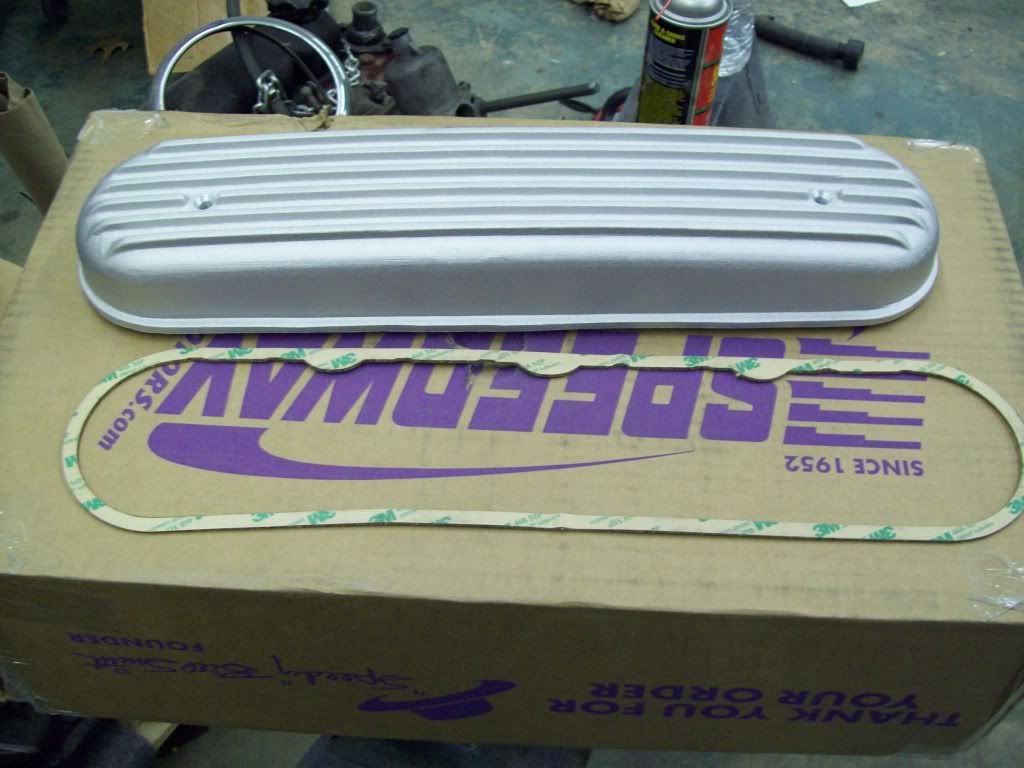
I have been struggling trying to find a valve cover setup I liked, and there really arent too many options for the LS motor, other than some Fabricated/Welded Covers and a few various other styles.. I kind of like the old 327 Corvette finned valve covers, so I thought I might like these, because they would fit the era of the car, but I am not sure about them yet.. In order to use them, I am going to have to work out some of the poor cast finish grinding marks, and they are just a bit bulkier than I wanted..
I ordered them in the Cast form, because I didnt want any polished parts under the hood or painted parts, because I am going for a natural metal finish look. The polished version might be a bit cleaner in the finish work, so that might be the way to go for others that like this style.


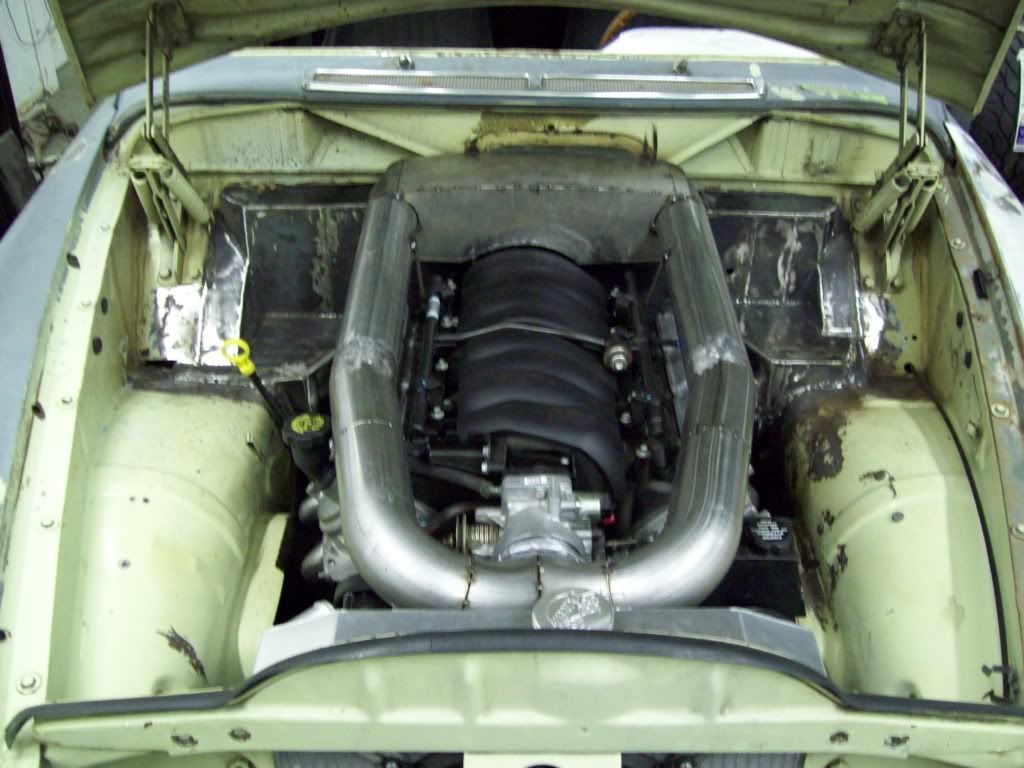
I have the machine shop working on a throttle body attachement collar for the intake tubes, and this collar will be welded onto the Y tube, so I can get rid of the rubber boot and clamp system that is typical here. The collar will have an internal double O-Ring set up that will seal the joint between the throttle body and intake tube.. The whole assembly is hard mounted to the top of the motor, so there wont be any virbration or engine torque forgiviness needed for the O-ring joint.
Comment
-
Here is something I am working on for a template, and I am sure there will be alot of people that will object to this look, but I als dont know how I feel about it yet, because I still think it needs something... I cant seem to find a decent intake cover for the plastic intake, and I am not real big on some of the aftermarket replacement intakes, because they are really just a bulkier version of the original.. It couldlbe painted, or even add a carbon fiber touch, but that isnt really what I am looking for..
I made this intake cover as a starter, and I think there are several options for it, but it still seems a bit plain or off.. I was thinking about having the intake cover painted body color, while having the intake tubes powder coated in an Aluminum look coating? I could also use the center of the intake cover for some sort of Air Brush logo'ing or badging? I could potentially add some fins that would blend into the valve covers? Not sure yet, because this is just a starter.. I think it has some potential, mainly because it will hide all the injector B.S., along with a bit of wiring and accelerator cable.
I still have to bring the Filter Box down into the center section, so the rearward part of the cover/filter box isnt completed. The air filter box will more than likely come down to meet the intake cover just behind the valve covers, and this will tie in, and curver around the back..


Comment
-
I couldnt stand it anymore, and didnt want to come to the shop tomorrow with a plain situation, so I made some fins up real quick.. I think this might be the ticket, but it will need just a bit of refining. I will make a better close out front panel later, and it will follow the contour of the front engine assembly/intake, which I think will compete the custom fit better..
The fins can be made real easily by stacking flat bar, and tack welding them together on the bench.. Just stand one up, lay one down, stand one up, lay one down, until you get the fin count you want..


Comment
-
This is the best thing ever.BascoComment
-
I still don't feel those horns going backwards.. have you ever consider just facing the intake backwards to a more cleaner solution?
And I have been in the LS1 scene since it ever came out and never saw those valve covers before. nice find!
Comment


Comment