If this is your first visit, be sure to
check out the FAQ by clicking the
link above. You may have to register
before you can post: click the register link above to proceed. To start viewing messages,
select the forum that you want to visit from the selection below.
The big thing is simply keeping everything as clean as possible... The material, the filler rod, even the tools you use to clean the material, which means use stainless wire brushes to clean stainless, and don't use them to brush anything other than stainless. We spend easily the same amount of time cleaning and prepping our parts as we do welding.
Another key is using an offset turners in order to spin the part. This allows you stay in one position while the part itself turns. You can then rest the cup on the part itself, and walk it back and forth ever so slightly across the seam as the part turns, which is known as "walking the cup". Very rarely is any part ( other than the base welds o the flange, or merge collector welds) welded without an offset turner. If we can spin it, we will.
The last thing I would say, which is a big part in weld seam quality, both aesthetically and structurally, is getting the fit-up as tight and clean as possible. Most of the exhaust systems we do, other than the manifolds, are welded using no filler rod. The pieces fit up so well that we can simply butt the part up and fuse them together, while also achieving 100% penetration. Big gaps are evil.
Now, obviously it will take a lot of time under the hood to get the hang of walking the cup, or just being comfortable welding in a number of positions, but if you practice the tips mentioned above, you'll have much better results.
Send the beer in the mail... heavy IPAs and stouts please;-)
Wish I could +rep for the tips and great info - Any links to some offset turners that could be purchased for the hobbyist?
I'd be happy to paypal you some IPAs if that also motivates you to keep going on the build too. haha
Thanks again for taking the time to write this out!
Wish you were closer, I'd get you beer to learn a thing or two on welding from you.
The big thing is simply keeping everything as clean as possible... The material, the filler rod, even the tools you use to clean the material, which means use stainless wire brushes to clean stainless, and don't use them to brush anything other than stainless. We spend easily the same amount of time cleaning and prepping our parts as we do welding.
Another key is using an offset turners in order to spin the part. This allows you stay in one position while the part itself turns. You can then rest the cup on the part itself, and walk it back and forth ever so slightly across the seam as the part turns, which is known as "walking the cup". Very rarely is any part ( other than the base welds o the flange, or merge collector welds) welded without an offset turner. If we can spin it, we will.
The last thing I would say, which is a big part in weld seam quality, both aesthetically and structurally, is getting the fit-up as tight and clean as possible. Most of the exhaust systems we do, other than the manifolds, are welded using no filler rod. The pieces fit up so well that we can simply butt the part up and fuse them together, while also achieving 100% penetration. Big gaps are evil.
Now, obviously it will take a lot of time under the hood to get the hang of walking the cup, or just being comfortable welding in a number of positions, but if you practice the tips mentioned above, you'll have much better results.
Send the beer in the mail... heavy IPAs and stouts please;-)
You don't need that maniford for the Forester, just finish it off for my STI.. Just kidding man, that is a work of art. I wish I had the time to learn that.
Table looks good though, how did you mount it underneath and how do you prevent the sway from side to side on the legs if you push either way -> TT <-
Also I **** that you can do all your cut so precise and clean. But glad to see the forester getting back out there
I like that... haven't come across that one yet, thanks for sharing!
As for the table legs, there are 4 gusseted flanges on the top corners which extend out 5" from either side of the leg. Each flange has 3 screws per, a total of 12 per leg across a 12" mouting surface, it's actually extemely rigid. I was very suprised how solid it was when I set it in place for the first time.
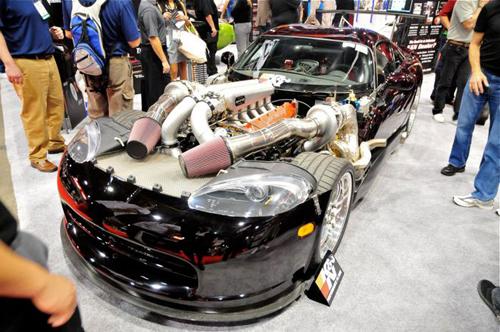
cool table. For the intake, how about something sort of mid-way between the two options? the reason i say is, since this build is somewhat very "hard-core", if you build the engine for form-follows-function and since you're not worried about packaging it under the bonnet, the intake runners would ideally be straight, and therefore form a "v"? therefore if you line up your plenums with those, then they will also be at an angle too. I think it'd look rad, and be different from the two "common" setups you've so far modelled. Just my 2c
I've thought of that, but my only concern would be the lack of visability with the intake's leaning at a 45. The driver's side plenum starts to creep over into the direct line of sight, which isn't a good thing. Maybe I'm just bieng a baby...
Now for some photos, the reason people come on this site...
Here is the table finished up. Again, the legs are 2" square stainless tubing. The welds are smoothed and has a brushed finish.
And now that the table is done I can start getting back to more important things. Here is the new manifold that will be going on the Forester. The rest of the exhaust and custom mufflers will follow shortly behind...
cool table. For the intake, how about something sort of mid-way between the two options? the reason i say is, since this build is somewhat very "hard-core", if you build the engine for form-follows-function and since you're not worried about packaging it under the bonnet, the intake runners would ideally be straight, and therefore form a "v"? therefore if you line up your plenums with those, then they will also be at an angle too. I think it'd look rad, and be different from the two "common" setups you've so far modelled. Just my 2c

 . Just kidding man, that is a work of art. I wish I had the time to learn that.


Leave a comment: