If this is your first visit, be sure to
check out the FAQ by clicking the
link above. You may have to register
before you can post: click the register link above to proceed. To start viewing messages,
select the forum that you want to visit from the selection below.
I hope you can get that front a little bit lower. It would look so much nicer. Not the usual stang though.
Yeah, probably not gonna happen. As I`ve stated at least a couple of times already, the front K-member brace is less than 1/4 inch off the ground. Going any lower would require way more work than I am willing to do.
I gotta say though, the pics that my friend Malcolm took are awesome! The official photoshoot is still in the works.
Michel and I got to work some more on the car today, and although we didn't get the job completely finished, we went a long way towards making it appear done!
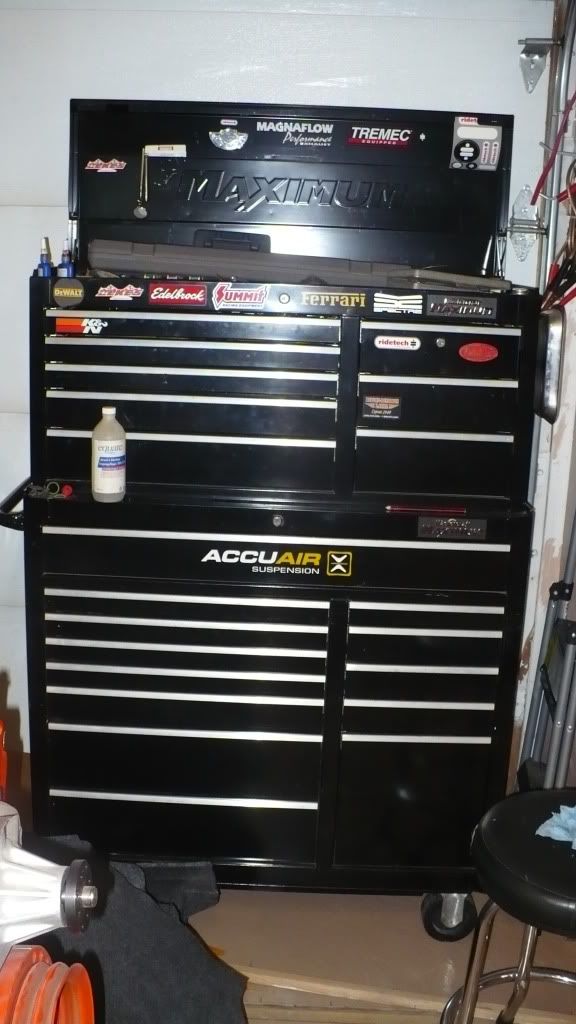
First things first, Michel slapped an Accuair sticker on his toolbox, to go with the Ridetech ones he put on there a few weeks ago.
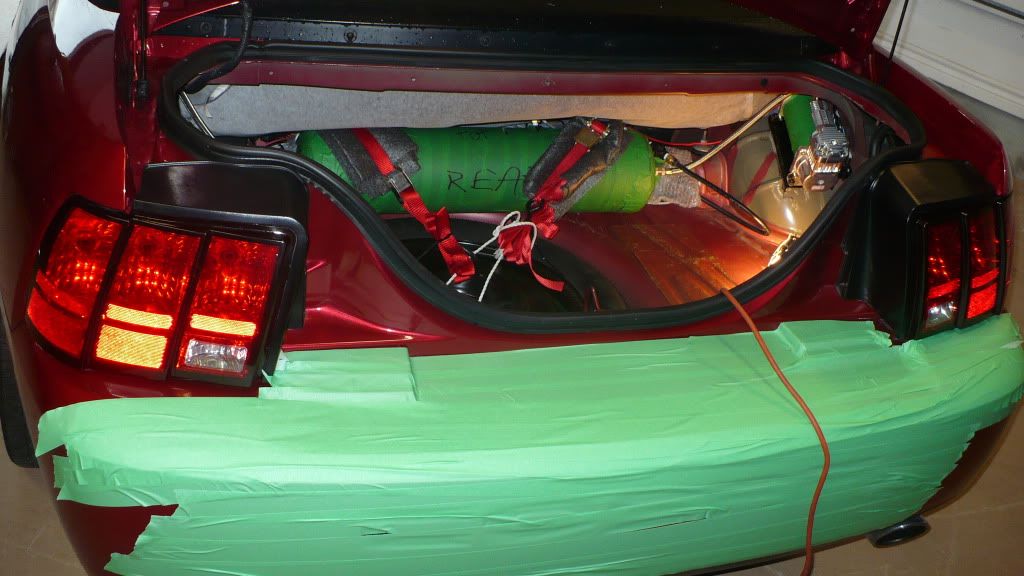
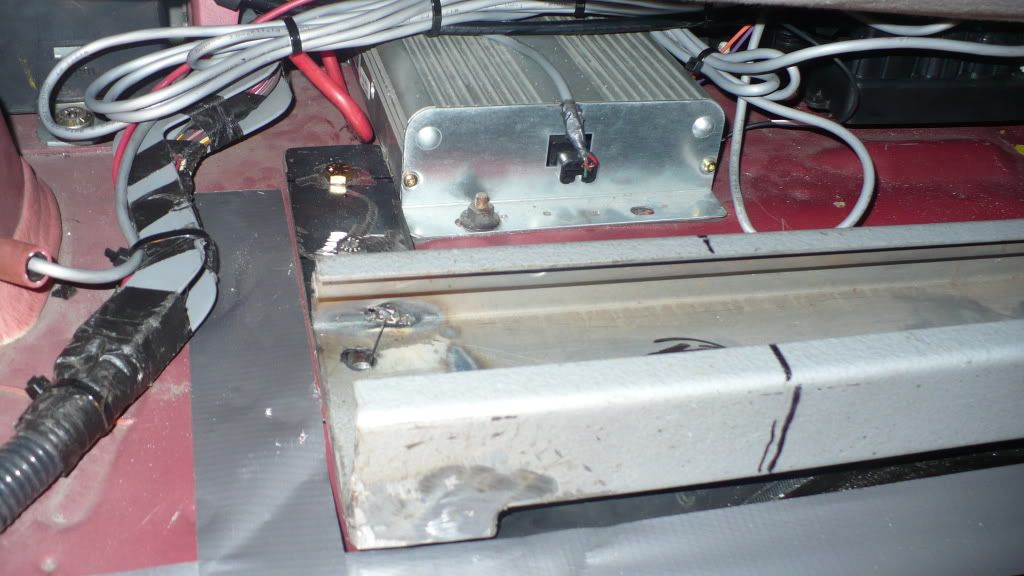
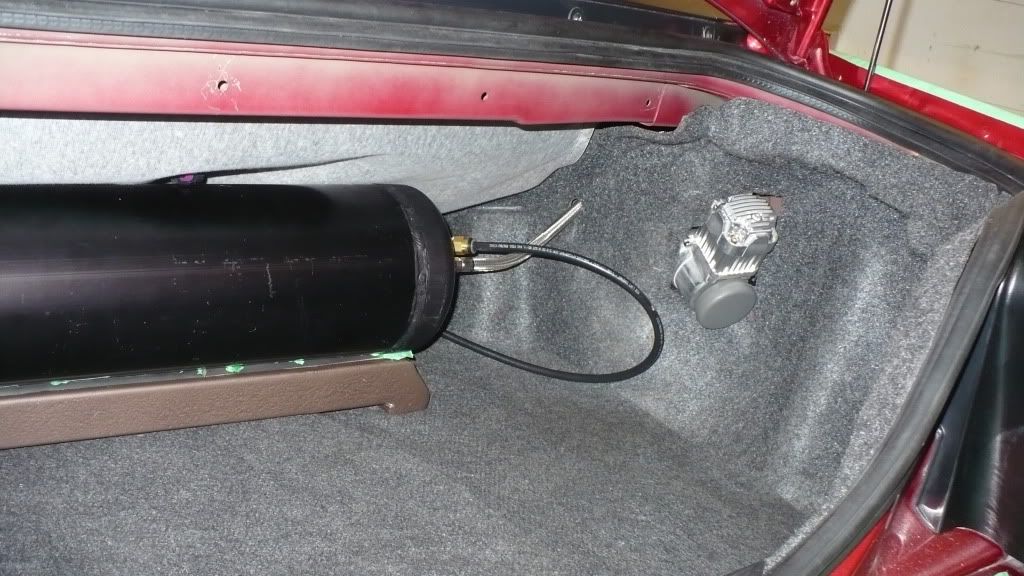
We worked exclusively on the trunk today, and in case you don't remember (or haven't looked), here's where we left off.
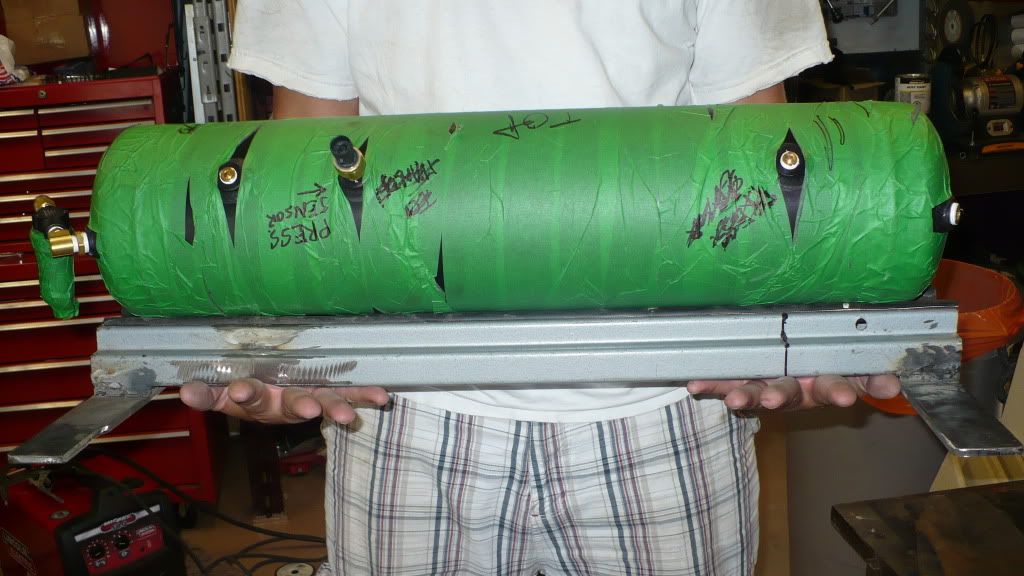
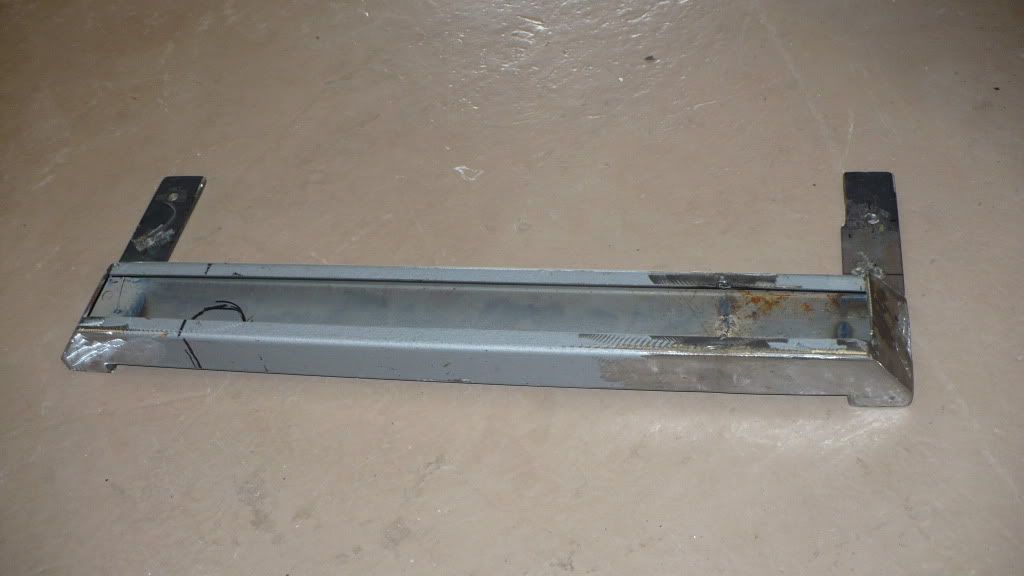
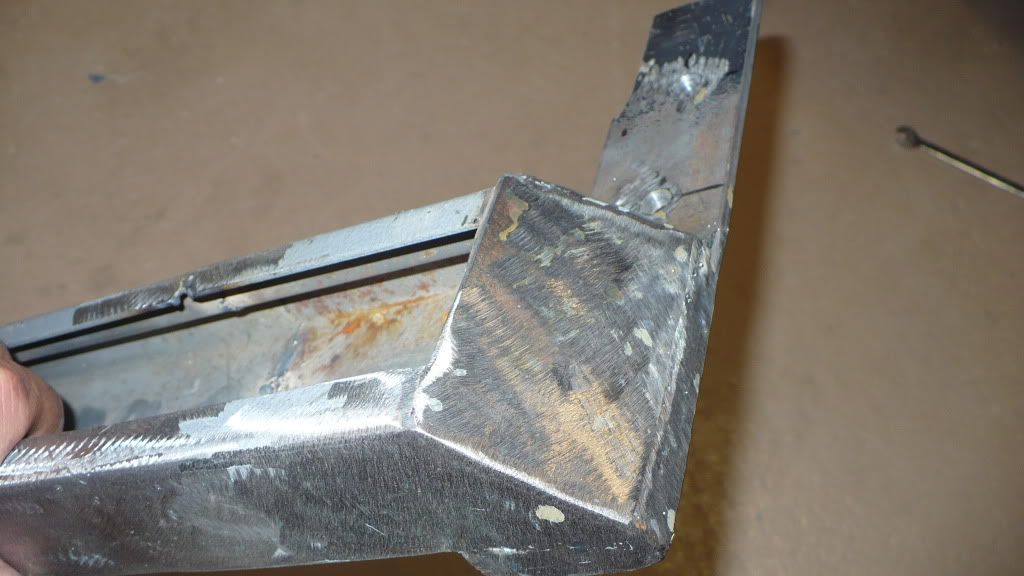
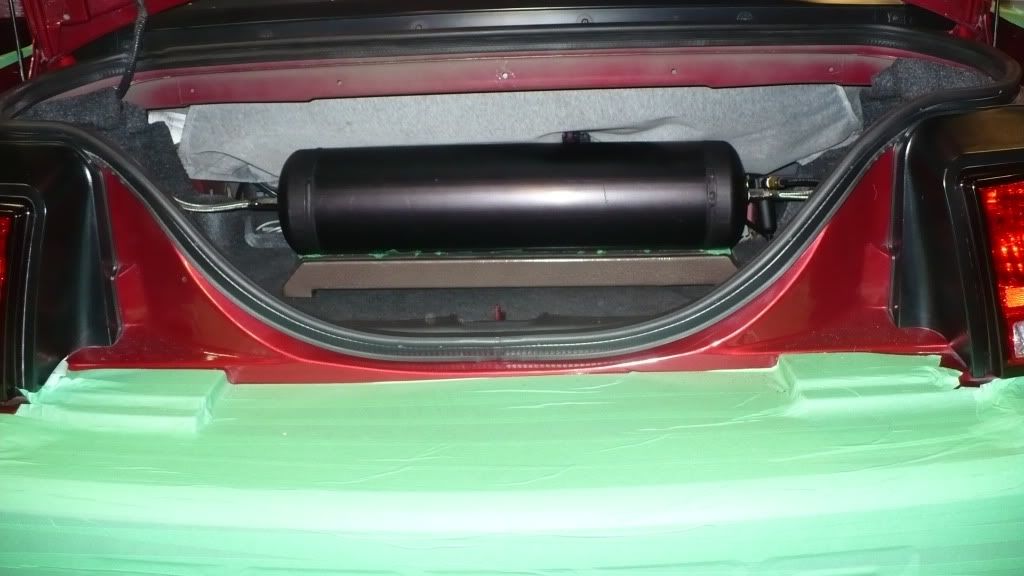
Michel took the bull by the horns and started working on the tank bracket. Here is the first iteration of it, showing the non-visible side then the visible side, then a quick test fit in the car.
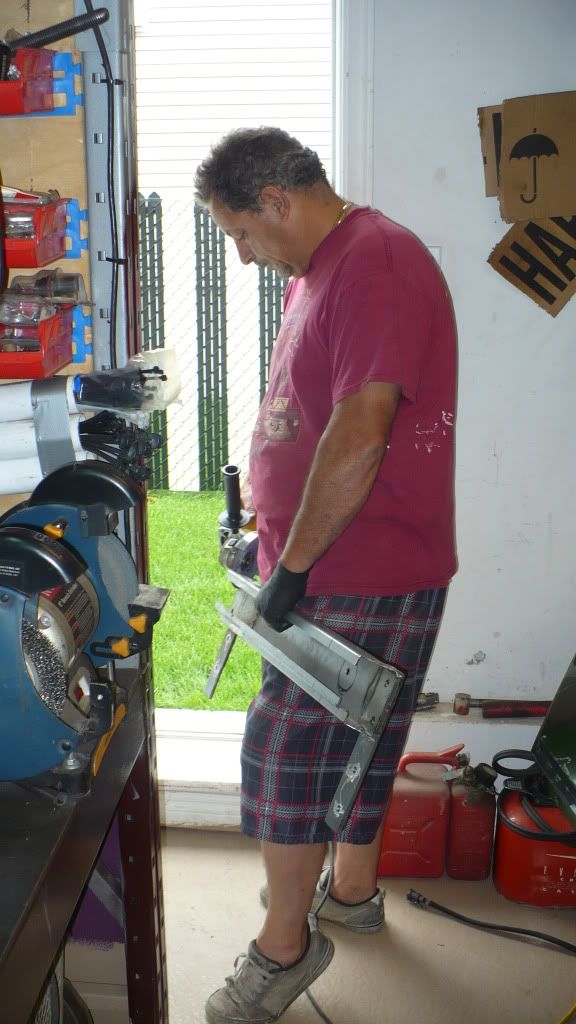
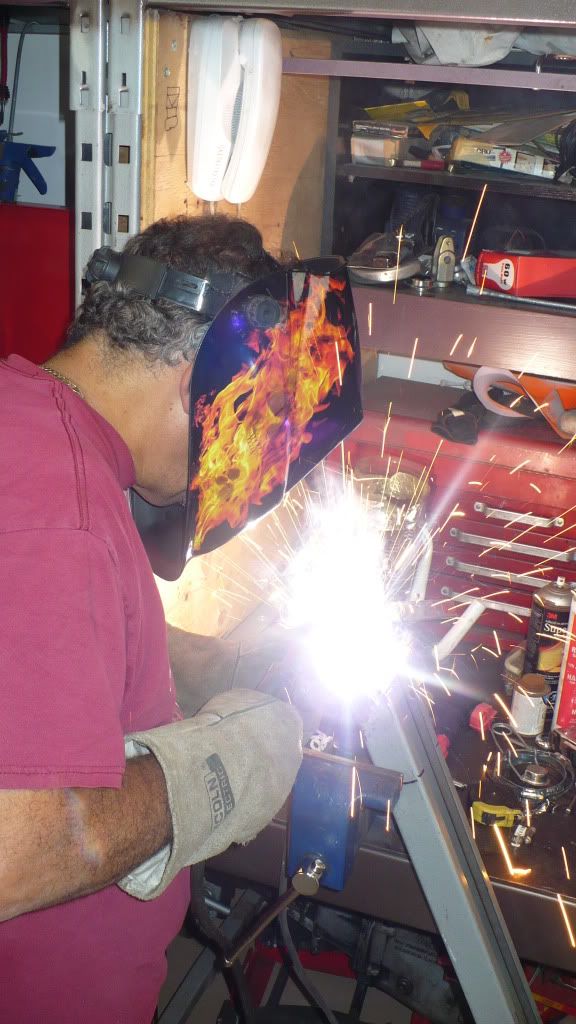
Here's Michel being all nonchalant with the grinder, and throwing down some welds.
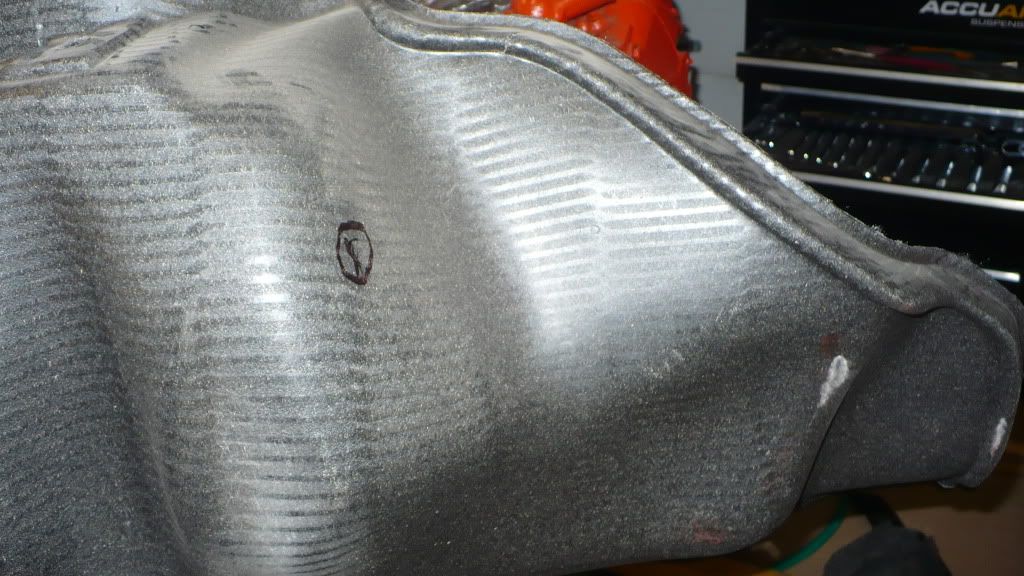
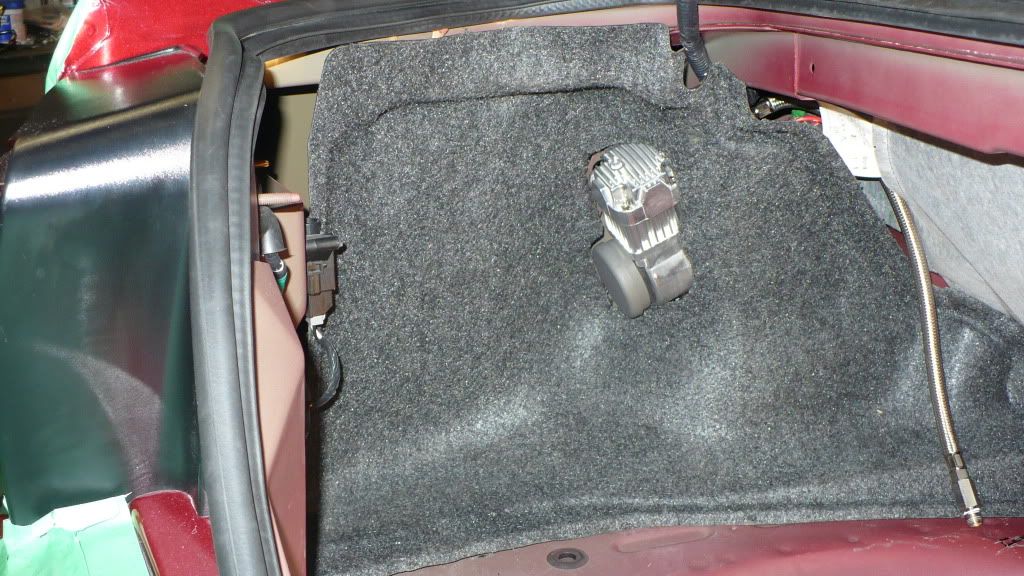
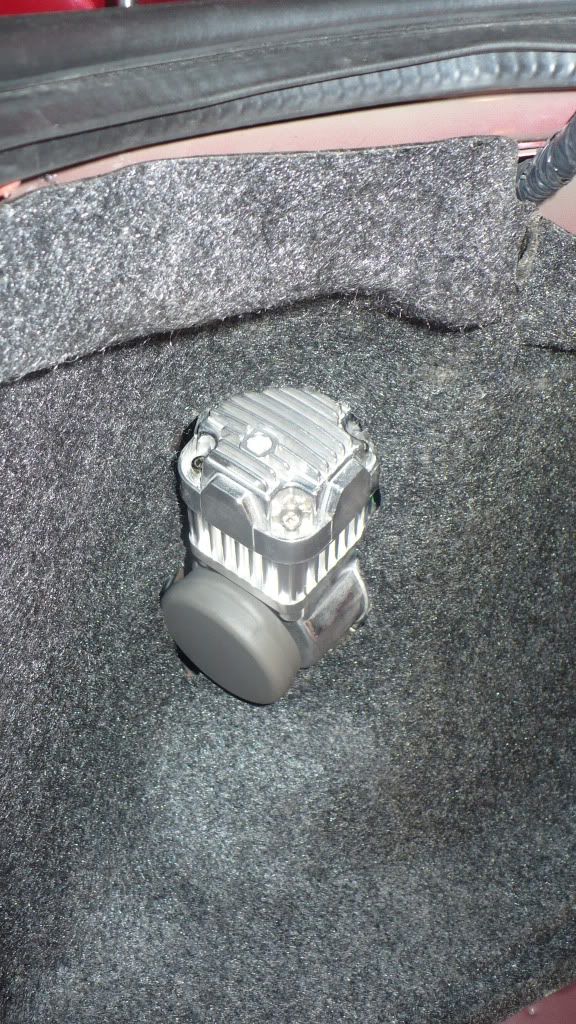
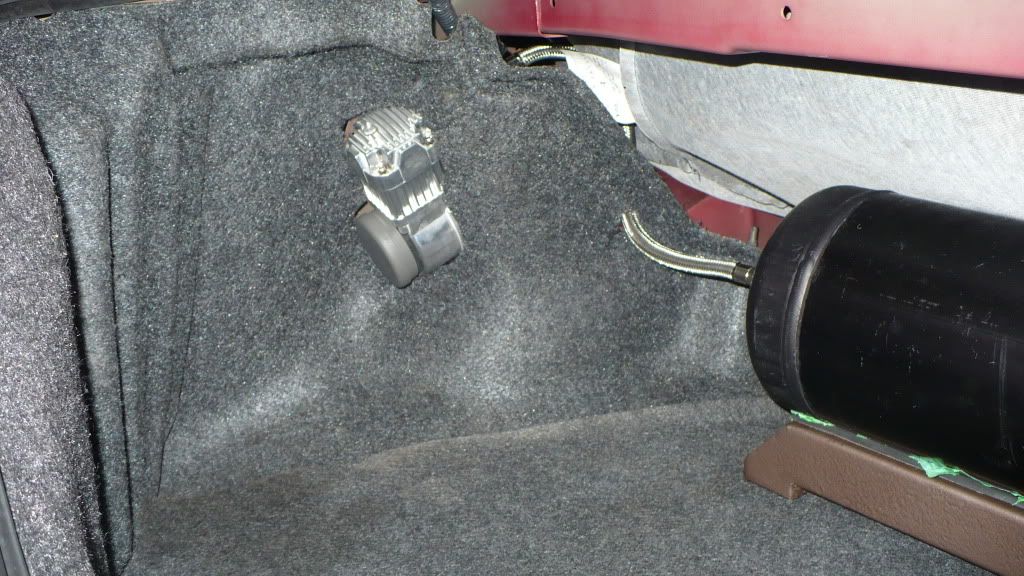
In the meantime, I got cracking on fitting the trunk side panels back in place, cutting holes in them to clear the heads of the compressors. It's a long and tedious process, starting with a black sharpie circle on the backside. Then, little by little, cutting away a small piece, then test fitting, checking where to cut next, removing, flipping the panel around, trying not to forget where to cut, cutting, and reinstalling, and repeating until satisfied.
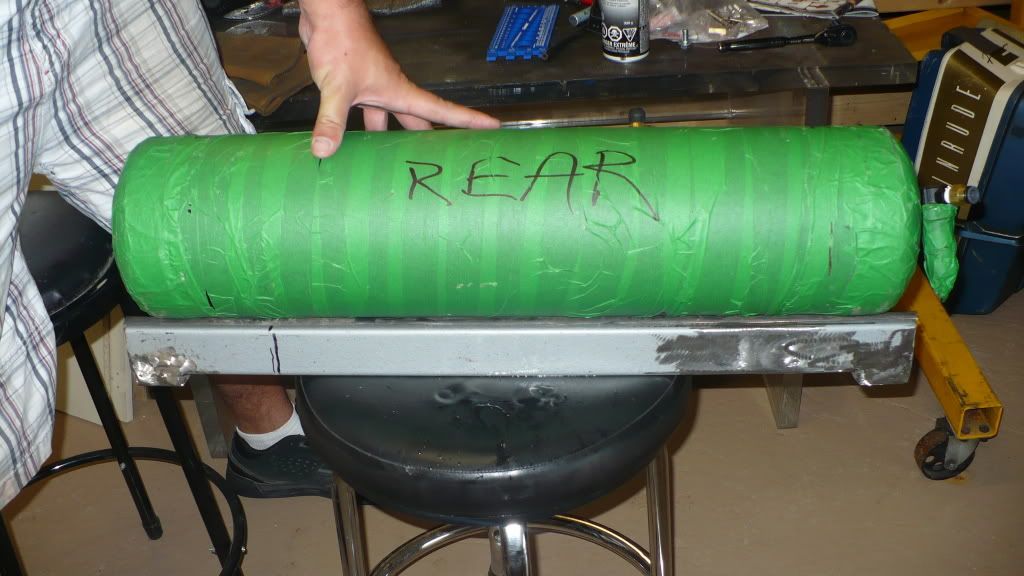
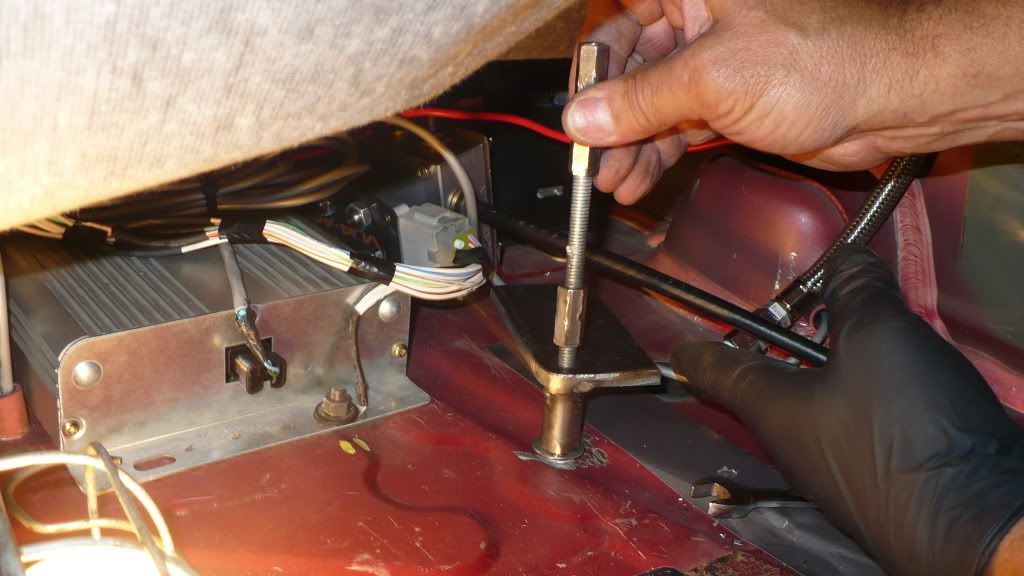
We had come up with an aesthetic upgrade for the tank bracket that Michel worked on in the meantime. We decided to angle the sides in towards the top, making a cleaner appearance. Then, one more test fit in the car. The long tabs on the bracket are necessary because the left side of the bracket is above the spare tire, where it can't be attached to anything. So they go forward, and bolt into the floorpan using the same inserts we had previously used for the ride height sensors. The last pic is the insert tool that Michel had fabricated back when we were doing the sensors. It was getting pretty beat up, but a little grease got us through it.
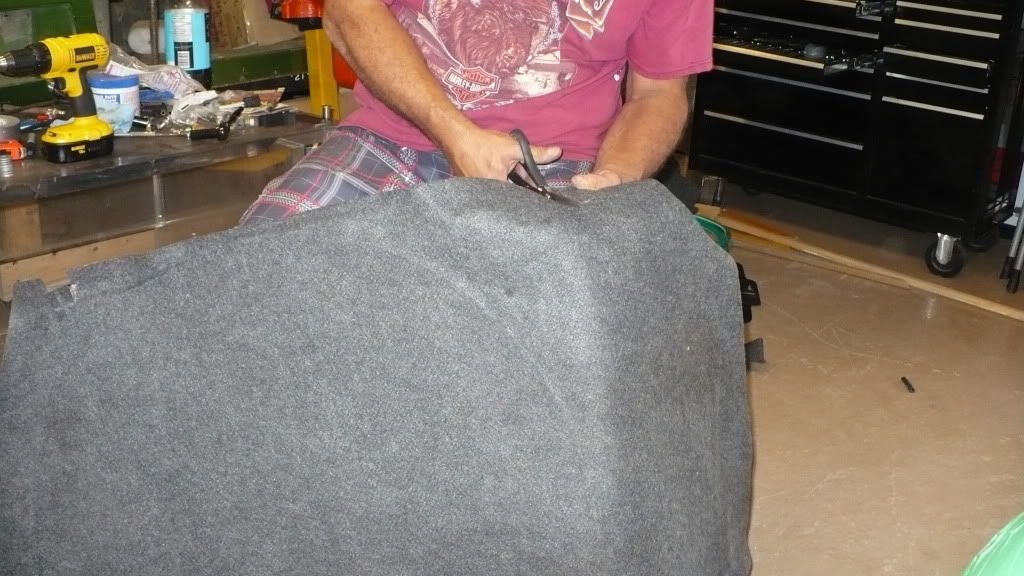
Once the side panels were done, we were able to test-fit the floor carpet. We figured the simplest way to keep it functional was to cut out the areas where the tank brackets bolted to the floor. This way, the carpet is completely removeable, and the spare tire can still be accessed. Putting the carpet back in is simple too, because we decided to put some spacers under the tabs of the tank bracket. This had the added benefit of making the whole tank bracket look like it's floating above the carpet once it's all put together! Pretty cool!
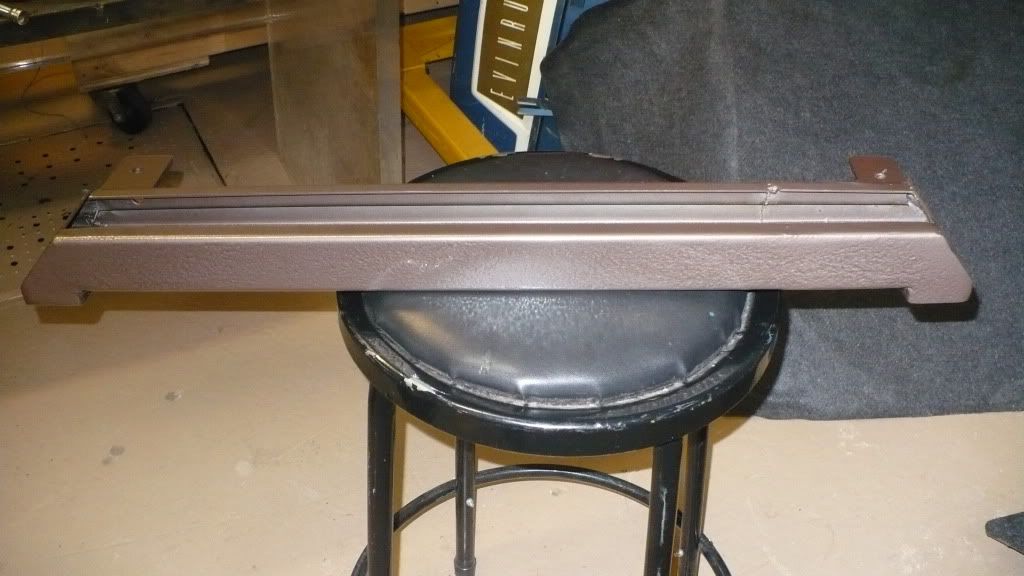
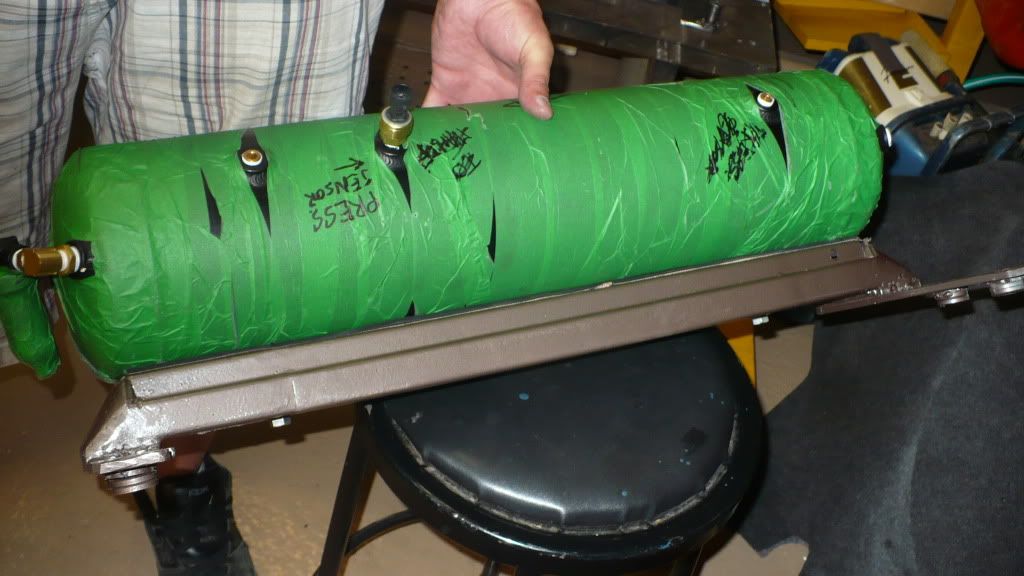
Michel hit the bracket with some hammered-finish paint that was kicking around on a shelf. I'm not sure exactly what I'd like to do in the way of painting the tank and bracket yet, so this will do for now. In the second pic you can see the stacked washers that I mentioned above. Betwheen the tank and the bracket there's an old rubber propane hose that was slit lengthwise and fitted over the bracket. Really simple, but looks pretty good, and protects the tank and maybe even damps some vibrations.
So we got so close, but we called it quits before we could tackle the front trunk panel. It's a tight fit, and we were both too tired to be doing delicate work. So this is where we stopped. You can also see that we drilled holes in the side panels to pass the braided compressor lines through. The left panel took a couple of tries to get the hole in the right spot.
Next time, we'll finish the trunk panel, and find a better solution for the air line that goes from the tank to the manifold. We discovered today that the water trap wasn't doing its job because the water was all in the tank. But in the meantime, I'm happy that the trunk is useable again.
cars looking really good man! "mixed reviews" on mustang forums to say the leasttt, although some are more welcoming of new concepts from time to time.
MontrealRacing.com's staff photographer Jeremy Glover (JagImaging.com) came out today to shoot the Cobra for a Car of the Month feature. I'll be getting copies of the final pics once he's done running them through the wringer, i.e. Photoshop. He said the feature might make it to www.CanIBeat.com as well. Cool!
Phil - the water trap isn't meant to keep moisture out of the tank per say. It's placed between the tank and the VALVE to keep debris and some moisture out of the valve All air valves are susceptible to debris in the system which can cause them to stick open or closed which is what you're trying to avoid with having the filter in between the tank and valve manifold.
Looks good! Definitely a great stance and I bet the ride comfort has improved immensely!
Mike Alexander Director of Marketing Mike@AccuAirCS.com
(877) 247-3696
Phil - the water trap isn't meant to keep moisture out of the tank per say. It's placed between the tank and the VALVE to keep debris and some moisture out of the valve All air valves are susceptible to debris in the system which can cause them to stick open or closed which is what you're trying to avoid with having the filter in between the tank and valve manifold.
Looks good! Definitely a great stance and I bet the ride comfort has improved immensely!
That's what I figured it was, but I don't care too much about having water in the tank. I might put a drain valve on one of the lower fittings next time we take it apart.
Thanks for the compliments guys, I really do appreciate it. If you care to refer back to my original post, you'll see that I don't really care what everyone else thinks of my car because I modify it for my own pleasure. The fact that other people do like it is icing on the cake!
Another quick update: I got the tires changed on the front today. I was watching the technician closely to make sure he didn't mess up my wheels, and also because I wasn't too sure about jacking the car up with the new suspension on it. Turns out there's nothing much to worry about, as long as you're smart about it. If you raise the suspension, turn the key off and then shove something under the car, you gotta think about turning the key on because the ride height resets to a lower setting than it was. It took 1.5 hours, but the guy did a good job, and we weren't in a rush anyways. I showed him the setup, and he thought it was pretty neat. As a side note on the tire that was down to the cord (of which I posted a pic earlier in this thread), There were a couple of spots that I could have pushed a ballpoint pen through! That's how near to a blowout I was. Kinda scary to think about it, but I was conscious of the situation, and I adjusted my driving accordingly.
I received a couple of teaser pics from the photoshoot, but I'm not sure if I have permission to share them or not, so I'll keep them under wraps for the moment. I will say, though, that I think viewers will like what they see. That reminds me, I spotted some serious neck snapping going on while the photoshoot was going down. It was amusing.
 Tweet
Tweet


Comment