If this is your first visit, be sure to
check out the FAQ by clicking the
link above. You may have to register
before you can post: click the register link above to proceed. To start viewing messages,
select the forum that you want to visit from the selection below.
well in that case, you can normally go to a paint supply store and have them mix aerosol cans of color matched paint for about twice the normal cost of a color that likely won't match. if you're good at spraying, nobody would ever know the difference, and its a nice option for people without a ton of funds or access to a booth/ painting equipment.
I would normally wetsand and cut and buff if I wanted a really nice result, but seeing as how I plan on sanding it back off and my prep work was really shoddy, I just skipped it. I think I'll update this thread later down the road when I re-do that panel with step by step pics and descriptions of how I did it.
And really thanks for the input man. I kinda wanted to prove something to myself and encourage the community through this little build deal. If it worked for somebody, totally worth it. (plus its way less embarassing to be seen in now )
Yeah, my friends wife works for the Sherwin Williams Automotive Paint Department... so I got each can for $13 haha. I already have 3 cans that I plan on using. I just don't want to lose the glossyness of stock paint, any defects in the paint are whatever since it's only going to cost me like $50 to do both bumpers.
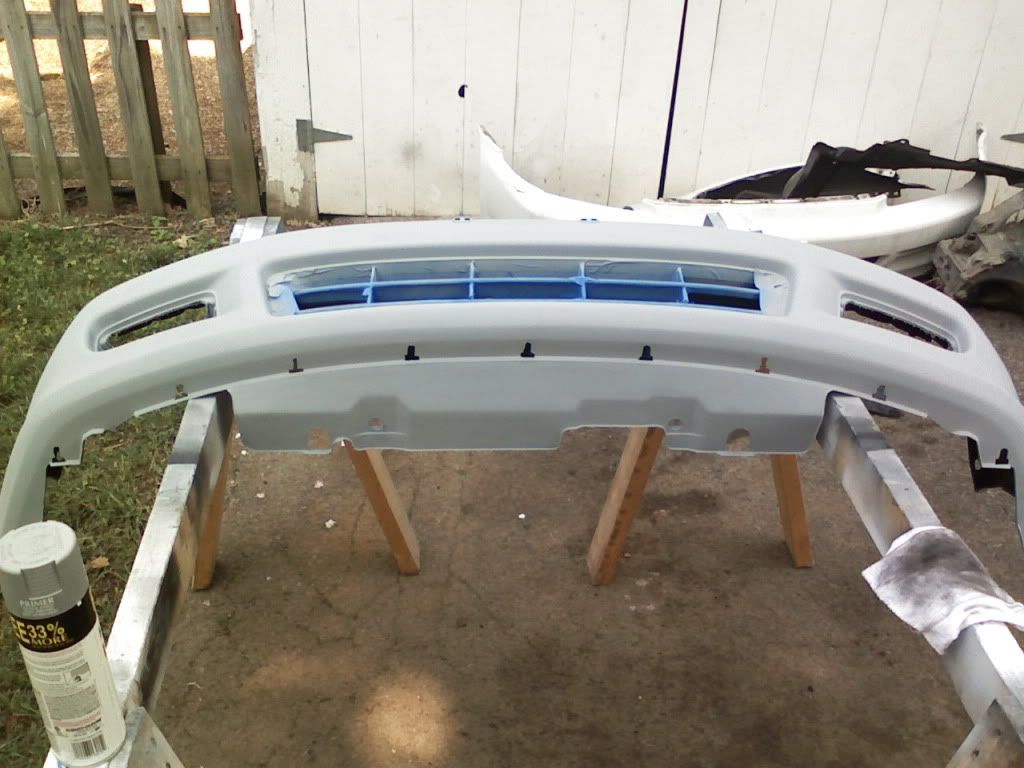
well then its all in the prep work really. any plastic that shows bare needs an adhesion promoter like bulldog or someting similar since paint doesn't typically like sticking to bare plastic. then use a good sandable primer and go over it with like 600 or something. Then spray color and clear over it. after that a 2000 grit wetsand and a good session with cutting and polishing using a rotary buffer will really bring out the finish.
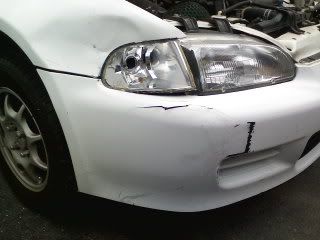
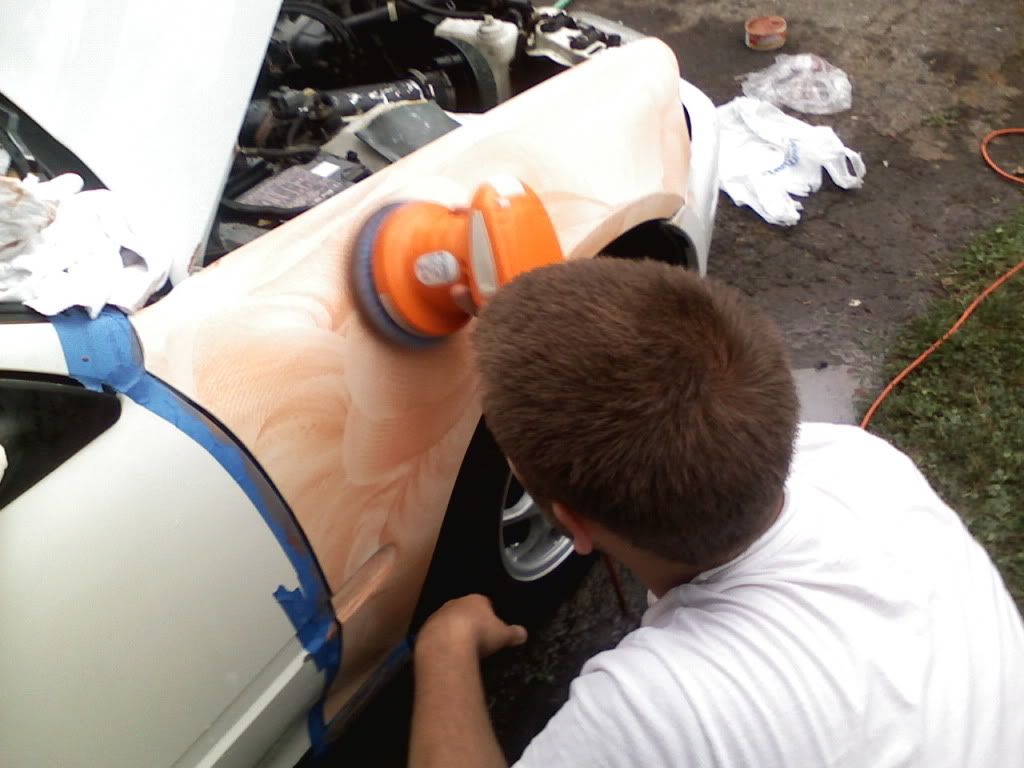
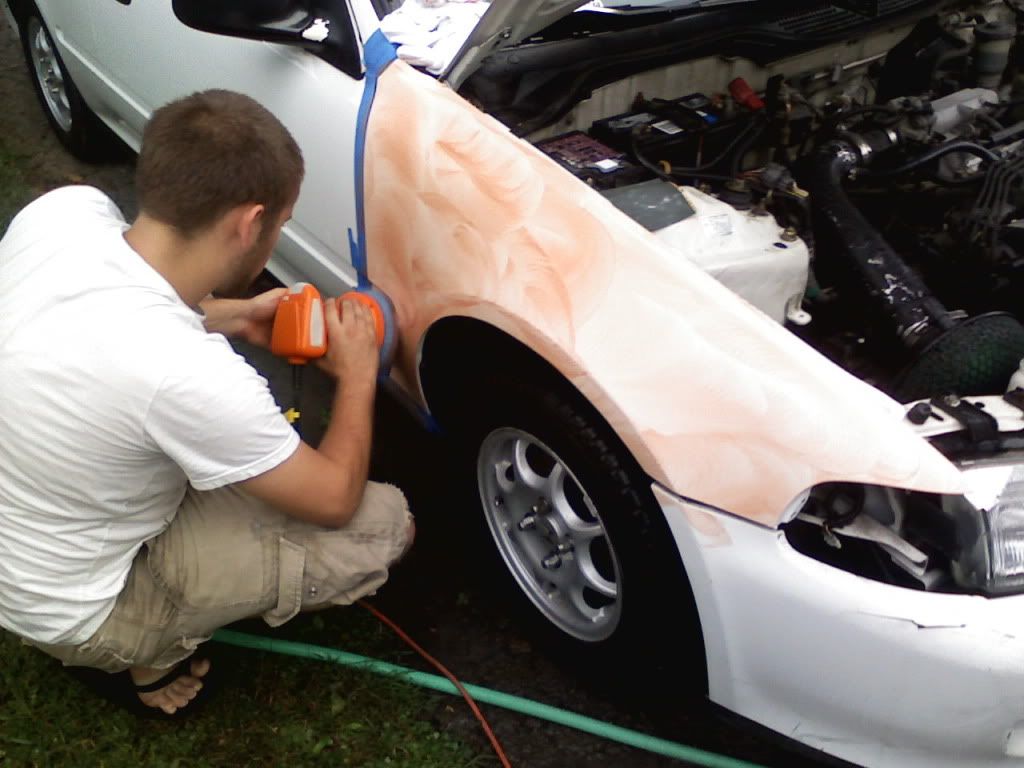
Here's a little blip of what I did with my brother's eg hatch. When he got it it had been ditched by the previous owner and suffered some body damage.
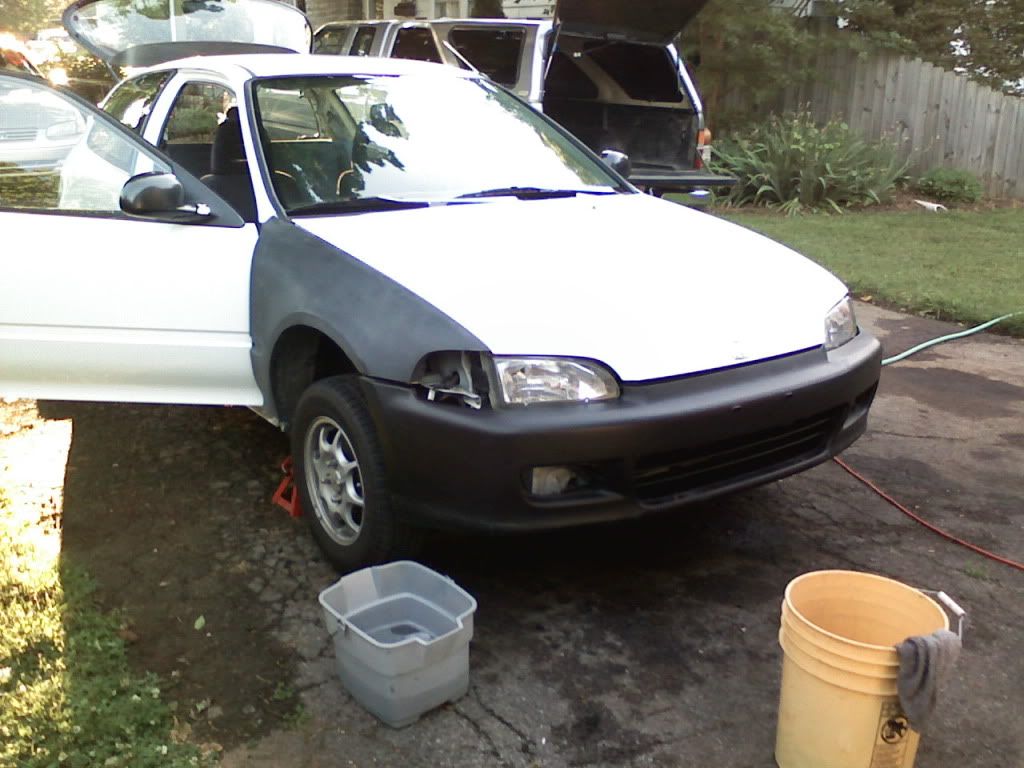
So I sourced him some new parts, which naturally were different colors
Sprayed them with rustoleum white gloss enamel, which luckily matched the white of the car really closely (white is hard to match)
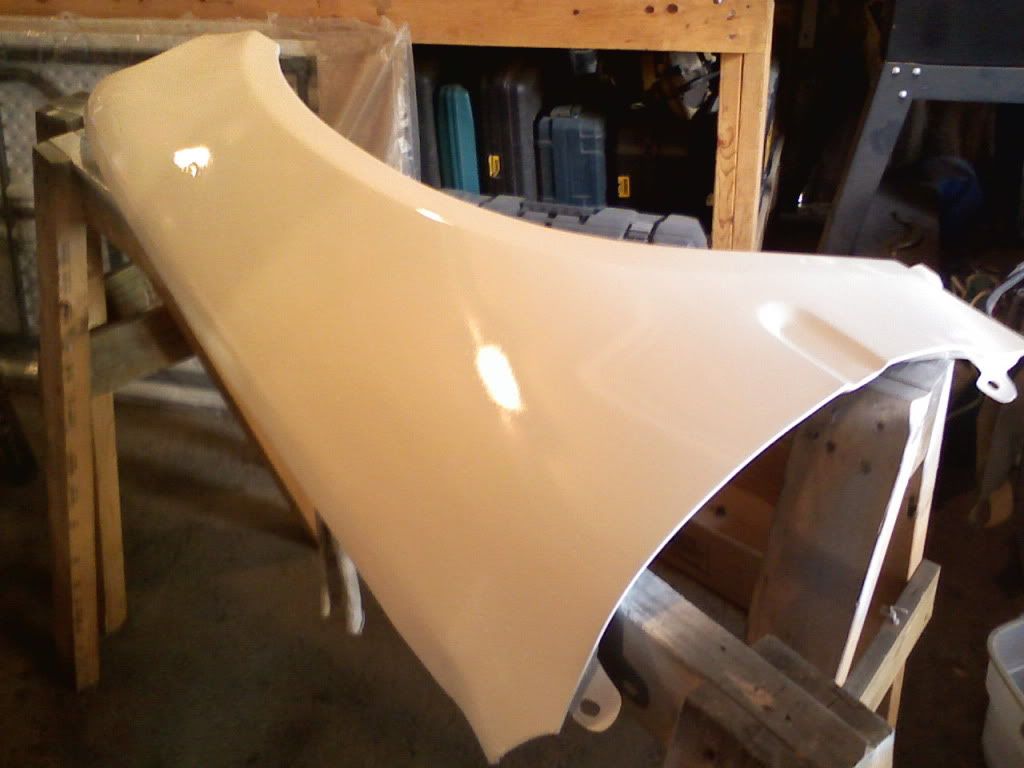
2000 grit wetsand, then used turtle wax buffing compound followed by polishing compound and wax
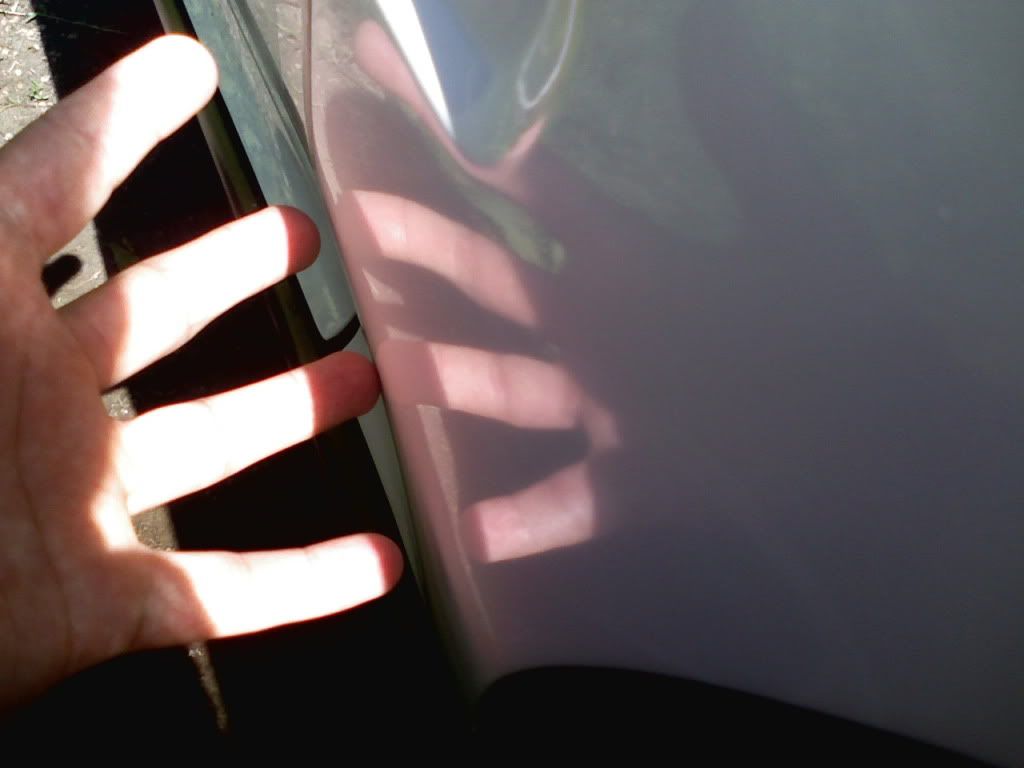
Fully cured, this was the finish I ended up with
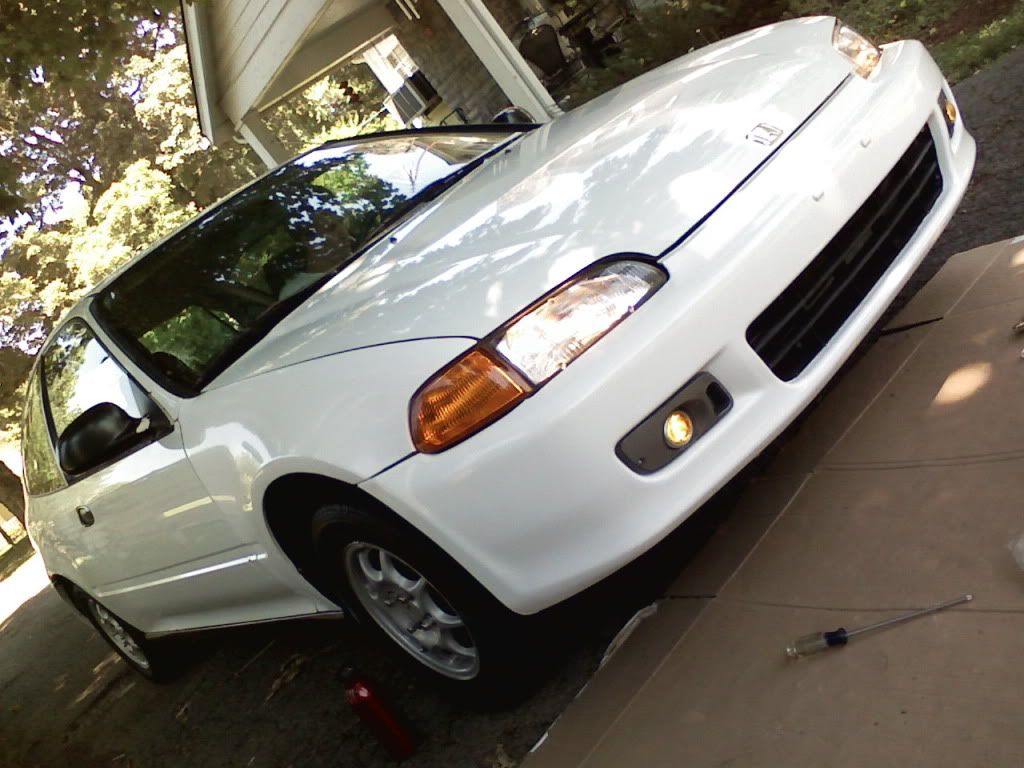
and the end result. The color is just slightly different, but most people never notice unless it's pointed out
like I said, hardly took any at IA, but here's the few I got that day. All crappy, all cell phone pics, all the time. I caught a bunch of people photographing the car but I haven't found them online yet.
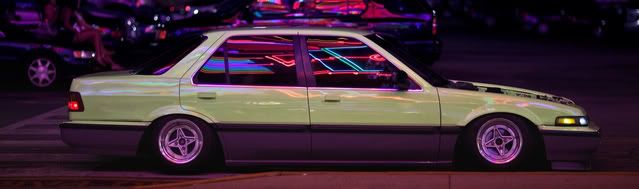
low reference shot
That credit card wouldn't stand up BETWEEN the bolts for the subframe, and the space between the bolts is the high spot there. Low spot was at about one inch to the ground. Just sayin.
and while downtown, since it had no suspension travel whatsoever, I hit a death bump (more like 10,000 of them, but anyway...) and caught air, causing the spring to come unseated in the top hat and bind against the strut, making the car sit funny, hop everywhere, and pull at really weird, random times. I reseated the spring but since I had to drive all the way home and this is my daily and I didn't want to die, I raised it up. *shudders in shame* But Mike literally said it almost wasn't drivable before... and if MIKE said that, I was doing pretty good. Plus I drove it all the way there at that height. The main problem was that it had no travel. I'm going to amend that problem and get it back down at some point.
 Tweet
Tweet


 )
)
Comment