 Tweet
Tweet
We teased ‘em the day before Tuner Galleria. We even had them in a shot in our post-Galleria write-up. But now you can see the whole deal, right here.
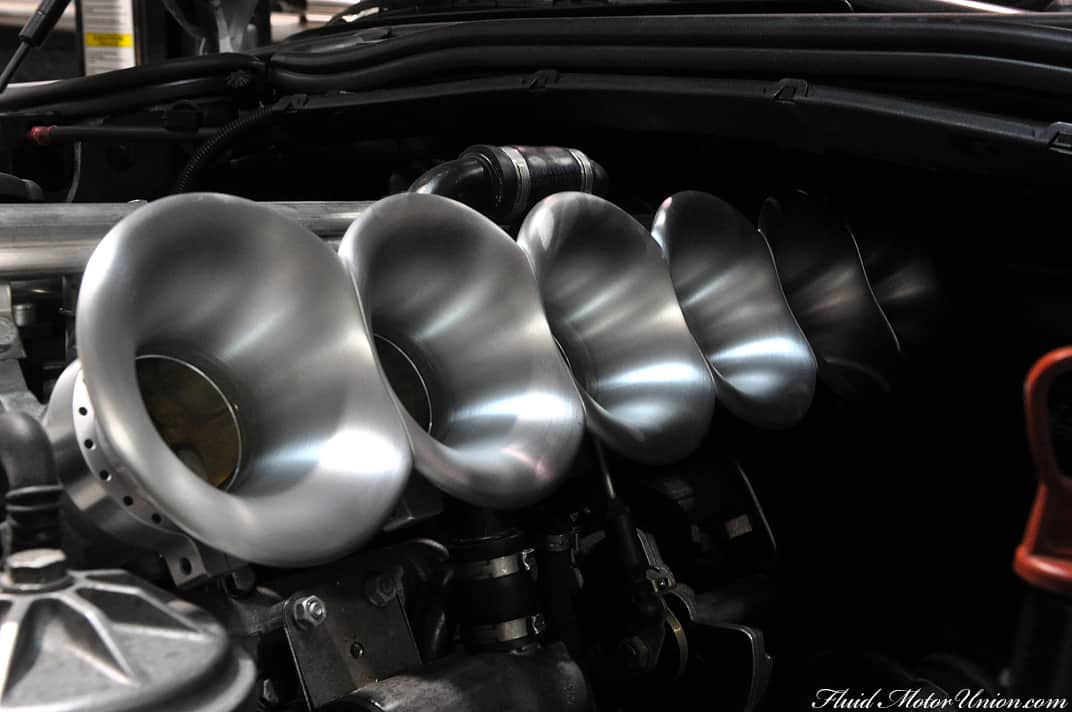
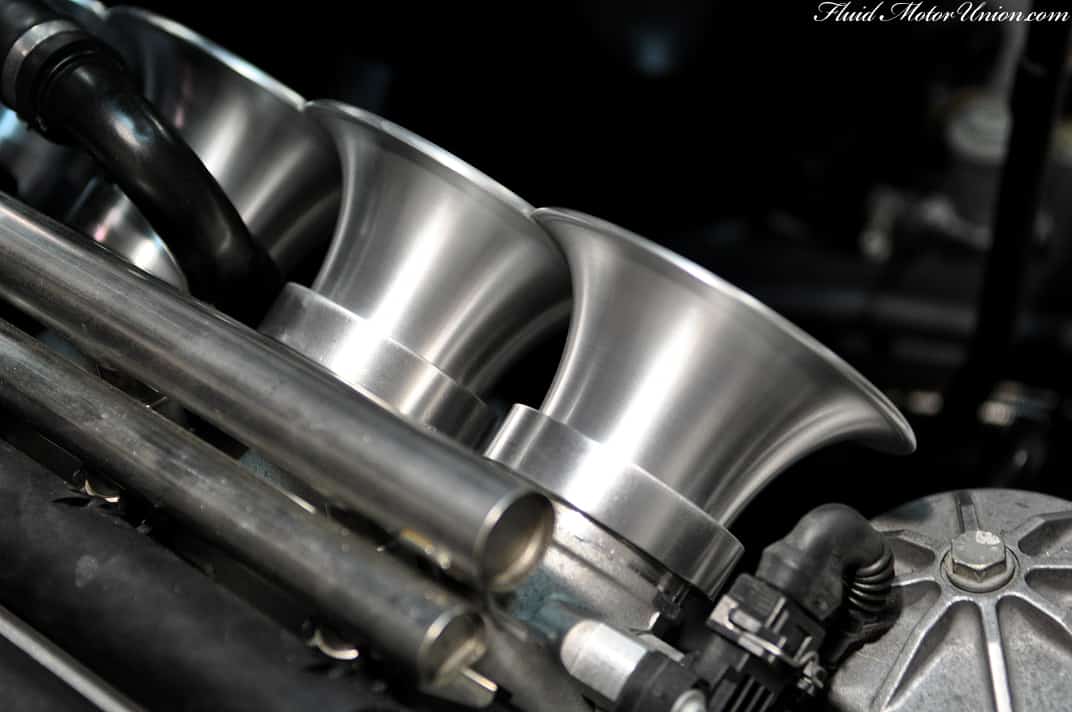
The new Fluid MotorUnion E46 M3 velocity stacks are decidedly the most ostentatious piece of equipment that we’ve put out lately. The main features of the velocity stack setup (just the stacks, without the extra rigging for the nitrous injection) are the aluminum stacks and the clamps. Having used various thin metal screw/operated clamps on previous versions of our velocity stack setups, we decided to approach this from a new direction. Previous clamps were flimsy, tough to position right and since they’re universal, don’t provide for the cleanest or most professional-looking fit. We sidestepped all that by creating a new style of clamp to use specifically for this engine. The round clamps have a single point of tightening on the end and are solid all-around, and they look more like part of the stack than something used to hold the stack in place. The two pictures that follow are of the velocity stacks and clamps, without all the extra nitrous rigging:
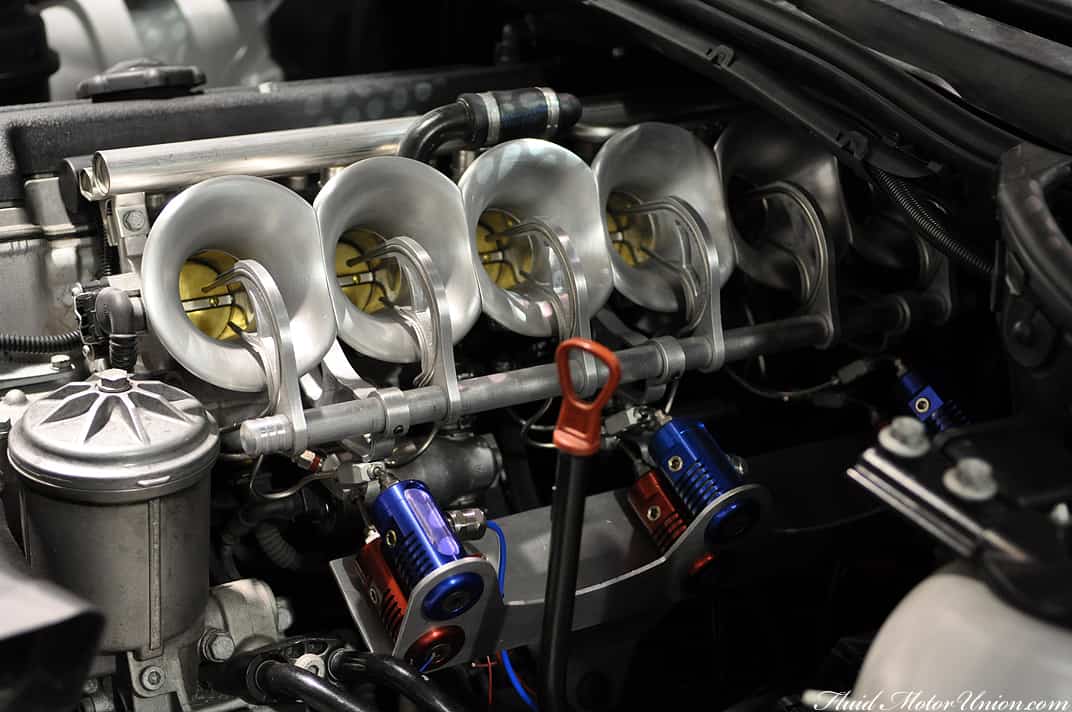
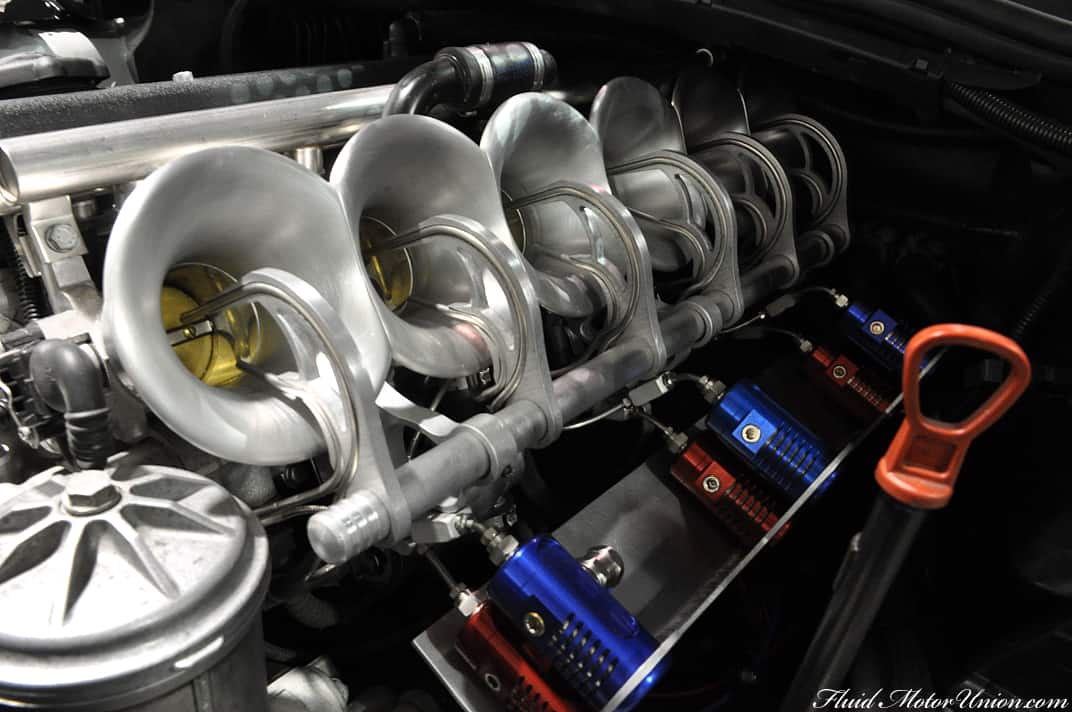
This setup below not only utilizes our new stack and clamp designs, but also a set of arms meant to deliver a wet shot of nitrous directly into the stacks when the butterfly valves are wide open. Putting all these pieces into the same engine bay creates a metallic jungle lurking underneath the hood, ready for any adventurous person to lean in and start exploring. And at first glance, it seems that there’s an awful lot going on. And you’re right, there is.
The tray for holding the nitrous setup is also made of aluminum, as are the arms pointed into the stacks. All these pieces were cut to our specifications in-house on the CNC mill, and run through the vibratory finisher to remove any sharp edges. The hard lines for the nitrous and gas were too small for a brake line bender, so we spent time (and many swollen fingers) manually bending the lines to fit in the exact positions we needed them; to make matters even more difficult, for a setup like this to operate correctly, each individual hard line has to be of equal length, making the routing an exercise in patience.
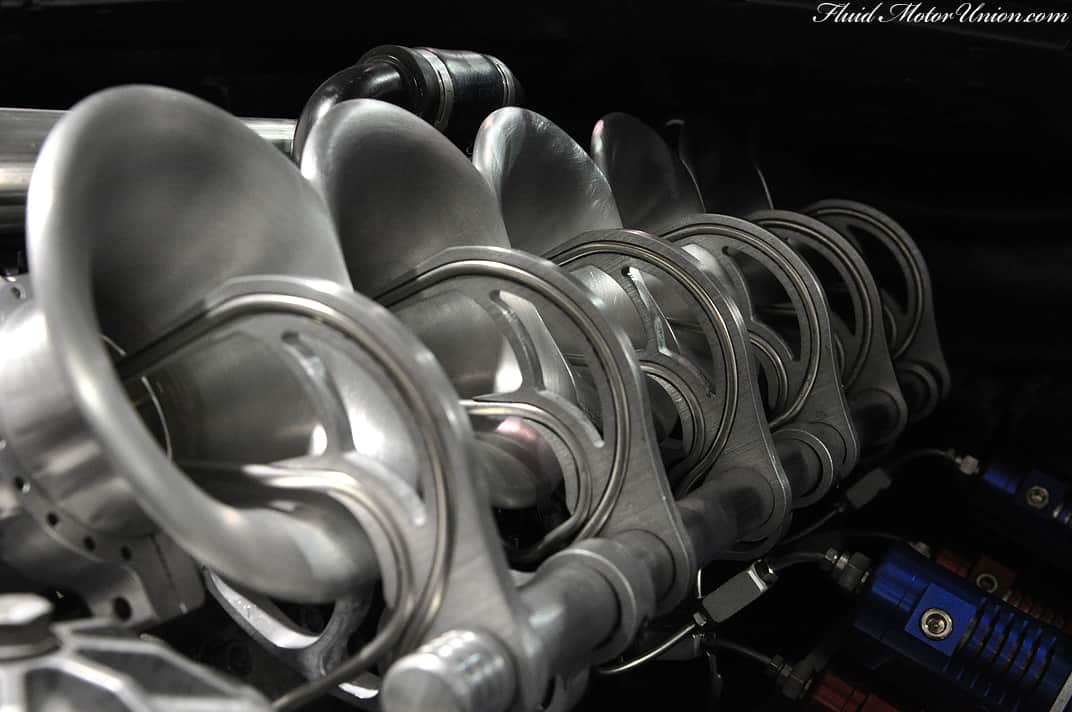
Despite all the frustration in assembling such a creation, stepping back to look at it after the build makes us realize that it was totally worth it. Here are the glamour shots, no teasing this time:
At this point, it’s only natural to offer up props to the company that helped us make this whole setup possible - Wizards of NOS, based out of the UK, supplied us with the nitrous equipment, and it included everything we needed for operation (including the nitrous itself, which came in an enclosure the size of an acetylene tank!). Knowing all the science behind this beautiful design makes us appreciate it even more, so much in fact that we want to replicate as many of these as we can.
If you’d like to inquire about purchasing a set of these stacks (with or without the nitrous rigging), feel free to shoot your humble narrator an e-mail, or PM me through the SW website.
The new Fluid MotorUnion E46 M3 velocity stacks are decidedly the most ostentatious piece of equipment that we’ve put out lately. The main features of the velocity stack setup (just the stacks, without the extra rigging for the nitrous injection) are the aluminum stacks and the clamps. Having used various thin metal screw/operated clamps on previous versions of our velocity stack setups, we decided to approach this from a new direction. Previous clamps were flimsy, tough to position right and since they’re universal, don’t provide for the cleanest or most professional-looking fit. We sidestepped all that by creating a new style of clamp to use specifically for this engine. The round clamps have a single point of tightening on the end and are solid all-around, and they look more like part of the stack than something used to hold the stack in place. The two pictures that follow are of the velocity stacks and clamps, without all the extra nitrous rigging:
This setup below not only utilizes our new stack and clamp designs, but also a set of arms meant to deliver a wet shot of nitrous directly into the stacks when the butterfly valves are wide open. Putting all these pieces into the same engine bay creates a metallic jungle lurking underneath the hood, ready for any adventurous person to lean in and start exploring. And at first glance, it seems that there’s an awful lot going on. And you’re right, there is.
The tray for holding the nitrous setup is also made of aluminum, as are the arms pointed into the stacks. All these pieces were cut to our specifications in-house on the CNC mill, and run through the vibratory finisher to remove any sharp edges. The hard lines for the nitrous and gas were too small for a brake line bender, so we spent time (and many swollen fingers) manually bending the lines to fit in the exact positions we needed them; to make matters even more difficult, for a setup like this to operate correctly, each individual hard line has to be of equal length, making the routing an exercise in patience.
Despite all the frustration in assembling such a creation, stepping back to look at it after the build makes us realize that it was totally worth it. Here are the glamour shots, no teasing this time:
At this point, it’s only natural to offer up props to the company that helped us make this whole setup possible - Wizards of NOS, based out of the UK, supplied us with the nitrous equipment, and it included everything we needed for operation (including the nitrous itself, which came in an enclosure the size of an acetylene tank!). Knowing all the science behind this beautiful design makes us appreciate it even more, so much in fact that we want to replicate as many of these as we can.
If you’d like to inquire about purchasing a set of these stacks (with or without the nitrous rigging), feel free to shoot your humble narrator an e-mail, or PM me through the SW website.


 " - Stretchd8
 " - FittedDownLow

Comment