 Tweet
Tweet
Originally posted by Graphitemk6
View Post
-
The stock wheels? They are kinda rough cast, that would take a ton of work to polish those. Plus they are place holders for now, I want some RS, Alpinas, or Weds. -
Did some more leather cleaning and dying last night. I thought it would be fun to do a 50/50 on one of the seats, so I taped it off and only cleaned and dyed one half. Check out the video below.
 Untitled by Nick Wood, on Flickr
Then I finished cleaning and dyeing the other half, the finished seat is on the left.
 Untitled by Nick Wood, on Flickr
And a before and after video with the finished seat next to the seat I had not cleaned.
 Untitled by Nick Wood, on Flickr
It looks like it matches to me.
 Untitled by Nick Wood, on Flickr
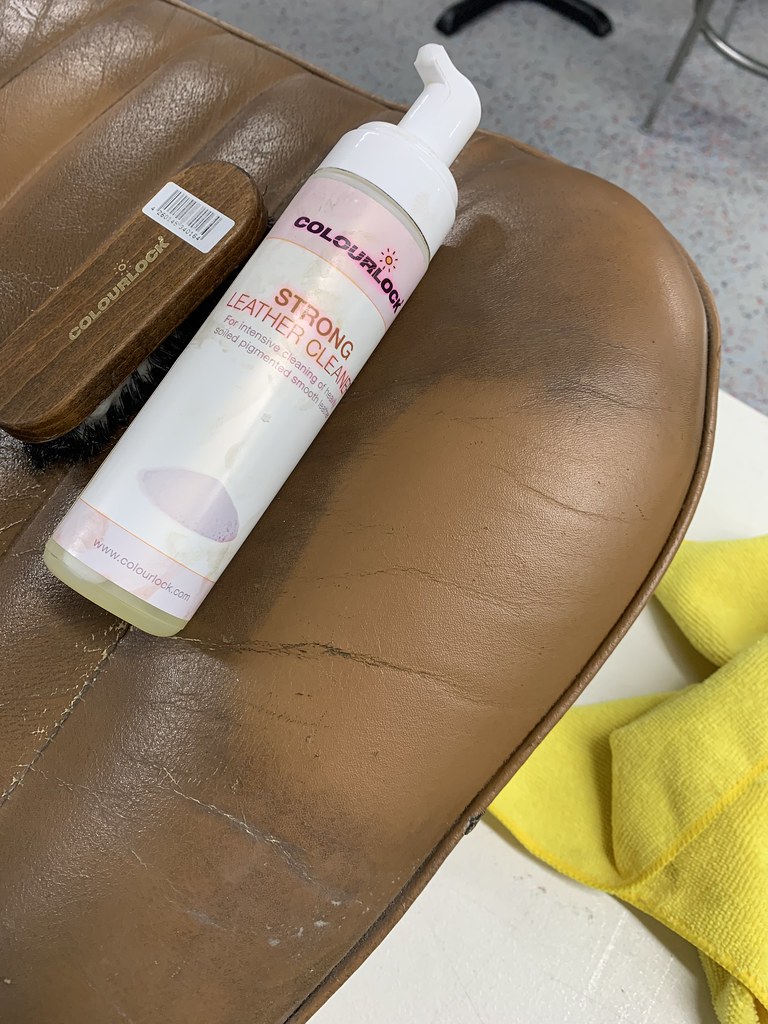
And then I cleaned the other seat with ColourLock strong leather cleaner and their brush. I thought the brand new white towel would be make for a nice example.
 Untitled by Nick Wood, on Flickr
I think they were a little dirty.

 Untitled by Nick Wood, on Flickr
Then I feathered the dye into the rest of the seat back. The color looks different due to lighting.
 Untitled by Nick Wood, on Flickr
Here is a shot with the rear seats swapped and the passenger front seat, just to show that the color is correct.
 Untitled by Nick Wood, on Flickr
I just need to put the leather shield on them tonight and then wait for the car to come back from paint so I can do the drivers seat.Comment
-
Small update. We picked up some wheel center caps for the factory 14" wheels.
 Untitled by Nick Wood, on Flickr
Naturally I had to clean them. I started with polishing the metal. Quick wipe with IPA and then a hand polish with Nuvite "C" and "S." Here is a little before and after.
 Untitled by Nick Wood, on Flickr
Then I moved on to the roundels. Started with a hand compound. Before.
 Untitled by Nick Wood, on Flickr
After compound, before a hand polish with Sonax.
 Untitled by Nick Wood, on Flickr
And the finished product after one last IPA wipe down and sealed with Jescar Powerlock. I could have sanded them and machined polished to get a little better finish but I think this is good enough.
 Untitled by Nick Wood, on Flickr
I know, super lame but I hope to have some painted car pics soon.Comment
-
God this is going to be beautiful when y'all are done.Ol Dirty Bastard - RIP
Photo by Alex Dooley
2016 Ducati Scrambler, 2015 Subaru ImprezaComment
-
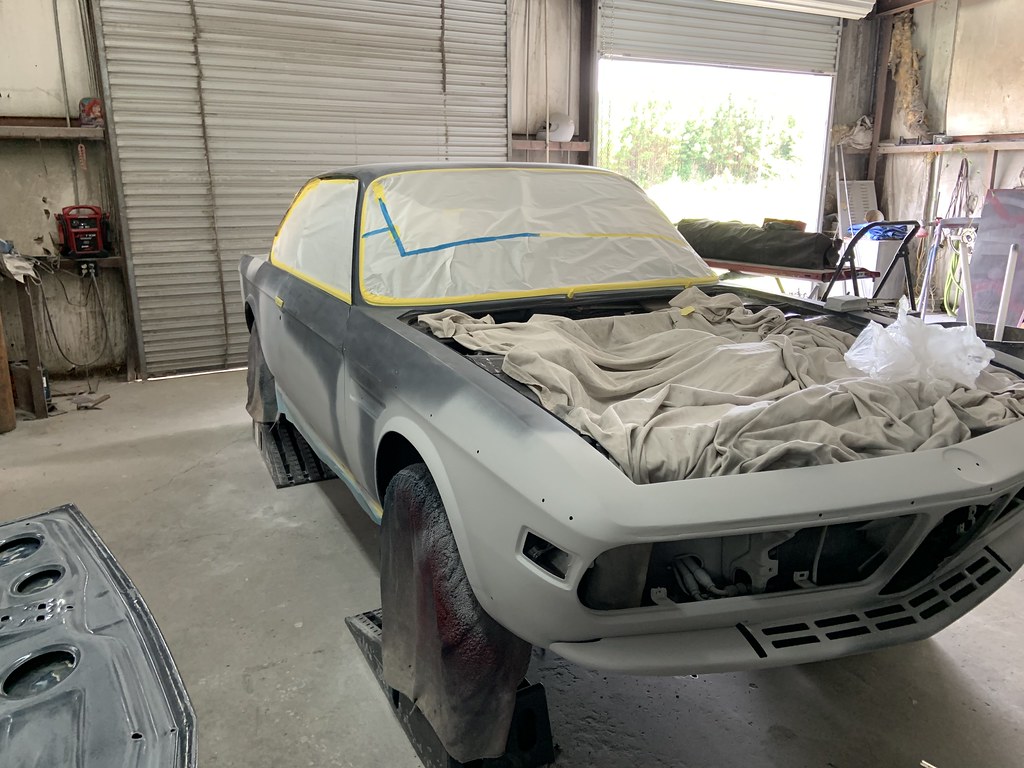
Its been pretty slow going lately. I dont know how body shop guys always have an emergency of some sort but they do. A couple weeks ago he got the car primed and block sanded. Excuse the photos, I havent been able to get away from work to check it out so my dad has been snapping the pics.
 Untitled by Nick Wood, on Flickr
The front end repair came out pretty good.
 Untitled by Nick Wood, on Flickr
 Untitled by Nick Wood, on Flickr
There have not been updates since then, but my dad went by yesterday and the car was in the booth and the textured under coating had been applied.
 Untitled by Nick Wood, on Flickr
There should be a fresh coat of Nachtblau on it now, and the clear should be drying.
 Untitled by Nick Wood, on Flickr
More updates soon. I cant wait to get it back home.Comment
-
I went in person to check on the car last night and its looking good. He going to button some stuff up and I hope to have it back home this weekend to start putting it back together.
 Untitled by Nick Wood, on Flickr
 Untitled by Nick Wood, on Flickr
I was really impressed with how well the front end repair turned out.
 Untitled by Nick Wood, on Flickr
Stay tuned, more to come soon.
 Untitled by Nick Wood, on Flickr
Comment
-
front corner repair and paint turned out great! the work on the dash is incredible.Comment
-
This looks so good, can't wait to watch the progress on the assembly."You could roll an E30 in a BMW showroom today and people would think:
Well, they finally got the 1 series right!"
3.0 L e30 ground up buildComment
-
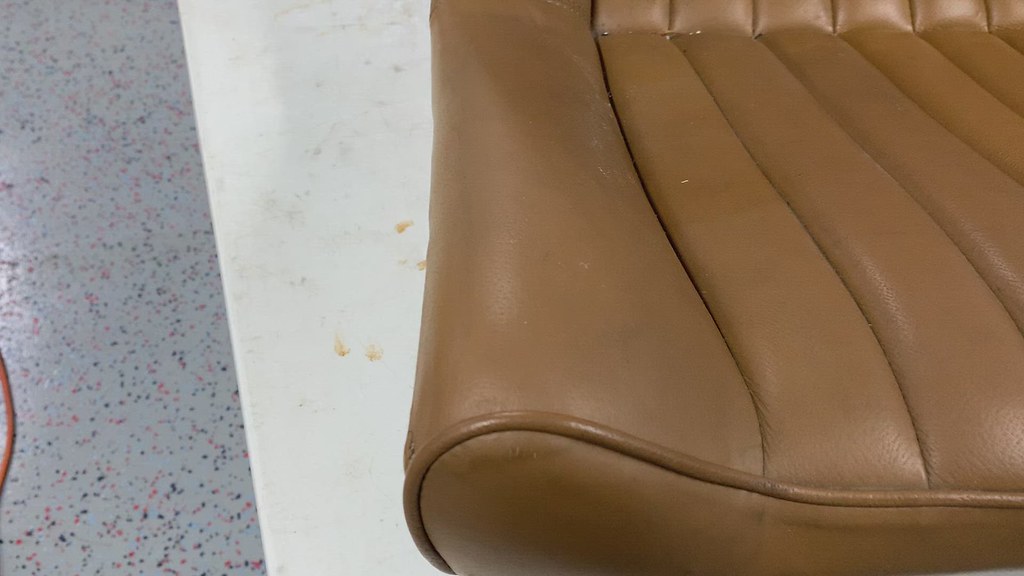
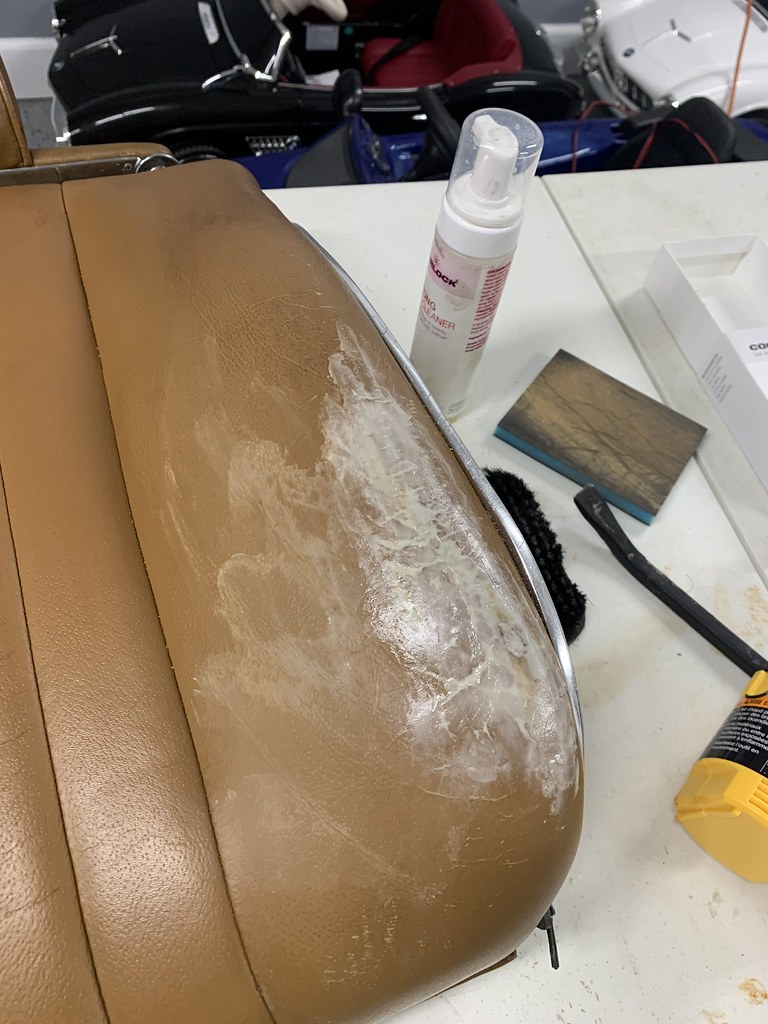
We moved the e9 to a corner of the shop where it would be out of the way, but we could still work on it. Since its not going to move for a little while I started to work on the drivers seat. Its in pretty bad shape compared to the others but I think I can fix it up. It will be passable. I did a little test spot with the brush and cleaner, pretty encouraging results.
 Untitled by Nick Wood, on Flickr
The cleaning alone helped a ton.
 Untitled by Nick Wood, on Flickr
There were some bad creases and small tears so I played with some filler I had from the kit I used on my M3 seats. Put a couple light coats of the filler on, dried it with the heat gun and sanded smooth. After that I put a few coats of dye on. I am pretty happy with the results.
 Untitled by Nick Wood, on Flickr
After that, I started on the seat back and the bolster damage. This is going to take a lot more filler and sanding. I am not sure that I can make this passable, but our interior guy said he could replace the panel and I could dye it to match. Since that is possible I figured Id give it a shot.
 Untitled by Nick Wood, on Flickr
Comment
-
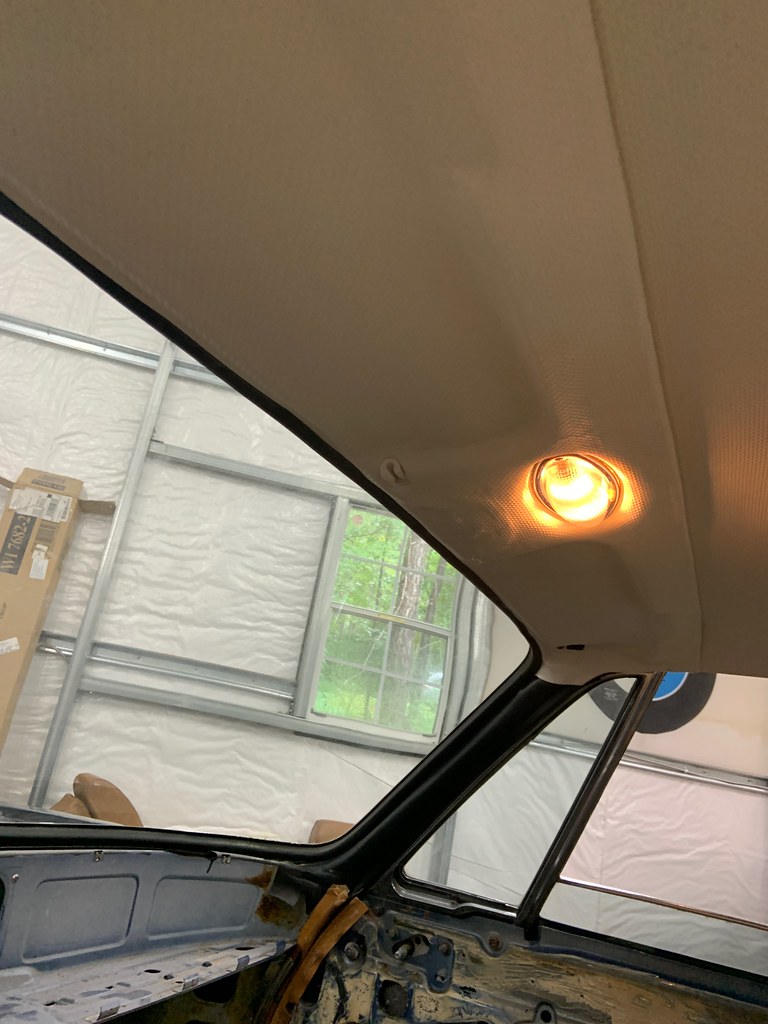
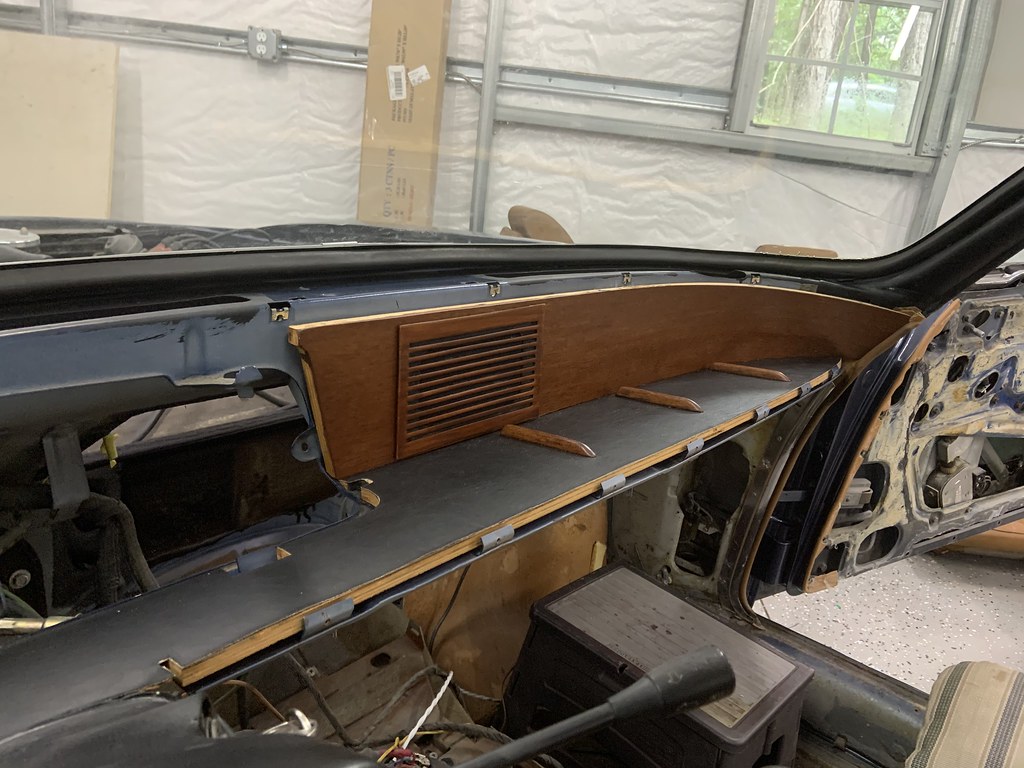
My dad buttoned up the headliner and then started on the wood dash install on the e9.
 Untitled by Nick Wood, on Flickr
 Untitled by Nick Wood, on Flickr
 Untitled by Nick Wood, on Flickr
This came out so nice. Especially for someone that that had never really veneered anything before.
 Untitled by Nick Wood, on Flickr
Comment
-
From the "it aint stupid if it works" files, my dad came up with a way to try to break the rusted headrest loose. (Yes everything really does rust on these cars.)
 Untitled by Nick Wood, on Flickr
But it technically hasnt worked yet, so its stupid. We sprayed some "panther wiz" as my dad calls it into the tube and he is letting it soak, we will try again today. While the PB blaster was doing its thing my dad put the chrome trim on the dash.
 Untitled by Nick Wood, on Flickr
 Untitled by Nick Wood, on Flickr
And after that he got started on the dash.
 Untitled by Nick Wood, on Flickr
I will probably spend some time sanding on compounding the paint this weekend. I dont know why, its just paint, but I am nervous about it.Comment
-
Well, we got the headrest out of the seat. It was a combination of the contraption my dad made and hitting the stuck post with an air hammer to loosen up the rust. Yes, everything in these cars rusts.
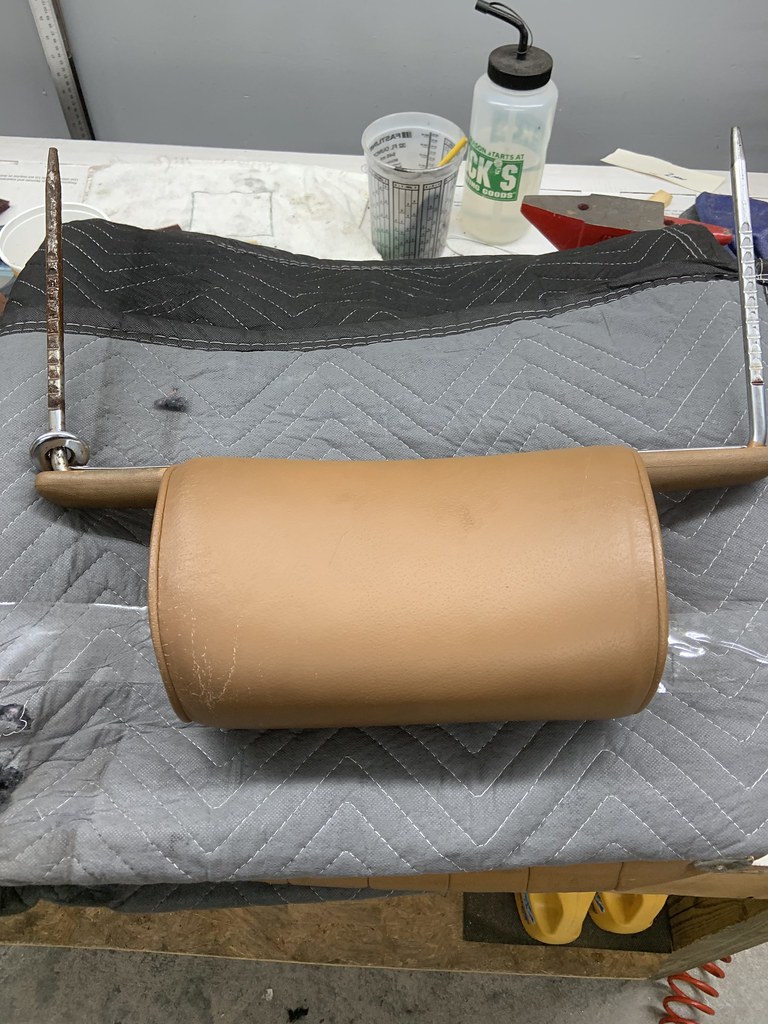 Untitled by Nick Wood, on Flickr
I took the seat back home and got to work. I did a little more sanding to smooth out where I filled in the pealing leather.
 Untitled by Nick Wood, on Flickr
And applied a couple coats of dye. It doesn't look great up close but I think its passable for now.
 Untitled by Nick Wood, on Flickr
I hauled them back to my dads shop Saturday morning and then got started on the E9's paint. I love the convenience of my wagon, I can just toss parts in it and have fun on the back roads on the way to drop them off.
 Untitled by Nick Wood, on Flickr
I also got started on the wet sanding of the e9. I started off hitting it with 1500 by hand and then 3000 on the Porter Cable.
 Untitled by Nick Wood, on Flickr
 Untitled by Nick Wood, on Flickr
No going back now. I hit it with a couple passes of Jescar correction compound and a Megs Microfiber cutting pad.
 Untitled by Nick Wood, on Flickr
 Untitled by Nick Wood, on Flickr
 Untitled by Nick Wood, on Flickr
It came out great, but it took a lot of passes with the compound. While I was working on the fender my dad sanded the roof. I don't know what he did but it would not correct out. I made a Harbor Freight run for some Megs 101, which they didnt have but I got 105. I also bought one of their sun match lights and stopped by my house to get the dewalt with the woolpad(this is the nuclear option.)
 Untitled by Nick Wood, on Flickr
I got the roof to about 90% perfect. There are some actual scratches in it, so I think my dad picked up some trash in the sandpaper. Its something I will only notice but, I will totally notice it. Not sure what the plan is, I am hoping the polish and coating/wax will hide them a little. I then moved on to the drivers door, with the same process of sanding and microfiber pads but using the Megs 105. It corrected out a little easier but it still took a couple of passes. This light was also making me chase every little mark and swirl, I am pretty impressed, its a nice product.
 Untitled by Nick Wood, on Flickr
The door, after correction.
 Untitled by Nick Wood, on Flickr
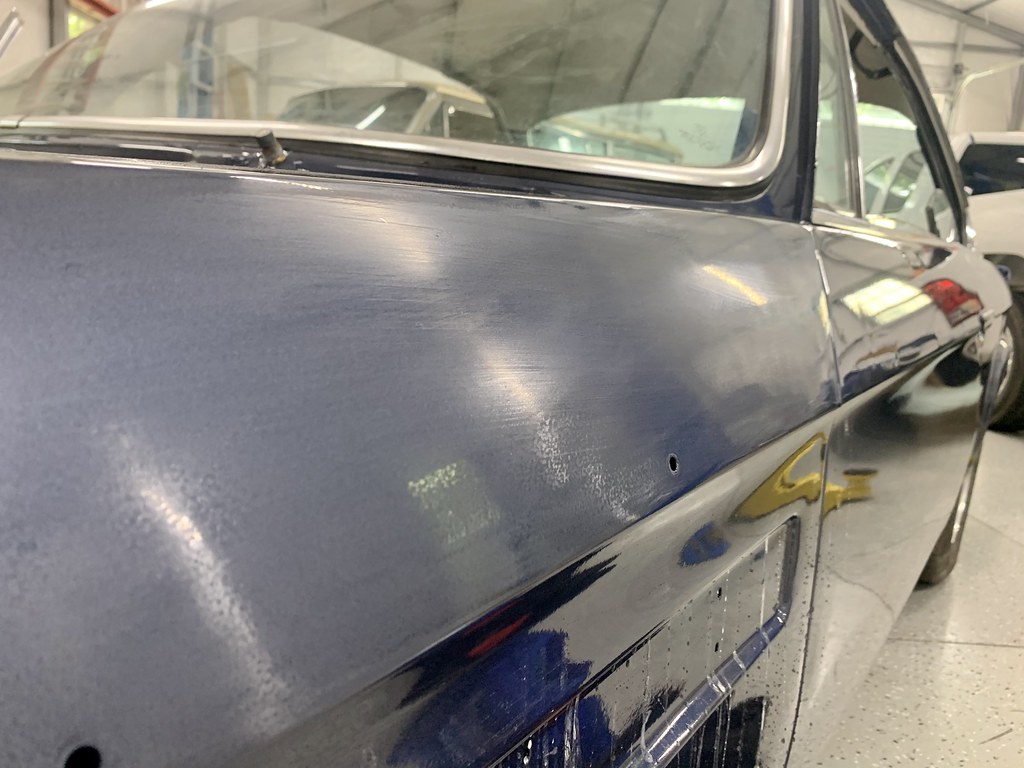
When working the door, there were a couple little spots were there were nubs in the clear. I sanded those spots a little harder, but when I compounded the car those spots corrected easier. I guess I am knocking the orange peal down level and this is making it easier for the compound to brighten it up. I did a small test spot on the drivers rear 1/4 and it confirmed my theory so I sanded down the panel a little harder than the rest.
 Untitled by Nick Wood, on Flickr
And this pretty much corrected out with 1 pass of 105. I think this will be my process on the rest of the car.
 Untitled by Nick Wood, on Flickr
There are a few small areas that I missed. I have a 1" and 2" pneumatic random orbital kit coming, and I am hoping its going to work for the tight areas. More to come this week.Comment
-
Awesome work, and an added bonus for me the pics are showing on my work computerMy BMW E36 318ti Steel Blue Compact build thread -
http://www.stanceworks.com/forums/sh...ad.php?t=88271Comment
-
Awesome work, and an added bonus for me the pics are all showing on my work computer :-)My BMW E36 318ti Steel Blue Compact build thread -
http://www.stanceworks.com/forums/sh...ad.php?t=88271Comment


Comment