 Tweet
Tweet
Probably the coolest New Beetle I've seen. The livery is awesome!
-
-
Freshly painted Projektzwo kit (which I am not so sure I want to use...)


So I made some renders how I can make it look for this year... it has -15 rear camber on, but probably will stay at -5 - cant afford custom spindle spacers made right now, staight ones we can fabricate easilly ourselfs... Also not sure about these fender vents... will see
The wing will be like this - again - decided to reuse the stands, switch them over, already welded up some bolt holes in them, now I need to cut the top part to accomodate wing, but it should look like this...


So rear flares arrived and I had to test fit them...


Now I need to turn back to 16" and almost stock height to pass street legality inspection for another two years, and after that, there will be some real update I hope...Comment
-
nice work....Comment
-
So I bought steering wheel and it came super ugly and probably fake...


So I tried to paint it with vinyl paint...

But its still wet after 3 weeks, so I ordered some materials and I will refurb it myself, lets learn something new
And then I recieved my 3D printed center panel, I had to outsource it due the size of it so I dont need to glue it from multiple pieces and that was right decision.
And I had to try fit it, I am stoked... now I need to fill it and paint it...


Comment
-
Great work! I like everything you have done except the wing. I cant put my finger on it but it just doesnt fit. Maybe it needs to be further back on the trunk. Maybe a little more meat to it like the old 911 whale tail. I dunno, just my thoughts.Comment
-
Thanks, it'll be different this year, so maybeOriginally posted by poondobber View Post)
Summary of this post for those lazy to scroll little bit of 3D printing, some maintenance and Projektzwo front finally installed
Test fitted the wing stands and made the brackets to mount it swan-neck style


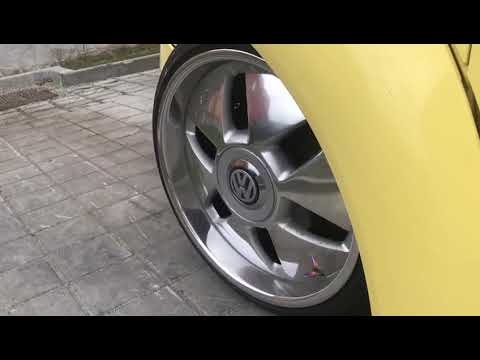
Then repolished the wheels, they could use professional polishing job but good enough for at-home work for now...
Before/After (this wheel was in worst condition)


And made myself floating center caps. Each cap is made of 5 printed parts, chrome trim ring from my audi caps, bearing, bolt (Which I had to grind to have super low heads) and 20g weight to keep it floating...


Took the door cards of for reupholstery (which wont happen for now in the end...) and discovered totally destroyed speaker - I was wondering why it blows cold air from that mesh while driving So I found unused 13cm speaker in my basement and printed the adaptor.


And also replaced faulty lock assembly

Mocked up first idea for passenger grab bar replacement as I can't use the stock one, tried to mimic the RSI shape at first, but I may go with simple filling shape in the end, not sure yet.


Also - the center part got painted.

Holding the paint can, being bored while being in lock-down, blackened the headlights.

I'll use similar rings in white for dual-color (white/amber) led rings I ordered

And then cleaned up all the decals, It looks much better now.

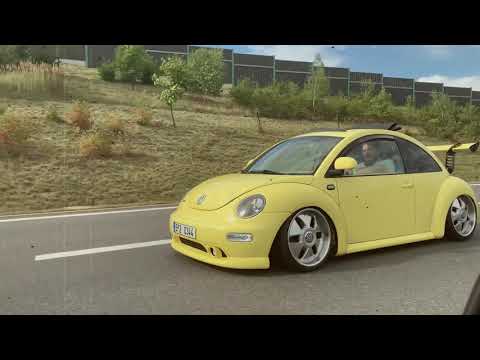
Lowered the front little bit more (about 20mm lower) and then my friend tried to take some better pics of it (that was before the center caps were finished)


3D Scanned projektzwo front and drawed some hex-mesh and fog blank plates


At first I wanted to copycat hella covers design, but decided not to and come up with this "logo/name" which I'd like to use for my creations in the future
Took the front of and installed whole part... I kinde love how it looks without the front clip while being on the ground and not on the stands But taking it of on the ground is kinda annoying, getting to these bolts and nuts in tight spaces without being able to see them


next steps - rear projektzwo, PU bushings (ordered), sectioned subframe (being done by my friend right now), AC delete (already have the parts), SAI delete (ordered)Comment
-
Awesome Cars WOW!Comment
-
Love all the little small details that you fabricated. The new front bumper with the hex mesh looks pretty dope. I feel like some more "race inspired " wheels would be pretty badassE34 build thread link
http://www.stanceworks.com/forums/sh...42#post1613542
Follow me on insta
e_dirty_4Comment
-
Little update
first of all, we had to use the opportunity - borders were closed so this road was almost abondened...


I finished the center part of dash:


with 3D printed clip-on system using stock TT metal clips as the second part going on this.

Also finally painted and mounted the wing, "sideplates" are 3D printed again.


Decided to go with tube cross brace, not cable bracing. It will be painted black.


Got sectioned subframe


It's already sandblasted and powdercoated. Polyurethane bushings ready to mount.
And we started fabrication of something to go wild.


Se you soon
Comment
-
Damn if I need that subframe too.
Sorry but without the wing looks so much better


Comment
-
I think I figured it out. Either the supports need to lean much further back so the back of the wing is even with the bumper or the it needs to be dropped down and level with the bottom of the windows. Also needs to be bigger.Originally posted by DawsonLiri View PostComment
-
Still Alive...
We replaced subframe for sectioned one.
Section, Sandblasted, powdercoated, Trimmed with new LCA poly bushings...
It helped a lot with inner fender rubbing and with axle binding.
We also replaced CV joints and deleted A/C
Now it sits on steering rods... But picking up TT hubs next monday so...


WE got Invited to local meet in Austria - LowBro bbw 3.0, so for the first time it got propper washed and kinda pollished...


This is only pic I have from the meet. There will be official video so...

And with all of our cars ready and clean, we went to a trip...
This is the oldest chain suspension bridge in our country.


And here is a short clip from that trip:
I also got this tattoed, not finished yet, so no final pics its still in outlines as its summer here....

Bought black interior panels, top parts in body color will be painted black&glitter

Comment
-
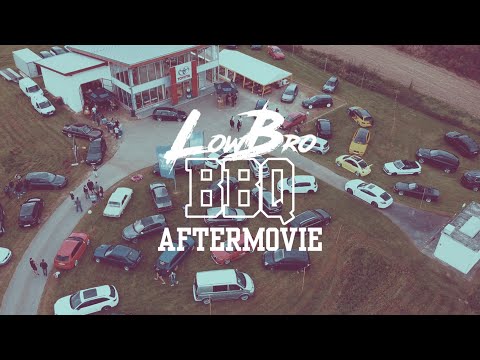
LowBro BBQ 3.0 aftermovie...
Asked my mom a favor and she sewednew floormats and trunk cover mat..


Still need to do the same in the trunk, but first I want to change subwoofer setup and make it more built-in
Also, after that steering wheel fail, I bought another one. In this shape:

Polished that super ugly center ring...

3D printed new cover for flat bottom

Painted, 3D printed temporary center emblem...


Not Bad... but it flex a lot... so I'll keep an eye on local classifieds looking for another one.Comment

Comment