-
So the color is BMW's Frozen Deep Green Metallic minus the frozen part.
I wanted a dark metallic green but couldn't find the perfect OEM BMW color. Then I came across this color and decided I don't mind changing the finish from matte to gloss.
The color/hue to an OEM color and that is what I was most concerned with.
So this is what BMW's frozen Deep Green Metallic would look like with a gloss finish instead of frozen.


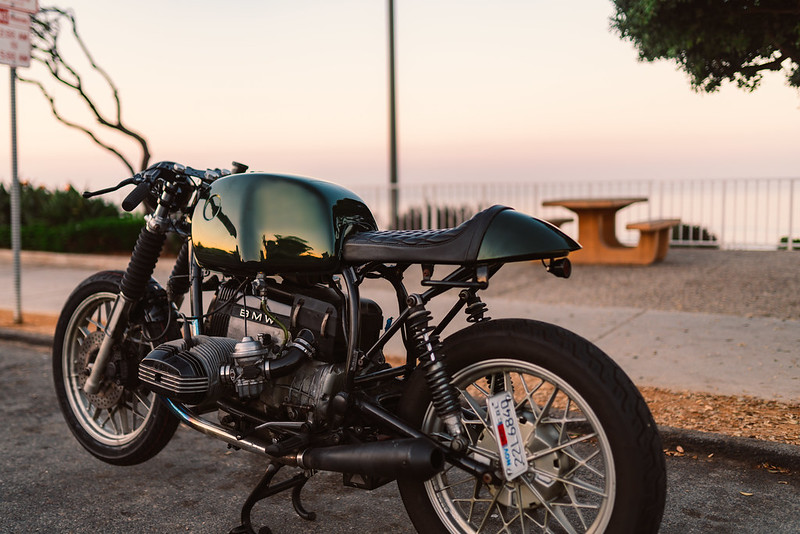
It's aboslutely terrible to photograph BTW
Badges and a new gas cap are already on the way.Leave a comment:
-
Leave a comment:
-
Dude hell yeah. Get this dang thing back together so we can ride.Leave a comment:
-
im an panel beater my self an work a lot with paint. that's not bad for a first time try, im pretty impressed with how it looks in the pictures
Leave a comment:
-
So I decided to paint my tank and rear cowl. My paint was definitely old but doable since the rest of the bike is also lookin a little old.
But being the responsible person I am, I decided to go for something like this instead of fixing something logical.
Truth be told have a friend that works in a paint booth and was nice enough to let me spray it myself with his close guidance. So it didn't cost as much as fixing something logical. Well... at least that's what I tell myself.
So I removed the roundels and started sanding it by hand because I have absolutely no idea what I am doing.


Then after showing a couple people they suggested something more logical (that seems to be a reoccurring theme)
A power sander

So in half the time I sanded it all down to bare metal.
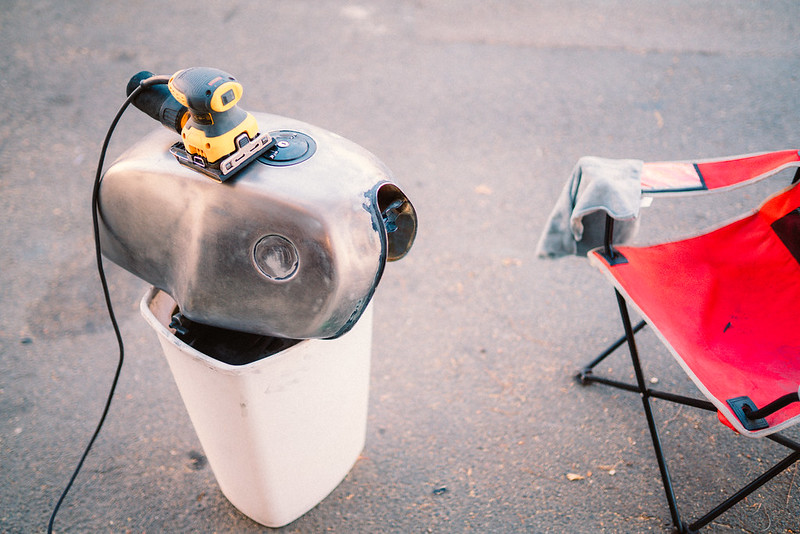


So I got a quick chance to lay down a layer of primer as a test to the seat cowl while he helped smooth out some of the imperfections I didn't know the tank possessed.


Next I applied a dark base coat


For the color itself, I had a couple in mind but I knew it had to be OEM. Techno Violet was my original thought and but there was another color I really wanted to find an OEM hue in.


So...
I did lay the color down and I am beyond stoked. Not only to do it myself but with out it turned out. Even under direct super vision haha
I'm going to just leave you with this until I get the chance to get some new roundels and a gas cap I really like.

Leave a comment:
-
thank you for not getting one of those ghetto ebay projector retrofit headlights with built in blinkers. your work on the bike is very good. love seeing updates on thisLeave a comment:
-
So while rewiring the bike I shorted out some parts of my charging system without knowing it. I found out mid ride when it shut off on me.
After doing some research, I removed the charging cover while the battery was still hooked up which is a huge no. Part of the diode board that sits right behind it is easily shorted out and it's almost impossible to remove the charging cover without touching it. So I bought a new diode board and found myself stranded once again. After a mile ride back home sitting on my bike in the back of a 1974 chevy panel van. This time due to the alternator.


EuroMotoElectronics offers a charging system that operates way better than the stock charging system. It also gets rid of the voltage regulator, diode board, and charging light as a whole.

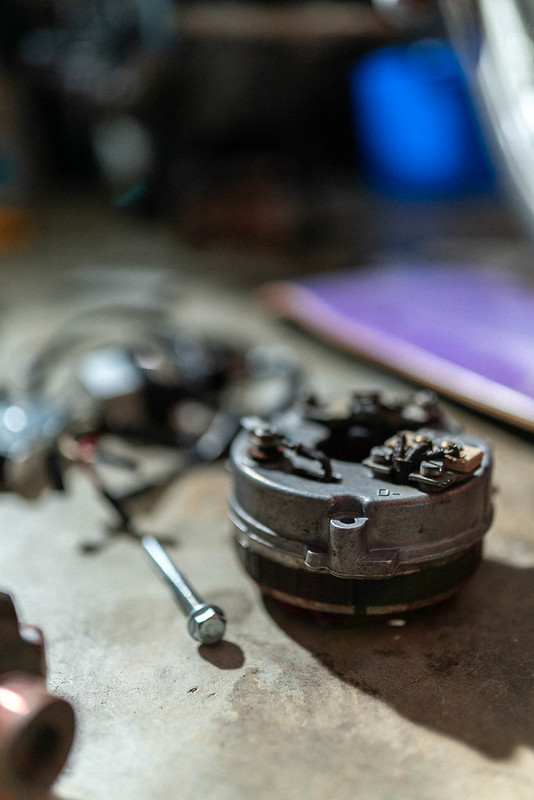

The kit actually uses an alternator and rectifier regulator from a Ducati with an adapter plate to sit exactly where the OEM alternator sat.

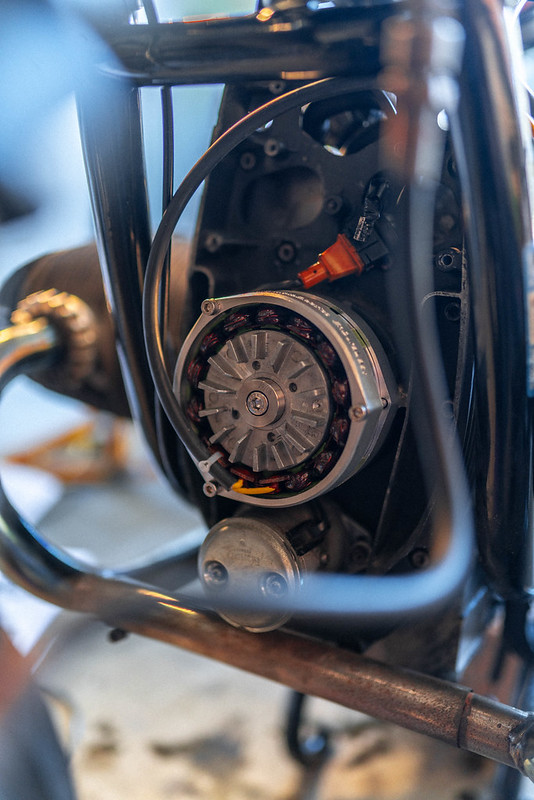
The rectifier regulator which takes the place of the diode board (converting ac power to dc power) now needed a spot. Since this kit now removes the voltage regulator from the equation, the rectifier found the voltage regulator's old stomping grounds to the left of the frame.
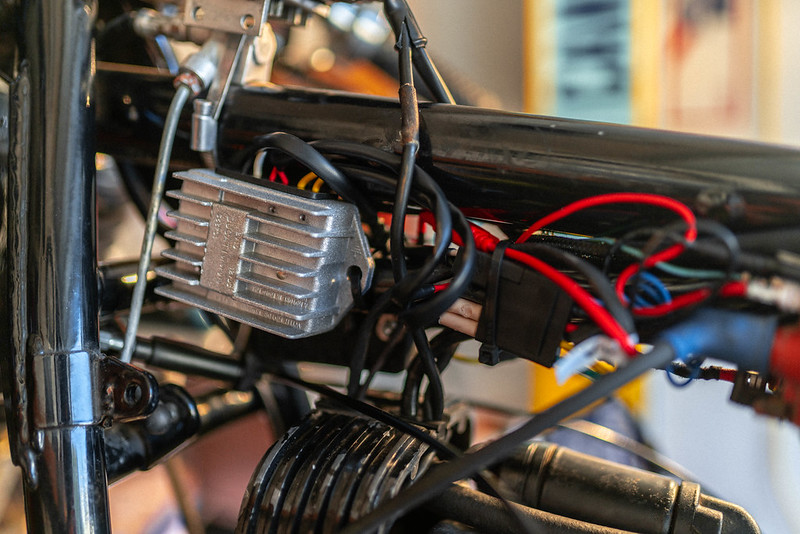
The wiring for the rectifier to the rest of the bike isn't the prettiest since it is so long. I just wanted to make sure everything worked before trimming things down and making them look more aesthetically pleasing.
I have about 20 miles on the bike which is about 15+ more than I've gotten in the past! At every stop my phone still reads that the bike has 12.5v+ and reaves up to 13.5v+ when I give it gas which is way more than it did before. After I have some more miles on it I'm sure I'll take it back apart and make it look a tad bit better.

fingers crossed I don't have to sit on my bike while sitting in the back of that '74 panel van again...Last edited by Zachbox; 01-27-2021, 11:40 PM.Leave a comment:
-
I'm stoked you've been looking forward to it! It's been a blast working on it and I'm stoked to be able to share it. ha and yeahhh. the triple clamp situation will totally work out at some point I just gotta tackle some other things first before giving that any more attention.Originally posted by The Norwegian View PostLeave a comment:
-
I've bean waiting on an update on this thread to bad about the headlight and triple clamp
 the wiring looks really good
Leave a comment:
Leave a comment: