Announcement

Collapse
No announcement yet.

Volvo 240 story + LS swap

Collapse
X
 
  • Filter
  • Time
  • Show
Clear All
new posts

  • #16
    so a year or so ago, i made some coilovers for another project, and built the adjuster collars. I had some of the material left and set it aside. which came in handy now. i was looking at my suspension set up, laying on the shop floor and thinking about how can fix issues I've had in the past. with the smaller springs in the rear, i found over large bumps, or extreme axle articulation the springs would loosen off and when the car came back to normal, it would make a horrible spring noise and snapping sound as the spring re-seated on the perch. I wanted to find a way to secure the spring to the perch with out hindering its function. after toying with some ideas of using clamps some how i finally figured out a good way to keep it attached to the perch. I used the spare material i had from before with the notches and thread already cut in it. i turned it back and cut it off. but then i tapped a set screw hole, and cut half the flange off. Now i can slide the new retainer inside the spring and wind it down inside the spring. the remaining half of the flange holds the first coil against the bottom perch. I'm anxious to install this and see how well it functions.

    here's an old pic of before when i was milling the spanner notches down the length of material


    then i turned the face back, and left a raised spigot to ride inside the spring


    then i took the ring and cut the flange on the band saw


    here's a shot of how it fits into the coil (ignore the rusty spring, its a driver, not a show car)


    here it is all assembled. this is all just finger tight, but once its cranked tight, this should solve any spring wandering issues from now on!
    Last edited by Cgilly; 04-05-2017, 06:26 PM.

    Comment


    • #17
      Got the engine in on the stand and and started stripping it down to the long block to clean and paint it. I think I'll be going with a different accessory drive setup anyways to make room for the lower car style intake. Also took the old manifolds off. I'll be going with a set of hooker cast manifolds


      Comment


      • #18
        This thread is full of fabrication porn, love seeing that stuff. Your solution for the spring problem is pretty genius.

        Comment


        • #19
          Over the weekend I stripped the engine down to the long block and scrubbed it clean and put a few coats of paint on it.


          Comment


          • #20
            so this is less of an update on the actual car. but more the stuff thats gonna make it happen. so far as you can tell from the thread this car has been my main car. my daily driver, and project all at the same time. well that has now changed. Im finally doing things right. I got rid of an old project I've been sitting on for years with no motivation to finish. that was my '69 vw bus. with that gone and a pocket full of cash i bought my self a good daily driver, with a plus that it will still be fun in the snow during the winter. so yea. i got myself an '04 vw passat. 1.8t 5-speed 4motion

            saying good bye to the old bus


            and heres the daily/parts hauler

            Comment


            • #21
              well got another big dump of updates.


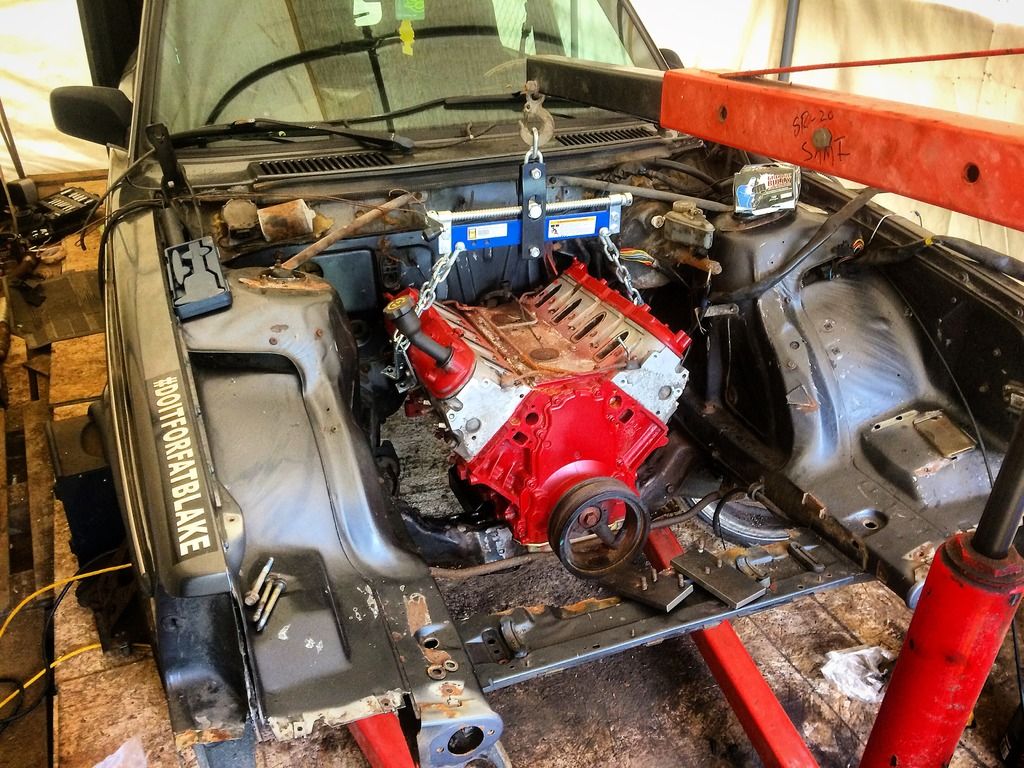
              built a sub floor of pallets and double layered some tongue and groove flooring boards down to build a floor in my tent shelter.


              then rolled her in. the last time that engine will run in this car.


              pulled the old greasy engine out. she did her service very well. for along time! 587,000km


              then started cleaning!

              Comment


              • #22
                Very interesting read so far. I know what you mean about not buying parts out of principal that you can make yourself :P

                Looking forward to updates.

                Comment


                • #23
                  So, I've ordered an oil pan. Until that comes I can't do anything with the engine. The truck pan is too large and I need to install the new pan to start measuring for mounts. So until that comes in I started doing other things and got my hand brake lever mounted


                  Comment


                  • #24
                    Got my oil pan yesterday and today I did my first test fit


                    Low profile custom steel pan with 6" deep sump and baffles


                    First test fit in the car went really well!


                    It all fits super well! I can't get over how well the engine mounting points on the block (circled in black) line up perfectly with the sub frame. And then plenty of room between the sump and back of the subframe


                    It does hang a little low under the subframe but I plan on using a skid plate

                    Comment


                    • #25
                      This is awesome
                      Insta Mintyhinrichs

                      Comment

                      Working...
                      X