Announcement

Collapse
No announcement yet.

Offset ain't everything.

Collapse
X
 
  • Filter
  • Time
  • Show
Clear All
new posts

  • h3llk1t3
    replied
    Originally posted by screescree View Post
    I believe people use a ridiculously low grade of sandpaper like 40-60 grit, I'm pretty sure its how they do the stainless brushed look on the Deloreans. Worth looking that up. I could be wrong though, in which case I apologise in advance
    Thanks man, I appreciate the tip, I think I'll just have to get a scrap billet piece and run some tests.

    Originally posted by Aitch View Post
    If you want any sort of brushed look, you are going to have to step up to some sort of metal brush or more aggressive grit of sandpaper/sanding wheel. You have to use the more abrasive materials to get the bite into the metal, and then the consistency of the pattern comes by virtue of using a tool with a consistent action (like your Dremel, or a drill or orbital sander). I did brushed faces on the spokes of some 350Z anniversary wheels using an orbital sander and 120-grit sandpaper discs, basically using mostly one side of the orbital wheel to get a bit of a radial brushing pattern that matched the outer diameter of the wheels.

    350z rims by Steve Hayward, on Flickr

    I know it's not exactly the finish you're after, but that gives some reference to what you get from 120-grit paper. The brushing finish you posted definitely looks like some sort of small-wire brush tool was used.

    Here's my thread on the wheel work I did.
    http://www.torontomazda3.ca/forum/sh...chining-wheels
    That's excellent looking dude, I've now ordered some steel wire brushes for my dremel and hopefully those will do the trick.


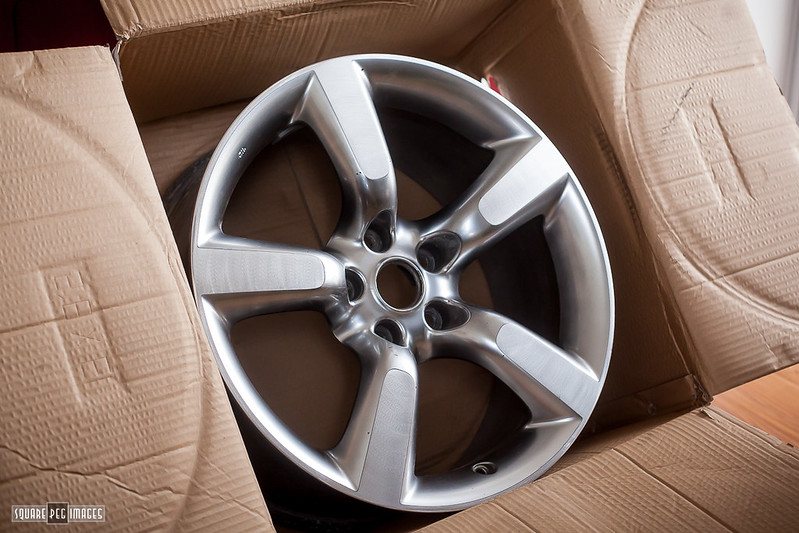
    And in the spirit of no post without picture, here I tried to express what I think about that bonnet.


    Leave a comment:


  • Aitch
    replied
    If you want any sort of brushed look, you are going to have to step up to some sort of metal brush or more aggressive grit of sandpaper/sanding wheel. You have to use the more abrasive materials to get the bite into the metal, and then the consistency of the pattern comes by virtue of using a tool with a consistent action (like your Dremel, or a drill or orbital sander). I did brushed faces on the spokes of some 350Z anniversary wheels using an orbital sander and 120-grit sandpaper discs, basically using mostly one side of the orbital wheel to get a bit of a radial brushing pattern that matched the outer diameter of the wheels.

    350z rims by Steve Hayward, on Flickr

    I know it's not exactly the finish you're after, but that gives some reference to what you get from 120-grit paper. The brushing finish you posted definitely looks like some sort of small-wire brush tool was used.

    Here's my thread on the wheel work I did.
    Thought people might be interested to see the results of this year's wheel refinishing efforts. I bought a set of 350z wheels from McGuyver who originally planned to have them refinished, but then found a mint set so sold these on. They came with a fair bit of road rash, of which 90% was on the flat faces and lips, so I figured that I could easily sand them down and leave a machined or polished finish. Here's some of the original damage (this example wheel was the worst):

    Leave a comment:


  • screescree
    replied
    I believe people use a ridiculously low grade of sandpaper like 40-60 grit, I'm pretty sure its how they do the stainless brushed look on the Deloreans. Worth looking that up. I could be wrong though, in which case I apologise in advance

    Leave a comment:


  • h3llk1t3
    replied
    Originally posted by chris432 View Post
    glad to see you are back!
    <3

    Originally posted by SebastienPeek View Post
    Glad to see after all the trial and error you got it fitting pretty damn well, also very nice of you to point out everything you did to make it fit, I really do hope other people find that post and do similar things, because we need more of those hoods on r34's.

    Also, this picture


    Made my entire day.
    Thanks man, I've got about a million more pics of the entire process that went into that bonnet.

    Also, you appear to be my kinda man.

    Originally posted by becausephilchow View Post
    Amazing, so jealous you have the ability to be able to fix FRP pieces like that.

    I would've kept my C63 if the Widebody kit had fit even remotely properly.
    Thanks I appreciate it, but I must truthfully say that I pretty much winged it all the way, I had to do and redo multiple times and I'm sure there are plenty of things that could've been sorted out better.

    I'm just trying to do my best and try to learn.

    Because.. there might be a second R34 coming real soon! Tom is tryna sell his X100 so we can pick up another R34 which I'll be taking to build up and he'll be taking this one.


    Anyway, while I have you people here - I could use some advice.

    I've been trying to get a brushed sort of finish on my discs with various dremel brushes but have not been very successful as they barely made a difference.


    In case you've been wondering what that rocket fuel is on the right side in the picture:


    It's Costco Margarita that I've been running on all summer long. It helped.


    Either way, back to brushing wheels; it seems the brushes I've been using are too soft and while the disc is made out of 6082-t6 billet I'm way too candy ass to attack it with metal brushes.

    I've seen pros on IG getting wonderful hand brushed finishes done but they're rather conservative with the information they hand out.

    For example like this one:


    I'll take any advice to be had.

    Leave a comment:


  • becausephilchow
    replied
    Amazing, so jealous you have the ability to be able to fix FRP pieces like that.

    I would've kept my C63 if the Widebody kit had fit even remotely properly.

    Leave a comment:


  • SebastienPeek
    replied
    Glad to see after all the trial and error you got it fitting pretty damn well, also very nice of you to point out everything you did to make it fit, I really do hope other people find that post and do similar things, because we need more of those hoods on r34's.

    Also, this picture


    Made my entire day.

    Leave a comment:


  • chris432
    replied
    glad to see you are back!

    Leave a comment:


  • Aitch
    replied
    Great work!

    Nice undies:

    Leave a comment:


  • screescree
    replied
    God damn that is beautiful.

    Leave a comment:


  • h3llk1t3
    replied
    Alright SW,

    Update time.

    Been a while.

    Not gonna apologize this time, apart from disliking the new design on these forums I was considering ditching updates altogether because I spent nearly every waking moment outside my actual job on this damn car.

    Last time I essentially left you with a semi fitted, good for nothing looking Cross Factory kit on my 34 which I was very close to throwing in the bin. After a couple weeks feeling sorry for myself I was done being fed up and got to work which initially seemed to be a mountain of tasks since I had no fucking idea how much work it involved properly fitting a glass fibre kit. And it turned out even worse.

    Basically every single part of the kit needed to be redone. All CF cut-out lines were crooked and had to be corrected on all 7 parts. But there were much more notable flaws:

    - Front fenders
    o Passenger side fender was a full cm higher than the bonnet
    o Driver side fender was completely deformed at the part where it meets the side skirt
    - Side skirts
    o Vents were pre-cut in the wrong places which Had to be filled and remade
    - Rear fenders
    o Fuel lid that came with the kit was utter shit and because I wanted to ditch the lid the entire fuel lid cut-out had to be reformed

    Have some pics.


    Rectifying these issues required a ton of work and I was rather chuffed with the results so I applied a fresh lick of paint and things started to look better again.


    When that was done I got to work on the front bumper, I genuinely tried to make that semi nose chop work but I ended up going with a full nose chop; these were the results.


    Around the same time my wheel discs had finally arrived with a couple of test lips.

    This is a 4.75 inch lip with a 50mm spacer on, meaning I should be able to fit a 6.75 inch lip on that wheel if I go with a rather stretched tire.


    Right after that I fell out of love with the front bumper and decided to ditch that and the OEM bonnet.
    I picked up a a Ztune front bumper and a oldskool JDL bonnet that I found on the net for a 100 bucks.


    Turned out that everything I had ever done on cars would be nothing what I had to put up with that fkn bonnet.

    Story time – JDL bonnets were made for fitting with GTR front bumpers BUT GTT hinges and latch catch. From what I know not many of these existed in the first place but most of them were sent back because people did not get them to fit, or even remotely to close for that matter. As such the company stopped making them rather rapidly.
    Since I did know about JDL bonnets before buying it, but had NO CLUE WHATSOEVER how mindbogglingly wrong they were due to limited info on the net about them, lemme put this in writing for the next moron that considers buying one of these.

    First time I popped the bonnet on the car there was a 20 cm gap between the latch catch mechanism and the bonnet. Basically the entire strut bar was in the way as well as the small maybe 5mm high seal that goes towards the windshield. Only after removing both of those it was remotely possible to close it.
    That wasn’t it by far, since I decided to go with a GTR crash bar and GTR front bumper retainer the bonnet needed 4 cuts in the front. The entire bonnet was a whole cm too far back. It lifted off towards the sides so by the time you reached the end of the headlight the bonnet was roughly 12mm too high. Not to mention the entire left side sitting a good cm higher than the right.

    It was in general in utter shitshape.


    So here’s what I did:

    - I made 4 cuts in the front and fibred them up to make room for the GTR retainer bar

    - I made a large hole towards the windshield and refibred it to make room for the rubber seal

    - I made 2 freaking length cuts along the bonnet, threw a tension strap around it with one of my paint stand thingies and laid glassfibre mats and epoxy on top of it to close them back up so I can get rid of the lift towards the sides.

    - I cut out the bolts sticking out of the bonnet and placed them a full cm further back and adjusted their depth as well so it moved a cm forward and no longer sat higher on one side.

    - I made a hole for the bonnet holder

    - Aaaaand, I made an indentation for the strut bar

    I admit summed up like that it don’t look too bad, but with all the trial and error and sanding and forming and puking the list felt 8 times as long. The next pictures shall illustrate a teeny tiny bit of the madness that went into it.


    In the meantime I’ve been also working on getting the new front bumper sorted out, as well as changing my mind on the rear spats once again. Yeah, those godforsaken rear spats were also complete dog shit. One side was an entire cm longer than the other side.


    On a goddamn sidenote, does no one fucking make proper glassfibre parts or what? I have several parts knocking about at home now from different countries including Japan and UK, and those are no bit better than them Chinese parts. Being off entire centimeters from side to side is just not acceptable.

    Anyway, right, the bonnet now fits rather well, but that’s where I am now.


    Next I’m gonna paint the spats and I ain’t sure yet if I wanna paint the bonnet or carbon skin it. We’ll find out soon.
    I’m also working on lips for under the side skirts and rear spats, but I shall show that next time. Maybe.

    In other news, I sold the R32. My heart was bleeding but it was time, there is more cars to build.
    So I popped it on the stockers and an incredibly nice fella from Switzerland took it off my hands and will be taking good care of it now.


    Apart from that we’re still doing the usual shit.

    Making exhausts


    Havin’ bbqs


    (If you need a wingman for your next 70’s party, I’m your man.)

    More exhausts


    And a burnout or two


    Talk soon.
    Last edited by h3llk1t3; 09-06-2017, 05:47 AM.

    Leave a comment:


  • uhhrace
    replied
    Good shit here!

    Leave a comment:


  • h3llk1t3
    replied
    Originally posted by Troy_Shark View Post
    Wheels look great.

    Do you use CAD for work or something? Or do you have you're own seats of the software. I know Inventor and FEA programs aren't cheap. Not sure about Fusion 360
    Only use Inventor and F360 for the actual designing process, as you say Inventor has quite a hefty price tag - Fusion360 however is free for students and companies below a certain amount of revenue. My brother in law uses Catia (which of course is a CAD system as well) for FEA who has a license from his job, that one really is not affordable for individuals. From what I know depending on the modules you want with your license, a single one can cost in excess of 50k$.

    Also, I popped on some LED rear lights.


    Leave a comment:


  • Troy_Shark
    replied
    Wheels look great.

    Do you use CAD for work or something? Or do you have you're own seats of the software. I know Inventor and FEA programs aren't cheap. Not sure about Fusion 360

    Leave a comment:


  • sdistc
    replied
    Nice.
    Subscribed to see where you end up with the wheel design and manufacturing

    Leave a comment:


  • Dr.AK
    replied
    Originally posted by h3llk1t3 View Post


    And fuck me - this is what I wanted.


    Good Lord.

    I mean... sweet Jesus!

    Turned out perfect

    Leave a comment:

Working...
X