 Tweet
Tweet
Originally posted by readfrost
View Post
-
Youre doing a good thing, keep it up. -
One hell of an undertaking! Good luck! Can't wait to see the end result! Also, that engine and subframe assembly is cute as feck! So tiny!I am a party pooper. I poop at parties.Comment
-
You're probably on a budget but it may be worth just getting the entire car sandblasted. It will save you a lot of work and reveal everything. Nice start! You've got your work cut out for you... no pun intended
Comment
-
damn there is a LOT of work to be done on this car. You've got a lot of spare time lol! nice project. Not the easiest to start with . For a teen you seem pretty knowlagable and well equiped.Ruining cars since 2006 yoComment
-
This is really an epic resurrection!
- RenatoTWMPerformance.com | TWMShiftKnobs.com | GodSaveTheManuals.com
sigpicComment
-
Subscribed, love this kind of projects. Good luck with the build!!Comment
-
Good to see one getting saved man, rust seems to hide on these, I found it in odd places when I was stripping mine down.Comment
-
Okay, so after I pulled the motor I figured I'd break it down so I can see its condition and so it can be stored. It's not a priority right now, as I need a car that rolls before it can run. I figured I'd show you all the tear down, and talk about the plans for this little 4 cylinder...
So first it needed a good cleaning, as it was covered in oil before:
 DSC_0974 by readfrost, on Flickr
I dont have any pictures of that because I was covered in water and oil afterwards and didn't want to screw up my camera with all that. You'll just have to believe me that it was a little cleaner...
So first the valve cover came off, inside she was a little dirty but not bad. An exhaust manifold stud was seized completely, and I could not get it off. Probably going to run one of my spare heads anyway, this one has a decent amount of build up/rust on it. We'll see...
 DSC_0986 by readfrost, on Flickr
Next the head came off, pretty easily actually, just a few (I think 12) head studs and it lifts right off.
 DSC_0996 by readfrost, on Flickr
Got her inside, and you can see a lot of the oil buildup that was covered by the auxiliaries and all that:
 DSC_0003 by readfrost, on Flickr
Water pump out
 DSC_0008 by readfrost, on Flickr
Bye bye oil pan, hello gunk... I must've gotten a little water in there when it was sprayed, probably through a blown gasket.
 19910332379_82fa20b5fa_o by readfrost, on Flickr
Pulled the cylinders out, a fair bit of carbon on them, but not bad. A little wear on the con rod bearings too, but still okay. the cylinder walls were all almost a mirror finish, which is bad. I'll send it out to be machined and have those honed (along with other operations) when I get to that stage.
Then they were all packed up for a rainy day when I can clean them out. Most likley to run high(er) compression pistons anyway, but I'll get into that later.
 DSC_0060 by readfrost, on Flickr
 DSC_0062 by readfrost, on Flickr
 DSC_0063 by readfrost, on Flickr
Pulled the crank shaft, some wear on these bearings too, but nothing unexpected.
 DSC_0073 by readfrost, on Flickr
 DSC_0074 by readfrost, on Flickr
 DSC_0075 by readfrost, on Flickr
Out!
 DSC_0076 by readfrost, on Flickr
I then pulled a few more things from the block, and then started to clean it. I couldn't get a few bolts and the dipstick tube out, but they will come.
First: degrease it all
 DSC_0089 by readfrost, on Flickr
 DSC_0094 by readfrost, on Flickr
Then spray her down:
 DSC_0101 by readfrost, on Flickr
 DSC_0106 by readfrost, on Flickr
I probably did this 3 or four times, she's pretty clean now:
 DSC_0114 by readfrost, on Flickr
This is just for me to remember how it was attached to my stand. This way you can reach the flywheel bolts easily and install everything without having to remove it. Pretty handy:
 DSC_0128 by readfrost, on Flickr
Cleaned my transmission a little more while I was at it:
 DSC_0129 by readfrost, on Flickr
So now that its all clean, I'll slowly refurbish the auxiliaries and things like oil and water pumps, but the engine is on hold for now. I mentioned the idea of an M20 swap at one point earlier, but that has changed:
 DSC_0135 by readfrost, on Flickr
This vin here matches the one on the body of the car, so I just have to keep them together. Instead, I'm leaning towards a twin sidedraft setup, with a hotter cam, and higher compression. Thats all I really want to think about right now, my budget isn't huge, but I think that is a good starting point for now.
The block is currently outside, I am going to bring it in this week, I am just weathering it a little bit.
 DSC_0133 by readfrost, on Flickr
For those of you who dont know, BMW used M10 blocks in the 80's to build the legendary M12. That little 1.5 liter turbo'd 4 cylinder could put 1,500hp in qualifying trim! They only started with blocks that had over 100,000 (issue free) miles on them, and left them out for a while to weather/rust. Legend has it that the engineers would actually pee on these blocks during their breaks to assist with the weathering process.
Why am I telling you this? Because I did the same! Did it make the block stronger? Not really. But did it make me feel better? Yes, and that's what counts.
As always, thanks for looking guys! Sorry in advance for any typos haha
Comment
-
-
-
Now this is a real project, glad youre taking the time to save this one! Alot of work but it seems to me you have a good grasp on the situation! in for moreComment
-
Okay, so if I remember correctly last update was all about the engine. Heres whats going on with the rest of the car:
Engineless and alone, she needed to get prepped for media blasting. That meant taking everything off, which turned out to involve a lot of cussing, a hack saw, and an angle grinder...
First, her ass needed a lift, so I managed to find the sketchiest way to get it about maybe 8 inches off the ground. Oh, how I love working on uneven surfaces:
Lifted her up:
 DSC_0162 by readfrost, on Flickr
Both tires came off around this time, also check out those Bilsteins, might just be the only good part off of this old girl. I'll definitely be running those, just gotta get them feeling young again. More on that at a later time:
 DSC_0157 by readfrost, on Flickr
Enter this little guy, made from a short pallet, and reinforced with anything I could find:
 DSC_0163 by readfrost, on Flickr
'Bout to drop the dopest mixtape of 2015:
 DSC_0165 by readfrost, on Flickr
I have no great pictures of it, but that 'dolly' was placed right underneath the middle of the car. Its just the right length to not touch the frame rails up front, and leave me space behind it to drop the rear subframe.
What followed was the prying out of my front subframe:
 DSC_0170 by readfrost, on Flickr
Remember how it was held on with two bolts and some string? Yeah it made removal that much faster, I must be a genius...
A friend came over and helped me pull out a bunch of stuff from the engine bay (brake booster, throttle linkage, brake lines, etc.)
 DSC_0173 by readfrost, on Flickr
Steering column (complete with the wheel), was pulled out:
 DSC_0178 by readfrost, on Flickr
Next up I dropped the rear subframe. This required only a socket and a rubber mallet, just a lot of rubber mallet-ing.
Out she goes:
 DSC_0187 by readfrost, on Flickr
Rust actually doesn't look horrible down here:
 DSC_0188 by readfrost, on Flickr
Now, after inspecting my rear subframe, it turns out I cannot use it when I put this little guy back together. Why? Because hiding up in the nether reaches of the subframe was this:
 DSC_0190 by readfrost, on Flickr
Awesome. Whelp, just have to find another one, I'm in no rush.
Horrendous picture, but there is my little dolly, straining a little but doing very well:
 DSC_0195 by readfrost, on Flickr
I spent the next few days cataloguing the majority of the junk-- I mean parts, that came off this car. I went over it with a fine tooth comb and got everything else out. Except for the door hinges. They didn't wanna move, so I'll be giving them the silent treatment (along with some WD-40, oh and a hammer..)
Here is how she sits now:
 DSC_0309 by readfrost, on Flickr
 DSC_0310 by readfrost, on Flickr
 DSC_0312 by readfrost, on Flickr
 DSC_0313 by readfrost, on Flickr
 DSC_0314 by readfrost, on Flickr
 DSC_0316 by readfrost, on Flickr
 DSC_0317 by readfrost, on Flickr
 DSC_0324 by readfrost, on Flickr
 DSC_0325 by readfrost, on Flickr
Hopefully she will be out for media blast next week. I bought myself some epoxy primer, and a crappy spray gun, plus all the other little things you need to spray a car. That will allow me to seal the old girl up before I head off to college in a week and a half. So close, but yet so far.Last edited by readfrost; 08-27-2015, 05:39 PM.Comment
-
Fairly large update coming at y'all:
Okay, so after she was all stripped down, she was loaded up onto a trailer. This was the real test of my dolly/pallet/whatever it was. Thankfully it preformed perfectly:
Rolled her up on the trailer, good thing it is such a small car, this is a lawn mowing trailer! Ha
 DSC_0339 by readfrost, on Flickr
 DSC_0342 by readfrost, on Flickr
 DSC_0345 by readfrost, on Flickr
And she was off to be stripped down, it was all very exciting. But, there was more stuff to be done...
Picked up a bunch of rolls of plastic and four rolls of duct tape. My next task was to turn the tent into a spray booth. So out went all of the crap that was in it, along with all of the dirt and dust and spiders that littered the floor. In came lots of plastic, and I mean lots. It took a while to figure out just exactly the best way to go about doing this, but after a few hours we ended up with this:
 DSC_0355 by readfrost, on Flickr
 DSC_0359 by readfrost, on Flickr
 DSC_0373 by readfrost, on Flickr
Pretty cool, eh? Looks like something right out of Dexter, one of his kill rooms or something... Creepy.
I already had primer, and I already had a gun, the only thing I needed was a hose and a compressor.
Oh look, a compressor (just like magic):
 DSC_0375 by readfrost, on Flickr
Then (I thought) I was all ready for the car to show up. So I took a few pictures:
 DSC_0380 by readfrost, on Flickr
 DSC_0384 by readfrost, on Flickr
 DSC_0388 by readfrost, on Flickr
After what seemed like forever, the car showed up. It probably was forever now that I think about it.. The car only got here at 9:30 last night, the neighbors must love me... Good thing I love them too.
 DSC_0397 by readfrost, on Flickr
 DSC_0407 by readfrost, on Flickr
 DSC_0406 by readfrost, on Flickr
She made it back to her home, safe and sound:
 DSC_0423 by readfrost, on Flickr
I took this moment in the middle of the night to take a few photos of it in bare metal. I only had my 35mm lens with me, so I couldn't really get the whole car in the shots. But, you win some, you lose some.
 DSC_0424 by readfrost, on Flickr
 DSC_0425 by readfrost, on Flickr
 DSC_0426 by readfrost, on Flickr
 DSC_0427 by readfrost, on Flickr
 DSC_0428 by readfrost, on Flickr
 DSC_0435 by readfrost, on Flickr
 DSC_0437 by readfrost, on Flickr
 DSC_0438 by readfrost, on Flickr
Overall not to many surprises showed up underneath the metric tonnes of bondo that someone had called 'bodywork'. Mostly the shock towers and the fire wall are areas I didn't know were as rusted as they actually were.
The car is still covered in the media it was blasted with at this point, which was a glass bead and water mixture. Looks like sand. I like sand. Just not all over my car.
Remember that compressor? That turned up to 100 psi, plus some goggles and a brush, fixed that little problem fairly quickly.
Here she is out in the light:
 DSC_0451 by readfrost, on Flickr
 DSC_0452 by readfrost, on Flickr
 DSC_0454 by readfrost, on Flickr
 DSC_0456 by readfrost, on Flickr
 DSC_0458 by readfrost, on Flickr
 DSC_0464 by readfrost, on Flickr
Once she was cleaned up, it was time for more business.
Mixed up my primer and loaded it into the gun:
 DSC_0478 by readfrost, on Flickr
Aaand I was ready to shoot!
Needless to say it was very hot in there. Not great for painting, but the best I could do.
 DSC_0484 by readfrost, on Flickr
 DSC_0493 by readfrost, on Flickr
Little brother was watching and learning a little bit:
 DSC_0502 by readfrost, on Flickr
Finished up the first coat, the interior had a few coats on it as I did that first.
 DSC_0511 by readfrost, on Flickr
 DSC_0512 by readfrost, on Flickr
 DSC_0514 by readfrost, on Flickr
 DSC_0515 by readfrost, on Flickr
 DSC_0516 by readfrost, on Flickr
 DSC_0517 by readfrost, on Flickr
 DSC_0518 by readfrost, on Flickr
 DSC_0519 by readfrost, on Flickr
 DSC_0524 by readfrost, on Flickr
 DSC_0535 by readfrost, on Flickr
I hit it with a little more around the C-pillars, along with the wheel wells, and engine bay. I also sprayed a decent amount into the trans tunnel and around when the rear subframe would be. It's not perfect, but it is a lot better than nothing.
I then just went in to check on the drying and document all of the rusted areas/ places that need to be patched:
 DSC_0544 by readfrost, on Flickr
 DSC_0545 by readfrost, on Flickr
 DSC_0547 by readfrost, on Flickr
 DSC_0551 by readfrost, on Flickr
 DSC_0554 by readfrost, on Flickr
 DSC_0556 by readfrost, on Flickr
 DSC_0565 by readfrost, on Flickr
 DSC_0567 by readfrost, on Flickr
 DSC_0568 by readfrost, on Flickr
 DSC_0571 by readfrost, on Flickr
 DSC_0575 by readfrost, on Flickr
 DSC_0580 by readfrost, on Flickr
 DSC_0581 by readfrost, on Flickr
 DSC_0583 by readfrost, on Flickr
 DSC_0590 by readfrost, on Flickr
 DSC_0591 by readfrost, on Flickr
 DSC_0599 by readfrost, on Flickr
So you can really get an idea of the 'repairs' that were done to this car. It is quite frankly appalling... I have no words for it.
Next step will be to go over the last set of photos (that was about half of them), and figure out which panels need to be replaced, and if I should use OEM or reproduction panels. I leave for college tomorrow, so progress will slow down a little, but I should have a few updates for you guys soon. As always, thanks for looking.Comment
-
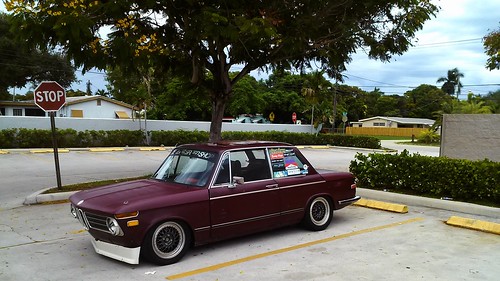
This is RAD brah! It's funny because in the first photo the car could pass as pristine condition... 2002"s are awesome and the fact that you scored a roundie is a plus. The body panels seem to give you no trouble but actually patching that rail could be a problem you have to make sure that things alignment is as straight as can be... love it though, keep up the solid work
______________Comment
-
p.s. i missed you whole second page till just now... YIKES!
______________Comment


Comment