-
Been a while since an update, but I've been working on the truck almost every night after work. I'm getting it ready for the Speed and Custom show later this weekend in London. It wont be running for the show, but It'll be mostly assembled. After the show I'll be tearing it all down for final welding then paint/powder coat and working to get it running for Eurokracy in June.
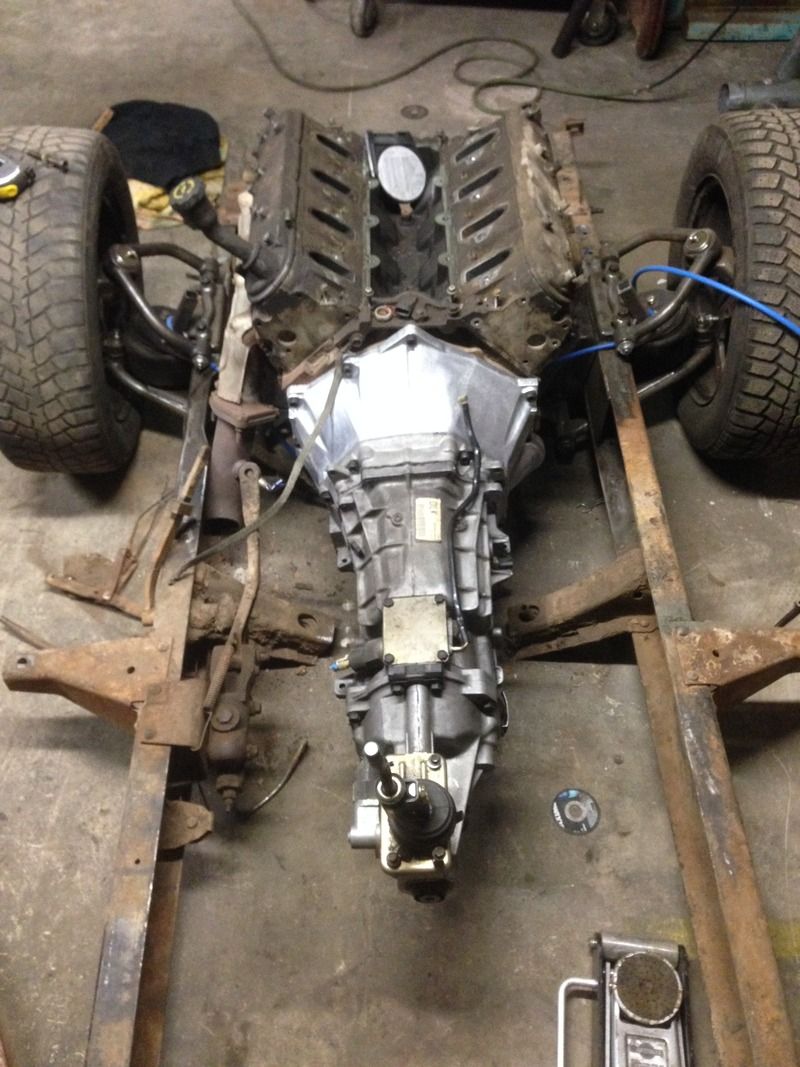
At the start of Feb I finally went to Rochester, New York to pick up a T56. Had some rad BBQ and a couple cold ones
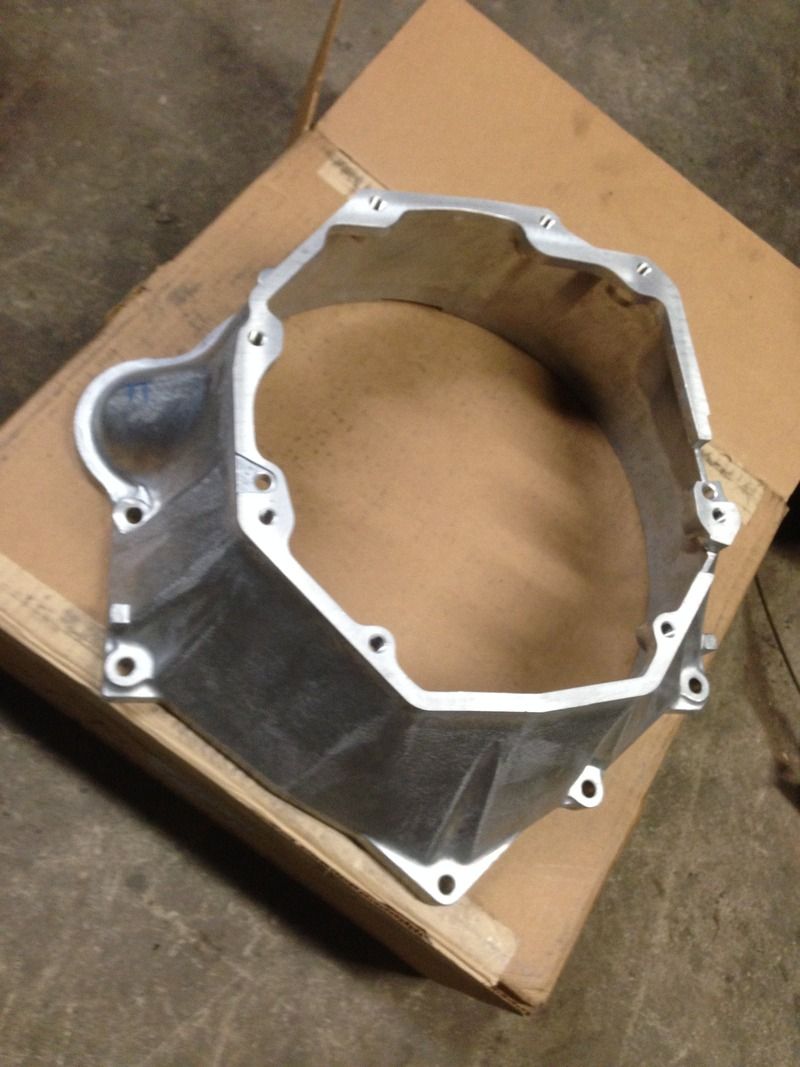
Unfortunately the bellhousing I had order and sent to Buffalo was on back order and didn't arrive until the week after. So another quick trip to the boarder to pick it up and then back to getting the trans in to get a look of where it'll sit in the frame.
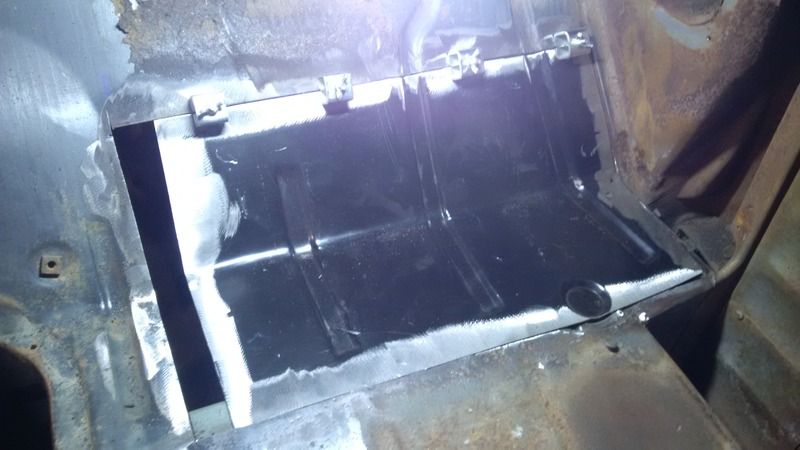
Somewhere in that time I had also tackled the rust in the passenger side floor. Cut my patch panel a little short, but that`s what welders are for
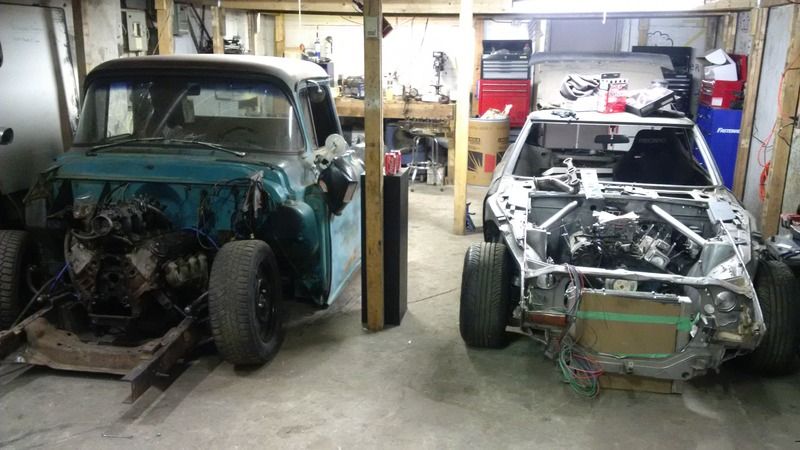
And a shot of the truck and the Z together
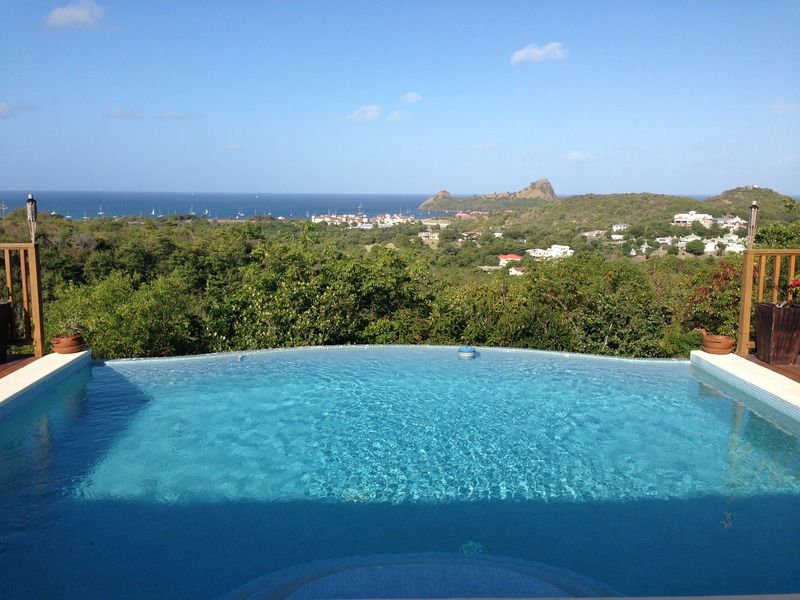
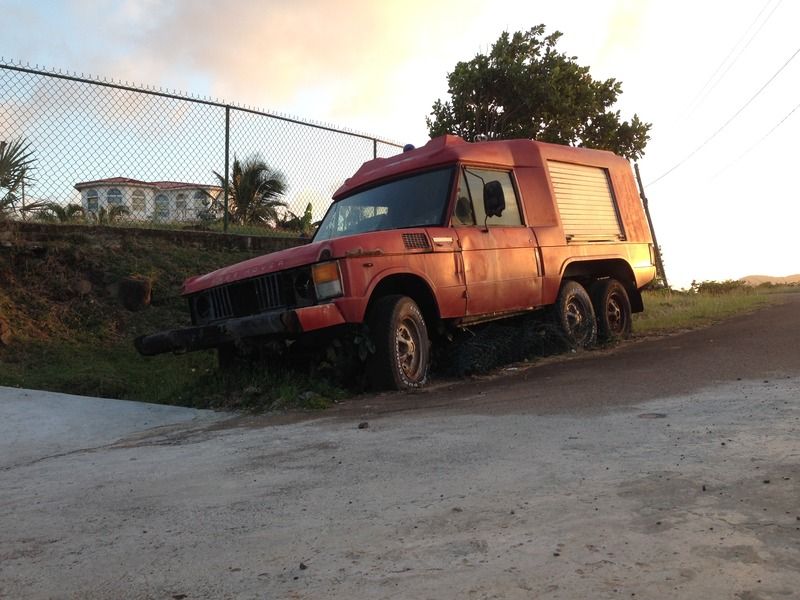
Then a lost a week of work to go relax in St. Lucia for my birthday in late February. Saw some pretty cool cars down there that you don`t see in Canada
Would definitely roll around in one of these as a daily
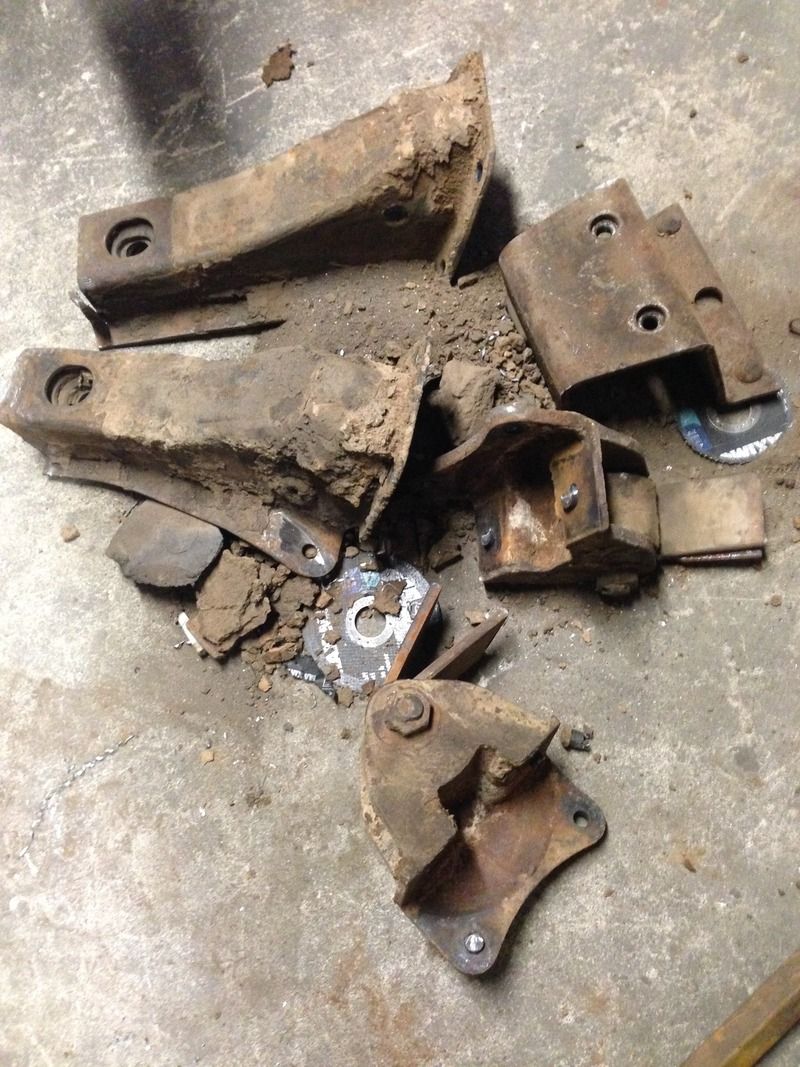
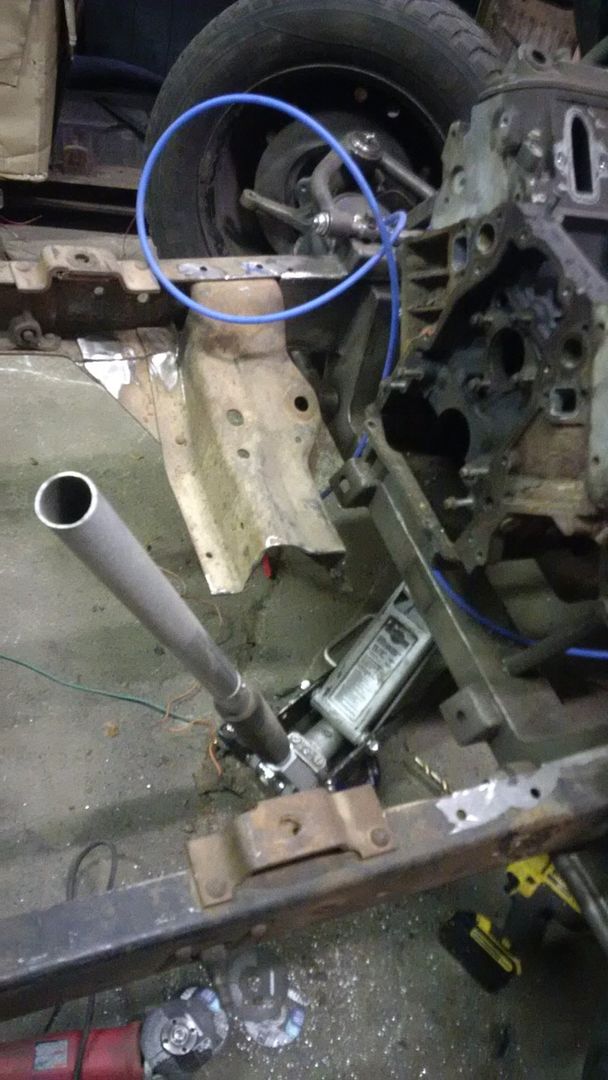
Back home and back to work. I decided on boxing the frame to give it some more strength. On top of that the original trans crossmember and leaf spring mounts had to be removed from the frame. This is no easy task when everything is riveted in place. After a couple of hours, plenty of zip disks and a couple broken drill bits I was left with this mess.
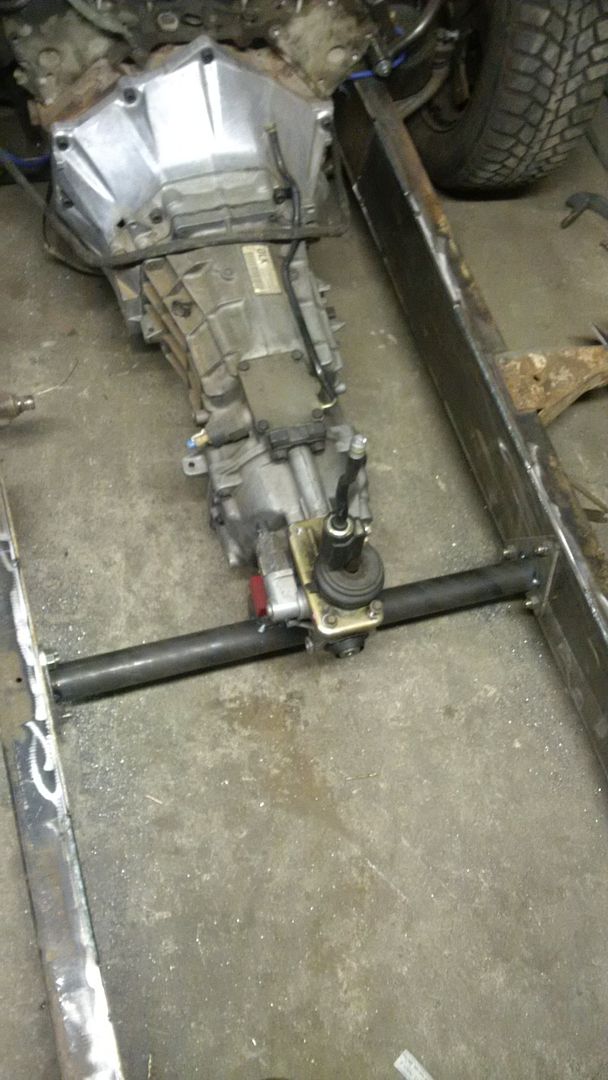
To box the frame I used 3/16" sheet and got it cut to just fit into the frame. Forgot to get pics of this but it's pretty self explanatory. Next was getting the new trans crossmember fit up. I had my machinist at work make up some slugs to be welded into the frame for the crossmember to bolt to. This way the frame wont distort when tightening the bolts. The slugs were 1" OD and 1/2" ID. Took some time to cut out the 1" holes for the slugs with a hole saw, but it got done. Made some plates for the ends and a bracket for the trans to sit on and welded it to a piece of 2" DOM tubing and it's done.
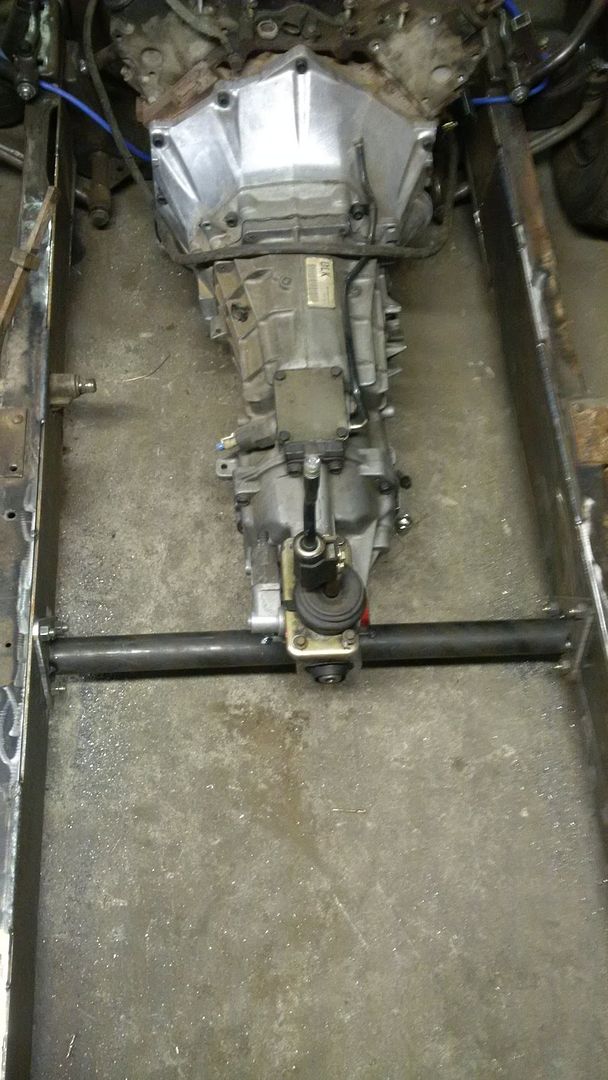
Tossed the cab back on to see what parts of the floor needed to be cut to fit the t56. Only needed to take some off the front of the trans tunnel and some off the rear. And you can see the finished product of the passenger side floor patch
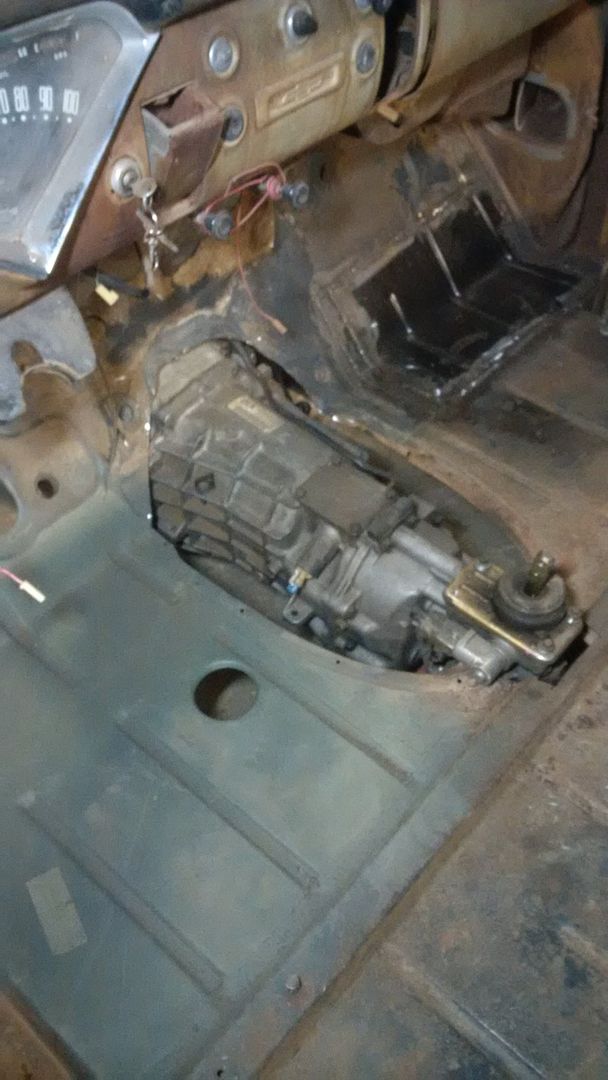
The floor will still need some clearancing for the driveshaft as you can see it's pretty close at the input. I'm toying with the idea of a 2 piece drive shaft to make life a little easier
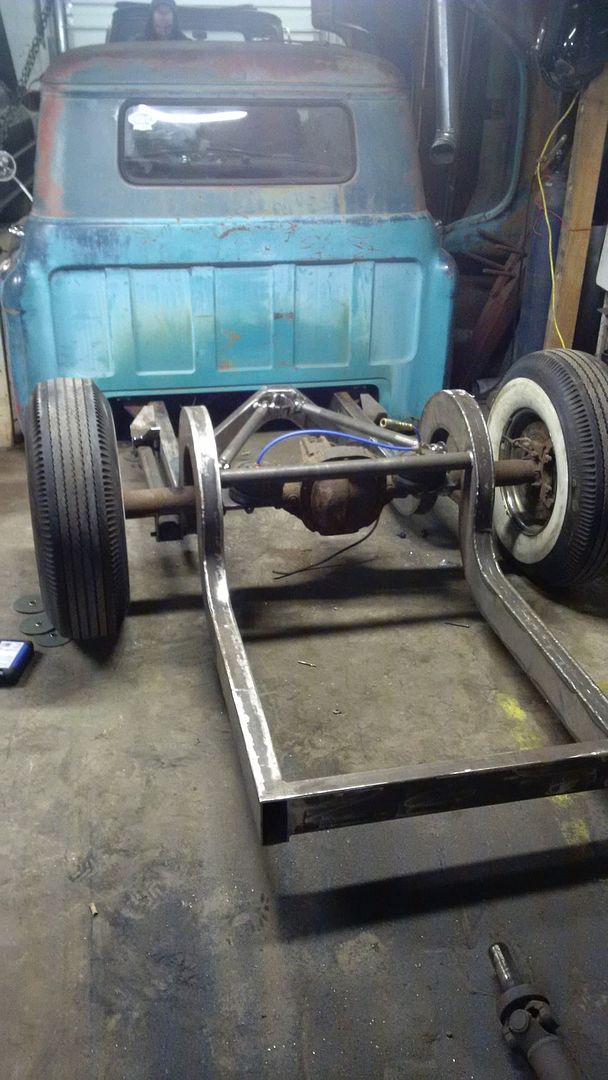
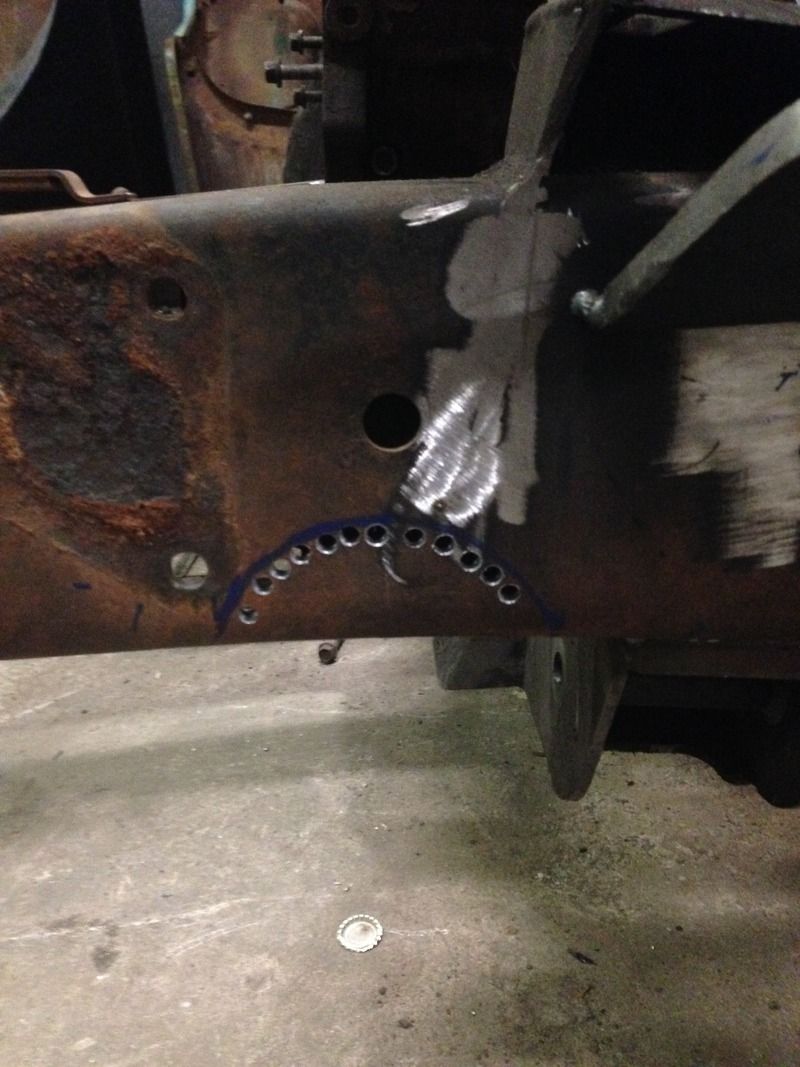
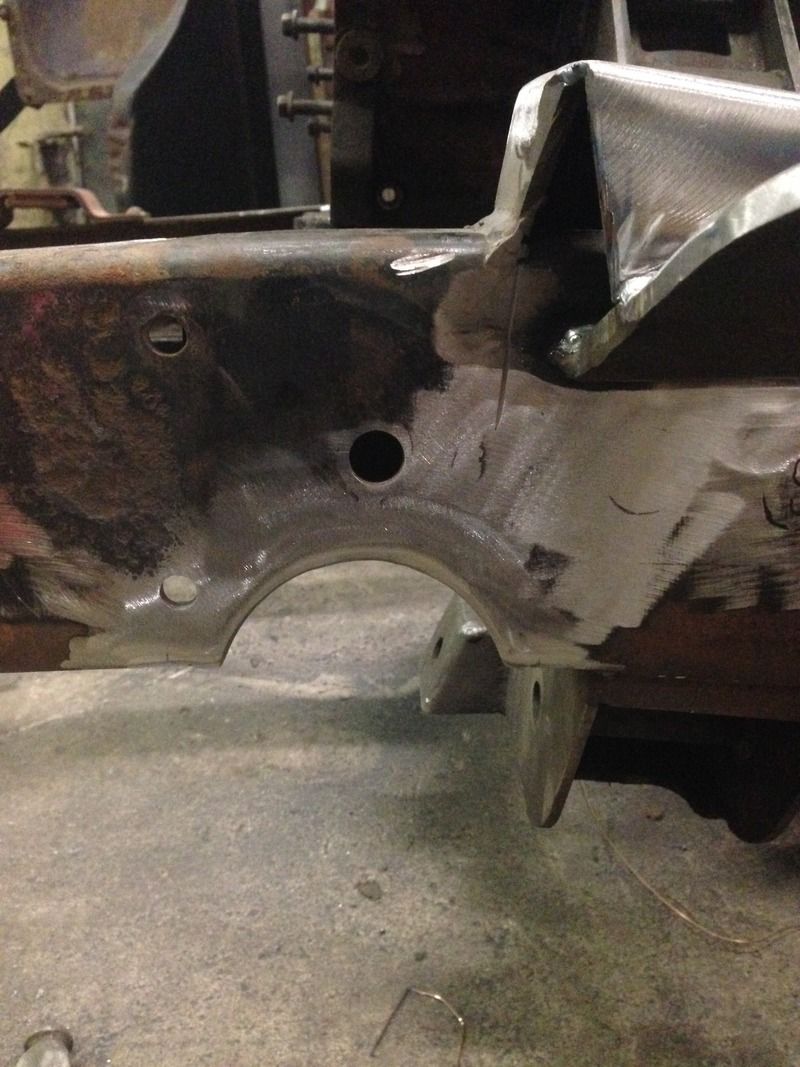
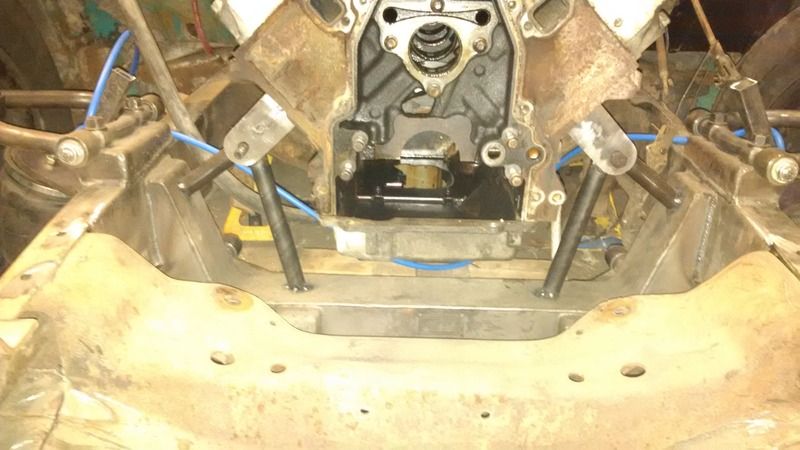
This brings us to the last week or so of work on the truck and the last of the stock crossmembers to be removed. Once again another hour or so went into getting the stock engine crossmember out to make room for the new steering rack. Cut that bitch in half and throw it in the scrap pile
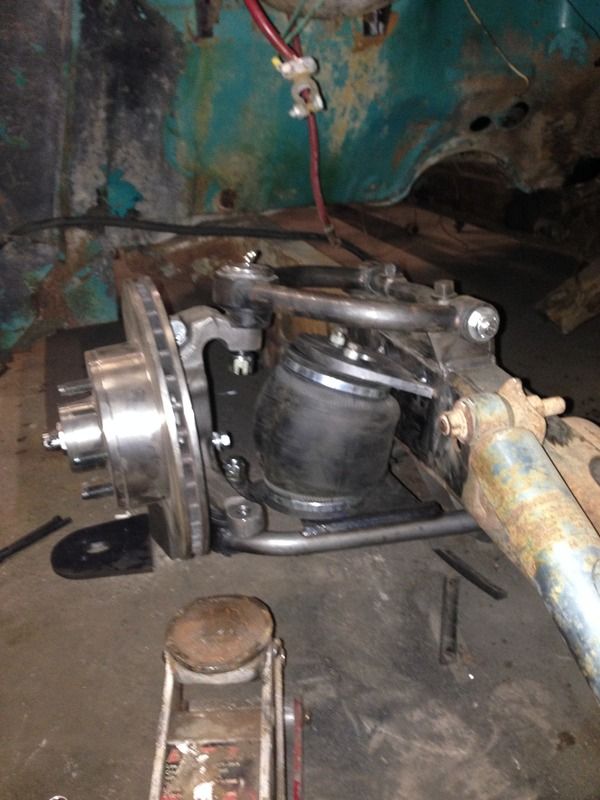
With the new steering rack going in, the frame had to be notched so the tie rods have clearance when it's aired out.
Drilled some holes
Cut some shit
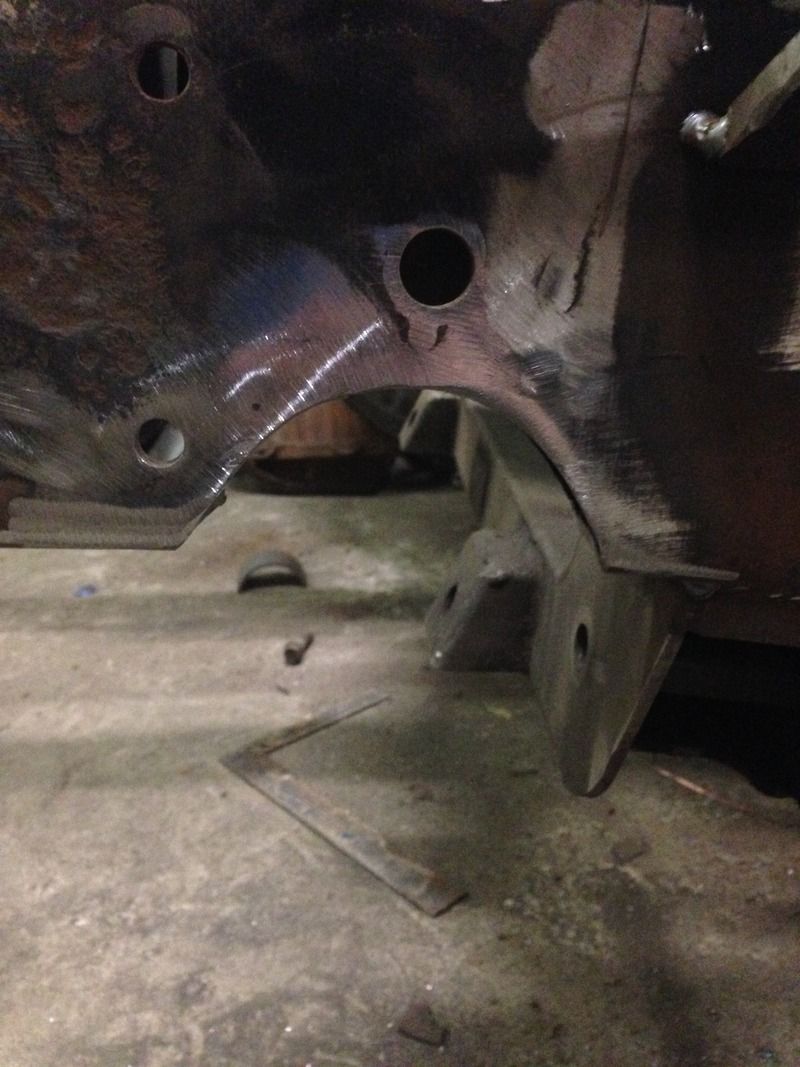
Fit up of the notches wasn't great, but it can be filled in with weld

And final product
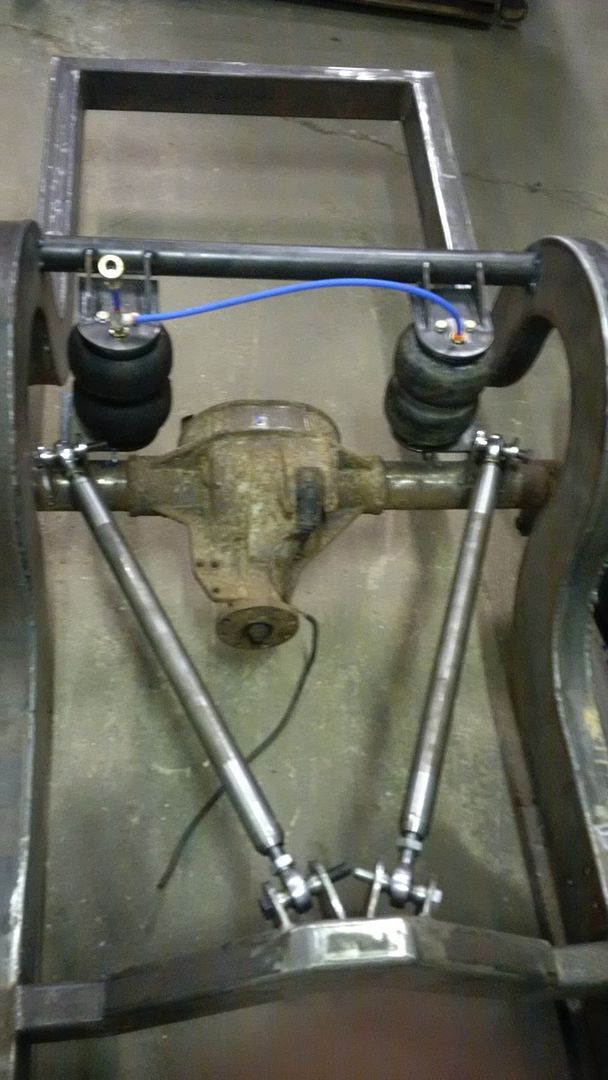
While I was working on that portion of the truck I made some gussets to go between the upper control arm mounts and the bag brackets

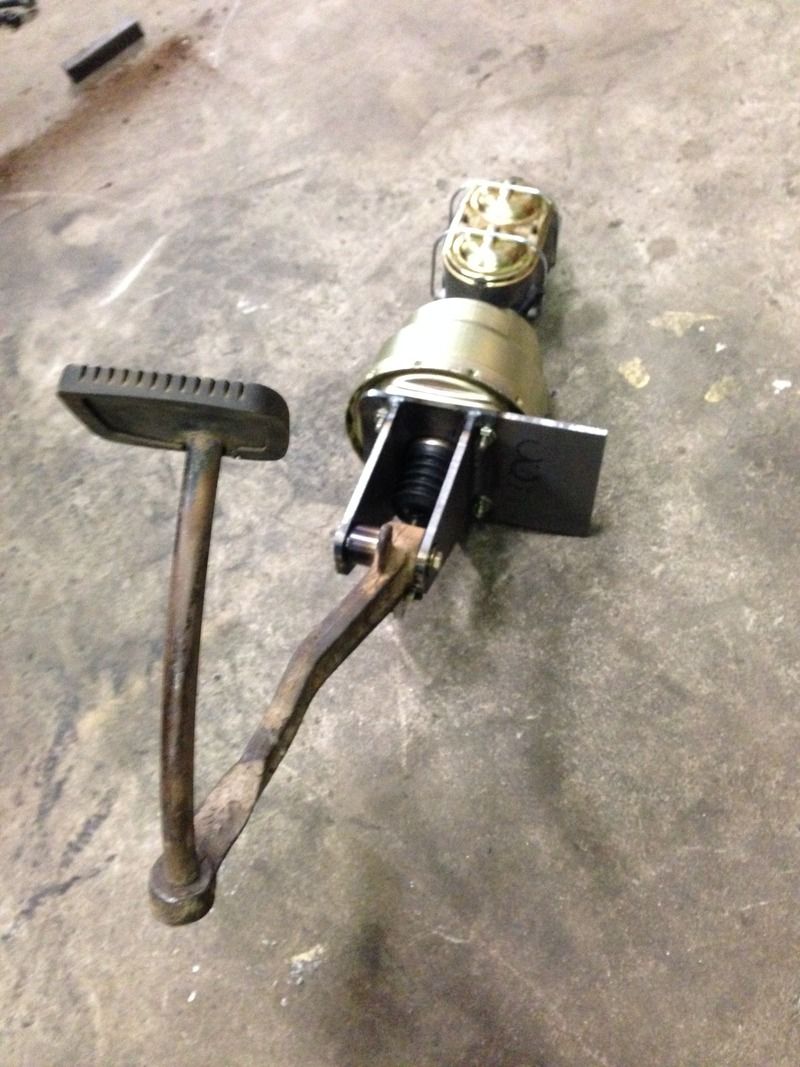
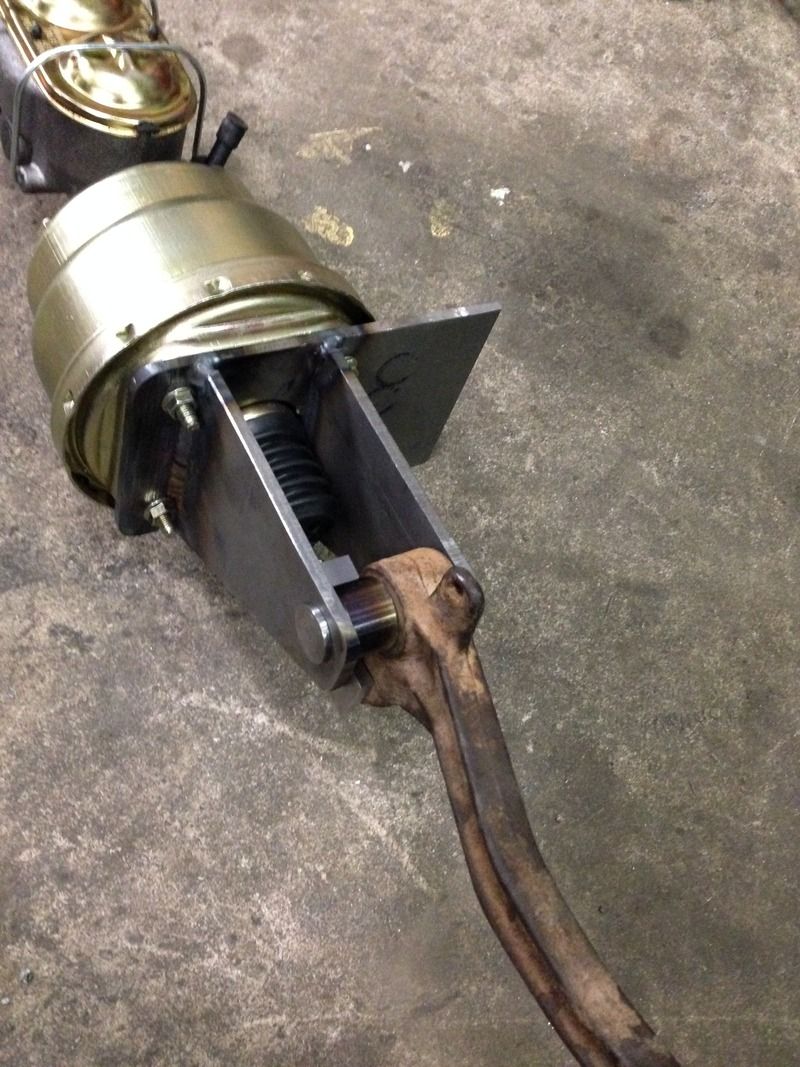
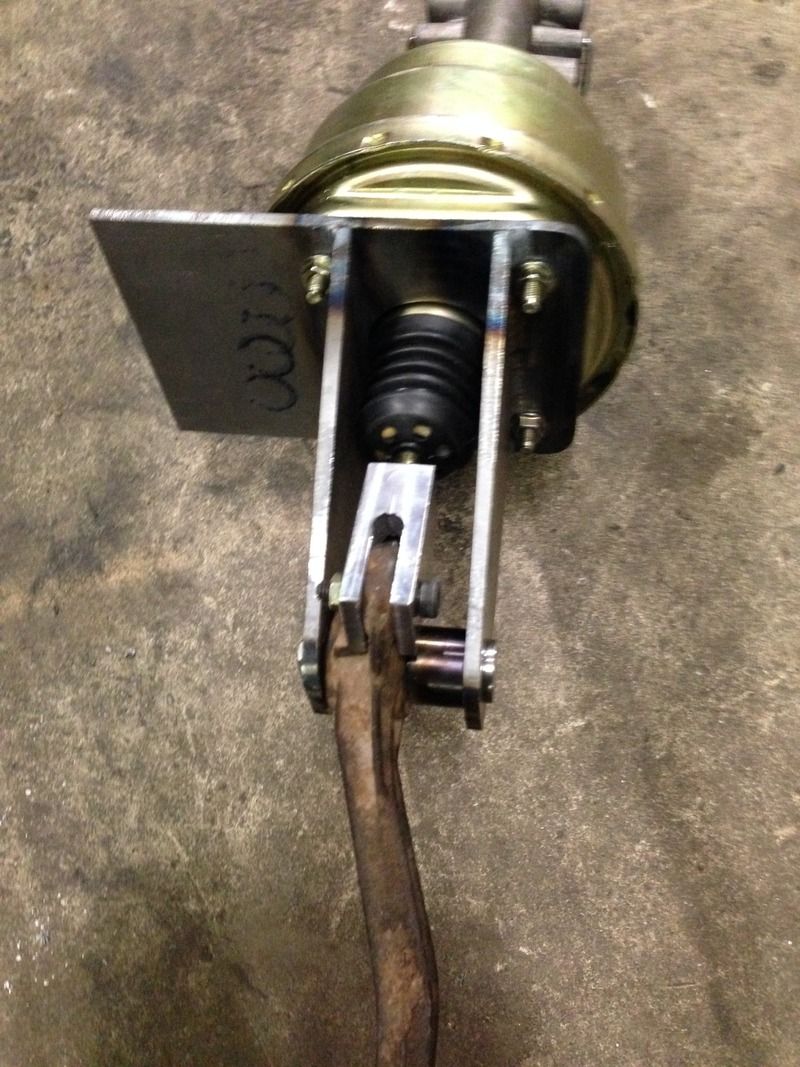
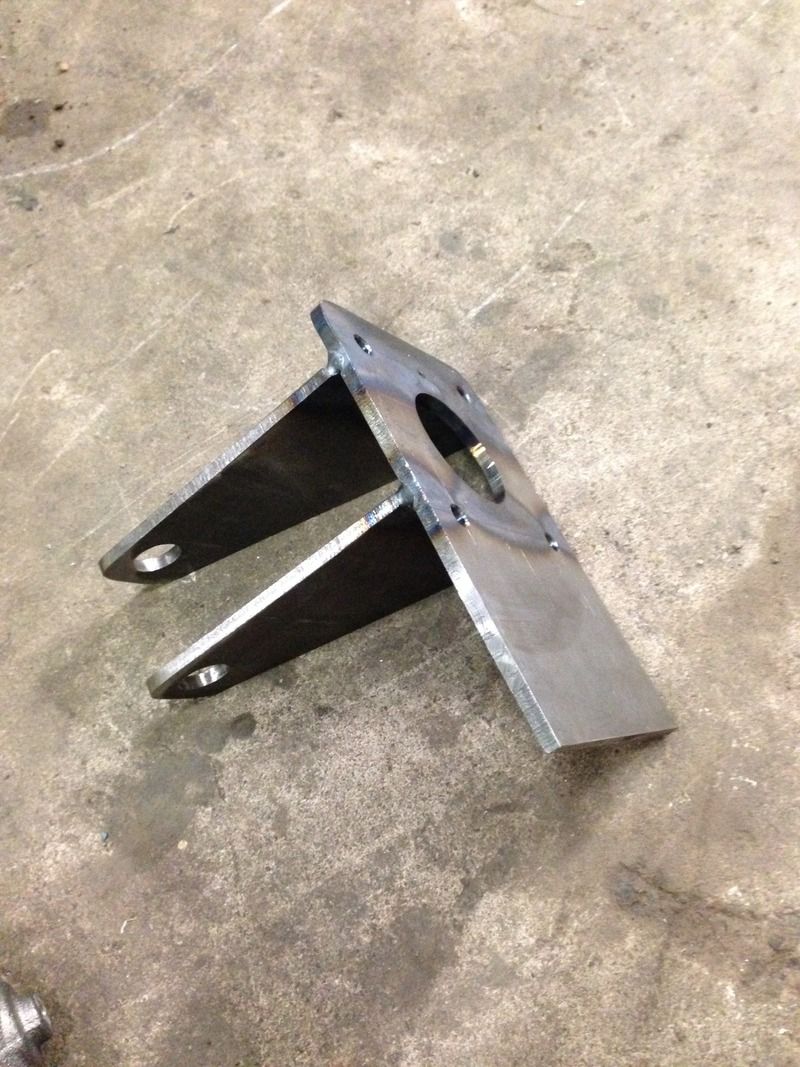
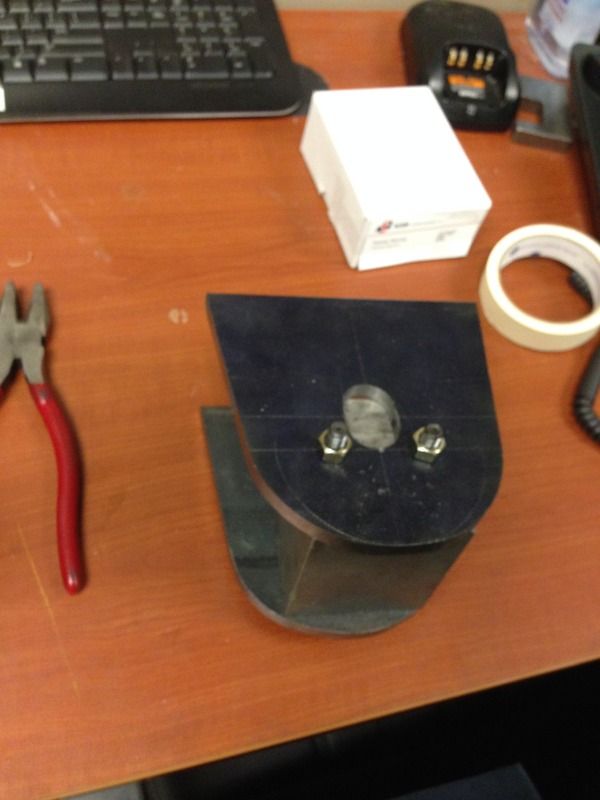
Since I wanted to retain the stock location of the master cylinder (under the drivers floor), yet wanted to upgrade to power brakes I had to make up a bracket for the assembly. I could have bought a bracket, but it would have needed some work to get it to work with the boxed frame. Also we make brake pedal assemblies at my work so it seemed fitting that I make it myself. Using the stock pedal arm I made the bracket to weld to the frame and hold the arm in position. Along with a machined pivot pin and clevis, cuz theres no point buying a clevis when you can just machine one.
That brings us to today and the truck nowhere near completion and 4 more days until it`s first show.
Leave a comment:
-
Originally posted by JordanByrneJ07 View PostThanks guys!Originally posted by fuxxo View Post
Been busy with the holidays so haven't had much time to work on the truck lately. Plus it's finally starting to get cold so hopefully once we get heat in the shop I'll have more drive to go work on it for more than an hour.
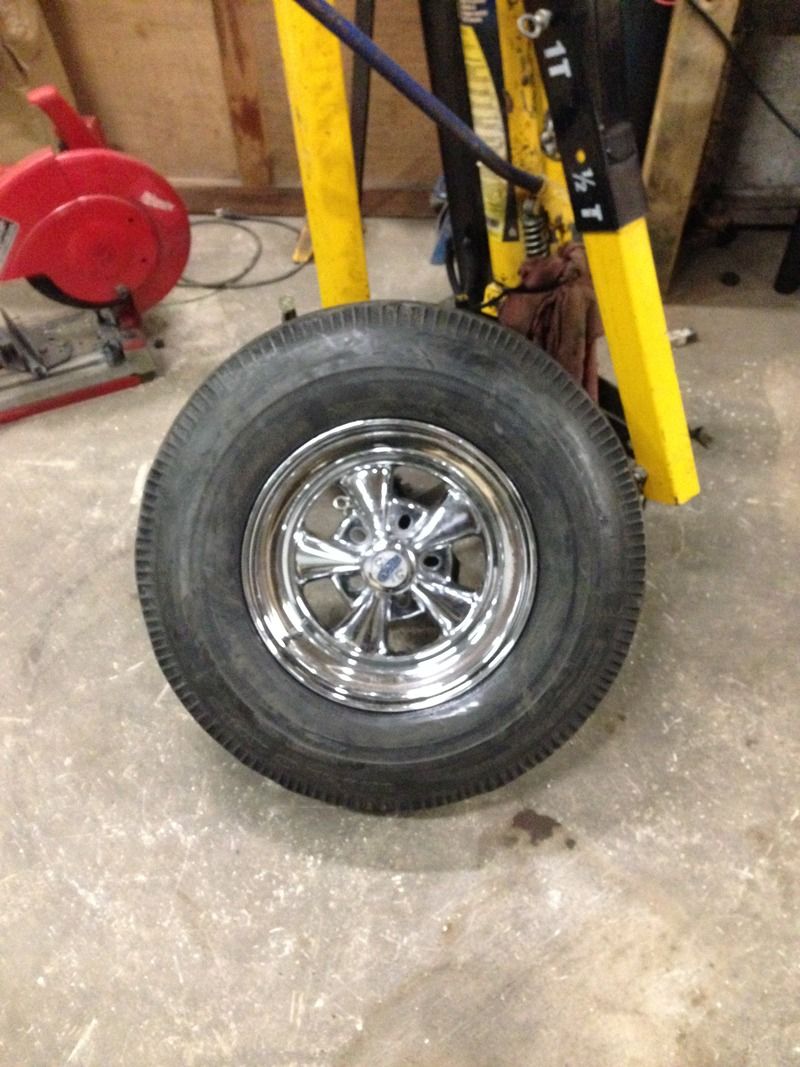
I got my bias ply tire mounted on the cragars and they look so much better than the previous radials. I'm thinking I'll get two more cragars for the front and run those for a while.
A really good friend of mine finally purchased an old vehicle after months of searching and figuring out what he wants. He picked up a 1966 Chevy C10, that came with a 6.0l vortec and 4l60e for a steal. He came to me to build the truck for him and wants it on the road come spring. It'll be getting a full back half 4-link much like mine, air ride, LS and being converted to short bed. We'll start up a build thread for that once we really start getting into it.
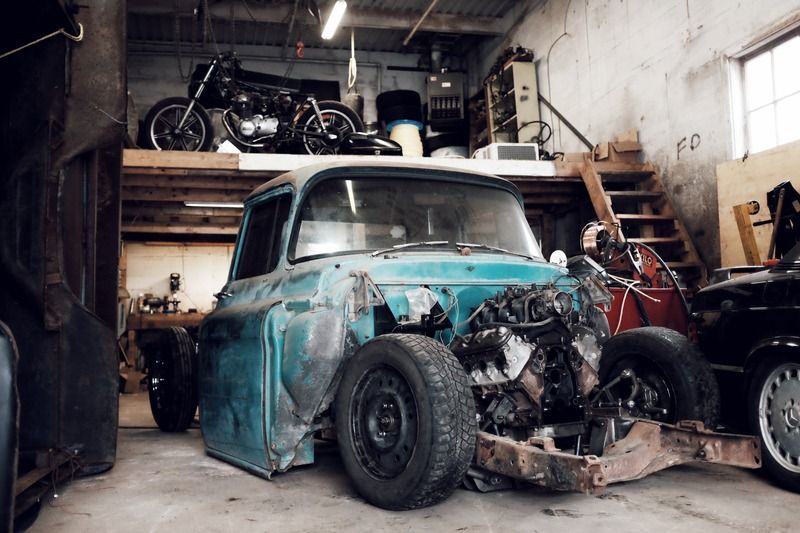
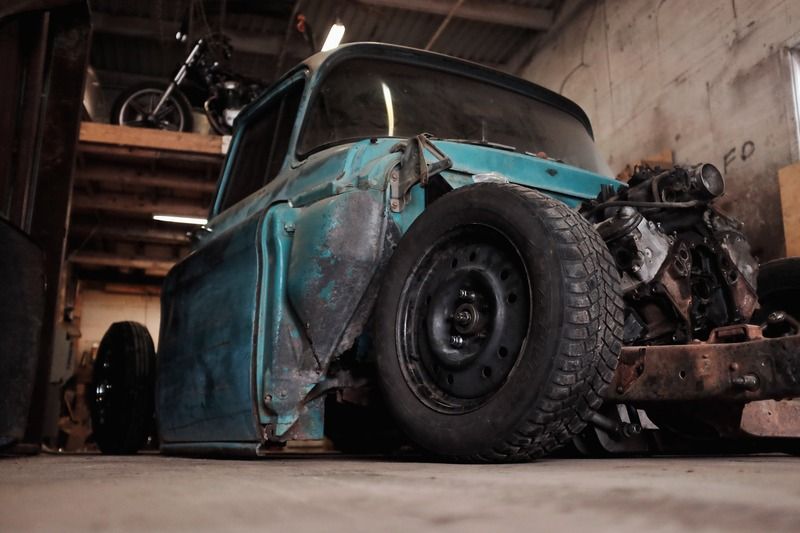
My brother was down from Thunder Bay for the holidays and took some shots of the truck that aren't Iphone quality. Enjoy!
Leave a comment:
-
wooooow :-O :-O awesome truck, I wish we had more of those here in europe :-/
and your welding skills are just insaneLeave a comment:
-
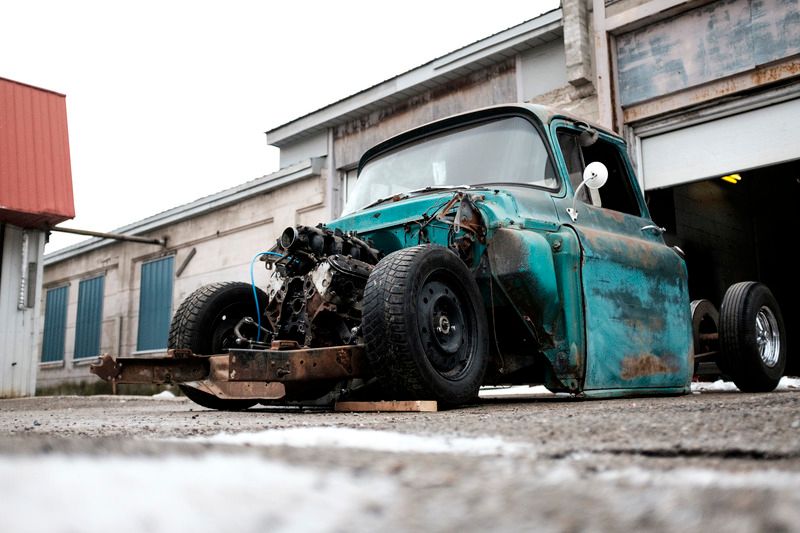
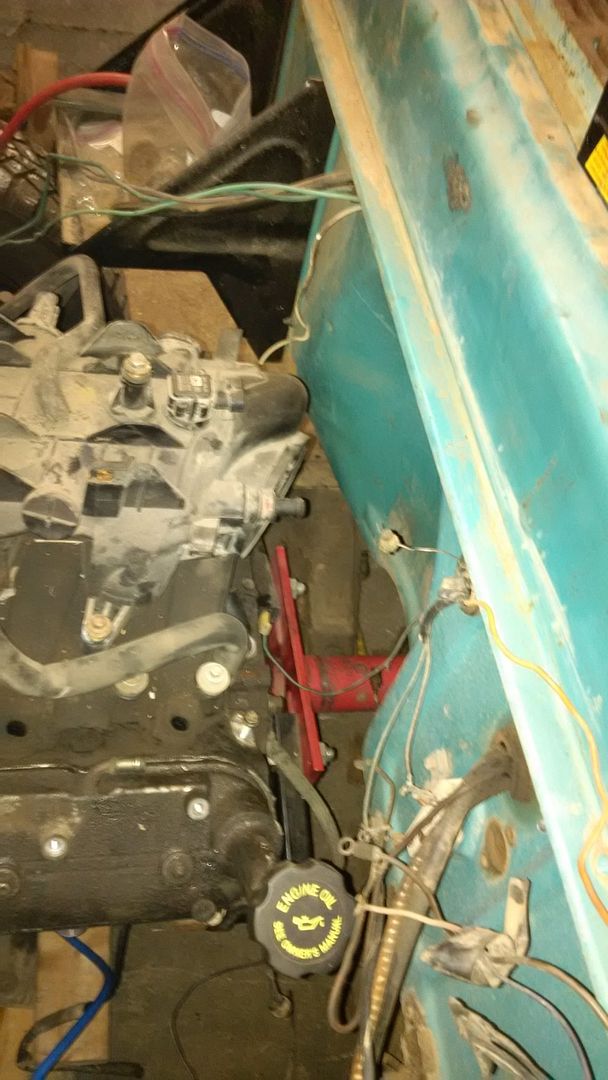
Engine mounts are done and tacked in place. 3/16"x1" DOM tube to a 2" tube with a rubber bushing inserted and bolted to the engine side motor mounts. Pretty simple design and I'll add some gusseting between the tubes. The drivers side will need some room for the steering shaft to go through.

The truck intake wont be staying and will be getting swapped out when the engine is built
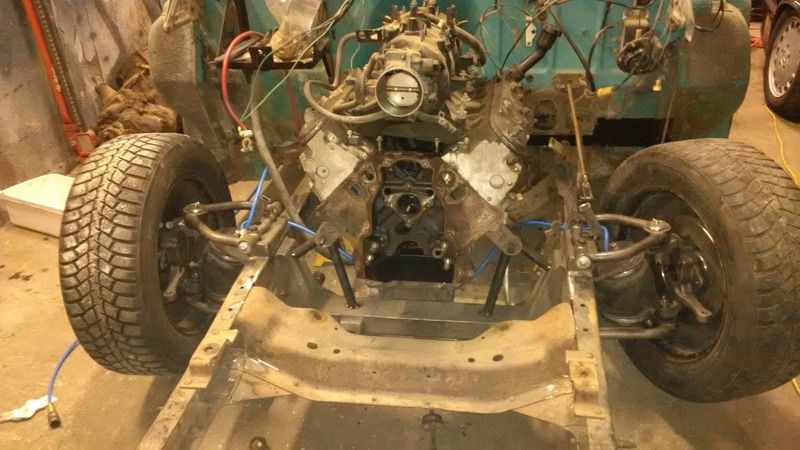
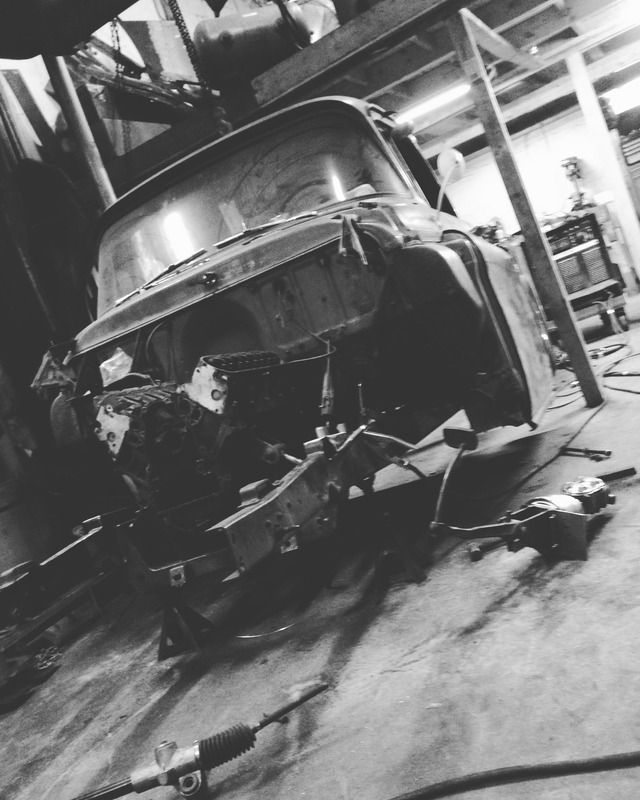
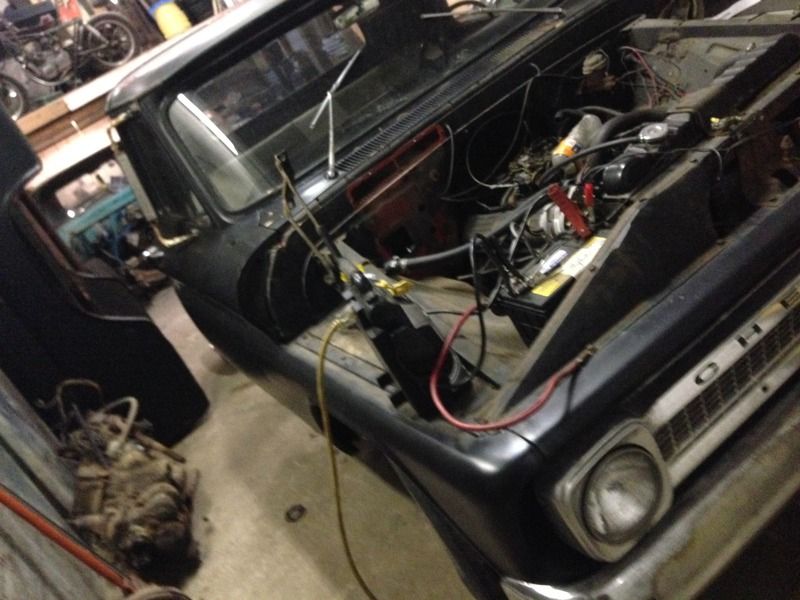
Good amount of clearance at the firewall. Tons of room for the engine, but the floor will need some work to fit the T56.
Leave a comment:
-
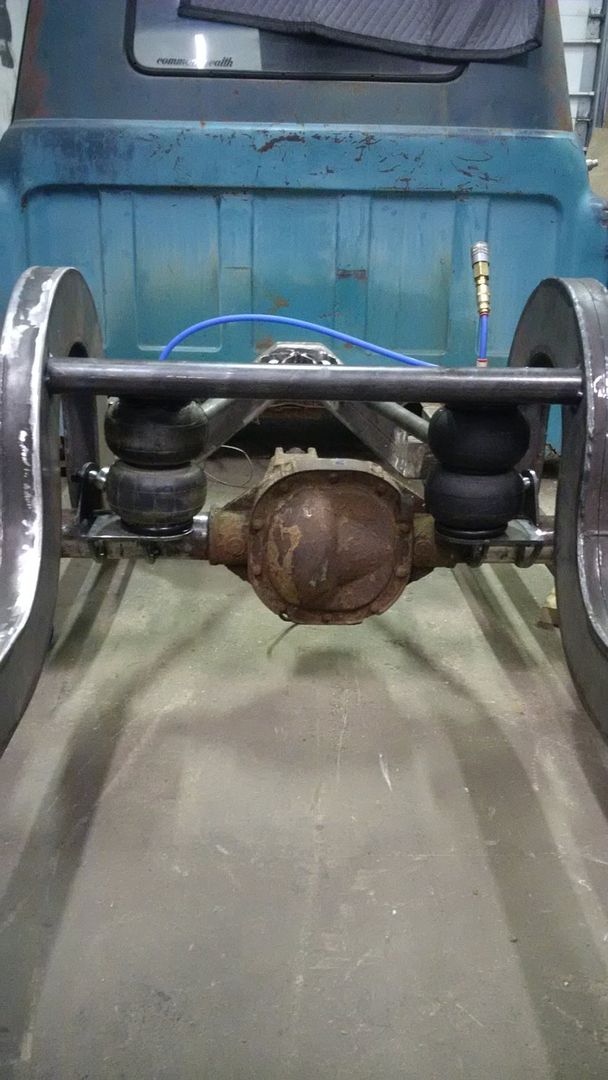
Got the rear bags in on friday night and pushed the truck outside. Then rearranged the shop and cleaned up so I can start getting the engine in.
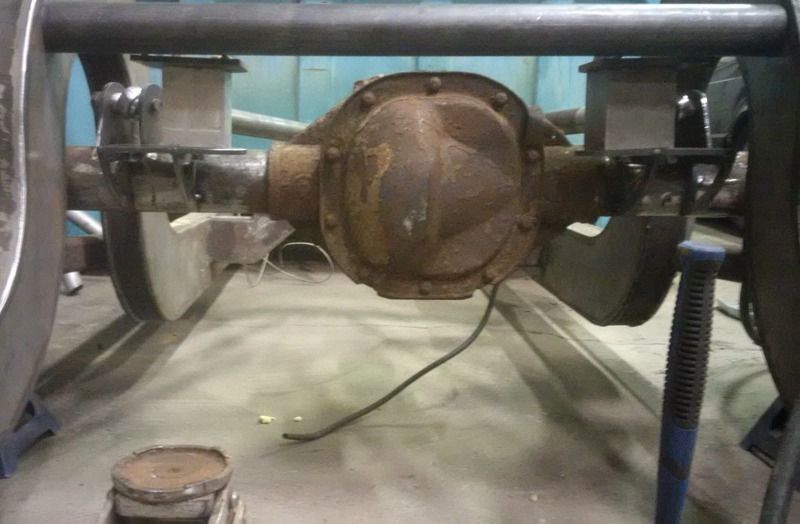
Rear crossmember for the upper bag mounts is 3/16"x2" DOM tube. Should be enough to hold the weight. Here you can see the mock up bag blocks. 3.5" blocks of aluminum. Set the chassis at the lowest it will sit at and the axle to 15.5" to account for the 31" tall bias ply tires. If my math is correct there will be .8" left before the bags fully bottom out when the truck is aired out. This way I can have some air in the bag and still roll as low as possible.
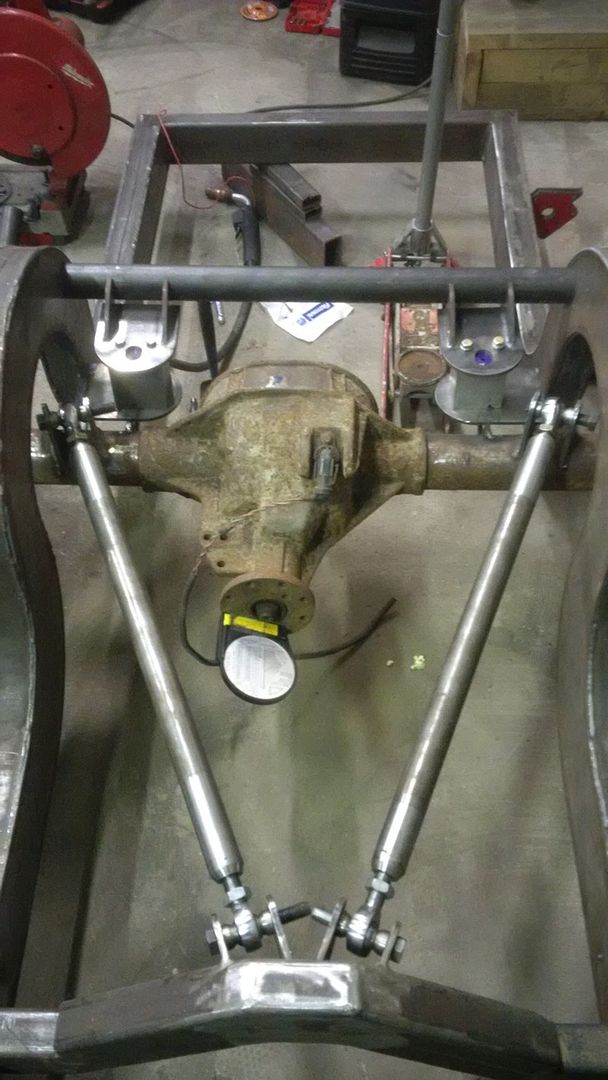
Got all that tacked on and installed the bags to test it out. Hooked up some fittings and air line to cycle it with a little compressor.
And a short vid of the rear working. Front works as well, but need to get ss-6 bags as the air house 1's I had laying around are too short.
https://www.facebook.com/video.php?v=773958122710596Leave a comment:
-
Patina is perfect, always loved the older trucks.
Keep up the awesome work!Leave a comment:
-
Small update til I get a bunch done on the weekend. Finally got the rear portion of the frame straightened out that tweaked when I welded it. That had been bugging me for a while and stopping me from progressing. Got the rear crossmember welded in as well. No pics of this yet.
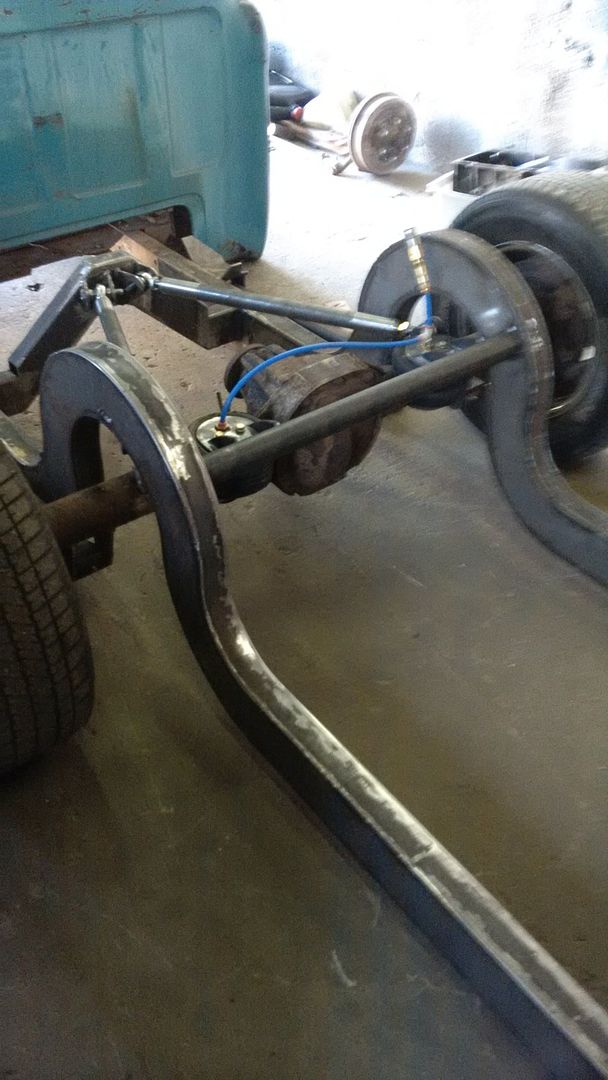
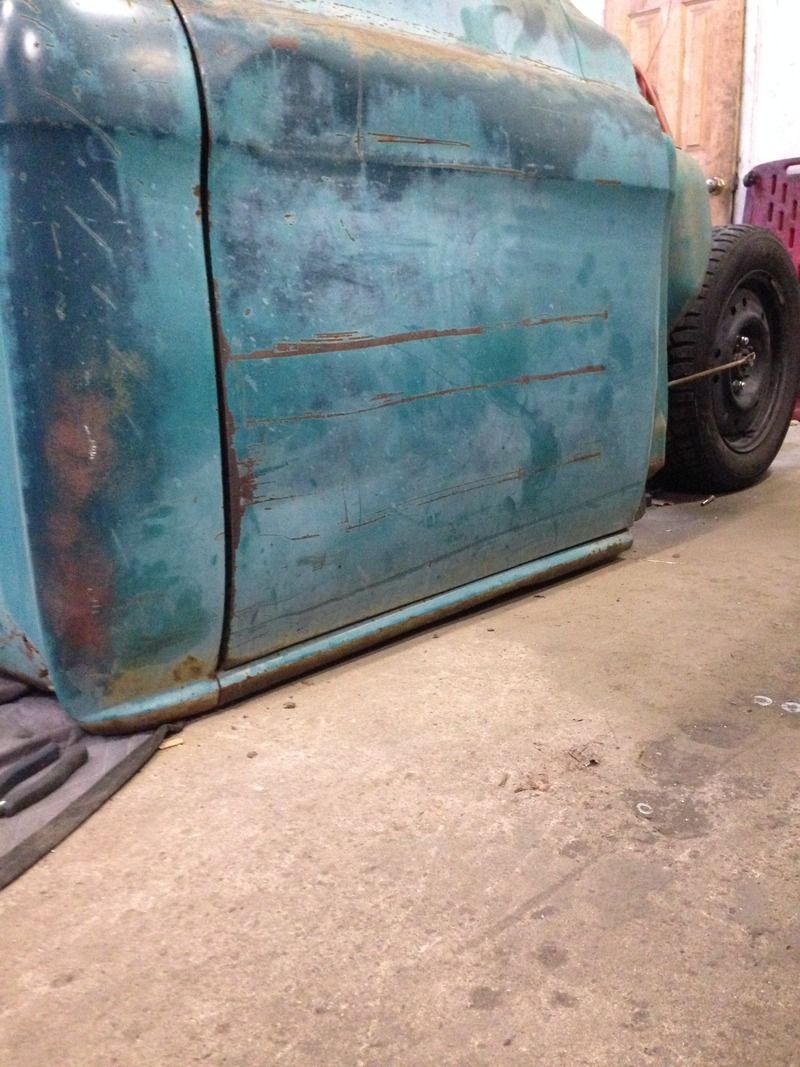
Also cut out the stock tranny crossmember and notched the control arms where they where hitting the mustang 2 crossmember. This brought the truck down a good 2-3" and now lays body.
Made some front upper bag plates and got the front bags in place. Had to cut the upper strut mount out to make way for the bag plate. Tacked em in and got them to the same angle as the lower control arms when slammed out. Also made some mock up bag blocks out of some aluminum. That way I can set the height of the bag brackets so that the bag isn't fully deflated when aired out and able to have some pressure to roll as low as possible. More on those later.
Planning to get the rear bag mounts in place this weekend and possibly start getting the engine in place. As well as roll it outside to get one last good look at it before winter hits.Leave a comment:


Leave a comment: